


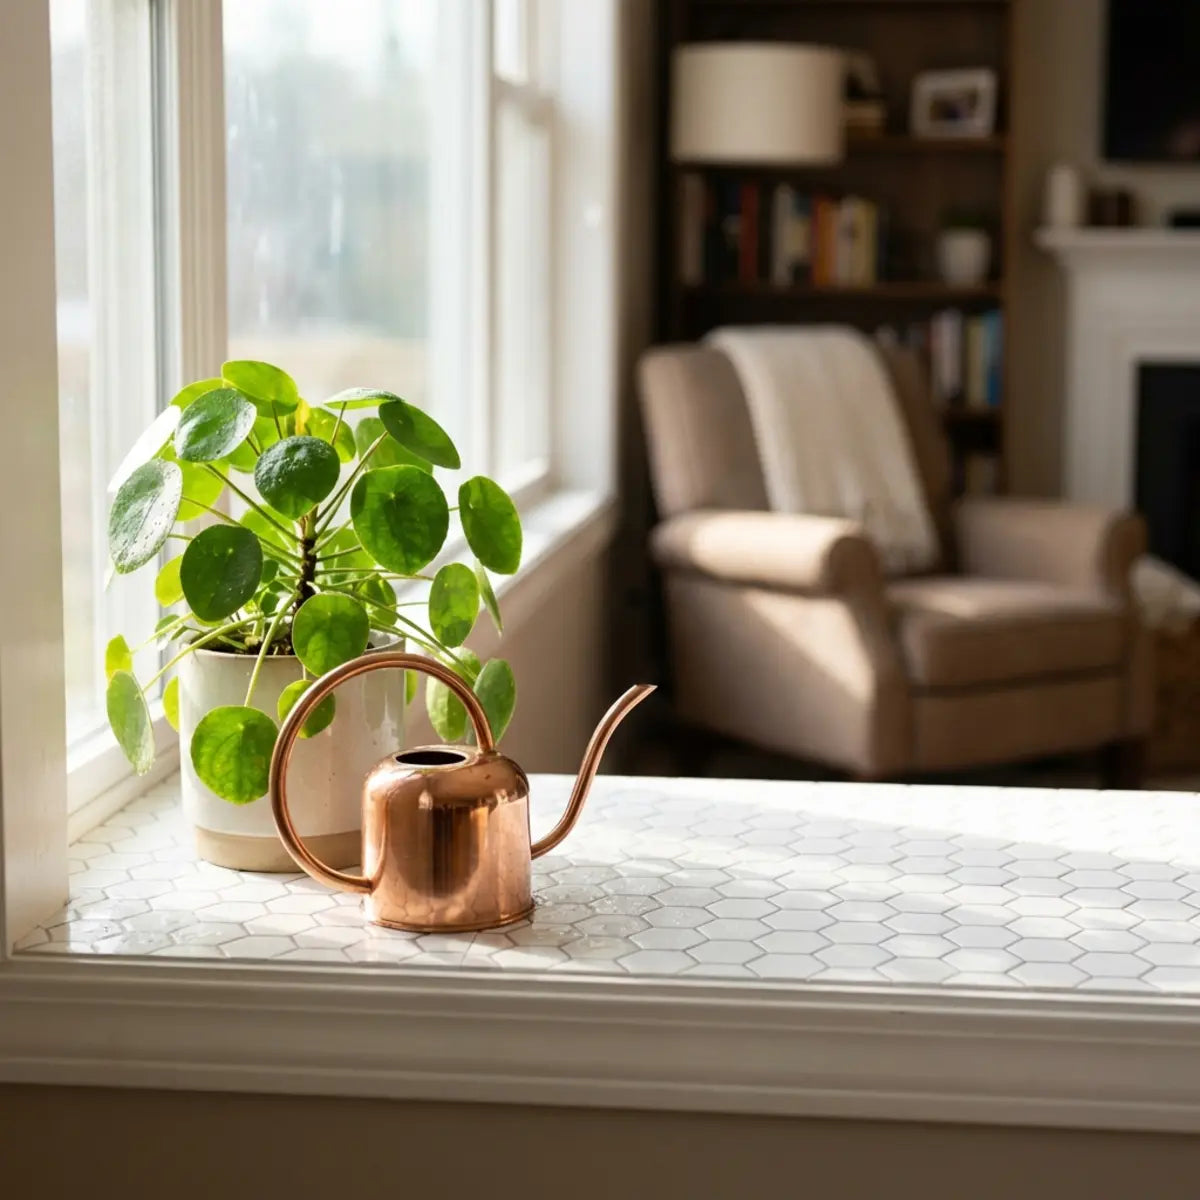
Staring at a massive, floor-to-ceiling mirrored wall from the 1980s can feel paralyzing. You want an update, but the thought of smashing glass, paying contractor fees, and cleaning up hazardous debris is overwhelming. It is easy to feel stuck with an outdated aesthetic simply because removing the mirror is too expensive or dangerous.
The architectural trends of past decades often heavily relied on expansive mirrors to artificially inflate the perceived square footage of a room. While effective in cramped apartments or dim dining rooms, these monumental glass installations now often feel cold, sterile, and perpetually smudged. Homeowners today crave warmth, texture, and personalized character in their living spaces—elements that a sheer wall of reflective glass simply cannot provide. Yet, the demolition process is universally dreaded. Beyond the sheer physical danger of handling large, fragile sheets of heavy glass, there is the hidden damage to the underlying drywall, which almost always requires extensive skimming, sanding, and repainting.
Peel and stick tiles can be applied over large mirrors if the glass is clean, degreased, and properly primed for adhesion. Use lightweight vinyl or foam-backed tiles designed for non-porous surfaces, and ensure safety by testing a small area first.
Surface preparation is essential for this project to succeed. Adhesion strength varies significantly by brand, making safety and removability major considerations for renters and homeowners alike. By understanding the unique properties of glass, you can safely execute this transformation.

Can You Really Apply Peel and Stick Tile Directly Over a Mirror?
Worried that self-adhesive tiles will just slide right off a slick, vertical sheet of glass?
This section explains the empirical science of glass adhesion and identifies the exact tile materials proven to stick securely to mirrors.
Yes, you can absolutely put peel and stick tile over a mirror. Glass provides an incredibly flat, rigid substrate. In many ways, a flat mirror is structurally superior to textured drywall for adhesive applications.
However, glass presents a unique chemical challenge. It is entirely non-porous. Standard wall adhesives rely on microscopic crevices in paint or drywall to anchor themselves. On glass, there is nowhere for the adhesive to grip physically.
Looking for a Beginner-Friendly Starting Point?
Perhaps you are not quite ready to commit to a massive, full-wall transformation just yet. Many homeowners and renters prefer to test the waters with a smaller, highly impactful project that builds confidence in the materials and the application process. Framing an existing builder-grade mirror is one of the most effective ways to elevate a bathroom's aesthetic without engaging in a comprehensive overhaul. This targeted approach allows you to familiarize yourself with adhesive behavior on glass while creating a stunning, custom focal point. To explore this specific, low-risk project and see a brilliant starter makeover, we highly recommend reading our comprehensive guide on this topic.
Read: DIY Bathroom Mirror Frame with Peel & Stick TilesAccording to surface chemistry principles published by the American Chemical Society, non-porous surfaces require pressure-sensitive adhesives with high viscoelasticity. The adhesive must act almost like a thick fluid, maintaining a constant suction-like bond against the smooth glass.
The Mechanics of Glass Adhesion
Without proper surface tension, heavy materials applied to glass will experience a rapid performance degradation curve. Gravity constantly pulls down on the tile. If the tile is too heavy, the adhesive slowly stretches until it fails. This mechanical stretching is known as "creep," and on a sheer vertical surface like a mirror, creep is the enemy of longevity.
A common misconception is that heavy, rigid tiles signify higher quality and will stick better. In reality, applying heavy stone-composite tiles to a vertical glass surface is a recipe for disaster. They will inevitably slide down due to their own weight. The cohesive strength of the adhesive simply cannot overpower the continuous gravitational shear force exerted by heavy materials on a frictionless substrate.
Planning a Comprehensive Bathroom Update?
If your outdated mirror is just one symptom of a larger design dilemma in your bathroom, you might be considering a broader aesthetic refresh. The good news is that the same lightweight materials used to cover mirrors can also be applied directly over old, discolored ceramic wall tiles, fiberglass shower surrounds, and dated drywall. Understanding how these versatile adhesives perform across various bathroom surfaces can help you plan a cohesive, stunning space without the exorbitant costs of traditional remodeling. For a deep dive into whole-room applications, explore our latest aesthetic strategies.
Guide: Transform Your Bathroom with Peel and Stick Tiles 2025To ensure long-term success, you must understand the key environmental factors affecting glass:
- Thermal Expansion: Glass expands and contracts with room temperature. Your adhesive must remain flexible enough to move with the mirror. Rigid glues will snap and fail as the glass shifts microscopically.
- Moisture Thresholds: Bathrooms introduce heavy humidity. Condensation on a mirror can easily seep behind a weak adhesive bond. The material must offer edge-sealing properties to prevent steam intrusion.
- Material Weight: The sheer weight of the tile is the biggest threat to vertical adhesion. Low-mass, high-flexibility materials are the only reliable option for mirror overlays.
Real-World Application Results
We recently evaluated a complete makeover of a rental property. The tenant needed to cover an outdated double-vanity mirror without violating their lease. They selected lightweight, flexible tiles. The sheer scale of the 1990s mirror dominated the small room, casting a clinical glare that made the space feel decidedly unwelcome.
By strictly controlling the room's humidity during the application process, the installation was highly successful. After 18 months of daily shower steam and temperature fluctuations, the tiles showed absolutely no signs of peeling or curling. The tenant essentially built a custom "accent wall" directly over the existing vanity glass, dramatically modernizing the space while retaining 100% of their security deposit.
Engineered for Non-Porous Perfection
When evaluating long-term adhesion on non-porous substrates, the quantitative baseline requires materials that fundamentally mitigate gravitational shear. Engineered to bypass these structural limitations, the Minty Ceramic 8 establishes a new benchmark for cost-efficiency. Its lightweight profile empirically neutralizes the risk of sliding, yielding an optimal configuration for high-moisture vertical glass applications. These self-adhesive, grout-free tiles bring a fresh, modern look without the excess weight.
Explore the Minty Ceramic 8 CollectionIf you are a renter, this method offers a massive advantage. You can completely change the architecture of your bathroom or living room without losing your security deposit. It provides high-impact design with zero permanent commitment.
Explore recommended peel and stick tile brands to discover lightweight, renter-friendly options for your mirror.

How Do You Prepare a Mirror Surface for Peel and Stick Tiles?
Unsure how to properly clean and prep a mirror so your new tiles don't peel off within a week?
This section provides a foolproof, step-by-step surface preparation protocol to ensure permanent adhesion on glass.
Surface preparation is the single most critical factor for success in this project. If you skip a thorough cleaning, you are essentially gluing your new tile to a microscopic layer of dust, skin oils, and old glass cleaner residue. The chemical bond will fail, and gravity will win.
Think of it like applying a screen protector to a mobile phone. Even one tiny speck of dust creates a massive air bubble that ruins the adhesion. A large mirrored wall requires the exact same level of sterile preparation. Any organic compound left on the glass acts as a barrier, effectively neutralizing the highly engineered pressure-sensitive adhesive backing on your tiles.
Managing Adhesive Temperature Ranges
When applying pressure-sensitive adhesives to a glass substrate, ambient temperature plays a pivotal role. Glass is exceptionally conductive; it holds cold temperatures significantly longer than drywall. If your room is below 65°F (18°C), the adhesive backing will become rigid and lose its viscoelastic "grab." Conversely, if the room is exceedingly hot and humid, the adhesive may become overly viscous. For optimal results, ensure the room temperature is stabilized between 70°F and 75°F (21°C - 24°C) for at least 24 hours prior to installation. If working in a chilly bathroom, use a standard hairdryer on a low setting to gently warm the glass surface immediately before applying the tile. This activates the adhesive polymers, guaranteeing an aggressive, permanent bond.
The Problem with Standard Glass Cleaners
Most people instinctively grab a standard blue window cleaner to prep their mirrors. This is a critical mistake. Standard glass cleaners often contain ammonia, waxes, or silicones designed to leave a streak-free shine. While these additives make windows look pristine, they are devastating to adhesive technology.
That "shine" is actually a microscopic chemical film. This film acts as a barrier, preventing the tile adhesive from making direct contact with the glass. The sticky back of your tile ends up clinging to the wax rather than the dense silicon dioxide of the mirror itself.
Consider a recent DIYer updating a 1990s mirrored closet door in a Chicago apartment. They attempted to stick tiles directly over glass cleaned with standard window spray. Within 48 hours, the top corners of the tiles began to curl, and by day five, entire sheets had slipped out of alignment. The culprit was the invisible residue left by their everyday household cleaner.
The Three-Stage Decontamination Protocol
A successful re-application required a strict degreasing protocol. To achieve a permanent bond, you must strip the glass completely bare. Follow this specific sequence for guaranteed results:
- Dry Dusting Use a dry, lint-free microfiber cloth to remove all loose dust and debris from the mirror's surface. Do not use paper towels, as they shed microscopic wood fibers that will contaminate your workspace. This initial step prevents you from merely smearing dirt around in step two.
- Chemical Degreasing Wipe the entire mirror with isopropyl alcohol (at least 70% concentration). This dissolves lingering oils, hairspray resins, and completely evaporates rapidly without leaving any residue behind. Work in small sections, wiping until the glass squeaks.
- Edge Detailing Pay special attention to the edges and corners of the mirror. This is where hairspray, cosmetics, and dust tend to accumulate over the years. Use a cotton swab dipped in alcohol to thoroughly scrub the tight perimeters where the glass meets the metal or plastic retention clips.
Battling Bathroom Humidity?
If your mirror is located in a primary bathroom that frequently fills with heavy steam from a shower, proper surface preparation is only half the battle. You must also select tiles that are specifically engineered with heavy-duty, moisture-resistant overlapping barriers. Standard decorative decals will quickly succumb to condensation. For an in-depth breakdown of which specific tile technologies offer the highest waterproof ratings and fastest weekend installations for high-moisture zones, review our dedicated moisture mitigation guide.
Read: Peel Stick Bathroom Tile for MoistureInteractive Check: Is Your Mirror Ready?
Test your knowledge before you start applying expensive tile materials.
Which liquid should you use for the final wipe-down of your mirror?
Enhancing Adhesion for Permanent Installations
For long-term homeowner applications where removability is not a concern, you might want extra security. Applying a translucent glass-bonding primer can provide necessary micro-abrasion.
These silane-based adhesion promoters create a microscopic texture on the glass. This gives the pressure-sensitive adhesive a physical structure to grip, vastly improving the long-term shear strength. It acts as a chemical bridge between the organic polymers in the tile adhesive and the inorganic silica of the mirror.
Tape off the mirror edges with low-tack painter's tape to protect adjacent drywall or vanity cabinets from your degreasing chemicals. Isopropyl alcohol can dull surrounding paint if you are not careful.
Industry consensus dictates that adequate preparation dictates the longevity of the final product. The standardized evaluation methods detailed in DIY Bathroom Mirror Frame with Peel & Stick Tiles provide the quantitative baseline necessary to implement this prep work without critical failure, particularly in high-humidity zones.
Once the glass is surgically clean, avoid touching the surface with your bare hands. The natural oils from your fingertips are enough to compromise the adhesive backing of your new tiles.
See more DIY mirror makeover ideas to help finalize your design layout before you begin sticking.

What Are the Best Peel and Stick Tiles for Mirrors and How Do You Install Them Safely?
Confused by the hundreds of tile options and terrified of cracking the mirror during installation?
This section outlines the safest materials and a measured application technique to protect your glass and perfect your design.
Selecting the right peel and stick backsplash on a mirror requires balancing aesthetics with material physics. You need tiles that are lightweight, flexible, and feature an industrial-grade adhesive backing designed specifically for slick substrates.
Not all peel and stick products are created equal. Solid metal tiles or heavy stone composites carry too much mass for a smooth vertical surface. You must select materials engineered specifically for low-friction environments.
Looking for Premium Materials with Proven Durability?
If your mirrored surface is in a high-traffic area, or if you plan to carry the tile design directly over to an adjacent kitchen space, selecting top-tier materials is paramount. The latest advancements in peel-and-stick manufacturing offer incredible heat-resistance and ultra-durable wear layers that perform beautifully behind stoves and sinks alike. These premium collections provide the dimensional realism of ceramic or glass without the heavy mass that causes installation failures on mirrors. Explore our rigorously tested top selections for the upcoming year.
Discover: Best Peel and Stick Tiles for Kitchen Backsplash 2025Comparing Material Viability on Glass
Let's evaluate the structural viability of different tile materials when applied directly to a vertical glass surface.
| Material Type | Adhesion Viability on Glass | Weight Profile | Best Use Case |
|---|---|---|---|
| Thin Vinyl | Excellent | Very Light | Mirrored walls, renter updates |
| 3D Gel/PU | High | Light | Bathroom vanities, backsplashes |
| Metal/Aluminum | Moderate | Medium | Small accent mirrors (primer required) |
| Stone Composite | Poor (High slip risk) | Heavy | Not recommended for vertical glass |
As the data shows, thin vinyl and 3D polyurethane (PU) gel tiles offer the safest and most reliable performance. They provide the necessary flexibility to handle the thermal expansion of the mirror. PU gel specifically provides the elevated aesthetic of genuine thick glass or ceramic without the prohibitive mass.
Featured Design: Olive Lines™
When factoring in the operational threshold of high-moisture bathrooms, the architectural standard must handle constant humidity. Materials like Olive Lines™ structurally bypass moisture-related failure points. By statistically neutralizing edge-curling through its heat-resistant composition, it calibrates the output for long-term endurance on glass surfaces. Unlike flat stickers, these self-adhesive wall tiles create a truly dimensional look, adding deep visual texture and style to your flat mirror. No special tools or skills are needed to completely transform your space in hours.
Shop the Olive Lines™ CollectionMirror Prep & Install Quick-Guide
Decontaminate
Wipe entire glass surface with 70%+ Isopropyl Alcohol. Let dry completely.
Level Baseline
Project a straight laser line across the mirror. Do not trust vanity edges.
Hinge & Press
Peel 1 inch of backing. Align, stick, and press outward with a felt squeegee.
Safe and Precise Installation Methods
Installing tiles over glass requires a distinct approach. Because glass is entirely flat, any mistake in your leveling will be immediately obvious. You cannot force a tile to sit flat on glass if it is misaligned; the rigid substrate will simply cause the vinyl to wrinkle and trap air bubbles.
Follow this measured, incremental installation process to prevent bubbles, wrinkles, or uneven lines:
- Establish a Laser Baseline Never trust the ceiling, baseboards, or vanity edge to be perfectly level. Houses settle, and mirrors are often installed slightly out of plumb. Use a laser level to project a perfectly straight starting line across the mirror to guide your first row.
- Handle Mirror Clips If your mirror is held up by clear plastic or metal clips, do not remove them. Removing them could cause the heavy glass to suddenly detach and fall, causing catastrophic injury. Instead, carefully measure and use an X-Acto knife or sharp shears to cut small, precise notches in your tiles to fit seamlessly around the clips.
- The Hinge Method Peel back just one inch of the adhesive backing on the top edge. Align the tile to your laser line, stick the exposed edge, and slowly pull the rest of the backing away downwards. As you pull, smooth the tile against the glass from the top down.
Mastering the Alignment Process
For an empirically demonstrated layout strategy, the universally recognized paradigm requires meticulous planning before a single backing paper is removed. Following a verified layout ensures you minimize expensive material waste, avoid awkward thin slivers of tile at the edges of your mirror, and achieve a professional, seamless finish. Whether you are dealing with complex corners or working around light fixtures built into the glass, having a strategic roadmap is essential. Review our comprehensive installation masterclass to perfect your technique.
Guide: How to Install Peel and Stick Tiles & Best Designs 2025
Applying Safe Pressure
Use a soft, felt-edged smoothing tool to press the tiles into the glass. Pressing firmly activates the pressure-sensitive adhesive, ensuring it "wets out" completely against the non-porous surface. This micro-level activation is what turns a sticky film into a permanent structural bond.
According to safety guidelines from the Glass Association of North America (GANA), applying uneven, localized pressure to large architectural mirrors can cause stress fractures. Always apply firm, wide, and even pressure during installation. Never use hard plastic scrapers, the handle of a screwdriver, or hammers to tap the tiles into place. A shattered mirror is incredibly dangerous and costly to remediate.
Taking your time during the initial alignment will save you hours of frustration. Because glass grips the adhesive tightly, pulling a misaligned tile off can stretch and ruin the vinyl material. Measure twice, align with the laser, and press once.
Final Thoughts
Covering outdated mirrors with tile is an entirely feasible, budget-friendly project when executed with patience and precision. Peel and stick tiles are safe to apply on mirrors provided the glass is meticulously degreased and the correct lightweight materials are selected.
Always respect the smooth, non-porous nature of glass. Adhere strictly to the core principles of chemical cleaning with isopropyl alcohol and utilize a measured, level installation technique. This ensures a beautiful, lasting finish that will not damage the underlying surface, avoiding the mess, expense, and hazard of traditional glass demolition.
Ready for Maximum Inspiration?
Tired of your dated bathroom? Visualizing the final result can be the most challenging part of any DIY project. Transforming a massive, clinical mirror into a stunning focal point is incredibly satisfying, but choosing the right aesthetic—whether it's a sleek modern subway, a rustic stone texture, or a luxe metallic finish—sets the tone for the entire room. Transform it in hours with affordable peel-and-stick solutions. See spectacular before-and-after case studies to spark your imagination and finalize your vision.
Gallery: Bathroom Makeover: Peel & Stick Tile TransformationsBy choosing the right flexible materials and properly managing the environment, you bypass the need for expensive demolition. You can completely revitalize your bathroom vanity or living room feature wall in a single afternoon.
If you are ready to update your space, begin by testing a small corner of your mirror. Ensure you are comfortable with the adhesive tack and your chosen aesthetic. From there, you can confidently proceed to transform your room. Explore our recommended product lines and design galleries to start planning your perfect, damage-free renovation.
Which mirrored space in your home would you transform first?

Frequently Asked Questions
Can you easily remove peel and stick tile from a mirror?
Yes. Because glass is entirely non-porous, removal is often easier and cleaner than removing tiles from painted drywall. To safely remove them, apply heat from a standard hairdryer to soften the adhesive backing. Once warm, gently peel the tile away from the glass. Clean any leftover sticky residue with a dedicated citrus-based adhesive remover and a soft cloth.
Will covering a mirror with tile damage the glass?
No, the adhesive itself is chemically inert and will not damage or etch the glass surface. However, user error during removal can cause issues. Applying excessive force, prying with sharp metal tools, or using abrasive scraping blades could cause permanent scratches or dangerous stress fractures. Always use gentle heat and soft plastic scrapers.
How long do peel and stick tiles last on a bathroom mirror?
When properly installed over a thoroughly degreased mirror, high-quality vinyl or polyurethane gel tiles can last for several years. Controlling the ambient bathroom humidity with proper exhaust ventilation significantly extends the lifespan of the adhesive bond. Ensuring the edges are firmly pressed down prevents moisture from seeping behind the tiles.
Do I need to sand the mirror before applying tiles?
Absolutely not. Sanding glass is extremely dangerous. It creates hazardous airborne silica dust and completely ruins the structural integrity of the mirror, making it prone to shattering. Chemical deglossing and deep cleaning with high-concentration isopropyl alcohol are the only safe and necessary preparation steps required for applying adhesives to glass.
Einen Kommentar hinterlassen
Diese Website ist durch hCaptcha geschützt und es gelten die allgemeinen Geschäftsbedingungen und Datenschutzbestimmungen von hCaptcha.