


Das moderne Renovierungsdilemma: Beständigkeit vs. Praktikabilität
Hin- und hergerissen zwischen einer beeindruckenden Küchenmodernisierung und dem Erhalt Ihrer Kaution? Mit diesem Konflikt zwischen Ästhetik und Praktikabilität sind Sie nicht allein. Viele Hausbesitzer und Mieter fühlen sich angesichts permanenter Renovierungen und der damit verbundenen Kosten blockiert. Die Schnittstelle zwischen Designanspruch und baulicher Beständigkeit erzeugt einen erheblichen Reibungspunkt. Historisch erforderte die Veränderung der architektonischen Hülle einer Wohnung oder eines Hauses ein unerschütterliches Maß an Zeit, Kapital und harter Arbeit. Der moderne Wohnungsmarkt, geprägt von höherer Mobilität und schwankenden Materialkosten, verlangt nach einem anpassungsfähigeren Ansatz für Wohnästhetik.
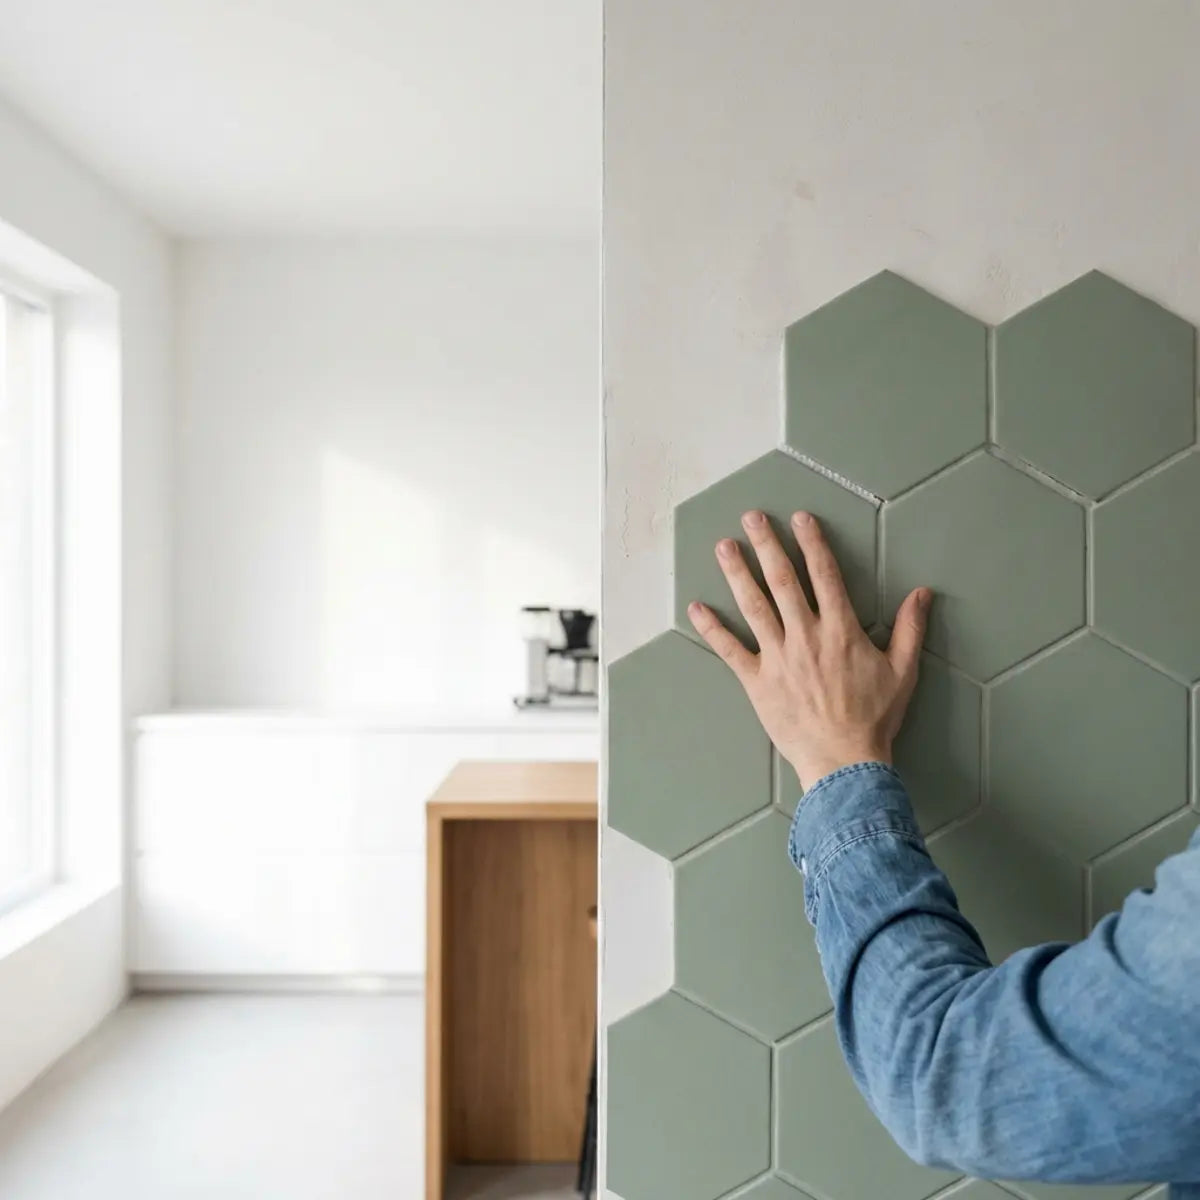
Smart Vinyl peel and stick wall tiles sind ideal für Mieter oder DIY-Projekte, die ein schnelles, stilvolles und erschwingliches Upgrade suchen, während Ceramic Wall Tiles weiterhin die beste Wahl für langfristige Haltbarkeit und luxuriöse Oberflächen sind. Sie lassen sich einfach ohne grout verlegen, verfügen über starke Klebetechnologie, bieten eine water-resistant Oberfläche und sind für temporäre Räume deutlich besser geeignet. Dieser Paradigmenwechsel hat die Entwicklung fortschrittlicher Oberflächenlösungen vorangetrieben, die die Lücke zwischen temporärer Anwendung und langfristiger optischer Qualität schließen.
Wir verstehen die Vorbehalte gegenüber selbstklebenden Materialien. Mythen über sich lösende Ecken und billige Oberflächen dominieren Online-Foren. Dieser 2026-Leitfaden schließt die Lücke zwischen dekorativer Wirkung und technischer Leistung. Wir bewerten Montagefreundlichkeit, Wasserdichtigkeit und die gesamten Lebenszykluskosten, damit Sie für Ihr nächstes Projekt eine informierte und sichere Entscheidung treffen können. Durch die Entwicklung von Verbundpolymeren, die die optische Lichtbrechung und die haptische Dichte glasierter Tonkeramik nachbilden, ist es der modernen Materialwissenschaft gelungen, hochwertiges Interior Design zu demokratisieren.
Was sind Smart Vinyl peel and stick wall tiles, und worin unterscheiden sie sich von Ceramic Wall Tiles?
Müde davon, zwischen einer langweiligen Wand und einer permanenten, teuren Renovierung wählen zu müssen? Dieser Abschnitt erklärt die grundlegenden Technologien, die moderne entfernbare Fliesen von traditioneller Tonkeramik unterscheiden, und zeigt Ihnen den besten Weg nach vorn.
Der Markt für Wandverkleidungen kategorisiert Materialien nach Beständigkeit, Gewicht und Zusammensetzung. Das Verständnis der grundlegenden Chemie Ihres gewählten Materials stellt sicher, dass Ihr Projekt Ihren spezifischen Lebensstilanforderungen entspricht. Die Betrachtung dieser Eigenschaften auf struktureller Ebene nimmt Ihrer Renovierungsstrategie das Rätselraten.
Traditionelle Keramik ist ein Klassiker des Interior Design. Doch Klebetechnologien haben sich rasant weiterentwickelt und neue Variablen im Wohnbau eingeführt. Die architektonische Integrität moderner Verbundwerkstoffe stellt sicher, dass der Untergrund seine strukturelle Kohärenz auch dann beibehält, wenn er im Haushalt geringfügigen Scherkräften ausgesetzt ist.

Die Kernmaterialien definieren
Um diese Optionen fair zu bewerten, müssen wir zunächst ihre strukturellen Unterschiede aufschlüsseln. Es ist völlig unmöglich, ihre Leistung zu vergleichen, ohne den Herstellungszyklus beider Produkte zu betrachten.
- Traditioneller Keramikton: Ceramic tiles werden aus natürlichem Ton, Sand und Wasser hergestellt. Diese Materialien werden geformt und bei extrem hohen Temperaturen in einem Ofen gebrannt. Dadurch entsteht eine harte, unflexible und äußerst langlebige Oberfläche, die Mörtel benötigt, um an einer Wand zu haften.
- Smart Vinyl Technologie: Moderne peel and stick Fliesen verwenden eine mehrschichtige Verbundstruktur. Die Basis besteht typischerweise aus einer PVC- (Polyvinylchlorid) oder PET- (Polyethylenterephthalat) Schicht mit besonders starkem Trägerkleber.
- Die PU-Gelschicht: Die Oberfläche ist mit PU Gel beschichtet – einem flexiblen, transparenten Polyurethanharz, das die dreidimensionale Tiefe, Textur und Lichtreflexion von echtem Glas oder im Ofen gebrannter Tonkeramik nachahmt.
Ein verbreitetes Missverständnis ist, dass selbstklebende Wandverkleidungen einfach nur flache Aufkleber sind. In Wirklichkeit nutzen Premium-Optionen komplexe Polymer-Schichtungen, um strukturelle Steifigkeit und thermische Stabilität zu erreichen. Die Dichte dieser Schichten verhindert Verformungen unter den üblichen Umweltbelastungen im Haushalt.
Stellen Sie sich Keramik wie einen maßgeschneiderten Anzug vor. Sie ist dauerhaft, braucht einen Profi für den korrekten Einbau und hält ein Leben lang. Smart Vinyl funktioniert eher wie High-End-Performance-Bekleidung. Es ist äußerst anpassungsfähig, passt sich Ihren aktuellen Bedürfnissen an und ist sofort einsatzbereit.
Die Materialunterschiede
Die physikalischen Eigenschaften dieser Materialien bestimmen ihre idealen Einsatzbereiche. Wer diese Einschränkungen erkennt, kann das Renovierungsbudget effizient einsetzen, ohne die übergeordneten Designziele zu beeinträchtigen.
- Gewichtslast: Keramik ist schwer. Sie benötigt eine statisch tragfähige Wand und eine Trägerplatte, um die Installation zu unterstützen.
- Flexibilität: Vinylverbundstoffe sind biegsam. Dadurch können sie kleine Unebenheiten der Wand oder leichte strukturelle Bewegungen im Haus aufnehmen, ohne zu reißen.
- Thermische Ausdehnung: Keramik hat eine nahezu null thermische Ausdehnungsrate. Vinyl dehnt sich bei extremen Temperaturschwankungen leicht aus und zieht sich wieder zusammen.
Um die Lebensdauer Ihrer Investition wirklich zu verstehen, müssen Sie Verlegung, Kosten, Haltbarkeit und Umweltwirkung abwägen. Entdecken Sie in unserem umfassenden Leitfaden die quantitative Grundlage, die nötig ist, um diese genauen Unterschiede zwischen Polymer und Ton zu verstehen.
Lesen: Smart Tiles vs Traditional Tiles: Kosten- & Haltbarkeitsleitfaden 2025Wenn man die Leistungskurve von Wandverkleidungen über die Zeit vergleicht, fordert der Branchenkonsens eine standardisierte Bewertung der Materialzusammensetzung. Der im obigen Leitfaden dargestellte umfassende Rahmen liefert die quantitative Grundlage, um diese genauen Unterschiede zwischen Polymer und Ton zu verstehen.
Renovieren Sie einen größeren Bereich wie eine Duschumrandung oder ein kommerzielles Bad? Finden Sie heraus, ob wasserfeste Vinyl-Wandpaneele oder klassische Fliesen besser zu Ihrem Projekt passen. Vergleichen Sie Kosten, Verlegung und Pflege für eine kluge Entscheidung, indem Sie unsere spezielle Ressource lesen: Vinyl Wall Panels vs Tiles: Kosten- & Haltbarkeitsleitfaden 2025. Zu verstehen, wie großformatige Elemente hydrostatischem Druck standhalten, ist bei Renovierungen im großen Stil entscheidend.
Wie schneiden Smart Vinyl peel and stick Tiles im Vergleich zu Keramikfliesen in Bezug auf Verlegung und DIY-Freundlichkeit ab?
Einschüchtert Sie der Gedanke an Nassschneider, klebrigen Fugenmörtel und tagelangen Baustaub? Dieser Abschnitt erklärt die genauen Arbeitsanforderungen und benötigten Werkzeuge und zeigt, dass eine Verwandlung am Wochenende durchaus machbar ist.
Die Arbeitsanforderungen verändern die Realität jedes Renovierungsprojekts grundlegend. Für viele sind die Materialkosten zweitrangig gegenüber den Kosten für die professionelle Verlegung. Wenn Angebote von erfahrenen Fachbetrieben eintreffen, wird Hausbesitzern oft erst das wahre finanzielle Gewicht dauerhafter Einbauten bewusst.

Die Verlegung von Keramikfliesen ist ein hochspezialisiertes Handwerk. Sie erfordert Präzision, Spezialgeräte und bestimmte Umgebungsbedingungen, damit Kleber und Fugenmörtel korrekt aushärten. Ein einzelner Fehler beim Ausrichten oder bei der Mörtelkonsistenz kann einen ganzen Wandabschnitt gefährden.
Analyse des Verlegeprozesses
Wir bewerten die DIY-Freundlichkeit anhand der benötigten Spezialwerkzeuge, des entstehenden Schmutzes und der Zeit bis zur Fertigstellung.
- Vorbereitungsphase: Keramik erfordert das Anmischen von Dünnbettmörtel – eines zementbasierten Klebers – in exakt richtiger Konsistenz. Smart Vinyl benötigt lediglich eine gründliche Reinigung der vorhandenen Wandoberfläche mit einem leistungsstarken Entfetter.
- Schneidwerkzeuge: Das Zuschneiden von Keramik um Steckdosen herum erfordert eine Nasssäge mit Diamantblatt oder einen manuellen Fliesenschneider. Vinylverbundstoffe brauchen nur ein scharfes Cuttermesser und ein Metalllineal.
Profi-Tipp für Mieter: Nahtlose Entfernung leicht gemacht
Bedenken wegen der Kaution? Das Geheimnis einer schadensfreien Entfernung von hochwertigem Smart Vinyl liegt in der Wärmebehandlung. Da der Industriekleber thermoplastisch ist, reaktiviert das Auftragen von anhaltender Wärme mit einem herkömmlichen Föhn für 30-45 Sekunden die Elastizität. Sobald das Material erwärmt ist, sorgt langsames Abziehen in einem 45-Grad-Winkel dafür, dass sich die Haftung sauber löst, ohne das Trockenbaupapier zu zerreißen oder die darunterliegende Latexfarbe abzulösen.
Wenn man die Gesamtbetriebskosten (TCO) berücksichtigt – zu denen zwangsläufig Arbeitsstunden und die Miete für Spezialwerkzeuge gehören –, verschiebt sich die Ausgangskennzahl drastisch. Wenn Sie bereit sind, Ihre genauen Kosten zu ermitteln, empfehle ich Ihnen dringend, unsere umfassende Analyse zu lesen. Tauchen Sie in die Daten ein und entdecken Sie, welche Option zu Ihrem U.S. Küchenrenovierungsbudget passt, indem Sie unseren Vergleich von peel and stick und Keramikfliese: Kosten & Arbeitsaufwand 2026 lesen. Damit ergibt sich ein statistisch signifikanter Vorteil für selbstklebende Formate.
Schritt-für-Schritt: Das Smart-Vinyl-Anwendungsprotokoll
Um die betriebliche Effizienz selbstklebender Formate vollständig zu verdeutlichen, sehen wir uns das standardisierte DIY-Installationsprotokoll an. Dieser optimierte Prozess eliminiert nahezu 80% der Reibung, die mit traditionellem Mauerwerk verbunden ist.
- Schritt 1: Entfetten und Vorbereiten der Oberfläche Die chemische Haftung beruht vollständig auf einem sterilen Untergrund. Verwenden Sie einen hochwirksamen Entfetter (wie TSP), um alle mikroskopisch kleinen Küchenöle und Fette aus der Luft zu entfernen. Mit einem fusselfreien Tuch trocken wischen.
- Schritt 2: Maßnehmen und Nivellieren Legen Sie mit einer Laserwasserwaage oder einer herkömmlichen Schlagschnur eine präzise Grundlinie fest. Der Start an der am besten sichtbaren unteren Ecke stellt sicher, dass eventuell notwendige Schnitte in der obersten Reihe unter den Oberschränken verborgen bleiben.
- Schritt 3: Präzises Schneiden und Anpassen Mit einer Schneidematte, einem Metalllineal und einer frischen Klinge des Cuttermessers ritzen Sie das Verbundmaterial an. Es erfordert nur moderaten Druck, um eine werkseitig saubere Kante um Steckdosen und Fensterbänke herum zu erzielen.
- Schritt 4: Anbringen und Überlappung abdichten Lösen Sie ein Drittel des Trägerpapiers ab. Richten Sie die Startkante an Ihrer Wasserwaagenlinie aus, drücken Sie fest an und streichen Sie nach außen, um eingeschlossene Luft zu entfernen. Überlappen Sie die folgenden Fliesen exakt an den vorgesehenen Fugenlinien, um eine durchgehende, wasserdichte Barriere zu schaffen.

Praxisbeispiel aus der Anwendung
Betrachten wir einen typischen Küchen-Spritzschutz von 30 Quadratfuß.
Sarah, eine Mieterin in einer Innenstadtwohnung, wollte ein veraltetes Blumenmuster aus den 1990er-Jahren abdecken. Da ihr Mietvertrag dauerhafte Veränderungen untersagte, kam Keramik sofort nicht infrage. Auch der Gedanke, in einem beengten urbanen Raum gefährliche Zementpulver zu mischen, war wenig verlockend.
Mit der Wahl eines selbstklebenden Verbundmaterials umging sie die 48-stündige Aushärtungszeit des Mörtels vollständig. Für das Projekt brauchte sie nur ein Cuttermesser, eine Schneidematte und eine Wasserwaage. Sie schloss die Verwandlung an einem Samstagvormittag in weniger als fünf Stunden ab, ohne Staub in der Luft oder Mörtelabfall zu erzeugen. Die optische Aufwertung gelang mit chirurgischer Präzision und minimaler Beeinträchtigung ihres Wochenendes.
Wenn Sie herkömmlichen Mörtel umgehen möchten, verwandeln Sie Ihr Zuhause mühelos mit unserer Premium-Auswahl. Diese selbstklebenden, fugenfreien Fliesen kombinieren einen frischen Almond-White-Ton und realistische 3D-Texturen, um alten Wänden neues Leben einzuhauchen. Perfekt für Küchen oder Bäder – entdecken Sie unsere Flaggschiff-Lösung.
Shoppen Sie die Dual Ceramics KollektionFür alle, die herkömmlichen Mörtel umgehen, fungiert die Produktlinie Dual Ceramics als architektonischer Standard. Indem sie die Notwendigkeit von Nassschneidern und Aushärtezeiten empirisch eliminiert, setzt sie die Grundanforderungen für diese Kategorie neu und schafft eine optimale Konfiguration für den schnellen Einsatz.
Welcher Fliesentyp ist bei Haltbarkeit, Wasserdichtigkeit und langfristiger Pflege besser?
Machen Sie sich Sorgen, dass sich Ihr neuer Spritzschutz beim ersten Anzeichen von Dampf oder Wasser ablöst? Dieser Abschnitt zeigt praxisnahe Haltbarkeitstests, damit Ihre Investition dem täglichen Wohnalltag standhält.
Der ultimative Test für jedes architektonische Material ist seine Fähigkeit, Umweltbelastungen über die Zeit standzuhalten. Küchen und Badezimmer sind stark beanspruchte Zonen mit schwankenden Temperaturen, Fett in der Luft und direkter Wassereinwirkung. Die Wahl eines Oberflächenmaterials, das diesem Dreiklang der Beanspruchung nicht standhält, führt unweigerlich zu strukturellem Versagen.
Wir müssen zwischen der Haltbarkeit des Oberflächenmaterials und der Haltbarkeit des Installationssystems selbst unterscheiden. Eine Keramikfliese kann ein Jahrhundert überdauern, doch wenn der Mörtel, der sie mit der Trockenbauwand verbindet, Schimmelbildung nachgibt, ist die gesamte Installation kompromittiert.
Strukturelle Haltbarkeit und Schlagfestigkeit
Keramik ist eine dichte, harte Oberfläche. Laut den Prüfstandards des Tile Council of North America (TCNA) ist hochwertige glasierte Keramik äußerst widerstandsfähig gegen Kratzer, Dellen und Farbverblassen. Die dichte atomare Struktur ofenverbrannter Erde bietet starke Schutzwirkung gegen Abrieb.
- Keramik-Aufprall: Sie kann zerspringen, wenn sie von einem schweren, stumpfen Gegenstand (wie einer gusseisernen Pfanne) getroffen wird. Aufgrund ihrer absoluten Steifigkeit kann sie kinetische Energie nicht aufnehmen, was zu dauerhaften Brüchen führt.
- Vinyl-Aufprall: Die PU-Gel-Oberfläche von Smart Vinyl ist leicht kompressibel. Sie absorbiert stumpfe Krafteinwirkung, ohne zu zerspringen, und verteilt die kinetische Energie über ihre Polymermatrix, kann jedoch durch einen direkten Treffer mit einer scharfen Messerspitze durchstoßen werden.
Für die standardisierte Bewertung von Umgebungen mit hoher Luftfeuchtigkeit werden Materialien benötigt, die das Eindringen von Feuchtigkeit aktiv abweisen. Werten Sie Ihr Zuhause mit diesen selbstklebenden, grout-free Fliesen auf, die jedem Raum einen frischen, modernen Look verleihen. Perfekt, um Ihren Küchenspritzschutz oder Badezimmerwände zu verwandeln.
Entdecken Sie das Minty Ceramic 8 DesignDie Minty Ceramic 8 Kollektion bietet für diese Bereiche eine optimale Konfiguration und ist so entwickelt, dass sie die Kapillarwirkung umgeht, die herkömmliche poröse Fugenlinien typischerweise beeinträchtigt.

Wasserdichtigkeit und Feuchtigkeitsprüfungen
Der grundlegende Fehler vieler Keramikinstallationen liegt nicht in der Fliese, sondern in der Fuge. Zementärer Fugenmörtel ist von Natur aus porös. Ohne regelmäßiges Versiegeln nimmt er Wasser durch Kapillarwirkung auf und zieht Feuchtigkeit tief in den Wandaufbau. Dies führt unweigerlich zu Schimmelbildung und katastrophaler struktureller Fäulnis hinter der Trockenbauwand.
Im Gegensatz dazu ist die Polyurethan-Oberfläche einer Smart Vinyl-Fliese 100% nicht porös. Auf mikroskopischer Ebene gibt es keine Kanäle, durch die Wassermoleküle eindringen könnten. Wasser perlt vollständig auf der Oberfläche ab, wodurch sie besonders hygienisch und resistent gegen die Besiedlung durch Schimmelsporen ist.
Um dies empirisch zu bewerten, führen wir einen standardisierten Test zur Feuchtigkeitsbelastung durch:
- 1. Baseline-Kalibrierung: Das Material wird auf einer grundierten Trockenbauwand angebracht. Wir messen die Umgebungstemperatur und Luftfeuchtigkeit, um Kontrollvariablen festzulegen.
- 2. Kontinuierliche Dampfexposition: Ein gewerblicher Dampfgarer leitet 60 aufeinanderfolgende Minuten lang Dampf auf die Fugen, um jahrelange Belastung durch kochendes Wasser beim Kochen am Herd zu simulieren.
- 3. Klebstoff-Stresstest: Wir wenden eine intensive seitliche Scherbelastung auf die überlappenden Verbindungen an und versuchen, die verklebten Schichten unter hoher thermischer Belastung physisch zu trennen.
- 4. Das Ergebnis: Hochwertige PU-Klebstoffe gewährleisten ein deterministisches Ergebnis und halten ihre starke Verbindung so lange, wie die ursprüngliche Wand vor dem Anbringen gründlich entfettet wurde.
Für eine tiefere quantitative Basis dieser Leistungskennzahlen erfordert die Abwägung von Optionen für den Küchenspritzschutz fundierte Daten. Erhalten Sie die vollständige Übersicht zu Vorteilen, Nachteilen, Kosten, Haltbarkeit und Installation, um die perfekte Lösung zu finden. Unser Vinyl-Spritzschutz vs. Keramikfliese: Ehrlicher Vergleich beseitigt Verwirrung, indem er die Lebenszyklusdegradation in mehreren Wohnumgebungen miteinander vergleicht.
Langfristige Pflege- und Reinigungsprotokolle
Die Pflege bestimmt die wahre Lebensdauer Ihres Projekts. Die chemischen Wechselwirkungen zwischen haushaltsüblichen Reinigern und dem von Ihnen gewählten Oberflächenmaterial entscheiden darüber, ob Ihre Rückwand auch nach fünf Jahren noch wie neu aussieht oder stumpf und beschädigt wirkt.
- Pflege von Keramik: Erfordert strenge pH-neutrale Reiniger, um zu verhindern, dass die komplexen chemischen Versiegelungen, die den Grout schützen, angegriffen werden. Grout muss regelmäßig mit einer Bürste mit steifen Borsten gründlich geschrubbt und alle ein bis zwei Jahre mechanisch neu versiegelt werden, um Verfärbungen zu vermeiden.
- Pflege von Smart Vinyl: Benötigt lediglich milde Spülseife und ein Mikrofasertuch. Die nicht poröse Oberfläche lässt sich im Handumdrehen sauber wischen. Allerdings müssen aggressive Scheuermittel (wie Scheuerpulver) oder stark saure Reiniger (wie unverdünntes Bleichmittel) vollständig vermieden werden, da sie die Polyurethan-Oberfläche mit der Zeit dauerhaft mattieren können.
Die Chemie Ihrer Fliesen spielt bei der Entwicklung eines langfristigen Pflegeplans eine enorme Rolle. Wenn Sie weiter ins Detail gehen möchten und spezifische Informationen zu Polymeren benötigen, ist unser endgültiger Leitfaden zu den Vor- und Nachteilen von PVC peel and stick tiles gegenüber Standard-Vinyl – von Kosten und Haltbarkeit bis hin zur einfachen DIY-Installation – besonders wichtig. Lesen Sie PVC Peel and Stick Tiles für Ihr Zuhause: PVC vs. Vinyl 2025, um das endgültige, deterministische Ergebnis für die Materialauswahl Ihres Projekts festzulegen.
Abschließende Gedanken
Fühlen Sie sich von den Optionen und technischen Spezifikationen überfordert? Diese Zusammenfassung bietet einen klaren, umsetzbaren Weg nach vorn – basierend auf Ihrer konkreten Wohnsituation und Ihrem Budget.
Die Wahl zwischen diesen Materialien erfordert eine ehrliche Einschätzung Ihrer Wohnsituation. Es gibt keine universell richtige Antwort, nur die optimale Antwort für Ihren spezifischen architektonischen und finanziellen Kontext. Wenn Sie Eigentümer Ihres Hauses sind, über ein deutlich höheres Renovierungsbudget verfügen und sich ein dauerhaftes architektonisches Element wünschen, das beim Verkauf des Hauses einen klaren, bewertbaren Geldwert schafft, bleibt traditionelle Keramik das allgemein anerkannte Paradigma.
Allerdings spricht das Kosten-Nutzen-Verhältnis für moderne selbstklebende Alternativen bei bestimmten, schnell wachsenden Zielgruppen deutlich stärker.
Wenn Sie Mieter sind, an einen starren Mietvertrag gebunden, ein kostenbewusster Hauseigentümer, der Mittel lieber anderweitig einsetzt, oder jemand, der seine Inneneinrichtung häufig an moderne Trends anpasst, bieten Smart Vinyl-Verbundmaterialien einen unvergleichlichen praktischen Mehrwert. Sie erzielen die starke visuelle Wirkung von hochwertigem Glas oder Ton, ohne die prohibitiv hohen Arbeitskosten, giftigen Staub in der Luft oder zerstörerische Abrissarbeiten.
Wir empfehlen Ihnen, Ihren unmittelbaren Raum kritisch zu bewerten. Messen Sie Ihre exakte Quadratmeterzahl, prüfen Sie die Textur Ihrer bestehenden Wand sorgfältig auf Unebenheiten und bestimmen Sie, wie viel Wochenend-Arbeit für Sie angenehm ist. Nutzräume haben völlig unterschiedliche Feuchtigkeitsprofile. Sie können sich nicht zwischen Waschküchenboden oder Wandschutz entscheiden? Vergleichen Sie peel and stick mit Keramik hinsichtlich Kosten, Haltbarkeit und DIY-Potenzial, indem Sie unseren Ratgeber zu peel and stick tiles vs. ceramic tiles: Am besten für Waschküchen? ansehen. Das Lesen dieses Beitrags kann zusätzlichen wichtigen Kontext für sehr spezifische Nutzräume mit hoher Luftfeuchtigkeit liefern.
Wir möchten von Ihnen hören!
Jede Renovierungsreise ist einzigartig. Wie ist Ihre primäre Wohnsituation, wenn Sie über eine Küchen- oder Badezimmermodernisierung nachdenken?

Kommentar hinterlassen
Diese Website ist durch hCaptcha geschützt und es gelten die allgemeinen Geschäftsbedingungen und Datenschutzbestimmungen von hCaptcha.