


Introducción
A medida que nos instalamos en 2026, ¿has mirado tu cocina y pensado que necesitaba una actualización fresca y moderna? ¡No estás solo! Hoy en día, muchos propietarios buscan una renovación fácil y budget-friendly para sus espacios de cocina sin el fastidio de los altos costes de una reforma importante. ¿Sabías que 75% de los aficionados al bricolaje prefieren las soluciones peel and stick por su comodidad? Ahí es donde DIY peel and stick kitchen tiles entran en juego. Este artículo se actualizó recientemente para garantizar su vigencia y precisión. Te guiaremos paso a paso para transformar tu cocina con estas ingeniosas baldosas, con un toque extra de las últimas DIY decor techniques. ¡Vamos allá y dale a tu cocina la makeover que se merece!
Entendiendo las baldosas peel and stick
Tipos de baldosas peel and stick disponibles en el mercado
- Vinyl Tiles: Asequibles, waterproof y disponibles en diversos patrones.
- Ceramic-Look Tiles: Imitan la cerámica real, pero son más ligeras y fáciles de instalar.
- Metal Tiles: Elegantes y modernas, ideales para el backsplash.
- Wood-Look Tiles: Cálidas y rústicas, perfectas para cocinas de estilo farmhouse.
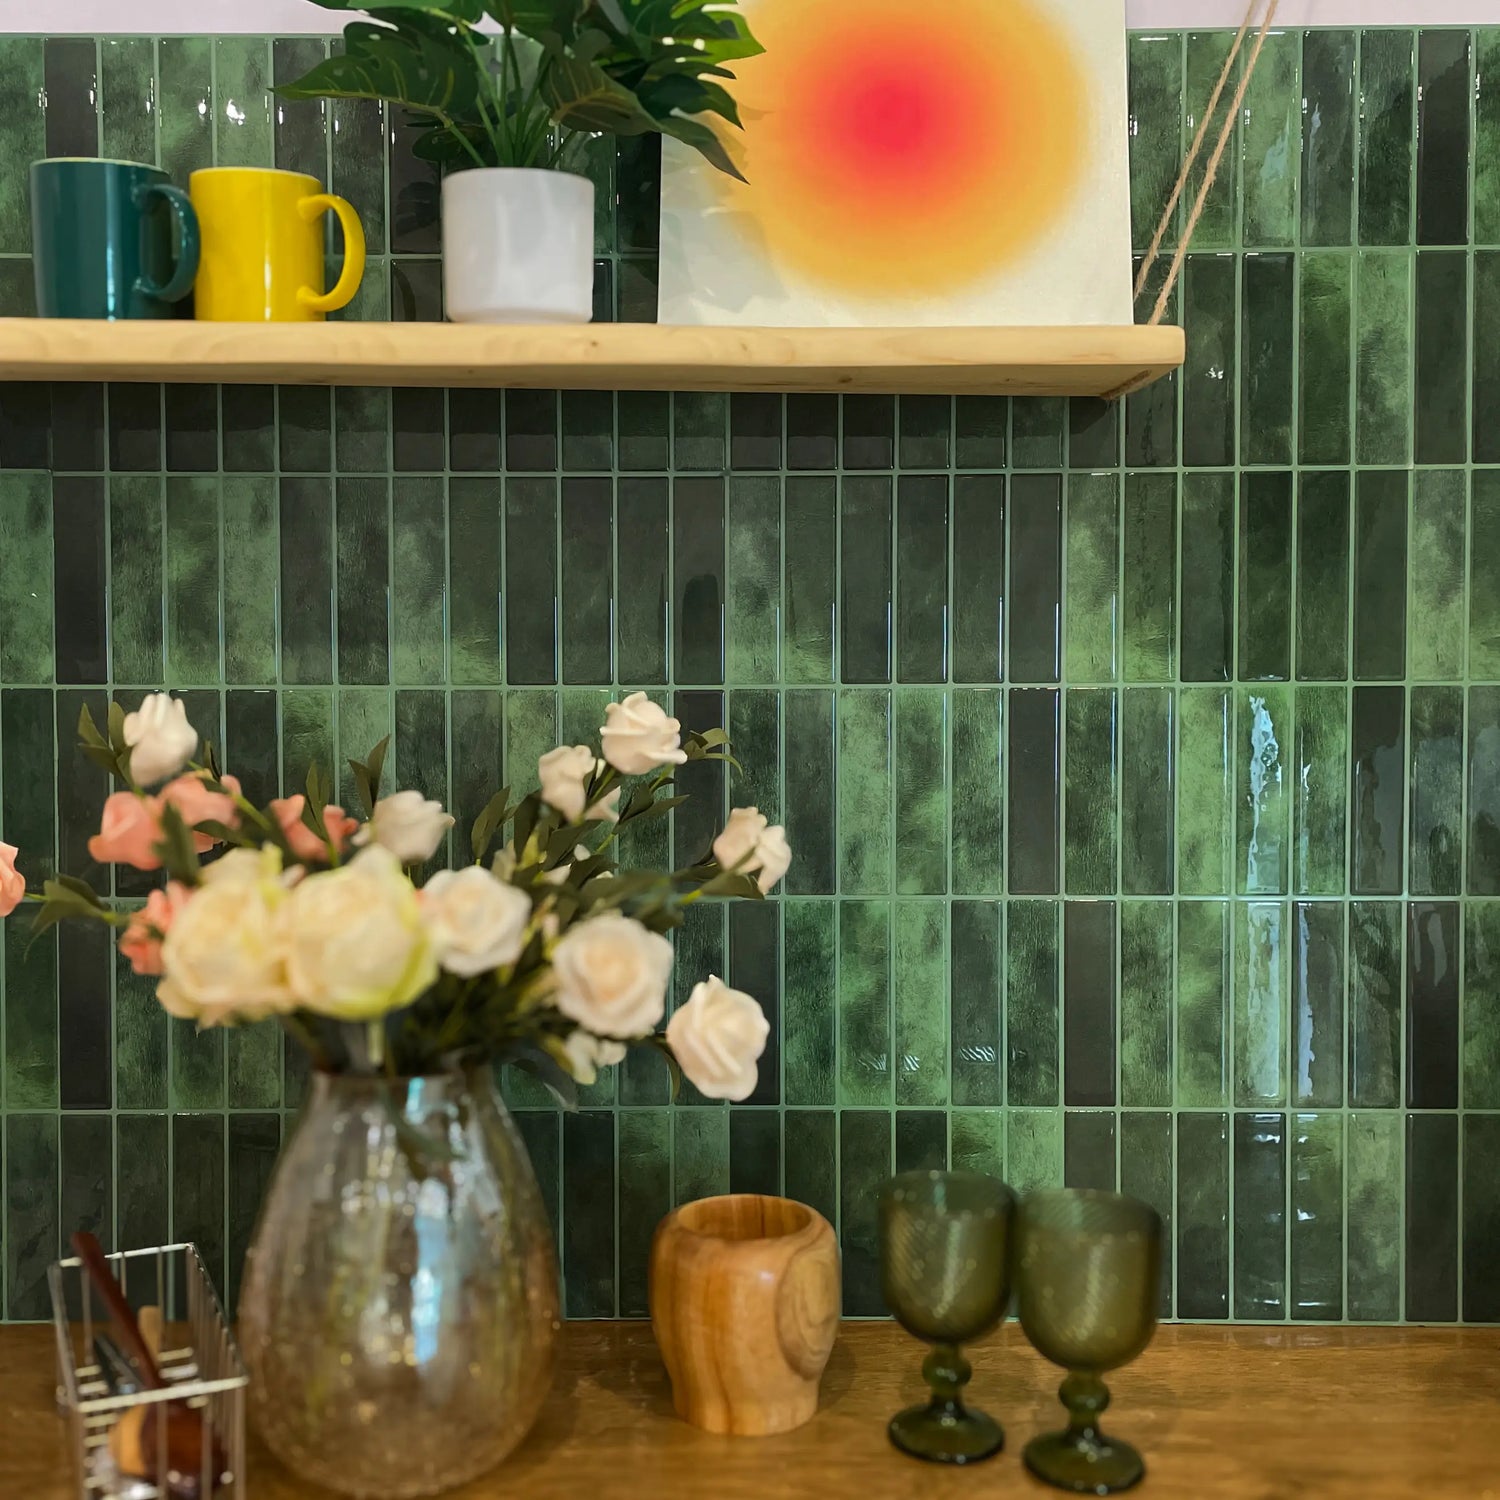
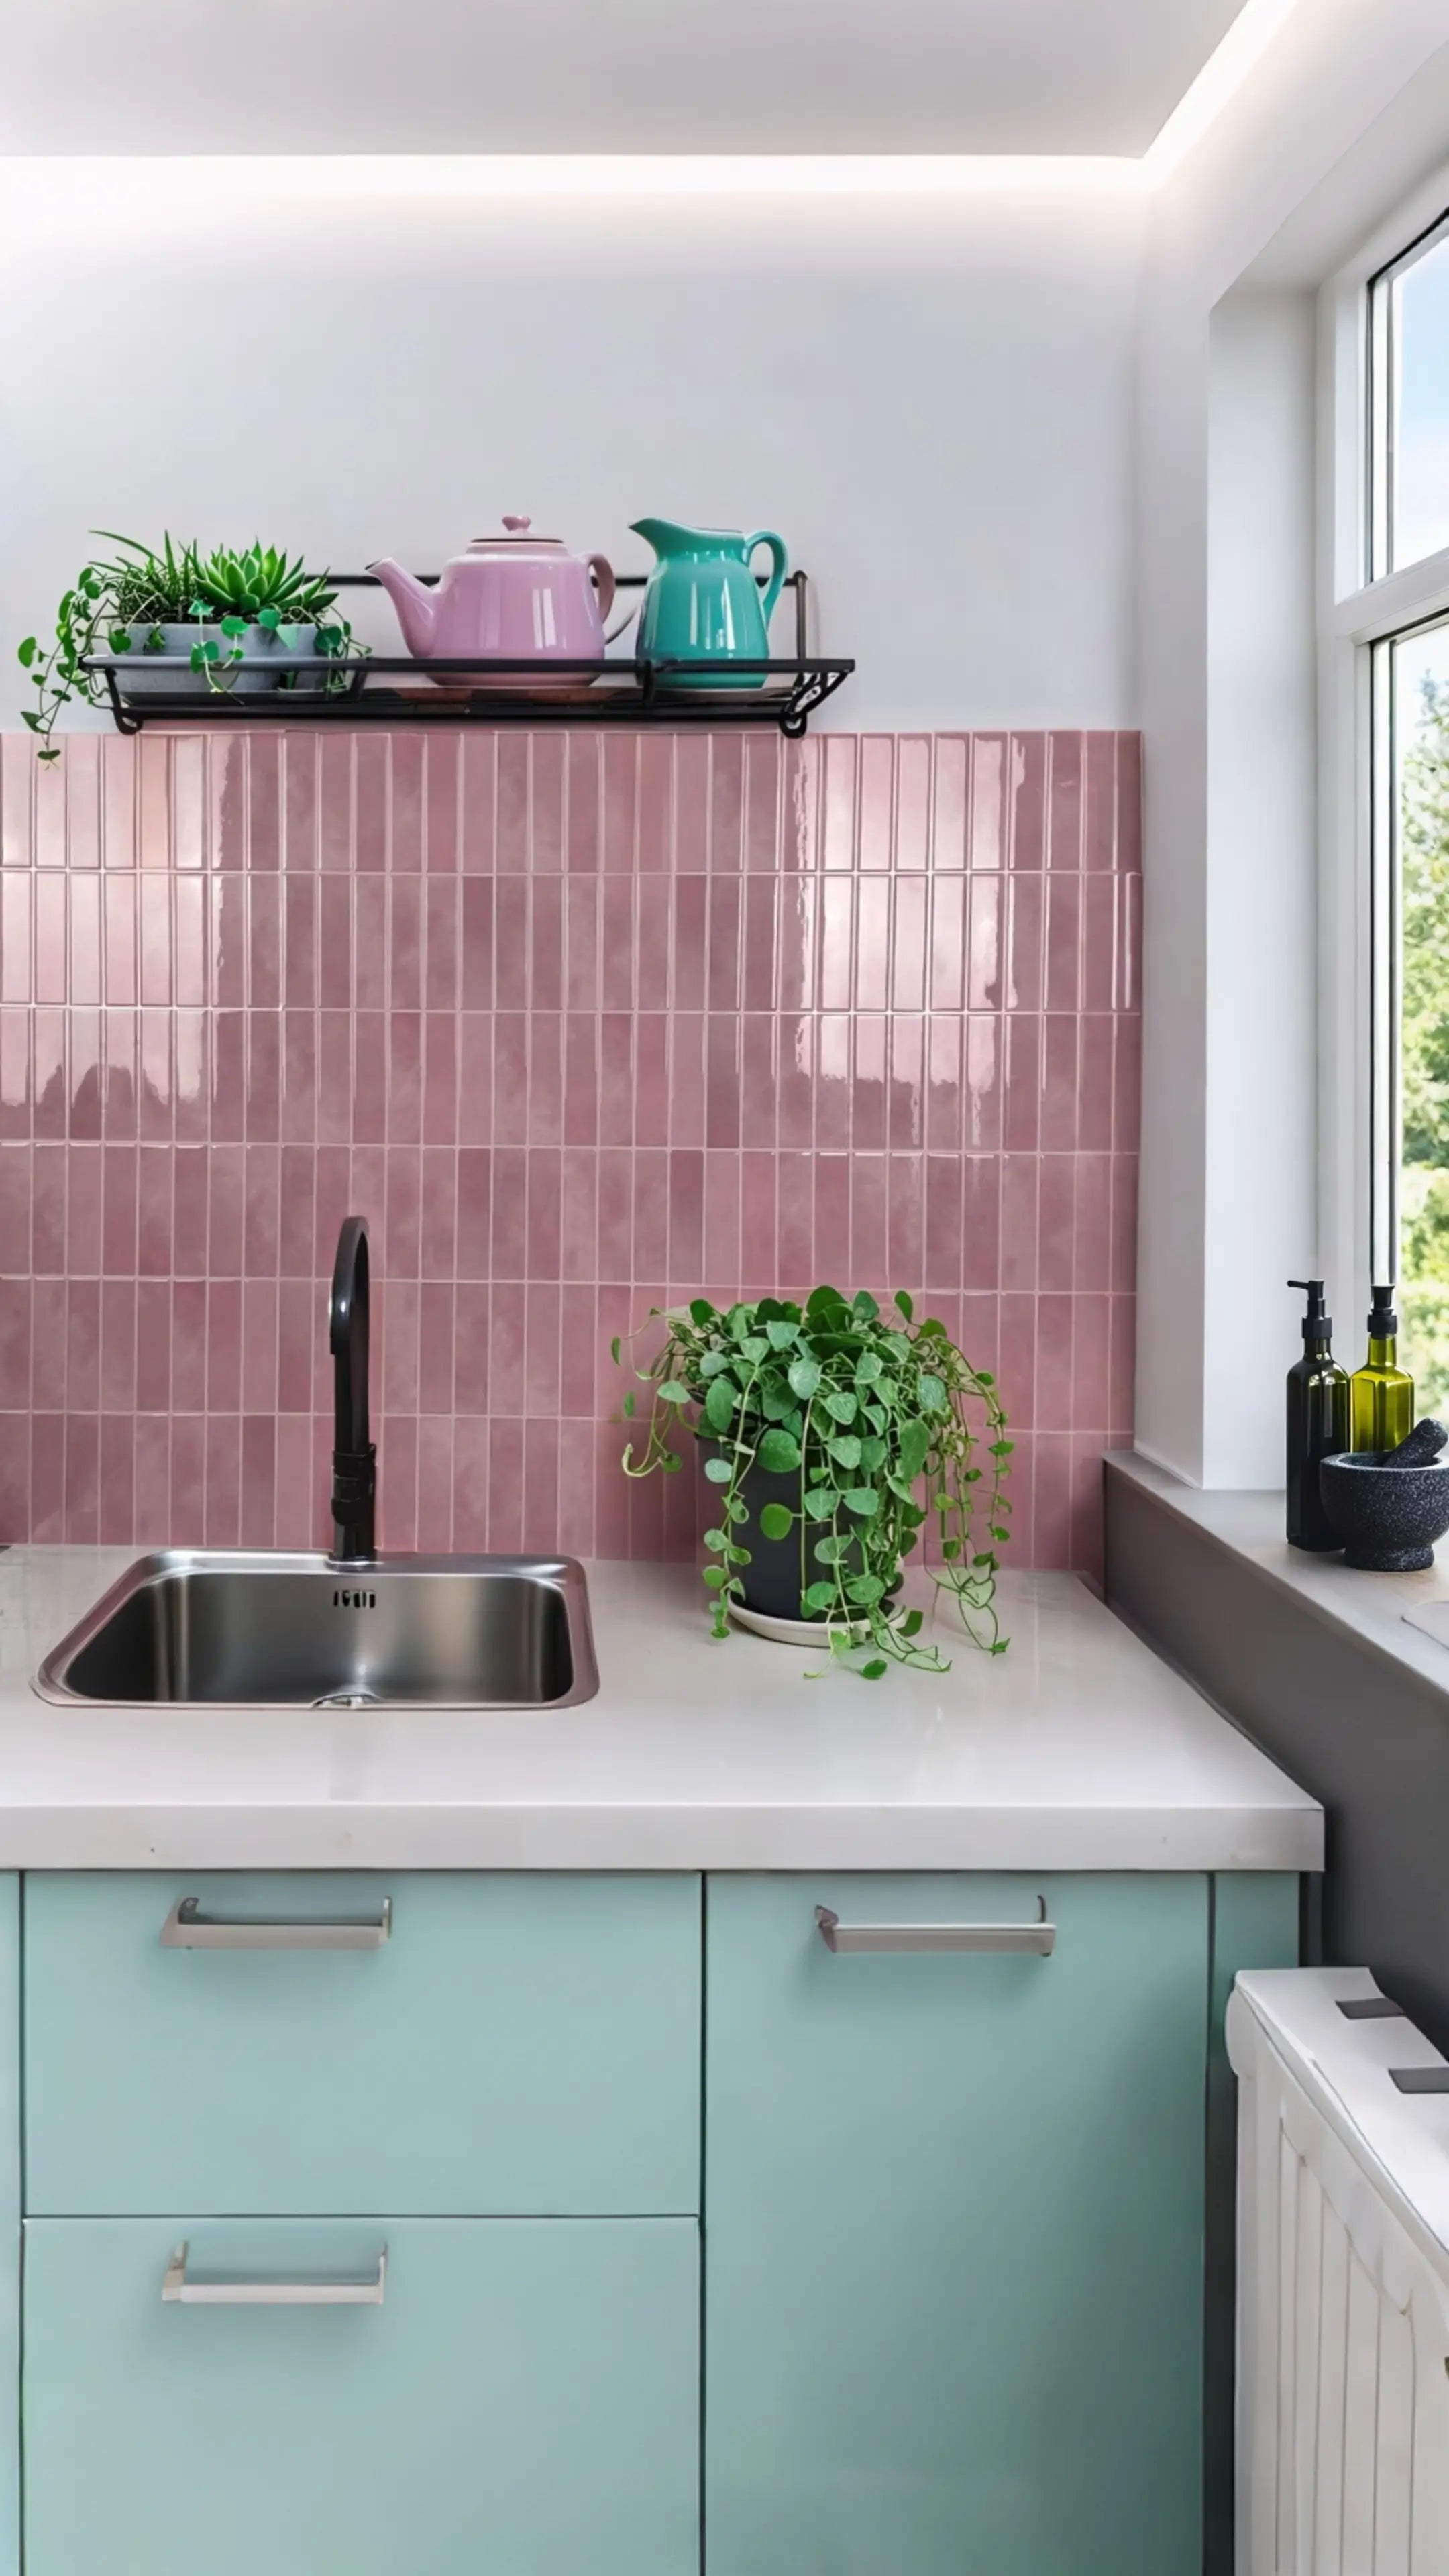
Cada tipo tiene su propio encanto. Por ejemplo, Timberline Checks aportan una acogedora vibra de madera, mientras que Crimson Horizon ofrece un look atrevido y moderno. Si te encanta la estética costera, Coastal Breeze aporta una sensación fresca y playera.
Beneficios de usar baldosas peel and stick
- Sin lechada ni adhesivos sucios—¡solo despega y pega!
- Aptas para inquilinos—fáciles de retirar sin dañar.
- Budget-friendly—cuestan una fracción de las baldosas tradicionales.
Una vez ayudé a una amiga a renovar su cocina con Blush Petals tiles, ¡y la transformación fue espectacular, todo en un solo fin de semana!
Rentabilidad frente al alicatado tradicional
El alicatado tradicional puede costar $10–$30 por pie cuadrado, mientras que las baldosas peel and stick oscilan entre $1–$5 por pie cuadrado. Además, ahorras en mano de obra, ya que la instalación es ideal para hacerlo tú mismo.
Preparando tu cocina para la transformación
Limpieza y medición de tu espacio de trabajo
- Elimina la grasa y la suciedad con un desengrasante.
- Mide tus paredes o suelos con precisión para evitar desperdiciar baldosas.
Una superficie limpia y lisa garantiza una mejor adhesión. Una vez me salté la limpieza y mis baldosas empezaron a despegarse en una semana: ¡lección aprendida!
Reuniendo las herramientas y materiales esenciales
- Cúter para cortar las baldosas.
- Nivel para mantener las baldosas rectas.
- Cinta métrica para mayor precisión.
Consulta nuestra DIY Peel and Stick Kitchen guía para ver una lista completa de herramientas.
Planificación de tu diseño y distribución
- Haz un boceto de tu distribución antes de pegar las baldosas.
- Combina patrones para lograr un look único.
Para inspirarte, visita nuestro Trendy Kitchen Wall Ideas blog.
Guía paso a paso para instalar baldosas peel and stick
Preparación de la superficie y consejos de adhesión
- Lija las superficies rugosas para mejorar la adherencia.
- Usa imprimación si hace falta para una adhesión extra.
Una vez instalé Snowfall Grid tiles en una pared ligeramente texturizada: lijar marcó toda la diferencia!
Colocación de las baldosas con precisión y eficacia
- Empieza desde el centro y trabaja hacia afuera.
- Presiona con firmeza para evitar burbujas de aire.
Para un recorrido más detallado, consulta nuestra Peel and Stick Tile Installation guía.
Solución de problemas comunes durante la instalación
- ¿Burbujas de aire? Pínchalas con un alfiler y alísalas.
- ¿Baldosas desalineadas? Levántalas con cuidado y recolócalas.
Mejorando tu cocina con una sencilla decoración DIY
Cómo elegir piezas decorativas complementarias
- Añade estanterías flotantes para tener más espacio de almacenamiento.
- Usa papel tapiz peel and stick para paredes de acento.
Nuestro Stylish Kitchen Wall Accents blog tiene excelentes ideas de combinación.
Incorporando elementos funcionales pero con estilo
- Los especieros magnéticos ahorran espacio.
- La iluminación bajo los gabinetes añade ambiente.
Principales tendencias de decoración DIY para cocinas
- Estanterías abiertas para un estilo minimalista.
- backsplashes llamativos como Tidal Plaid tiles.
Mantenimiento y cuidado de tu cocina renovada
Prácticas de limpieza rutinaria para mantener el aspecto
- Limpia con un paño húmedo—¡sin químicos agresivos!
- Evita estropajos abrasivos para evitar rayones.
Consejos para evitar daños en tus tiles y decoración
- Usa salvamanteles debajo de las ollas calientes.
- Sella los bordes en zonas con mucha humedad.
Cuidado a largo plazo para una estética de cocina sostenible
- Inspecciona los tiles una vez al año para detectar bordes levantados.
- Renueva la decoración según la temporada para darle un aire nuevo.
Para ideas de temporada, consulta Seasonal Kitchen Decor.
Preguntas frecuentes
1. ¿Los tiles peel and stick soportan el calor?
Sí, los tiles de calidad actual resisten el calor normal de la cocina, pero evita siempre el contacto directo con llamas abiertas o ollas calientes. Los metal tiles como Bright White Zigzag son especialmente resistentes al calor para backsplashes.
2. ¿Los peel and stick tiles son waterproof?
La mayoría de las opciones de 2026 son muy resistentes al agua y se pueden limpiar con facilidad. Sin embargo, Verdant Dawn tiles están diseñados para ser totalmente waterproof, lo que los convierte en la opción ideal para zonas cercanas al fregadero.
3. ¿Cuánto duran los peel and stick tiles?
Con una preparación adecuada de la superficie y buen cuidado, los adhesivos modernos permiten que estos tiles duren entre 5 y 10 años.
4. ¿Puedo usarlos en paredes texturizadas?
Las texturas ligeras funcionan bien, aunque lijar las zonas más altas ayuda. Para texturas intensas, prueba nuestros Olive Squares tiles: tienen una construcción más gruesa diseñada para adherirse mejor a superficies irregulares.
5. ¿Son aptos para inquilinos y fáciles de quitar?
Absolutamente. Uno de los mayores beneficios es que se pueden retirar aplicando calor bajo (como el de un secador) sobre la superficie, lo que permite despegarlos sin dañar la pared de debajo.
Reflexiones finales
A medida que abrazamos las tendencias de 2026, una DIY peel and stick kitchen makeover sigue siendo la forma perfecta de renovar tu espacio de manera eficiente y asequible. Tanto si eliges Coastal Breeze para lograr un ambiente sereno como Crimson Horizon para un efecto dramático y atrevido, las posibilidades son infinitas. ¿Listo para empezar? ¡Elige tus tiles favoritos de nuestra colección y comienza hoy mismo la transformación de tu cocina!
Para más consejos, explora nuestro Modern Kitchen Decorations blog.


Deja un comentario
Este sitio está protegido por hCaptcha y se aplican la Política de privacidad de hCaptcha y los Términos del servicio.