


La guía definitiva de supervivencia para adhesivos en RV
Imagine desbloquear tu RV después de un largo invierno en almacenamiento o llegar a tu campamento tras un viaje de costa a costa. Entras, esperando la acogedora renovación que pasaste los fines de semana perfeccionando, solo para encontrar que tu hermoso backsplash peel and stick se está despegando de la pared o que tu nuevo luxury vinyl plank está levantándose en los bordes.
Es una sensación hundente que todo propietario experimentado de RV conoce. Pero esta es la realidad: tu RV es, en esencia, un terremoto rodante que experimenta cambios de temperatura lo bastante drásticos como para romper materiales residenciales estándar.

Los materiales peel and stick pueden resistir el calor, el frío y la vibración en un RV gracias al uso de adhesivos clasificados para altas temperaturas, superficies correctamente preparadas y agentes de unión flexibles a base de polímeros. La clave está en elegir materiales con clasificación adecuada y seguir pasos de instalación específicos para RV.
En esta guía, vamos más allá del consejo genérico. Analizaremos la física de la falla del adhesivo, explicaremos por qué los productos “para el hogar” suelen fallar en la carretera y ofreceremos un protocolo probado en batalla para garantizar que tus renovaciones se mantengan en su lugar, sin importar el pronóstico.
¿Qué hace que los materiales peel and stick para RV fallen en condiciones extremas?
La mayoría de las personas asume que, cuando un azulejo se cae, el pegamento simplemente “se secó”. En nuestra experiencia analizando fallas de materiales, el culpable rara vez es la antigüedad del pegamento, sino más bien una incompatibilidad física.
La ciencia de la expansión térmica diferencial
El principal enemigo de cualquier interior de RV es el Coefficient of Thermal Expansion (CTE). Este es un término de ingeniería sofisticado para describir cuánto cambia de tamaño un material cuando cambia la temperatura.
En una casa fija, tu drywall y tu azulejo se mantienen a una temperatura relativamente constante de 70°F (21°C). En un RV, las temperaturas pueden oscilar desde -20°F en almacenamiento hasta más de 100°F bajo el sol de verano.
Cuando esto sucede, los materiales en tu RV se expanden y contraen a diferentes ritmos:
- ▶ El sustrato: Las paredes de tu RV (a menudo de contrachapado luan o aluminio) se expanden a la tasa A.
- ▶ El acabado: Tu azulejo vinílico peel and stick se expande a la tasa B.
Si el vinilo se expande más rápido que la pared detrás de él, crea “esfuerzo cortante” a lo largo de la capa adhesiva. Con el tiempo, la fuerza de cizalla supera la adherencia del adhesivo y el azulejo se suelta. En la industria esto se conoce como “fatiga de la línea de unión”.
Analogía: Piensa en el adhesivo como una persona que toma de la mano a otras dos personas (la pared y el azulejo). Si la persona de la izquierda avanza mientras la persona de la derecha permanece quieta, la persona del medio (el adhesivo) eventualmente tiene que soltar a una de ellas.
Si estás planeando una renovación cerca de una estufa o calefactor, el vinilo estándar se deformará. Para áreas expuestas a fluctuaciones extremas de temperatura, comprender los límites del material es crucial. Te recomendamos encarecidamente consultar nuestro análisis en profundidad sobre Azulejos peel and stick resistentes al calor para cocinas con altas temperaturas para asegurarte de que tu instalación sobreviva al calor.
Desajuste de energía superficial
Otra razón común de falla es aplicar adhesivo de alta calidad sobre superficies de “baja energía”. Muchas paredes de RV están cubiertas con papel tapiz de vinilo o tratadas con limpiadores a base de silicona para repeler la suciedad. Estos están diseñados químicamente para no adherirse.

Concepto clave: niveles de dyne.
La adhesión no es solo pegajosidad; se trata de que el adhesivo “moje” la superficie. Si la energía superficial (medida en dynes) de la pared es inferior a la tensión superficial del adhesivo, el pegamento formará gotas en lugar de extenderse. Esto da como resultado una unión mecánica débil que no puede soportar el viaje.
Ejemplo real: la falla durante el almacenamiento invernal
Hace poco asesoramos a un propietario de RV en Minnesota que instaló un piso premium de luxury vinyl plank (LVP) en octubre. La instalación parecía perfecta. Sin embargo, no tuvo en cuenta la “temperatura de transición vítrea” del adhesivo.
Durante una ola de frío de -30°F, el adhesivo se congeló y se volvió quebradizo (como vidrio). Cuando la temperatura subió en primavera, el piso se expandió rápidamente, pero el adhesivo congelado se había fracturado a nivel microscópico. ¿El resultado? Todas las tablas se curvaron en las esquinas.
Recomendación: Para zonas propensas al calor extremo, como cerca de las hornillas, elegir el material adecuado es la mitad de la batalla. Antes de comprar, revisa nuestro desglose técnico en La guía definitiva de baldosas peel and stick resistentes al calor para cocinas (edición 2025) para entender qué sustratos pueden soportar estos cambios térmicos.
¿Cómo afectan las oscilaciones de temperatura y la vibración al rendimiento del adhesivo en los RV?
Mientras la temperatura provoca expansión, el viaje provoca fatiga. Entender cómo interactúan estas dos fuerzas es fundamental para el mantenimiento del adhesivo del RV.
Vibración y carga cíclica
Tu RV soporta un mini terremoto cada vez que sales a la carretera. En ingeniería, esto se llama “carga cíclica”. Una unión puede ser lo bastante fuerte para sostener una baldosa ante un solo gran golpe, pero ¿qué pasa con 10,000 pequeñas vibraciones durante un viaje de 500 millas?
Los adhesivos de construcción estándar suelen ser rígidos. Cuando endurecen, se vuelven como piedra. Las uniones rígidas odian la vibración. Bajo sacudidas constantes, los adhesivos rígidos desarrollan microgrietas. Estas grietas se propagan hasta que la unión falla por completo.
Dato: Según estándares de pruebas de durabilidad (como ASTM D3163 para uniones adhesivas), los adhesivos epoxi rígidos pueden perder hasta 40% de su resistencia al corte tras una exposición prolongada a vibración de alta frecuencia, mientras que los adhesivos elastoméricos (flexibles) conservan casi 95% de su integridad.
Cuando se considera la flexibilidad, el material importa tanto como el pegamento. Existe una diferencia clara en cómo los distintos plásticos manejan este estrés. Para entender qué material ofrece la mejor flexión para la vida en movimiento, lee nuestra comparación en Baldosas peel and stick de PVC para tu hogar: PVC vs. vinilo 2025.
El “efecto horno” y el creep del adhesivo
Cuando estacionas tu RV bajo la luz directa del sol, la temperatura interior puede superar fácilmente los 120°F (49°C), incluso si afuera solo hay 80°F.
A estas temperaturas, muchos adhesivos sensibles a la presión (PSA) sufren un proceso llamado “creep”. El calor ablanda los polímeros del pegamento, convirtiéndolo de un semisólido en un líquido viscoso. Entonces la gravedad entra en juego. Si tienes baldosas pesadas en una pared vertical, se irán deslizando lentamente —milímetro a milímetro— hasta desprenderse.

Tabla: rendimiento del adhesivo bajo estrés
Así reaccionan los distintos tipos de adhesivo que se usan comúnmente en los RV ante estos factores de estrés:
| Tipo de adhesivo | Resistencia a las vibraciones | Resistencia al calor | Resistencia al frío | Mejor caso de uso |
|---|---|---|---|---|
| PSA acrílico estándar | Moderado | Moderado (hasta 140°F) | Bien | Decoración general, molduras ligeras. |
| Acrílico de alta temperatura | Alta | Alto (hasta 200 °F+) | Excelente | supervivencia de peel and stick para RV, salpicaderos de cocina. |
| Adhesivo de construcción (solvente) | Bajo (frágil) | Alta | Moderado | Reparación del armazón (evítela para suelos flexibles). |
| Polímero de silano modificado | Excelente (flexible) | Excelente | Excelente | Unión estructural de alta resistencia, suelos. |
Humedad y condensación
No podemos hablar de las causas del fallo del adhesivo en RV sin mencionar el agua. Los RV son espacios pequeños y cerrados donde respirar, cocinar y ducharse disparan los niveles de humedad.
Cuando la temperatura baja por la noche, esa humedad se convierte en condensación sobre las paredes. Si tu adhesivo es a base de agua, esta humedad puede reemulsionar el pegamento y volverlo a convertir en una pasta húmeda.
¿Cómo pueden los propietarios de RV asegurarse de que los materiales peel and stick duren todas las estaciones?
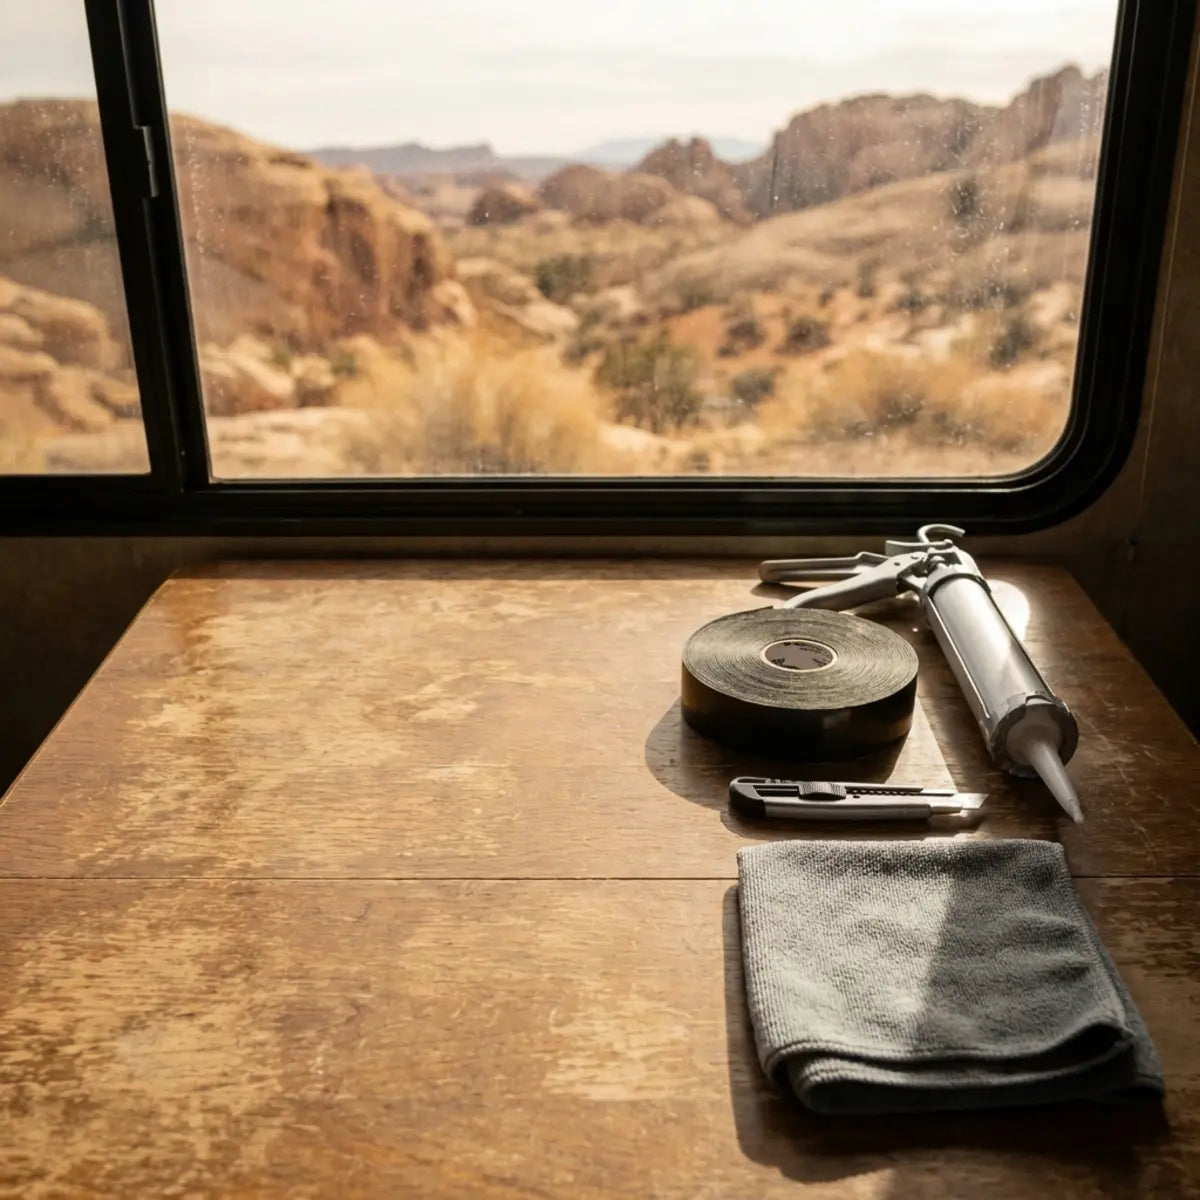
Para lograr la supervivencia del peel and stick en RV, debes dejar de tratar la instalación como una pegatina y empezar a tratarla como un proyecto de construcción. El secreto está 90% en la preparación y 10% en el producto.
Fase 1: El protocolo de “sala limpia”
La mayoría de los fallos del bricolaje ocurren antes incluso de despegar el protector. Es probable que las paredes de tu RV estén cubiertas de aceites, sprays de silicona o hollín invisible de la carretera.
- Desengrasa a fondo: Lava la zona objetivo con TSP (fosfato trisódico) o un desengrasante de alta resistencia. Esto elimina los aceites de cocina y la suciedad de la carretera.
- La pasada con alcohol: Este es el paso más crítico. Limpia toda la superficie con 70% alcohol isopropílico__. Esto elimina cualquier residuo dejado por el jabón y se evapora rápidamente, dejando un perfil de energía superficial impecable.
Fase 2: La aclimatación no es negociable
Debes engañar a los materiales para que “crean” que ya están instalados.
Lleva tus paneles o pisos peel and stick al RV al menos 48 horas antes de la instalación. Mantén la temperatura del RV estable entre 68 y 72 °F. Esto asegura que el adhesivo, el vinilo y la pared tengan el mismo tamaño y flexibilidad durante la creación de la unión.
Concepto erróneo común: “Puedo simplemente usar una pistola de calor para calentarlo mientras avanzo.”
Realidad: usar una pistola de calor durante la instalación crea una expansión temporal. En cuanto el material se enfría, se contrae y genera tensión inmediata sobre la nueva unión. Usa la pistola de calor después de colocar el material para fijar el pegamento, no antes.
Fase 3: Potenciar la unión
Para materiales resistentes a la vibración para RV, a veces el adhesivo de fábrica necesita ayuda.
- ✓ Usa un imprimador: En superficies porosas como madera contrachapada en bruto o luan, usa un imprimador a base de látex. Esto sella los poros para que el adhesivo se adhiera a la superficie, no al polvo dentro de la madera.
- ✓ La presión es clave: Los adhesivos sensibles a la presión (PSA) requieren... presión. No basta con dar unos golpecitos al azulejo. Debes activar el entrecruzamiento químico microscópico.
- ✓ El método del rodillo: Usa un rodillo en J (o un rodillo de cocina, si no tienes otra cosa) para aplicar mucha presión sobre cada pulgada cuadrada del material. Esto expulsa las burbujas de aire y fuerza al adhesivo a penetrar en la textura de la pared.
Fase 4: Refuerzo estratégico
Para las zonas cerca del techo o alrededor de las ventanas, donde el calor y la gravedad son más intensos, no tengas miedo de añadir refuerzo.
Unas cuantas gotas de un adhesivo de construcción de alta calidad (como Liquid Nails Fuze*It o Gorilla Construction Adhesive) en las esquinas de tus piezas pueden actuar como "anclas". Aunque el adhesivo principal se ablande con el calor, estas anclas mantendrán la pieza en su lugar hasta que se enfríe y vuelva a endurecerse.
Enlace contextual: Si buscas específicamente mejorar tu zona de cocina, el peso también es un factor. Los azulejos pesados se comban. Para opciones ligeras y duraderas pensadas para la vida móvil, te recomendamos leer Transformación de la cocina del RV: Por qué los azulejos peel and stick son perfectos para campistas.
Revisiones rutinarias: la "prueba de toque"
Convierte la inspección del adhesivo en parte de tu lista de verificación antes de cada viaje. Presiona con firmeza las esquinas de tus azulejos o pisos. Si oyes un sonido de "crujido", la unión se está separando.
Si lo detectas a tiempo, a menudo puedes reactivar el pegamento con un secador de pelo (calor bajo) y un rodillo. Si esperas hasta que se caiga, el adhesivo habrá acumulado polvo y quedará arruinado.
Comprobación de conocimientos en campo
¿Cuál es el enemigo n.º 1 de las uniones adhesivas en un RV según la física de la vida móvil?
Preguntas frecuentes
¿Cuál es la temperatura mínima absoluta que puede soportar peel and stick?
La mayoría de los adhesivos sensibles a la presión estándar comienzan a perder adherencia y a volverse quebradizos por debajo de 40°F (4°C). Sin embargo, una vez totalmente curados (normalmente 72 horas después de la instalación), los adhesivos acrílicos de calidad pueden soportar temperaturas de hasta -20°F sin desprenderse, siempre que no se manipulen físicamente ni se flexionen mientras están congelados. La zona de peligro suele ser instalarlos con frío, no almacenarlos en él.
Mis paredes tienen textura; ¿seguirá funcionando el peel and stick en un RV?
La textura reduce la superficie a la que el adhesivo puede agarrarse, lo cual es arriesgado en un RV con vibraciones. Si tus paredes tienen bastante textura, debes lijar los puntos más altos o usar un adhesivo en aerosol adicional (como 3M Hi-Strength 90) para rellenar los huecos y crear una unión más fuerte.
¿Puedo usar Super Glue para arreglar una esquina que se está despegando?
No recomendamos el Super Glue estándar (cianoacrilato). Se cura formando un plástico duro y quebradizo. Cuando tu RV golpee un bache, esa unión frágil se romperá, pudiendo arrancar incluso un trozo de la pared. En su lugar, usa un adhesivo flexible o una pequeña cantidad de silicona transparente, que puede absorber la vibración.
¿Cómo elimino los residuos de adhesivo si más adelante quiero cambiar el aspecto?
Como las paredes de los RV suelen estar cubiertas por una fina chapa de papel, los químicos agresivos como Goof Off pueden disolver la propia pared. Empieza con calor (secador de pelo) para ablandar el residuo y luego arráncalo rodándolo con el pulgar. Para las zonas más rebeldes, usa un limpiador a base de cítricos, pero pruébalo primero en un lugar poco visible.
Guía para inquilinos: Si estás alquilando o piensas vender tu RV pronto, necesitas una estrategia de retirada segura. Para una guía completa de este proceso sin dañar las paredes subyacentes, consulta Transforma y retira con seguridad los azulejos peel and stick para inquilinos.
Conclusiones finales: construir para la carretera

Una renovación exitosa de RV no se trata solo de estética; se trata de diseñar para un entorno móvil. Al respetar las fuerzas de causas del fallo del adhesivo en RV—la expansión térmica, la fatiga por vibración y la energía superficial—, puedes crear un interior bonito que resista las carreteras más duras y los climas más extremos.
Tu lista de supervivencia
- 1. Selecciona materiales resistentes a altas temperaturas y a las vibraciones.
- 2. Aclimata tus materiales durante 48 horas.
- 3. Limpia con desengrasante y alcohol isopropílico.
- 4. Presiona firmemente usando un rodillo para activar la unión.
- 5. Sella los bordes en zonas propensas a la humedad.
No dejes que el miedo al fracaso te impida crear un espacio que te encante. Con la preparación adecuada y los métodos respaldados por la ciencia que hemos descrito, tu RV se sentirá como en casa sin importar dónde lo aparques.
Nota de mantenimiento: Una vez instalados, el siguiente reto es mantener tus azulejos con un aspecto impecable. Una limpieza inadecuada puede degradar el adhesivo con el tiempo. Para proteger tu inversión, consulta nuestra Guía de mantenimiento de azulejos peel and stick 2025.
¿Listo para empezar tu proyecto? Explora nuestra selección curada de materiales aptos para campers en nuestra guía Los mejores azulejos de ducha impermeables peel and stick para 2025.
¿Cuál ha sido hasta ahora tu mayor desafío con las renovaciones de RV? ¡Cuéntanos en los comentarios abajo!

Deja un comentario
Este sitio está protegido por hCaptcha y se aplican la Política de privacidad de hCaptcha y los Términos del servicio.