


Direct Answer: Upgrading Leased Office Breakrooms
Yes, you can upgrade a leased office breakroom using commercial-grade peel and stick tile without violating lease agreements or triggering construction downtime. By focusing on low-splash zones and utilizing products with thick polyurethane resins, facility managers can achieve a high-impact, lease-safe aesthetic transformation. This approach significantly reduces the Total Cost of Ownership (TCO) and mitigates Wall Restoration Risk (WRR) upon lease expiration, provided that proper heat-assisted removal protocols are followed.
Modernizing a leased office space often presents a frustrating dilemma for facilities teams. Employees expect a clean, updated breakroom that feels welcoming. However, management cannot risk noisy construction, violate strict lease agreements, or settle for cheap DIY aesthetics. The solution requires shifting how we evaluate workplace upgrades. As organizations globally transition to hybrid work models, the physical office must justify the commute. A stark, uninspiring kitchenette actively detracts from corporate culture, while a well-appointed space fosters collaboration and employee retention.
We must move away from comparing basic material costs. Instead, professionals evaluate these projects based on Lease-Safe Upgrade Efficiency. This metric prioritizes high visual impact, minimal operational disruption, and absolute risk reduction for commercial tenants. The traditional methodology of hiring specialized masonry contractors, pulling municipal permits for minor aesthetic changes, and coordinating weekend shutdowns is no longer financially viable for mid-term commercial leases.
Peel and stick tile can work in a commercial office breakroom when the wall surface is suitable, the product is rated for interior backsplash use, and the goal is a low-downtime, lease-safe visual upgrade rather than a permanent wet-area renovation. For leased office spaces, it is often the fastest way to improve breakroom appearance, cleanability, and employee perception without major construction or end-of-lease risk. It empowers internal facilities teams to execute high-fidelity design updates strictly within standard operational maintenance budgets.
Before a facilities team approves a breakroom wall finish, it should compare the wall audit against Stickwoll's surface prep and installation steps so cleaning, drying, pressure activation, and cure-time expectations are documented before the first panel is placed.
-
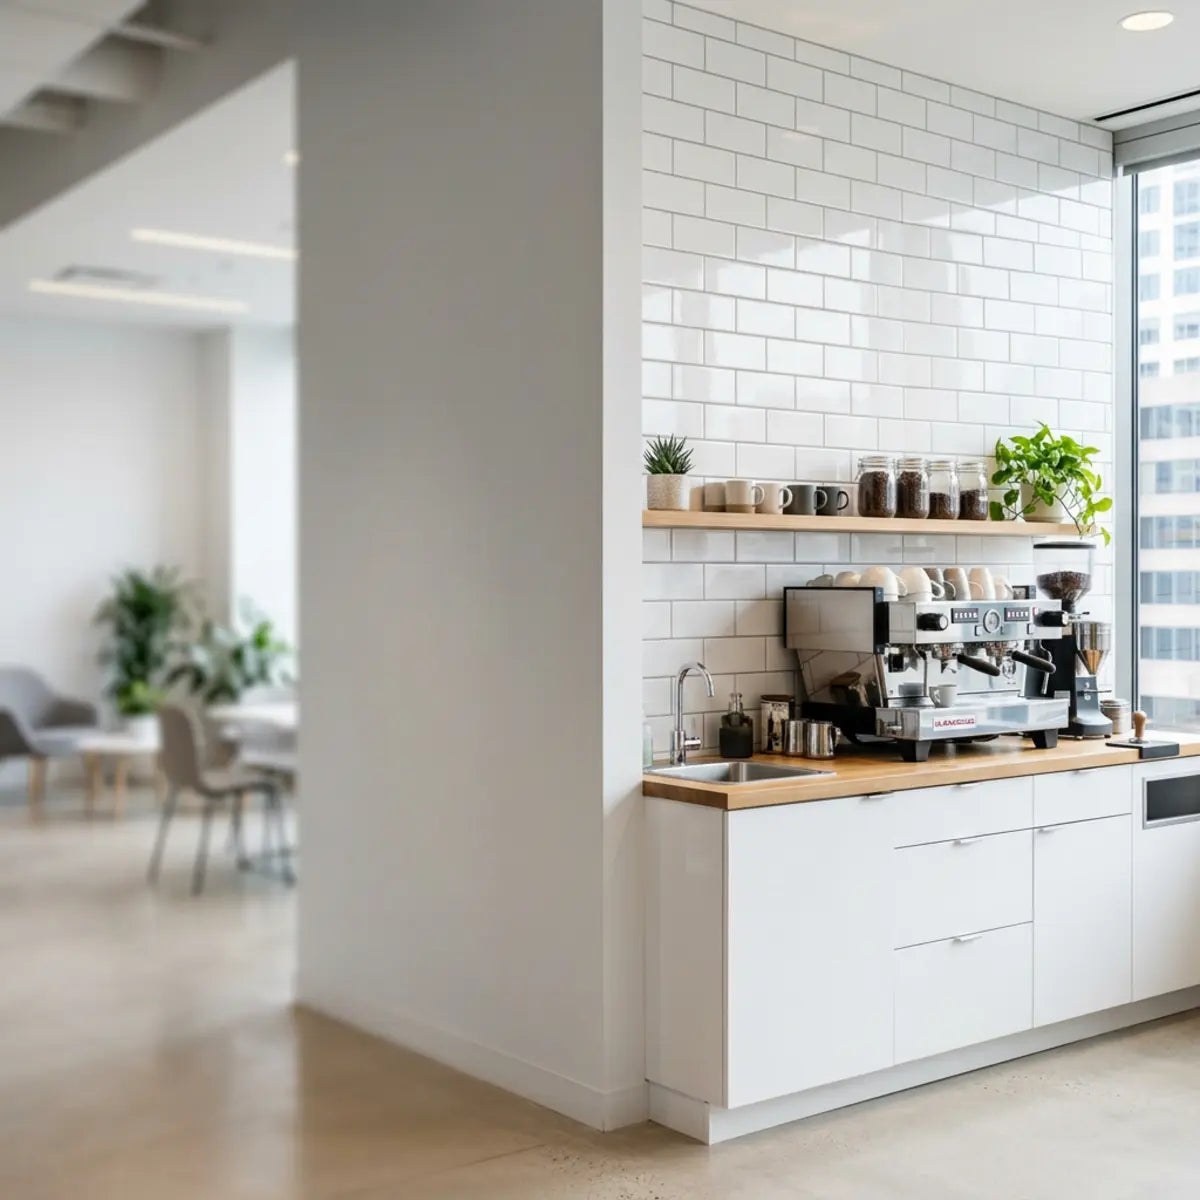
Target strategic zones: Use peel and stick tile where lease restrictions and downtime matter most. Focus on highly visible areas that dictate employee perception, such as primary coffee stations and hydration hubs, maximizing your aesthetic return on investment.
-
Shift the baseline: Evaluate options using Lease-Safe Upgrade Efficiency instead of upfront price alone. Factor in the hidden costs of operational disruption, long-term maintenance labor, and end-of-lease demolition mandates typically associated with permanent masonry.
-
Audit the environment: Confirm wall condition, cleaning needs, and removal expectations before installation. A rigorous substrate audit guarantees longevity, preventing the humiliating failure of materials peeling in front of company executives and staff.

Can peel and stick tile be used in a commercial office breakroom?
Yes, commercial office peel and stick tile performs reliably in low-splash zones. Proper application requires a clean, stable wall surface and selecting commercial-grade materials. It is not suitable for high-heat areas or constantly wet environments. Navigating the myriad of available products requires a discerning eye; facilities managers must explicitly filter out thin, hobby-grade decals intended for temporary dorm room decor.
When evaluating breakroom materials, industry consensus dictates a standardized evaluation. We benchmark this decision using Lease-Safe Upgrade Efficiency (LSUE). This composite score balances visual impact, installation speed, removability, maintenance burden, and landlord-risk reduction. A product that boasts rapid installation but fails catastrophically upon removal, tearing the drywall and jeopardizing a multi-thousand dollar security deposit, yields a negative LSUE score and must be discarded from consideration.
The Divide Between Residential Marketing and Commercial Reality
Residential design content often prioritizes subjective aesthetics over longevity. Homeowners can easily touch up a peeling corner. In a commercial office, failing adhesive reflects poorly on facility management and creates an immediate maintenance ticket. The optics of a deteriorating workplace directly correlate with employee sentiments regarding corporate stability and care.
A common misconception assumes all self-adhesive tiles are thin, printed vinyl. Today, advanced iterations feature multi-layer composites. These include aluminum-backed panels and thick polyurethane resins engineered to withstand high-traffic environments. Commercial-grade polyurethane resins offer substantial dimensional stability. They resist the fading effects of harsh, continuous fluorescent overhead lighting and offer a robust barrier against minor impacts from misplaced coffee mugs or heavy catering trays.
Think of commercial peel and stick tile like high-end vinyl graphics used on fleet vehicles. It provides a durable, professional finish. Furthermore, it remains entirely removable when prepared and applied correctly. The chemical composition of the pressure-sensitive adhesive (PSA) used in these high-tier products is fundamentally different from residential counterparts, formulated specifically for long-term tension hold rather than initial tack stickiness.
Self-Assessment: Is Peel and Stick Right for Your Office Breakroom?
Answer these three quick questions to determine if a self-adhesive architectural finish is the optimal choice for your commercial space.
Evaluating Best-Fit Environments in the Office
Identifying the correct zone is critical. Empirically demonstrated, self-adhesive products succeed when applied to low-stress substrates. These areas experience light moisture but lack heavy grease or extreme temperature fluctuations. The corporate breakroom typically contains multiple micro-environments, and successfully segmenting them dictates the lifespan of your upgrade.
-
Coffee Stations: Protects drywall from daily espresso splatters and water drips. This is fundamentally the highest-traffic zone in any modern office, and implementing a wipeable surface drastically reduces daily janitorial friction.
-
Sink-Adjacent Walls: Acts as a functional barrier against light hand-washing splashes. A properly installed and sealed adhesive tile prevents moisture from silently rotting the underlying drywall over a multi-year lease.
-
Kitchenette Accent Walls: Provides a fast visual refresh for outdated employee dining areas. Elevating the design language of the space subconsciously encourages employees to keep the area cleaner and more organized.
-
Hydration Stations: Creates a designated, wipeable zone around freestanding water coolers. These areas frequently suffer from hard water stains on flat-painted drywall; a protective finish eliminates this issue entirely.
Identifying Poor-Fit Environments and Red Flags
Not every wall is a candidate for adhesive finishes. A quantitative baseline requires assessing the physical demands of the space. Pushing a temporary product beyond its operational threshold yields a negative return on investment and poses a hazard to the structural integrity of the facility.
- ? Behind Heavy Cooking Equipment: Direct heat melts adhesives and warps composite resins. Commercial ranges and high-output griddles require Class A fire-rated stainless steel or heavy ceramic tile.
- ? Unstable Substrates: Applying tile over peeling paint guarantees immediate bond failure. The adhesive is only as strong as the layer it is gripping; if the paint releases from the drywall, the tile falls with it.
- ? Highly Textured Walls: Deep stucco or heavy orange-peel finishes prevent necessary surface contact. Pressure-sensitive adhesives require micro-level surface contact; vast gaps caused by texture severely diminish hold strength.
- ? Back-of-House Grease Zones: True commercial kitchens require code-compliant stainless steel or ceramic. The continuous atomization of cooking oils will rapidly break down any acrylic or polyurethane adhesive backing.
Assessing Suitability as a Facility Manager
Facility managers must audit the physical environment before approval. This includes testing paint adhesion and measuring ambient humidity. A standardized evaluation fundamentally mitigates the risk of wasted budget and project failure. If your building's HVAC system is shut off entirely over the weekend causing immense humidity swings, you must ensure the selected product is rated for high thermal expansion.
The assessment must include a thorough review of the current lease agreement. Many triple-net leases have strict tenant improvement clauses. You must document the wall's current state with time-stamped photographs before any material application begins. This indisputable evidentiary baseline is your primary defense against aggressive landlords during exit negotiations.
Ensuring a Professional, Corporate Appearance
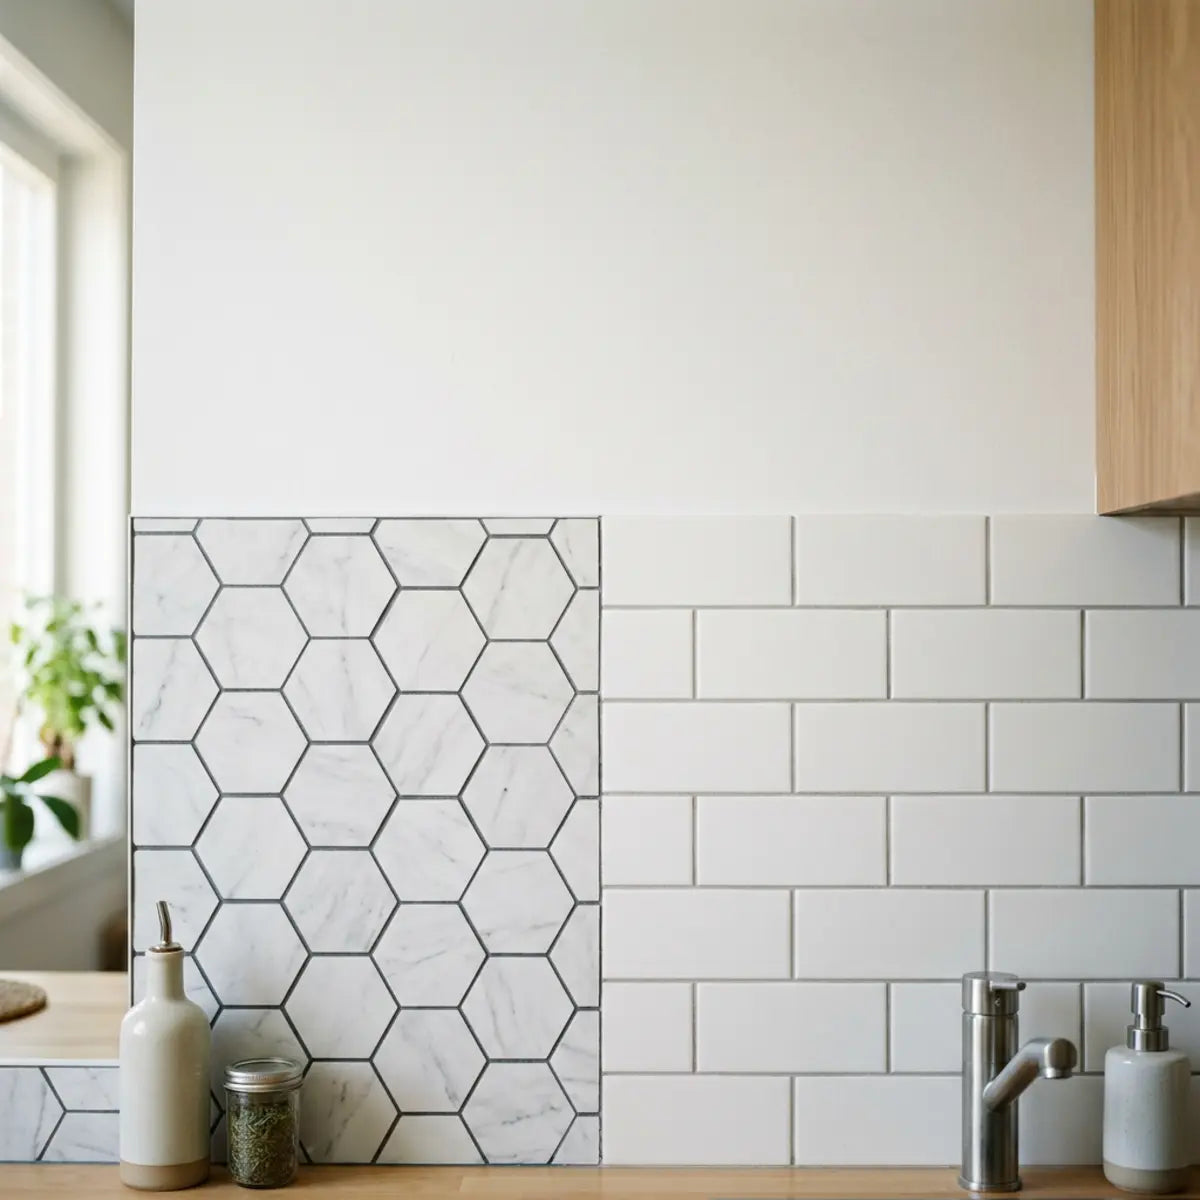
Selecting the right finish separates a professional upgrade from a messy DIY attempt. Office environments require subdued, architectural finishes. Glossy, hyper-patterned residential tiles often clash with corporate branding and commercial carpet. A workplace should project stability, focus, and professionalism-loud, trendy patterns can quickly become an eyesore that distracts from the overarching corporate identity.
For after-hours projects, the schedule should also account for the 48-hour acclimation rule, because materials stored in a cold service room or delivery dock can move after installation if they are not stabilized first.
We strongly suggest matte finishes, brushed metallic composites, or neutral subway tile designs. These options mimic permanent architectural standards. By strictly adhering to these visual parameters, you calibrate the output to reflect a premium corporate identity. Furthermore, matte finishes are exceptionally adept at hiding minor smudges and fingerprints, reducing the perceived maintenance burden during the middle of a busy workday.
How do you upgrade a leased office breakroom without construction?
Upgrading without construction requires a systematic workflow. This involves inspecting the substrate, scheduling after-hours installation, and utilizing precision tools. Applying self-adhesive tile over existing surfaces bypasses the need for demolition and specialized contractors. The modern facilities manager operates as an operational surgeon, aiming to enhance the space without the patient (the staff) ever noticing the procedure taking place.
Evaluating installation methods requires a factual baseline. We calculate the Operational Disruption Score (ODS), which measures time, mess, noise, access restrictions, and staff interruption. Self-adhesive solutions yield a demonstrably lower ODS than traditional mortar applications. A lower ODS translates directly to maintained productivity, ensuring that the company's core operations are entirely unhindered by aesthetic improvements.
Reviewing Lease Language and Approvals
Pro Tip: Securing Landlord Approval
Never assume minor aesthetic changes are immune to lease restrictions. Draft a formal, one-page proposal for your property manager. Include three critical components: 1) A specification sheet proving the product is removable and non-damaging. 2) Before-photos of the target wall. 3) An offer to apply a 12x12 inch test patch in an inconspicuous area (like behind a refrigerator) for their review. Framing the upgrade as a "reversible aesthetic enhancement that improves surface cleanability" shifts their perspective from 'unauthorized alteration' to 'tenant-funded property protection.'
Never order materials before consulting the tenant improvement clause of your commercial lease. Standard agreements often prohibit permanent alterations without written consent from the property management team. Violating these clauses can result in severe financial penalties or even initiate default proceedings.
Draft a brief proposal for your landlord. Frame the upgrade as a reversible aesthetic enhancement that improves cleanability. This proactive communication inherently neutralizes potential conflicts during lease renewals or exit inspections. Maintaining a transparent, collaborative relationship with commercial property owners ensures smoother operations across the entirety of the lease lifecycle.
Executing the Wall Inspection and Preparation
Surface preparation is the absolute most critical step. Adhesive failure is rarely a product defect; it is almost always a preparation failure. The wall must be structurally sound, dry, and free of airborne kitchen grease. In a corporate breakroom, even microwaving foods daily creates an invisible, microscopic layer of aerosolized lipids on the surrounding walls.
Leading adhesive guidelines, such as those published by 3M, establish a definitive standard. Walls must be cleaned with a degreaser, rinsed, and dried for a minimum of 24 hours. This empirically demonstrated protocol prevents catastrophic bond failure. The drying period allows deep-set moisture from the cleaning process to evaporate from the porous drywall surface.
The Substrate Audit Checklist
-
Paint Stability: Press masking tape firmly to the wall and rip it off. If paint flakes, the wall is unstable and requires priming with a dedicated bonding primer prior to tile application.
-
Texture Assessment: Light orange peel requires sanding. Heavy texture requires a skim coat. You cannot bypass physics; adhesives require flat, unencumbered surface area to execute chemical bonds.
-
Moisture Testing: Tape a square of plastic to the wall. If condensation forms overnight, investigate leaks. Applying a non-breathable tile over a damp wall invites rapid black mold proliferation.
-
Obstruction Mapping: Measure and template all electrical outlets and light switches accurately. Ensure you have the appropriate outlet extenders if the tile thickness causes the faceplate to recess dangerously.
The Lease-Aware Installation Workflow
Execution requires precision and patience. Begin in the most visible corner and work outward. Use a standard level to draw a baseline; never trust the breakroom countertop to be perfectly straight. Commercial casework often settles over time, meaning following the counter line blindly will result in a dramatically slanted installation at eye level.
- Template and Cut: Measure twice. Cut the tile face-up using a sharp utility knife and a metal straightedge. For thicker composite resins or metal-backed tiles, scoring deeply and snapping on a rigid edge provides the cleanest, factory-like edge without splintering the facade.
- Peel and Align: Expose only the top inch of the adhesive backing. Align the tile carefully to your level baseline. This "hinge method" allows you to pivot and micro-adjust the heavy tile before committing the massive surface area of the adhesive to the drywall.
- Press and Secure: Smooth the tile downward. Press firmly across the entire surface using a rubber roller to activate the adhesive. Pressure-sensitive adhesives mandate immense mechanical pressure to flow into the micro-pores of the substrate; mere hand pressure is insufficient for long-term hold.
- Finish the Edges: Apply a thin bead of removable silicone caulk at the countertop seam to prevent water ingress. Smooth the caulk with a profiling tool for a pristine, architectural finish that mimics a professionally grouted installation.

Coordinating with Office Operations
Communication is vital for a smooth process. Send a company-wide email detailing the upgrade timeline. By scheduling the core installation after hours, you bypass peak traffic and maintain a low Operational Disruption Score. An unexpected morning discovering the coffee machine is blocked off will trigger immediate frustration among staff, undermining the positive intent of the upgrade.
Ensure the breakroom remains functional during the day. If the project takes two evenings, clear all tools and debris before the morning shift arrives. A clean job site projects competence and minimizes staff complaints. Because peel and stick tile does not require thinset mortar or messy wet saws, striking the worksite and returning the space to full functionality takes mere minutes.
ADA Guidelines and Accessibility Considerations
When adding backsplashes or wall-mounted accessories, strict adherence to ADA guidelines is required. The Americans with Disabilities Act mandates clear floor space and specific reach ranges for shared amenities. Altering the depth of a wall surface, even by a fraction of an inch, can subtly change the dynamics of these critical measurements.
Ensure that the added thickness of the tile does not push countertop appliances too far forward. Protruding objects must not extend more than 4 inches into circulation paths. Maintaining these clearances yields an optimal configuration for all employees and shields the enterprise from compliance audits or accessibility-related grievances.
Post-Installation Punch List and Documentation
A project is not complete without a formal punch list. Inspect every seam for lifting. Verify that all electrical outlet covers sit flush against the newly applied tile surface. Re-torque any loose switch plates, ensuring no exposed wiring is accessible. The difference between a DIY project and a professional integration is entirely dependent on meticulous edge finishing and electrical integration.
Take detailed, well-lit photographs of the completed installation. Store these images alongside the pre-installation photos in your facility management files. This documentation establishes a quantitative baseline proving the condition of the property, creating a robust shield against opportunistic landlords attempting to leverage aesthetic enhancements into penalty fees during lease transition periods.
Comparing Operational Disruption
When factoring in long-term performance and installation hurdles, we must compare the options objectively. The following data benchmarks the disruption factors, vividly illustrating why traditional masonry is largely obsolete for mid-lease cosmetic augmentations.
| Disruption Metric | Traditional Ceramic & Mortar | Commercial Peel & Stick |
|---|---|---|
| Installation Time | 3 to 5 days (includes curing) | 4 to 8 hours |
| Noise Level | High (wet saws, grinding) | Low (utility knife scoring) |
| Dust & Debris | Severe (requires plastic barriers) | Minimal (paper backing only) |
| Specialty Labor | Required (licensed tile setter) | Not Required (facilities staff) |
| ODS Rating | High Disruption | Low Disruption |
What are the cost advantages of temporary tile for commercial spaces?
The true cost of temporary tile is significantly lower than traditional masonry. It bypasses specialized labor, permit delays, and the eventual required demolition at the end of a commercial lease. When a CFO asks for budget justification, framing the conversation strictly around the initial square-footage material cost is a strategic error. You must present the macro-economic picture of the installation lifecycle.
A standardized evaluation relies on the Total Cost of Ownership (TCO). Empirically demonstrated, temporary backsplashes bypass contractor fees. This calibrates the output toward a superior cost-to-yield ratio over a standard three-year commercial lease. If your enterprise plans to relocate or scale rapidly within the next 36 to 60 months, sinking heavy capital into immovable masonry violates basic asset management principles.
Breakroom Backsplash Budget Estimator
Input your estimated square footage to compare the projected costs between commercial-grade peel and stick tile versus traditional contracted masonry.
Calculating the Workplace Experience Yield
Office upgrades are an investment in employee retention. A dark, outdated breakroom negatively impacts morale. We measure the success of this investment through the Workplace Experience Yield. When human resources leaders discuss the challenge of bringing teams back into the office, environment quality is repeatedly cited as a massive friction point. If the office kitchen looks worse than the employee's kitchen at home, resentment builds.
This metric compares the total cost of the upgrade against the perceived value by the staff. A low-cost, high-impact peel and stick installation generates a statistically significant boost in employee satisfaction. It proves that management cares about shared environments, converting a minimal budget expenditure into a high-visibility win for corporate culture.
Bypassing Contractor Fees and Permits
Traditional commercial renovations require licensed contractors. Finding a reliable vendor for a small breakroom backsplash is difficult; many commercial firms refuse micro-jobs because their overhead is too high. Furthermore, traditional work often requires building permits, triggering municipal inspections, electrical code reviews, and lengthy administrative delays that stall the project for months.
Peel and stick applications bypass this costly ecosystem entirely. Your internal facilities team or a trusted corporate handyman can execute the project. This fundamentally mitigates labor bloat and keeps the project strictly within a quarterly maintenance budget, avoiding capital expenditure approval committees and endless procurement red tape.
How do you maintain and clean an office coffee station backsplash?
Maintain office backsplashes by wiping them daily with a non-abrasive, pH-neutral cleaner and a microfiber cloth. Explicitly avoid harsh industrial solvents, rough scrubbing pads, and excessive water pooling at the seams. Applying chlorine bleach or heavy-duty ammonia strippers will rapidly chemically degrade the protective polyurethane wear layer, dulling the finish and eventually causing the tile to become brittle.
Evaluating hygiene requires establishing a performance degradation curve. By utilizing pH-neutral cleaning protocols, facilities managers fundamentally mitigate surface deterioration. This matches the operational threshold of standard acrylic breakroom panels. With proper care, these surfaces retain their factory luster for years, effortlessly rejecting common office stains like coffee, tea, and microwave splatters.
Once the backsplash is in service, the cleaning vendor should follow a grease-safe cleaning routine for peel-and-stick tile instead of defaulting to abrasive pads or harsh degreasers that can weaken exposed edges.
Adhering to OSHA Sanitation Mandates
OSHA workplace sanitation standards require breakrooms to be maintained in a clean and hygienic condition. Shared food preparation areas must be free of mold, grime, and hazardous bacteria buildup. Failing to meet these basic standards can result in employee complaints, illness outbreaks across the staff, and in extreme cases, regulatory action and fines.
Smooth, non-porous peel and stick tiles support these mandates efficiently. Unlike traditional tile, they eliminate permeable grout lines that harbor bacteria, trap moisture, and require intensive, labor-heavy scrubbing with specialized grout brushes. This smooth surface yields an optimal configuration for rapid, daily sanitization by night crews, ensuring compliance with absolute minimal effort.
Training the Nightly Janitorial Staff
Night-shift cleaning crews often use heavy-duty industrial solvents by default. These chemicals will rapidly degrade the adhesive backing of temporary tiles if they seep behind the edges. You must formally update your cleaning vendor's statement of work to explicitly state the new cleaning protocol for the breakroom walls. Do not assume they will automatically identify the material as a sensitive finish.
Pro-Tip: Place a discreet, professionally printed label near the sink. It should read: "Use mild soap and water only on backsplash. Do not scrub." This simple communication drastically extends the lifespan of the installation by serving as a constant visual reminder to rotating janitorial staff who may not have seen your initial vendor memo.

Managing Moisture and Seam Integrity
Excess water pooling at the base of the backsplash is the enemy of any adhesive. Over time, standing water near the sink will seep under the bottom edge, compromising the bond. The capillary action of water will slowly pull moisture upwards behind the tile, silently dissolving the adhesive matrix and fostering an environment for hidden mold growth.
Always apply a thin bead of clear, removable silicone caulk where the tile meets the countertop. This engineered barrier inherently neutralizes water ingress. It is a critical step that cannot be skipped in a commercial setting. Inspect this caulk line quarterly; if it begins to peel or discolor, strip it out and re-apply immediately to maintain the watertight integrity of the installation.
Will removable tile damage walls at the end of a commercial lease?
High-quality removable tile will not typically damage commercial walls. This assumes it was applied to fully cured, sound paint and is removed slowly using controlled heat to loosen the adhesive backing. The fear of catastrophic wall destruction is largely based on user error-specifically, individuals attempting to violently rip the tiles off the wall while cold, treating them like packing tape rather than engineered architectural finishes.
We assess end-of-lease liability using Wall Restoration Risk (WRR). A standardized evaluation proves that heat-assisted removal inherently neutralizes drywall tearing. This establishes a definitive baseline for zero-penalty lease exits and complete deposit recovery. By following the science of the materials, facilities teams can confidently alter spaces knowing they have a clear path back to the original baseline.
The Chemistry of Temporary Adhesives
Removable tiles utilize pressure-sensitive adhesives (PSAs). These adhesives are designed to form a strong bond that resists gravity and light moisture. However, they are specifically engineered to release their grip when subjected to sustained thermal energy. Unlike construction mastics or superglues, PSAs remain slightly viscous at a microscopic level, allowing them to shift from a solid holding state to a pliable, releasing state.
If a tile is applied to cheap, builder-grade flat paint, the adhesive may bond stronger to the paint than the paint bonds to the drywall. This is why the initial substrate audit is a non-negotiable requirement. Ensure your facility is painted with at least a satin or semi-gloss commercial paint; these finishes possess the structural integrity required to withstand the tensile force of the adhesive over multiple years.
The Heat-Assisted Removal Protocol
Attempting to rip the tile off cold will cause severe drywall damage. You must alter the physical state of the adhesive before applying pulling force. This requires introducing a thermal element to temporarily liquify the PSA matrix.
- Thermal Application: Apply heat evenly using a standard commercial heat gun or high-powered hair dryer. Keep the nozzle moving to avoid scorching the tile face. Focus heavily on the corners and the uppermost edge, as breaking the initial seal is the most crucial step of the process.
- Controlled Peeling: Once the corner is warm to the touch, begin peeling. Always pull back slowly at a 45-degree angle. Pulling straight out horizontally places immense stress directly onto the drywall paper; pulling sharply back against the tile itself shears the adhesive efficiently without risking the underlying paper matrix.
- Patience and Pacing: Do not rush. Let the heat do the work. If resistance increases, apply more heat. Dedicate a solid afternoon to this process at the end of your lease; saving a few hours by rushing is not worth triggering thousands of dollars in drywall repair and repainting fees from your landlord.
Treating Residual Adhesive and Final Restoration
Even with perfect removal, a slight tacky residue may remain on the wall. Do not attempt to scrub this off with an abrasive sponge, as you will ruin the underlying paint. Physical agitation alone will only smear the pressure-sensitive adhesive, creating an unsightly gray smudge that landlords will undoubtedly cite as damage.
Apply a commercial citrus-based adhesive remover to a soft cloth. Gently dab the sticky areas and let the solvent break down the residue. Wipe the wall clean with a damp cloth, leaving a pristine surface ready for the landlord's inspection. This chemical dissolution process is safe, efficient, and guarantees the wall returns to its original condition prior to the upgrade.
Get Your Leased Office Backsplash Checklist
Ensure you miss zero critical steps. Download our comprehensive, printable checklist designed specifically for facilities managers securing landlord approvals and executing lease-safe upgrades.
Download Free ChecklistFinal Thoughts
Commercial office breakrooms require practical, low-risk solutions. Peel and stick tile is not a universal replacement for permanent commercial masonry in heavy wet zones. However, when evaluated by Lease-Safe Upgrade Efficiency and Workplace Experience Yield, it is undeniably effective. It provides a massive aesthetic upgrade while maintaining a critically low Wall Restoration Risk.
By strictly adhering to professional installation and maintenance protocols, facility managers can modernize shared spaces quickly and economically. Elevating the standard of your corporate environment does not necessitate sacrificing thousands of dollars or suffering through weeks of demolition dust. It requires executing precision upgrades with the right, technologically advanced materials.
Taking the next step requires careful planning and the right materials. We encourage you to download a leased office backsplash checklist to evaluate your specific walls. Compare office-safe, commercial-grade styles, and request product guidance tailored to your breakroom's exact footprint to ensure a flawless, lease-compliant upgrade. The modern workplace is rapidly evolving; ensure your facilities reflect the agility and professionalism of your core business.
If the breakroom needs a quiet workplace look rather than a decorative kitchen statement, a neutral Slate City tile finish gives the project a commercial gray palette that fits shared offices, coffee stations, and leased tenant spaces.

Leave a comment
This site is protected by hCaptcha and the hCaptcha Privacy Policy and Terms of Service apply.