





















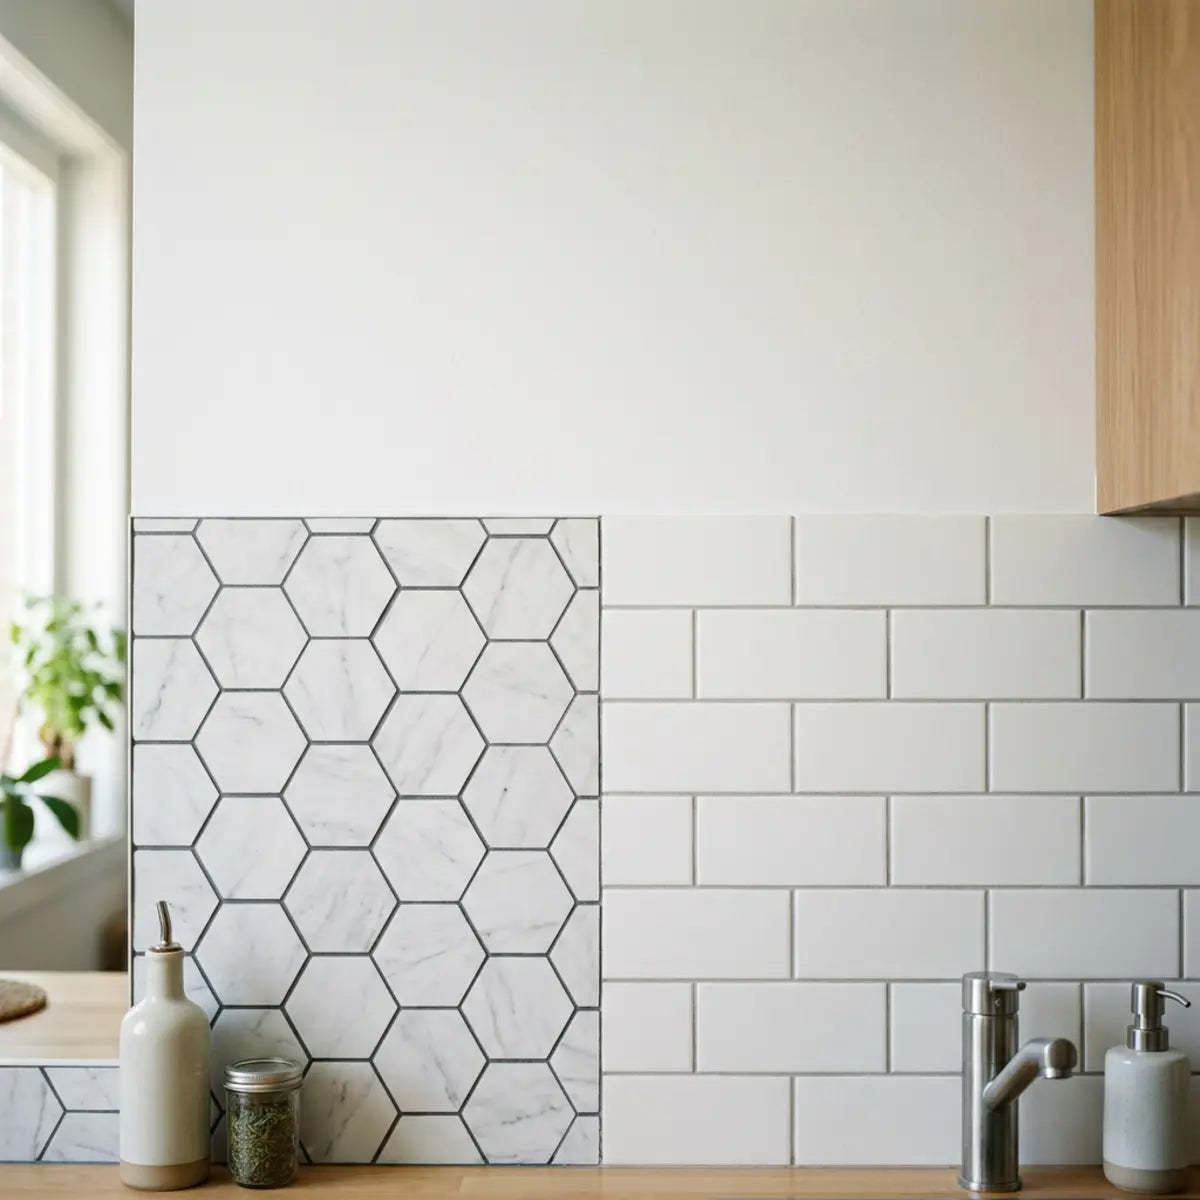
Interlocking, overlapping and straight-edge peel-and-stick tiles do not hide seams in the same way. The edge design changes how adjacent pieces meet, but seam visibility also depends on print continuity, grout-line graphics, wall flatness, lighting, cutting accuracy and the manufacturer’s installation method. There is no universal “seam detection score” that predicts the finished wall.
This guide compares seam systems without inventing SDI/SPE metrics or transferring one brand’s rules to another. Some Smart Tiles designs use printed overlap markers; some Art3d products use overlap systems, while other Art3d products use interlocking joins. Straight-edge products can use butt joints or other product-specific details. The exact installation guide for the SKU always overrides a generic seam rule.
What is an overlap seam?
An overlap system is designed so part of one sheet covers a designated edge or grout-line area on the previous sheet. The overlap can help hide the meeting point when the printed pattern and grout lines are aligned correctly. It also means the nominal sheet dimensions may be larger than the usable coverage after overlap.
Smart Tiles’ current installation guides for several product families instruct users to align and overlap marked grout-line areas. The company’s Metro installation page also tells users to arrange the pattern before installation and describes a product-specific adhesive set period. Those instructions belong to Smart Tiles; another brand may use a different overlap width, marker or adhesive behavior.
What is an interlocking seam?
Interlocking tiles use shaped edges or tabs that fit together rather than a simple rectangular overlap. The joint can break up a long straight seam visually, especially in stone, mosaic or geometric patterns. But an interlocking edge does not eliminate the need for accurate layout. Misaligned tabs, pattern mismatch or a non-flat wall can still make the join visible.
Some Art3d product lines describe themselves as interlocking rather than overlapping. That is exactly why “peel-and-stick tile” cannot be given one universal seam instruction. Before cutting the first piece, identify whether your product overlaps, interlocks, butts together or uses a different proprietary joint.
What is a straight-edge seam?
A straight-edge or butt-joint product places adjacent edges next to each other without a shaped interlock. The visual result depends heavily on how consistent the edge, printed grout line, wall plane and alignment are. A clean straight joint can look intentional, while a small gap or height difference may be easier to notice because the seam follows a continuous line.
Do not force two straight edges tightly together if the manufacturer specifies another spacing or joint detail. Material movement, seam construction and printed pattern are product-specific. The goal is to reproduce the designed joint, not to make every seam as tight as physically possible.
Why seams become visible
Seams usually become noticeable for several different reasons that can look similar from across the room. The joint may actually be open, the two pieces may sit at different heights, the print may not continue cleanly, a faux grout line may double in width, or side lighting may cast a shadow across an overlap. Diagnose the cause before trying to “fix the seam.”
A seam that is visually obvious on day one because the pattern is misaligned needs a different solution from an edge that begins lifting weeks later. The first is primarily a layout/placement issue; the second can involve wall contamination, insufficient contact, moisture, edge stress, substrate texture or a product used outside its intended conditions.
Wall flatness matters more than a homemade score
A self-adhesive sheet follows the surface beneath it. High texture, ridges, deep grout lines and patched areas can create local high and low spots. Those changes can telegraph through the finish or prevent adjacent edges from sitting in the same plane.
Use the product manufacturer’s surface requirements. Do not assume every peel-and-stick product requires the same drywall finish level, a skim coat or sanding. If the product excludes textured walls, choose another product or prepare the wall using a method that is appropriate and safe for the substrate.
Clean the wall according to the product instructions
Kitchen grease, dust and cleaning residue can interfere with pressure-sensitive adhesive. But there is no universal cleaner that belongs in every peel-and-stick installation. Smart Tiles, for example, currently recommends a degreaser such as TSP for its own products and tells users not to use dish soap. Other manufacturers may specify a different cleaner or surface treatment.
The broader adhesive principle is to create a clean, dry, compatible surface. 3M’s pressure-sensitive adhesive guidance describes the importance of surface cleaning and application pressure, but your tile’s adhesive may not be a 3M product. Use the tile manufacturer’s instructions as the final reference.
Do not make sanding the default seam fix
If a wall is textured, sanding may change the finish and can create dust or expose older coatings. In U.S. homes built before 1978, paint disturbance also raises lead-safety questions. EPA’s lead-safe renovation guidance for DIYers explains why sanding, scraping and cutting older painted surfaces require special care.
If the tile requires a smoother surface than the wall can safely provide, the answer may be a different product or professional wall repair rather than aggressive DIY sanding.
Dry-layout several pieces before exposing adhesive
A single sheet does not reveal the repeat. Lay out several pieces on a clean flat surface and identify where grout lines, veins, geometric marks or stone fragments cross the seam. If the product uses overlap labels or directional markers, find them before working on the wall.
Dry-layout also reveals usable coverage. An overlap system may reduce the area contributed by each sheet. Buying material from nominal sheet dimensions alone can leave the project short, especially when the pattern requires additional trimming.
Use reference lines instead of trusting the countertop
Countertops, floors and cabinet bottoms can be slightly out of level. If the first row follows a sloped reference, the problem can grow across the wall. Mark a level horizontal line and, when helpful, a vertical reference line. Art3d’s metal peel-and-stick installation guide, for example, instructs installers to lay out the project and establish horizontal and vertical reference lines before placement.
The exact starting location depends on the room and product. The principle is to establish a reference you have verified instead of using a nearby architectural line simply because it looks straight.
Make difficult cuts before peeling the backing
Outlets, corners and cabinet returns are easier to solve while the tile can still be moved freely. Measure and test the cut, then confirm the piece fits before exposing adhesive. Art3d’s metal-tile guide explicitly recommends checking a cut tile in its intended location before removing the backing.
Cutting tools vary by material. A flexible gel or vinyl sheet may use a knife or scissors, while a metal-faced product can require a saw or metal-cutting method. Do not transfer a cutting instruction from one construction to another because both are sold as peel-and-stick tile.
Do not stretch or force a seam into alignment
Flexible products can sometimes be pulled slightly while positioning, but stretching a sheet to make one seam meet can create tension elsewhere. The product may relax after installation, opening another edge or distorting the printed grout line.
If the pattern will not align naturally, stop and check orientation, product direction, wall reference and whether the sheet has been cut correctly. Reposition only within the product’s permitted installation window.
Application pressure should follow the product method
Pressure-sensitive adhesives generally need contact pressure, but there is no universal requirement that every peel-and-stick tile must be rolled with the same hard-rubber tool or the same PSI. Some products call for hand pressure, others recommend a roller, and different constructions can be damaged by overly aggressive force.
Follow the exact installation guide. Smart Tiles tells users to press firmly after positioning. Art3d’s reclaimed-wood instructions describe using a J-roller for that specific plank system. Those are examples of product-specific methods, not a rule that every backsplash tile must use the same tool.
Lighting can make a good seam look more obvious
Grazing light—light traveling almost parallel to the wall—emphasizes small height changes. Under-cabinet lighting can therefore reveal an overlap or slightly raised edge that is difficult to see under diffuse ceiling light. Glossy surfaces can also reflect the joint more strongly than matte or textured finishes.
Evaluate samples under the lighting that will actually be used in the room. If a backsplash will have strong under-cabinet LEDs, test several joined pieces under that light before ordering the full quantity.
Print continuity can matter as much as edge geometry
An interlocking edge can still look obvious if a stone vein or geometric repeat jumps across the joint. A straight edge can look quiet when the print and grout line continue cleanly. Seam quality is therefore a combination of physical joint design and visual pattern design.
Compare product galleries that show more than one installed sheet. Close-up single-tile images are useful for texture and color but cannot show how a pattern repeats over a larger field.
Bathroom and kitchen seams face different exposure
A kitchen backsplash can receive grease, cleaning and localized sink splashes. A bathroom wall can experience humidity and, depending on location, direct water. Those exposures should be checked against the exact product instructions rather than converted into a generic “waterproof seam” claim.
Smart Tiles’ FAQ and installation materials, for example, distinguish ordinary backsplash/bathroom use from direct shower or bathtub exposure. Art3d product lines publish their own placement limits. A seam system that looks visually tight does not automatically make the wall assembly suitable for direct wet-area use.
Standing water is different from a routine splash
Water that runs off a backsplash during ordinary cleaning or a brief sink splash is different from repeated saturation, pooling or direct shower spray. Seams and exposed edges are potential paths into the substrate when the installation is outside the product’s intended use.
The EPA’s mold and moisture guidance emphasizes fixing leaks and controlling moisture rather than covering a damp wall. If the wall is repeatedly wet, address the water source before treating seam appearance as the main problem.
Do not seal every seam by default
Some peel-and-stick systems are designed to overlap without grout or sealant. Others may specify a particular edge or perimeter treatment. Adding caulk, grout or adhesive where the manufacturer does not call for it can change appearance, flexibility and future removal.
Use the product’s seam and edge instructions. If the instructions are unclear, ask the manufacturer before adding another chemistry to the system.
What if an edge begins lifting?
Do not immediately add construction adhesive. First check for wall dust, grease, texture, moisture, poor initial pressure, tension from misalignment or use outside the recommended room conditions. A local symptom can reveal a broader substrate or layout issue.
If the manufacturer provides a correction method, follow it. If not, document the problem and contact the seller or manufacturer. Random adhesive can make later removal harder and can be incompatible with the tile or wall finish.
How to compare interlocking and overlap products fairly
Compare the same categories for both products: usable coverage, material thickness, wall requirements, seam method, cut method, pattern repeat, room limits and future repair. Do not compare one product’s nominal sheet size against another product’s usable post-overlap coverage.
It can also be useful to order a sample or small quantity from both candidates. Join several pieces on a temporary test board or other approved surface, then view the seams under the actual lighting. That visual comparison is more informative than a proprietary score with no standardized test behind it.
How to compare straight-edge products
For straight-edge designs, inspect edge manufacturing consistency and the printed or molded grout line. Ask whether the manufacturer expects the pieces to butt directly, leave a joint, overlap a printed border or use a trim. Small differences in those details can change both coverage and seam appearance.
If the product uses a strong linear pattern, mark the wall carefully and check alignment every few pieces. Do not wait until the last sheet to discover that a small first-row error has accumulated across the installation.
Plan spare material for seam repairs
A lifted or damaged sheet is easier to replace when the exact pattern remains available. Keep the product identifier and a few spare pieces when practical. Dye lots, print runs or manufacturing changes can make later matching less predictable.
If a seam problem was caused by a damp substrate or failing paint, repair the cause before installing the spare. Replacing the decorative piece alone will not correct the underlying condition.
Do not use a universal cure-time rule
Some manufacturers publish a set period for their own adhesive systems. Smart Tiles, for example, currently describes a 48-hour setting period for certain product lines. That does not mean every peel-and-stick product should be left untouched for exactly 48 hours.
Follow the exact manufacturer’s return-to-use guidance. Wall temperature, fresh paint, sealants, primers and different adhesive chemistries can introduce different waiting periods.
Do not use a universal temperature window
Installation temperature and substrate temperature can affect some pressure-sensitive adhesives, but the allowed range is product-specific. Do not copy a 65–75°F rule or any other range from a different tile brand unless your exact instructions use it.
For exterior-facing walls or cold rooms, allow the product and substrate to reach the conditions specified by the manufacturer. A wall that feels cold to the hand may need more planning than an interior partition wall.
A practical seam diagnostic
| What you see | Likely questions to investigate | What not to assume |
|---|---|---|
| A visible dark line immediately after installation | Pattern alignment, gap, wall color, straightness of the joint. | Do not assume the adhesive is failing. |
| A raised overlap edge | Correct overlap direction, debris, wall flatness, pressure, product orientation. | Do not automatically add glue. |
| Edge lifting after time | Contamination, wall coating strength, moisture, tension, room placement. | Do not assume every edge needs sealant. |
| Double-width printed grout line | Overlap markers and print alignment. | Do not trim away the joint until the instructions are checked. |
| One sheet sits higher than the next | Texture, patching, old grout lines or debris beneath the sheet. | Do not force the high piece flat with excessive pressure if the wall is uneven. |
Before installation: seam checklist
- Identify whether the exact product overlaps, interlocks, butts or uses another joint.
- Read the manufacturer’s surface and cleaning instructions.
- Check whether the wall texture is allowed.
- Measure usable coverage after any required overlap.
- Dry-layout several pieces to understand the repeat and seam direction.
- Establish a verified level reference line.
- Plan outlets, corners and final edge cuts before removing backing.
- Use the cutting tool specified for the actual material.
- Apply the pressure method recommended for the product.
- Follow product-specific setting or return-to-use time.
After installation: seam checklist
- Inspect the wall from normal viewing distance and under normal room lighting.
- Check that overlaps or interlocks are oriented correctly.
- Look for gaps, raised edges, air pockets and pattern discontinuity.
- Keep sink splashes, steam and cleaning within the product’s stated limits.
- Do not introduce extra adhesive or sealant without confirming compatibility.
- Keep spare pieces and product information for future repairs.
How to evaluate a sample without inventing a test score
A useful home sample check can be descriptive rather than numeric. Join several pieces as instructed on a clean test surface approved by the manufacturer. Record whether the seam is easy to align, whether the print repeats naturally, whether one edge sits higher, how the joint looks under side lighting, and how difficult the material is to cut accurately.
Do not turn that exercise into a “scratch score” or “seam score” and publish it as a standardized test. Your sample surface, lighting, pressure and installation skill are not controlled laboratory conditions. The value is to compare the products for your project, not to claim a universal ranking.
When a seam is mainly a design issue
Some seams are structurally sound but visually more noticeable than expected. In that situation, changing the lighting angle, using a lower-contrast pattern or choosing a joint system with less linear repetition may matter more than applying another adhesive.
If the design is already installed and secure, avoid destructive fixes for a purely visual issue. A small line that is obvious at twelve inches may disappear from normal standing distance once the room is furnished.
When a seam is a substrate issue
A seam can reveal a ridge, depression or old grout line beneath the product. If multiple joints lift along the same vertical or horizontal path, inspect what is happening behind that line. Repeated failure at the same substrate feature suggests the wall condition deserves attention.
Do not keep replacing sheets over a damp or deteriorated patch. Fix the underlying wall before installing more material.
When a seam is a material or manufacturing issue
If several sheets from the same box have irregular edges, mismatched pattern marks or inconsistent dimensions, document the issue before installing the entire project. Photograph the pieces with a ruler or reference line and contact the seller or manufacturer.
Trying to trim every piece to compensate for a manufacturing problem can change the intended joint and reduce coverage. A replacement batch may be the better solution.
Frequently asked questions
Are interlocking seams always less visible than straight seams?
No. Interlocking geometry can break up a seam, but print continuity, wall flatness, lighting and installation accuracy still matter. A well-made straight joint can look quieter than a poorly aligned interlocking one.
Do overlap tiles cover less area than their nominal size?
Often, yes, because part of one sheet covers part of the previous sheet. Use the manufacturer’s stated usable coverage rather than multiplying nominal width and height when the system requires overlap.
Should I use caulk or grout on peel-and-stick seams?
Only when the exact product instructions call for it. Many overlap systems are designed to be installed without traditional grout. Adding another material can change appearance, flexibility and removal.
Do I need a seam roller?
It depends on the product. Some manufacturers recommend a roller for specific constructions; others call for firm hand pressure. Use the method in the exact installation guide rather than applying one tool rule to every peel-and-stick product.
How long should I wait before using the backsplash normally?
Follow the exact product’s setting or return-to-use guidance. Some manufacturers publish a 48-hour period for particular adhesives, but that number is not universal across brands or constructions.
Can I install over a textured wall?
Only if the product allows it and the texture still permits sufficient contact. Some products exclude heavily textured surfaces. Do not assume sanding is the correct fix, particularly on older painted surfaces where paint disturbance can raise lead-safety concerns.
Are peel-and-stick seams waterproof?
Do not treat a tight-looking seam as a waterproofing system. Wet-area suitability depends on the product, joint design, edges, penetrations and substrate. Direct shower exposure is different from routine backsplash splashes.
Why did an edge lift after looking fine at first?
Possible causes include contamination, incomplete contact, wall texture, weak paint, moisture, misalignment stress or use outside the product’s intended conditions. Diagnose the cause before adding extra adhesive.
Bottom line
Interlocking, overlap and straight-edge peel-and-stick tiles can all produce clean-looking walls when the product, wall and installation method fit each other. The edge geometry is only one part of seam performance. Surface condition, pattern continuity, reference lines, cuts, pressure, lighting and room exposure all contribute to what you see.
Skip homemade seam-scoring systems. Identify the actual joint system, follow the exact manufacturer’s instructions and compare samples under your real lighting. That approach gives you a more useful answer than a synthetic number pretending that every brand, adhesive and wall can be measured on one scale.
Plan inside and outside corners before the field seams
Corners can expose seam problems that a flat wall does not. An inside corner may require one piece to terminate cleanly before the next wall begins, while an outside corner may need a trim or product-specific wrap detail. Do not decide the corner treatment after the field is already installed; a small shift in the starting line can determine whether the final corner piece is wide enough to handle cleanly.
If the manufacturer publishes a corner guide, follow it. A flexible sheet that can bend around a corner is not automatically supposed to be wrapped, and a rigid or metal-faced product may need a completely different edge solution.
Outlets can create several seams in a very small area
An outlet or switch can turn one clean sheet into several narrow pieces. Plan whether the opening can be cut within one tile or whether a seam will land nearby. Very narrow strips are harder to align and can create more exposed edges, so shifting the reference line by a small amount may produce a stronger layout.
Turn off power before removing electrical covers and use appropriate electrical-safety practices. The decorative tile should not be used to hide a damaged box or wiring problem, and added material thickness should not leave cover plates or devices improperly fitted.
Usable coverage is a seam issue as well as a budget issue
If a product overlaps, the installed coverage of each sheet can be smaller than its nominal dimensions. Interlocking tabs and pattern trimming can also affect how much of a piece contributes to the finished wall. Use the manufacturer’s coverage information and your dry layout instead of multiplying package dimensions without accounting for the joint.
This matters near the end of a project: a buyer who orders exactly the nominal wall area may run short after overlaps and cuts. A small spare allowance also helps if a later seam repair requires replacing one piece from the same design run.



Leave a comment
This site is protected by hCaptcha and the hCaptcha Privacy Policy and Terms of Service apply.