


Kurzantwort: Was ist Faux Venetian Plaster Peel & Stick Tile?
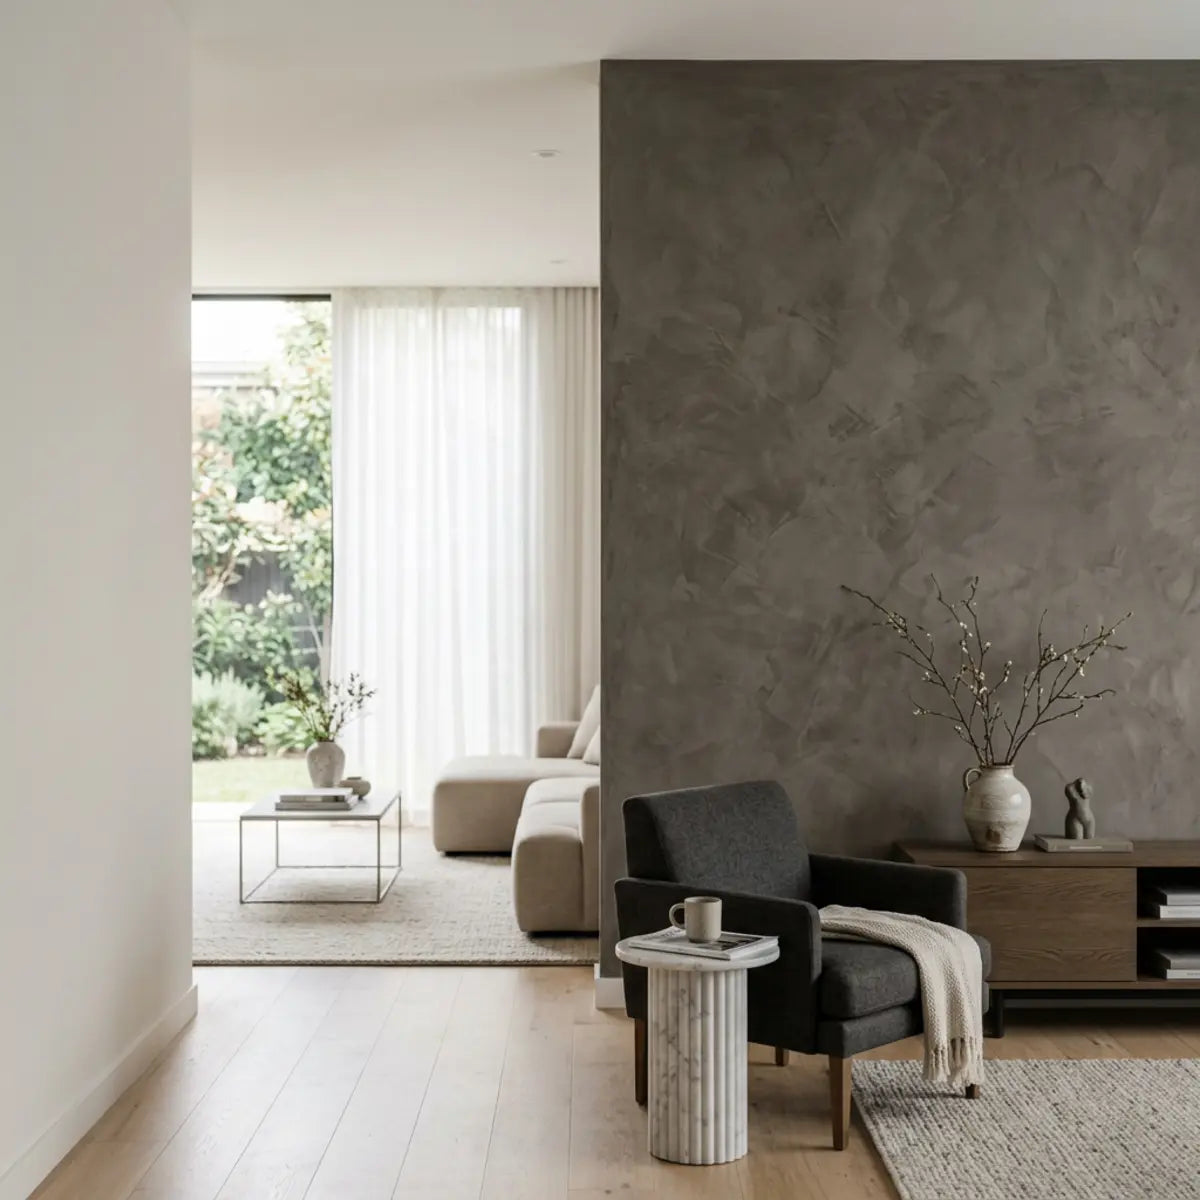
Faux Venetian plaster peel and stick tile ist ein technisch entwickelter Verbund-Wandbelag, der die feine, von Hand aufgetragene Textur und die Tiefenwirkung von authentischem lime plaster nachbildet. Er ist die erste Wahl für eine luxury aesthetic ohne Schmutz, hohe Arbeitskosten oder die Dauerhaftigkeit traditioneller Mauerarbeiten.
- Am besten geeignet für: Mieter, DIY-Renovierer, accent walls und kitchen backsplashes.
- Installation: Kein nasser Mörtel, kein Verfugen und keine Spezialkellen erforderlich.
- Haltbarkeit: Bei fachgerechter Montage in gut belüfteten Räumen sehr widerstandsfähig gegen Umgebungsfeuchtigkeit.
Bei der Bewertung von Wandstrukturen für eine anstehende Renovierung sollte die erste Frage nicht sein, was absolut authentisch ist. Fragen Sie stattdessen: Welcher Wandbelag bietet den besten Luxury Finish ROI bei möglichst wenig Schmutz, Aufwand, Dauerhaftigkeit und späterem Bedauern? Viele Hausbesitzer befürchten zu Recht, dass synthetische Oberflächen flach oder billig wirken oder in anspruchsvollen Bereichen wie Bädern und Mietobjekten schlecht funktionieren. Die Entwicklung von Innenoberflächen hat sich weit von einfachen Kunststofffolien entfernt und ist in eine Ära hochrealistischer, strukturell robuster Verbundpaneele eingetreten, die Auge und Haptik grundlegend täuschen.
Faux Venetian plaster peel and stick tile ist die einfachste Möglichkeit, eine hochwertige, von plaster inspirierte Strukturwand ohne Kosten für handwerkliche Putzarbeiten, nassen Schmutz oder eine dauerhafte Installation zu erhalten. Für die meisten Hausbesitzer und Mieter bieten selbstklebende Verbundfliesen die beste Balance aus Realismus, Geschwindigkeit, Rückbaubarkeit und Flexibilität im Raum. Das gilt, sofern Sie die richtige Oberfläche wählen, mit dezenten Fugen rechnen und sie dort einsetzen, wo die Feuchtigkeit kontrolliert ist.
Durch den Vergleich von echtem plaster mit Tapeten, Paneelen und microcement lässt sich klar erkennen, wo selbstklebende Verbundfliesen am besten funktionieren. Ziel ist es, realistische Erwartungen an Textur, Fugen, Haltbarkeit und Rückbau zu setzen, damit Ihr nächstes Projekt eine optimale Lösung ergibt, die Ihre normale Trockenbauwand in ein architektonisches Meisterwerk verwandelt.
Was ist faux Venetian plaster peel and stick tile?
In diesem Abschnitt: Verwirrt von den sich überschneidenden Aussagen zu Tapeten, starren Paneelen und modernem microcement? In diesem Abschnitt werden selbstklebende Verbundfliesen klar definiert und gezeigt, wie sie architektonische Tiefe liefern, ohne dass eine Kelle oder ein professioneller Handwerker nötig ist.
Faux Venetian plaster peel and stick tile ist ein Verbund-Wandbelag, der speziell entwickelt wurde, um die Tonalität, die feine Bewegung und die matte, leicht schimmernde Textur traditionell von Hand geglätteten Putzes nachzubilden. Er macht nasse Verarbeitung, Mischen oder spezielle handwerkliche Veredelung überflüssig. Das Geniale an diesem Material liegt in seiner mehrschichtigen Konstruktion: eine langlebige, visuell komplexe Oberflächenschicht ist mit einem dichten stabilisierenden Kern verbunden und mit einer gewerblichen druckempfindlichen Kleberückseite versehen.
Um diese Kategorie zu verstehen, muss man sie von traditionellen Materialien abgrenzen. Traditioneller Putz basiert auf chemischer Bindung und feuchter Aushärtung, während moderne peel-and-stick-Alternativen fortschrittliche Polymere und druckempfindliche Klebstoffe verwenden. Im Grunde bringen Sie eine flexible, vorveredelte Schicht von von Mauerwerk inspirierter Textur direkt auf Ihre vorhandene Wand auf.

Begriffsdefinitionen für Wandstrukturen
In diesem Abschnitt: Schwer, den Jargon von Innenarchitekten und Handwerkern zu entschlüsseln? Wir erklären die branchenüblichen Begriffe, damit Sie Ihre Wandbelag-Optionen präzise vergleichen und eine fundierte Kaufentscheidung treffen können.
Um eine informierte Entscheidung zu treffen, müssen Sie zuerst die grundlegenden Materialien verstehen. Die Terminologie im Bereich architektonischer Oberflächen kann oft irreführend sein, da Marketing häufig Begriffe vermischt, um minderwertige Produkte zu verkaufen.
- Venetian Plaster Eine traditionelle architektonische Oberfläche aus gebranntem Kalksteinmehl, gemischt mit Wasser. Sie wird in mehreren dünnen Schichten mit einer Kelle aufgetragen und poliert, um eine glatte Oberfläche mit Tiefen- und Struktureffekt zu erzeugen. Sie ist wunderschön, geschichtsträchtig und unglaublich teuer in der Installation.
- Lime Plaster Eine breitere Kategorie atmungsaktiven Putzes aus Calciumhydroxid und Sand. Er härtet durch Karbonatisierung aus, wird also an der Wand wieder zu Kalkstein, und ist sehr porös. Er erfordert einen Meister seines Fachs, um gleichmäßig ohne Risse aufgetragen zu werden.
- Microcement Eine polymermodifizierte zementbasierte Beschichtung, die dünn auf bestehende Oberflächen aufgetragen wird. Sie bietet ein durchgehendes, fugenloses und sehr langlebiges industrielles Finish, erfordert jedoch eine spezielle, aufwendige Verarbeitung und erhebliche Trocknungszeiten zwischen den Schichten.
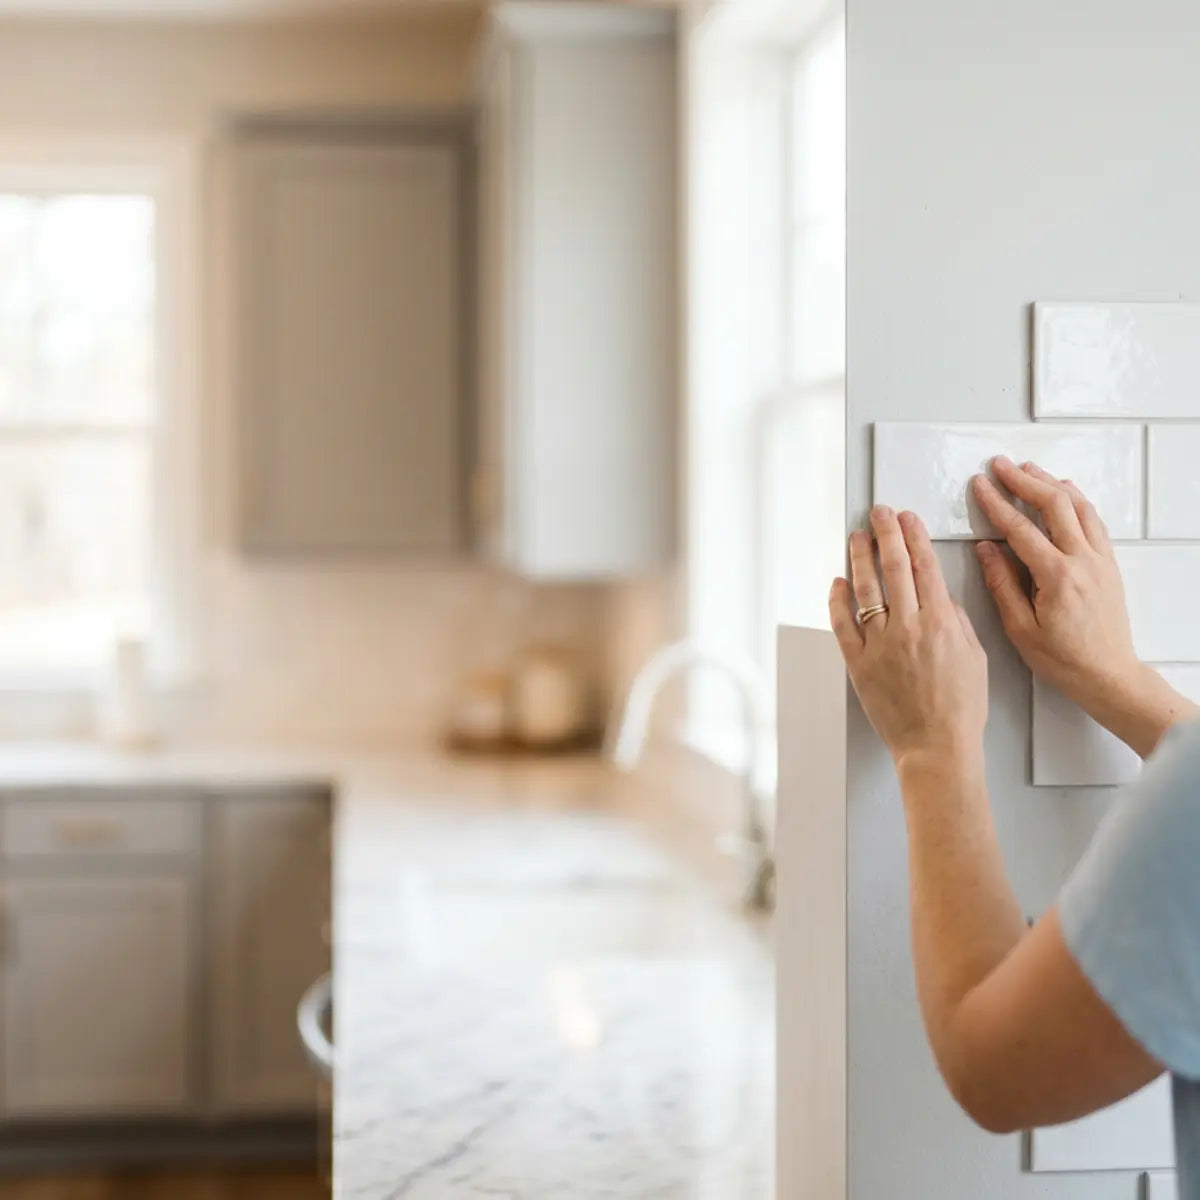
- Peel and Stick Wandfliese Eine leichte, selbstklebende Innenverkleidung. Sie setzt auf eine stark haftende Rückseite statt auf Mörtel oder Fugenmasse und ist für eine schnelle DIY-Installation konzipiert. Moderne Varianten haben sich weit von den glänzenden Vinyl-Aufklebern des letzten Jahrzehnts entfernt.
- Verbund-Wandfliese Ein mehrschichtiges Produkt. In diesem Zusammenhang besteht es typischerweise aus einer langlebigen Vinyl- oder PVC-Oberfläche, die natürliche Texturen nachahmt, einer stabilisierenden Kernschicht und einer Klebeschicht. Dieser Kern verhindert, dass die Fliese die Unebenheiten der darunterliegenden Trockenbauwand durchzeichnet.
Die Mechanik visueller Realitätsnähe
In diesem Abschnitt: Sie fragen sich, warum manche Faux-Finishes überzeugend hochwertig wirken, während andere wie bedruckter Kunststoff aussehen? Dieser Abschnitt erklärt die ausgefeilte Technik und die visuellen Mechanismen hinter hochwertiger Texturreplikation.
Realismus bei faux plaster ist nicht nur eine Frage der Farbe, sondern davon, wie die Oberfläche mit Licht interagiert. Hochwertige faux Venetian plaster tiles simulieren handaufgetragenen Putz durch sehr spezifische Fertigungstechniken visuell. Es ist eine Übung in optischer Täuschung, angetrieben von Materialwissenschaft.
Hersteller erreichen dies durch Tonvariationen und leichte Farbabstufungen, die die natürlichen Unregelmäßigkeiten von gemischtem Kalk nachahmen. Zudem erzeugt fortschrittliche 3D-Texturierung physische Erhebungen. Trifft gerichtetes Licht auf diese Erhebungen, entstehen Mikro-Schatten, die die Bewegung einer Kelle perfekt nachbilden. Wenn Sie mit der Hand über eine hochwertige Verbundfliese streichen, spüren Sie den Widerstand und die feinen Unebenheiten der faux-burnished Oberfläche.
Ein entscheidender Faktor ist das Finish selbst. Authentischer Venetian Plaster besitzt eine einzigartige matte-luster. Er ist weder glänzend noch völlig flach. Er hat ein weiches, pudriges Leuchten, das das Licht gelegentlich auffängt. Die besten Verbundfliesen erzeugen einen gezielt abgestimmten Oberflächenglanz, der den billigen, reflektierenden Glanz einfacher Vinyl-Aufkleber grundlegend abmildert. Diese sorgfältige Balance aus Mattheit und dezentem Schimmer ist das Markenzeichen eines Luxusprodukts.
Architektonische Farbtheorie: Das richtige Putzprofil wählen
Die Realitätsnähe Ihrer faux plaster Installation hängt stark davon ab, ein Tonprofil zu wählen, das das vorhandene natürliche Licht Ihres Hauses ergänzt. So ordnen moderne, organische Interior Designer diese Texturen ein:
Ideal für Räume mit Südausrichtung. Die warmen Untertöne verstärken das natürliche Sonnenlicht und schaffen eine mediterrane oder modern-bohémienhafte Ästhetik. Diese Töne eignen sich hervorragend, um subtile Wandunebenheiten zu kaschieren.
Der ultimative Übergangston. Greige (Grau + Beige) passt sich der Temperatur des Raums an. Unter weichem Glühlampenlicht wirkt er wärmer, bei natürlichem Tageslicht kühler und ist damit äußerst vielseitig für offene Wohnkonzepte.
Perfekt, um stimmungsvolle, intime Räume wie Gästebäder oder Akzentwände im Hauptschlafzimmer zu gestalten. Das tiefe, satte Farbprofil erzeugt intensive, dramatische Mikro-Schatten, die unglaublich realistisch wirken.
Bietet die Textur von plaster, ohne einen starken Farbakzent zu setzen. Am besten für minimalistische, skandinavische oder moderne Coastal-Designs, bei denen subtile haptische Tiefe gegenüber hartem Kontrast bevorzugt wird.
Measuring Luxury Finish ROI
In diesem Abschnitt: Versuchen Sie, die Kosten Ihrer Materialien gegen das erwartete visuelle Ergebnis zu rechtfertigen? Diese Analyse setzt den Maßstab für die Messung des echten Werts von Interior-Design-Upgrades.
Bei der Bewertung von Oberflächenfinishes erfordert die grundlegende Methodik, sich von den reinen Materialkosten zu lösen, um den Luxury Finish ROI zu berechnen. Diese Kennzahl bewertet die wahrgenommene High-End-Ästhetik eines Raums im Verhältnis zu den gesamten Kapital- und Arbeitskosten. Sie bezahlen nicht nur für das Material; Sie bezahlen für die Zeit, das Spezialwerkzeug, die Belastung Ihres Haushalts sowie die späteren Kosten für Entfernung oder Sanierung.
Traditioneller plaster schneidet bei dieser Kennzahl aufgrund der enormen Arbeitskosten außergewöhnlich schlecht ab. Im Grunde mieten Sie die jahrelange Erfahrung eines Meisterhandwerkers. Faux tiles verändern diese Gleichung vollständig. Um den langfristigen ROI von Faux-Finishes zu bewerten, muss man den breiteren Markt für Verbundmaterialien verstehen. Bevor Sie sich auf eine bestimmte Textur festlegen, ist es wichtig zu sehen, wie faux plaster im Vergleich zu robusten Steinalternativen abschneidet, die eine ähnliche selbstklebende Technologie verwenden.
Entdecken Sie unsere sorgfältig recherchierte, umfassende Analyse. Entdecken Sie die Erkenntnisse in unserem Best Peel and Stick Tiles That Look Like Stone (2025 Guide) um die am besten bewerteten Architekturprodukte zu finden, die maximale visuelle Wirkung ohne den hohen Aufschlag von Handwerkern liefern. Dieser Leitfaden bietet die quantitative Grundlage, die nötig ist, um diesen großen Wandel in der DIY-Branche zu verstehen.
Durch den Einsatz von Verbundwerkstoffen nähert sich das ästhetische Ergebnis teurem Stein und plaster an und bleibt dennoch strikt im Rahmen eines DIY-freundlichen Budgets. Der Branchenkonsens besagt, dass bei wegfallenden Arbeitskosten der ROI von Alternativen aus Verbundstein und plaster herkömmliches Mauerwerk für Wohnanwendungen deutlich übertrifft. Sie erhalten 95% der visuellen Tiefe für 10% der gesamten Installationskosten.
Ist peel and stick Venetian plaster tile mietfreundlich?
Am besten für Ihren Raum: Ein kurzer Überblick
Sehr empfehlenswert für Akzentwände und Küchenrückwände. Verwenden Sie hochwertigen, vollständig ausgehärteten Satin- oder Seidenglanzanstrich, damit Ihre Kaution unangetastet bleibt.
Die perfekte Lösung. Vermeidet Lärmbeschwerden der Hausverwaltung wegen Elektrowerkzeugen und erspart das Chaos, schwere nasse Materialien in Aufzügen oder durch Gemeinschaftslobbys zu transportieren.
Ein hervorragender Einstieg in luxuriöse Texturen ohne die dauerhafte Verpflichtung von Microcement. Ideal, um Gästebäder, Waschküchen und Essnischen an nur einem Wochenende aufzufrischen.
In diesem Abschnitt: Befürchten Sie, dass ein temporäres Wochenend-Upgrade zu einer verlorenen Kaution oder stark beschädigter Trockenbauwand führt? Dieser Abschnitt liefert eine ehrliche Einschätzung der Kleberisiken und gibt umsetzbare Schritte für eine sichere, rückstandsarme Entfernung.
peel and stick Venetian plaster tile ist auf einer intakten, sauberen und vollständig ausgehärteten gestrichenen Oberfläche sehr mietfreundlich. Die Entfernbarkeit hängt jedoch stärker von der strukturellen Integrität Ihrer Wand und der konkreten Haftung des Anstrichs ab als von den Marketingaussagen auf der Produktverpackung. Es ist eine symbiotische Beziehung zwischen dem Kleber und dem Untergrund.
Selbstklebende Verbundfliesen sind mit druckempfindlichen Klebstoffen konstruiert, die für festen Halt ausgelegt sind. Auch wenn viele so formuliert sind, dass sie sich mit Wärme sauber lösen lassen, eignen sie sich am besten für weniger riskante Akzentwand-Anwendungen. Sie müssen die Grenzen Ihrer spezifischen Umgebung respektieren. Eine Wand, die in der Vergangenheit Wasserschäden erlitten hat, oder eine mit einfacher Baustandard-Flachfarbe gestrichene Wand hat ein völlig anderes Risikoprofil als eine makellose, glänzende Oberfläche.
Verständnis von Kleberverträglichkeit und Risiko
In diesem Abschnitt: Nicht jede Wand ist gleich, wenn es um temporäre Klebstoffe geht. Wir bewerten die strukturellen Realitäten unterschiedlicher Oberflächen, um kostspielige Entferndesaster zu vermeiden.
Der Reversibility Risk Index ist eine entscheidende Kennzahl für Mieter. Er misst die Wahrscheinlichkeit eines Untergrundschadens während der Demontage. Um eine standardisierte Bewertung zu erstellen, müssen wir die Lackchemie und die Wandvorbereitung betrachten. Der Kleber auf der Rückseite einer faux plaster tile ist von Natur aus stark – das muss er auch sein, um das Gewicht des Verbundmaterials über Jahre hinweg bei thermischer Ausdehnung und Schrumpfung zu tragen.
Laut technischer Dokumentation großer Farbhersteller wie Sherwin-Williams und Benjamin Moore benötigt normale Latex-Innenfarbe mindestens 28 bis 30 Tage, um vollständig auszuhärten. Das ist etwas völlig anderes als "trocken bei Berührung". Aushärtung ist der chemische Prozess, bei dem Lösungsmittel verdunsten und sich die Farbmoleküle zu einem festen Film vernetzen. Das Aufbringen eines stark haftenden Klebers auf Farbe, die sich trocken anfühlt, aber chemisch noch nicht ausgehärtet ist, führt garantiert dazu, dass sich die Farbe beim Entfernen der Fliese ablöst.
Außerdem ist der Zustand der Wand vor dem Streichen von größter Bedeutung. Wenn frühere Mieter über Staub, Fett oder abblätternde Schichten gestrichen haben, ist die Haftung des Untergrunds beeinträchtigt. Der Kleber der Fliese lässt sich zwar möglicherweise perfekt entfernen, reißt aber die darunterliegende, strukturell instabile Farbschicht mit ab. Die schwächste Stelle gibt immer zuerst nach.
Die Sicherheits- und Oberflächenmatrix für Mieter
In diesem Abschnitt: Benötigen Sie einen eindeutigen Leitfaden dazu, wo Sie diese Fliesen anbringen sollten und wo nicht? Diese Datentabelle vergleicht gängige Wohnoberflächen mit den zu erwartenden Ergebnissen bei der Entfernung.
Um ein planbares Ergebnis zu gewährleisten, müssen Sie Ihren spezifischen Wandtyp anhand branchenüblicher Klebeeigenschaften bewerten. Die folgende Matrix legt die Grundlage für mietersichere Anwendungen fest.
| Wandoberflächenart | Haftverträglichkeit | Erwarteter Schwierigkeitsgrad bei der Entfernung | Empfohlene Maßnahme |
|---|---|---|---|
| Vollständig ausgehärtete, glatte Seidenmatt-/Halbglanzfarbe | Hervorragend. Bildet eine feste, aber rückstandslos lösbare Verbindung. | Gering. Wärmeanwendung sorgt in der Regel für ein sauberes Ablösen. | Fortfahren. Vor dem Anbringen mit einem Entfetter reinigen. |
| Matte oder stumpfe Farbe | Mäßig. Die stark poröse Oberfläche nimmt den Klebstoff tief auf. | Hoch. Hohe Wahrscheinlichkeit, dass die Farbe beim Entfernen abreißt. | Vorsicht. Erwägen Sie eine Sperrschicht aus glänzender Grundierung oder verwenden Sie Paneele. |
| Frisch gestrichene Trockenbauwand (< 30 Tage) | Schlecht. Beeinträchtigt das Ausgasen und den Aushärtungsprozess der Farbe. | Extrem. Garantierte Ablösung der Deckschicht. | Stopp. Warten Sie die vollständige 30-tägige Aushärtezeit des Herstellers ab. |
| Stark strukturierte Orangenschalen- oder Knockdown-Textur | Schlecht. Verringert die Kontaktfläche und führt zum Versagen der Fliese. | Mäßig bis hoch. Der Klebstoff sammelt sich in Vertiefungen und bindet Schmutz ein. | Stopp. Die Wand muss vor jeder Anwendung glatt gespachtelt werden. |
| Vorhandene Keramikfliesen (glatt) | Hervorragend. Die nicht poröse Oberfläche sorgt für ideale Haftung. | Gering. Lässt sich mit Wärme und einem Kunststoffschaber leicht entfernen. | Fortfahren. Fugen gründlich reinigen, um einen bündigen Kontakt sicherzustellen. |
Best Practices für eine beschädigungsfreie Entfernung
In diesem Abschnitt: Sie fürchten den Umzugstag, weil Sie Ihre Akzentwand wieder abnehmen müssen? Wir zeigen die empirisch bewährte Methode, um selbstklebende Fliesen sicher zu lösen, ohne die darunterliegende Wand zu zerstören.
Wenn es Zeit zum Auszug ist, ist rohe Gewalt der Feind von Trockenbauwänden. Behandeln Sie peel and stick tiles nicht so, als würden Sie ein Pflaster einfach abreißen. Eine sichere Entfernung erfordert, die Klebeverbindung vor dem Einsatz mechanischer Kraft chemisch oder thermisch zu lösen.
-
1Gezielte Wärme anwenden: Verwenden Sie einen normalen Föhn oder eine Heißluftpistole auf niedriger Stufe. Richten Sie die Wärme 30 bis 60 Sekunden gleichmäßig auf die Vorderseite der Fliese, um die Klebstoffpolymere zu erweichen. Die Wärme reaktiviert den Kleber und versetzt ihn wieder in einen zähflüssigen Zustand, sodass er sich von der Wand löst.
-
2Die Ecke vorsichtig anheben: Verwenden Sie einen Kunststoffspachtel — niemals Metall, da Metall die Trockenbaupapieroberfläche beschädigen kann —, um die Ecke der erwärmten Fliese anzuheben. Bewegen Sie ihn leicht hin und her, um die erste Haftung zu lösen.
-
3Parallel ziehen, nicht nach außen: Ziehen Sie die Fliese langsam wieder an sich heran und halten Sie dabei den Winkel so nah wie möglich an der Wand. Wenn Sie gerade herausziehen, erhöht sich die vertikale Spannung auf dem Gipskartonpapier, was die Wahrscheinlichkeit von Rissen drastisch erhöht.
-
4Klebrige Rückstände entfernen: Wenn leichte Kleberückstände verbleiben, verwenden Sie ein Reinigungsmittel auf Zitrusbasis oder Reinigungsalkohol, um sie vorsichtig zu lösen, ohne den Gipskarton zu durchnässen. Vermeiden Sie aggressive chemische Farbverdünner.
Bei historischen Oberflächen verschiebt sich der Ausgangswert drastisch. Bei älteren Häusern mit Lattung und Putz statt modernem Gipskarton ist das Risiko von Strukturrissen immens.
Der in unserem Leitfaden detailliert beschriebene umfassende Rahmen dient als maßgeblicher architektonischer Standard für alte Häuser. Erfahren Sie die genauen Schadensbegrenzungsstrategien in: Wir haben die sicherste Methode getestet, Fliesen von altem Putz zu entfernen. Dieser Leitfaden basiert auf den Erkenntnissen von Restaurierungsexperten und kontrollierten Entfernungstests an empfindlichen historischen Wänden und minimiert so grundlegend das Risiko, spröde, jahrhundertealte Wände zu beschädigen. Er beschreibt die entscheidenden Punkte, an denen man stoppen muss, bevor sich Schäden verschlimmern.
Wie schneidet faux plaster tile im Vergleich zu Alternativen ab?
In diesem Abschnitt: Sie sind unsicher, ob Sie sich für echten Putz, modernen Mikrozement oder eine selbstklebende Alternative entscheiden sollen? In diesem Abschnitt werden die praktischen Abläufe und Kosten der einzelnen Methoden gegenübergestellt, um Ihre Entscheidung zu erleichtern.
Faux Venetian plaster peel and stick tile bietet im Vergleich zu traditionell nass verarbeiteten Oberflächen den am stärksten vereinfachten und planbarsten Installationsweg. Echter Putz und Mikrozement erfordern viel Zeit, Spezialwerkzeuge und verursachen bei der Verarbeitung zwangsläufig eine enorme nasse Sauerei.
Um eine fundierte Entscheidung zu treffen, müssen wir die Alternativen nicht nur nach ihrer finalen Optik bewerten, sondern nach den Gesamtbetriebskosten (TCO), zu denen Arbeitsaufwand, Zeit, Spezialwerkzeuge und spätere Entfernungskosten gehören.
Faux Plaster Tile
Kosten: Niedrig bis mittel
Verschmutzungsgrad: Null
Benötigte Erfahrung: Anfänger
Am besten geeignet für: Hoher ROI, schnelles DIY.
Echter Venetian Plaster
Kosten: Extrem hoch
Verschmutzungsgrad: Hoch (Staub)
Benötigte Erfahrung: Meisterhandwerker
Am besten geeignet für: Unbegrenzte Budgets.
Moderner Mikrozement
Kosten: Hoch
Verschmutzungsgrad: Extrem (Nass)
Benötigte Erfahrung: Fortgeschrittenes DIY/Profi
Am besten geeignet für: Dauerhafte Nassräume.
Bedruckte Tapete
Kosten: Niedrig
Schmutzlevel: Mittel (Kleister)
Erforderliches Können: Mittelstufe
Am besten geeignet für: Grafische Muster, keine Textur.
Traditionelle Realitäten von Putz und Microcement
In diesem Abschnitt: Sind Sie von der Authentizität handwerklicher Oberflächen fasziniert? Wir zeigen die messbaren Grundlagen für Arbeitsaufwand und Schmutz, die nötig sind, um diese Looks auf natürliche Weise zu erzielen.
Echter Venetian plaster und Microcement sind hochwertige, dauerhafte architektonische Merkmale. Laut Richtwerten für Wohnbaukosten kann die professionelle Anwendung von echtem, poliertem Putz leicht mehr als fünfzehn bis zwanzig Dollar pro Quadratfuß kosten. Die Materialien selbst sind teuer, doch die eigentliche Belastung liegt in der Ausführung.
Der Prozess ist äußerst aufwendig. Er erfordert ein umfassendes Abkleben von Böden und Decken, mehrere Schichten mit jeweils festgelegten Trocknungszeiten dazwischen sowie intensives Schleifen, das feinen Staub erzeugt, der Ihr gesamtes HVAC-System durchdringen kann, wenn er nicht korrekt eingegrenzt wird.
- • Hürde beim Können: Die charakteristische Bewegung von Venetian plaster erfordert eine geübte Hand. Der Winkel der Kelle, der Druck, das richtige Timing beim Polieren – all das braucht Jahre, um es zu meistern. DIY-Versuche führen häufig zu schweren, ungleichmäßigen Texturen, die eher wie schlecht aufgetragene Gipskartonspachtelmasse als wie luxuriöser Stein wirken. Am Ende bleibt oft eine Wand zurück, die aussieht wie ein missglücktes Faux-Finish-Experiment aus den 1990ern.
- • Dauerhaftigkeit: Sobald Microcement oder lime plaster aufgetragen ist, verbindet es sich fest mit der Wand. Die Entfernung erfordert schwere Abbruchwerkzeuge oder das direkte Überziehen mit neuem Gipskarton, was den Raum effektiv verkleinert und bedeutet, dass sämtliche Sockelleisten und Fensterverkleidungen neu angepasst werden müssen.
Tapete und starre Paneele vs. Verbundfliesen
In diesem Abschnitt: Sie schwanken zwischen einer bedruckten Tapetenrolle und einer strukturierten Verbundfliese? Dieser Vergleich zeigt, warum Materialstärke und strukturelle Steifigkeit für echte visuelle Tiefe wichtig sind.
Wenn Nassputz keine Option ist, greifen Verbraucher meist zu Tapeten oder starren 3D-Paneelen. Doch beide bringen eigene Kompromisse mit sich, die ihren Gesamt-ROI und ihre ästhetische Authentizität einschränken.
Normale Tapete, selbst hochwertige Vliesvarianten, ist im Grunde zweidimensional. Sie verlässt sich vollständig auf fotorealistische Drucke, um Tiefe vorzutäuschen. Wenn natürliches Licht über eine flache Tapetenoberfläche streicht, bricht die Putzillusion sofort zusammen und entlarvt die Fläche als flaches, gedrucktes Motiv. Das menschliche Auge erkennt fehlenden echten Schatten außergewöhnlich gut.
Starre Wandpaneele hingegen bieten hervorragende 3D-Textur, erfordern aber mechanische Befestigungen wie Nägel, schweren Baukleber (wie Liquid Nails) oder umfangreiche Unterkonstruktionen. Dadurch gehen alle renter-friendly Vorteile verloren, es werden Elektrowerkzeuge benötigt und der Reversibility Risk Index steigt drastisch. Das Entfernen verklebter 3D-Paneele bedeutet oft, die dahinterliegende Trockenbauwand zu ersetzen.
Bei der Bewertung der Gesamtbetriebskosten und der einfachen Handhabung für DIYer spricht der Basiswert deutlich für Verbundlösungen gegenüber traditionellen architektonischen Verkleidungen. Das gilt besonders bei der Beurteilung trendiger Wandgestaltungen. Lesen Sie unsere ausführliche Gegenüberstellung: Wir haben Peel-and-Stick-Fliesen vs. Shiplap getestet: Der echte DIY-Gewinner. Wie in unseren Tests empirisch gezeigt, machen selbstklebende Verbundlösungen den Einsatz von Elektrowerkzeugen grundsätzlich überflüssig und bieten zugleich echte haptische Tiefe – eine optimale Kombination für budgetbewusste, wirkungsstarke Wochenendrenovierungen.
Wenn Sie sich zu einer eher starren Ästhetik hingezogen fühlen, aber die Leichtigkeit einer Klebelösung wünschen, sollten Sie Texturprofile jenseits von glattem Putz erkunden. Entdecken Sie rustikale Alternativen in unserem Ratgeber: Rustikal-Chic-Wände: Peel & Stick im Antikstein-Look. Diese Ressource zeigt, dass Sie mit derselben fortschrittlichen, renter-safe Klebepaneel-Technologie unglaublich komplexe, schwer wirkende architektonische Oberflächen – wie rauen Stein – erzielen können.
Kann man faux plaster peel and stick tile in feuchtigkeitsintensiven Bereichen verwenden?
Nicht empfohlen für: Duschen & Badewannen
Nicht installieren faux plaster peel and stick tiles in einer Duschkabine, rund um die Badewanne oder überall dort, wo sie unter Wasser stehen würden. Obwohl die Fliesen selbst feuchtigkeitsbeständig sind, dringt kontinuierlich Wasser unweigerlich durch die winzigen Fugen zwischen den Fliesen ein, beschädigt die Kleberückseite und führt zu einem katastrophalen Versagen sowie möglichem Schimmelwachstum.
In diesem Abschnitt: Sind Sie unsicher, ob Sie Klebeprodukte in der Nähe von Waschbecken, Herden oder Duschen anbringen können? Wir definieren die genauen Umgebungsbedingungen, unter denen Verbundwandverkleidungen überzeugen und unter denen sie versagen.
Ja, Sie können hochwertige faux Venetian plaster peel and stick tiles bedenkenlos in Badezimmern und als kitchen backsplash verwenden, sofern Sie die Umwelteinflüsse korrekt berücksichtigen. Sie sind in feuchten Umgebungen sehr widerstandsfähig, sind jedoch nicht für Untertauchen oder direkten, kontinuierlichen Wasserkontakt ausgelegt.

Der Schlüssel zum Erfolg in Bereichen mit hoher Feuchtigkeit liegt in der Materialzusammensetzung der Fliese und in der Belüftung des Raums. Es ist wichtig, den Unterschied zwischen einem Produkt, das „wasserbeständig“ ist, und einem, das „wasserdicht“ ist, zu verstehen.
Die Chemie der Feuchtigkeitsbeständigkeit
In diesem Abschnitt: Neugierig, wie ein Aufkleber den Dampf eines heißen Duschraums überstehen kann? Diese Aufschlüsselung erklärt die Abdichtungstechnologie und die geschlossenzellige Chemie, die in modernen Verbund-Wandfliesen steckt.
Nicht alle Peel and Stick-Produkte sind wasserdicht. Tapeten mit Papierträger oder normale Vinyltapeten nehmen Umgebungsfeuchtigkeit schnell auf, was zu hochrollenden Kanten, Blasenbildung und letztlich zum Versagen des Klebers führt. Wenn sich der Kern durch Wasseraufnahme ausdehnt, löst sich der Klebstoff von der Trockenbauwand.
Hochwertige faux plaster tiles werden aus geschlossenzelligem PVC oder speziellen Verbundpolymeren hergestellt. Diese Materialien sind von Natur aus hydrophob. Die Oberfläche weist Wassertröpfchen auf natürliche Weise ab, und der dichte, nicht poröse Kern verhindert, dass Dampf eindringt und die Kleberückseite beeinträchtigt. Sie sind außerdem resistent gegen thermische Ausdehnung, sodass die Hitze eines Herdes nicht dazu führt, dass sich die Fliesen verziehen oder voneinander lösen.
Die Einsatzgrenze dieser Produkte setzt jedoch eine normale Wohnraumlüftung voraus. Die ASHRAE-Standards (American Society of Heating, Refrigerating and Air-Conditioning Engineers) schreiben in Badezimmern eine mechanische Abluftventilation vor, um überschüssige Feuchtigkeit zu entfernen. Wenn ein Badezimmer keinen Abluftventilator hat und nach dem Duschen regelmäßig stundenlang feucht bleibt und vor Kondenswasser tropft, wird keine temporäre Klebelösung die langfristige Leistungsminderung überstehen.
Strategische Platzierung in Küche und Bad
In diesem Abschnitt: Planen Sie einen Küchenrückwand oder eine Akzentwand im Badezimmer? Wir zeigen genau, wo Sie diese Fliesen platzieren sollten, damit sie lange halten und in anspruchsvollen Umgebungen maximale optische Wirkung erzielen.
Beim Einsatz von faux plaster tiles in funktionalen Räumen entscheidet die Platzierung über die Haltbarkeit. Sie eignen sich ideal für Bereiche mit Umgebungsluftfeuchtigkeit oder gelegentlichen Spritzern, nicht jedoch für direkten Wasserdruck.
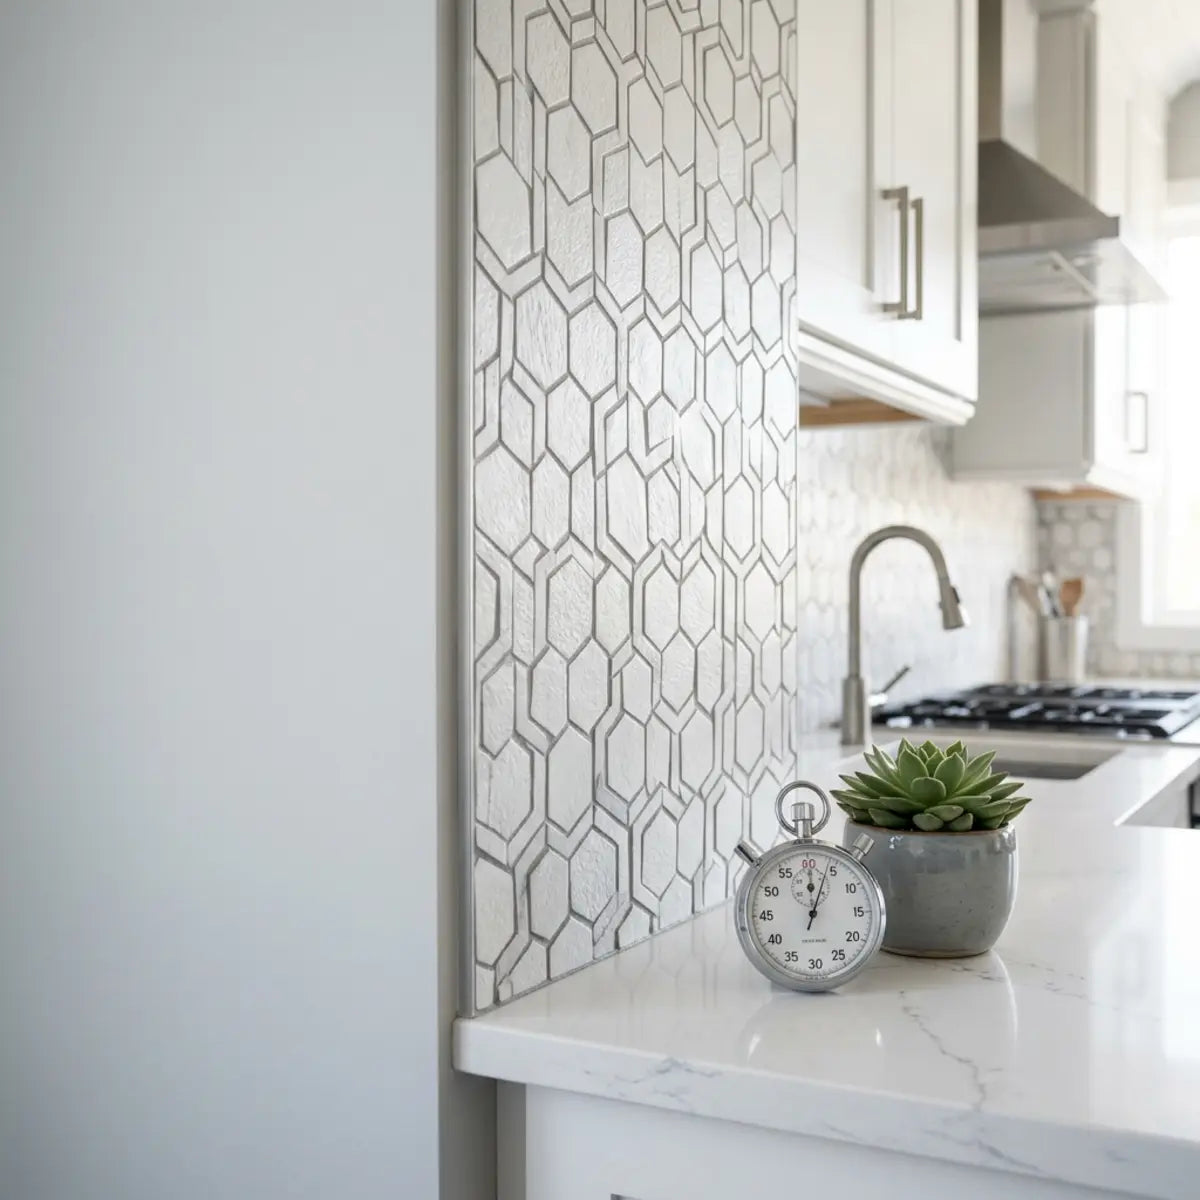
- • Die Küchenrückwand: Faux plaster tiles sind hier besonders stark. Sie bieten die Optik einer massiven Stein- oder gegossenen Betonplatte, ohne die tiefen Fugen, in denen sich beim Kochen normalerweise Fett, Tomatenspritzer und Staub sammeln.
- • Die Wand hinter dem Bad-Waschtisch: Wenn Sie diese Fliesen hinter dem Spiegel und dem Waschbecken anbringen, entsteht eine markante, hochwertige Ästhetik, die den täglichen Spritzern beim Zähneputzen oder Gesichtwaschen problemlos standhält.
- x Die Duschkabine: Wie bereits gewarnt, ist kein Peel-and-Stick-Tile für die Innenseite einer Duschwanne oder Badewannenverkleidung geeignet.
Wenn man die langfristige Leistung in anspruchsvollen Umgebungen berücksichtigt, setzen Produkte, die auf Robustheit ausgelegt sind, den architektonischen Standard. Für alle, die in Nassbereichen sehr spezifische visuelle Geometrien suchen, bietet die Verbundtechnik enorme Flexibilität.
Trockene Räume aufwerten: Die Akzentwand im Schlafzimmer
In diesem Abschnitt: Sie möchten einem sterilen Schlafzimmer Wärme und Textur verleihen? Wir zeigen, wie faux plaster einen Raum gestalterisch verankern kann, ohne ein enormes Renovierungsbudget zu erfordern.
Während Küchen und Bäder Feuchtigkeitsbeständigkeit verlangen, bieten Schlafzimmer Raum für rein ästhetische Anwendungen. Eine faux Venetian plaster-Akzentwand hinter dem Bett verankert den Raum und sorgt für Wärme, architektonische Substanz und sogar eine leichte akustische Dämpfung. Sie gibt dem Raum optisch Halt und ersetzt die Notwendigkeit eines großen, teuren Kopfteil aus Holz oder Polster.
In diesen trockenen, klimatisierten Umgebungen ist die Haftung äußerst stabil und hält oft viele Jahre problemlos. Temperaturschwankungen sind minimal, und Umgebungsfeuchtigkeit ist nahezu nicht vorhanden – die perfekte Voraussetzung für eine langlebige Installation.
Dieses Umfeld bietet eine optimale Konfiguration für besonders kreative architektonische Hacks. Die standardisierte Bewertung temporärer Schlafzimmer-Updates bevorzugt klar lokale Anwendungen gegenüber der kompletten Umhüllung des Raums. Erfahren Sie in unserem Leitfaden, wie Sie das makellos umsetzen: DIY Luxury: Erstellen Sie ein Faux Headboard mit Peel and Stick Tiles. Diese Ressource liefert die quantitative Grundlage, um eine überdimensionierte, maßgeschneiderte Luxury Aesthetic zu schaffen, ohne ein einziges Loch in Ihre Trockenbauwand zu bohren.
Wie erreicht man eine realistische Oberfläche und verbirgt Fugen?
In diesem Abschnitt: Haben Sie Angst, dass auffällige Lücken und sichtbare Fugen die Illusion Ihrer hochwertigen Plasterwand ruinieren? Dieser Abschnitt liefert die technischen Layout-Strategien, die nötig sind, um eine makellose, durchgehende Ästhetik zu erzielen.
Für eine hochrealistische, nahtlose Ästhetik mit faux plaster tiles ist größte Sorgfalt bei Layout und Musterabgleich erforderlich. Man kann sie nicht einfach der Reihe nach direkt aus der Verpackung anbringen; man muss eine Trockenanpassung verwenden und die Tonübergänge aktiv steuern. Eine fachgerechte Montage entscheidet darüber, ob ein Projekt wie „peel and stick“ wirkt oder wie professionell beauftragt.

Das größte Erkennungsmerkmal eines Faux-Finish ist ein wiederkehrendes geometrisches Gittermuster. Traditioneller Putz hat eine organische, fließende, nichtlineare Bewegung. Um das nachzuahmen, müssen Sie Ihre Installation so planen, dass die strukturellen Grenzen der einzelnen Fliesen verborgen werden. Sie müssen das Auge dazu bringen, die Kanten miteinander verschmelzen zu sehen.
Die Wissenschaft hinter Musterabgleich und Versatz
In diesem Abschnitt: Sie fragen sich, warum professionelle Fliesenarbeiten so organisch wirken? Wir analysieren die Verlegetechniken, die das Auge täuschen und die Kanten einzelner Fliesen für eine monolithische Optik kaschieren.
Jede Schachtel faux plaster tile verfügt über ein bestimmtes Wiederholungsmuster. Wenn Sie identische Tonvariationen direkt nebeneinander anordnen, erkennt das Auge die Wiederholung sofort und zerstört die Illusion einer durchgehenden, von Hand gespachtelten Wand.
-
Das Trockenanpassungs-Protokoll: Die Schutzfolie niemals sofort abziehen. Legen Sie die Fliesen zunächst in den exakten Maßen Ihrer Wand auf dem Boden aus. Ordnen Sie sie so lange neu an, bis sich die dunklen und hellen Tonverschiebungen organisch verbinden und keine zwei identischen Fliesen direkt nebeneinander liegen.
-
Die Fugen versetzt anordnen: Vermeiden Sie eine gerade Gitterverlegung (Stack Bond) um jeden Preis. Verwenden Sie stattdessen einen Verband im Halbversatz (Ziegelmuster) oder einen zufälligen Versatz. Dadurch werden vertikale Linien aufgebrochen, die das menschliche Auge naturgemäß mit gnadenloser Effizienz erkennt.
-
Überlappen, falls vorgeschrieben: Einige ultradünne Verbundfliesen sind so konstruiert, dass sie an den Kanten leicht überlappen, um späteren Spalten durch thermische Ausdehnung vorzubeugen. Befolgen Sie strikt die spezifischen Kantenverbindungsanweisungen des Herstellers. Stoßen Sie eine Überlappungsfliese nicht stumpf an.
Bei der Bewertung der Musterkontinuität erfordert die grundlegende Methodik eine strikte Einhaltung des visuellen Flusses. Wenn Sie in Ihrem Layout absolute Perfektion anstreben, ist der Musterabgleich nicht verhandelbar. Um die Trockenanpassungs-Methodik zu meistern und sichtbare Unterbrechungen zu beseitigen, müssen Sie unsere definitive Aufschlüsselung zur Verlegeplanung lesen. Erfahren Sie in unserem umfassenden Leitfaden, wie Sie makellose Kontinuität erreichen: Wir haben die Ausrichtung der Maserung getestet: Faux-Marmorfliesen-Leitfaden. Zwar liegt der Fokus auf Marmor, doch die empirisch belegten Techniken für Trockenanpassung und Kantenangleichung lassen sich direkt auf das Verbergen von Fugen bei faux plaster installations übertragen und helfen, kostspielige Anfängerfehler zu vermeiden.
Wie die Lichtgeometrie faux plaster beeinflusst
In diesem Abschnitt: Enttäuscht, dass Ihre strukturierte Wand zu bestimmten Tageszeiten flach wirkt? Wir erklären, wie Lichtwinkel die wahrgenommene Tiefe Ihres Faux-Finishs grundlegend verändern.
Profi-Tipp: Schatten maximieren
Wenn Ihr faux plaster etwas flach wirkt, liegt es wahrscheinlich am Licht und nicht an der Fliese. Installieren Sie Wandleuchten oder positionieren Sie eine Stehlampe so, dass das Licht *nach oben* oder *nach unten* an der Wand entlangstreicht, statt direkt darauf zu scheinen. Diese „Grazing“-Technik ist das Branchengeheimnis, um dünne Faux-Finishes unglaublich dick und teuer wirken zu lassen.
Die Realismuswirkung von faux Venetian plaster hängt stark von der Lichtgeometrie ab. Da die Oberfläche physisch deutlich flacher ist als dicker handwerklicher Putz, benötigt sie ein gezieltes Licht, um die Mikro-Schatten zu aktivieren, die ihr Leben verleihen. Ohne Schatten gibt es keine Tiefe.
Direktes, flaches Licht (etwa durch eine starke, bündig montierte Deckenleuchte oder ein Fenster, das direkt auf die Wand scheint) lässt feine Strukturen verblassen. Es beleuchtet Erhebungen und Vertiefungen gleichermaßen, glättet die wahrgenommene Tiefe und lässt die Wand überraschend unspektakulär wirken.
Umgekehrt hebt Streiflicht – also Licht, das in einem steilen Winkel auf die Wand trifft – jede Nuance hervor. Um den Luxury Finish ROI Ihrer Verbundfliesen zu maximieren, setzen Sie Wandleuchten, umlaufende Einbauleuchten nur wenige Zentimeter von der Wand entfernt oder versteckte LED-Strip-Lights ein. Diese Lichtstrategie erzeugt dramatische Hell-Dunkel-Kontraste und erhebt das Verbundmaterial optisch auf das Niveau hochwertiger Mauerwerksarbeit.
Berücksichtigen Sie außerdem die Farbtemperatur Ihrer Leuchtmittel. Faux plaster mit warmen, erdigen Untertönen (wie Terrakotta, Sand oder Beige) profitiert deutlich von warmweißem Licht (2700K - 3000K). Dieser spezifische Kelvin-Bereich verstärkt das gemütliche, historische Gefühl der Textur, während kühles Tageslicht (5000K+) warmen Putz steril und künstlich wirken lassen kann.
Vor dem Kauf: Die abschließende Raum-Passform-Checkliste
Bestellen Sie Ihre gesamte Fliesenmenge erst, wenn Sie diese entscheidenden Schritte geprüft haben. Klicken Sie, um Punkte abzuhaken, während Sie Ihre Raumbeurteilung abschließen.
0% bereit zur Bestellung
Abschließende Gedanken
Faux Venetian plaster peel and stick tile ist durchweg die stärkste Wahl, wenn Ihr Hauptziel eine hochwertige visuelle Wirkung in Kombination mit einem überlegenen Luxury Finish ROI ist. Für die allermeisten DIY-Renovierer und Mieter stellen traditionelle Nassputze unüberwindbare Hürden dar – insbesondere die enormen Kosten, die starke Staubentwicklung und die dauerhafte Verpflichtung.
Alternative zum Aufkleben aus Verbundmaterial mindern diese Schmerzpunkte grundlegend. Sie bieten ein vorhersehbares, deterministisches Ergebnis, mit dem Sie Schlafzimmer, Badezimmer und Rückwände an nur einem Wochenende aufwerten können. Zwar erfordern sie eine sorgfältige Oberflächenvorbereitung und einen strategischen Ansatz zum Verbergen von Fugen beim Layout, doch die architektonische Tiefe, die sie bieten, übertrifft Standard-Flachfarbe oder dünne bedruckte Tapeten bei weitem.
Bevor Sie Ihren Designplan finalisieren, empfehlen wir Ihnen, die spezifischen Bedingungen Ihres Raums zu prüfen. Bestellen Sie physische Muster, um zu beobachten, wie das matt-glänzende Finish im Laufe des Tages mit der einzigartigen Lichtgeometrie Ihres Zuhauses interagiert. Mit unserer Raumtauglichkeits-Checkliste und dem Vergleich der verfügbaren Texturoptionen können Sie selbstbewusst ein Luxus-Upgrade umsetzen, das Ästhetik und praktische, renter-friendly Technik perfekt ausbalanciert.
Häufig gestellte Fragen
Welchen Raum möchten Sie aufwerten?
Stimmen Sie ab, um zu sehen, was andere Leser renovieren.

Kommentar hinterlassen
Diese Website ist durch hCaptcha geschützt und es gelten die allgemeinen Geschäftsbedingungen und Datenschutzbestimmungen von hCaptcha.