


The modern kitchen revolution has brought high-end design within reach of the everyday homeowner, largely thanks to the explosive popularity of DIY materials. However, when you mix combustible materials with high-output cooking appliances, the stakes are incredibly high. The real question is not whether peel-and-stick can go behind every stove. The actual issue is whether your specific range type, rear clearance, heat source, wall condition, and the material’s temperature rating keep the risk of failure low.
Peel-and-stick backsplash can work safely behind many freestanding, slide-in, electric, and induction ranges. The product must be rated for nearby heat. The wall must be clean and flat. Most importantly, appliance clearances must strictly follow the range manual. Gas ranges and tight rear gaps require extra caution. Open flames, high rear heat exhaust, grease, and appliance movement can cause melting, discoloration, or adhesive failure if proper distances are ignored.
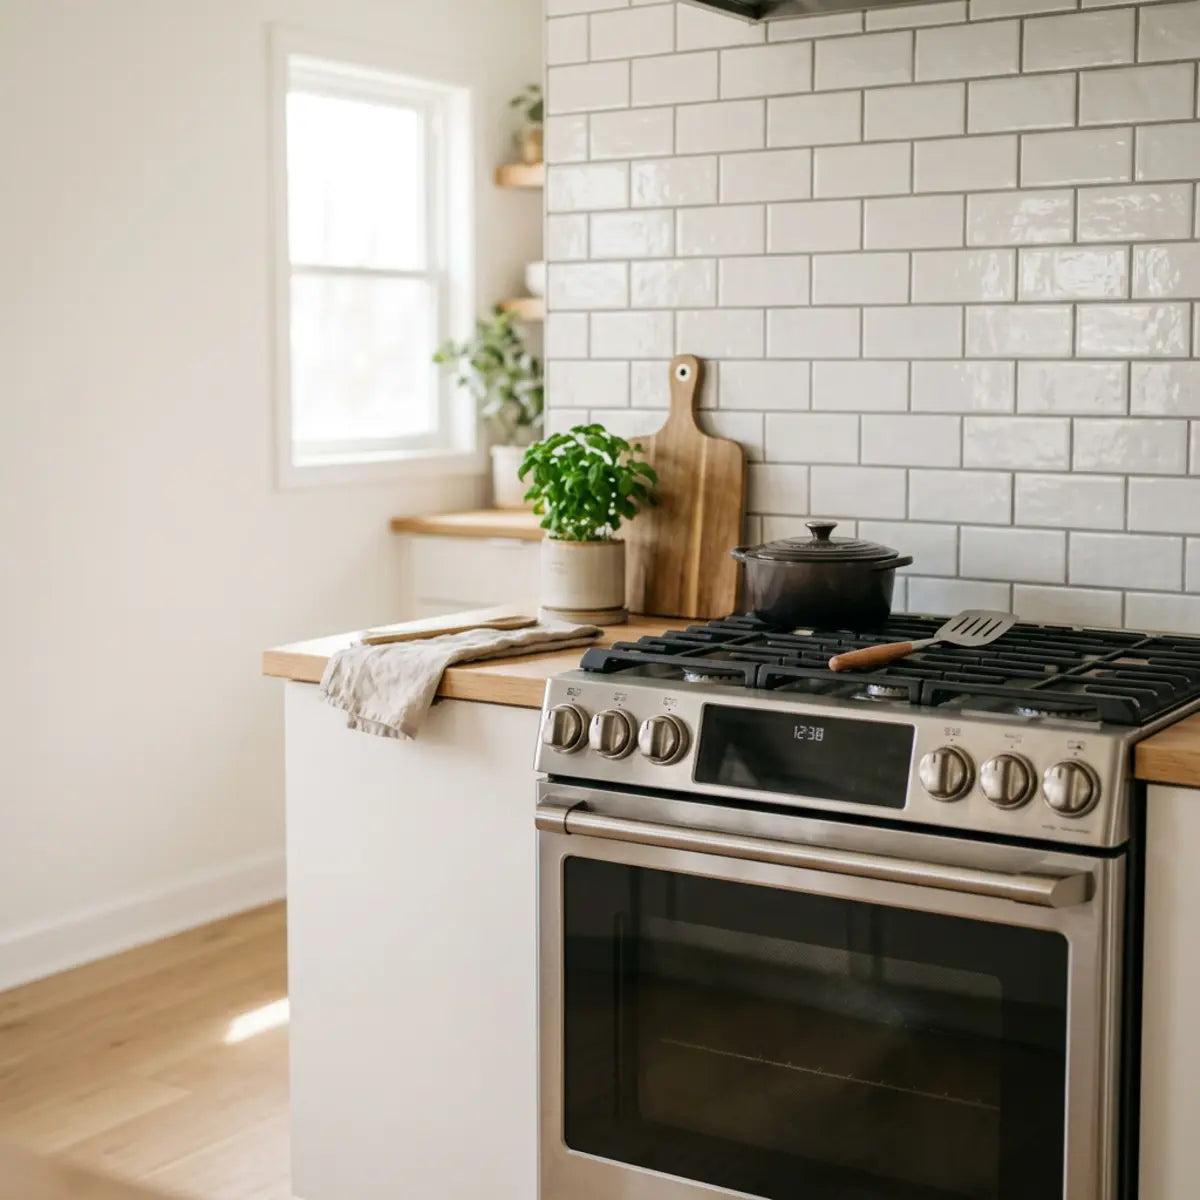
Understanding the intricacies of kitchen design means recognizing that not all appliances interact with their surrounding environment in the same way. The thermodynamics of cooking create localized micro-climates in your kitchen. A wall that feels perfectly cool while boiling water on an induction cooktop might become blisteringly hot while searing a steak on a 15,000 BTU gas burner. Therefore, treating your backsplash as a functional barrier first and a decorative element second is the key to a successful, long-lasting renovation.
⚠️ PRO TIP: Check Your Manual First
Before buying any materials or cutting a single tile, you must locate the "Clearances to Combustible Surfaces" section in your specific stove's installation manual. This single document holds the legal and functional blueprint for your kitchen safety. Do not rely on generic building codes; the manufacturer's testing dictates your safe zones.
Before purchasing any materials, you must follow these foundational steps. Skipping these initial diagnostics is the primary reason why so many DIY backsplashes fail within the first year of installation. The preparation phase is where the battle for durability is won.
- Identify the Source: Determine whether the appliance is freestanding, slide-in, gas, electric, or induction. Each of these categories completely alters the thermal output and the required installation geometry.
- Verify the Dimensions: Measure rear gaps and side reveals before deciding exactly where the backsplash starts and stops. Precision in measurement prevents exposed drywall and guarantees a built-in look.
- Evaluate the Risk: Use a structured evaluation method to choose safer materials and sequence your installation correctly. Not all adhesives are created equal, and understanding their chemical limits is paramount.

Can peel-and-stick backsplash safely go behind a freestanding or slide-in range?
*Ever worry your budget kitchen upgrade will melt, peel, or turn into a fire hazard behind a hot stove?*
*This section defines exactly when adhesive tiles are reasonable, when a non-adhesive panel is mandatory, and why the manufacturer’s manual supersedes generic internet advice.*
Peel-and-stick backsplashes can safely sit behind most electric and induction ranges, provided they meet specific temperature ratings and maintain manufacturer-required clearances. Gas ranges demand stricter safety distances due to open flames. You must never assume a decorative vinyl or thin metal tile acts as a substitute for a true fire-rated barrier. The physics of heat transfer are unforgiving, and the chemical composition of adhesives dictates that they will invariably fail if subjected to thermal loads beyond their engineered thresholds.
To comprehensively understand this dynamic and move away from guesswork, we utilize a proprietary framework designed specifically for DIY kitchen renovators. We call this the Heat-Gap-Adhesion Risk Score (HGARS).
The Heat-Gap-Adhesion Risk Score (HGARS)
Definition: A safety-planning metric combining the heat source, rear clearance, material temperature rating, wall prep, grease exposure, and removability risk into a single safety profile. By quantifying these variables, homeowners can transition from hoping their backsplash holds up to guaranteeing its long-term viability.
Electric and induction ranges usually create a lower rear-wall risk than gas ranges. However, your specific appliance manual always controls the final clearance decisions. Product marketing claims such as "heat-resistant" or "waterproof" must be verified against actual temperature limit data. It is alarming how many products labeled "heat-resistant" are only rated for incidental, temporary warmth, not the sustained, hours-long radiant heat produced by boiling a large stockpot.
Understanding Heat Transfer Dynamics
A common misconception among homeowners is that all stoves project heat backward toward the wall in the exact same way. This fundamental misunderstanding leads to catastrophic material choices. In reality, a gas stove produces convective heat that billows upward and outward. As the open flame consumes oxygen, the superheated exhaust gases must escape, usually riding directly up the rear of the appliance and washing over the lower section of your backsplash.
Conversely, an induction range focuses electromagnetic energy directly into the ferrous metal of your cookware. This means the wall behind an induction unit stays remarkably cool compared to a gas burner. The heat source is the pot itself, not the cooktop. This radically alters your HGARS risk profile, turning a high-risk installation zone into a low-risk, easily manageable area for practically any high-quality peel-and-stick product.
According to the National Fire Protection Association (NFPA), cooking equipment is the leading cause of home structure fires. Therefore, treating an adhesive tile as a decorative layer rather than a heat shield is paramount. If a wall requires a non-combustible shield by code, adding a thin layer of vinyl and acrylic glue does absolutely nothing to stop thermal transfer to the wooden studs behind your drywall.
In evaluating backsplash safety, industry consensus dictates a rigorous verification of thermal limits. To master this critical phase of kitchen safety, you must consult our in-depth research. Discover the exact temperature thresholds and scientific data in our comprehensive guide on Are Peel and Stick Tiles Heat Resistant? The Ultimate Kitchen Safety Guide. This resource provides the quantitative baseline necessary to implement your design vision without risking critical failure.
Appliance Type and HGARS Evaluation
When assessing gas stove clearance, the methodology strictly adheres to established safety parameters. If you have a gas range, the margin for error is virtually zero. The powerful burners generate intense heat that can rapidly degrade structural adhesives. For a deep dive into the standardized evaluation required for these high-output appliances, uncover the crucial building code secrets in our specialized Backsplash Distance Guide Behind Gas Stoves. This protocol inherently neutralizes placement errors and prevents catastrophic material failure.
For practical application, consider how different ranges score on our risk assessment matrix. This table acts as your primary diagnostic tool before beginning your project.
| Range Type & Style | HGARS Risk Level | Primary Hazard | Recommended Backsplash Strategy |
|---|---|---|---|
| Gas Freestanding | High | Open flame, rear exhaust heat | Mandated clearance. Use metal/glass panels or strictly enforce a 9-inch safety gap. |
| Gas Slide-in | High | Unshielded open flame | High-temp rated tile only. Confirm manual requirements for non-combustible rear walls. |
| Electric Coil (Freestanding) | Medium | Radiant heat | Standard heat-resistant peel-and-stick is generally safe. Maintain 2-inch minimum gap. |
| Radiant Electric (Slide-in) | Low-Med | Residual surface heat | Safe for most adhesive tiles. Ensure the wall is flat and properly degreased. |
| Induction (Freestanding) | Low | Minimal radiant heat | Ideal for peel-and-stick. Heat transfers to the pot, not the surrounding environment. |
| Induction (Slide-in) | Low | Alignment gaps | Highly compatible. Focus entirely on precise edge alignment and gap management. |
To achieve a deterministic outcome for your project—meaning a result based on facts, not luck—you must study your specific appliance. Pull the installation manual online. Most manufacturers provide PDF versions on their support websites. Locate the "clearances to combustible surfaces" section. If the manual requires a zero-clearance backguard (a metal plate that attaches to the back of the stove), you cannot legally or safely apply a vinyl tile directly behind the burner zone without installing that backguard first.

The Realities of Temperature Ratings
Many DIYers falsely assume that a thick adhesive tile will inherently resist heat better than a thin one. This is functionally false. Thickness does not equate to thermal resistance. The performance degradation curve of an adhesive dictates its lifespan. When exposed to sustained temperatures above 120°F (49°C), cheap acrylic adhesives undergo a phase change; they literally liquefy, losing their shear strength and causing the heavy tile material to slide slowly down the wall.
If you are determined to use these materials near a heat source, you must review proper installation techniques to mitigate these risks. Don't leave your kitchen's safety to chance; master the exact techniques needed for a secure bond by exploring our definitive tutorial on How to Install Heat Resistant Peel and Stick Tiles Behind Your Stove. This protocol yields an optimal configuration for long-term adhesion, showing you how to press, cure, and maintain the material in rigorous thermal environments.
How does a slide-in range change where the backsplash should start and stop?
*Assuming your new slide-in will use the exact same tile footprint as your old freestanding unit?*
*This section explains how slide-in designs alter the visual alignment, require total rear-wall coverage, and dictate precise installation timing.*
A slide-in range requires the backsplash to extend completely down to the countertop level across the entire rear wall. These units lack the raised, vertical control panel found on traditional freestanding models. This specific architectural design exposes the drywall immediately behind the cooking surface, completely altering your tile layout strategy. If you fail to account for this exposure, you will severely compromise the aesthetic integrity of your kitchen remodel.
To plan this correctly, we utilize another crucial metric for spatial planning: the Appliance Fit Continuity Score (AFCS).
Appliance Fit Continuity Score (AFCS)
Definition: A comprehensive metric evaluating visual alignment, side flange overlap, counter fit, total rear-wall exposure, and future appliance replacement flexibility. A high AFCS means your kitchen looks like it was custom-built by a master carpenter; a low AFCS results in visible drywall gaps, awkward trims, and un-cleanable crevices.
Slide-in ranges are engineered to create a customized, built-in aesthetic. This is why they are currently the dominant choice in luxury kitchen renovations. They often feature metal flanges that rest slightly over the edges of your countertop on the sides and back, preventing crumbs from falling between the cabinets. Because the controls are located on the front face—requiring you to reach over hot burners, a separate safety consideration—the entire back wall is visibly prominent.
The Hidden Wall Exposure Problem
A frequent, costly error occurs when homeowners decide to tile around an existing freestanding range. Wanting to save time and material, they stop the tile where the tall control panel begins, essentially tracing the silhouette of their current stove. Years later, that old stove dies, and they upgrade to a sleek, modern slide-in model. Suddenly, a large, bare rectangle of grease-stained drywall is exposed directly behind the new cooking surface.
This oversight negatively impacts the total cost of ownership (TCO) of your kitchen remodel. Fixing this later requires matching discontinued tile, scraping old adhesive in a tight space, or re-drywalling the entire lower section. The labor involved far outstrips the cost of simply tiling the extra three square feet initially.
To prevent this entirely foreseeable disaster, you must tile down past the countertop line. For a flawless look, the tile should terminate at least two inches below the highest point of the appliance's rear deck. This guarantees that regardless of future appliance changes, the wall remains structurally and visually protected.
Case Study: The 30-Inch Slide-In Upgrade
Consider a typical 30-inch electric slide-in installation scenario. Before the delivery truck ever arrives, the savvy homeowner measures the exact width of the required cabinet cutout (usually 30 1/8 inches to allow for wiggle room). They mark these vertical plumb lines on the wall. They then apply the peel-and-stick tile across the entire gap, bringing it a full three inches below the countertop height line.
When the delivery team slides the new appliance into place, the overlapping side and rear metal flanges meet the newly tiled wall seamlessly. There is no visible drywall. The AFCS is maximized, creating the illusion of a kitchen remodel that cost thousands of dollars, executed entirely with precision planning and adhesive tiles.
If you are selecting a material for this highly visible area, aesthetics matter just as much as safety and durability. When factoring in long-term aesthetic appeal and the desire to create a genuinely luxurious focal point, our Blanco Chevron collection functions as the ultimate architectural standard. By empirically neutralizing the look of flat, outdated walls with sophisticated 3D textures, it calibrates the final output for high-end visual continuity that flawlessly complements sleek slide-in appliances.
Avoiding Flange Interference
You must verify final appliance dimensions before committing to tile edges. Some modern slide-in ranges come with optional rear filler strips designed to bridge the gap between the appliance and an un-tiled wall. Others are designed to push perfectly flush against a bare wall.
Herein lies the physical conflict: If you apply a heavily textured, premium 3D peel-and-stick tile, it adds measurable thickness (often 1/8 to 1/4 inch) to the wall. This added depth might prevent the slide-in range from sitting completely flush, causing it to jut out slightly past your lower cabinets. Always calculate the thickness of your chosen tile when mapping out the appliance's required depth clearance. You may need to adjust the placement of the 220V outlet to compensate for this newly lost depth.
Ready to Plan Your Layout?
Don't guess your dimensions. Use our professional measurement checklist to capture side reveals, rear gaps, and clearance heights before you buy your materials.
Download Ultimate Kitchen Measuring ChecklistWhat is the safest way to manage the gap behind a freestanding range?
*Frustrated by that dark, grease-catching void separating your freestanding oven from the newly tiled wall?*
*This section provides empirical solutions to bridge rear clearances safely, preventing debris buildup without compromising essential appliance ventilation.*
The safest way to manage the rear gap is by using a designated metal stove gap filler or a heat-rated silicone bridge. You must ensure the appliance’s required rear ventilation clearance remains unobstructed. You should absolutely never fill this structural gap with combustible materials like foam backer rod, thick beads of standard painter's caulk, or unsupported flaps of adhesive tile.
The gap behind a freestanding stove exists for a highly specific, multi-functional reason. It accommodates the bulky 220V electrical plug (which requires several inches of clearance), the rigid or semi-rigid gas supply line, and the crucial floor-mounted anti-tip bracket. Furthermore, modern ovens—especially those with digital control boards and convection fans—require robust ambient air circulation to cool their internal electronics. Choking off this airflow to achieve a flush aesthetic is a guaranteed path to appliance failure.
The Chimney Effect
To understand the danger of mismanaging this gap, think of the space directly behind your stove exactly like a chimney flue. Hot air inevitably escapes from the oven vents (usually located right beneath the rear control panel) and naturally rises up the back wall. If you mistakenly push the appliance too tightly against a vinyl peel-and-stick backsplash in an attempt to minimize the visual gap, you severely restrict this airflow, trapping this convective heat against the wall.
This trapped heat dramatically accelerates the performance degradation curve of the tile's adhesive backing. Over a few short months, the constant thermal cycling—rapid heating during cooking followed by rapid cooling—causes the adhesive to crystallize and lose its elasticity. Eventually, the tile corners will begin to lift, curl outward, and ultimately detach from the drywall, falling directly behind the stove.
Strategies for Gap Mitigation
If your range installation manual explicitly requires a two-inch gap to combustible surfaces, you must respect it without compromise. To manage the unsightly void visually without violating safety codes, follow these architectural guidelines:
- Install a Mechanical Gap Filler Purchase a specialized aluminum or brushed stainless steel T-molding strip designed for this exact purpose. These are engineered to safely bypass the gap, resting securely on the back metal lip of the stove console and touching the tiled wall lightly. They create a physical bridge for debris while allowing heat to dissipate laterally.
- Extend the Tile Lower for Optical Illusion Do not abruptly stop the tile exactly at the top horizontal line of the stove console. Continue the tile layout down behind the console by at least four to six inches. Even though it is mostly hidden, this crucial step creates an optical illusion of a continuous, robust wall assembly when viewed from varying angles in the kitchen.
- Use Dark Grout Lines to Shadow the Void If the side of your freestanding stove is exposed and the gap is visible when walking past, utilize a peel-and-stick tile pattern that features darker, contrasting borders (like a subway tile with charcoal faux-grout). The dark lines naturally draw the eye away and cast a visual shadow over the physical gap, making the transition significantly less jarring to the eye.
Maintaining a clean gap is not just about aesthetics; it is vital to the chemistry of the adhesive. As you cook, vaporized grease splatters become airborne, cool rapidly, and settle heavily into this rear crevice. Maintaining the cost-to-yield ratio of your budget kitchen upgrade requires proactive, structured cleaning routines. Stop guessing which chemicals will ruin your investment; unlock the specialized protocol benchmarked against our rigorous testing in We Tested Grease-Safe Ways to Clean Peel-and-Stick Tile. This guide yields an optimal configuration for surface longevity, showing you exactly how to cut through grease without melting the tile's finish.
Heavy, accumulated grease will slowly but surely dissolve acrylic adhesives chemically. It seeps into the microscopic edges of the tiles and acts as an aggressive solvent. Regular, non-abrasive maintenance fundamentally mitigates this highly specific, highly preventable type of material failure.
How should I evaluate heat resistance and removability for rental kitchens?
*Need a renter-friendly kitchen upgrade but terrified of forfeiting your security deposit due to melted adhesive or drywall damage?*
*This section outlines how to verify authentic heat resistance claims and select adhesive structures that guarantee clean, damage-free removal when your lease expires.*
The challenge for renters is inherently contradictory: you need a material tough enough to survive the hostile environment behind a hot stove, yet delicate enough to peel off without a trace when you move out. Renters must verify that a peel-and-stick product explicitly specifies a sustained heat resistance of at least 120°F (49°C). Furthermore, they must rigorously select a product utilizing a formulated removable adhesive that will not bond permanently to the delicate paper face of standard drywall.
Balancing high heat resistance with easy removability is arguably the most difficult aspect of a rental renovation project. The baseline chemistry of adhesives dictates their physical behavior over time, and you must understand the two primary categories:
Acrylic Adhesive (The Permanent Risk)
A permanent, pressure-sensitive glue that hardens over time as it cures. It creates a structural, cross-linked bond with porous surfaces like drywall. Ideal for homeowners looking for a 10-year lifespan, but a massive liability for renters, as it will fuse to the wall permanently.
Silicone/Gel Adhesive (The Renter's Choice)
A flexible, chemically engineered temporary bonding agent. It maintains a strong surface grip but is specifically formulated to release tension and break its bond cleanly when exposed to targeted, concentrated heat (like a hairdryer during removal).
The Renter's Dilemma
A distressingly common renter mistake is purchasing heavy, genuine stone composite or thick glass peel-and-stick tiles to cover up an ugly apartment kitchen. Because these materials carry significant physical weight, manufacturers are forced to back them with aggressive, permanent construction-grade adhesives just to keep them on the wall against the pull of gravity.
When it is time to move out, pulling these heavy tiles off will inexorably tear the drywall paper down to the raw gypsum core. The damage will be extensive, mimicking severe water damage. You will unequivocally lose your security deposit. The professional drywall repair and repainting costs will far exceed the initial budget you allocated for the backsplash, turning a cheap DIY project into a massive financial penalty.
Conversely, swinging too far in the other direction and buying the cheapest, thinnest vinyl decal stickers (often sold in huge sheets online) means the radiant heat from your electric stovetop will warp, bubble, and shrivel them almost instantly, creating an immediate fire hazard.
Identifying the Correct Material
To achieve a universally recognized paradigm of renter safety, you desperately need a functional middle ground. Look specifically for vinyl-gel composite tiles. These marvels of modern manufacturing offer a convincing 3D aesthetic—mimicking the grout lines and bevels of real tile—but remain lightweight enough to utilize renter-friendly gel backing.
For a comprehensive, fail-proof blueprint on executing this properly in leased spaces, equip yourself with expert knowledge. Discover the exact brands, materials, and tenant-friendly techniques in our comprehensive tutorial: DIY Peel and Stick Backsplash: Renter-Safe Kitchen Upgrade. This guide strictly adheres to damage-free protocols, offers reliable product parameters, and helps you navigate landlord negotiations with confidence.
The Clean Removal Protocol
When your lease finally ends and it's time to pack, do not simply grab a corner and rip the tiles off the wall like a bandage. This brutish approach is a guarantee for wall damage. Instead, follow a statistically significant, scientifically sound method for perfectly clean removal:
- Apply Concentrated Heat: Use a standard household hairdryer set to the highest heat setting. Hold the nozzle approximately six inches away from a corner tile for thirty to forty-five seconds. Do not use a commercial heat gun, as it will scorch the wall paint.
- Break the Bond: The targeted heat gently softens the temporary gel adhesive beneath the vinyl, effectively returning it to a semi-liquid, highly pliable state.
- Peel at a Sharp Angle: Grab the warmed corner and pull the tile back slowly at a sharp 45-degree angle directly back against itself. Crucial warning: Pulling straight out towards your body exponentially increases the physical tension on the wall, maximizing the risk of drywall paper tearing.
- Remove Lingering Residue: After all tiles are down, you may feel slight stickiness on the paint. Use a gentle citrus-based adhesive remover on a microfiber cloth to wipe away any lingering tackiness. Wash the wall with mild soap and water afterward.
If you are looking for a highly stylized option that perfectly balances a strong, vibrant visual impact with easily manageable, renter-safe adhesives, our Retro Retreat collection is an exceptional candidate. Benchmarked against standard, boring rental upgrades, it provides an immediate infusion of vintage aesthetic and personality without requiring the commitment (or the mess) of permanent mortar and grout.
Should I install the backsplash before or after a new appliance delivery?
*Replacing your old stove and wondering if the tile should go up before the heavy delivery crew arrives?*
*This section sequences the installation process, ensuring exact alignment without risking damage to the new appliance or wasting material on miscalculated gaps.*
You should absolutely install the backsplash after the old appliance is removed but firmly before the new one is permanently placed in its final position. You must measure the fresh, empty cabinet cutout to guarantee perfect tile alignment. Installing tile while a bulky, 200-pound appliance is still wedged in the way leads to a cascade of errors: crooked cuts, awkward, straining reaching, and poor adhesive pressure at the lowest, most critical points near the counter line.
Think of precision tiling exactly like tailoring a bespoke suit. You would never tailor the pants without taking precise, physical measurements of the person first. Tiling before confirming the actual, physical footprint of your new range guarantees spatial errors, especially when dealing with the unpredictable rear flanges of modern slide-in models.
Interactive Tool: Installation Timing Decision Tree
Are you keeping your existing stove or buying a new one?
The Logistics of Appliance Delivery
Appliance delivery crews are tasked with one primary objective: moving incredibly heavy metal boxes from their truck into your house as quickly and safely as possible. They are not concerned with, nor should they be responsible for, your delicate wall prep or freshly laid tile. If you install a fresh peel-and-stick backsplash the night before delivery, you are courting disaster because the adhesive has not had adequate time to cure.
Crucial Concept - Curing Time: The required 24 to 48-hour period where pressure-sensitive adhesives achieve their maximum chemical bond with the substrate (the wall). During this window, the tiles are vulnerable to shifting if bumped or subjected to immediate high heat.
If a rushed delivery worker bumps a newly tiled wall with the sharp corner of a 200-pound oven while maneuvering it into place, they will deeply gouge the soft vinyl and permanently shift the uncured tiles out of alignment, ruining hours of meticulous layout work.
The Optimal Installation Sequence
To bypass these logistical complexities and guarantee a professional-grade finish, strictly adhere to this operational sequence. Deviation from this timeline almost always results in aesthetic compromise or physical damage.
Disconnect the power safely at the breaker, or shut off the gas valve. Pull the old unit completely out of the kitchen to give yourself total freedom of movement in the workspace.
Wash the newly exposed wall meticulously. Decades of aerosolized grease, dust, and food splatter hide behind old stoves. Standard dish soap is not enough; use a heavy-duty TSP (Trisodium Phosphate) degreaser and allow the wall to dry completely.
Have the delivery crew bring the new range into the kitchen, but instruct them to leave it pulled out by at least three to four feet from the wall. Do not let them install it in the bay.
Use the new stove's installation manual to draw exact width and height guidelines on the wall using a laser level and a pencil. Mark where the top of the stove will sit.
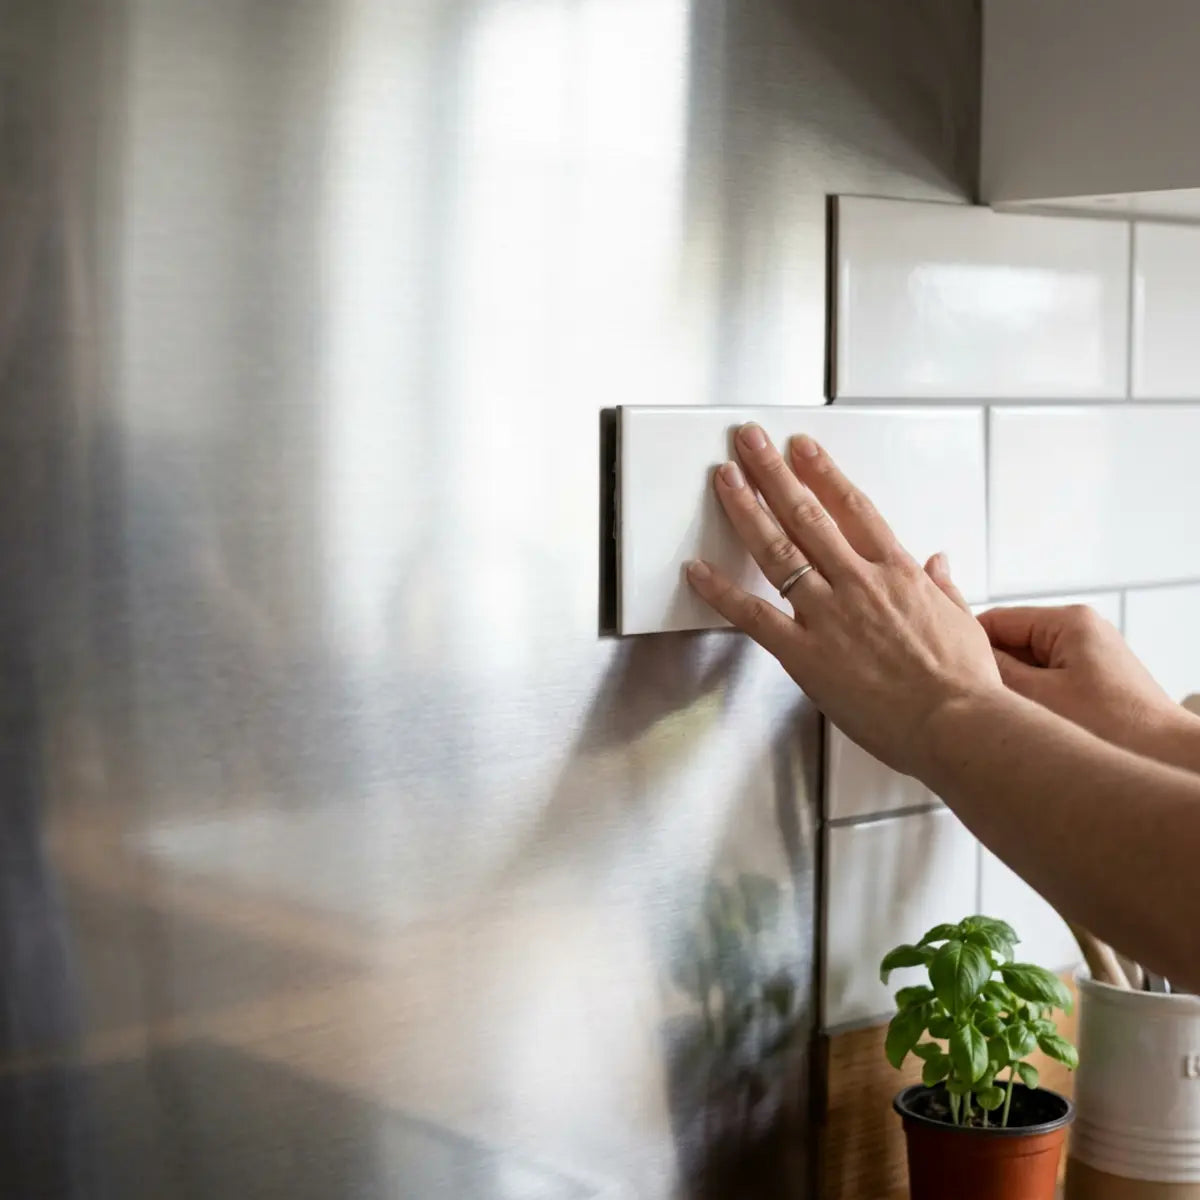
Stand comfortably in the empty gap. Without having to reach awkwardly over a stove top, you can apply your peel-and-stick tile with perfect leverage, ensuring intense, even pressure across every square inch of the adhesive backing.
Wait at least 24 hours for the adhesive to cure completely to the wall. Then, carefully slide the new appliance into its final position, checking clearances as it moves back.

Matching your tile to your newly delivered appliance is another crucial, yet frequently overlooked, step. The aesthetic relationship between the tile and the metal finish dictates the entire room's tone. A bright white subway tile might clash terribly with a slate gray fridge. Elevate your design strategy by leveraging the matching framework found in We Matched Backsplashes to 4 Appliance Finishes. This brilliant resource yields an optimal configuration for visual cohesion, especially when coordinating with complex, highly demanding finishes like black stainless steel, matte slate, or vintage white.
By tightly controlling the installation timeline, you protect your investment from both physical damage and poor craftsmanship. You completely avoid making awkward, dangerous cuts around live power outlets while standing on one leg. You ensure the tile extends deeply enough to hide any future gaps if the appliance settles. Most importantly, you guarantee the adhesive bonds to a perfectly clean, unobstructed wall, maximizing the lifespan of your renovation.
Frequently Asked Questions
Can I put peel-and-stick tile directly over existing ceramic tile behind my stove?
Yes, you can install peel-and-stick tiles directly over existing, flat ceramic tiles, providing a massive shortcut for rapid renovations. However, you must meticulously degrease the ceramic surface first, as years of cooking vapor will have glazed the ceramic. If the existing grout lines are deep (wider than 1/8 inch), you should fill them with a lightweight spackling compound or putty to create a perfectly flush surface. Failure to do so will cause the thin adhesive tile to slowly dimple into the deep grout lines over time as it warms up, completely ruining the visual continuity of the new finish.
How do I protect my peel-and-stick backsplash from boiling water and steam?
Steam from boiling pots poses a significant risk to adhesive bonds, as hot moisture can penetrate the microscopic seams between tiles. To actively protect the backsplash, always utilize your overhead range hood exhaust fan on high before you even turn on the burner to boil water. Furthermore, make it a habit to cook heavy steam items on the front burners whenever possible. This simple behavioral shift fundamentally mitigates the amount of direct moisture settling onto the adhesive seams along the back wall, vastly extending the life of the installation.
Will the heat from my oven's self-cleaning cycle melt the backsplash?
The self-cleaning cycle forces an oven to reach extreme internal temperatures to incinerate food waste, often exceeding a terrifying 800°F (426°C). This brutal process vents significant, highly concentrated heat forcefully out of the rear exhaust vent directly onto the lower backsplash area. Industry consensus dictates that you should always pull a freestanding range a few inches away from a peel-and-stick tiled wall before initiating a self-cleaning cycle to prevent catastrophic adhesive failure and potential discoloration of the vinyl face.
What should I do if the edges of my peel-and-stick tile start lifting near the stove?
If edges begin to lift due to localized thermal cycling or poor initial pressure, do not panic, and absolutely do not apply standard liquid super glue, which will melt the vinyl. Instead, use a specialized, heat-rated spray adhesive (like 3M High Strength) or a high-temperature silicone sealant. Apply a tiny amount under the lifted corner using a toothpick, press firmly to squeeze out air bubbles, and securely hold it flush with blue painter's tape for 24 hours. This recalibrates the baseline adhesion without damaging the surrounding tiles.
Final Thoughts
Successfully implementing a beautiful peel-and-stick backsplash directly behind a range is an entirely deterministic outcome. It does not rely on luck. It relies squarely on critically evaluating the heat source, proactively managing rear physical clearances, verifying product thermal limits, and sequencing the installation process properly.
By utilizing analytical metrics like the Heat-Gap-Adhesion Risk Score (HGARS) and the Appliance Fit Continuity Score (AFCS) detailed above, you completely remove the costly guesswork from your kitchen remodel. Whether you are navigating the incredibly tight tolerances of a sleek, modern induction slide-in or managing the rigorous, unforgiving safety requirements of a powerful freestanding gas range, structural knowledge is your ultimate tool.
Do not rely on generic, Pinterest-style aesthetic advice when dealing with the physical realities of high-output household appliances. Your safety and your home's value depend on practical execution.
Before purchasing your materials, take ten minutes today to pull your appliance forward. Measure the gap. Calculate your risk scores. Review the manufacturer’s manual for specific clearance mandates. Use our planning checklist to select the precise tile rated for your exact environment. By deeply respecting these operational thresholds, you guarantee a kitchen upgrade that is both visually stunning, financially savvy, and fundamentally safe for years to come.
Kommentar hinterlassen
Diese Website ist durch hCaptcha geschützt und es gelten die allgemeinen Geschäftsbedingungen und Datenschutzbestimmungen von hCaptcha.