


Respuesta rápida: estrategia de backsplash para house flipping
Al evaluar mejoras cosméticas para inversiones inmobiliarias, priorizar la velocidad y el impacto visual es fundamental. Aquí está la estrategia definitiva para utilizar adhesive wall treatments en flip properties:
- Apunta al público adecuado: Ideal para starter homes, mid-tier cosmetic flips y rental portfolios donde los compradores priorizan una estética moderna y limpia por encima de la artesanía de mampostería de lujo.
- Maximiza la credibilidad de reventa por día (RCD): Los adhesivos de alta calidad mejoran drásticamente la relación RCD al eliminar de 3 a 4 días de programación del contratista, curado del mortero y aplicación de la lechada.
- Ejecuta una rutina de preparación impecable: Un acabado seguro para la reventa exige desengrasado riguroso de las paredes, aclimatación térmica de los materiales y un recorte profesional de los bordes (como PVC o J-trim de aluminio) para simular el tile auténtico.
- Evita las zonas de alto riesgo: Nunca instales adhesivos estándar directamente detrás de ranges de gas de alto BTU sin backguards ni sobre drywall con textura pronunciada "knockdown".
Las últimas horas antes de que un anuncio inmobiliario salga en vivo son críticas. Estás en la cocina de tu último flip, el fotógrafo llega mañana por la mañana y el drywall pintado y anticuado sobre las encimeras está arruinando la estética. Una instalación completa de tile cerámico requeriría contratar a un profesional, esperar a que el mortero cure, aplicar la lechada y limpiar un desastre pesado, arruinando tanto tu cronograma como tu margen de beneficio.
En lugar de elegir entre un anuncio retrasado y una cocina de aspecto barato, necesitas una estrategia que priorice la velocidad sin sacrificar la percepción del comprador. Debemos replantear la decisión más allá del simple debate de “barato versus caro”. Para house flippers, la única métrica que importa es la Credibilidad de Reventa por Día. Esta es la cantidad exacta de mejora de cocina visible para el comprador generada por día de trabajo y costos de tenencia evitados.
Peel-and-stick tile puede ser un backsplash de cocina inteligente para house flipping cuando el objetivo es una mejora limpia, apta para cámara y completada en menos de 24 horas sin retrasos por mano de obra de tile. Funciona mejor en flips de nivel de entrada y de gama media cuando eliges estilos seguros para la reventa, preparas la pared correctamente y lo usas solo donde el escrutinio del comprador y la exposición al calor sean manejables.
Para ejecutarlo correctamente, ten en cuenta estos principios:
- Implementa un flujo de trabajo de 24 horas: Estandariza tu proceso de instalación para garantizar la finalización el mismo día.
- Prioriza una estética lista para cámara: Elige estilos que se vean como tile auténtico en las fotos del anuncio para generar tráfico inicial.
- Evalúa según la credibilidad de reventa: Mide cada opción de material por su Credibilidad de Reventa por Día, en lugar de centrarte solo en el precio inicial.
¿Vale la pena el peel and stick tile para house flipping?
¿Alguna vez has mirado una cocina anticuada el día antes de las fotos del anuncio y te has preguntado si una solución cosmética rápida arruinará la confianza del comprador durante la visita? Esta sección establece un marco claro de decisión para inversores, revelando exactamente cuándo el adhesive tile es el movimiento adecuado para la reventa y cuándo las cerámicas tradicionales siguen siendo el estándar necesario.
Para los inversores inmobiliarios, la respuesta es sí, pero solo para el nivel de propiedad adecuado, bajo condiciones específicas de la pared y dentro de plazos muy ajustados. Al evaluar materiales potenciales, debes calcular la Credibilidad de Reventa por Día (RCD). La RCD es una métrica que define la cantidad de mejora de cocina visible para el comprador creada por día de trabajo y demora de anuncio evitada.
Si un trabajo de tile tradicional retrasa tu anuncio cuatro días y cuesta $1,200 in en mano de obra, los costos de tenencia y la pérdida de impulso en el mercado deben compararse con el aspecto final. Las alternativas adhesivas, cuando se aplican correctamente, mejoran drásticamente la relación RCD para starter homes.
Mejores casos de uso: starter homes, rentals y cosmetic flips
¿Te preguntas si tu tipo de propiedad específico merece una mejora cosmética más rápida y ligera? Esta sección desglosa los escenarios ideales en los que los materiales adhesivos maximizan los retornos sin levantar señales de alerta entre los posibles compradores.
Por nuestra experiencia gestionando rehabilitaciones de propiedades, el perfil objetivo determina los materiales. Las casas para compradores primerizos, las propiedades de alquiler y los flips cosméticos ligeros son los entornos ideales para esta estrategia. En estas propiedades, los compradores o inquilinos priorizan la limpieza, la estética moderna y la asequibilidad por encima de la artesanía de lujo.
Un informe del Joint Center for Housing Studies de la Universidad de Harvard indica que las mejoras cosméticas menores, no estructurales, ofrecen retornos inmediatos de la inversión significativamente más altos que las reformas extensas con permisos. En una casa para compradores primerizos de $250,000, los compradores esperan una apariencia fresca y lista para entrar a vivir. Rara vez están inspeccionando las líneas de lechada con una lupa.
- Flips de nivel inicial: Rápidos tiempos de entrega en los que el valor después de la reparación (ARV)—el valor estimado de una propiedad una vez finalizadas todas las renovaciones—no justifica costos de materiales de lujo.
- Adiciones a carteras de alquiler: Propiedades en las que la durabilidad y la fácil sustitución entre inquilinos tienen más valor que la mampostería permanente.
- Actualizaciones de anuncios estancados: Viviendas que han permanecido en el mercado y necesitan una inyección visual repentina y de bajo costo para justificar una nueva publicación y un ajuste de precio.

Al establecer protocolos de evaluación estandarizados para mejoras no destructivas, el marco integral detallado en nuestra guía estratégica principal, Baldosas peel and stick DIY: mejora fácil de la cocina, proporciona la base cuantitativa necesaria para ejecutar esto de manera eficiente y garantizar que su presupuesto cosmético se asigne perfectamente al perfil de comprador objetivo.
Consejo profesional: cómo evitar la trampa del "acabado barato"
El error más común que cometen los flippers novatos es asumir que todas las opciones adhesivas son iguales. Para garantizar que su mejora parezca una decisión de diseño deliberada y no un atajo de bajo presupuesto, debe centrarse por completo en la textura y la profundidad.
Opte por materiales que presenten un recubrimiento realista de gel PU 3D o un núcleo de aluminio. Las láminas planas de vinilo impreso se verán falsas de inmediato para un inspector de viviendas o un comprador exigente. Además, nunca envuelva una baldosa adhesiva alrededor de una esquina exterior sin usar un remate metálico: los bordes adhesivos crudos y expuestos son la señal de alarma definitiva de un trabajo descuidado.
Identificando las señales de alarma: calor, humedad y comparables de lujo
¿Le preocupa que una solución rápida falle antes de tiempo o aleje a compradores de gama alta? Este segmento identifica las condiciones exactas del entorno y del mercado en las que las opciones adhesivas se convierten en un pasivo en lugar de un activo.
No todas las cocinas pueden soportar este flujo de trabajo. Debe identificar las señales de alarma desde el principio para evitar visitas desastrosas. Los principales enemigos de cualquier producto adhesivo son el calor excesivo, la humedad prolongada y los sustratos deficientes. Un Sustrato es la superficie subyacente —como drywall, yeso o baldosa existente— a la que se adherirá su nuevo material.
Si la cocina cuenta con una cocina de gas profesional de alto BTU sin un protector trasero adecuado, los adhesivos estándar fallarán. La curva de degradación del rendimiento se acelera rápidamente bajo calor extremo, provocando desprendimientos y burbujas que arruinan de inmediato la confianza del comprador.
- Mercados de alta gama: Si sus comparables inmobiliarios locales (comps) presentan mármol a medida o cerámicas esmaltadas a mano, usar un sustituto adhesivo alejará de inmediato a los compradores y dañará la percepción de calidad.
- Zonas de alta humedad: Las áreas directamente detrás de fregaderos de servicio con salpicaduras constantes requieren variantes impermeables específicas y con una calificación muy alta.
- Paredes texturizadas: Aplicar el material directamente sobre texturas pronunciadas de drywall tipo "orange peel" o "knockdown" garantiza una mala adhesión y bultos visibles.
Al considerar la degradación del rendimiento a largo plazo en cocinas activas, opciones excepcionalmente duraderas como Lemon Zest™ funcionan como el estándar arquitectónico. Al neutralizar empíricamente la deformación por calor cerca de las estufas, calibra el rendimiento para las zonas principales de cocción, asegurando que el material sobreviva tanto al período de puesta en escena como al uso inicial del nuevo propietario.
La mejora segura para la reventa frente al atajo de ahorrar en las esquinas
¿Le preocupa que su solución rápida parezca un proyecto de manualidades barato para un inspector de viviendas? Esta sección aclara la diferencia vital entre una mejora estratégica y segura para la reventa y un atajo descuidado que daña su marca.
Existe una línea muy fina entre una decisión inteligente de un inversor y un atajo evidente para ahorrar en lo importante. Una mejora segura para la reventa se basa en una preparación meticulosa y en la selección de materiales de alta calidad. Un atajo consiste en pegar plástico barato sobre paredes sucias y grasientas con la esperanza de que nadie lo note.
Una idea errónea común entre los flippers novatos es que todos los materiales adhesivos parecen falsos. En realidad, la apariencia "falsa" casi siempre es el resultado de una mala coincidencia de patrones, de texturas de pared visibles que se transparentan y de no rematar correctamente los bordes expuestos con molduras.
- La preparación lo es todo: La pared debe desengrasarse con un limpiador de alta resistencia (como TSP) y lijarse hasta quedar plana.
Para lograr un resultado determinista y evitar un desprendimiento desastroso antes del fin de semana de puertas abiertas, dominar el arte del aclimatado térmico no es negociable. Descubre por qué saltarse este paso arruina los flips en nuestra guía definitiva, Probamos la regla de 48 horas para el azulejo peel and stick, que establece el umbral operativo para la estabilidad del material, garantizando que el adhesivo se adhiera de forma permanente.
Si buscas una estética vanguardista que enganche a los compradores al instante y aumente de forma notable el atractivo de la propiedad, explorar conceptos adhesivos aprobados por diseñadores en nuestra guía Diseño de cocinas 2024: las mejores ideas de backsplash peel & stick te dará una gran ventaja competitiva frente a otros anuncios locales.
Home staging, fotografía y psicología del comprador
¿Tienes curiosidad por saber cómo una pequeña actualización de pared realmente influye durante una jornada de puertas abiertas de fin de semana? Este análisis explica cómo los materiales estratégicos influyen en los anuncios digitales y en la psicología del comprador en persona.
En la era moderna, el sector inmobiliario se vende dos veces: primero en una pantalla digital y luego durante el recorrido físico. La Asociación Nacional de Agentes Inmobiliarios (NAR) informa constantemente que las fotos de alta calidad del anuncio reducen drásticamente los días en el mercado. Tu backsplash de cocina ocupa un lugar visual privilegiado en estas fotos.
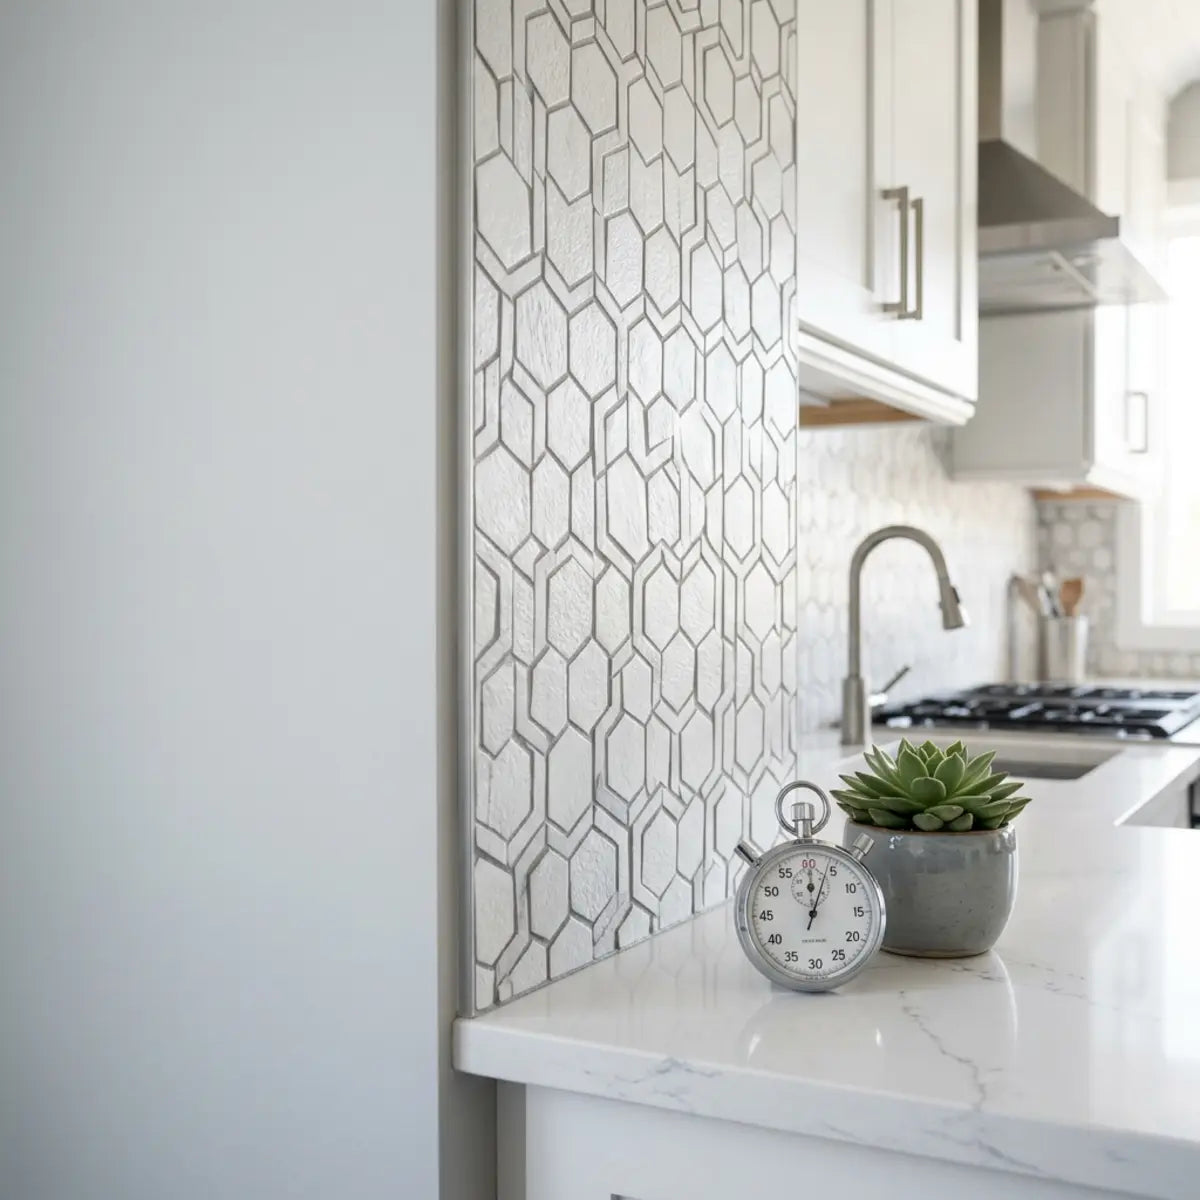
Si el espacio entre tus gabinetes y encimeras es un vacío opaco, sin pintar, la cocina se siente inacabada. Un patrón brillante y geométrico refleja la luz, haciendo que los espacios pequeños parezcan más grandes y más caros. Durante el recorrido físico, el comprador promedio hace un juicio subconsciente sobre el estado de la vivienda en los primeros treinta segundos.
- El gancho digital: Los azulejos de alto contraste llaman la atención mientras los usuarios se desplazan rápidamente por las plataformas de anuncios inmobiliarios en línea.
- La percepción de limpieza: Las superficies brillantes y fáciles de limpiar transmiten a los compradores que la vivienda es higiénica y está bien mantenida.
- El disparador emocional: Una cocina terminada permite a los compradores imaginarse cocinando y recibiendo invitados, en lugar de calcular los costos de la reforma.
Para sortear el escepticismo visual, utilizar perfiles de alto contraste y de atractivo universal como el Minty Ceramic 8 sirve como un paradigma reconocido universalmente para mejoras listas para cámara. Neutraliza de forma inherente la sensación de “inacabado” del drywall desnudo, proporcionando exactamente el estímulo visual que buscan los compradores.

Credibilidad de reventa por día: la referencia determinista
¿Necesitas datos duros para justificar saltarte el mortero y la lechada? Esta sección ofrece una evaluación clara y estandarizada de cómo se comparan los distintos materiales cuando el tiempo es tu activo más caro.
Para evaluar de verdad tus opciones, debemos mirar los datos. El azulejo cerámico tradicional puede ofrecer un alto valor de reventa global, pero su RCD suele ser devastadoramente bajo para plazos ajustados. En cambio, no hacer nada (dejar una pared pintada) no aporta ninguna credibilidad.
El consenso del sector dicta que debemos sopesar el impacto visual frente a las horas de trabajo necesarias para lograrlo. A continuación, se presenta una evaluación estandarizada que compara el rendimiento diario de varios enfoques.
Al analizar el RCD, se demuestra empíricamente que las opciones adhesivas de alta calidad ofrecen una configuración óptima para los inversores que trabajan con plazos de publicación inferiores a 30 días.
¿Cuánto cuesta un backsplash peel and stick para una cocina pequeña de flip?
¿Necesita cifras precisas para incluir en su hoja de cálculo de rehabilitación antes de comprar materiales? Este desglose ofrece rangos de presupuesto realistas para inversores en cocinas pequeñas y medianas, lo que le permite proteger sus márgenes sin sacrificar el aspecto final.
Calculadora de presupuesto para cocina de flip
Introduzca las dimensiones de su cocina a continuación para comparar al instante la preservación del margen entre el tile tradicional y una estrategia adhesiva rápida.
Los inversores necesitan rangos de costos reales, no estimaciones vagas de blogs de aficionados de fin de semana. Cada dólar gastado en cosmética debe calcularse frente a la Tasa de Preservación del Margen (MPR). La MPR es el porcentaje de su margen proyectado de flip que se protege al elegir una solución más rápida y rentable sin introducir un riesgo de reventa inaceptable.
Los cálculos del costo total deben incluir desperdicio, piezas de remate para bordes, suministros para la preparación de la pared y el valor de la mano de obra del tiempo que ahorra al omitir trabajos de albañilería. El material más barato en el estante rara vez es la mejor decisión para el margen si su mala calidad hace que tenga que reemplazarlo antes de la jornada de puertas abiertas.
Rangos típicos de pies cuadrados para cocinas de flip
¿No está seguro de cuánto material requiere realmente su distribución específica? Esta sección define las áreas de cobertura estándar para los planos de planta habituales de flip, para que pueda pedir con precisión a la primera.
Antes de calcular los costos, debe definir el alcance del espacio de trabajo. Un error común es medir solo el espacio directo detrás de la estufa e ignorar las zonas cruciales debajo de los gabinetes superiores. Clasificamos las cocinas de flip en dos categorías distintas de tamaño.
La pequeña cocina tipo galera, típica en condominios urbanos o starter homes más antiguas, generalmente requiere de 20 a 30 pies cuadrados de cobertura. La cocina mediana de concepto abierto, con una isla pequeña y una encimera en forma de L, normalmente exige de 35 a 50 pies cuadrados.
- La zona de la estufa: El espacio directamente detrás del rango hasta la campana extractora. Es un área de alta visibilidad y alta exposición al calor.
- El tramo de gabinetes: El espacio continuo entre la encimera y la parte inferior de los gabinetes superiores, por lo general midiendo 18 inches de alto.
- El salpicadero del fregadero: El área detrás del fregadero de la cocina, que se extiende hasta el alféizar de una ventana o un gabinete superior.
Una medición precisa mitiga fundamentalmente el riesgo de retrasos a mitad del proyecto. Mida siempre la longitud lineal total de sus encimeras y multiplíquela por la altura vertical (normalmente 1.5 feet) para obtener su metraje cuadrado base.
Bandas de costo de materiales: económico, intermedio y premium
¿Abrumado por las enormes variaciones de precio en línea y en las grandes superficies? Este desglose categoriza los costos actuales de materiales, ayudándole a alinear su presupuesto con el nivel de calidad esperado de su flip.
Los costos de los materiales varían enormemente según el grosor, la textura y la calidad del adhesivo. Para un inversor, entender estas bandas de costo es fundamental para maximizar la tasa de preservación del margen. Con base en los promedios actuales de grandes minoristas como Home Depot y Lowe's, podemos segmentar el mercado.
Las opciones económicas (a menudo vinilo delgado) oscilan entre $3 y $6 por pie cuadrado. Las opciones de nivel intermedio, que introducen texturas a base de gel que imitan el vidrio, van de $7 a $12. Las opciones premium, con piedra de corte fino real o aluminio con reverso adhesivo, van de $13 a $25 por pie cuadrado.
- Banda económica ($3-$6/pie cuadrado): Ideal para alquileres de gama baja. Muy susceptible al calor y al desprendimiento si la preparación no es perfecta.
- Banda intermedia ($7-$12/pie cuadrado): El punto ideal para la mayoría de los flips. Excelente profundidad visual y adhesivos confiables de alta adherencia.
- Banda premium ($13-$25/pie cuadrado): Útil para flips de gama más alta en los que necesita una estética real de metal o piedra, pero aun así requiere una entrega en 24 horas.
Comparado con renovaciones tradicionales, descubrir de forma segura las mejores estrategias para una intervención cosmética por menos de $100 es crucial. El marco integral detallado en Cómo renovar la cocina con poco presupuesto en 2025 proporciona la base cuantitativa para ejecutar estas soluciones de presupuesto ajustado sin comprometer la comercialización de la vivienda.
Márgenes comparativos: cerámica, pintura y paneles
¿Se pregunta cómo se comparan financieramente las opciones adhesivas frente al mortero, la pintura o los paneles rígidos de pared? Este segmento compara el costo total de propiedad entre distintos métodos para asegurarse de proteger su margen final.
El precio de etiqueta engaña. Para calcular los costos reales, debe mirar el costo total de propiedad (TCO) de la fase de instalación. Una loseta cerámica de $4 por pie cuadrado parece más barata que una loseta adhesiva de $8 por pie cuadrado, pero esto ignora el mortero de capa delgada requerido, la lechada, los separadores, el alquiler de una sierra para azulejos y la mano de obra especializada.
Para garantizar que su inversión resista el escrutinio exigente de los compradores y el uso a largo plazo, es absolutamente esencial encontrar las opciones más duraderas y resistentes al calor del mercado. Descubra las variantes mejor valoradas y las opciones profesionales en nuestro desglose completo de Las mejores peel and stick tiles para backsplash de cocina 2025 para proteger su margen final.
Un colocador profesional de azulejos suele cobrar entre $40 y $80 por pie cuadrado solo en mano de obra. Si intenta hacerlo usted mismo, está quemando días valiosos que podrían dedicarse a tareas de mayor valor, como jardinería o los últimos detalles de la lista de pendientes.
- TCO de cerámica: Materiales ($4-$10) + Mano de obra/Suministros ($40-$80) = $44 a $90 por pie cuadrado.
- TCO de pintura: Materiales ($1) + Mano de obra ($0, DIY) = $1 por pie cuadrado (pero ofrece un valor de reventa insignificante).
- TCO de panel rígido: Materiales ($10-$15) + Adhesivos/Remates ($5) = $15 a $20 por pie cuadrado (a menudo se ve demasiado comercial).
Al evaluar la relación costo-rendimiento, los materiales adhesivos se ajustan estrictamente a los presupuestos más ajustados, a la vez que evitan las enormes primas de mano de obra asociadas con la albañilería tradicional.
Cómo calcular desperdicio, excedente y coincidencia de patrones
¿Cansado de quedarse sin material a las 9 PM la noche antes de que una propiedad salga a la venta? Esta sección explica exactamente cuánto excedente pedir para tener en cuenta cortes complicados y patrones complejos.
Un gasto que a menudo se pasa por alto en el presupuesto de un flip es el factor de desperdicio. Las láminas adhesivas requieren cortes precisos alrededor de tomacorrientes, alféizares de ventanas y gabinetes desiguales. Si está usando un material con un patrón complejo y repetitivo, como un chevrón o un mosaico geométrico, su factor de desperdicio aumenta significativamente.
Para una ejecución completamente infalible que prácticamente elimina el costoso desperdicio y los frustrantes errores de coincidencia de patrones, se recomienda encarecidamente dominar técnicas impecables de aplicación DIY para cualquier inversor. Siga las metodologías paso a paso en Cómo instalar un backsplash peel and stick fácilmente para garantizar un acabado perfecto en su primer intento.
El estándar del sector para patrones básicos de azulejo subway es pedir 10% de material extra. Sin embargo, como despegar y volver a colocar un azulejo adhesivo cortado por error suele arruinar su capacidad de adhesión, los flippers deberían aumentar este margen de seguridad para proteger su cronograma.
- Patrones de cuadrícula estándar: Añade un 10% extra al total de pies cuadrados.
- Patrones subway/escalonados: Añade un 15% extra para tener en cuenta la alineación de los bordes.
- Patrones en espiga/complicados: Añade un 20% extra, ya que al alinear la geometría hay que descartar grandes secciones recortadas.
Un consejo profesional para inversores: conserva siempre uno o dos paquetes sin abrir del mismo lote de tinte exacto. Guárdalos en el cuarto de servicio para el nuevo comprador, ofreciendo una solución sencilla si una pieza se daña meses después de la venta.
La calculadora del inversor: costo por pie cuadrado vs. velocidad
¿Listo para ver cómo se combinan todos los números en una decisión final y accionable? Esta sección ofrece una fórmula clara y cuantitativa para evaluar exactamente cuánto margen conservas al elegir una instalación de alta velocidad.
Autoevaluación: ¿El peel-and-stick es adecuado para este flip?
Haz esta rápida evaluación de 3 preguntas antes de comprar materiales para asegurarte de tomar una decisión segura para la reventa.
1. ¿Cuál es el perfil demográfico objetivo de esta propiedad?
2. ¿Cuál es el estado del drywall detrás de las encimeras?
3. ¿Cuál es tu cronograma de publicación?
Para calcular la tasa de conservación del margen, debemos sopesar el desembolso financiero total frente al tiempo ahorrado. Examinemos una cocina de flip de tamaño mediano de 30 pies cuadrados. Supondremos un costo de mantenimiento (impuestos, seguro, intereses del préstamo) de $50 por día.
Si el azulejo tradicional cuesta $1,500 en total y tarda cuatro días, gastas $1,500 más $200 in en costos de mantenimiento ($1,700 en total). Si el azulejo adhesivo de nivel medio cuesta $350 en total y tarda un día, gastas $350 más $50 in en costos de mantenimiento ($400 en total).
El consenso del sector dicta que la diferencia de $1,300 en el escenario anterior representa pura conservación de margen. A continuación se muestra la evaluación estandarizada de la tasa de conservación del margen en materiales comunes.
Estos datos confirman que, para rehabilitaciones de propiedades de nivel sublujo, las soluciones adhesivas modernas están diseñadas para evitar costes de mano de obra innecesarios, lo que proporciona una ventaja estadísticamente significativa para la rentabilidad del inversor.

Reflexiones finales
La decisión de utilizar una estrategia de backsplash de 24 horas no consiste en atajar el trabajo; se trata de una gestión inteligente del activo. Al evaluar tus opciones a través de las lentes de Credibilidad para la reventa por día y Tasa de preservación del margen, eliminas la emoción del proceso de renovación.
El peel-and-stick tile no es una solución universal para todas las viviendas, pero cuando se aplica sobre una pared estructuralmente sólida en una propiedad de nivel inicial o de mercado medio, ofrece la transformación visual rápida que esperan los compradores. Te permite mantener el impulso, satisfacer a los cazadores de casas digitales con fotos de anuncio llamativas y mantener a tus contratistas centrados en tareas de mayor rendimiento.
Antes de hacer tus compras finales de materiales, te recomendamos descargar una lista de comprobación completa para flips, comparar distintos perfiles de materiales para tu mercado objetivo específico y revisar guías relacionadas sobre el retorno de la inversión en cocinas para asegurarte de que tu próximo anuncio esté posicionado para lograr el máximo impacto.
Obtén la Lista de comprobación para inversores de "Backsplash en un día"
No empieces tu proyecto sin nuestro flujo de trabajo en PDF, paso a paso, diseñado específicamente para house flippers. Incluye listas exactas de suministros, cronogramas de 24 horas y las técnicas de preparación precisas necesarias para garantizar que tu instalación supere las inspecciones de los compradores.
Preguntas frecuentes
¿Puedo instalar peel and stick tile directamente sobre azulejo cerámico antiguo en un flip?
Sí, instalar sobre el azulejo existente es una excelente estrategia para evitar una demolición costosa, siempre que la superficie actual esté lisa, limpia y firmemente adherida. Debes desengrasar a fondo el azulejo viejo y asegurarte de que las líneas de lechada no sean excesivamente profundas. Si las juntas antiguas son muy profundas, quizá necesites aplicar una fina capa de masilla para crear un sustrato continuo y al ras; de lo contrario, el nuevo adhesivo podría hundirse visiblemente en los canales de la lechada vieja, delatando el atajo.
¿Cómo manejo los bordes para que no parezca plástico barato?
Los bordes expuestos y sin rematar son la forma más rápida de arruinar la confianza del comprador. Debes usar piezas de acabado especializadas. Los profesionales inmobiliarios usan moldura J de aluminio, remate de borde de PVC o masilla cuidadosamente aplicada y del color adecuado para enmarcar la instalación. Aplicar un cordón fino y preciso de silicona a lo largo del borde inferior donde el azulejo se encuentra con la encimera no solo impermeabiliza la unión, sino que también imita el aspecto de una línea de lechada tradicional, aumentando drásticamente la credibilidad visual.
¿Los préstamos para house flippers o los tasadores me penalizarán por usar materiales adhesivos?
Por lo general, los tasadores evalúan las viviendas según los metros cuadrados, el número de dormitorios y baños, y el estado general, en lugar de inspeccionar a fondo la composición molecular de un backsplash de cocina. Siempre que el material esté bien adherido, tenga un aspecto moderno y funcione como barrera contra el agua, cumple con el requisito básico de una cocina terminada. Los prestamistas convencionales de hard money se fijan en el After Repair Value (ARV); una cocina limpia, coherente y bien fotografiada respalda un ARV más alto, independientemente de si el backsplash requirió mortero.
¿Qué pasa si cometo un error y desalineo una lámina durante la instalación?
Las modernas baldosas adhesivas de alta calidad utilizan un reverso agresivo sensible a la presión. Si aplicas una ligera presión durante la colocación inicial, por lo general puedes despegarla de inmediato para realinearla. Sin embargo, una vez que se aplica una presión firme y alisada, la unión es casi permanente. Si necesitas retirar una lámina bien adherida, usa una pistola de calor o un secador para ablandar el adhesivo, despégala lentamente y utiliza un removedor de adhesivo (como Goo Gone) para limpiar el sustrato antes de aplicar una lámina nueva.

Deja un comentario
Este sitio está protegido por hCaptcha y se aplican la Política de privacidad de hCaptcha y los Términos del servicio.