


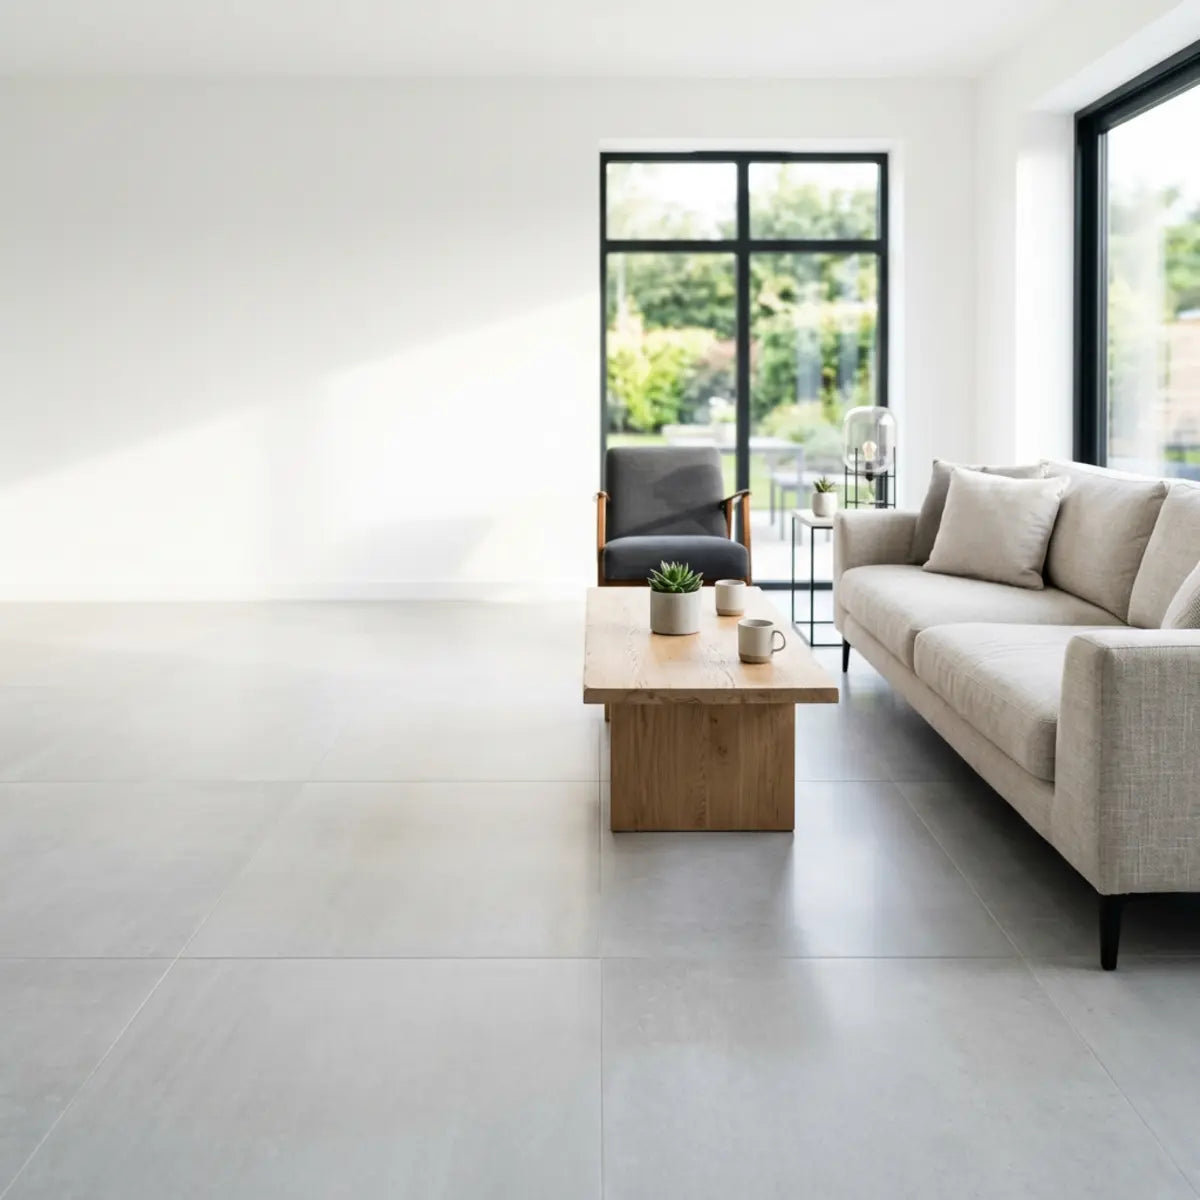
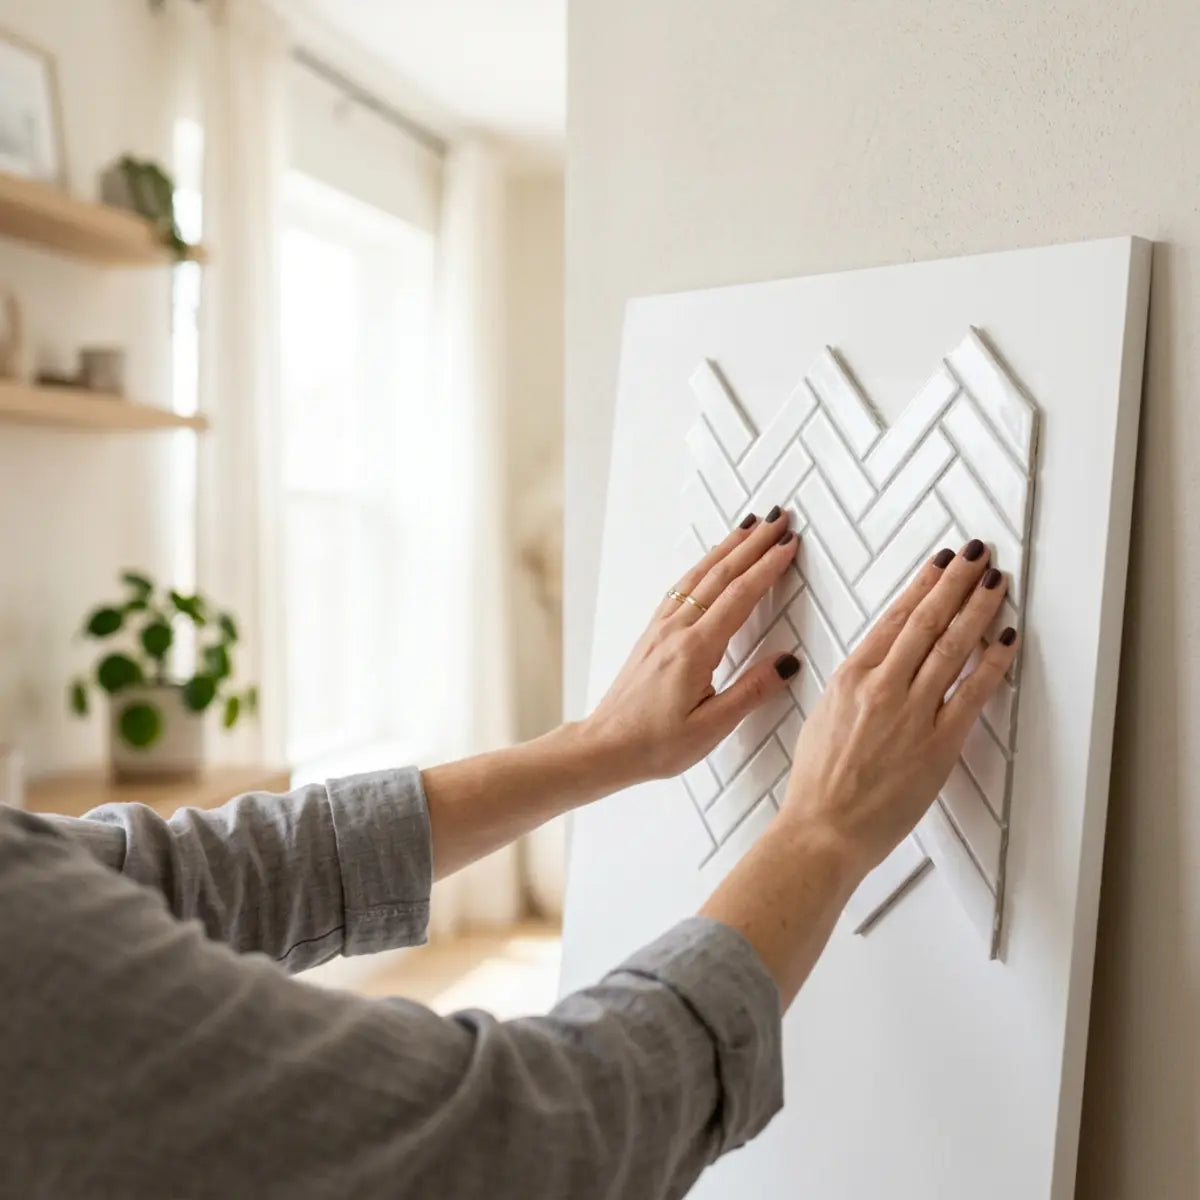
El panorama moderno de la renovación de la cocina ha sido completamente revolucionado por los avances en materiales de bricolaje para el hogar. Atrás quedaron los días en que una impresionante mejora de baldosas requería mezclar mortero sucio, alquilar una sierra de agua y pasar días recuperándose del esfuerzo físico de la instalación tradicional. Las opciones autoadhesivas premium de hoy ofrecen transformaciones visuales impresionantes en una fracción del tiempo. Sin embargo, esta accesibilidad trae consigo un nuevo conjunto de desafíos de diseño que los propietarios deben navegar con cuidado. El éxito visual de tu proyecto no depende solo del color o el patrón que elijas, sino, de manera crucial, del acabado superficial específico y de cómo interactúa con tu entorno.
Pasas horas desplazándote por fotos de inspiración perfectamente estilizadas, por fin eliges un bonito backsplash y dedicas el fin de semana a instalarlo. Pero en el momento en que enciendes los under-cabinet LEDs o la luz de la mañana golpea la pared, un glare cegador rebota прямо en tus ojos. Lo que se veía elegante en línea de repente se siente abrumador y duro en la realidad.
Para la mayoría de las cocinas luminosas, un peel-and-stick backsplash matte es la opción más segura para controlar el glare, ocultar las fingerprints cotidianas y crear un aspecto diario más suave. Los acabados glossy pueden funcionar excepcionalmente bien en cocinas más oscuras o espacios pequeños que necesitan desesperadamente más rebote de luz. Sin embargo, las superficies de alto brillo suelen mostrar reflexions intensas bajo ventanas y under-cabinet LEDs.
Si quieres un punto medio confiable, un satin finish suele ser el mejor equilibrio entre brightness y comodidad visual.
El glare, en última instancia, depende del acabado elegido combinado con la dirección de la iluminación y el tipo específico de bombilla. Una superficie matte suele ganar en comodidad visual y control de manchas en hogares con mucho tráfico. En cambio, el glossy funciona mejor cuando la brightness ambiental de la habitación importa más que el control de reflections. A continuación exploraremos los compromisos visuales exactos y las realidades de mantenimiento. Comprender el delicado equilibrio entre luz, espacio y textura es el arma secreta de los diseñadores de interiores profesionales. Al dominar estos principios, elevas tu proyecto de bricolaje de una simple manualidad de fin de semana a una sofisticada mejora arquitectónica.
El espectro de acabados para backsplash
Visualizar cómo se difunde la luz sobre diferentes superficies fabricadas es crucial. A continuación se muestra un espectro conceptual que demuestra cómo cambia la reflectancia de la luz desde cero glare hasta una intensidad similar a un espejo.
Dispersa los fotones en todas direcciones. Aspecto aterciopelado. Sin reflections marcadas.
Resplandor suave. Captura la luz ambiental de la habitación pero difunde los haces LED directos y duros.
Acabado tipo espejo. Rebota la luz en línea recta. Maximiza la sensación de espacio.
¿Cuál es realmente la diferencia entre los acabados matte y glossy de un peel-and-stick backsplash?
¿Alguna vez te has preguntado por qué una peel-and-stick tile se ve totalmente diferente en tu cocina que en línea?
Esta sección define las diferencias de acabado usando un comportamiento visual objetivo y la respuesta a la iluminación, dejando de lado el lenguaje subjetivo de decoración.
La diferencia fundamental radica por completo en cómo sus superficies físicas interactúan con los rayos de luz. Los acabados matte dispersan la luz entrante en múltiples direcciones para difuminar naturalmente el glare. Los acabados glossy reflejan los rayos de luz de manera uniforme en una sola dirección, creando puntos brillantes intensos.
Para entender estos materiales, debemos definir claramente cómo se fabrican para los compradores de bricolaje. Cuando las fábricas producen baldosas de vinilo o gel de poliuretano, la capa superior de desgaste se diseña específicamente mediante un proceso de curado. La textura aplicada durante esta etapa final determina todo sobre cómo se verá visualmente el producto en tu hogar.
- Acabado Matte: Una superficie diseñada con texturas microscópicas pensadas para difundir la luz, ofreciendo baja reflectividad y una apariencia plana y apagada. Esta microtextura es prácticamente invisible a simple vista, pero actúa como miles de pequeños prismas, rompiendo los haces de luz intensos.
- Acabado Glossy: Una superficie lisa y muy reflectante diseñada para rebotar la luz directamente, imitando el aspecto del vidrio pulido o la cerámica esmaltada. El proceso de curado de las baldosas glossy implica alisar completamente los polímeros, sin dejar ninguna alteración en la superficie.
- Acabado Satin: Un enfoque de fabricación híbrido que ofrece una reflectividad leve con un brillo suave, diseñado para evitar un glare duro y cegador sin perder una sensación táctil lisa que facilita la limpieza.
El factor más crítico en esta comparación es el concepto de Light Reflectance Value. Light Reflectance Value (LRV)—el porcentaje de luz visible que una superficie refleja en lugar de absorber. Una baldosa glossy estándar puede presumir de un LRV del 80 al 90 por ciento, devolviendo casi toda la luz a la habitación. Un equivalente matte auténtico suele situarse por debajo del 40 por ciento. Este porcentaje determina por completo cuánta brightness tendrá tu cocina sin encender luces adicionales.
La brightness visual es totalmente diferente de la comodidad visual. Una cocina puede ser luminosa sin causar fatiga visual. La Illuminating Engineering Society (IES) señala que controlar la reflectancia de las superficies es fundamental para una iluminación de tareas funcional. Cuando cortas verduras, necesitas comodidad visual, no solo brightness en bruto. En el diseño de cocinas comerciales, las normativas estrictas limitan las superficies de alto LRV cerca de las estaciones de preparación para evitar precisamente este tipo de fatiga óptica. Los aficionados al bricolaje que llevan baldosas glossy a su hogar a menudo pasan por alto este principio ergonómico.

Las superficies de subway tile en relieve o texturizadas se comportan de manera diferente a los paneles planos impresos. Un panel plano glossy actúa como un espejo perfecto, reflejándolo todo sin fallos. Una baldosa glossy en relieve rompe un poco la reflexión a lo largo de sus líneas de lechada falsas y bordes biselados, pero las superficies elevadas aún crean puntos brillantes intensos.
Piensa en una baldosa glossy como un lago en calma que refleja el sol perfectamente hacia tus ojos. Una baldosa matte funciona como un océano agitado, rompiendo la luz entrante en un resplandor suave, disperso y manejable por toda la superficie.
Para evaluar correctamente estas superficies, el consenso de la industria exige ir más allá de la estética. Nos basamos en una evaluación estandarizada llamada Glare Control Score (GCS). Esta métrica mide la comodidad visual cotidiana bajo iluminación directa en una escala del 1 al 10, sustituyendo valoraciones vagas centradas solo en el estilo.
El marco integral detallado a continuación proporciona la base cuantitativa necesaria aquí. Demuestra empíricamente cómo los distintos recubrimientos superficiales de vinilo y gel mitigan o agravan fundamentalmente el glare. Entender el material base es tan importante como el acabado. Si quieres profundizar en la integridad arquitectónica de estas capas y en cómo el núcleo real de la baldosa afecta la durabilidad, nuestra guía definitiva de materiales es lectura esencial antes de comprar.
Análisis en profundidad Vinyl vs. Gel vs. Rigid Core: La guía definitiva de materiales para peel and stick tile (edición 2026) Descubre las diferencias clave entre las peel and stick tiles de vinyl, gel y rigid core. Aprende sobre durabilidad, costo y diseño para elegir el suelo perfecto con imágenes comparativas y datos reales de durabilidad. Haz clic para leer la guía completa.Consejo de diseñador profesional: La prueba de luz en 3 fases
Nunca compres una caja completa de azulejos basándote solo en una foto en línea. Pide muestras de acabados matte y glossy. Pégalas directamente en la pared donde se instalarán. Debes evaluarlas en tres momentos específicos: 1. Desayuno (8 AM): Comprueba cómo la luz intensa de la mañana incide sobre el acabado. 2. Mediodía (1 PM): Evalúa el brillo ambiental e indirecto de la habitación. 3. Noche (8 PM): Enciende todos tus under-cabinet LEDs y las luces del techo para detectar puntos de glare cegador. Solo así podrás tomar una decisión informada.
| Tipo de acabado | Valor de reflectancia de la luz (LRV) | Puntuación de control de glare (1-10) | Mejor entorno de iluminación | Nivel de confort visual |
|---|---|---|---|---|
| True Matte | Bajo (<40%) | 9/10 | Luz solar intensa, LEDs directos | Excelente |
| Satin / Eggshell | Medio (40-60%) | 7/10 | Luz natural difusa, luces del techo | Muy bueno |
| High Gloss | Alto (>80%) | 3/10 | Baja luz natural, zonas de sombra | Pobre (alta fatiga) |
| Embossed Glossy | Alto (>75%) | 4/10 | Luz ambiental moderada | Aceptable |
¿Qué acabado de backsplash oculta mejor las huellas, las manchas y las marcas de agua?
¿Te preocupan las limpiezas constantes que exige la zona alrededor de la estufa y el fregadero de la cocina?
Esta sección ofrece expectativas realistas de mantenimiento basadas en la visibilidad de la suciedad cotidiana, para ayudarte a evitar superficies que requieren mucho cuidado.
Los acabados matte ocultan empíricamente mucho mejor las huellas, las rayas y las manchas de agua seca que las alternativas glossy. La superficie difusa, ligeramente текстurizada, interrumpe el contorno visual de las manchas. Las superficies glossy, en cambio, resaltan al instante los aceites y los minerales del agua mediante un fuerte contraste visual. Cuando la luz incide sobre una huella grasosa en un azulejo high-gloss, el aceite altera el índice de refracción de ese punto concreto, haciéndolo muy visible sobre el acabado de espejo perfecto que lo rodea.
Hay una diferencia enorme entre una superficie que se limpia fácilmente y una superficie que es fácil de mantener limpia a la vista. Los compradores a menudo confunden ambas cosas. Una superficie glossy puede limpiarse con facilidad con una sola pasada de una toalla de papel, pero hace que cada nueva mancha sea hipervisible entre una limpieza profunda y la siguiente. Esto crea un ciclo de limpieza constante de manchas que frustra a muchos propietarios que pensaban que estaban eligiendo una opción de bajo mantenimiento.
Los acabados matte gestionan de forma excepcional la visibilidad de las realidades cotidianas de la cocina. La bruma de grasa de la estufa se integra en una superficie matte, atenuándola ligeramente en lugar de crear texturas manchadas evidentes. Las manchas de agua dura cerca del fregadero pierden sus contornos nítidos y costrosos sobre un acabado plano. La ciencia detrás de esto está relacionada con la tensión superficial; como las superficies matte son ligeramente porosas o texturizadas a nivel microscópico, las gotas de agua se dispersan más ampliamente en lugar de formar gotas compactas y dejar anillos minerales concentrados al evaporarse.

Las superficies con patrones y las líneas de lechada falsas también disimulan la suciedad de forma distinta a las láminas planas y continuas. Un azulejo glossy con un patrón muy marcado ocultará mucho mejor una huella dactilar que un azulejo glossy blanco sólido. El color y el contraste de la lechada interactúan mucho con la elección del acabado para determinar la visibilidad general de la suciedad. Los patrones visuales complejos obligan al ojo humano a trabajar más para identificar anomalías (como la suciedad), ofreciendo un camuflaje natural.
Piense en una estación de café muy usada. Cada vez que toma una taza o limpia los posos derramados, los nudillos pueden rozar el backsplash. En una superficie glossy, esas interacciones diarias dejan un rastro de huellas dactilares manchadas. En una superficie matte, la evidencia prácticamente desaparece en la textura.
Medimos esta realidad diaria con una Puntuación de Visibilidad de Suciedad Diaria (DMVS). Esta puntuación patentada actúa como un punto de referencia determinista para el mantenimiento cotidiano y evalúa con qué rapidez una superficie parece sucia después del uso normal de la cocina. Evaluar el ROI general del ciclo de vida implica entender las diferencias de limpieza entre materiales. Si su objetivo principal es minimizar la frustración de la limpieza, debe fijarse en cómo se compara el peel-and-stick con las alternativas líquidas y engorrosas.
Análisis comparativo de la suciedad Comparamos la suciedad del backsplash: peel-and-stick vs epoxy ¿Quiere una mejora de cocina sin suciedad? Compare backsplash peel and stick vs epoxy por costo, limpieza, vapores y dificultad antes de elegir. En lugar de tratar peel-and-stick y epoxy como ideas de bricolaje separadas, este artículo ofrece a los lectores un veredicto directo cara a cara. Haga clic para leer más.Al considerar el mantenimiento a largo plazo, es obligatorio seguir estrictamente los protocolos de limpieza adecuados para proteger el acabado. Usar los productos químicos incorrectos puede alterar de forma permanente el brillo de su azulejo, derritiendo la capa de difusión matte o eliminando la capa transparente glossy. Entender la compatibilidad con solventes es absolutamente crítico para la durabilidad de su inversión.
Protocolos de mantenimiento Probamos desengrasantes en un backsplash peel and stick Probado, no adivinado: aprenda cómo limpiar la grasa del backsplash peel and stick de forma segura sin dañar el acabado ni el adhesivo. Vea qué funciona. Ofrece a los lectores una respuesta respaldada por evidencia en lugar de consejos genéricos de limpieza. Haga clic para ver los resultados de la prueba.| Factor de mantenimiento | Acabado matte auténtico | Acabado satin | Acabado high gloss |
|---|---|---|---|
| Visibilidad de huellas dactilares | Muy baja | Baja a moderada | Extremadamente alta |
| Contraste de las manchas de agua | Bajo | Moderado | Alto (muy visible) |
| Visibilidad de la película de grasa | Se integra | Se ve como manchas opacas | Se ve como vetas aceitosas |
| Visibilidad de rayas (después de limpiar) | Rara | Ocasional | Común sin limpiacristales |
| Puntuación de Visibilidad de Suciedad Diaria (DMVS) | 8/10 (Excelente) | 6/10 (Bueno) | 3/10 (Malo) |
¿Cómo afecta la iluminación LED bajo gabinete al glare del tile peel-and-stick?
¿Sus luces bajo gabinete convierten su backsplash recién instalado en un espejo distractor y cegador?
En esta sección se explica cómo la iluminación direccional interactúa con el brillo del tile y ofrece estrategias prácticas de colocación.
Las luces LED bajo gabinete crean haces de luz concentrados y muy direccionales que convierten al instante los backsplash glossy en espejos duros y cegadores. Los acabados matte o muy texturizados neutralizan de forma eficaz este efecto de glare localizado al dispersar el haz de luz concentrado antes de que llegue a sus ojos. La proximidad de la fuente de luz a la superficie de la pared intensifica este efecto óptico.
Los diodos modernos de tira LED emiten una luz increíblemente intensa y enfocada. Cuando se instalan a solo unos centímetros por encima de una superficie high-gloss, el ángulo de reflexión rebota la luz directamente hacia la línea de visión de cualquiera que trabaje en la encimera de la cocina. Esto crea una fuerte fatiga visual durante la preparación de alimentos. A diferencia de las bombillas incandescentes tradicionales, que proyectan un resplandor cálido y omnidireccional, los diodos LED expuestos proyectan columnas de luz concentradas que generan reflejos muy definidos y agresivos.
Desglose visual: anatomía de un punto caliente LED
Al analizar un backsplash glossy bajo una tira LED sin pantalla, notarás tres zonas distintas de interferencia:
- ▼ El resplandor máximo (parte superior 3 inches): Una franja sólida de luz blanca deslumbrante que borra por completo el color del azulejo.
- ▼ El reflejo del diodo (sección central): Puntos individuales, nítidos, amarillos o blancos que reflejan los chips LED reales directamente hacia tus ojos.
- ▼ El rebote del mostrador (sección inferior): Glare secundario que rebota en las encimeras brillantes y vuelve hacia los azulejos inferiores.
Este fenómeno está impulsado por la reflexión especular. Reflexión especular—la reflexión precisa, como de espejo, de la luz en una superficie, donde el ángulo de entrada es igual al ángulo de salida. Este es exactamente el principio de física óptica que causa los puntos cegadores directamente debajo de tus armarios superiores. Como las encimeras suelen medir alrededor de 36 inches de altura, y los armarios superiores estándar se sitúan a 54 inches, la geometría garantiza que las reflexiones especulares lleguen a los ojos de cualquiera que esté cerca de la encimera.
Una idea equivocada muy común es que simplemente bajar la intensidad de los LED solucionará el reflejo glossy. Atenuar reduce la salida total de luz, pero no cambia la reflexión especular nítida de los diodos LED individuales. Solo verás puntos más tenues, pero igual de definidos, reflejados en el azulejo. Es un problema estructural y geométrico, no estrictamente un problema de brightness.
Si de verdad debes usar un azulejo peel-and-stick glossy debajo de los armarios, necesitas una intervención de iluminación. Instala siempre tus tiras LED dentro de canales de aluminio equipados con difusores de plástico grueso y esmerilado (a menudo llamados "milky covers"). Esto dispersa la luz antes de que llegue al azulejo, suavizando el reflejo inevitable y mezclando los puntos duros de los diodos en un haz continuo y más suave.
Al mitigar la reflexión especular, la textura física de la superficie actúa como una intervención crítica y necesaria. No puedes depender solo de ajustes de iluminación. Debes seleccionar materiales diseñados para absorber y dispersar haces direccionales a nivel microscópico. Un azulejo de gel perfectamente plano no tiene defensa contra fotones direccionales; solo puede ceder ante el glare especular.
Productos como la Colección Pristine White Moroccan funcionan aquí como el estándar arquitectónico. Al neutralizar empíricamente los puntos calientes mediante texturas 3D realistas y un acabado controlado, reajustan las expectativas base de confort visual bajo iluminación direccional intensa. Si dependes mucho de tu under-cabinet LEDs para preparar comidas, priorizar una opción texturizada y no reflectante es una necesidad funcional.
Producto recomendado para control de glare Compra azulejos de la Colección Pristine White Moroccan Mejora tu hogar con los azulejos peel and stick de la Colección Pristine White Moroccan. Estos azulejos autoadhesivos y sin lechada ofrecen una estética moderna y limpia, perfecta para renovar el backsplash de tu cocina, las paredes del baño o cualquier espacio personalizado. Instalación fácil, diseño desmontable y texturas 3D realistas creadas específicamente para mitigar el glare direccional.¿Los azulejos peel-and-stick glossy pueden hacer que una cocina pequeña parezca más grande?
¿Te cuesta una cocina tipo galley oscura, estrecha y poco acogedora que se siente pequeña?
Esta sección revela cómo los acabados glossy estratégicos pueden rebotar la luz ambiental y ampliar con éxito tu espacio visual.
El mito
"El azulejo glossy siempre hace que una cocina pequeña se vea más grande y mejor."
La realidad
Los acabados glossy solo amplían el espacio si hay luz ambiental real para reflejar. En cocinas totalmente oscuras, lo glossy solo parece plástico; necesita una fuente de luz para hacer su magia.
Sí, los acabados glossy pueden hacer que una cocina pequeña se sienta notablemente más grande al reflejar la luz ambiental y actuar como un espejo sutil que ensancha la habitación. Este efecto de "bounce light" aumenta la profundidad percibida del espacio, fingiendo metros cuadrados mediante una ilusión óptica. La percepción espacial humana depende mucho de las pistas de los límites. Cuando una superficie de pared refleja la habitación sobre sí misma, al cerebro le cuesta definir el tope duro del límite, interpretando inconscientemente el espacio como más amplio de lo que realmente es.
En cocinas afectadas por poca luz natural o ventanas pequeñas, los verdaderos acabados matte absorben la poca luz que existe, apagando la habitación. Las superficies glossy captan cada lumen disponible y maximizan su alcance, devolviendo la luz a las sombras. Por eso rara vez ves pintura matte negra en pequeños apartamentos de sótano; la absorción es enemiga de la sensación de espacio.
Conviene entender la iluminación ambiental. Luz ambiental—la iluminación general, no direccional, presente en una habitación, totalmente separada de los focos intensos. Los azulejos glossy se benefician de la luz ambiental, convirtiendo estancias apagadas en espacios vibrantes y luminosos sin generar fatiga visual dolorosa. La luz suave filtrada por una persiana o rebotada en un techo blanco crea un brillo perfecto y uniforme sobre un azulejo de gel high-gloss.
Piensa en un baño pequeño sin ventanas. Los diseñadores usan con frecuencia grandes espejos high-gloss que cubren paredes enteras para engañar al cerebro y hacerle percibir el doble de espacio. Un backsplash glossy en la cocina utiliza exactamente los mismos principios psicológicos y ópticos, solo a una escala ligeramente menor.

Muchos compradores DIY asumen que glossy siempre equivale a un glare terrible. Esto es completamente falso. El glare severo solo ocurre con luz directa, intensa y sin pantalla. En condiciones de iluminación suave, indirecta o orientada al norte, los acabados glossy simplemente brillan con elegancia, elevando el ambiente de toda la cocina. Si tu cocina tiene techos altos y ventanas amplias que no reciben el sol directamente sobre las paredes, glossy es un recurso de diseño fenomenal.
Maximizar la reflectancia de la luz requiere evaluar el umbral operativo de la superficie del azulejo en entornos con poca luz. Elegir un acabado solo por tendencias, sin analizar el déficit de luz natural de tu cocina, conduce a resultados decepcionantes y sombríos que requieren demasiada iluminación artificial para corregirse. Tienes que trabajar con la arquitectura que tienes, no con la que desearías tener.
Los azulejos peel-and-stick de pared Minty Ceramic 8 ofrecen una configuración óptima para espacios pequeños y oscuros. Su brillo glossy específico mitiga fundamentalmente la absorción de la poca luz. Esto proporciona un aumento estadísticamente significativo de la brightness percibida de la habitación en comparación con alternativas planas matte instaladas exactamente en las mismas condiciones.
Producto recomendado de alto LRV Compra azulejos Minty Ceramic 8 Actualiza tu hogar con las baldosas de pared autoadhesivas Minty Ceramic 8. Estas baldosas autoadhesivas y sin lechada aportan un aspecto fresco y moderno a cualquier espacio, por lo que son perfectas para transformar el backsplash de tu cocina, las paredes del baño o zonas decorativas personalizadas. Instalación fácil, impermeables, muy reflectantes y duraderas.¿Los backsplashes peel-and-stick matte son más difíciles de mantener limpios?
¿Te preocupa que un acabado matte atrape la grasa de cocina y se niegue a soltarla?
Esta sección aclara la diferencia entre ocultar la suciedad y eliminarla de verdad, con datos objetivos sobre limpieza.
Cuestionario rápido de autoevaluación: ¿qué tipo de iluminación de cocina usas más?
Selecciona tu principal situación de iluminación a continuación para ver qué acabado maneja mejor de forma natural el mantenimiento y el glare en tu espacio.
Los backsplashes matte son un poco más difíciles de limpiar físicamente porque su superficie microtexturizada crea fricción microscópica contra la esponja. Aunque ocultan mejor la suciedad diaria, las salpicaduras intensas de grasa requieren un desengrasante específico y un fregado suave, en lugar de una simple pasada en seco sin esfuerzo.
Las superficies de alto brillo son completamente lisas, lo que permite que las toallas de papel y los paños de microfibra se deslicen sin esfuerzo por el panel. Las superficies matte presentan picos y valles microscópicos. Microtextura—pequeñas variaciones de la superficie invisibles a simple vista, pero que se sienten fácilmente como resistencia física o arrastre al limpiar. Ese arrastre es justamente la propiedad que dispersa la luz para evitar el glare; no puede haber difusión sin fricción.
Cuando la grasa del tocino salpica un azulejo glossy, queda justo sobre el recubrimiento liso. Una sola pasada suele eliminarla. Cuando esa misma grasa cae sobre un azulejo matte, se deposita en los valles microscópicos del acabado, y necesita un disolvente (como un desengrasante a base de surfactantes) para extraerla de forma eficaz, ya que limpiar solo con fricción podría simplemente extenderla más profundamente en la textura.
Las pruebas de usabilidad con consumidores muestran que las superficies matte auténticas requieren aproximadamente entre un 15 y un 20 por ciento más de presión física para eliminar aceites de cocina secos y pegajosos en comparación con sus equivalentes de alto brillo. Estás cambiando limpieza visual por una rutina de limpieza profunda un poco más laboriosa los fines de semana. Para los propietarios que odian ver el desorden diario, este intercambio vale totalmente la pena.
Nunca uses estropajos abrasivos como lana de acero o esponjas abrasivas fuertes sobre baldosas peel-and-stick matte. Aunque el acabado oculta la suciedad, el vinilo o el recubrimiento en gel sigue siendo susceptible a los arañazos. Los abrasivos arruinarán de forma permanente la capa de difusión matte, creando zonas opacas, brillantes y dañadas. En su lugar, usa limpiadores enzimáticos o fórmulas estándar de jabón para platos que descomponen químicamente los enlaces lipídicos.
La calidad del material determina por completo qué tan fácilmente un acabado matte libera la suciedad sin degradarse químicamente con el tiempo. Los plásticos matte más baratos se vuelven permanentemente pegajosos cerca de fuentes de calor debido a la migración de plastificantes, atrapando polvo y suciedad para siempre. Los recubrimientos premium de poliuretano resisten esta degradación por calor y mantienen su acabado preciso durante años.
La evaluación estandarizada incluida en nuestras reseñas exhaustivas de marcas comparó directamente a los principales competidores entre sí. Demostró de forma empírica que los recubrimientos matte premium resisten las manchas permanentes, estableciendo un nuevo estándar para la durabilidad y la facilidad de mantenimiento de las baldosas matte. Si quieres un acabado matte que no se convierta en un imán pegajoso para el polvo, debes comprar calidad.
Datos de referencia de calidad Las mejores marcas de backsplash peel and stick revisadas ¿No sabes qué backsplash peel & stick dura más? Probamos rigurosamente las mejores marcas de Amazon, Home Depot y Wayfair en durabilidad, resistencia al agua y valor. ¡Obtén información de expertos! Descubre qué fórmulas matte realmente liberan la suciedad.¿Cómo influyen el presupuesto y la mano de obra en tu decisión de acabado?
¿Intentas equilibrar un aspecto de diseñador de alto nivel con un presupuesto ajustado y apto para inquilinos?
Esta sección compara el valor a largo plazo y la realidad de la instalación de distintos acabados para proteger tu bolsillo.
Matriz de decisión por escenario
- 1 Cocina luminosa + cocina intensiva Ganador: MATTE. La abundancia de luz resaltará cada huella en una superficie glossy. Matte te mantiene tranquilo.
- 2 Cocina con poca luz + cocina ligera Ganador: GLOSSY. Necesitas más reflexión de la luz que la capacidad de ocultar salpicaduras de grasa intensas.
- 3 Apartamento de alquiler + presupuesto ajustado Ganador: SATIN/MATTE. Más tolerante durante una instalación complicada sobre paneles de yeso imperfectos, evitándote costes de material desperdiciado.
- 4 Iluminación LED intensa bajo los gabinetes Ganador: MATTE. Es absolutamente necesario para evitar reflejos bruscos de los diodos, a menos que instales difusores esmerilados costosos.
Tu elección específica de acabado rara vez afecta el precio de compra inicial de las baldosas peel-and-stick, pero sí impacta mucho el costo total de propiedad (TCO). Un acabado glossy barato y de baja calidad muestra arañazos y desgaste con una rapidez increíble, obligándote a reemplazarlo mucho antes que un equivalente matte. Al evaluar una mejora DIY, debes tener en cuenta la vida útil de la integridad estética, no solo si el adhesivo se pega.
Durante el proceso real de instalación DIY, las baldosas glossy no perdonan. Si tu cúter se resbala un poco o tu herramienta de alisado arrastra un trozo afilado de suciedad por la superficie, un acabado glossy mostrará de inmediato un microarañazo permanente y muy visible. El acabado perfecto tipo espejo no deja absolutamente ningún margen para errores de principiante. Al instalar varias láminas alrededor de cortes complejos para enchufes, esta presión puede ser increíblemente frustrante.
Los acabados matte son increíblemente tolerantes durante la instalación. Ocultan de forma natural pequeños errores de corte, marcas de instalación y leves imperfecciones de la pared detrás del azulejo. Si tu panel de yeso de base tiene pequeñas hendiduras, un azulejo glossy podría deformarse ligeramente y evidenciar esa imperfección mediante reflejos distorsionados. Matte absorbe la luz y oculta por completo las fallas del sustrato. Esta durabilidad prolonga la vida visual del backsplash, asegurando que tu mejora económica luzca impecable durante años, no solo meses.
Los inquilinos deben prestar mucha atención a esta dinámica. Si necesitas un backsplash temporal que resista dos años de uso intensivo sin verse desgastado, un acabado satin o matte, más indulgente, es una apuesta financiera mucho más segura que un delicado acabado espejo high-gloss. Cuando llegue el momento de mudarte, quieres que el proceso de retirada sea tan limpio como la instalación.
Al calcular la relación costo-rendimiento de cualquier mejora de cocina, la mano de obra y los ciclos de reemplazo son métricas críticas. Un azulejo barato que requiere reemplazo al cabo de doce meses es, en esencia, más caro que un azulejo premium que resiste cinco años de fregado diario. La matemática financiera del DIY favorece claramente hacer bien el trabajo una sola vez, usando un acabado que se adapte a tu estilo de vida.
Los datos empíricos de nuestros análisis de costo se adhieren estrictamente a los modelos estándar de depreciación. Demuestran que utilizar paneles DIY duraderos reduce drásticamente el gasto inicial sin comprometer la integridad estética a largo plazo. Si estás comparando el costo del peel-and-stick de gama alta frente a contratar a un contratista para cerámica real, la brecha financiera es enorme.
Análisis financiero Peel and Stick vs. Azulejo cerámico: comparación de costo y mano de obra 2026 Compara los costos, la mano de obra y la durabilidad del backsplash peel and stick de 2026 frente al azulejo cerámico. Descubre qué opción se ajusta a tu presupuesto de remodelación de cocina de U.S. Haz clic para leer el desglose financiero completo.Además, el análisis comparativo de referencia en nuestras comparaciones entre marcas valida estas afirmaciones. Demuestra que invertir en recubrimientos premium mitiga fundamentalmente los costos de reemplazo temprano, lo que genera una ventaja estadísticamente significativa en los presupuestos de los inquilinos a largo plazo.
Comparativa entre marcas Stickwoll vs. las mejores marcas de azulejos peel and stick de 2025 ¿Estás eligiendo los azulejos peel and stick adecuados? Mira cómo se compara Stickwoll con las mejores marcas en durabilidad, opciones de diseño únicas y precio. Lee la comparación completa para asegurarte de que tu dinero vaya a materiales premium.Reflexiones finales
¿Listo para tomar la decisión final sobre la mejora de tu backsplash de cocina?
Esta sección ofrece un resumen claro y definitivo para guiar tu compra con confianza.
Lista de verificación para elegir el acabado antes de comprar
No pases por caja hasta que puedas marcar estos pasos fundamentales de evaluación:
Tu decisión final debe basarse por completo en las condiciones de iluminación específicas de tu cocina y en tus hábitos personales de limpieza, no solo en fotos de inspiración de moda. Matte es, de forma empírica, la mejor opción de bajo glare; glossy funciona muy bien en espacios oscuros selectos, y satin ofrece una opción intermedia perfectamente equilibrada.
Deja de adivinar basándote en fotos de internet muy editadas. Debes evaluar tus fuentes de luz reales y físicas. Pide muestras físicas de ambos acabados y pégalas directamente debajo de tus gabinetes. Obsérvalas por la noche con las luces LED encendidas y de nuevo durante la luz brillante de la mañana.
Te invitamos a comparar directamente las muestras de acabados en tu propio espacio antes de comprometerte con una pared completa. Explora nuestras opciones de peel-and-stick de bajo glare y consulta nuestras guías de compra detalladas para asegurarte de que tu próximo proyecto DIY produzca un resultado hermoso, cómodo y duradero.
Preguntas frecuentes
¿Se ve más realista el azulejo matte o glossy?
Los acabados matte y satin suelen verse mucho más realistas que los acabados high-gloss en la categoría peel-and-stick. Los plásticos glossy muy reflectantes a menudo rebotan la luz de una manera que revela su naturaleza de vinilo o gel. Un acabado matte difunde la luz y imita mucho mejor la apariencia natural y sólida de la piedra, la pizarra o el azulejo cerámico sin esmaltar.
¿Cómo se reduce el glare en un backsplash glossy ya instalado?
Si ya instalaste un backsplash peel-and-stick glossy y odias el glare, la mejor intervención es cambiar la iluminación. Instala canales difusores gruesos y esmerilados sobre cualquier tira de LED under-cabinet para suavizar la fuente de luz. Como alternativa, cambia las bombillas LED blancas frías y brillantes (4000K+) por bombillas más cálidas y suaves (2700K) para reducir al instante la dureza del reflejo de la superficie.
¿Es el azulejo peel-and-stick satin una buena solución intermedia?
Sí, un acabado satin es un excelente y muy práctico punto intermedio para la mayoría de los aficionados al DIY. Ofrece una configuración óptima que capta algo de luz ambiental para que la cocina se sienta luminosa, sin reflejar el glare intenso y puntual causado por la luz solar directa o la iluminación de trabajo. También logra un buen equilibrio entre ocultar las fingerprints diarias y permitir limpiezas rápidas sin esfuerzo.
¿Un backsplash matte hará que mi cocina pequeña se vea demasiado oscura?
Un backsplash matte real absorbe la luz, así que no ayudará a rebotar la luz ambiental por una cocina diminuta sin ventanas. Si tu objetivo principal es hacer que un espacio oscuro se vea más grande y brillante, matte no es la opción óptima. Sin embargo, si tu cocina pequeña recibe mucha luz natural o tiene una iluminación superior increíblemente brillante, un acabado matte funcionará perfectamente sin oscurecer la habitación.

Deja un comentario
Este sitio está protegido por hCaptcha y se aplican la Política de privacidad de hCaptcha y los Términos del servicio.