


En bref : peut-on poser du carrelage sur du MDF ?
Poser du peel-and-stick tile directement sur du MDF demande une préparation spécifique en raison du caractère très poreux du matériau. Pour une installation réussie et durable, il faut traiter la chimie du substrat avant d’appliquer tout adhésif.
- MDF brut : Très poreux et sujet à la poussière. Ne pas poser directement.
- MDF peint : Nécessite une évaluation soigneuse de l’état de séchage et de l’adhérence de la peinture. Procédez avec prudence.
- MDF apprêté (shellac) : La référence en architecture intérieure. Scelle les fibres, limite le dégazage et crée une adhérence optimale. Fortement recommandé.
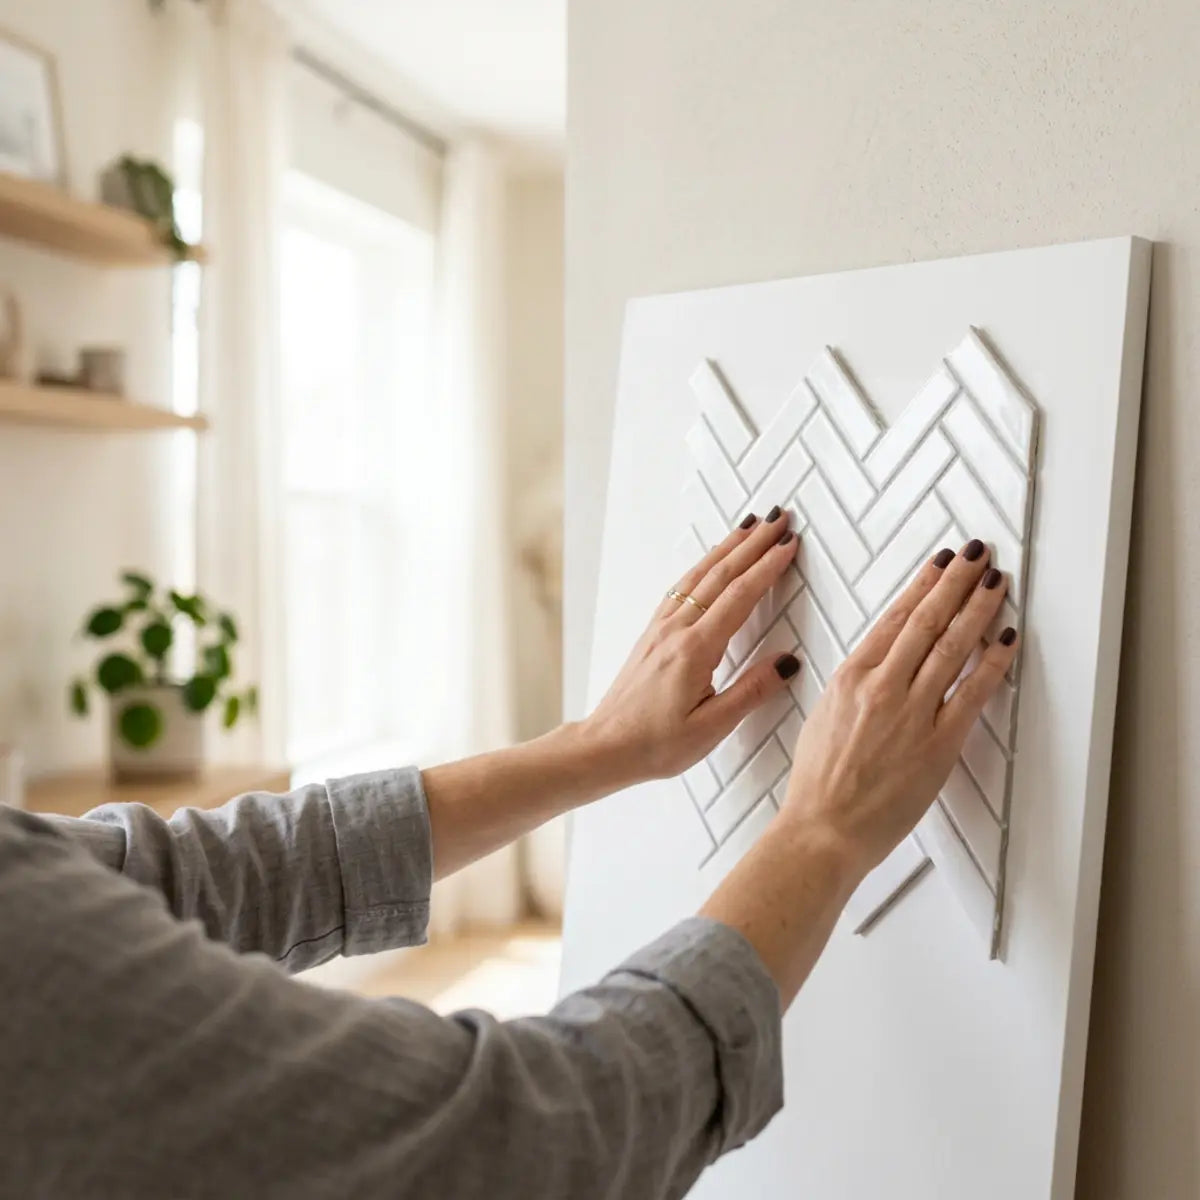
L’univers de la décoration intérieure moderne a connu un énorme regain d’intérêt pour les meubles encastrés sur mesure et les aménagements intégrés haut de gamme. Les propriétaires délaissent de plus en plus les murs plats et sans relief pour adopter des détails architecturaux riches, qui apportent à la fois du caractère et des rangements fonctionnels. Les salons se transforment avec des bibliothèques du sol au plafond, tandis que les salles à manger gagnent en élégance grâce à des arrière-cuisines de majordome sophistiquées. Cette renaissance du DIY et de la menuiserie sur mesure s’est naturellement combinée aux progrès rapides des finitions architecturales, en particulier des carreaux composites haut de gamme.
Cependant, la rencontre entre menuiserie sur mesure et finitions adhésives modernes soulève des défis complexes de science des matériaux. Lorsqu’on planifie un aménagement intégré haut de gamme, la vision esthétique va souvent plus vite que la préparation technique. Vous imaginez peut-être un superbe renfoncement carrelé derrière vos étagères ouvertes, mais la réussite de ce projet dépend entièrement des couches invisibles sous le carrelage. Le substrat — le matériau structurel sous-jacent — dicte en silence la longévité de votre projet. Dans les meubles encastrés sur mesure, ce substrat est presque toujours du MDF (panneau de fibres à densité moyenne).
Vous vous demandez si vos meubles intégrés en MDF sur mesure peuvent supporter une mise à niveau rapide avec du carrelage ? Vous avez besoin d’une réponse claire avant de dépenser votre budget.
Le peel-and-stick tile peut adhérer au MDF, mais le MDF brut est une surface à haut risque, car la poussière, la porosité et l’absorption des fibres affaiblissent l’adhésif sensible à la pression. Lors de notre test de préparation du MDF, un MDF apprêté et entièrement sec a offert l’adhérence la plus fiable pour des meubles intégrés sur mesure, tandis que le MDF brut était le moins fiable et que le MDF peint nécessitait une évaluation minutieuse de la surface avant la pose.
Nous avons testé les variables exactes qui déterminent le succès ou l’échec sur le MDF (panneau de fibres à densité moyenne). Nos conclusions recentrent tout le projet sur l’état de préparation du substrat. La qualité de la préparation est le facteur décisif de votre installation, pas la marque de carrelage que vous choisissez.
Ce guide vous livre notre verdict testé sur le MDF brut, apprêté et peint. Nous détaillons le workflow de préparation le plus sûr pour les meubles intégrés et les fonds de bibliothèque. Nous abordons aussi les étapes essentielles de dépannage en cas de bords qui se décollent ou d’échec d’adhérence.
Le peel-and-stick tile adhère-t-il vraiment au MDF ?
Vous craignez que des conseils génériques sur la pose de carrelage sur bois ne s’appliquent pas à votre projet en MDF sur mesure ?
Cette section donne un verdict direct fondé sur nos tests de substrat, en montrant précisément pourquoi le MDF nécessite un scellement spécifique pour éviter les échecs d’adhérence.

Oui, le peel-and-stick tile peut tout à fait adhérer au MDF, mais seulement si la surface est correctement scellée et entièrement sèche. Traiter le MDF brut comme une plaque de plâtre standard ou du contreplaqué fini est la recette garantie de l’échec.
Le MDF brut agit comme une éponge rigide. Sa structure très poreuse retire agressivement l’humidité des adhésifs. Ce processus d’appauvrissement réduit fondamentalement la force d’adhérence du carrelage.
Pour vraiment mesurer l’ampleur de ce défi, il faut voir comment le MDF est conçu en usine. Le MDF (panneau de fibres à densité moyenne) est fabriqué à partir de bois durs et de bois tendres résiduels, réduits en fibres dans un défibreur. Ces fibres de bois microscopiques sont ensuite mélangées à de la cire et à des résines de formaldéhyde spécialement formulées. Le mélange est soumis à une chaleur intense et à une pression énorme pour former des panneaux denses et plats. On obtient ainsi une planche remarquablement lisse, sans veinage naturel, idéale pour être coupée et rainurée par les menuisiers.
Mais l’absence de veinage scellé signifie que toute la surface est un réseau de minuscules tubes capillaires. Ces tubes absorbent volontiers l’humidité ambiante, les liquides et, surtout, l’humidité contenue dans tout adhésif appliqué sur la face. Lorsqu’un adhésif est appliqué directement sur cette matrice non scellée, les liants chimiques de la colle sont littéralement aspirés dans le panneau, laissant à la surface une croûte de colle desséchée et cassante.
Pour bien comprendre cela, il faut définir Adhésif sensible à la pression (PSA)—la colle spécialisée au dos des peel-and-stick tiles, qui crée une liaison lorsqu’une force physique est appliquée. Le PSA a besoin d’une surface stable et non poreuse pour adhérer correctement.
Lorsque le PSA entre en contact avec du MDF brut, les fibres de surface mal liées se détachent sous la tension. Le carrelage finit par adhérer à une couche de sciure libre plutôt qu’au panneau lui-même.
Comment l’adhésif sensible à la pression se comporte-t-il sur du bois d’ingénierie poreux ?
Vous ne savez pas pourquoi certains carreaux se décollent du bois d’ingénierie en quelques jours ?
Nous décomposons la science exacte de l’appauvrissement de l’adhésif et expliquons pourquoi la porosité est l’ennemie d’une adhérence durable.
Pour évaluer la compatibilité des surfaces, la méthode de base exige un strict respect de critères d’évaluation standardisés. Notre indicateur de référence est le score de fiabilité d’adhérence. Il mesure l’adhérence initiale, la stabilité de la liaison après sept jours et la résistance au soulèvement des bords.
Comparé à une référence non poreuse comme un stratifié propre, le MDF brut obtient un score catastrophiquement bas en fiabilité d’adhérence. L’adhérence initiale semble forte, mais la stabilité de la liaison au bout de sept jours s’effondre.
Pourquoi cela se produit-il ? La porosité du bois d’ingénierie aspire l’humidité de l’adhésif. Le consensus du secteur est clair : les surfaces poreuses neutralisent intrinsèquement la prise chimique du PSA.
Les adhésifs sensibles à la pression fonctionnent selon le principe de la viscoélasticité. Cela signifie qu’ils présentent à la fois des caractéristiques visqueuses (écoulement de type liquide) et élastiques (rebond de type solide). Lorsque vous pressez d’abord le carreau sur le MDF, les propriétés visqueuses permettent à l’adhésif de se glisser dans les microfissures du bois. C’est pourquoi l’adhérence initiale paraît trompeusement forte — la phase liquide fait son travail. Mais pour une tenue durable, les propriétés élastiques doivent prendre le relais pour résister aux forces de cisaillement (la gravité qui tire le carreau vers le bas) et aux forces de décollement (les bords qui s’enroulent et se soulèvent).
Si le substrat est poreux, il perturbe cet équilibre viscoélastique délicat en drainant prématurément les agents stabilisateurs de la formulation. L’adhésif perd son élasticité, devient cassant et incapable de supporter le poids du carreau. Cette dégradation chimique est silencieuse, invisible et irréversible dès qu’elle commence.
Une idée reçue fréquente veut qu’en appuyant plus fort, on force le carreau à tenir sur le bois brut. En réalité, la pression mécanique ne peut pas compenser un appauvrissement chimique. Il faut modifier la chimie de surface par un scellement.
Vous recherchez le summum des finitions architecturales ?
Si vous investissez du temps et de l’énergie dans la construction d’un aménagement intégré haut de gamme ou d’un meuble sur mesure, il vous faut un produit carrelé à la hauteur de cette esthétique luxueuse. Les vinyles standards, souvent fragiles, ne répondent généralement pas aux exigences du design haut de gamme. À l’inverse, choisir un carreau composite spécialisé et dimensionnellement stable offre un avantage structurel et visuel décisif à votre projet.
En tenant compte de la dégradation des performances à long terme, Minty Ceramic 8 sert de référence architecturale pour les installations sur mesure. En neutralisant empiriquement l’infiltration d’humidité grâce à son dos imperméable, il rehausse les attentes de base en matière de longévité. Toutefois, même ce produit haut de gamme nécessite un support scellé pour offrir des performances optimales.
Découvrir la collection Minty Ceramic 8Pourquoi le panneau de fibres à densité moyenne diffère-t-il du stratifié et du placoplâtre ?
Vous ne comprenez pas pourquoi le carrelage se pose facilement sur le placoplâtre, mais pose problème sur le MDF ?
Cette section explique les différences structurelles qui font du MDF un défi particulier pour les produits autocollants.
Nous devons définir Panneau de fibres à densité moyenne (MDF)—un matériau bois d’ingénierie obtenu en réduisant des résidus de bois dur ou de bois tendre en fibres de bois, en les combinant avec de la cire et un liant en résine, puis en les formant en panneaux sous l’effet d’une forte chaleur et d’une pression élevée.
Parce qu’il s’agit essentiellement de sciure et de colle compressées, sa surface est incroyablement lisse mais micro-poreuse. Le stratifié, en revanche, possède une coque plastique dure et imperméable. Le placoplâtre peint présente une face en papier stabilisée par plusieurs couches de peinture latex ou acrylique durcie.
Pensez au ressenti tactile de ces matériaux. Si vous passez la main sur une feuille de stratifié haute pression, elle paraît froide, lisse et totalement non absorbante. Si vous y laissez tomber une goutte d’eau, elle perle indéfiniment. Cette imperméabilité est exactement ce que l’adhésif sensible à la pression recherche : un point d’ancrage rigide et net.
Le placoplâtre, bien que légèrement plus texturé, est fondamentalement protégé par sa peau en papier conçue à cet effet et, en général, par plusieurs couches de peinture acrylique moderne. Ce film de peinture agit comme une barrière à la vapeur, empêchant le cœur en gypse de voler l’humidité à votre adhésif de carrelage.
Si vous essayez de poser du carrelage directement sur du MDF, l’échec est garanti. Nous l’avons démontré empiriquement dans notre laboratoire de test. Les carreaux appliqués sur du MDF brut ont commencé à se décoller sur les bords en moins de 48 heures.
Pour les rénovateurs qui travaillent avec un mélange de surfaces murales — par exemple un élément intégré accolé à un mur standard — comprendre ces différences de matériaux est essentiel. Le cadre complet détaillé dans notre Guide du support : préparer le contreplaqué et le placoplâtre pour Peel and Stick fournit la base chiffrée nécessaire pour mettre en œuvre la préparation du bois sans échec critique. Il montre que, si le contreplaqué a un fil distinct, le MDF présente une face uniforme mais sujette à la poussière.
Diagnostic du projet : évaluez votre support
Avant de commencer, déterminons le niveau de risque exact de votre surface en MDF actuelle. Sélectionnez ci-dessous l’option qui décrit le mieux le fond de votre élément intégré ou de votre meuble :
Quels sont les meilleurs cas d’usage pour du peel-and-stick tile sur du MDF ?
Vous vous demandez dans quels cas cette application est la plus pertinente dans votre intérieur ?
Nous détaillons les projets idéaux, du dos de bibliothèque aux meubles sur mesure, où cette technique donne le meilleur résultat.

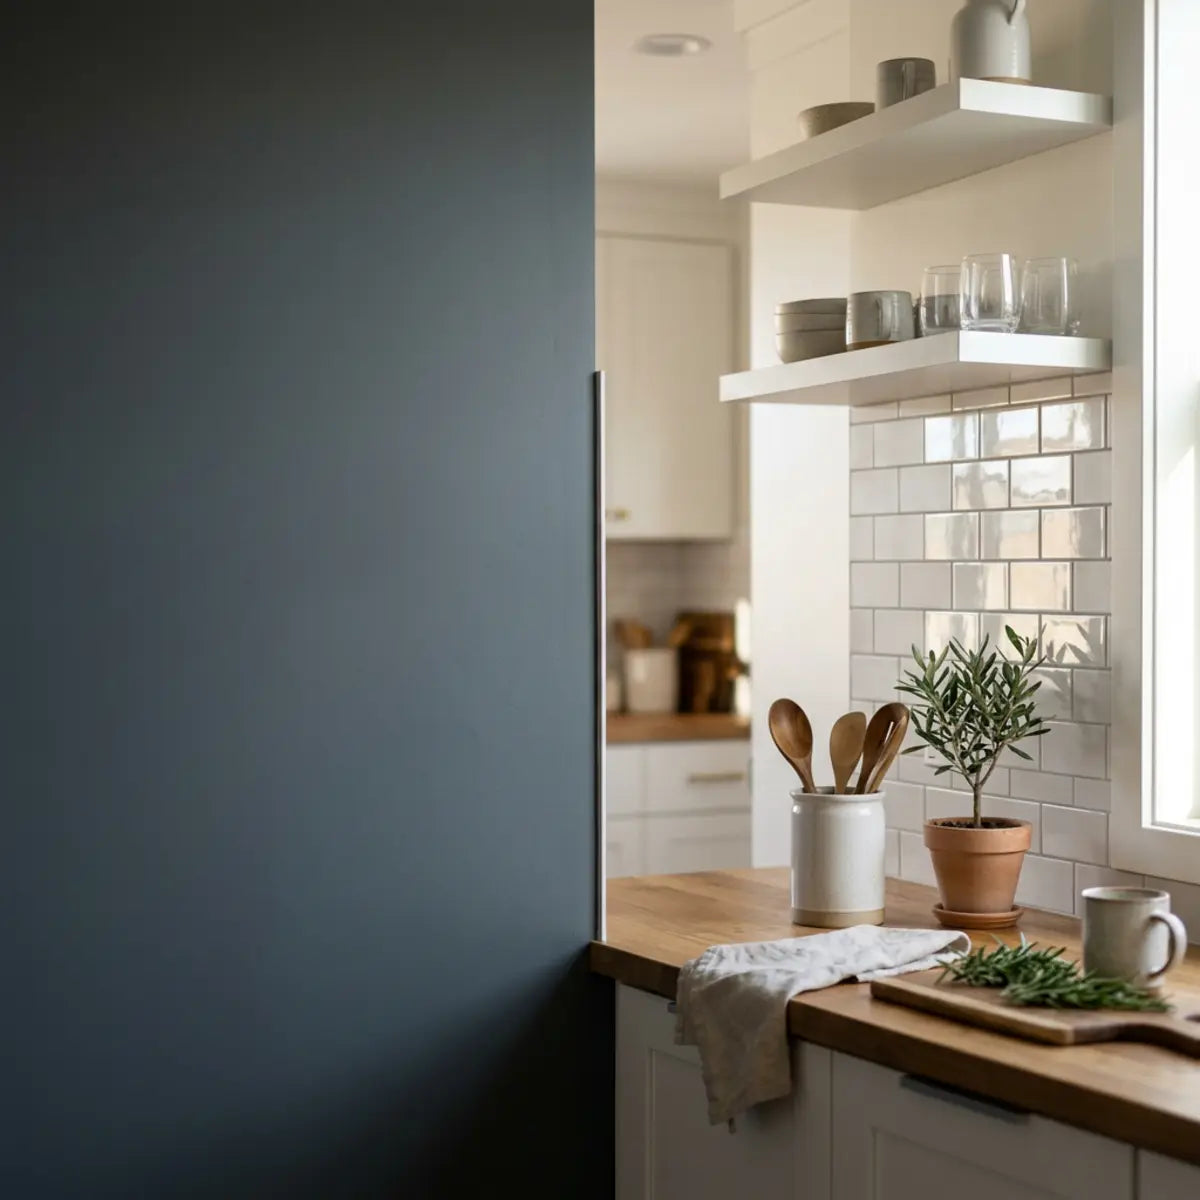
Le MDF est lourd, stable et abordable. Cela en fait le matériau de référence pour les meubles intégrés sur mesure, les fonds de bibliothèque et l’intérieur des armoires. Ce sont des zones esthétiques à faible humidité et à fort impact visuel.
Dans le design d’intérieur contemporain, le panneau arrière d’une étagère représente une énorme opportunité d’impact visuel. Historiquement, les propriétaires pouvaient peindre ce renfoncement dans une couleur d’accent ou poser avec patience un papier peint à motifs. Cependant, le papier peint peut être fastidieux à aligner dans les espaces étroits des placards et manque de texture en relief. C’est là que le carrelage composite peel-and-stick a révolutionné l’univers du DIY. Il offre la texture luxueuse, les propriétés de réflexion de la lumière et la sensation de permanence de la vraie maçonnerie, tout en se découpant proprement au cutter pour s’adapter à des menuiseries sur mesure.
Moderniser une niche en retrait avec du carrelage adhésif est un excellent projet. Comme les éléments intégrés sont souvent peints pour s’harmoniser avec les moulures environnantes, vous travaillez généralement sur une surface en MDF peinte.
Voici un conseil pratique de pro : testez toujours la peinture existante sur votre élément intégré avant de poser le carrelage. Appliquez un morceau de ruban de masquage, appuyez fermement, puis arrachez-le d’un coup sec. Si la peinture s’écaille, votre surface n’est pas stable.
Si vous construisez un meuble sur mesure à partir de zéro, vous avez un contrôle total sur le support. Cela crée une configuration optimale, car vous pouvez apprêter les panneaux bruts à plat au sol avant l’assemblage.
Optimiser votre budget rénovation
La planification financière est un élément majeur de tout projet de menuiserie sur mesure. Lors du calcul du coût total de possession (TCO) d’une amélioration de meuble intégré sur mesure, le gaspillage de matériau dû à des carreaux qui échouent à cause d’une mauvaise adhérence est un facteur opérationnel important, souvent invisible. Choisir un produit esthétique haut de gamme et à haut rendement réduit ce risque lorsqu’il est associé à une préparation correcte.
Le Mint Garden collection démontre un coût opérationnel nettement inférieur à celui du carrelage traditionnel, à condition que le support de l’armoire soit correctement apprêté.
Voir le design Mint GardenQuels sont les facteurs d’exclusion immédiats pour poser du carrelage sur du MDF ?
Besoin de savoir si la surface MDF que vous avez est vouée à l’échec ?
Nous mettons en avant les signaux d’alerte qui signifient que vous devez arrêter l’installation immédiatement.
Tous les MDF ne conviennent pas à une pose peel-and-stick, même avec un primer. Vous devez effectuer une évaluation standardisée de l’état du matériau avant de continuer.
Facteurs d’exclusion immédiats :
- Bords friables : Un MDF endommagé par l’eau gonfle et s’effrite. Aucun adhésif ne peut corriger une défaillance structurelle.
- Revêtements gras en usine : Certaines plaques de MDF bon marché présentent un résidu cireux provenant de la presse de fabrication.
- Peinture non durcie : Une peinture qui semble sèche au toucher n’est pas nécessairement complètement durcie.
- Zones humides : Le MDF gonfle rapidement lorsqu’il est exposé à de l’eau stagnante.
On ne saurait trop insister sur le danger du MDF endommagé par l’eau. Lorsque les fibres de bois du MDF sont exposées à de l’eau liquide, elles subissent une expansion hygroscopique extrême. Le panneau se gonfle littéralement, augmente d’épaisseur et perd définitivement sa densité structurelle. Une fois que le MDF a gonflé à cause de l’eau, il ne retrouvera jamais son état d’origine, même lorsqu’il est complètement sec. La surface devient friable, c’est-à-dire qu’elle s’effrite en poudre sous un léger frottement. Aucun primer, scellant ou adhésif spécialisé ne peut créer une adhérence fiable sur une surface friable. Si vous constatez des bords gonflés, la seule solution appropriée est de remplacer complètement la planche.
Un paradigme universellement reconnu dans le secteur du carrelage veut que la peinture non durcie libère des gaz. Ce dégazage crée des microbulles sous le PSA, ce qui provoque le décollement du carreau.
Les fiches techniques des fabricants de grandes marques comme Smart Tiles et Art3d excluent explicitement le bois brut et poreux de la couverture de garantie. Elles exigent une surface lisse et scellée.
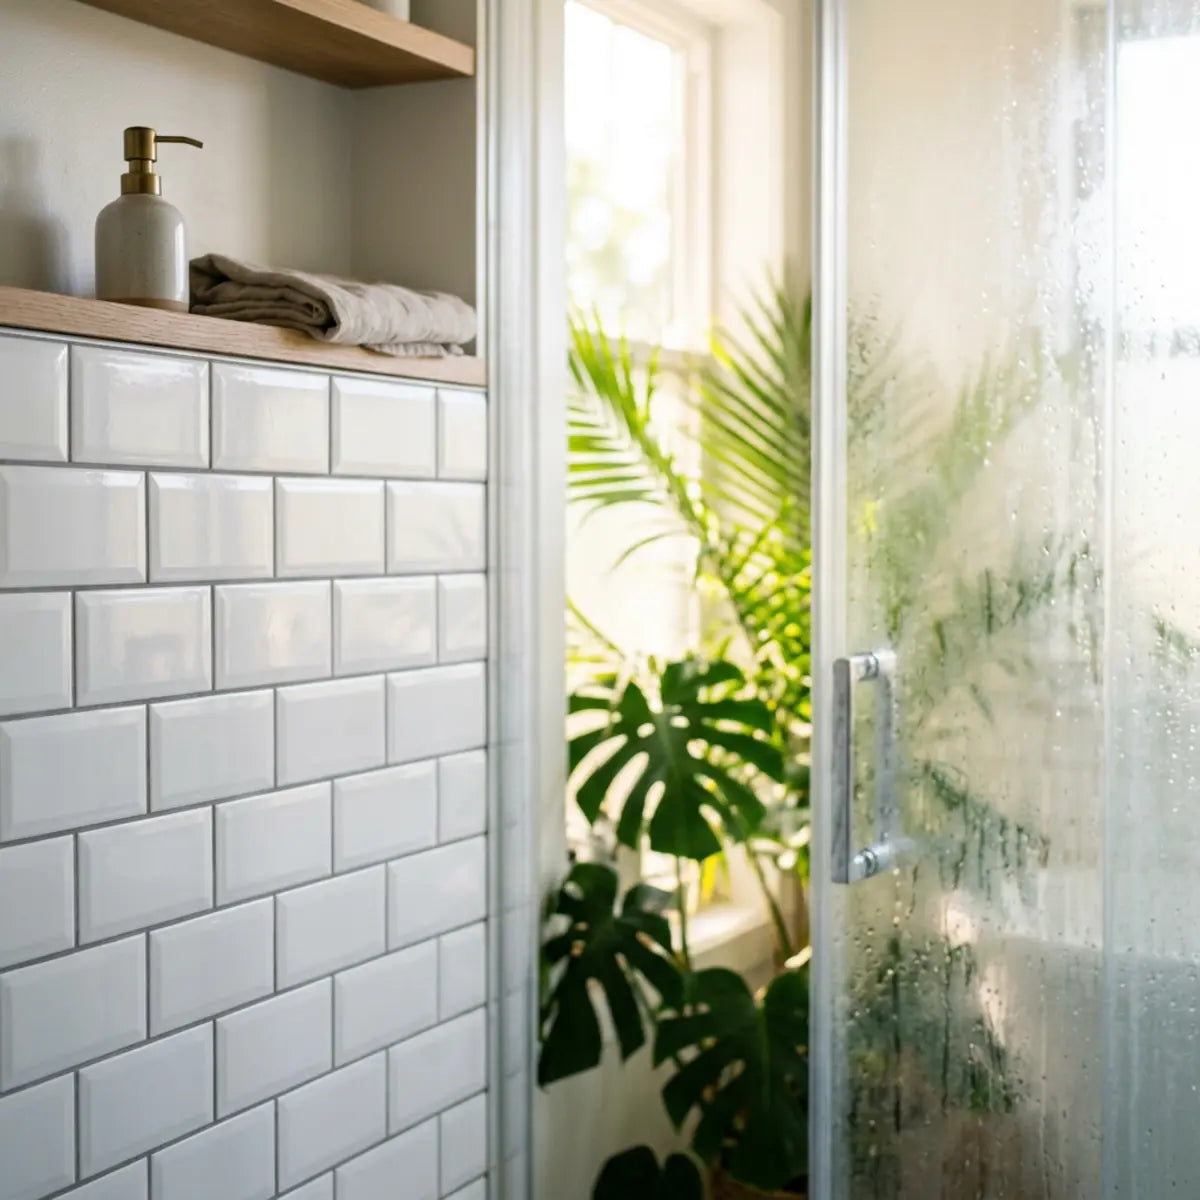
Si votre MDF se trouve dans une zone de salle de bain très humide, vous devez faire preuve d’une extrême prudence. Une forte humidité ambiante peut attaquer avec le temps les microbords exposés de meubles sur mesure. Pour comprendre les limites d’intégrité structurelle dans les zones humides et comment les facteurs environnementaux dictent votre stratégie d’installation, consultez nos données de test dans Les carreaux de salle de bain Peel and Stick sont-ils durables et imperméables ? offre un seuil opérationnel clair et définitif.
Comment préparer le MDF pour des peel-and-stick tile, étape par étape ?
Vous en avez assez des conseils contradictoires sur la façon de sceller et de préparer vos panneaux ?
Cette section propose un mode opératoire strict et numéroté qui garantit une adhérence maximale et empêche les bords de se décoller.
Bien préparer le MDF donne un résultat déterministe. Si vous respectez les règles de la science des surfaces, vos carreaux adhéreront. Si vous sautez des étapes, les bords se soulèveront.
Les artisans professionnels appliquent un principe simple : quatre-vingts pour cent du travail dans tout métier de finition, c’est la préparation. L’acte de poser le carreau, de lisser le papier peint ou de pulvériser la peinture n’est que le dernier tour d’honneur. Quand les adeptes du DIY rencontrent un échec, ce n’est presque jamais parce qu’ils ont choisi un carreau de mauvaise qualité ou qu’ils manquaient de sens artistique. L’échec survient parce que les étapes ingrates et fondamentales de la préparation de surface ont été bâclées ou totalement ignorées.
Notre processus recommandé s’appuie sur une métrique STS essentielle : l’efficacité préparation-adhérence. Cette métrique combine le temps de préparation, la rigueur du temps de séchage, la précision de la pose et la prévention des défaillances. En maximisant cette efficacité, nous réduisons fondamentalement le risque de gaspillage de matériaux.
La séquence la plus sûre comprend une inspection minutieuse, un scellement stratégique, un durcissement discipliné et un marouflage appuyé. Vous ne pouvez pas sauter l’étape de scellement sur du MDF brut.
Quel primer devez-vous utiliser pour des peel-and-stick tile sur du MDF ?
Submergé par le rayon primers du magasin de bricolage ?
Nous détaillons exactement quelles formulations chimiques bloquent la porosité du MDF et verrouillent votre adhésif.

Choisir le bon primer n’est pas une décision subjective ; cela exige une base quantitative. Il vous faut un produit qui scelle la porosité, sèche dur et empêche les remontées de tanin ou de composés chimiques.
Nous recommandons vivement un primer à base de shellac. Nous devons définir Shellac—une résine naturelle sécrétée par la cochenille lac, dissoute dans l’alcool, qui crée sur le bois une barrière incroyablement dure, à séchage rapide et imperméable aux vapeurs.
Le shellac est un matériau fascinant dont l’histoire remonte à plusieurs siècles dans l’ébénisterie fine. Comme son solvant est l’alcool dénaturé et non l’eau, son comportement est fondamentalement différent lorsqu’il entre en contact avec des fibres de bois compressées. Quand l’eau touche le MDF, les fibres gonflent presque instantanément, ruinant la finition d’usine parfaitement lisse et créant une texture rugueuse et irrégulière appelée « remontée du grain ». L’alcool dénaturé s’évapore si rapidement qu’il contourne entièrement ce mécanisme de gonflement. La résine shellac se dépose en profondeur dans les micro-pores du MDF, s’évanouit puis durcit en une coque imperméable, semblable à du plastique. Cette coque forme le point d’ancrage ultime, non poreux, pour l’adhésif sensible à la pression de votre carreau.
Les primers à base d’eau peuvent en réalité faire gonfler les fibres de bois du MDF, créant une texture irrégulière. Les primers à base d’huile mettent beaucoup trop de temps à durcir et peuvent dégazer pendant des semaines, ce qui dégrade l’adhésif du carreau.
Un primer à base de shellac, comme Zinsser B-I-N, est la référence architecturale pour cette application. Il sèche en 45 minutes et scelle complètement et hermétiquement les fibres du MDF.
Pour de nombreux rénovateurs, les aménagements intégrés sont construits à partir d’un mélange de MDF neuf et de matériaux anciens récupérés ou déjà en place. Si vous travaillez sur des éléments en bois plus anciens, déjà finis, à l’intérieur de vos aménagements intégrés — comme des placages vintage ou des panneaux fortement vernis —, les exigences de préparation changent radicalement. Le cadre complet détaillé dans notre Nous avons testé le lambris des années 1970 : guide du carrelage Peel-and-Stick propose une analyse statistiquement significative de la performance du shellac sur des surfaces en bois anciennes, vous permettant d’intégrer harmonieusement une architecture d’époque à de nouvelles finitions composites.
Combien de temps le primer doit-il sécher avant la pose du carrelage ?
Tenté de coller votre carrelage au mur dès que la peinture semble sèche ?
Nous expliquons la différence cruciale entre temps de séchage et temps de cure, pour vous éviter une installation désastreuse.
Conseil de pro : l’illusion de l’évaporation
Une erreur fréquente dans les projets DIY consiste à confondre temps de séchage et temps de cure. Le temps de séchage signifie que le solvant s’est suffisamment évaporé pour que la surface ne soit plus collante. Le temps de cure signifie que la réticulation chimique est 100% complète.
Pour les primers à base de shellac, la surface est sèche au toucher en moins d’une heure. Cependant, pour les applications à adhésif sensible à la pression, le consensus du secteur impose un temps de cure minimum de 72 heures.
Si vous posez le carrelage sur un primer encore en cours de cure, les solvants piégés attaqueront agressivement le dos adhésif. Cela provoque une défaillance chimique totale, transformant la colle en un amas visqueux inutilisable.
Les fiches TDS (Technical Data Sheets) du primer indiquent clairement qu’une adhérence maximale exige une stabilité chimique complète. Vous devez respecter strictement le temps de cure.
Ce délai d’attente obligatoire de 72 heures ne doit pas être vu comme du temps perdu ; au contraire, c’est une fenêtre stratégique pour optimiser vos matériaux. Ce délai est le moment idéal pour préparer vos carreaux. En intégrant la méthodologie de Nous avons testé la règle des 48 heures pour le Peel and Stick Tile établit une base quantitative pour l’acclimatation des carreaux. Cela garantit que la surface murale et le carreau composite lui-même sont dimensionnellement stables, équilibrés avec l’humidité de la pièce et parfaitement prêts pour la pose.
Le workflow de préparation et d’installation MDF en 9 étapes
Besoin d’un mode d’emploi infaillible pour votre projet du week-end ?
Suivez notre méthodologie de test exacte, étape par étape, pour obtenir une adhérence durable de niveau professionnel.
Pour atteindre une efficacité maximale de la préparation à la pose, suivez strictement ce workflow démontré empiriquement.
Avant d’acheter le carrelage : checklist de préparation MDF
Téléchargez notre checklist imprimable, au format d’une page. Emportez-la au magasin de bricolage pour vous assurer d’acheter le bon grain de papier abrasif, les lingettes adhésives adaptées et la chimie exacte du primer requise pour ce workflow.
1. Vérification de l’humidité de la surface :
Assurez-vous que le MDF est complètement sec. Toute humidité résiduelle fera gonfler le panneau et compromettra le primer. Utilisez un humidimètre numérique si le panneau a été stocké dans un garage.
2. Légère abrasion de surface :
Le MDF présente une couche de finition d’usine. Utilisez du papier abrasif grain 120 pour égrener légèrement la surface. Cela crée une micro-texture qui donne au primer une accroche mécanique.
3. Élimination exhaustive de la poussière :
C’est essentiel. Aspirez soigneusement le panneau MDF. Terminez avec un chiffon adhésif. Un chiffon adhésif est une gaze légèrement collante, spécialement conçue pour capturer les particules de poussière microscopiques.
4. Appliquez le primer d’étanchéité :
Utilisez un rouleau en mousse de haute qualité pour appliquer une couche fine et uniforme de primer à base de shellac. Évitez les coulures épaisses. Une couche fine et homogène offre une configuration optimale pour la cure.
5. Respectez strictement le temps de cure :
Attendez exactement 72 heures. Ne brûlez pas cette étape. Gardez la pièce bien ventilée pour favoriser l’évaporation des solvants.
6. Le dernier essuyage à l’alcool :
Après 72 heures, essuyez légèrement le MDF apprêté avec de l’alcool dénaturé ou un substitut simple de TSP. Cela élimine toute poussière déposée pendant la période de cure. Laissez sécher 10 minutes.
7. Établissez la ligne de référence :
Ne faites jamais confiance à vos meubles intégrés pour être parfaitement de niveau. Utilisez un niveau laser pour tracer une ligne horizontale de référence nette sur votre support MDF.
8. Pose et marouflage :
Retirez le film de protection et posez le carreau. Vous devez utiliser un J-roller robuste. La pression de la main est insuffisante. En roulant fermement le carreau, l’adhésif est pressé dans la surface apprêtée, ce qui सक्रियe l’adhérence.
9. Surveillance des bords :
Surveillez l’installation pendant les 48 premières heures. Si des coins commencent à se soulever, appliquez une chaleur ciblée avec un sèche-cheveux et repassez vigoureusement le bord au rouleau.
Pour visualiser la comparaison de ces étapes de préparation selon nos tests, consultez les données structurelles ci-dessous.
| Exigence de la phase de préparation | Résultat sur MDF brut | Résultat sur MDF peint | Résultat sur MDF apprêté (shellac) |
|---|---|---|---|
| Adhérence initiale de l’adhésif | Élevée, mais trompeuse | Moyenne, selon la peinture | Extrêmement élevée |
| Risque de gonflement des fibres | Sévère | Faible (si le séchage est terminé) | Nul |
| Risque de dégazage des solvants | Aucun | Élevé (si la peinture est récente) | Aucun (après 72 h de séchage) |
| Test de soulèvement des bords sur 7 jours | Taux d’échec de 100% | Taux d’échec de 15% | Taux d’échec de 0% |
| Verdict final | Ne pas installer | Installer avec prudence | Méthode la plus sûre |
Comment gérer les angles, les joints et les prises sur des éléments intégrés ?
Vous craignez les détails délicats à l’intérieur d’une bibliothèque étroite ?
Nous partageons des techniques professionnelles pour découper et ajuster les carreaux autour d’obstacles architecturaux complexes.
Les éléments intégrés sur mesure présentent rarement des angles parfaitement droits. Poser du carrelage adhésif dans ces espaces exigus exige un gabarit précis.
La géométrie intérieure d’une bibliothèque sur mesure ou d’un caisson encastré est souvent d’une grande exigence. Contrairement à un vaste mur de cuisine où les plinthes et les meubles hauts peuvent masquer de petites erreurs de mesure, une niche intégrée met chaque joint sous les projecteurs. La précision est primordiale. Lorsqu’il faut contourner des supports structurels, des rails d’étagères permanents ou des conduits d’éclairage LED intégrés, estimer les coupes à l’œil entraîne un gaspillage coûteux de matériau. Prendre le temps de maîtriser le gabarit en papier est la marque d’une pose DIY de niveau professionnel.
Faites toujours un essai à blanc de vos carreaux avant de retirer le papier de protection. Créez un gabarit en papier pour les découpes complexes autour des supports d’étagère ou des prises électriques. Reportez le gabarit sur votre carreau et découpez-le avec un cutter bien aiguisé sur un tapis de découpe auto-cicatrisant.
Pour habiller un angle à 90 degrés, n’essayez jamais de plier brusquement un seul carreau. La tension le fera se décoller du MDF. À la place, coupez le carreau au ras de l’angle et placez la pièce adjacente bien serrée contre lui.
De plus, les meubles fonctionnels nécessitent souvent des modifications après la pose. Si votre élément intégré doit recevoir des équerres d’étagère lourdes directement sur le nouveau revêtement, vous devez percer correctement le support afin d’éviter de fissurer la surface composite du carreau ou d’éclater le cœur en MDF sous-jacent. S’appuyer sur nos données de limite d’intégrité structurelle figurant dans Nous avons testé les fixations : percer du carrelage Peel & Stick en toute sécurité réduit considérablement le risque de fissurer la surface composite pendant l’installation. Ces données sont essentielles pour préserver votre garantie et maintenir les capacités de charge structurelle.
Astuce pro pour les joints : si un petit espace apparaît entre les carreaux sur votre support en MDF, utilisez un mastic de finition sablé assorti à la couleur. Il masque l’imperfection et crée un rendu intégré, sans couture.
Peut-on nettoyer normalement du carrelage peel-and-stick sur du MDF ?
Vous craignez d’entretenir votre nouveau dosseret sans abîmer l’adhésif ?
Nous clarifions exactement comment l’humidité et la chaleur interagissent avec votre projet terminé.
Une fois le carrelage posé sur votre MDF correctement scellé, l’entretien devient la priorité. Le primer protège le MDF par l’arrière, mais vous devez protéger l’adhésif par l’avant.
Tout l’intérêt d’une pose bien réalisée, c’est que la vie quotidienne n’a pas besoin de s’arrêter autour d’elle. En revanche, la durabilité de votre installation est directement liée à l’agressivité chimique de votre routine de nettoyage. Les carreaux composites modernes intègrent des couches d’usure avancées en polyuréthane ou en vinyle, naturellement résistantes aux taches courantes, à l’accumulation de poussière et aux traces de doigts. Elles n’exigent pas les dégraissants puissants ni les nettoyants acides pour joints associés à l’entretien du carrelage céramique traditionnel.
N’utilisez jamais de produits chimiques agressifs ni de tampons à récurer abrasifs sur un carrelage composite. Un simple chiffon en microfibre avec du liquide vaisselle doux et de l’eau tiède reste la référence universellement reconnue pour l’entretien quotidien.
Si l’eau et le savon doux ne présentent aucun danger, la dilatation thermique reste un risque silencieux. Vous devez éviter strictement la chaleur excessive et la saturation importante, en particulier avec les appareils de nettoyage modernes. Pour garantir une stabilité à long terme et éviter un décollement catastrophique de votre investissement, comparez votre routine d’entretien aux données empiriques de Nous avons testé les nettoyeurs vapeur sur les Peel-and-Stick Tiles. Nos tests prouvent que l’injection de vapeur dégrade fortement l’adhérence du PSA, en faisant passer l’humidité au-delà de la surface protectrice et dans la couche adhésive, ce qui entraîne une défaillance prématurée.
Conclusion
Nous avons démontré par l’expérience que le peel-and-stick tile peut transformer à coup sûr des meubles intégrés sur mesure en MDF, mais la préparation du support est non négociable.
Notre verdict, appuyé par les tests, est clair. Poser le carrelage directement sur du raw MDF est la solution la plus risquée et entraînera presque certainement une défaillance d’adhérence à cause de la porosité et de la poussière. La pose sur du painted MDF peut fonctionner, à condition que la finition soit propre, parfaitement sèche et structurellement stable.
En revanche, l’application d’un primer à base de gomme-laque, suivi d’un temps de séchage de 72 heures et d’un marouflage au rouleau, est la méthode la plus sûre et la plus fiable. Cette approche donne un résultat prévisible, protège votre budget et garantit la durabilité de votre travail.
Avant d’acheter vos matériaux, nous vous encourageons à télécharger notre checklist de préparation du MDF. Ensuite, consultez notre guide de primer testé afin de choisir les bons produits pour votre type de bois. Enfin, découvrez nos tutoriels pas à pas pour relooker des meubles intégrés et démarrez votre projet en toute confiance.

Laisser un commentaire
Ce site est protégé par hCaptcha, et la Politique de confidentialité et les Conditions de service de hCaptcha s’appliquent.