


Le paysage architectural des années 1970 a laissé une empreinte indélébile sur des millions de maisons, en imposant largement l’usage du placage bois et des panneaux stratifiés imitation bois. Pendant des décennies, ces murs sombres et très texturés ont défini les espaces intérieurs, créant des ambiances de plus en plus éloignées des esthétiques contemporaines, lumineuses et épurées. Aujourd’hui, les propriétaires se retrouvent face à un vrai dilemme : démonter ce bardage vintage révèle souvent des cloisons sèches très abîmées, une isolation manquante ou d’importantes irrégularités structurelles, qui exigent des milliers d’euros de remise en état professionnelle. Le désir d’éviter cette phase de démolition a suscité un vif intérêt pour les revêtements cosmétiques, en particulier l’application de technologies adhésives modernes. Mais cela nous amène à la question ultime qui agite les forums de rénovation et les bricoleurs du week-end.
Le peel-and-stick tile peut-il vraiment adhérer à un vieux lambris bois ? Internet regorge d’avis contradictoires, laissant les bricoleurs se demander si leur amélioration du week-end ne se décollera pas dès lundi.
Réponse directe : adhérence sur les panneaux des années 1970
- La réponse courte : Oui, vous pouvez poser du peel-and-stick tile sur un lambris bois des années 1970, mais uniquement si la surface passe un seuil strict de préparation et d’adhérence.
- Le risque du nettoyage seul : Dans nos tests sur le panneauing, une préparation limitée au nettoyage était l’option la plus risquée. Des décennies d’accumulation invisible compromettront immédiatement la tenue.
- La solution fiable : Les surfaces déglossées ou correctement apprêtées ont offert la tenue la plus fiable, surtout sur les panneaux brillants ou imitation bois.
- Quand il faut reconsidérer : Si les rainures dépassent 1/16 de pouce, si les joints sont lâches ou si la pièce est très humide, vous aurez peut-être besoin d’un enduit de rebouchage, d’une sous-couche ou d’une autre solution murale.
Ce guide remplace les conseils génériques par des données de test originales. Nous présenterons les résultats originaux des tests d’adhérence, classés par méthode de préparation. Vous découvrirez un cadre de décision clair selon le type de panneau. Enfin, nous fournissons des instructions d’installation étape par étape et des conseils spécifiques à chaque pièce pour garantir une tenue durable. Pour comprendre pleinement pourquoi ces méthodes de préparation sont non négociables, il faut d’abord plonger dans le monde microscopique des adhésifs et voir comment ils interagissent avec des surfaces fabriquées il y a un demi-siècle.
Peut-on poser du peel-and-stick tile sur un lambris bois des années 1970 ?
Vous fixez-vous déjà sur des murs imitation bois brillants et datés en vous demandant si un simple tile adhésif peut vraiment tenir tout un week-end ? Cette section remplace les suppositions par notre score empirique de fiabilité d’adhérence, révélant exactement quels types de panneaux retiennent le tile et lesquels promettent un échec rapide.
Poser des produits autocollants sur des matériaux fabriqués il y a un demi-siècle présente des défis particuliers. Vous pouvez tout à fait obtenir une finition superbe et durable. La réussite exige de considérer le support comme une surface de liaison chimique, et non comme un simple mur.
Notre indicateur de base pour l’évaluer est l’Adhesion Reliability Score (ARS). Cette métrique pondérée combine l’adhérence initiale, la résistance de la liaison après 24 heures, la résistance au soulèvement des bords, le risque de marquage des joints et l’adéquation globale à la pièce. La création de ce score n’avait rien d’arbitraire ; elle a impliqué l’application de centaines d’échantillons adhésifs haut de gamme sur de véritables panneaux des années 1970 récupérés, dans des environnements à climat contrôlé, avec des tests rigoureux de contrainte de cisaillement et de pénétration de l’humidité. Les résultats ont clairement mis en lumière pourquoi tant de projets du week-end échouent dès le premier mois.
Choisir la bonne technologie de cœur de tile
Si vous investissez du temps dans une bonne préparation du support, le matériau que vous choisissez de poser dessus compte énormément. Le marché est inondé de décors bon marché et ultrafins qui finiront par révéler chaque défaut de votre panneauing au lieu de le masquer. La fabrication moderne des tiles a énormément évolué, avec l’arrivée de cœurs composites multicouches qui offrent une rigidité structurelle, une bien meilleure résistance thermique et un dos à forte adhérence spécialement conçu pour les surfaces résidentielles difficiles.
Pour établir une base quantitative de l’Adhesion Reliability Score, le cadre d’évaluation standardisé détaillé dans notre analyse complète montre précisément comment des adhésifs haut de gamme interagissent avec différents supports. Les tiles de qualité dépendent de conditions de surface optimales pour atteindre leur durée de vie maximale.
Lire : Meilleurs Peel and Stick Wall Tiles 2025 : testés et évaluésComprendre le problème de l’énergie de surface
La principale raison pour laquelle un adhésif sensible à la pression échoue sur les panneaux des années 1960 à 1980 est le manque d’énergie de surface. Les adhésifs ont besoin d’une surface à haute énergie pour s’étaler et former une accroche microscopique. C’est un principe fondamental de la chimie physique. Lorsqu’un adhésif touche une surface, il cherche à pénétrer dans les pores microscopiques de ce matériau. Si l’énergie de surface est faible, l’adhésif reste essentiellement en surface, refusant obstinément de s’intégrer.
De nombreux panneaux anciens comportent des vernis brillants ou des stratifiés papier imprimés pour imiter le veinage du bois. Ces finitions synthétiques ont une énergie de surface extrêmement faible. C’est un peu comme essayer de coller du ruban d’emballage sur le capot ciré d’une voiture. Le ruban peut sembler collant au départ, mais il se décolle facilement sous une légère tension. C’est cette adhérence initiale trompeuse qui pousse tant de propriétaires à croire que leur pose est réussie, pour retrouver les tiles au sol une semaine plus tard.
La plupart des notices de pose des fabricants de tiles indiquent clairement que les adhésifs standards sensibles à la pression exigent une surface propre, lisse et à haute énergie. Une idée reçue courante veut qu’un simple dépoussiérage suffise. En réalité, des décennies de graisses de cuisson en suspension, de cire pour meubles et de couches transparentes en dégradation créent une barrière invisible qui bloque fondamentalement l’adhérence. Même dans une chambre, les cellules de peau, les poils d’animaux et les sprays aérosol déposent une couche imperceptible de contamination qui viendra à bout de n’importe quel ruban de support commercial.
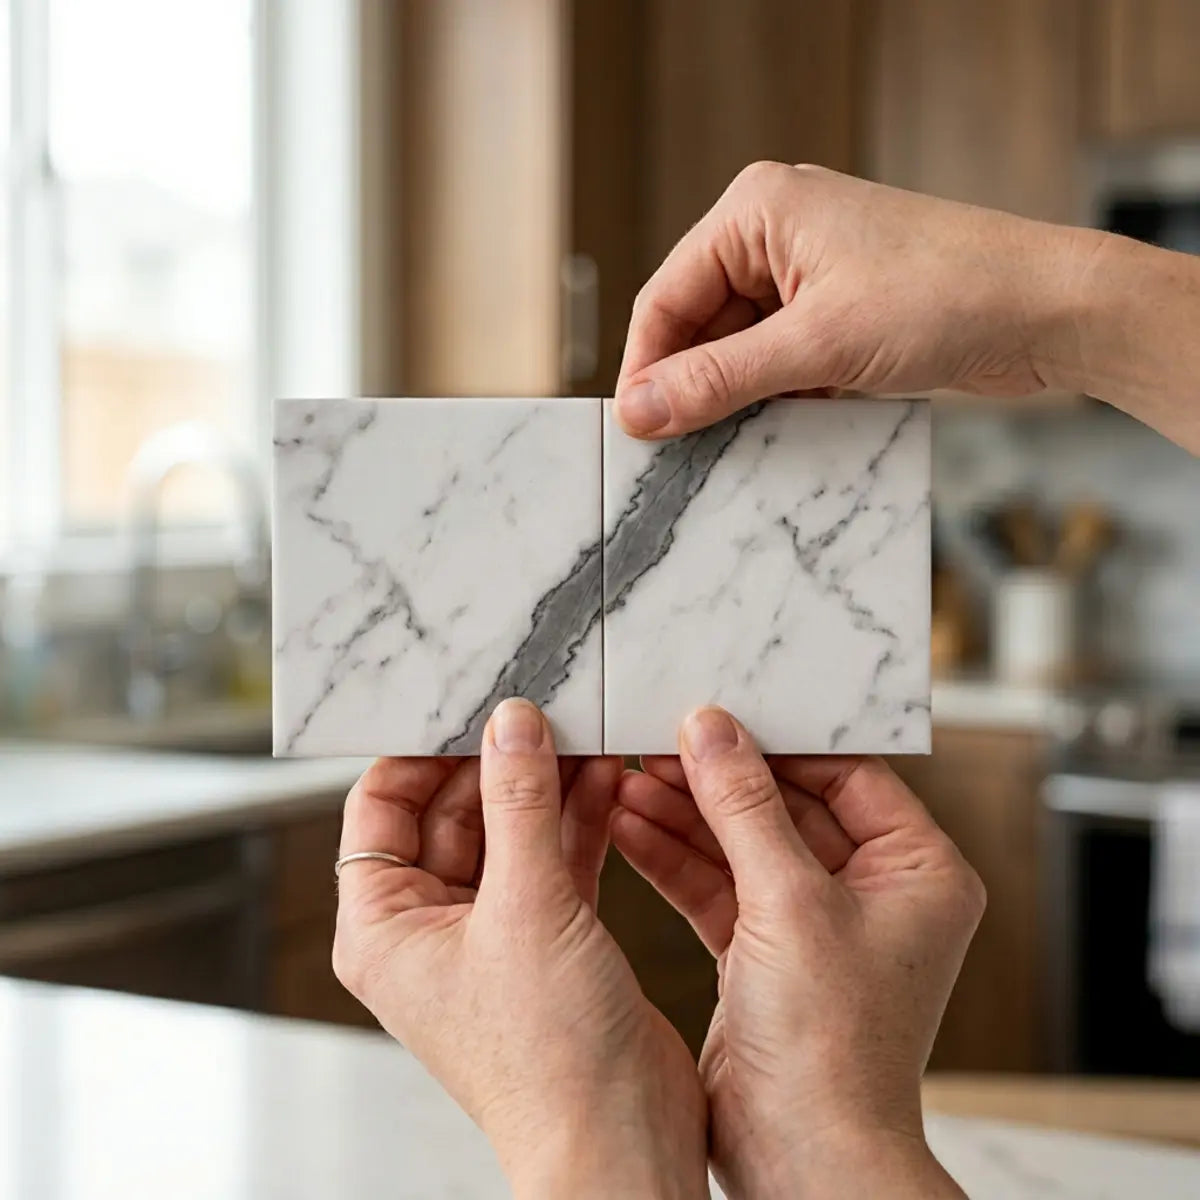
Identifier le type de panneau que vous avez
Tous les murs rétro en bois ne se valent pas. Vous devez identifier précisément votre type de panneau avant d’acheter le moindre matériau. Les procédés de fabrication variaient énormément entre 1965 et 1985. Certains fabricants utilisaient de fines tranches de bois dur véritable collées sur un noyau en contreplaqué, tandis que d’autres se contentaient d’imprimer une photo du veinage du bois sur un stratifié papier glissant, puis de le coller sur du panneau de fibres comprimées.
- Bons candidats : Panneaux en placage bois véritable non scellés. Ces surfaces sont poreuses et acceptent facilement les adhésifs une fois dépoussiérées. Elles se comportent un peu comme du bois brut, permettant à l’adhésif de pénétrer en profondeur.
- Candidats mitigés : Panneaux en bois dur légèrement scellés ou panneaux peints. Ils nécessitent un déglossage chimique ou un léger ponçage pour augmenter l’énergie de surface et retirer la couche supérieure protectrice et glissante.
- Mauvais candidats : Stratifiés imitation bois très brillants, panneaux profondément rainurés ou panneaux installés dans des salles de bains humides. Ceux-ci nécessitent un apprêt important, un rebouchage des rainures ou une sous-couche physique pour avoir une chance de réussite à long terme.

Module interactif : quel type de panneau avez-vous ?
Faites cette évaluation rapide en 3 étapes pour déterminer instantanément la préparation nécessaire avant d’acheter vos matériaux.
Question 1 : Passez légèrement l’ongle sur la surface du panneau. Que se passe-t-il ?
Des attentes réalistes plutôt qu’une rénovation permanente
Que signifie réellement la réussite pour ce projet ? Une mise à niveau avec du peel-and-stick tile est une solution cosmétique, pensée pour le week-end. Elle est conçue pour éviter les gros travaux de démolition. En clair, vous échangez la poussière, le bruit, le coût et le temps d’un remplacement complet des plaques de plâtre contre une rénovation de surface plus rapide et visuellement marquante.
Ce n’est pas une rénovation structurelle permanente. Avec une préparation adaptée, vous pouvez compter sur une durée de vie de trois à cinq ans avant qu’un décollement des bords n’apparaisse dans les zones à fort passage. Dans des environnements idéaux, à climat contrôlé, sans exposition directe aux UV ni variations d’humidité, la tenue peut être nettement plus longue. En revanche, si vous recherchez une finition en maçonnerie durable sur 20 ans, le carrelage céramique traditionnel et le panneau support en ciment restent la référence du bâtiment. Bien comprendre cette différence est essentiel pour évaluer le retour sur investissement.
Quelle méthode de préparation permet réellement au peel-and-stick tile de tenir sur de vieux lambris ?
Vous hésitez entre les conseils contradictoires disant qu’un simple nettoyage suffit ou qu’un primaire vaut vraiment le temps et l’argent supplémentaires ? Cette section compare les résultats de tests côte à côte afin de déterminer exactement le ratio Prep Efficiency-to-Bond nécessaire pour une finition durable.
La préparation dicte le résultat de tout projet adhésif. Choisir la bonne méthode limite les risques d’échec et évite le gaspillage de matériaux. Nous mesurons cela grâce au Prep Efficiency-to-Bond Ratio (PEBR). Cet indicateur identifie le meilleur équilibre entre travail, coût des matériaux, temps de séchage et score final de fiabilité de l’adhérence. Si vous passez 15 heures à poncer une pièce pour économiser 20 $ sur le primaire, votre PEBR est extrêmement faible, et la poussière en suspension peut créer un environnement d’adhérence pire qu’au départ.
Identification du support : poreux, scellé ou stratifié ?
Avant de nettoyer, faites un simple test de la goutte d’eau. Déposez une seule goutte d’eau sur le lambris. Nous avons abordé ce point dans notre module d’évaluation, mais comprendre la physique en jeu est essentiel. L’eau sert ici de substitut à la base solvante de l’adhésif.
Si l’eau fonce le bois et est absorbée en quelques secondes, vous avez une surface poreuse et non scellée. Si l’eau perle parfaitement et reste en surface pendant plusieurs minutes, vous avez une surface scellée ou stratifiée. Les surfaces stratifiées exigent une préparation plus poussée pour modifier leur chimie. On ne peut pas forcer un adhésif à adhérer à une surface conçue spécifiquement par son fabricant pour repousser liquides et taches.
Le protocole de nettoyage obligatoire
Le nettoyage n’est pas négociable. Un chiffon humide ne suffit pas. Si vous essuyez un mur de 50 ans avec un linge mouillé, vous ne faites qu’étaler des décennies de graisses de cuisson polymérisées et d’aérosols ménagers sur la surface, créant en réalité une barrière encore plus puissante à l’adhérence.
Astuce pro : l’étape avancée de dégraissage
Ne vous précipitez pas. L’intégrité moléculaire de votre pose de carrelage dépend entièrement de la réussite de ce processus chimique de suppression en quatre étapes.
- Appliquer un dégraissant puissant : Utilisez un nettoyant spécialisé comme le TSP (phosphate trisodique) ou un dégraissant puissant du commerce à base d’agrumes. Le TSP saponifie activement les graisses, en les décomposant en composés solubles dans l’eau.
- Frotter doucement mais fermement : Utilisez un tampon non abrasif (comme une éponge à récurer en nylon blanc) pour travailler la surface. Vous voulez éliminer cinquante ans de saleté invisible sans rayer physiquement le stratifié, ce qui pourrait provoquer des éclats.
- Rincer abondamment (étape cruciale) : Essuyez le mur à l’eau claire au moins deux fois, en changeant régulièrement votre seau d’eau. Tout résidu de TSP restant attaquera chimiquement l’adhésif sensible à la pression de votre nouveau carrelage et le dissoudra activement.
- Sécher complètement : Laissez le mur sécher à l’air libre pendant au moins 24 heures. L’humidité piégée derrière un carreau vinyle non respirant provoquera un cloquage immédiat.
Une erreur fréquente consiste à utiliser du liquide vaisselle standard. Les savons à vaisselle contiennent souvent des agents adoucissants, des hydratants et des traces d’huiles qui laissent volontairement un film pour protéger les mains. Ce film réduit drastiquement le PEBR et crée une barrière glissante qui fera décoller les carreaux dès que la température de la pièce augmentera.
Maîtriser la préparation du support selon les matériaux
Si vous constatez que votre lambris est irrécupérable et décidez de le recouvrir d’un nouveau placo ou d’un contreplaqué fin avant la pose, votre méthode de préparation changera complètement. Le lambris bois demande de supprimer la brillance, tandis que les matériaux poreux comme le placo brut nécessitent un scellage pour éviter qu’ils n’absorbent l’humidité de vos adhésifs. Comprendre les besoins chimiques opposés de ces surfaces, c’est ce qui distingue les bricoleurs amateurs des poseurs de niveau professionnel.
Lors de l’évaluation du Prep Efficiency-to-Bond Ratio sur des surfaces variées, le consensus du secteur impose une norme de préparation universelle. La méthodologie de base établie dans notre documentation technique complète donne une configuration optimale qui se transpose parfaitement aux applications sur lambris bois poreux.
Lire : Guide du support : préparer le contreplaqué et le placo pour le peel and stickPonçage ou déglossage
Si votre lambris est scellé ou brillant, un simple nettoyage donne un score de fiabilité de l’adhérence insuffisant. Vous devez supprimer cet aspect brillant pour exposer un profil d’accroche mécanique ou chimique.
Le ponçage avec du papier de verre grain 120 crée un relief mécanique (de minuscules rayures) sur lequel l’adhésif peut s’accrocher. Cependant, poncer un vieux stratifié produit souvent d’énormes quantités de poussière fine, hautement toxique, contenant des vernis anciens et des agents liants potentiellement nocifs. De plus, un ponçage agressif peut déchirer le faux bois à base de papier, créant une surface instable et pelucheuse qui ruine totalement l’adhérence. L’adhésif finit par coller aux fibres de papier desserrées plutôt qu’à la structure du mur.
Le déglosseur liquide — souvent appelé « papier de verre liquide » — est fréquemment le choix le plus malin. On l’applique avec un chiffon, on le laisse réagir chimiquement avec l’ancien scellant, puis on l’essuie. Il modifie la structure moléculaire de la brillance, augmente l’énergie de surface sans générer de particules en suspension, et offre une meilleure surface pour les applications adhésives. C’est plus rapide, plus sûr et nettement plus adapté à la pose.
L’avantage du primaire d’accrochage
Nos tests indiquent qu’un primaire d’accrochage de haute qualité surpasse presque toujours une préparation limitée au nettoyage sur des panneaux lisses. Si vous voulez avoir l’esprit tranquille, le primaire est l’assurance ultime pour votre projet du week-end.
Selon les fiches techniques de fabricants de référence comme Zinsser (B-I-N Shellac-Base) et KILZ (Adhesion Primer), ces revêtements précis sont formulés pour adhérer aux surfaces denses et brillantes sans nécessiter de ponçage intensif. En séchant, ils forment une couche serrée, uniforme et à haute énergie sur laquelle les adhésifs sensibles à la pression se lient parfaitement. Le primaire comble en quelque sorte l’écart, en s’accrochant d’un côté au stratifié glissant et en offrant de l’autre un point d’ancrage idéal pour l’adhésif du carrelage.
Références de test : tableau de score des méthodes de préparation
Le tableau suivant illustre le résultat déterministe de nos tests sur un panneau imitation bois des années 1970 à finition brillante, sur une période de stress contrôlée de 90 jours.
| Méthode de préparation | Score de fiabilité de l’adhérence (ARS) | Rapport efficacité de préparation / adhérence (PEBR) | Utilisation idéale |
|---|---|---|---|
| Nettoyage simple uniquement (eau/savon) | 2/10 (risque élevé d’échec) | Faible (matériaux gaspillés) | Jamais recommandé pour les vieux panneaux. |
| Nettoyage + dégraissage au TSP | 5/10 (adhérence limite) | Moyen (rapide, risque modéré) | Bois véritable non scellé, découpé brut. |
| TSP + décapant de brillance liquide | 8/10 (adhérence solide) | Élevé (excellent équilibre) | Panneaux légèrement scellés ou peu brillants. |
| TSP + ponçage (grain 120) | 7/10 (bonne adhérence, beaucoup de poussière) | Moyen (travail intensif) | Bois véritable épais avec vernis transparent. |
| TSP + primaire d’accrochage | 10/10 (adhérence maximale) | Très élevé (meilleur résultat à long terme) | Stratifiés imitation bois très brillants et panneaux lisses. |
Avis d’expert : activation de l’adhésif sensible à la pression et pression au rouleau
Un élément souvent oublié dans la préparation des panneaux n’est pas le mur lui-même, mais la manière de traiter l’adhésif pendant la pose. Les Peel-and-stick tiles utilisent des polymères élastomères sensibles à la pression. Cela signifie que leur adhérence structurelle est directement activée par la pression physique et la chaleur ambiante.
Si vous posez les carreaux dans une pièce froide (en dessous de 65°F), l’adhésif est rigide et ne parvient pas à épouser la texture microscopique de vos panneaux fraîchement apprêtés. Laissez toujours les carreaux s’acclimater dans la pièce pendant 48 heures. Pendant la pose, utilisez un rouleau J standard et exercez une pression ferme et régulière sur chaque centimètre carré du carreau. Ce frottement génère une chaleur microscopique, réduit juste assez la viscosité de l’adhésif pour qu’il « mouille » parfaitement la surface, et augmente considérablement votre score de fiabilité de l’adhérence.
Comment traiter les rainures profondes et les joints irréguliers des panneaux ?
Vous craignez que ces lignes verticales sombres ne réapparaissent à travers votre toute nouvelle crédence et ne gâchent l’illusion ? Cette section présente des solutions éprouvées pour combler les écarts et garantir que vos carreaux restent parfaitement plats et bien fixés.
Les vieux panneaux sont rarement parfaitement plats. Ils comportent généralement des rainures verticales décoratives destinées à imiter des planches de bois individuelles. Il y a un demi-siècle, c’était un élément de design très à la mode. Aujourd’hui, c’est le principal obstacle structurel à une pose de carreaux nette. Si vous appliquez directement des carreaux fins et flexibles sur ces espaces sans les évaluer, vous rencontrerez inévitablement le redouté « effet de marquage ».
Comprendre l’effet de marquage
Le marquage se produit lorsqu’un matériau de surface souple s’affaisse dans l’espace vide situé en dessous. C’est un processus physique lent et inévitable, entraîné par la température, la gravité et les légers mouvements constants de la structure de votre maison.
Au fur et à mesure que l’adhésif durcit et que la maison bouge légèrement avec les variations de température, le carreau souple épouse la rainure. En quelques semaines, des indentations verticales visibles apparaîtront sur votre nouvelle crédence. Cela brise immédiatement l’illusion d’un vrai carrelage en céramique ou en pierre, en révélant les vides en dessous. La lumière accroche ces indentations et projette des ombres qui donnent à votre nouvelle installation un aspect bon marché et posé à la hâte.

Paramètres de pose directe
Peut-on parfois poser directement sur les rainures sans les remplir ? Oui, mais uniquement dans des conditions très précises liées à la conception structurelle du carreau.
Si les rainures sont extrêmement peu profondes — moins de 1/16 de pouce de profondeur et moins de 1/8 de pouce de largeur — un carreau peel-and-stick épais et rigide peut souvent franchir l’espace avec succès. Les autocollants fins en vinyle seul échoueront à ce test et s’affaisseront immédiatement. Vous devez choisir un carreau doté d’une structure composite multicouche robuste.
La solution structurelle 3D pour les rainures du lambris
La meilleure façon de lutter contre les rainures peu à modérément marquées du lambris sans recourir au mastic consiste à utiliser des carreaux de qualité architecturale conçus spécifiquement avec des capacités de pontage. Les carreaux composites modernes présentent une structure rigide qui ne peut tout simplement pas se déformer dans de petites cavités, recouvrant ainsi efficacement les imperfections tout en conservant leur intégrité structurelle.
En tenant compte de la dégradation des performances à long terme sur des supports irréguliers, Dual Ceramics s’impose comme la référence architecturale. En neutralisant de manière empirique les petites irrégularités de surface grâce à sa structure 3D plus épaisse, il calibre le rendu pour une finition visuelle parfaitement plane, en évitant totalement de combler les lignes légères du lambris.
Voir le produit : Dual CeramicsCombler et enduire les rainures
Pour des rainures standard ou profondes, combler les vides est indispensable. Sauter cette étape est le moyen le plus rapide de ruiner l’esthétique de votre projet.
- 1. Nettoyez les rainures : La poussière et les huiles s’incrustent profondément dans ces cannelures au fil des décennies. Nettoyez-les soigneusement avec un embout brosse d’aspirateur et, si nécessaire, un coton-tige humide imbibé de dégraissant.
- 2. Appliquez le mastic : Enfoncez un enduit de rebouchage de haute qualité, sans retrait, ou un bouche-pores spécial bois dans les lignes verticales à l’aide d’un couteau à enduire souple de 4 pouces. Faites-le pénétrer profondément dans l’espace afin qu’aucune poche d’air ne subsiste.
- 3. Raclez à ras : Maintenez le couteau bien plaqué contre le lambris pour que le mastic arrive parfaitement à fleur de la surface du mur. Tout excédent laissé sur la face plane du panneau créera une surépaisseur sous votre nouveau carreau.
- 4. Poncez et appliquez l’apprêt : Une fois sec, poncez légèrement les zones réparées pour les lisser. Vous devez apprêter l’enduit sec, sinon il agira comme une éponge et aspirera l’humidité de votre colle pour carrelage, provoquant un décollement des bords le long de chaque ligne rebouchée.
L’alternative de la sous-couche
Parfois, un vieux lambris est tout simplement trop voilé, trop lâche ou trop texturé pour être sauvé avec un enduit. Si le panneau fléchit physiquement lorsque vous appuyez dessus, ou s’il est gondolé à cause d’anciens dégâts des eaux, poser du carrelage par-dessus est structurellement irresponsable.
Dans ces cas, le rapport coût/rendement le plus efficace consiste à ignorer complètement le lambris. Poser directement sur les anciens murs une sous-couche en drywall de 1/4 de pouce ou en contreplaqué lauan offre un support neuf et parfaitement plat. Cela réduit fondamentalement le risque de report des défauts et garantit une surface impeccable pour vos carreaux adhésifs. Même si cela nécessite de découper de minces panneaux de bois, c’est souvent bien plus rapide que d’essayer de reboucher, poncer et mettre à niveau à la perfection des planches des années 1970 fortement endommagées.
L’environnement de la pièce dicte-t-il la préparation du lambris ?
Vous craignez que l’humidité quotidienne de la salle de bain ou la chaleur de la cuisinière fasse décoller vos nouveaux carreaux pendant la nuit ? Cette section détaille les contraintes environnementales et les ajustements de préparation indispensables dans les zones très humides ou très chaudes.
Un mur d’accent dans un salon n’est pas soumis aux mêmes contraintes qu’une crédence derrière une cuisinière. Les variations de température, l’humidité ambiante et la chaleur rayonnante directe influencent fortement la tenue des adhésifs sensibles à la pression dans le temps. La liaison adhésive est une réaction chimique qui peut être inversée sous l’effet de certaines contraintes environnementales.
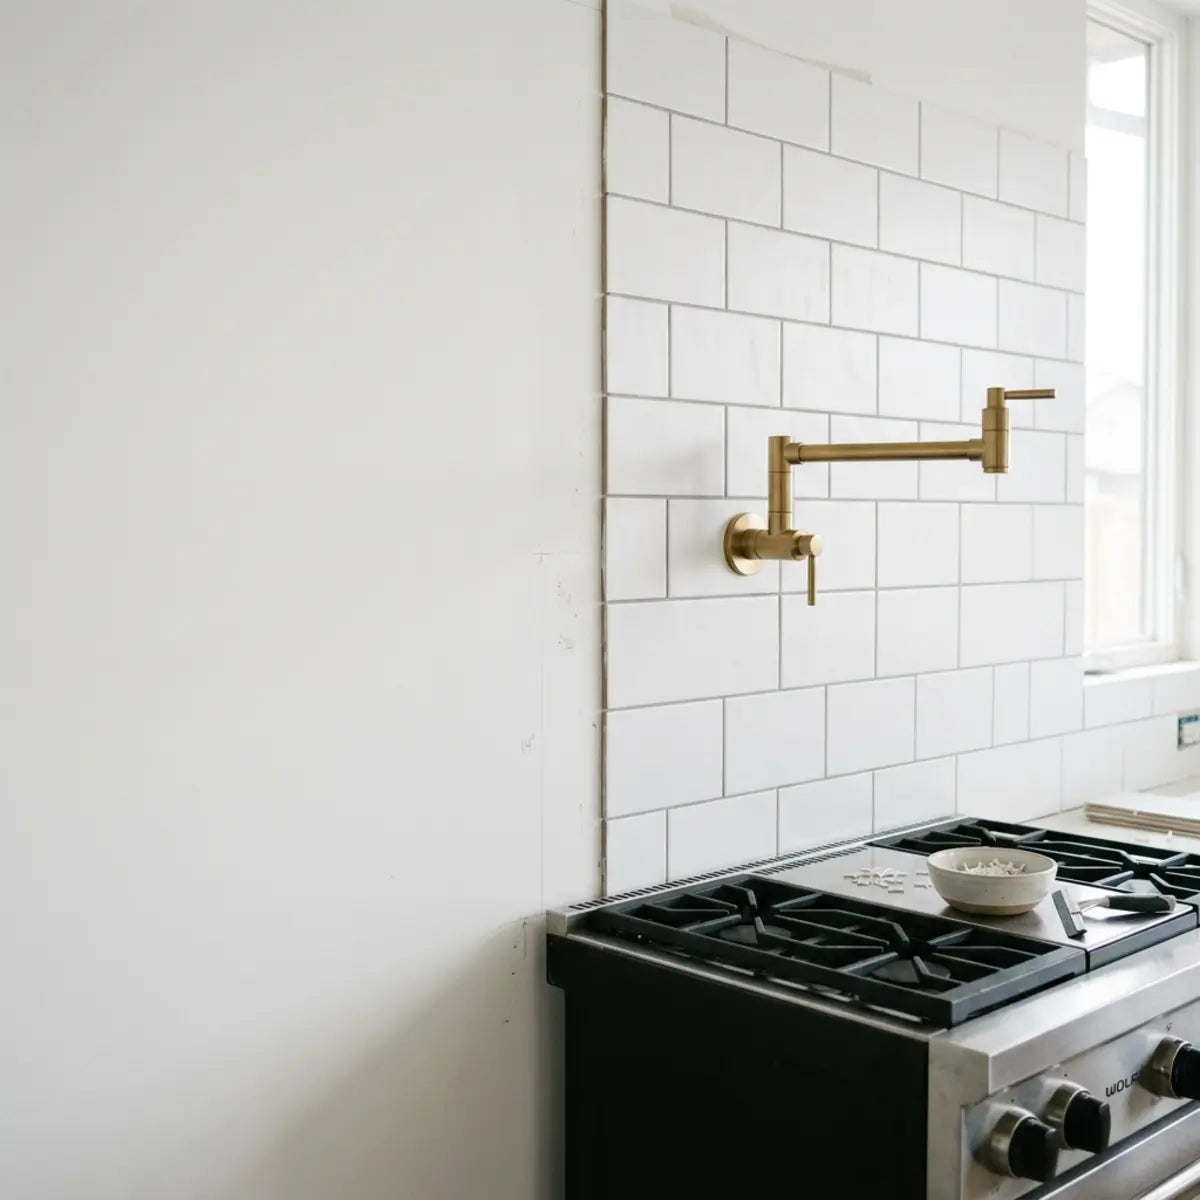
Limites pour une crédence de cuisine
Les cuisines génèrent une chaleur ambiante importante, surtout derrière les zones de cuisson. Cette chaleur peut traverser de minces carreaux et attaquer la matrice adhésive par l’arrière.
Les adhésifs peel-and-stick standard peuvent ramollir lorsqu’ils sont exposés en continu à de fortes températures directes. La plupart des fabricants de carreaux respectent strictement des consignes de sécurité imposant une distance minimale de 8 à 9 pouces entre la source de chaleur (comme un brûleur à gaz) et le carreau adhésif. Ignorer cette distance peut faire décoller les carreaux par plaques lorsque la cuisinière fonctionne à pleine puissance.
De plus, le lambris de cuisine retient souvent des couches invisibles de graisse issues de décennies d’huiles de cuisson en aérosol déposées sur les murs. Le dégraissage n’est pas facultatif ici ; c’est l’étape la plus critique. Si vous posez des carreaux sur des traces microscopiques d’huile de cuisson, le seuil de performance de l’adhésif tombe à zéro. La graisse agit en quelque sorte comme un agent de démoulage chimique.
Humidité de la salle de bain et faux bois
Les salles de bain présentent le risque d’échec le plus élevé en raison des cycles quotidiens de vapeur dense et d’une humidité localisée. Le défi est ici double : protéger la liaison adhésive et protéger le lambris vulnérable en dessous.
De nombreux panneaux imitation bois des années 1970 comportent des âmes en papier compressé ou en panneau dur sous leur surface stratifiée. Si l’humidité pénètre par les joints de vos nouveaux carreaux, elle atteindra cette âme en papier. Le lambris absorbera rapidement l’eau, gonflera, se déformera et rejettera violemment le carreau adhésif posé dessus. Les carreaux eux-mêmes sont imperméables, mais les joints constituent des points de défaillance potentiels.
Astuce de pro pour la salle de bain : Scellez toujours les bords. Appliquez un fin cordon de silicone de haute qualité, résistant aux moisissures, le long du bord inférieur, là où le carreau rejoint le meuble-vasque ou la baignoire. Cela empêche l’eau stagnante de remonter derrière l’installation par capillarité.
Variations de température dans les mobil-homes
Les mobil-homes et les chalets anciens présentent souvent des lambris intérieurs. Ces structures connaissent généralement des variations de température plus importantes que les maisons classiques, en raison de profils d’isolation murale plus fins et de dessous exposés.
Le lambris en bois se dilate et se contracte fortement avec ces changements thermiques. Les carreaux adhésifs doivent offrir une flexibilité élastomère suffisante pour accompagner le mur. Si le lambris bouge fortement, une liaison rigide de mauvaise qualité peut se rompre ou faire bomber les carreaux vers l’extérieur. Une bonne acclimatation est essentielle dans ces environnements. Laissez les boîtes de carreaux dans la pièce pendant 48 heures avant la pose afin d’égaliser leur température avec l’état moyen exact de la structure.
Que faire avec un lambris déjà peint
Une grande partie des propriétaires, au cours des trois dernières décennies, a tenté de résoudre le problème du « lambris sombre » en appliquant simplement une peinture latex bon marché dessus. Si votre lambris a été peint, la dynamique thermique change complètement. La peinture latex se dilate et se contracte différemment du bois en dessous. Appliquer un adhésif sur une mauvaise peinture signifie que vous adhérez uniquement à la couche de peinture, qui peut se décoller du bois à tout moment.
Pour les environnements lambrissés déjà modifiés avec des finitions latex standard, le seuil de performance exige des techniques spécifiques de liaison chimique afin de garantir que la couche de peinture ne se cisaille pas. L’évaluation standardisée de notre guide d’installation complet réduit fondamentalement le risque de décollement dans des climats peints et variables.
Lire : Poser des Stick Tiles sur des murs peints : guide et conseilsFaut-il comparer le peel-and-stick tile au shiplap sur un vieux lambris ?
Vous hésitez entre recouvrir ce mur daté avec des sticky tiles ou poser des lames de bois modernes ? Cette section compare le rapport coût/rendement pour vous aider à choisir la mise à niveau esthétique la plus intelligente selon votre niveau de bricolage.
Lorsqu’on se retrouve face à toute une pièce recouverte d’un lambris démodé, les bricoleurs comparent souvent deux solutions de week-end très populaires pour masquer cet énorme décor tristement daté : poser du peel-and-stick tile moderne ou clouer des lames de shiplap blanches, très tendance. Les deux options permettent de faire disparaître efficacement l’esthétique des années 1970 sans démolir les plaques de plâtre, mais elles exigent des ressources, des outils et des engagements structurels très différents.
Évaluer le coût total de possession (TCO)
Le coût ne se limite presque jamais au prix du revêtement. Le shiplap nécessite d’acheter le bois aux bonnes dimensions, une cloueuse à brads spécialisée, un compresseur d’air (ou un équivalent sans fil coûteux), un mastic à bois spécifique pour les centaines de trous de clous visibles, un primaire d’accrochage, puis enfin la peinture de finition. Le coût des matériaux grimpe vite et dépasse souvent le budget initial de 40%.
Le peel-and-stick tile nécessite généralement seulement les carreaux eux-mêmes, un simple cutter, un tapis de découpe auto-cicatrisant et le primaire d’accrochage de surface de votre choix. Même si les carreaux haut de gamme affichent un coût au pied carré plus élevé que du pin brut, l’absence totale d’outils électroportatifs spécialisés et de fournitures de finition en plusieurs étapes maintient le budget global du projet bien plus bas pour les débutants.
Le grand débat du mur d’accent
Choisir entre ces deux méthodes, ce n’est pas seulement une question de prix ; c’est aussi une question d’épaisseur ajoutée à la pièce, de propriétés acoustiques et de durabilité à long terme. Nous avons réalisé de vastes installations comparatives dans des pièces identiques afin de mesurer le véritable investissement en temps, les coûts d’outils cachés et l’impact visuel final entre le shiplap rigide et les tuiles adhésives 3D modernes.
Découvrez quel matériau tient réellement la promesse d’un « upgrade de week-end » et lequel finit inévitablement par se transformer en chantier poussiéreux de plusieurs semaines. La seule comparaison qui combine des détails concrets sur les coûts, des notes sur la facilité d’installation et des tests d’humidité et de durabilité pour les bricoleurs du quotidien est enfin là.
Lire : Nous avons testé le Peel and Stick Tile vs Shiplap : le vrai gagnant du DIYMain-d’œuvre et vitesse d’installation
La pose de shiplap à l’aide de clous demande une planification structurelle minutieuse. Vous devez utiliser un détecteur de montants pour localiser les montants de l’ossature derrière l’ancien lambris. Comme les anciens panneaux sont souvent très fins (parfois jusqu’à 1/8 inch), les clous qui ne trouvent pas de montant traverseront simplement l’arrière sans offrir la moindre tenue structurelle, ce qui finira par faire se décoller les lames lourdes du mur. Il faut aussi savoir découper avec précision les ouvertures autour des prises et interrupteurs à l’aide d’une scie sauteuse ou d’un outil multifonction oscillant.
Les carreaux auto-adhésifs offrent une vitesse de pose nettement plus rapide. Ils se marquent avec précision et se cassent net avec un simple cutter. Parce qu’ils sont extrêmement légers, ils adhèrent directement à la surface du panneau préparée, sans dépendre des montants structurels. Vous collez sur la peau de surface, en évitant totalement d’avoir à réaliser une menuiserie intérieure complexe.
Considérations pour les locataires
Les propriétaires autorisent rarement les locataires à enfoncer des centaines de brads dans des murs existants. Les dégâts physiques laissés par une pose de shiplap nécessitent une remise en état professionnelle du placo. Si vous louez un logement avec un vieux lambris, le shiplap est presque certainement interdit par votre bail.
Les options adhésives offrent une alternative non destructive, à condition que la surface soit correctement préparée et que l’adhésif soit formulé pour être retiré. Lorsqu’on évalue le coût total de possession (TCO) sur un cycle de location standard de 12 à 24 mois, la base de calcul change complètement pour les locataires. Préserver votre dépôt de garantie devient alors le principal moteur financier.
Protéger votre dépôt de garantie
La physique du retrait d’un adhésif très puissant d’une surface des années 1970 sans arracher le délicat faux bois laminé exige une application thermique précise. Si vous saisissez simplement un coin pour tirer, vous risquez d’arracher le papier sous-jacent du mur, ce qui entraînera de lourds frais de dommages facturés par votre propriétaire.
Le cadre complet détaillé dans notre guide technique de dépose montre un coût opérationnel statistiquement plus faible et protège les dépôts de garantie. En utilisant une application ciblée de chaleur et des outils de décollement d’adhésif spécialisés, vous pouvez remettre l’espace proprement dans son état d’origine le jour du déménagement.
Lire : Comment poser des Peel and Stick Wall Tiles sans dommageListe de contrôle avant achat : feu vert / feu rouge
Cliquez sur les éléments ci-dessous pour vérifier que votre projet est prêt à être mené à bien.
Réflexions finales
Prêt à lancer la transformation de votre pièce ce week-end ? Cette section synthétise nos tests empiriques en un plan d’action final simple pour garantir la réussite totale de votre projet sur ancien lambris.
Moderniser un lambris en bois des années 1970 sans démolition lourde est tout à fait possible. Le rêve de recouvrir cette époque sombre et datée de la décoration intérieure en un seul week-end est parfaitement à la portée du bricoleur moyen. Nos tests prouvent que le peel-and-stick tile offre la meilleure configuration lorsque la préparation correspond parfaitement aux besoins chimiques et physiques du support. Les échecs que vous lisez en ligne sont presque toujours dus à l’oubli de l’étape de préparation chimique, en espérant un miracle.
Ne vous contentez pas d’un simple coup de chiffon. Évaluez le niveau de brillance et la porosité de votre lambris. Si vous avez affaire à des stratifiés faux bois lisses, un nettoyage au TSP suivi d’un primaire d’accrochage de haute qualité est le schéma de réussite universellement reconnu. Si vos murs présentent de profondes rainures décoratives, vous devez les remplir ou utiliser une tuile 3D plus épaisse afin d’éviter que l’effet de télégraphie ne vienne ruiner les lignes nettes de votre nouvelle installation.
En respectant les limites des adhésifs sensibles à la pression et en contrôlant l’humidité ambiante, vous pouvez obtenir une finition durable et élégante qui transforme complètement la luminosité et l’aspect moderne de votre espace.

La ressource pédagogique ultime
Vous en avez assez de reconstituer des rénovations coûteuses et salissantes à partir de tutoriels en ligne fragmentés ? Nous avons rassemblé la masterclass définitive sur les systèmes de carrelage adhésif modernes. Avant d’acheter vos matériaux, consultez notre guide détaillé pour comparer les options de primaire, choisir un type de carreau avec l’épaisseur adaptée à l’état de votre mur et créer dès aujourd’hui votre checklist de préparation sur mesure. Arrêtez de deviner et commencez à agir avec une confiance professionnelle.
Lire : Peel and Stick Tiles : Guide complet 2025Sublimez votre espace avec un design interactif
Une fois votre lambris parfaitement préparé et modernisé, il est temps d’arrêter de simplement décorer et de commencer à véritablement créer. Découvrez une création originale qui associe une technologie adhésive premium à un design mural interactif breveté. Ce n’est pas qu’un revêtement mural ; c’est une expérience visuelle dynamique que vous contrôlez.
Voir le produit : Petalglow Stick™Accordéon de dépannage : corrections après installation
Questions fréquentes
Dois-je poncer le lambris brillant avant de poser des peel-and-stick tiles ?
Oui, il faut généralement supprimer l’aspect très brillant pour garantir une adhérence fiable. Les adhésifs sensibles à la pression ont du mal à accrocher sur des surfaces lisses à faible énergie. Cependant, au lieu d’un ponçage physique salissant, passer les panneaux avec un déglossant liquide ou appliquer un primaire d’accrochage de haute qualité est souvent beaucoup plus rapide et élimine la poussière toxique des anciens vernis transparents.
Le peel-and-stick tile va-t-il masquer les rainures verticales de mon mur ?
Cela dépend de l’épaisseur du carreau et de la profondeur des rainures. Les revêtements vinyles très fins vont s’enfoncer dans les rainures en quelques semaines, créant des marques verticales appelées effet de télégraphie. Des carreaux 3D plus épais et rigides peuvent franchir des rainures très peu profondes. Pour des rainures standard ou profondes, vous devez les remplir de mastic et les poncer à fleur avant la pose afin de conserver des lignes visuelles nettes.
Puis-je poser une crédence self-adhésive sur du lambris derrière une cuisinière ?
Oui, mais en respectant strictement les distances thermiques. Vous devez laisser un espace d’au moins 8 à 9 pouces entre la source de chaleur et le carreau. Une chaleur directe et constante ramollira l’adhésif, provoquant le décollement des carreaux et créant un risque d’incendie potentiel sur un ancien lambris en bois desséché.
Combien de temps dure un peel-and-stick tile sur des murs en bois des années 1970 ?
Lorsqu’ils sont correctement dégraissés, apprêtés et posés dans une pièce à climat contrôlé, des peel-and-stick tiles haut de gamme peuvent facilement durer trois à cinq ans, voire plus. Dans les salles de bains très humides ou sur des murs brillants non apprêtés, la durée de vie peut tomber à quelques semaines seulement en raison d’une défaillance de l’adhésif ou d’une déformation des panneaux.
Laisser un commentaire
Ce site est protégé par hCaptcha, et la Politique de confidentialité et les Conditions de service de hCaptcha s’appliquent.