
















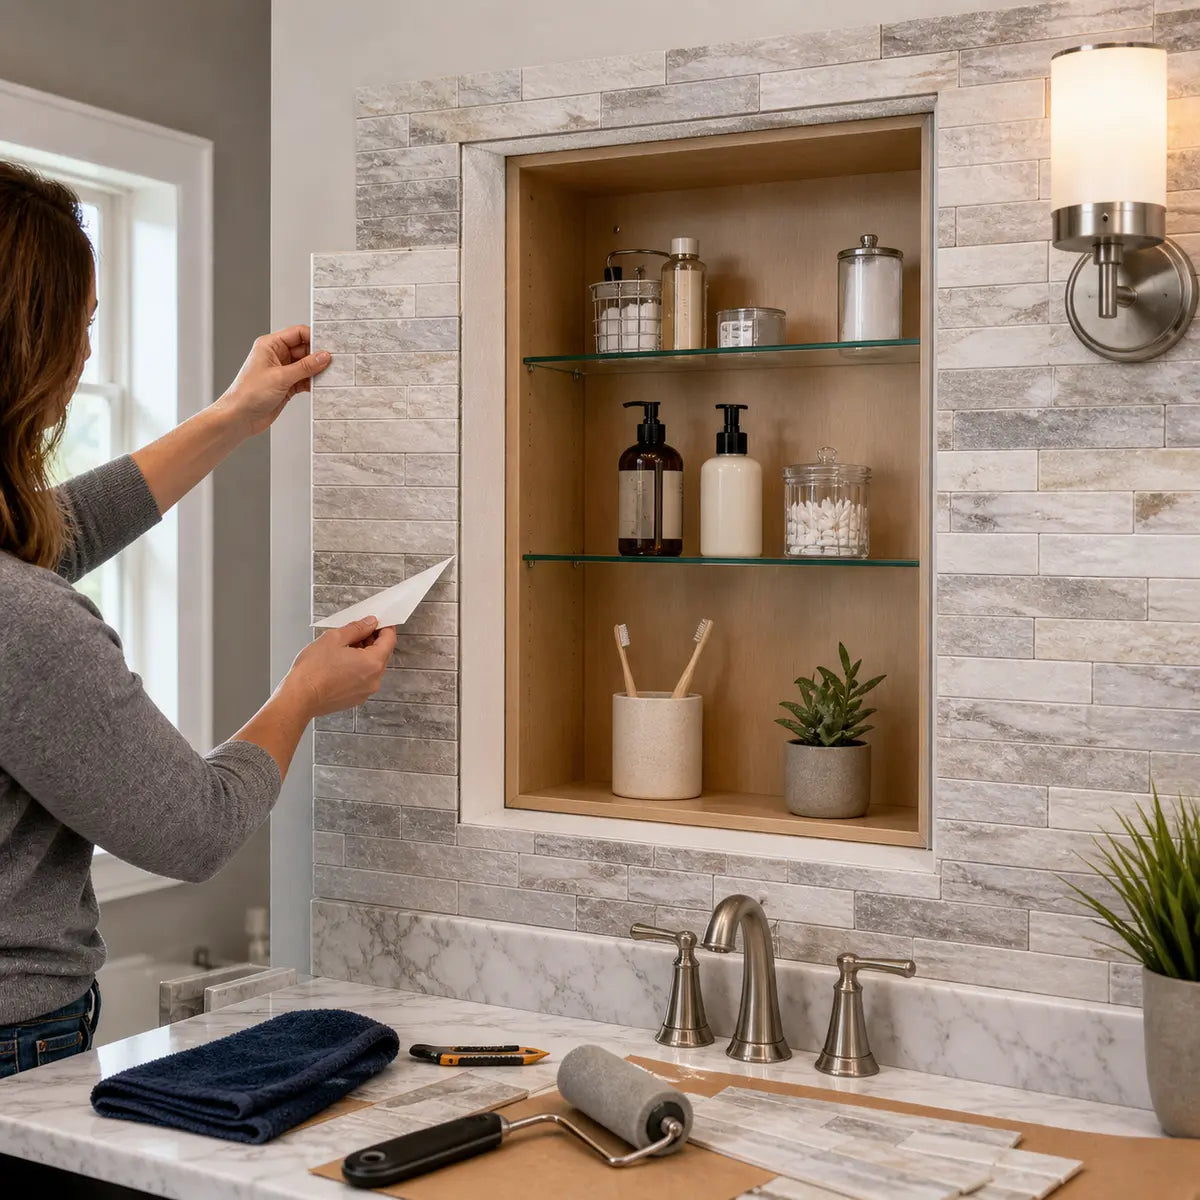
The flat bathroom wall is usually the easy part. The challenge begins where that wall turns into a recessed medicine-cabinet opening with four different depths, four inside corners, visible cut edges, and a cabinet flange that may or may not cover your work.
Explore this guide
Before measuring, use these terms consistently:
- Wall face: The main flat bathroom wall surrounding the cabinet.
- Return: The surface running from the wall face into the recessed opening. There are left, right, top, and bottom returns.
- Reveal: The visible depth or band around the cabinet after installation.
- Flange: A projecting cabinet rim that may sit against the finished wall and conceal part of the perimeter.
- Inside corner: The line where the wall face turns into a return, or where two returns meet near a corner of the opening.
Treat the opening as four connected installation zones rather than one rectangular hole. That shift makes the layout easier to understand and helps prevent the most common problems: narrow slivers, uneven reveals, drifting pattern lines, exposed adhesive edges, and return pieces that do not sit flat.
Why Is a Recessed Medicine Cabinet Harder to Tile Around?
A recessed cabinet turns a two-dimensional tile layout into a three-dimensional fitting job. A sheet that looks perfectly aligned on the wall face may reach the cabinet at an awkward point, creating a thin strip on one side, a visible cut at the top, or a pattern that cannot continue cleanly onto the returns.
A simplified cross-section looks like this:
ROOM SIDE INSIDE CABINET OPENING WALL FACE | | peel-and-stick tile V ======================= wall substrate |\ | \ inside corner | \ | \ RETURN | \================ | | | REVEAL | CABINET BODY | | |=====================| ^ | cabinet flange if the model has one
Viewed from the front, the four returns form a connected frame:
TOP RETURN +-------------------+ | \ / | | \ / | LEFT | CABINET | RIGHT RETURN | OPENING | RETURN | / \ | | / \ | +-------------------+ BOTTOM RETURN The diagonal marks represent the four return-to-return corner areas.
Three conditions make the work more exacting.
First, the opening may not be square. The left return can be deeper at the top than at the bottom. The top return may dip slightly. A cabinet that looks centered can have different flange coverage on each side. One “standard return depth” copied four times may fit only one location.
Second, the wall-face layout and return layout compete for attention. Centering the pattern on the vanity or wall may create a poor cut at the cabinet. Centering it on the cabinet may make the wider wall look unbalanced. A successful layout usually protects the most visible pattern lines while moving less attractive cuts into concealed or visually quiet areas.
Third, peel-and-stick tile constructions are not interchangeable. A flexible vinyl sheet, raised gel mosaic, thin metal tile, rigid composite panel, or stone-faced product may require a different cutting tool and corner method. Manufacturer instructions checked for several product families differ on approved substrates, cleaners, fresh-paint waiting periods, corner fabrication, water exposure, and finishing materials. The Aspect distressed metal installation guide, for example, includes requirements that apply to that metal product rather than to peel-and-stick tile as a universal category.
The practical lesson is simple: use the workflow in this guide for planning and fitting, but take material-specific instructions from the exact tile, cabinet, cleaner, primer, trim, adhesive, and sealant documentation.

Can Peel-and-Stick Tile Go Around a Medicine Cabinet?
Peel-and-stick tile can be planned around a recessed medicine cabinet only after you confirm that the selected tile is approved for the bathroom location and for every surface it will touch. Approval for a painted wall face does not automatically mean approval for the cabinet returns.
Inspect the wall face and all four returns independently. A single opening may contain several materials:
- Painted drywall on the wall face
- Joint compound on one return
- Exposed gypsum board edge on another
- Painted or bare wood at the top
- Metal from the cabinet body or flange
- Old adhesive, laminate, plaster, or existing tile
- Patching material at damaged corners
This matters because tile manufacturers publish different acceptable-surface lists. Some identify prepared drywall, plaster, smooth glazed tile, mirror, or other smooth indoor surfaces as acceptable for specified products. Others exclude unpainted drywall, sheetrock, plaster, wallpaper, textured walls, or damp surfaces. The Smart Tiles surface and corner guidance illustrates how approval, preparation, paint age, moisture exposure, and corner instructions are tied to a specific product system.
“Suitable for bathrooms” should not be treated as “waterproof” or “approved for every bathroom surface.” The checked Aspect, Smart Tiles, and WallPops instructions distinguish between certain bathroom or splash uses and direct shower, bathtub, standing-water, immersion, or constantly wet exposure. For a practical room-zone review, see the guide to low-splash bathroom walls for peel-and-stick tile.
If you have not selected a tile yet, start with the peel-and-stick tile planning guide. Confirm the location and substrates before comparing visual options such as Subway Marble peel-and-stick wall tile or Subway Magic peel-and-stick wall tile. Those product destinations provide selection context, but they do not establish compatibility with your particular cabinet returns, edge finish, primer, sealant, or moisture exposure.
Which Cabinet Configuration Do You Have?
Your cabinet configuration determines where the tile stops, which cuts remain visible, and whether the cabinet should be removed before installation. Do not choose the cutting route from appearance alone.
Start with four inputs:
- Does the cabinet have a projecting flange?
- Does that flange actually overlap the wall on all four sides?
- Is the cabinet removable without disturbing wiring, plumbing, framing, or required mounting?
- Will the finished tile thickness interfere with the flange or door?
Find your preliminary planning route
Select what you have verified on the installed cabinet. This tool gives a preliminary route only; the complete configuration table and exact cabinet documentation remain controlling.
Logic and limit: Verified four-sided flange coverage plus documented removability points toward the removable-cabinet route. Verified coverage on a fixed cabinet points toward templating beneath the accessible flange. Partial or absent coverage points toward an exposed finish line. Unknown conditions require measurement and model confirmation rather than a guessed cut.
Use the following decision table as a route finder.
| What you observe | Planning route | Where the wall-face cut lands | Return strategy |
|---|---|---|---|
| Removable cabinet with a documented flange that can seat over the finished surface | Confirm allowable finish thickness, remove the cabinet if permitted, tile to the measured concealed zone, then reinstall as directed | Under the flange, within its verified coverage | Tile returns only if the cabinet design and tile instructions allow it |
| Fixed cabinet with an accessible projecting flange | Template each wall-face piece to meet or extend beneath the flange only as far as the actual gap allows | At or slightly under the measured flange edge, never based on an assumed overlap | Measure each return from the wall corner to the cabinet boundary |
| Fixed cabinet with little or no concealing flange | Treat the perimeter as an exposed finish line | At the visible cabinet edge or approved trim line | Use a documented clean cut, compatible trim, butt joint, or approved sealant detail |
| Cabinet surround or decorative frame covers the opening | Confirm how the surround is removed and reinstalled | Within the surround’s measured coverage | Do not block fasteners, clips, access points, or ventilation |
| Powered, lighted, mirrored, or feature-rich cabinet | Follow the exact cabinet installation and service instructions before changing the perimeter | Determined by the model documentation | Preserve wiring access, junction areas, removable panels, sensors, vents, and service clearance |
| Unknown cabinet model or uncertain flange fit | Pause final cutting and identify the cabinet or measure the installed assembly directly | Not yet determined | Template only after the finish boundary is known |
A flange is not a general-purpose error allowance. Kohler’s documentation for two specific recessed models says their flange fits flush against the wall, but the Kohler K-2962 roughing-in sheet does not establish how much of your tile cut another cabinet will conceal. Added tile thickness can also change how a flange seats.
Measure flange coverage on the actual cabinet:
- Mark the visible outside edge of the flange with low-tack tape.
- Determine where the cabinet opening or flange underside begins.
- Record the true overlap on the left, right, top, and bottom.
- Check several points along each side rather than measuring only at the center.
- Compare the smallest measured overlap with the planned tile cut.
- Confirm that the tile thickness does not keep the flange from seating correctly.
- Open the door fully and check for contact with tile, trim, lighting, nearby walls, or other obstacles.
Cabinet specifications can include model-specific rough openings, hinge angles, framing instructions, piping warnings, and obstruction checks. One Kohler K-99895 cabinet specification, for example, lists a nominal 19-1/4-inch by 25-1/4-inch by 3-5/8-inch recess cutout and a 108-degree door opening. Those numbers apply only to that model, but they show why a cabinet’s actual documentation matters.
Do not tile over fasteners, vents, wiring access, junction boxes, labels, removable covers, shelf-support areas, lights, sensors, or required service gaps. If removing or altering the cabinet involves electrical components, plumbing, structural framing, or concealed conditions, stop the decorative work and use qualified help where required.
Plan the Wall-Face Pattern Before Measuring the Returns
The wall-face pattern should establish the visual grid for the entire installation. Plan it before measuring return pieces because the location of the surrounding cuts determines which colors, grout lines, or tile shapes reach the cabinet opening.
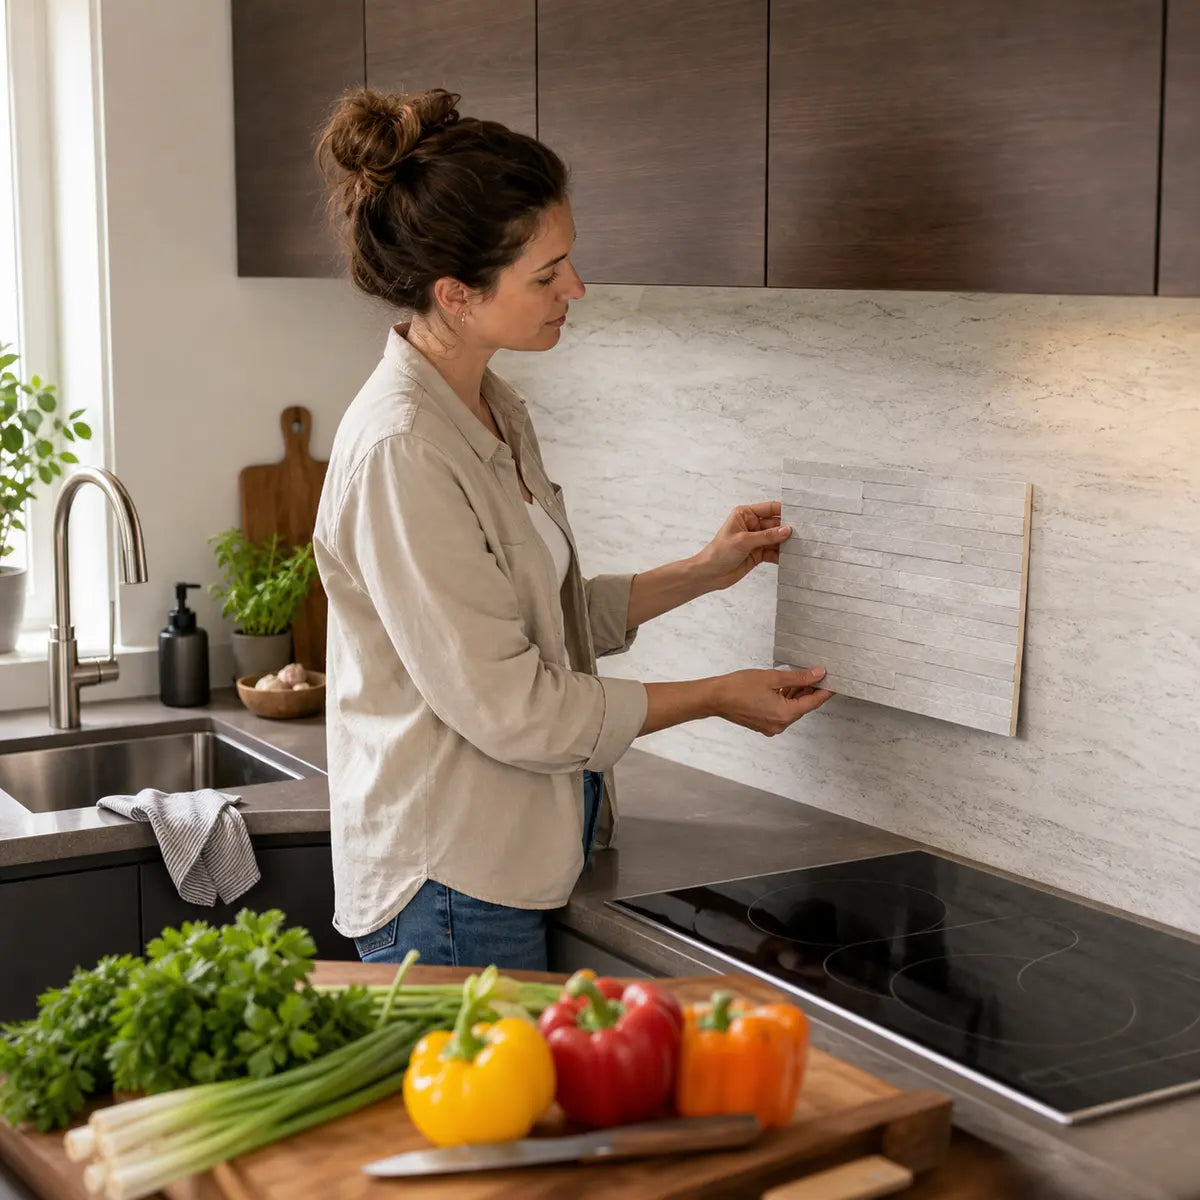
Place several unopened or liner-backed sheets on the wall and compare three layouts:
- Pattern centered on the cabinet
- Pattern centered on the vanity or wall
- Pattern shifted enough to avoid narrow cabinet-edge pieces
A balanced layout does not always mean mathematically equal cuts. It means the visible result appears intentional from the normal standing position.
POOR CABINET-EDGE LAYOUT | full | full | full | sliver | CABINET | full | full | ^ narrow, fragile piece MORE BALANCED LAYOUT | part | full | full | wider cut | CABINET | wider cut | full | part | ^ stronger visual boundary
Pay attention to both axes.
Horizontal layout: Check the cuts at the left and right sides of the cabinet, at wall corners, and at any nearby outlet or edge.
Vertical layout: Check what happens above and below the cabinet. A tiny strip directly over the cabinet is often more noticeable than a larger cut moved to the ceiling line or another quiet boundary.
For subway and brick patterns, preserve the row rhythm. A cut sheet that shifts half a tile out of sequence can make the cabinet appear crooked even when the opening is level. With veined, geometric, or directional patterns, mark every sheet’s orientation before cutting.
A good planning rule is to protect long pattern lines before protecting small decorative fragments. People tend to notice a broken horizontal course or an abrupt color jump before they notice that one individual tile shape is slightly narrower.
Review the complete wall layout from several feet away. Temporary painter’s-tape outlines can represent the cabinet cut and outside tile boundaries. If you need a broader refresher on reference lines and balanced placement, use the beginner peel-and-stick subway tile installation guide before committing to the cabinet cuts.

How Do You Measure All Four Medicine-Cabinet Returns?
Measure every return as its own tapered shape. Do not assume the left and right returns match, that the top and bottom are parallel, or that one depth measurement can be copied around the opening.
First, define the two boundaries of each return:
- Outer boundary: The inside corner where the wall face turns into the opening.
- Inner boundary: The cabinet body, flange, trim, reveal line, or other confirmed stopping point.
Then record the length and depth of each return at multiple locations.
Four-return measurement worksheet
| Zone | Length at outer edge | Length at cabinet edge | Depth at first end | Depth at center | Depth at second end | Edge treatment | Notes |
|---|---|---|---|---|---|---|---|
| Left return | Top: | Bottom: | |||||
| Right return | Top: | Bottom: | |||||
| Top return | Left: | Right: | |||||
| Bottom return | Left: | Right: |
For the left return, measure depth at the top, center, and bottom. For the top return, measure at the left, center, and right. Differences tell you whether the opening is out of square or the cabinet sits unevenly in the recess.
Record measurements directly on a sketch:
TOP RETURN depth: L ___ C ___ R ___ +---------------------------+ | | LEFT RETURN | CABINET OPENING | RIGHT RETURN depth: | | depth: T ___ | | T ___ C ___ | | C ___ B ___ | | B ___ +---------------------------+ BOTTOM RETURN depth: L ___ C ___ R ___
Measure to the actual finished boundary, not to a shadow line or reflection in the mirror. A mirrored flange can make the edge difficult to read. Low-tack tape placed on the intended finish line gives you a clearer target.
If a flange will cover the cut, record two dimensions:
- Distance from the wall-face corner to the visible flange edge
- Distance from the wall-face corner to the deepest verified point the tile may extend beneath the flange
That creates a concealment range. Keep the planned cut inside the measured range while preserving enough clearance for the cabinet to seat as directed.
If the perimeter will remain visible, build in only the gap required by the chosen, compatible finishing method. Do not add a generic caulk gap or trim allowance before selecting the actual finish.
Measurements identify the shape, but they do not capture every bump, corner radius, bowed surface, or flange variation. That is why the paper template is the final fitting tool.
Make Paper Templates Before Cutting Tile
A paper template transfers the real opening geometry to the tile while the release liner is still intact. It is especially useful for tapered returns, uneven corners, flange notches, patterned sheets, and cuts that will remain visible.
Use thin cardstock, kraft paper, or another material that holds its shape without being too stiff to fit into the opening.
- Cut a rough blank slightly larger than the first return.
- Place it against the return and crease or mark the wall-face corner.
- Mark the cabinet-side boundary.
- Trim the paper gradually until it lies flat without buckling.
- Mark the template’s orientation:
LEFT RETURN,TOP,WALL SIDE, andCABINET SIDE. - Mark the face of the tile that must remain visible.
- Add pattern-registration marks showing which grout lines or motifs must meet the wall face.
- Repeat for all four returns.
- Place the four templates together around a drawn rectangle to check corner relationships.
- Transfer each template to the liner-backed tile only after its orientation is confirmed.
The most common template mistake is accidental mirroring. A left-return template flipped onto the wrong side of the tile produces a piece that fits backward. Labels such as VISIBLE FACE UP and CABINET EDGE are more reliable than relying on memory.
For a patterned tile, the template determines shape while a pattern window determines appearance. Place the template over different parts of a spare sheet and choose the section that continues the surrounding pattern or avoids an awkward fragment.
Choose the cutting tool from the tile construction
Do not assume every peel-and-stick tile can be cut with a utility knife. WallPops instructions permit scissors or a knife for specified products, while Aspect’s distressed metal instructions call for metal-cutting tools and may require a metal-cutting rotary tool for intricate work. The correct tool may instead be shears, a scoring tool, a saw, or another manufacturer-approved method.
Use a clean, stable cutting surface away from the sink and wet areas. Follow the tile and tool instructions, inspect the tool before use, and secure work as required. The OSHA hand and power tool guide provides general safety guidance on using the correct tool, inspecting equipment, securing powered work, and using task-appropriate protection. For household work, treat it as general safety context rather than a substitute for the tile and tool manuals.
When transferring the template:
- Keep the liner attached unless the tile instructions say otherwise.
- Mark the waste side of every line.
- Make a test cut in scrap material before cutting a key patterned piece.
- Support raised or rigid tile so the face is not crushed or cracked.
- Inspect the cut edge for burrs, delamination, exposed adhesive, or face damage.
- Do not force a rigid tile around a corner because it appears slightly flexible.
- Do not use a powered electric tool in a damp location unless it is approved for that use.
A slightly oversized first cut is usually easier to refine than an undersized piece. Trim in small increments, then return the piece to the opening after each adjustment.
For general obstacle-cutting and template practice, the peel-and-stick tile measuring and cutting guide provides useful background. The cabinet templates should still be based on your four separate return measurements.

Dry-Fit Every Irreversible Cut
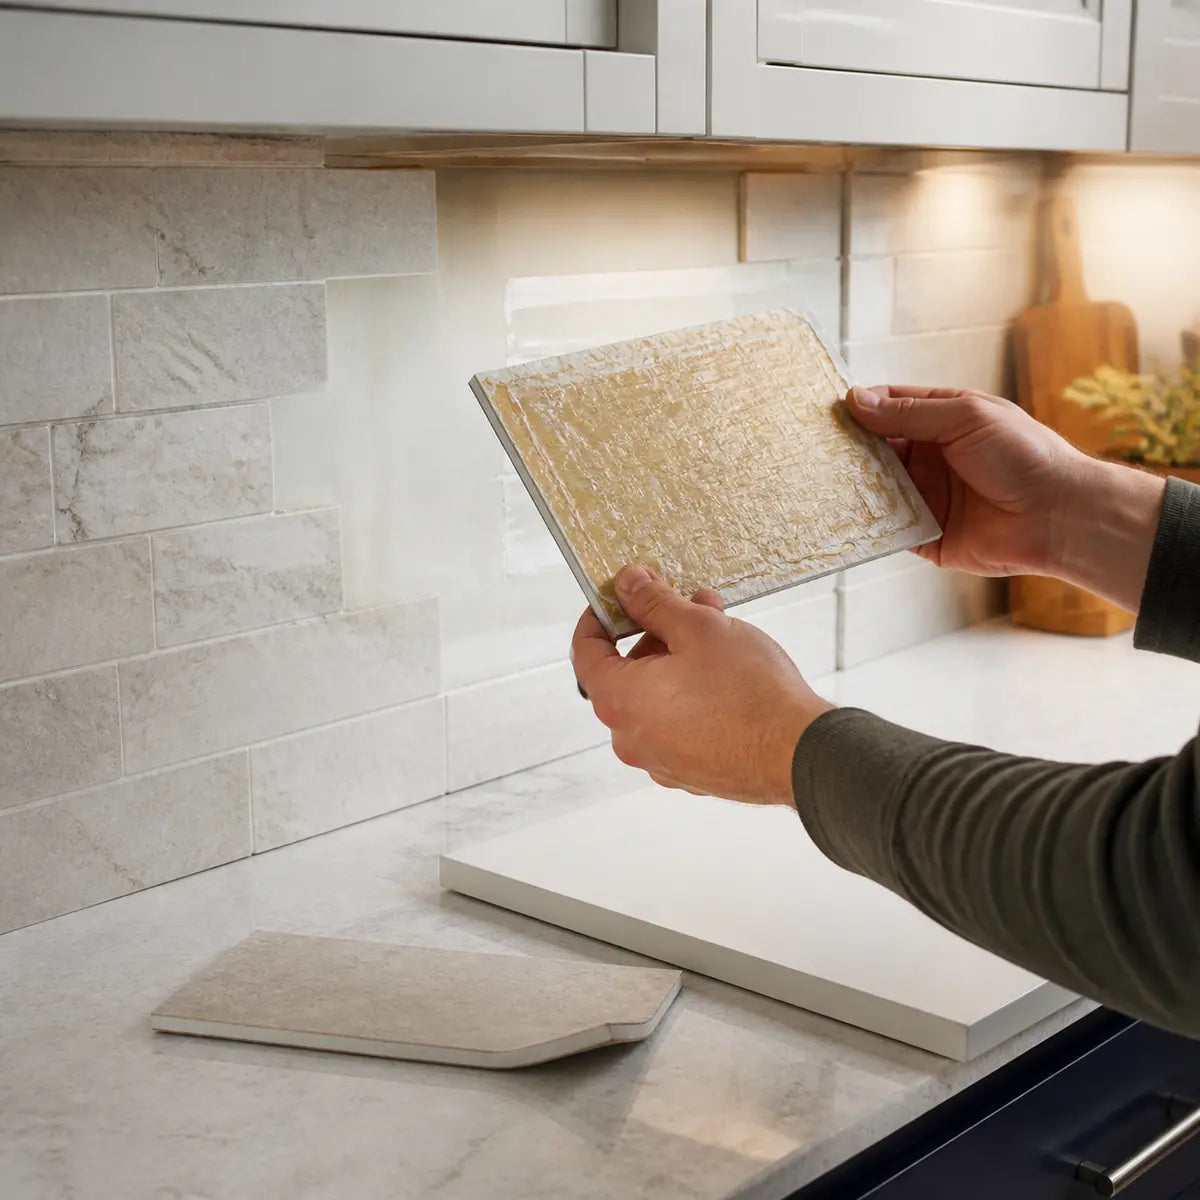
Dry-fitting is the final checkpoint before adhesive contact. Every wall-face cut and return piece should be held in its intended position with the liner intact, provided the exact product instructions allow that handling.
Several checked manufacturer guides support arranging the pattern before installation, checking fit, and applying firm pressure after alignment. The Smart Tiles Metro installation instructions, for example, distinguish initial placement from the firm pressure used after alignment and report a product-specific setting period. Do not transfer that timing or repositionability to another adhesive system.
If one answer is no, keep the liner attached. Adjust the template, layout, or finish before proceeding.
Photograph the completed dry fit and keep the labeled templates nearby. If a cut piece is damaged later, the template can reduce the time required to make a replacement.
Install the Wall Face Around the Opening
Install the surrounding wall face from established level and plumb reference lines, not from the cabinet edge alone. An existing cabinet may be slightly out of level, and copying that error into every tile row can make the full wall appear tilted.
Preparation must follow the exact tile and surface documentation. Checked manufacturers prescribe different methods: one may call for a particular degreaser, another for warm water with no cleaner residue, and another for an alcohol-based method on a specified nonporous substrate. Fresh-paint waits also differ. Smart Tiles identifies 21 days for freshly painted drywall in its FAQ, while WallPops directs users to wait at least four weeks for the products covered by its guide, or longer if required by the paint manufacturer. WallPops also specifies a product-specific acclimation period in its backsplash installation instructions.
Those differences are the reason this guide does not prescribe a universal cleaner, primer, temperature, or waiting period.
Once the surface is approved, prepared, and dry:
- Recheck the pattern against the reference lines.
- Install full wall-face sheets while leaving cabinet-cut pieces until their neighboring alignment is established.
- Keep adhesive surfaces free of dust, oils, cleaner residue, and repeated finger contact.
- Position each cabinet-edge piece from the established tile grid.
- Confirm the cut against the flange or exposed finish line before final pressure.
- Apply firm, even pressure over the full tile surface as required by the manufacturer.
- Inspect the wall-to-return corner for unsupported edges or trapped debris.
Do not use extra pressure as a remedy for a damp, dusty, textured, weak, unapproved, or incompatible substrate. Pressure can help make intended contact; it cannot correct a surface that the adhesive system was not specified to bond to.
A broader bathroom preparation sequence is available in the guide to preparing bathroom walls for peel-and-stick tile.

How Do You Tile the Vertical and Horizontal Returns?
Tile the returns from labeled templates, working in an order that protects the most visible joints and accommodates the approved corner method. The left and right returns are often easier to align first, but there is no universal installation order because tile construction, pattern, edge finish, and cabinet geometry differ.
Vertical returns
For the left and right returns:
- Confirm which edge meets the wall face and which meets the cabinet.
- Compare the top, center, and bottom depths with the template.
- Align any visible pattern line with the wall-face tile.
- Position the piece without stretching or twisting it.
- Check that the full adhesive area can contact the approved return substrate.
- Verify the top and bottom corner joints before applying final pressure.
- Press the piece according to the tile instructions, giving careful attention to the edges without inventing extra force or pass counts.
If the return is tapered, the cabinet-side edge and wall-side edge may not be parallel. That is normal for an out-of-square opening. A tapered piece that fits the real space is preferable to a rectangular piece that leaves a widening gap.
Horizontal returns
Top and bottom returns deserve separate attention.
The top return is visible in the mirror and may show gaps that are difficult to notice from a straight-on view. Use a hand mirror or phone camera to inspect the cabinet-side cut before adhesion.
The bottom return can collect dust, cosmetic residue, and occasional splash depending on the cabinet’s position. Confirm that the tile is approved for the location and that the surface is sound. Do not treat a cosmetic edge bead as a waterproofing assembly.
Dry-fit the horizontal pieces against both vertical returns. If the opening is not square, one end may require a different angle from the other.
How should the four return corners meet?
The correct treatment depends on the exact tile. Possible methods include:
- A butt joint between two separate pieces
- A manufacturer-approved overlap
- A product-specific bend or wrap
- A compatible trim or corner profile
- A documented sealant joint
- A concealed cut beneath an approved cabinet surround
Do not select a method by tile appearance alone. Aspect describes butted inside corners for specified products and a separate routing-and-bending process in certain cases. Smart Tiles describes other concave and convex corner techniques for its products. The Aspect metal and collage technical FAQ demonstrates why a method approved for one construction cannot be assumed appropriate for another.
A flexible-looking face does not prove that the adhesive layer, backing, printed surface, or raised tile pattern can tolerate a sharp fold. Wrapping an unapproved product can concentrate stress at the corner and pull the adhesive away from one or both surfaces.
If separate pieces are required, choose which edge will be visually dominant. In many openings, a clean vertical return edge meeting a carefully fitted top or bottom piece is less noticeable than four competing overlaps. Use the same joint hierarchy at all four corners unless the cabinet geometry makes that impossible.

How Should You Finish Tile Edges Around the Cabinet?
Use a concealed cut only when actual flange coverage is verified. If the edge remains visible, choose a finish documented as compatible with the tile, cabinet finish, substrate, and bathroom exposure.
| Edge option | Best fit | Main advantage | Main concern |
|---|---|---|---|
| Verified flange concealment | Cabinet flange covers the cut and can seat over the finished thickness | Hides the raw perimeter cut | Coverage and allowable thickness are model-specific |
| Clean exposed cut | Tile has a stable, presentable edge approved for exposure | Minimal added thickness | Cut quality, exposed backing, sharpness, or delamination may be visible |
| Butt joint | Separate wall-face and return pieces meet at a corner | Avoids forcing an unapproved bend | Requires accurate cutting and a documented joint detail |
| Manufacturer-approved overlap | Tile system permits overlapping pieces | Can conceal one cut edge | Added thickness and pattern interruption may remain visible |
| Compatible trim | A trim system is approved for the tile and installation sequence | Creates a defined perimeter | Many conventional tile trims assume mortar installation and may not suit self-adhesive tile |
| Compatible sealant joint | All involved manufacturers approve the contact surfaces and joint use | Can soften a small intentional transition | Compatibility, staining, movement, cure, access, and appearance must be checked |
| Wrapped corner | Exact tile instructions allow the bend geometry | Can maintain visual continuity | Bend stress and exposed backing vary by construction |
Sealant is conditional, not automatic. Aspect and Smart Tiles each mention silicone in specific finishing contexts, but those instructions do not prove that any generic silicone is compatible with an unspecified tile, cabinet coating, return substrate, or perimeter joint. A sealant bead must not cover required access or ventilation, and it should not be described as waterproof unless the complete assembly has that documented function.
Trim needs the same scrutiny. A profile made for mortar-set ceramic tile may depend on an anchoring leg embedded in mortar. That does not mean it can simply be placed behind a self-adhesive sheet. Check how the trim is retained, whether its thickness matches the tile, whether cut edges are safe, and whether the metals or finishes are compatible.
For a deeper comparison, use the guide to peel-and-stick tile edge finishes after identifying which edges will remain visible.
What Can You Do About Gaps, Lifting, or Pattern Drift?
Most cabinet-area problems can be isolated and repaired if they are diagnosed before extra adhesive, caulk, or trim is added. Start with the cause rather than covering the symptom.
A gap appears beside the cabinet
Determine whether the gap is within a verified concealed area or will remain visible. If it is visible, compare these repair paths:
- Replace the piece using a corrected template.
- Shift the finish line only if the full layout and cabinet clearance still work.
- Add compatible trim if the system allows it.
- Use a documented sealant joint only when the gap size, materials, access needs, and application are approved.
Do not fill a large fitting error with an oversized bead. That usually makes the perimeter more noticeable and may create an unsupported joint.
A narrow return piece begins to lift
Do not assume that more pressure or generic glue is the answer. Check for:
- An unapproved or dusty substrate
- Moisture or cleaner residue
- Texture, loose paint, joint compound, or exposed gypsum
- A piece narrower than the tile manufacturer permits
- Stress from bending or forcing the piece into a tapered space
- A corner overlap that holds one edge away from the surface
- A flange, trim, or cabinet component pressing against the tile
- Adhesive contamination during repeated fitting
If supplemental adhesive is permitted, use only the type and placement authorized for the exact tile and substrate. Otherwise, replace the piece after correcting the underlying condition. The general guide to repairing loose or damaged peel-and-stick tile can help with problems that extend beyond the cabinet opening.
The pattern drifts near the cabinet
Pattern drift often begins before the cabinet is reached. Recheck the original level and plumb reference lines. A cabinet edge should not replace those references unless it has been independently verified.
If the liner is still attached, remake the piece from the correct pattern position. If the tile is already installed, check the product’s removal and repositioning instructions. Some adhesives allow limited adjustment during initial placement; others do not. Do not promise that a pressed tile can be lifted and reused.
The reveal looks uneven
First decide whether the tile is uneven or the cabinet opening itself is out of square. Use a straightedge and measurements rather than judging from the mirror reflection.
If the cabinet is uneven, forcing equal-width tile pieces can produce gaps or buckling. A controlled taper may look more finished because it follows the actual boundary. If the cabinet or flange is loose, incorrectly seated, or obstructed by the new finish thickness, address the cabinet installation rather than disguising it with tile.
A cut edge is damaged
Replace the piece when the damage exposes adhesive, creates a sharp edge, separates the decorative face, or remains visible after the approved finish is installed. Small cosmetic marks should not be hidden with an unverified coating or sealant.
Keep the paper templates until the entire installation has passed inspection. They make isolated replacement far easier.
Final Inspection Before the Project Is Complete
A good recessed-cabinet installation is defined by fit and function rather than a perfectly square drawing imposed on an imperfect opening. The pattern should look intentional, each piece should lie flat, and the cabinet must remain usable and serviceable.
Inspect the work in this order:
- View the full wall from the doorway and check pattern balance.
- Check horizontal and vertical pattern lines around the cabinet.
- Look into the mirror for reflected gaps on the top and side returns.
- Run a visual check along every wall-face cut and cabinet-side edge.
- Inspect the four return-to-return corners.
- Confirm that narrow pieces have full contact and no curling edges.
- Open and close the cabinet door through its required range.
- Test shelves, lights, outlets, sensors, and other features without obstructing access.
- Verify that vents, fasteners, removable covers, labels, and service areas remain available.
- Confirm that any trim or sealant matches its documented installation and cure instructions.
- Follow the tile manufacturer’s waiting, setting, cleaning, and moisture-exposure requirements.
- Save the cabinet, tile, primer, trim, adhesive, and sealant documentation with your measurements and templates.
A careful measure-template-dry-fit-commit sequence will not make every opening square. It will give you a controlled way to fit the opening that actually exists.

Finish with a medicine-cabinet service and moisture handover
After the decorative work is complete, photograph the four returns, flange, fasteners and any removable trim before shelves and stored items hide the details. Keep the cabinet model information with the tile record. A future repair should not require guessing which edge can be removed safely.
Inspect the lower return and nearby wall during normal sink use. EPA moisture guidance emphasizes fixing water sources rather than covering recurring dampness. If water repeatedly reaches an edge, address the splash path or use an assembly suitable for that exposure; do not rely on an extra bead of cosmetic sealant to make the recess waterproof.
Do not attach mirrors, lights, shelves or cabinet loads to the decorative tile unless the supporting system is designed for them. The tile finish and the cabinet support have different jobs. Preserve access to fasteners, electrical components and shutoffs according to the cabinet and building requirements.
For repair stock, label a few pieces with the pattern direction and purchase date. Returns are highly visible at eye level, so a later replacement can stand out if the orientation or shade differs. A simple installation photo often makes a future local repair easier than a written note alone.
Frequently Asked Questions
Where should tile cuts land around a recessed medicine cabinet?
Tile cuts should land either within the cabinet flange’s verified concealment area or at a deliberately planned exposed finish line. Measure the actual flange coverage on all four sides, confirm that the finished tile thickness is allowed, and do not rely on nominal cabinet dimensions or visual estimates.
Should I install the medicine cabinet before or after peel-and-stick tile?
The correct order depends on the cabinet model. A removable cabinet with a flange may be intended to seat against the finished wall, while an existing fixed cabinet may need tile fitted around it. Check mounting, flange, wiring, service-access, and finished-wall-thickness instructions before removal or reinstallation.
Can I wrap one tile sheet from the wall face onto the return?
Only if the exact tile manufacturer approves the bend, corner geometry, and substrate combination. Some products use separate butted pieces; others describe product-specific bend or corner methods. Flexibility by hand is not proof that a tile may be wrapped through a cabinet corner.
How do I stop narrow return pieces from lifting?
Begin by confirming that narrow pieces are permitted. The return must be an approved, sound, clean, dry, smooth surface, and the piece must fit without bending stress or interference from the cabinet. Apply the specified pressure, but do not use extra pressure or generic adhesive to compensate for an incompatible surface or unsupported piece size.
Can I use caulk around the medicine cabinet?
Use sealant only when the tile, cabinet, substrate, and sealant manufacturers support that contact and joint. Do not cover ventilation, fasteners, removable parts, or required access. A cosmetic perimeter bead should not be treated as a waterproofing system.
Sources and scope
- US EPA — Mold, Moisture and Your Home — Moisture-source control and drying; not tile-product certification.


Lämna en kommentar
Denna webbplats är skyddad av hCaptcha och hCaptchas integritetspolicy . Användarvillkor gäller.