
















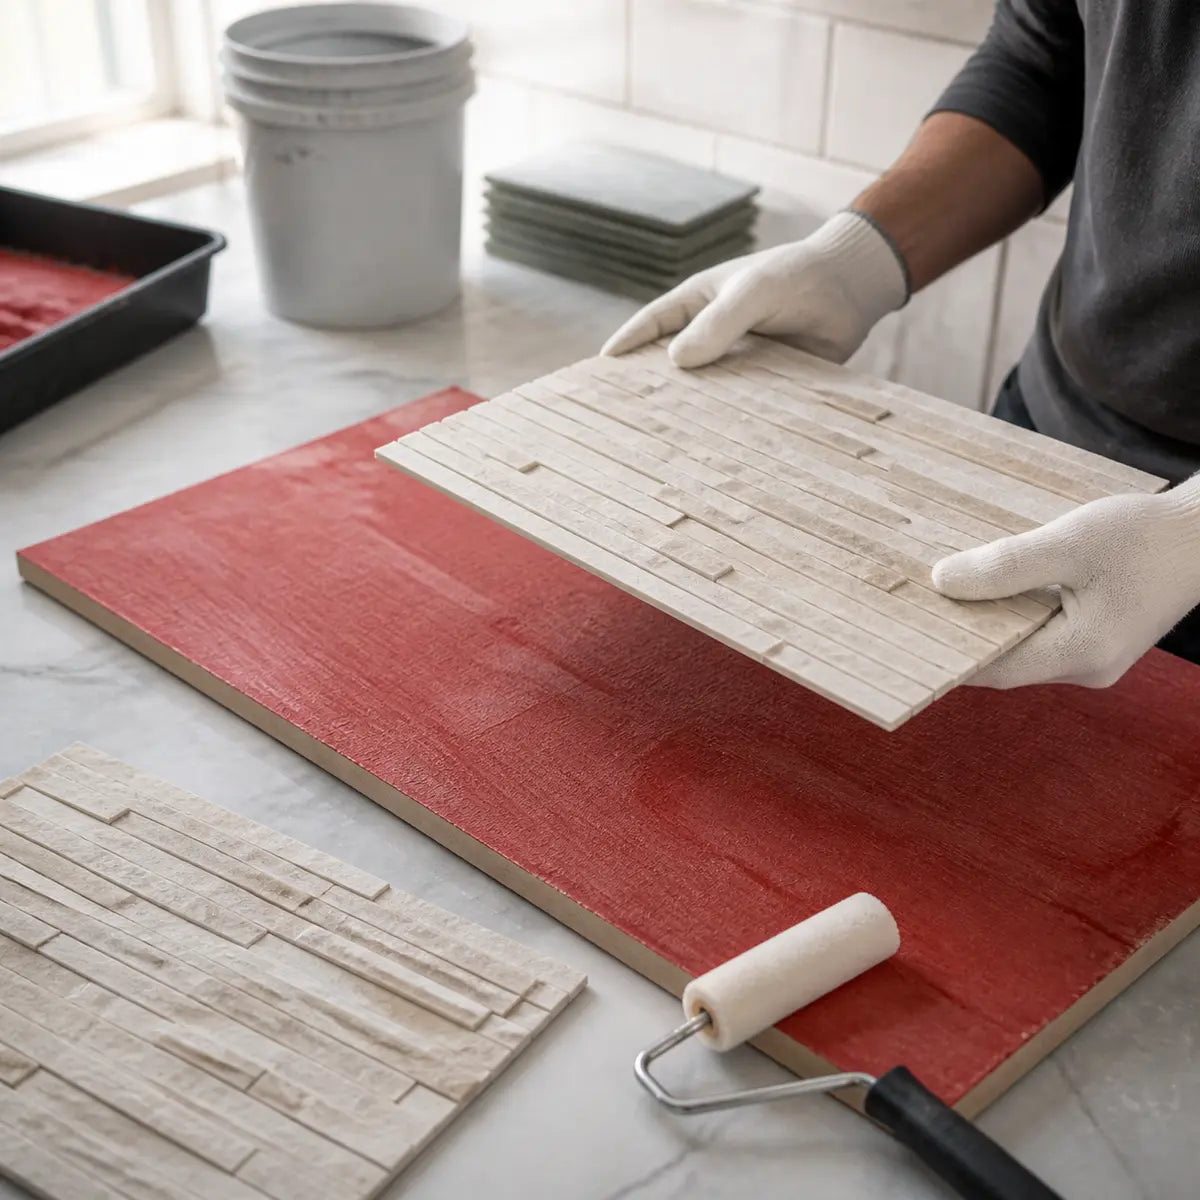
A peel-and-stick tile can feel firmly attached to RedGard today and still be the wrong installation for the wall, the adhesive, or the room. Immediate tack, durable bonding, membrane integrity, and written system approval are four separate questions.
Explore this guide
The practical answer is conditional: do not assume you can install peel-and-stick tile over RedGard merely because a sample sticks. Identify both exact products, review their current instructions, classify the exposure area, and use a limited documented test patch only if the written instructions permit one. Proceed only when the evidence supports that exact pairing and location.
This distinction matters because “RedGard” can refer to different membrane products, while “peel-and-stick tile” covers many constructions, backing materials, adhesives, weights, and use restrictions. Advice that applies to one combination may be wrong for another.
The checked RedGard technical data applies specifically to RedGard Waterproofing and Crack Prevention Membrane identified as TDS-104. It does not automatically apply to RedGard Fabric Membrane, SpeedCoat, Uncoupling Mat, or another RedGard-branded product. The exact peel-and-stick tile is equally important. No Stickwoll product, including Dual Ceramics self-adhesive wall tile, should be represented as approved for RedGard or direct-wet use without separate product-specific evidence.

Illustration only; no actual product pairing or manufacturer approval is established by the picture.
Can You Install Peel-and-Stick Tile Over RedGard?
The RedGard TDS-104 dated February 14, 2025 specifies a polymer-modified mortar meeting ANSI A118.4 or A118.15 for tile and stone. It also expressly excludes pre-mixed adhesives and exposure to solvent-based materials. A factory-applied pressure-sensitive backing is not thereby confirmed as an accepted setting method. Read the current-linked TDS-104, limitations and tile-installation sections.
Do not treat the absence of a named pressure-sensitive product as permission, or assume that a restriction on pre-mixed adhesives precisely defines every factory backing. Request written clarification for the exact assembly rather than interpreting the category yourself.
A responsible decision therefore has three possible outcomes:
- Go: Both exact products and the intended location are supported in current written instructions or written manufacturer clarification. The membrane is correctly cured, intact, and acceptable without unapproved alteration. A documented comparison patch reveals no negative condition.
- Verify: Instructions are silent, ambiguous, or refer only to general surfaces such as “smooth walls.” Obtain written clarification from the tile manufacturer and Custom Building Products before covering the membrane.
- Stop: The tile is excluded from the exposure area, RedGard is not an approved substrate, the membrane is damaged or contaminated, or the proposed preparation requires unapproved sanding, solvents, primer, coating, or supplemental adhesive.
Most undocumented tile-over-RedGard proposals belong in verify, not go. That is not excessive caution. It reflects the fact that two individually useful products do not automatically form a tested system when combined.
The same principle applies to renters and property-maintenance users. Even where alteration is permitted, a strong pressure-sensitive adhesive may make later removal destructive. If removal pulls, stretches, tears, or delaminates the membrane, the project can become a waterproofing repair rather than a decorative update.
For broader planning around room exposure, substrate condition, preparation, and removal risk, use the Peel-and-Stick Tile Guide. The RedGard question still requires a separate product-specific decision.
Why Doesn’t Initial Tack Settle the Question?
Initial tack tells you only that the adhesive made enough contact to resist light movement at that moment. It does not tell you whether the bond will strengthen, weaken, slide under the tile’s weight, release at the edges, react with the membrane, or remain suitable after humidity and temperature changes.
Pressure-sensitive adhesive, often shortened to PSA, is an adhesive that forms a bond through contact and applied pressure rather than through a conventional mortar cure. Its behavior depends on more than whether it feels sticky.
Four stages must be separated:
| Question | What it tells you | What it does not prove |
|---|---|---|
| Does the tile grab immediately? | The backing has initial tack on the current surface | Long-term holding power |
| Does it remain flat after a defined dwell period? | The specimen stayed stable during that recorded period | Full service life or wet-area performance |
| How does it separate during removal? | Where visible failure occurred in that specimen | Hidden membrane integrity or warranty coverage |
| Do both manufacturers permit the system? | Whether the documented installation is supported | Workmanship quality or future maintenance |
“Dwell time” means the time between applying an adhesive-backed specimen and evaluating its bond. Dwell matters because some pressure-sensitive bonds change as the adhesive conforms to the surface and trapped interfacial air moves out of the bond line.
In laboratory work on a high-performance PSA transfer tape, Williams and Kauzlarich observed bond development over long dwell periods and found that the surface characteristics affected that development. The Williams and Kauzlarich dwell-time study did not test wall tile, RedGard, shower exposure, or any Stickwoll product. Its value here is narrower: it shows why “stuck now” and “stable later” are different observations.
Humidity can also change pressure-sensitive adhesive behavior. A controlled study by Schindler, Koller, and Muller-Buschbaum conditioned a model acrylic PSA for 24 hours across relative humidity levels ranging from below 2% to 96%. The researchers observed humidity-dependent changes in near-surface structure, tack, and failure behavior. The ACS study of humidity and PSA failure did not use RedGard or commercial peel-and-stick wall tile, so it cannot predict whether your tile will fail at a particular humidity.
A 2025 study of a modified acrylate adhesive on high-density polyethylene reported different peel and tack behavior for its experimental formulation. HDPE is not a RedGard membrane. The open original study is useful for understanding why substrate and formulation matter, not for setting a peel-strength requirement for a wall tile.
The useful lesson is not that every bathroom will cause failure. It is that adhesive chemistry, surface energy, roughness, pressure, time, temperature, and moisture can change the result. A photograph taken immediately after installation captures only one point in that process.

Illustration, not a specified pressure method or a verified RedGard-and-tile test.
What Must You Verify Before Testing the Tile?
Verify the exact membrane, exact tile, current instructions, exposure area, and membrane condition before attaching a test specimen. If any of those facts is missing, the result will be difficult to interpret and easy to overstate.
Identify the exact RedGard product
Do not rely on the wall’s red color or a contractor’s memory. Record the product name from the container, invoice, project documents, or installation photographs.
For RedGard Waterproofing and Crack Prevention Membrane TDS-104, Custom Building Products describes a liquid-applied elastomeric material that cures into a monolithic membrane. The TDS uses a solid-red surface with no visible pink as its visual dry indicator. It reports typical drying of 1 to 1.5 hours, with drying taking as long as 12 hours depending on ambient conditions.
Those times are not a universal countdown for applying peel-and-stick tile. Coat thickness, temperature, humidity, substrate, ventilation, and installation quality can affect drying. A solid-red appearance also does not confirm correct coverage, film thickness, freedom from pinholes, or compatibility with a later adhesive.
Record:
- Full RedGard product name and variant
- Technical data or instruction version
- Application date
- Number of coats
- Known coverage or wet-film measurements
- Drying and cure conditions
- Whether the membrane has been exposed to traffic, dust, sunlight, water, cleaners, or other construction materials
- Any pinholes, thin areas, wrinkles, scratches, soft areas, punctures, or peeling
If you cannot identify the membrane, stop before bonding a test patch to it. A result on an unknown red coating cannot be responsibly generalized to RedGard TDS-104.
Identify the exact peel-and-stick tile
“Peel-and-stick tile” is an installation category, not a single material. Products may use thin vinyl film, thicker PVC, composite panels, metal-faced pieces, stone-faced pieces, foam layers, or other backings. Their adhesives and exposure limits can differ.
Record:
- Brand
- Product name
- SKU or variant
- Lot number, if available
- Tile dimensions and weight
- Wall or floor classification
- Backing construction
- Adhesive description, if published
- Approved substrates
- Excluded substrates
- Moisture, heat, and direct-water restrictions
- Required cleaning, priming, coating, or waiting periods
- Current instruction date or page-check date
Do not substitute instructions from another brand. For example, one manufacturer may require a waiting period after primer, while another may specify a different preparation system. Neither instruction authorizes applying that primer to RedGard.
Our room-and-surface screening guide for peel-and-stick wall tile can help organize the surface review, but it does not establish RedGard compatibility.
Classify the location
Describe the actual exposure rather than writing only “bathroom” or “kitchen.”
A powder-room accent wall, a backsplash behind a lightly used sink, a wall beside a shower, and the inside of a shower enclosure are not equivalent. They differ in direct water, humidity, cleaning frequency, temperature cycling, exposed edges, and the consequences of a loose tile.
Use one of these categories:
- Dry decorative wall
- Wall with occasional incidental splashes
- High-humidity wall without direct spray
- Tub or shower-adjacent wall
- Direct shower or bathtub spray area
- Continuously wet or submerged area
- Countertop or horizontal ledge
- Floor or other load-bearing surface
A wall product should not be transferred to a floor, countertop, or horizontal wet ledge unless its instructions expressly permit that use.
Check both instruction sets
The decisive question is not simply, “Does RedGard accept tile?” It is:
Do the current instructions or written manufacturer clarifications permit this exact pressure-sensitive tile to bond directly to this exact RedGard product in this exposure area, using a preparation method that does not compromise the membrane?
The RedGard TDS-104 tile-and-stone section specifies a Custom Building Products polymer-modified mortar meeting ANSI A118.4 or A118.15 based on application requirements. It reports a typical four-week shear bond strength to cement mortar of 267 psi and a typical shear strength after water immersion of 89 psi under its cited ANSI A118.10 tests.
Those values concern RedGard-to-cement-mortar test assemblies. They are not peel-strength values for an adhesive-backed tile, and they do not test decorative panel seams, edge lift, or water migration behind a peel-and-stick finish.

Illustration only. Do not infer a cleaner or preparation method from the image; follow membrane guidance.
Use a Go, Verify, or Stop Screen Before Surface Preparation
Do not prepare RedGard as though it were ordinary painted drywall. A technique that improves tack on paint could damage, contaminate, soften, or change a waterproofing membrane.
The checked TDS requires protection from contamination and puncture, excludes solvent-based materials, and does not supply a pressure-sensitive-tile preparation procedure. It also identifies compatibility with water-based paints only; that statement is not approval of an arbitrary paint-plus-tile assembly. TDS-104.
That leaves several common DIY suggestions unsupported for this pairing.
Does RedGard need primer before peel-and-stick tile?
There is no universal evidence that RedGard needs, accepts, or benefits from a generic primer beneath peel-and-stick tile. A primer creates a new interface: tile adhesive to primer, primer to membrane, and membrane to its underlying substrate.
A tile manufacturer’s instruction to prime porous drywall does not automatically apply to an elastomeric waterproofing membrane. A primer that helps one adhesive wet out on drywall could have a different effect on RedGard. It may also affect removal and warranty questions.
The correct approach is:
- Check whether the exact tile instructions require or permit primer over the named substrate.
- Ask whether Custom Building Products permits that exact primer over the identified RedGard membrane.
- Obtain the answer in writing when the published documents are silent.
- Do not apply primer merely to rescue weak initial tack.
The controlled primer test framework for peel-and-stick tile explains how an unprimed comparison can clarify what changed. It does not authorize primer over RedGard.
Should RedGard be sanded before applying self-adhesive tile?
Do not sand RedGard unless the manufacturer provides written instructions permitting the exact process for the intended assembly. Sanding removes material and can create thin spots, scratches, dust, pinholes, or other damage that is difficult to evaluate visually.
The mistaken assumption is that a rougher surface must create a better bond. Surface roughness is only one variable. If sanding damages the membrane, any increase in short-term tack is beside the point.
Sanding also makes a later removal result hard to interpret. Red material transferred to the adhesive might reflect a deliberately weakened surface rather than compatibility with an intact membrane.
Can you clean RedGard before installing the tile?
Cleaning should be limited to a method approved for the membrane and the tile adhesive. Do not use solvents, aggressive degreasers, abrasive pads, or chemical cleaners based on generic wall-preparation advice.
If the membrane is dusty, greasy, coated with construction residue, or otherwise contaminated, the safest decision may be to ask Custom Building Products how to restore or repair it. A cleaner that leaves residue can reduce adhesion. A stronger cleaner can affect the membrane itself.
Can extra adhesive fix the problem?
Extra adhesive does not convert an undocumented pairing into an approved system. It introduces another material with its own chemical compatibility, curing, vapor, thickness, removal, and warranty questions.
It may also create uneven support. Stripes or dots of added adhesive can hold some areas while unsupported edges remain vulnerable to lift. A rigid supplemental adhesive beneath a flexible tile and flexible membrane can produce a different stress pattern from the original pressure-sensitive backing.
Use added adhesive only when both the tile and membrane instructions support the exact product and method. Do not assume perimeter sealant makes the tile layer waterproof. Sealed outer edges do not validate every seam, penetration, corner, or adhesive interface.

Illustrative inspection, not proof of long-term adhesion or waterproofing integrity.
How Do You Test Peel-and-Stick Tile Adhesion on RedGard?
Use a limited comparison patch as a screening observation, not as a universal approval test. The patch should document obvious incompatibility, movement, edge lift, transfer, or membrane damage under recorded conditions.
ASTM D3330/D3330M contains controlled peel-adhesion methods for pressure-sensitive tapes, including testing a given tape on a surface of interest. The ASTM pressure-sensitive tape peel standard also warns that peel adhesion may not provide design information because it usually has no direct relationship to a functional requirement.
A wall-tile panel may be too stiff or otherwise outside the standard’s intended specimen behavior. Do not describe a hand-pulled wall patch as an ASTM D3330 test. The standard is useful here because it highlights controlled variables and interpretation limits.
1. Resolve permission before testing
Do not attach a specimen if testing itself violates the membrane or tile instructions. Contact the relevant manufacturers when RedGard or liquid waterproofing membranes are not clearly addressed.
Ask a narrow written question:
Is [full tile product and SKU] permitted for direct pressure-sensitive installation over fully cured [full RedGard product] on a [precise exposure category] wall? If so, what cleaning, preparation, cure verification, application-pressure, waiting, edge-finishing, and removal instructions apply?
Attach photographs and product documents where possible. A specific question is more likely to produce a useful answer than “Will peel-and-stick work over RedGard?”
2. Choose a low-consequence test area
Select a small, inconspicuous area that can be inspected and repaired if removal affects the membrane. Do not use a critical shower corner, receptor connection, drain transition, plumbing penetration, niche, seam, fastener area, or visibly thin section.
A test patch is partly destructive because the removal inspection may stress the membrane. If there is no acceptable repair path, do not perform the test on the installed waterproofing.
3. Create a comparison surface
Apply an identical specimen from the same tile lot to a surface the tile manufacturer expressly approves, if such a comparison can be prepared correctly.
The comparison does not prove RedGard compatibility. It helps answer a narrower question: did the tile behave noticeably differently on RedGard than on a named acceptable surface under similar conditions?
Keep these variables as consistent as practical:
- Tile product and lot
- Specimen size
- Backing age and condition
- Surface temperature
- Room temperature and relative humidity
- Orientation
- Application pressure
- Application tool
- Dwell period
- Inspection method
- Removal direction and speed
4. Photograph both surfaces before contact
Take clear, well-lit close photographs of:
- The RedGard surface
- Corners and edges of the proposed patch area
- Any texture, ridges, pinholes, scratches, dust, or discoloration
- The tile face
- The full adhesive backing
- Backing seams, foam layers, exposed adhesive, or irregular coverage
- Product labels and lot information
- A ruler or scale beside the specimen
Photographs taken only after installation cannot establish the membrane’s starting condition.
5. Apply the specimens consistently
Follow the exact tile instructions for backing removal, placement, pressure, rolling, and repositioning. Use the same method on the RedGard patch and comparison specimen.
The general Stickwoll tile application and removal guidance covers layout, gradual backing removal, pressing, cutting, and cautious removal. It does not establish RedGard compatibility, so product-specific instructions still control.
Record:
- Date and exact time
- Temperature and relative humidity
- Specimen dimensions
- Wall orientation
- Application tool
- Number and direction of passes
- Whether the tile was repositioned
- Any contamination of the adhesive
- Immediate edge condition
- Immediate bubbles, wrinkles, or sliding
Do not keep pressing a weak patch until it appears successful without recording what happened. Repeated pressure is a test variable.
6. Use timed observations
There is no published universal observation period or acceptance threshold for peel-and-stick wall tile over RedGard. A practical screening record can still use predefined checkpoints, such as immediately after application, after 24 hours, after 72 hours, and after seven days.
Those checkpoints are organizational choices, not proof of service life. Longer observation may reveal movement that an immediate check misses, but a stable one-week patch cannot simulate years of humidity, cleaning, heat, water exposure, seam stress, and material aging.
At each checkpoint, inspect without repeatedly lifting corners. Record:
- Corner lift
- Edge lift
- Bubbles
- Wrinkles
- Downward movement
- Rotation
- Tile distortion
- Adhesive ooze
- Color change
- Membrane visibility at edges
- Odor or softening
- Differences from the comparison specimen
A transparent ruler, fixed reference line, or repeat photograph from the same position can help reveal small changes.

Not an actual measured failure record. Do not copy the depicted powered-tool setup as a removal method.
How Should You Record the Test-Patch Observations?
Record the physical observations before assigning any conclusion. “It passed” or “it seems strong” hides the details needed to judge whether the sample was stable, changing, or damaging the membrane.
Use a table like this for each specimen:
| Checkpoint | RedGard specimen | Approved-surface comparison | Stop, verify, or continue observing |
|---|---|---|---|
| Before application | Product ID, surface condition, defects, temperature, humidity | Product ID and surface condition | |
| Immediately after pressing | Initial grab, bubbles, edge contact, position | Same observations | |
| 24 hours | Corner lift, edge lift, sliding, distortion | Same observations | |
| 72 hours | Changes since prior check | Same observations | |
| Seven days | Stability, lift, movement, residue | Same observations | |
| Before removal | Final photographs and measurements | Final photographs and measurements | |
| During removal | Force impression, release path, tearing, stretching | Same observations | |
| After removal | Adhesive transfer, membrane effects, residue | Substrate effects and residue |
The most important record is the change between checkpoints. A 1 mm edge gap that remains unchanged is a different observation from a corner that progresses from flush to visibly lifted. Neither observation has a published universal acceptance threshold for this pairing, but progressive change is a clear reason to stop.
Use descriptive language:
- “Top-right corner lifted enough to admit a paper edge.”
- “Lower edge moved downward relative to the reference line.”
- “Two bubbles appeared near the center after the humidity increase.”
- “Comparison specimen remained flat while the RedGard specimen lifted.”
- “Tile released with adhesive remaining mostly on its backing.”
- “Red coating transferred to the adhesive during removal.”
Avoid unsupported strength labels such as “commercial grade,” “permanent,” or “shower proof.” The field patch does not measure those claims.
A useful record includes negative findings too. If there is no visible lift, no movement, no bubbling, and no membrane transfer, write each observation separately. “No issue” is less useful than a list of the conditions actually checked.
This guide does not report an original completed RedGard-and-tile field trial. A valid project record needs exact product identities, conditions, observations and any removal effects. A suggested observation method should not be mistaken for evidence that this combination has passed.
What Does the Removal Pattern Tell You?
Removal can show where visible separation occurred, but it cannot prove that the waterproofing system remains fully intact. Inspect the tile backing, adhesive layer, RedGard surface, and surrounding membrane before cleaning or repairing anything.
Removal analysis is often more informative than the hand-pull sensation. A sample may feel difficult to remove because the tile is stiff, because the adhesive stretches, because the membrane deforms, or because the membrane itself begins separating. Those are different outcomes.
Adhesive failure at the RedGard interface
In this pattern, most adhesive remains on the tile backing and the RedGard surface appears relatively clean.
This describes visible separation between adhesive and membrane during removal. Whether it indicates inadequate performance depends on the specified test and intended removal behavior; a deliberately removed sample necessarily separates somewhere. It cannot establish service suitability. Do not respond by sanding the membrane or adding stronger adhesive without written approval.
Adhesive failure at the tile backing
Here, adhesive remains on the RedGard while the tile backing separates from its own adhesive layer.
That points to failure within the tile construction rather than proof of a successful membrane bond. The exact product lot, storage conditions, backing construction, and manufacturer instructions need review.
Cohesive adhesive failure
“Cohesive failure” means the adhesive splits within itself, leaving adhesive on both the tile and RedGard.
This shows that some bond existed at both interfaces, but it does not establish adequate durability. Temperature, dwell time, pull rate, adhesive thickness, and material chemistry can affect this pattern.
Membrane or substrate failure
Red material on the tile, a torn or stretched membrane, exposed substrate, pinholes, or delamination beneath the RedGard is a serious stop condition.
Do not interpret membrane transfer as evidence of an excellent tile bond. The finish may have bonded more strongly than the membrane or one of its underlying interfaces could tolerate. Waterproofing repair may be required before the wall is covered.
A clean-looking release is also limited evidence. Visual inspection cannot confirm microscopic effects, changes in film thickness, or continued system qualification. If the patch was installed in a waterproofing area, ask the membrane manufacturer or a qualified tile professional how the area should be evaluated and repaired.
Mixed failure
Many removals show more than one pattern. One edge may release cleanly while another pulls membrane material. Photograph the whole patch and close details rather than selecting the most favorable area.
Record:
- Approximate percentage of adhesive on each surface
- Areas of clean release
- Areas of adhesive splitting
- Red transfer
- Stretching or tearing
- Exposed substrate
- Residue
- Changes in gloss, color, or texture
- Whether the membrane lifted from the material below it
- The repair instructions received
Do not scrub, scrape, or solvent-clean the area before documentation. Those actions can erase the failure pattern and cause further damage.

Potential damage is a reason for professional assessment; the image does not prove a tested outcome.
Does the Installation Location Change the Decision?
Yes. A dry decorative wall and a direct-spray shower wall require different evidence, even if the same tile initially sticks to both. RedGard behind the tile does not remove the tile manufacturer’s moisture restrictions.
A waterproof membrane manages water at its own layer when it is correctly installed as part of a supported assembly. It does not automatically make the decorative covering, adhesive, seams, edges, or penetrations waterproof.
Dry decorative walls
A dry wall is the lowest-exposure scenario, but substrate approval still matters. Heat, cleaning, tile weight, and future removal can affect the installation.
A documented patch may provide useful screening evidence here when both instruction sets permit the test and the comparison remains stable. Written approval remains the strongest basis for describing the pairing as supported.
Occasional-splash areas
Sink backsplashes and similar walls can receive intermittent droplets and cleaning. Water may reach exposed edges, imperfect seams, cutouts, and corners.
Classify the real use rather than relying on the room name. A guest-bath wall with minimal exposure differs from a heavily used family sink where water regularly remains against the lower edge.
Our guide to low-splash bathroom walls explains ventilation, drying, exposed edges, and conservative placement in more detail.
High-humidity areas
Humidity can affect pressure-sensitive adhesives even without direct liquid water. Ventilation, shower frequency, drying time, seasonal conditions, and temperature cycling all matter.
A patch observed during a dry week may not represent the room’s most demanding conditions. Do not manufacture an accelerated steam or water test unless the product manufacturer provides a method. Uncontrolled exposure could damage the membrane or create a misleading comparison.
Direct shower or bathtub spray
Treat direct-wet installation as a stop unless the exact peel-and-stick product is expressly approved for that use and the full membrane-covering assembly is supported.
Representative manufacturer guidance shows why brand-specific limits matter. Smart Tiles states that its products may tolerate bathroom humidity and occasional splashes when properly installed but should not be placed in direct shower or bathtub exposure. Aspect’s Stone and Brick guidance also excludes shower use and names specific acceptable substrates that do not include RedGard. These restrictions apply only to those products, but they show why “peel-and-stick tile” cannot be treated as one universal material.
Use the bathroom exposure-zone guide for peel-and-stick tile to separate dry, splash-prone, and direct-wet walls. No waterproof membrane should be used to override an overlying tile’s direct-water exclusion.
Floors, countertops, and horizontal ledges
A wall tile should not be placed on a floor or load-bearing horizontal surface unless it is specifically approved for that use. Foot traffic, standing water, impact, rolling loads, heat, and concentrated pressure create demands that a vertical wall patch does not test.
A countertop or shower ledge also collects water differently from a wall. A tile that remains attached vertically may still be unsuitable for that horizontal exposure.

Illustration only; bathroom placement and the exact combined system require separate approval.
Troubleshoot Lift, Bubbles, or Sliding Without Damaging RedGard
Treat edge lift, bubbling, sliding, and release as evidence to investigate, not defects to hide with more pressure or adhesive. The safest response is to preserve the membrane, document the symptom, and identify the variable that changed.
| Symptom | Possible contributors to check | Unsafe shortcut |
|---|---|---|
| Immediate edge lift | Surface texture, contamination, low contact pressure, stiff backing, unsupported substrate | Sanding RedGard without approval |
| Lift after a delay | Adhesive relaxation, surface mismatch, humidity, temperature, tile memory | Injecting unknown adhesive |
| Bubbles | Trapped air, backing distortion, uneven membrane texture, temperature change | Puncturing through the tile and membrane |
| Downward sliding | Tile weight, adhesive flow, heat, insufficient holding power | Fasteners through the waterproofing |
| Red transfer during removal | Membrane damage, weak membrane interface, excessive removal stress | Covering the damaged area without evaluation |
| Residue on RedGard | Adhesive transfer or cohesive failure | Solvent cleaning |
| Failure at only one patch | Local contamination, thin membrane, different pressure, surface defect | Generalizing from the other patch |
Start with product identity and documentation. Confirm that the tile came from the same lot, the backing was not contaminated, and the RedGard area was in the recorded starting condition.
Then compare the RedGard specimen with the approved-surface specimen. If both lift in the same way, the issue may involve the tile, storage, application method, or environmental conditions. If only the RedGard specimen changes, substrate interaction becomes a stronger concern. This is still an observation, not a diagnosis of the exact chemical cause.
Do not puncture bubbles. A pin, knife, staple, screw, or nail can pass through the finish and waterproofing layer. Do not fasten loose tiles mechanically through RedGard in a wet-area assembly unless an approved penetration-detail method is provided.
Do not warm the tile or membrane with uncontrolled heat to increase tack. Temperature can change adhesive flow and may affect the finish or membrane. Any permitted temperature range should come from the exact product instructions.
Do not repeatedly peel and reapply the same specimen unless the tile instructions expressly permit repositioning. Each cycle can contaminate the adhesive, stretch the tile, alter the membrane, and make later observations less representative.
The most useful troubleshooting question is:
Which documented variable could explain the change, and can it be corrected without violating either product’s instructions or altering the membrane?
If the answer is unclear, stop and seek written guidance. The goal is not to force the patch to stay attached. The goal is to determine whether the proposed assembly has a defensible basis.

Illustrative layers, not an approved waterproofing detail or evidence that the installation is complete.
Make the Final Go, Verify, or Stop Decision
Choose “go” only when document support, location, membrane condition, preparation, and observations all align for the exact products. A strong-looking patch cannot compensate for unsupported wet-area use or a preparation method that may damage RedGard.
Go
Proceed only when all of the following are true:
- The exact RedGard product is identified.
- The exact peel-and-stick tile and current instructions are identified.
- The intended wall or surface use is expressly permitted.
- The exposure category is within the tile’s published limits.
- The membrane’s condition and cure meet its instructions.
- The substrate pairing is addressed by current instructions or written manufacturer clarification.
- The required preparation is accepted by both manufacturers.
- No unapproved sanding, puncturing, solvent cleaning, priming, coating, or supplemental adhesive is used.
- The documented comparison patch shows no progressive lift, bubbling, sliding, transfer, or visible membrane effect during the chosen observation period.
- Removal or repair risk is acceptable to the property owner.
- Any required permit, warranty, or professional-installation conditions are satisfied.
Even then, describe the result accurately: the exact system is supported under the stated conditions. Do not convert it into a claim about every peel-and-stick tile or every RedGard product.
Verify
Choose verify when:
- One or both products are identified, but the instructions are silent about the pairing.
- RedGard is described only through a broad term such as “waterproof membrane.”
- The tile instructions say “smooth, clean, and dry” without naming the membrane or applicable substrate category.
- The proposed location has humidity or splash exposure that is not clearly addressed.
- A primer, cleaner, coating, or supplemental adhesive is being considered.
- The patch remains attached, but no written system approval exists.
- The removal pattern is unclear.
- The membrane’s application history or cure condition cannot be confirmed.
- The project could affect a waterproofing warranty, lease, inspection, or permitted assembly.
Ask both manufacturers the same precise question and retain their replies with the project record. Where the consequences of failure are significant, consult a qualified tile installer, waterproofing specialist, or design professional familiar with the local project requirements.
Stop
Stop when:
- The exact products cannot be identified.
- The tile is excluded from the intended location.
- Direct shower, bathtub, submerged, floor, or countertop use is proposed without express approval.
- RedGard is pink, soft, contaminated, punctured, peeling, visibly thin, or otherwise suspect.
- Solvent cleaning is proposed.
- Sanding or abrasion could reduce membrane thickness.
- The plan relies on punctures, staples, screws, or other unapproved fasteners.
- The tile lifts, bubbles, slides, rotates, distorts, or releases.
- Removal transfers RedGard, exposes the substrate, or delaminates the membrane.
- Extra adhesive is being used to overcome an undocumented substrate.
- The project depends on the assumption that RedGard’s mortar-system test values apply to a pressure-sensitive adhesive.
- The patch is being treated as proof of shower suitability, code compliance, warranty coverage, or permanent service life.
Stopping at this stage is less costly than covering a questionable membrane and discovering the problem after the full installation is complete.
Frequently Asked Questions
Will peel-and-stick tile stick to fully cured RedGard?
It may exhibit initial tack, but no universal answer applies to all products. The exact RedGard variant, tile adhesive, backing, surface condition, pressure, dwell time, temperature, humidity, and exposure area all affect the observation.
A physical bond does not establish written approval. Check the current instructions for both exact products and obtain written clarification when the substrate pairing is not addressed.
How long should a test patch remain in place?
There is no universal manufacturer- or engineering-defined duration that converts a RedGard test patch into proof of long-term suitability. Define and record multiple checkpoints rather than making one immediate judgment.
Immediate, 24-hour, 72-hour, and seven-day checks can organize a comparison, but they are not acceptance standards. A stable patch during that period does not simulate years of heat, humidity, cleaning, water exposure, seam stress, and aging.
Is RedGard waterproof enough to make peel-and-stick tile safe for a shower?
RedGard’s waterproofing performance does not automatically transfer to the peel-and-stick tile, its pressure-sensitive adhesive, seams, edges, or penetrations. The checked RedGard water-immersion and shear values concern its documented cement-mortar tile-system testing.
The exact decorative tile must be approved for direct shower exposure, and the combined assembly must be supported. A waterproof layer behind an excluded finish does not remove the finish manufacturer’s restriction.
Can I paint over RedGard and then install peel-and-stick tile?
Do not add paint or another coating unless Custom Building Products and the tile manufacturer approve the exact coating and sequence. Painting creates two new bond interfaces and may change drying, adhesion, removal, and warranty conditions.
A tile instruction that permits installation over cured paint on drywall does not automatically authorize paint over a waterproofing membrane.
What if the tile has already been installed over RedGard?
Inspect the wall without puncturing or aggressively pulling the tile. Document product identities, location, installation date, preparation, edge condition, movement, bubbles, moisture exposure, and any loose sections.
If the installation is in a direct-wet area, shows movement, or lacks documented support, contact the manufacturers and a qualified installation professional before removing large areas. Removal can damage the membrane, so the repair plan should be established first.
Turn an uncertain product pairing into an answerable technical question
The most useful document is a short assembly record, not a photograph of a tile sticking to a red wall. Draw the layers from the supporting structure to the decorative face. Identify which surfaces actually touch. If paint, primer or supplemental adhesive is proposed, put it in the drawing as a separate layer instead of hiding it inside a general preparation note.
For each layer, record the product name, version, intended use and who supplied the instruction. Keep the sequence explicit. An approved substrate beneath a membrane is not necessarily an approved finish above it. The same word primer can describe preparation for the original substrate or a proposed coat on the cured membrane, and those are different questions.
Three examples of apparently similar but different proposals
In one hypothetical project, a dry decorative wall was coated with an identified membrane and the owner wants to attach a particular wall panel directly. The unanswered question is compatibility of that pressure-sensitive backing with the cured membrane. The room being dry does not settle the interface question. A written response should identify that pairing, not merely say the tile is suitable for bathrooms.
In a second project, an installer proposes painting the membrane and then attaching the same panel. That creates an additional interface. A general statement about water-based paint compatibility does not identify whether the selected coating, curing process and adhesive are accepted together. Ask about the full stack rather than using a paint label to bypass the missing panel approval.
In a third project, the location is inside a shower. The decorative product's direct-water eligibility now becomes an independent prerequisite. A membrane underneath does not remove that prerequisite, and a good-looking sample on a dry wall does not test it. If the finish is excluded from direct spray, another finish system is needed instead of a more aggressive sample experiment.
Use a response checklist instead of a yes-or-no screenshot
A useful technical reply names the membrane, covering, preparation and exposure. It states which current instructions apply and whether additional conditions or professional assessment are required. Save any attachments and the date. If the reply addresses only one product, ask the other manufacturer about its own requirements; do not assume one company can extend another company's warranty.
A reply such as suitable for smooth walls leaves important uncertainty when the proposed wall is a waterproofing membrane. Ask whether that substrate category includes the identified cured membrane. Where the answer is no, retain it and choose another route. Where the answer is conditional, make the conditions visible in the project plan before scheduling labor.
Protect the membrane during design and ordering
Use a separate sample board for early color, pattern and cutting decisions. It lets you compare the decorative finish without repeatedly bonding and removing pieces from installed waterproofing. The board cannot prove compatibility, but it can resolve appearance questions before any permitted on-site trial is considered. Keep those two purposes separate in the photographs and notes.
Plan access and repair before a permitted test on the actual membrane. Ask who will assess and restore the area if removal affects it, and what documentation the completed waterproofing requires. Do not choose a critical corner or penetration merely because it is easy to hide. A concealed location can still be essential to the water-management system.
If the covering is already installed, collect labels, installation photos and a description of normal use before making large changes. Contact the relevant technical service about inspection and removal. Do not peel progressively larger areas to satisfy curiosity, and do not puncture bubbles. The next action should answer a defined question while preserving the wall's water-management function.
The final record should distinguish documented approval, unanswered questions and observations. A stable sample is an observation; a source document for the correct pairing is a different kind of evidence. Keeping both visible makes future maintenance, contractor handover and product support more useful than relying on a memory that the sample seemed very sticky.
Sources and scope
- Custom Building Products RedGard TDS-104, 14 February 2025 — Checked pages 2, 3 and 7: limitations, mortar-system data and installation; not pressure-sensitive tile approval.
- Williams and Kauzlarich: Dwell Time Effect in Peeling PSA Laminates — Publisher abstract verified; high-performance PSA tape, not RedGard tile test.
- Schindler et al.: Relative Humidity and PSA Failure Mechanisms — Model adhesive films; not installed bathroom-wall performance.
- Shi et al. 2025: Modified Acrylate PSAs — HDPE and experimental formulation, not RedGard or Stickwoll.
- ASTM D3330/D3330M-04(2025), public scope — Tape peel-method scope only; not a purchased full standard or product certification.


Lämna en kommentar
Denna webbplats är skyddad av hCaptcha och hCaptchas integritetspolicy . Användarvillkor gäller.