
















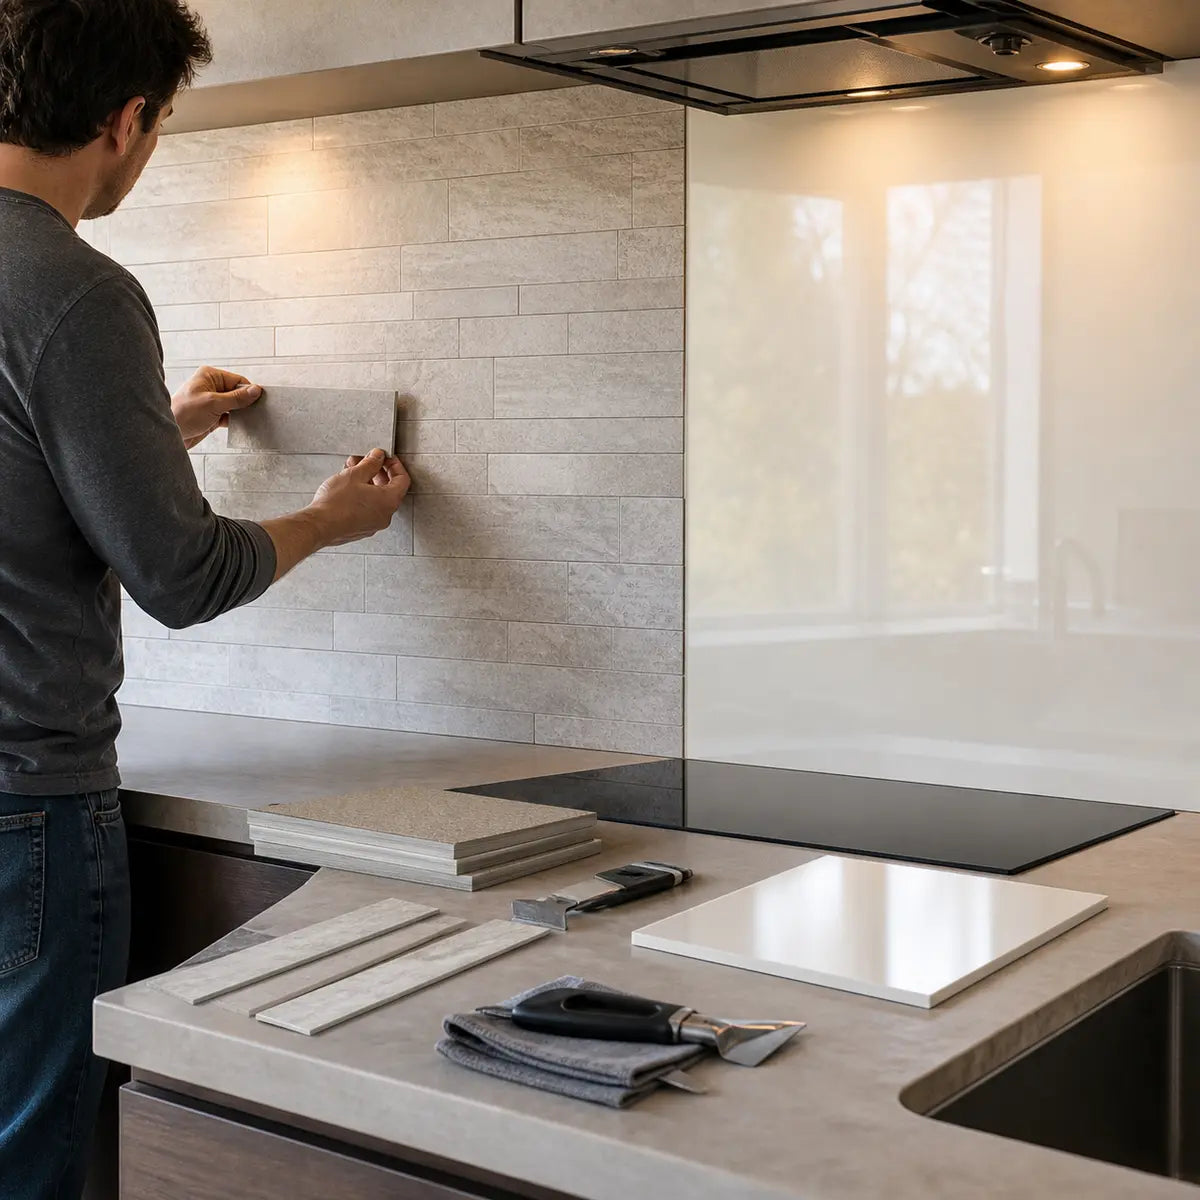
A two-column pros-and-cons list makes peel-and-stick tile vs. acrylic backsplash look like a simple choice. It isn’t. Neither material wins in every kitchen. Start by checking the exact backsplash product, appliance manual, wall condition, and local requirements. Then compare cleaning, scratches, repair scope, complete project cost, and removal risk.
Explore this guide
The fastest way to reach a responsible decision is to classify each part of your project as pass, verify, or stop:
| Status | What it means | What to do next |
|---|---|---|
| Pass | The exact product instructions, appliance requirements, substrate, cleaning routine, and installation plan are compatible. | Compare complete cost and choose the format you prefer. |
| Verify | A specification, clearance, wall condition, cleaner restriction, repair method, or removal outcome is uncertain. | Get written product information, inspect the wall, or request a current quote before buying. |
| Stop | Product instructions prohibit the location, required appliance information is missing, the wall is unsuitable, or the proposed installation would conflict with an adopted requirement. | Change the material, change the layout, or consult the manufacturer or a qualified installer. |
This distinction matters most around a stove. A description such as “heat resistant” does not tell you whether a product is permitted behind your appliance, at your measured distance, on your wall, under your local rules.
Which backsplash wins for your type of project?
Peel-and-stick tile usually has the edge when you value manageable DIY installation and a smaller nominal repair unit. Acrylic usually has the edge when you want fewer seams and a continuous sheet appearance. Both conclusions remain conditional on heat placement, wall preparation, finish, cleaning restrictions, and the exact installation system.
Peel-and-stick backsplash is a collection of self-adhesive wall-tile units. Depending on the design, those units may imitate subway tile, stone, mosaic, metal, or other materials without separate mortar and grout.
An acrylic backsplash is normally made from one or more rigid plastic sheets. Acrylic is often identified as PMMA, or poly(methyl methacrylate), a clear thermoplastic that can be colored, printed, coated, or given a glossy face. Sheet size, coating, thickness, adhesive, trims, and permitted heat exposure vary by product.
| Decision factor | Peel-and-stick tile | Acrylic sheet backsplash |
|---|---|---|
| Visual structure | Repeating tile units, joints, overlaps, or simulated grout lines | Broad continuous panels with fewer field seams |
| Typical DIY challenge | Keeping rows, overlaps, and pattern alignment consistent | Measuring, cutting, drilling, handling, expansion allowance, and cutout accuracy |
| Wall sensitivity | Close adhesive contact makes grease, dust, texture, unstable paint, and unevenness important | Flatness remains important because a rigid sheet can telegraph waves, resist seating, or leave stressed areas |
| Nominal repair unit | One tile or a small group of tiles, subject to overlap and pattern layout | A marked area if refinishing is permitted, or a larger panel section if replacement is required |
| Scratch response | Usually clean gently or replace a damaged unit; exact options depend on the finish | May range from coating-safe cleaning to authorized polishing or panel replacement |
| Seams | More joints or simulated grout lines | Fewer field joints, though perimeter joints, panel joints, and trims may still be needed |
| Removal | Tile-by-tile removal may be possible, but residue or paint damage cannot be ruled out | Panel removal can involve adhesive, sealant, trims, outlets, and a larger wall area |
| Cost pattern | Material may be bought in smaller units, but waste, preparation, edge finishing, and future replacements still count | Sheet, fabrication, delivery, cutouts, trims, adhesive, handling, and installation can materially affect the total |
| Best initial fit | DIY-oriented projects where the wall and heat zone are confirmed and modular repair matters | Projects prioritizing fewer seams where the exact panel system and installation details are documented |
A common mistake is to treat “easy installation” and “simple project” as the same thing. Applying an individual tile may be easy. Preparing a greasy or poorly painted wall, planning cuts around outlets, keeping a pattern level, finishing exposed edges, and correcting a misaligned first row can still take time.
The same principle applies to acrylic. A smooth panel may look visually simple, yet a single measuring error around a receptacle or cabinet return can affect a large and relatively expensive piece. Thermal movement may also require product-specific gaps, trims, and sealant details.

For a wider view of design, quantity, exposure, cleaning, and edge decisions, use the Stickwoll peel-and-stick tile project guide. If you are still comparing peel-and-stick with other material families, the peel-and-stick backsplash selection guide provides broader orientation.
Can peel-and-stick tile or acrylic go behind a stove?
Sometimes, but neither material category has a universal safe stove clearance. You need agreement among the exact backsplash instructions, the exact appliance manual, and any applicable local or property requirements. If one of those documents prohibits the location or cannot be obtained, the responsible result is stop, not guess.
The phrase backsplash heat resistance is often treated like one number. Real installations involve several separate questions:
- Is the appliance gas, electric, induction, dual-fuel, or another type?
- Is there an exposed flame?
- What distance is measured, and between which exact points?
- Does the appliance require a backguard, noncombustible surface, or wall covering with a stated temperature capability?
- Does the backsplash instruction provide a clearance, service-temperature limit, or appliance restriction?
- Are the panel face, adhesive, sealant, trim, printed layer, and wall coating all suitable for that location?
- Has the applicable code been identified for the property?
Peel-and-stick instructions vary too. As checked on August 19, 2026, the Sakura Bloom product instructions state that this product should remain at least 30 cm from stoves, ovens, and fireplaces and should not be exposed to direct flame. Stickwoll’s general FAQ separately refers to at least 8 inches from a gas flame. These statements have different scopes and must not be averaged or reduced to the smaller value.
The lesson is simple: the name of a material is not a heat rating. A measured distance also does not prove suitability unless the product and appliance documents define compatible conditions.

The Stickwoll stove-area tile guide can help you organize the product questions, but it cannot replace the manual for your appliance or the instructions for the exact tile you plan to install.
Which material needs more wall preparation?
Peel-and-stick tile usually makes adhesive contact quality more visible, while acrylic demands a flat, stable base that can support a larger rigid panel. Neither material should be treated as a cover for grease, loose paint, moisture damage, unstable drywall paper, or severe unevenness.
For peel-and-stick tile, adhesion depends on contact between the adhesive and the wall. Texture, dust, grease, chalking paint, moisture, and peeling coatings reduce the quality or area of that contact. Pressing harder cannot turn a failing paint layer into a stable substrate.
Stickwoll’s current general guidance calls for a smooth, clean, dry surface, firm pressure during application, and avoidance of rough materials such as brick, textured walls, and concrete. That description is a starting point. It does not define a universal flatness tolerance, moisture limit, paint-cure period, or grease-removal procedure.
The general adhesive mechanism is well established, even though different products use different formulations. The 3M VHB surface-preparation bulletin explains that its pressure-sensitive tape system requires stable, clean, dry surfaces and firm application pressure to create adhesive contact. For that named tape system, 3M also reports bond growth over time. Those percentages and pressure specifications cannot be assigned to Stickwoll or another tile unless the manufacturer confirms an equivalent adhesive and procedure.
Acrylic panels have their own wall demands. A rigid sheet can bridge tiny imperfections, but it does not make an unstable wall acceptable. A bowed wall may stop a panel from seating evenly. High spots can create visible distortion or concentrated pressure. Low spots can leave unsupported areas. Large adhesive beads and perimeter sealant also require the products and spacing specified by the panel manufacturer.
Cutouts raise the stakes. A peel-and-stick layout may allow several pieces to be fitted around an outlet. An acrylic sheet often requires an accurately positioned opening in a larger panel. The installer must also account for outlet extensions, power isolation, local electrical requirements, edge finishing, drilling technique, and any minimum distance between a cutout and the panel edge.
Thermal movement is another sheet-specific issue. The documented Lustrolite guide reports movement of 0.7 mm per 1,000 mm of panel length for each 10°C temperature change and recommends 4 mm perimeter expansion gaps for that system. These figures are not universal acrylic specifications, but they show why a rigid sheet should not be cut and trapped tightly without consulting its installation guide.

Wall-readiness test
Classify the wall before choosing the backsplash:
| Wall condition | Peel-and-stick implication | Acrylic implication | Decision |
|---|---|---|---|
| Smooth, stable coating with no grease or moisture | Potentially suitable after product-specified cleaning and preparation | Potentially suitable if flatness and adhesive compatibility are confirmed | Pass to product verification |
| Light texture | May reduce full adhesive contact or show through thin material | May create uneven support or visible distortion | Verify or correct the surface |
| Loose, chalking, blistered, or poorly bonded paint | Tile may adhere to paint that later separates from the wall | Panel adhesive may pull against an unstable coating | Stop and repair the coating |
| Grease near the cooking area | Can interfere with adhesion | Can interfere with panel adhesive and sealant | Stop and degrease using compatible methods |
| Active moisture, mold, or damaged drywall | Adhesive installation is not a repair | A panel may conceal rather than resolve the condition | Stop and correct the source |
| Fresh paint | Cure and compatibility depend on the paint and backsplash instructions | Adhesive compatibility and cure remain relevant | Follow the paint manufacturer’s cure guidance |
| Existing tile | Joint texture, cleaner residue, loose tiles, and edge transitions require review | Flatness, bonding method, added thickness, and trims require review | Verify the complete assembly |
Do not make a buying decision based on appearance alone. A wall can look smooth while carrying grease film, weak paint, repair dust, or uncured coating.
Pattern and relief also affect installation. A product such as Platinum Stones hexagonal wall tiles has a different alignment and edge-planning task from a broad acrylic sheet. That is a format observation, not proof that one will adhere better to your wall.
Which backsplash handles scratches and cleaning better?
Neither surface should be called scratch-proof, and cleaner compatibility is product-specific. Peel-and-stick tile often offers a smaller possible replacement unit, while acrylic may offer refinishing options only when the exact face is confirmed as polishable. A hard-coated panel can have stricter repair rules than ordinary smooth acrylic.
The first practical distinction is between scratch visibility and scratch repairability. A mark may be physically shallow but visually obvious because it changes how light reflects. Gloss, color, pattern, texture, viewing angle, and lighting can all influence what you notice. There is not enough product-specific evidence to rank every dark, light, matte, glossy, patterned, or textured finish.
The second distinction is the surface construction. “Acrylic” may refer to an uncoated polishable sheet, a hard-coated panel, a printed panel with a protected face, or another proprietary assembly. Treating all of them as sandable is a serious mistake.
The PLEXIGLAS cleaning and surface-treatment guidance warns that dry wiping can scratch the covered acrylic materials. It recommends water with dishwashing liquid and a soft, non-linting cloth or sponge, with non-scouring products for more intensive cleaning. For identified smooth, polishable grades, it describes progressive wet sanding and polishing as a scratch-treatment procedure.
That procedure is not permission to sand an unspecified backsplash. Abrasive treatment removes surrounding material and may change gloss, optical uniformity, coatings, printed layers, or warranty status. The documented Lustrolite guide takes a different position for severe damage to its hard-coated face: if the coating is compromised, the panel should be replaced rather than refinished.
There is experimental evidence that polishing can reduce scratches on certain PMMA specimens. In a peer-reviewed PMMA scratch-reduction experiment, researchers reported that the studied polishing process reduced scratch-area fractions from 50–60% to 1–5% across aged specimen types and reduced measured surface roughness by about 85%.
The specimens represented conservation problems in new and naturally aged PMMA, not installed kitchen panels. The experiment did not test hard-coated Lustrolite, backsplash adhesives, cooking heat, grease, household cleaning cycles, or warranty outcomes. It shows that some PMMA scratches can respond to a studied abrasive process, not that your acrylic backsplash can safely be polished.
Peel-and-stick tile needs the same product-specific caution. Stickwoll’s general care instructions recommend a soft cloth or sponge with mild soap and water and warn that abrasive products, harsh chemicals, and scrubbers may dull the finish. A tile being water resistant does not make every degreaser, solvent, scouring pad, or steam method acceptable.
| Maintenance question | Peel-and-stick tile | Acrylic panel |
|---|---|---|
| Routine cleaning | Use the exact tile’s approved mild, nonabrasive method | Use the exact panel’s approved wet, soft-cloth method |
| Dry dusting | Check the finish instructions | Avoid if the product guidance warns that dry particles may scratch |
| Abrasive pads or powders | May dull or mark the finish | May scratch, haze, or damage a coating |
| Solvents and strong chemicals | Adhesive, printing, finish, and seams may be affected | Acrylic, coating, rear printing, adhesive, or sealant may be affected |
| Minor visible mark | Clean first; do not assume it is permanent damage | Clean first with an approved method; do not polish without authorization |
| Deep scratch or cut | A replacement tile may be possible, depending on layout and spare stock | Refinishing or panel replacement depends on the exact surface construction |
| Unknown cleaner | Test only as the product instructions permit | Test only as the product instructions permit |
Follow a scratch-response ladder
- Stop the cleaning method that caused the mark. Repeated rubbing can enlarge a scratch or change the surrounding sheen.
- Identify the exact product and face construction. Find out whether it is coated, printed, textured, polishable, or subject to a restricted care method.
- Clean gently before diagnosing damage. Grease streaks and residue can resemble scratching.
- Inspect under normal room lighting. Harsh directional light can make minor surface variation look worse than it does in daily use.
- Ask the manufacturer for the permitted repair method. Get written confirmation before sanding, polishing, heating, applying solvent, or using a repair compound.
- Compare repair with replacement. For tile, inspect overlaps and pattern continuity. For acrylic, identify the panel boundaries, cutouts, trims, and adhesive system.
- Test any approved treatment on spare material first. A technically successful scratch reduction can still leave a visible gloss change.

Peel-and-stick tile vs. acrylic backsplash: Complete project cost
There is no defensible universal cost winner without dimensions, current product quotes, wall condition, cutouts, labor, tools, delivery, waste, and repair assumptions. Peel-and-stick may have a lower entry cost for some projects, while acrylic may reduce field seams. Either result can reverse once preparation, fabrication, labor, or future replacement is included.
Package price is the weakest cost comparison because the two formats are not sold, cut, or installed in the same way. A useful estimate must cover the wall from its current condition through finished installation and eventual repair planning.
Use this formula for both options:
Do not automatically apply the same waste percentage to both systems. A tile layout with many small cuts, a directional print, or an offset pattern may use material differently from a sheet panel with one large sink opening and several electrical cutouts. Use the manufacturer’s quantity method or a measured cutting plan.
Build a two-column cost estimator
Enter the following figures for each material:
| Cost input | Peel-and-stick estimate | Acrylic estimate |
|---|---|---|
| Measured coverage | ||
| Base material quote | ||
| Documented overage | ||
| Spare repair material | ||
| Shipping and tax | ||
| Cleaning and wall preparation | ||
| Patching, sanding, sealing, or leveling | ||
| Cutting and installation tools | ||
| Adhesive, primer, sealant, and trims | ||
| Outlet and obstacle work | ||
| Fabrication or professional cutting | ||
| Installation labor | ||
| Removal and disposal | ||
| Probable wall restoration | ||
| Complete estimated total |
Apply this result logic:
- Lower-cost peel result: Peel-and-stick has the lower complete quoted total, passes the heat and wall checks, and its joints and repair limitations are acceptable.
- Lower-cost acrylic result: Acrylic has the lower complete quoted total, passes the heat and wall checks, and its fabrication and larger repair unit are acceptable.
- Cost tie result: The difference is smaller than the amount you personally consider meaningful. Choose by seams, repair granularity, cleaning, installation risk, and removal.
- Incomplete result: One option lacks fabrication, labor, trim, delivery, wall-preparation, or removal figures. Do not compare totals yet.
- False-saving result: The lower material price depends on skipping required wall work, heat verification, edge finishing, or compatible installation products. Correct the scope before choosing.
This method lets you set your own cost tolerance instead of relying on an arbitrary national price. It also prevents a common budgeting error: counting your own labor as free while counting professional labor for the competing option. Even if you do not assign a dollar rate to DIY time, record the expected hours, helper needs, and cost of rework.
Peel-and-stick can be attractive when you already own basic cutting tools, the wall needs little correction, and the layout is simple. Acrylic can become more competitive when a supplier provides accurately cut panels and the project has long uninterrupted runs. Acrylic can also become more expensive when delivery, specialist fabrication, multiple outlet openings, difficult handling, or a failed cut enters the scope.
Future cost deserves a line of its own. Saving spare tiles may reduce the chance that a small future repair becomes a full visual redesign. Saving a full acrylic panel may be impractical, but documenting the color, thickness, coating, supplier, batch information, cut dimensions, and trim system can still help.
For another format-based budget comparison, see the peel-and-stick versus ceramic cost and labor guide. Ceramic is a different material, but the article reinforces the useful distinction between product price and complete project cost.
Repairability and removal can change the better choice
Peel-and-stick usually offers a smaller nominal replacement unit, while acrylic usually exposes you to a larger repair or replacement area. That does not mean one damaged tile will always lift cleanly or that every acrylic scratch requires a whole-panel replacement.
Repair granularity means the smallest practical unit you must disturb to correct damage. The word practical matters. A tile may be physically small, yet its overlapped edge, simulated grout line, or continuous print can connect it visually and mechanically to neighboring pieces.
For the documented Stickwoll and Lustrolite systems, the format difference is clear enough to guide planning. Stickwoll tiles are discrete units, but the FAQ says removed tiles are not reusable. Lustrolite directs replacement when severe damage compromises its hard coating. Neither instruction assures an invisible repair.
A peel-and-stick repair may expand beyond one unit when:
- The damaged tile sits beneath an overlapping edge.
- Pulling it disturbs a neighboring seam.
- The adhesive takes weak paint or drywall paper with it.
- The replacement comes from a visibly different batch.
- The pattern crosses tile boundaries.
- The original design has been discontinued.
- Edge sealant, caulk, or trim must be removed first.
Acrylic replacement scope depends on panel boundaries. A backsplash made from several planned sections may allow one section to be replaced. A single long panel with sink, outlet, and corner cutouts may require much more measuring, removal, and fabrication. Adhesive coverage, perimeter sealant, trims, cabinets, and electrical devices can all affect access.
Scratch repair can alter that calculation. If the exact acrylic face is expressly polishable, an approved treatment may be less disruptive than replacing a tile. If the panel has a hard coating that cannot be restored after severe damage, the sheet format may create a larger replacement task.
Pattern continuity can be as important as physical replacement. A simple repeating layout may tolerate a later repair more easily than a mural-like print or a pattern that crosses several units. A subway-format product such as Jet Subway peel-and-stick wall tile should still be evaluated for its exact overlap, color continuity, and future stock availability. The product format alone does not promise an exact match.

What about backsplash removal?
Removal depends on the whole wall assembly:
- How well the paint was bonded before installation
- Whether the paint was fully cured
- Whether primer was used
- Wall material and previous repairs
- Adhesive strength and installation pressure
- Time installed
- Heat, moisture, and grease exposure
- Removal angle, speed, and temperature
- Cleaner or adhesive-remover compatibility
Acrylic is not automatically easier or harder to remove. A mechanically retained panel may behave differently from a panel bonded with extensive adhesive and sealed on all sides. A larger sheet can also transfer removal force across a wider wall area.
Who should choose peel-and-stick tile, and who should choose acrylic?
Choose peel-and-stick when modularity, a smaller working format, and DIY pacing matter most. Choose acrylic when fewer seams and a continuous panel appearance matter most. Choose neither until the heat zone, wall, installation system, and removal plan pass verification.
Choose peel-and-stick tile when all of these are true
- The exact tile and appliance instructions permit the proposed location.
- The wall is smooth, stable, clean, dry, and compatible with the adhesive.
- You are comfortable establishing level reference lines and managing repeated alignment.
- More joints or simulated grout lines suit the intended appearance.
- A smaller nominal replacement unit is valuable.
- You accept that removal can leave residue or affect the wall.
- You can retain labeled spare material.
- The complete project estimate remains favorable after preparation, waste, trims, and repair stock.
Peel-and-stick is often a practical format for a homeowner who wants to complete one wall section at a time. It can also suit a landlord or renovator working under a tight schedule, provided appearance, heat, wall condition, and removal have been checked. For schedule planning, see the 24-hour backsplash plan for property updates.
Do not interpret DIY accessibility as permission to skip substrate repair or appliance documentation. A fast installation on a weak wall is still a weak installation.
Choose an acrylic backsplash when all of these are true
- The exact panel is permitted with the exact appliance and measured layout.
- The panel’s coating, adhesive, trims, and sealants are documented.
- The wall is flat and stable enough for the specified bonding system.
- You prefer broad color or print fields with fewer seams.
- Accurate panel handling, cutting, drilling, and expansion allowances are available.
- You understand whether scratches can be cleaned, polished, or require panel replacement.
- The panel sections have been planned with future access and replacement in mind.
- Fabrication, delivery, cutouts, labor, and removal are included in the budget.
Acrylic can be compelling where a long, uninterrupted visual field is the priority. It is less compelling if you expect frequent impact damage in one concentrated area and the chosen hard-coated panel cannot be refinished.
Choose neither material yet when any of these are true
- The appliance model cannot be identified.
- The backsplash product has no relevant installation instructions.
- “Heat resistant” is the only available stove-area information.
- Product and appliance clearances conflict.
- The wall has moisture, loose paint, grease, severe texture, or structural movement.
- The acrylic coating and scratch-repair method are unknown.
- A renter lacks written approval.
- The budget excludes required preparation, fabrication, electrical work, trims, or disposal.
This stop category is a useful decision, not a failure to choose. It prevents a material preference from overriding missing safety or installation information.
If both options fail the project constraints, compare other material systems rather than forcing one of them into the space. The faux stone versus natural stone backsplash comparison shows how weight, sealing, stains, stove placement, cost, and repair change across another pair of formats.
What should you verify before buying either backsplash?
Verify heat first, wall condition second, complete cost third, and repair scope fourth. Appearance should influence the final choice only after both materials have passed the conditions that determine whether they can be installed and maintained responsibly.
Use this final decision sequence:
- Identify the exact appliance. Record the brand, model, fuel type, configuration, and installed dimensions.
- Obtain the appliance installation manual. Find all wall-covering, clearance, backguard, and heat-related instructions.
- Identify the exact backsplash product. Do not compare only “peel-and-stick” with “acrylic.”
- Obtain the current backsplash instructions. Confirm substrate, heat placement, adhesive, edge, expansion, cleaner, and repair requirements.
- Resolve conflicts using the more restrictive applicable condition. Ask the manufacturers or a qualified installer when the documents use incompatible terms or measurement points.
- Inspect the wall. Correct moisture, loose coating, grease, unstable drywall paper, and unacceptable texture or flatness.
- Plan every seam and cutout. Include outlets, windows, corners, cabinet returns, sink edges, exposed ends, and appliance interfaces.
- Calculate complete project cost. Include preparation, tools, waste, trims, fabrication, labor, delivery, removal, and repair stock.
- Choose the repair unit you can live with. Compare a tile or small group of tiles with an acrylic panel section and its cutouts.
- Document the installation. Save instructions, measurements, product details, photographs, receipts, spare stock, and care methods.
- Stop if key documents are missing. A generic category comparison cannot fill a product- or appliance-specific information gap.
Frequently asked questions
Is acrylic always more heat resistant than peel-and-stick tile?
No. “Acrylic” and “peel-and-stick” describe broad material or installation categories, not universal heat ratings. One acrylic guide may prohibit gas-cooktop use, while another panel may specify different conditions. Peel-and-stick instructions can also vary by product. Compare the exact backsplash with the exact appliance manual.
Can I replace just one damaged peel-and-stick tile?
Possibly, but it is not assured. The nominal replacement unit is smaller than a large sheet, yet overlaps, pattern continuity, strong adhesion, sealant, nearby tiles, and wall condition can expand the repair. Keep labeled spare material and study the original installation sequence before removing anything.
Can scratches be polished out of an acrylic backsplash?
Only if the exact manufacturer confirms that the face is polishable and supplies or approves the procedure. Some smooth acrylic grades can be sanded and polished. A hard-coated panel may prohibit refinishing after its coating is compromised. Never test an abrasive method on the installed face first.
Is peel-and-stick backsplash safe for a rental?
It can be considered only with written property approval and a wall-specific removal plan. Adhesive residue, paint lifting, drywall damage, cleaner effects, and nonreusability remain possible. Test methods and landlord requirements should be settled before covering the wall.
Which backsplash is cheaper?
The cheaper material package is not necessarily the cheaper project. Measure the actual wall, get current quotes, and include wall preparation, waste, repair stock, tools, trims, adhesive, fabrication, delivery, cutouts, labor, removal, disposal, and wall restoration.
The better choice is the one that survives the full decision sequence: verify the heat zone, confirm the wall, calculate the complete project, and choose the repair scope you are prepared to manage. If the exact product instructions or appliance requirements are missing, pause the purchase. Once those conditions are confirmed, compare suitable Stickwoll options and acrylic panels on equal, documented terms.
Keep repair size separate from repair certainty
Peel-and-stick products often use smaller nominal pieces than an acrylic sheet, which can make a local repair conceptually easier. But overlaps, strong adhesion, pattern continuity, sealant and wall condition can expand the affected area. Acrylic scratches may sometimes be polished or locally improved depending on the exact material and coating, but the documented repair procedure controls the decision.
Compare the repair instructions for the exact two products rather than promising an invisible or exact-match repair.
Use the existing PMMA evidence narrowly
A peer-reviewed PMMA study found substantial scratch reduction after a studied polishing process on the specimens tested. That is useful evidence that some acrylic surfaces can respond to polishing, but it does not prove that every colored or hard-coated backsplash panel can be restored the same way.
Follow the acrylic manufacturer’s care and repair instructions before applying an abrasive or polish to a finished backsplash.
Plan removal with the wall finish in mind
A smaller self-adhesive tile can still pull weak paint or leave residue, while a bonded acrylic panel can involve a larger area of adhesive or mechanical attachment. Photograph the original wall and understand the installation method before choosing on the basis of future removal.
For rentals, obtain permission and avoid treating either material as certain to leave the wall unchanged.
Sources and scope
- 3M: Applying VHB Pressure-Sensitive Tape — General surface-preparation principles for named 3M tapes; not Stickwoll specifications.
- 2024 IRC: General Mechanical System Requirements — Model-code context; local adopted requirements may differ.
- Peer-reviewed PMMA scratch-reduction study — Laboratory evidence for studied PMMA specimens; it does not establish universal repair performance.


Lämna en kommentar
Denna webbplats är skyddad av hCaptcha och hCaptchas integritetspolicy . Användarvillkor gäller.