













Wall finishes · A room-by-room comparison
Neither composite peel-and-stick tile nor PVC wall panels are the universal winner. The better choice is the product documented for your room, exposure, wall condition, and installation method. A decorative kitchen backsplash, a frequently splashed sink wall, and the inside of a shower need different comparisons.
For a dry or lightly splashed decorative wall, an adhesive-backed tile can be worth considering if its instructions permit the surface and location. For a shower, start with a documented wet-area system, including its backing, joints, edges, and penetrations. Near a stove, check the wall finish’s restrictions alongside the appliance’s installation requirements before choosing a pattern.
Choose by exposure first, appearance second, and price after you understand the complete installation. A water-resistant surface does not establish a waterproof wall assembly, and a heat-resistance statement does not establish approval beside every appliance.
This composite peel and stick tile vs PVC wall panels comparison uses named manufacturer examples where instructions support a specific distinction. Those examples help explain what to verify; their ratings and installation requirements do not transfer to other products.
Our recommendation is to make the room requirements your first filter. Once both candidates pass that filter, compare their texture, installation effort, cleaning, repair, and complete project cost.
What are composite peel-and-stick tiles and PVC wall panels?
Composite peel-and-stick tile describes a construction and installation format, while PVC identifies a material: polyvinyl chloride, a plastic. These labels are not necessarily mutually exclusive, so ask what the exact product contains before treating them as opposing material categories.
For shopping purposes, separate three questions:
- What forms the visible face and supporting body?
- How does the product attach to the wall?
- How are joints, boundaries, and openings finished?
A peel-and-stick product arrives with adhesive backing. “Composite” alone does not tell you its core, decorative face, coating, backing, or adhesive formulation. Request those details for the selected product rather than assuming that the name establishes ceramic content, heat performance, or shower suitability.
PVC wall panels can also differ in size, edge design, finish, and attachment method. As one documented example, ACP identifies Palisade panels as extruded rigid PVC with tongue-and-groove connections—edges that fit into one another—and flat textures, including finishes intended to resemble stone or concrete. That description applies to Palisade, not every PVC wall panel. (ACP, Palisade Product Data.)
The useful comparison is therefore one finished product and its installation instructions against another. Comparing broad labels can conceal the details that determine whether either option fits.

Separate the material from the assembly
An assembly is the complete installed arrangement: the wall behind the finish, adhesive or attachment system, finish pieces, joints, trims, seals, and openings.
A panel face may tolerate water while an unfinished corner admits it. A tile may adhere to a suitable coating while that coating remains poorly attached to the wall. Those are different questions, and each deserves its own check.
Use the peel-and-stick tile planning guide to organize surface, layout, edge, and care questions before comparing individual finishes. Keep the selected product’s instructions beside that broader planning guidance.
Composite tile vs PVC panels: the practical comparison
The main tradeoff is between complete product systems, rather than a reliable category-wide advantage. Use this table to identify the question that matters most for your project, then compare the actual instructions and samples.
| Decision factor | Composite peel-and-stick tile | PVC wall panels |
|---|---|---|
| Construction | Verify face, core, backing, coating, and adhesive | Verify PVC construction, surface finish, and edge design |
| Attachment | Factory-applied adhesive; substrate compatibility remains essential | Check whether the selected system uses adhesive, mechanical attachment, or another method |
| Cooking heat | Require product-specific placement guidance and appliance compatibility | Require the same; one product’s temperature limit cannot represent the category |
| Routine splashes | Confirm permitted exposure and boundary treatment | Confirm permitted exposure, joint treatment, and trims |
| Direct shower water | Require explicit product and complete assembly instructions | Consider only a documented shower system installed as specified |
| Appearance | Compare actual relief, joint pattern, sheen, and exposed edges | Compare the same features, including panel boundaries |
| Preparation | Check surface smoothness, dryness, cleanliness, and stability | Check the documented substrate and attachment requirements |
| Cleaning | Follow finish-specific cleaner and tool restrictions | Follow finish-specific cleaner and tool restrictions |
| Repair | Ask how an individual piece is removed and replaced | Ask how connected edges and adhesive bonds are released |
| Value | Count preparation, finishing, labor, and future restoration | Count those same items, including system accessories |
Do not award either candidate an automatic durability or waterproofing advantage from this table. It is a comparison checklist, not a performance rating.
Find your project’s next step
Start with your room: kitchen backsplash, sink zone, bathroom wall, or direct shower area. Then identify all relevant exposures: ordinary splashes, persistent dampness, direct spray, or cooking heat. Finally, classify the wall as ready, needing repair, or uncertain.
Apply the following routes in order. Keep every exposure requirement that applies, even if an earlier condition pauses the project.
| Your conditions | Your next step |
|---|---|
| Wall is damp, loose, damaged, or its condition is uncertain | Resolve the wall condition before choosing an adhesive finish. Keep heat and water requirements on the project list. |
| Direct shower spray reaches the finish | Compare documented shower assemblies. Require backing, joint, corner, penetration, and boundary instructions. |
| Cooking heat affects the location | Confirm the exact finish’s restrictions against the appliance instructions and applicable local requirements. |
| Wall is sound and the area receives ordinary splashes | Compare products expressly permitted for that exposure, including their seam, edge, and cleaning requirements. |
| Wall is sound and the area is decorative and dry | Compare approved substrate compatibility, appearance, installation effort, and removal expectations. |
For example, a sound bathroom wall outside the shower may lead to a finish comparison. A sound wall inside the shower leads to an assembly comparison. If a kitchen wall is both splashed and heated, the candidate must satisfy both requirements.
This guide identifies the next documentation or preparation task. It does not certify a product or determine that a particular installation is safe.
The reminder combines your answers; it does not inspect the wall. A shower location always retains the direct-water requirement. Persistent dampness pauses covering even when the wall otherwise appears sound. Heat checks remain on the list alongside water checks, so selecting one exposure never clears another.
Which material is safer around kitchen heat?
Neither “composite” nor “PVC” provides enough information to rank safety near a stove. Use the exact wall finish’s placement restrictions together with the appliance manufacturer’s installation instructions. A generic “heat resistant” label is not enough to make that decision.
For a concrete example, ACP states a maximum continuous temperature of 140°F for Palisade panels and excludes saunas and steam rooms. It also recommends at least 6 inches between a heat source or burner and installed Palisade tiles, while directing users to appliance information. These are Palisade-specific manufacturer instructions, not universal PVC limits or universal stove clearances. (ACP, Palisade Frequently Asked Questions.)
Those figures answer different questions. A continuous temperature limit describes a stated operating restriction. A clearance recommendation describes placement. Neither establishes that every arrangement satisfying one condition satisfies the other.
Stickwoll’s FAQ directs users to appliance clearance requirements and avoidance of direct flame or concentrated heat. Its published stove guidance does not provide a numeric tile temperature limit. That guidance supports a cautious placement check; it does not support ranking Stickwoll above or below Palisade for heat resistance. (Stickwoll, FAQ.)
Read the documents together
Before buying, identify the appliance model and obtain its installation manual. Then ask the wall-finish supplier to confirm the proposed location for the exact product, including the attachment method.
Your questions should cover the installed finish, rather than a raw ingredient:
- Is the location behind or beside this appliance permitted?
- What temperature and exposure restrictions apply?
- Does the guidance cover the complete product, including its face, backing, and adhesive?
- Are there required clearances or protective arrangements?
- Do the appliance instructions impose requirements the finish cannot meet?
If the documents conflict or leave the proposed location unclear, pause that part of the project. A product recommendation from a photograph or general category description cannot settle the issue.
Do not copy another product’s clearance. The Palisade recommendation belongs to that named system and cannot establish placement for another panel, a peel-and-stick tile, or your particular appliance.

Plan the kitchen in separate zones
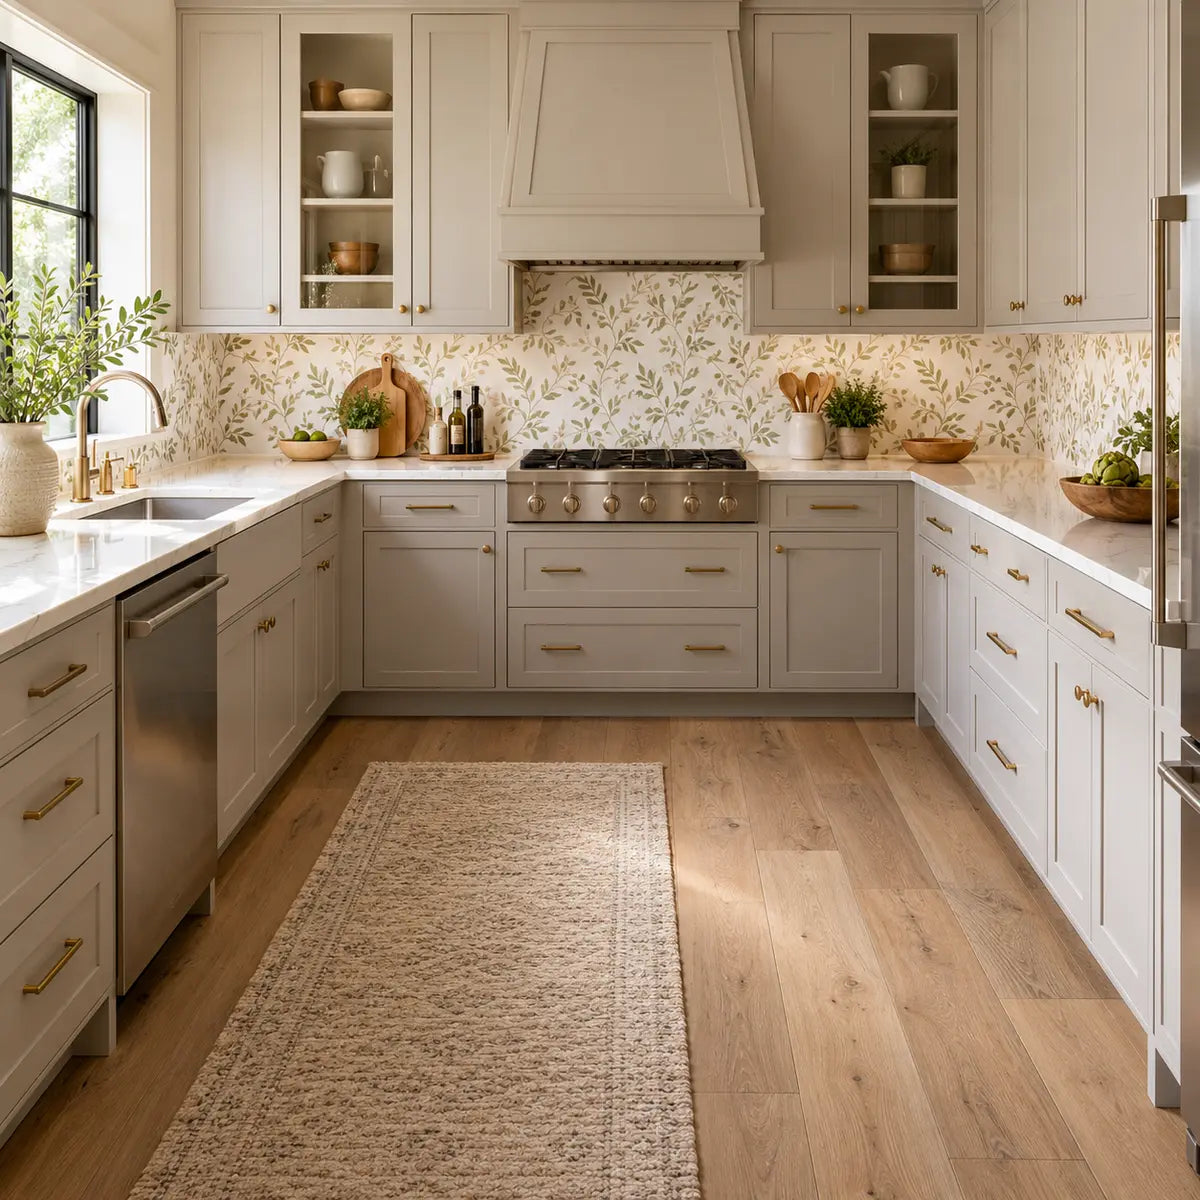
Treat the sink run and the cooking area as separate purchasing decisions. A finish you like for an ordinary splash location still needs its own heat assessment before continuing behind the range.
As a practical planning exercise, sketch the wall and mark the appliance, sink, exposed boundaries, and intended finish transitions. This gives the supplier something specific to review and helps you avoid buying one material for an entire wall before checking its most demanding location.
The backsplash heat and cleaning documentation checklist can help organize those questions. Use it to prepare the conversation; obtain the final placement answer from the applicable product and appliance instructions.
Which finish looks and feels more convincing?
The more convincing finish is the one whose actual texture, sheen, pattern, and edges work in your room. Judge physical samples in the intended location, rather than assuming that composite means deeper texture or PVC means a flat, artificial appearance.
Separate visual texture from physical relief. Visual texture is the printed or colored appearance of stone, grout, or another surface. Physical relief is the shape you can feel. A photograph can show the first clearly while revealing little about the second.
Palisade’s technical sheet, for example, describes flat textures while offering stone- and concrete-like appearances. That tells you why a convincing image should not be treated as proof of a matching tactile surface. The same sample-based scrutiny belongs in a peel-and-stick comparison. (ACP, Palisade Product Data.)
Use a sample inspection that answers real questions
Place samples vertically where you intend to install them. Look at them in daylight and under the room’s normal lighting. Hold adjacent pieces together so you can assess the joint as well as the face.
Check the features you will actually notice:
- Whether the sheen suits the cabinets, countertop, and fittings.
- Whether printed detail and physical relief meet your expectations.
- How the joint looks from normal viewing distance.
- Whether the pattern repeats in a distracting way.
- What a cut edge or finished boundary will look like.
- Whether you are comfortable cleaning the surface using the permitted method.
This is a preference exercise, not an independent realism test. A finish that looks too glossy to one homeowner may be exactly what another wants.
Give exposed edges particular attention. Ask to see the proposed trim or termination beside the sample. The face may occupy most of the wall, but an unresolved boundary can make an otherwise appealing installation feel incomplete.
For a later finish shortlist, the Dual Ceramics listing with Almond White finish information provides a catalog destination to inspect. Confirm the exact product identity, sample appearance, and technical suitability before purchase; its name alone does not establish ceramic construction or room approval.

Are either of these finishes waterproof enough for a bathroom or shower?
Bathroom suitability depends on the specific exposure and complete installation. A decorative bathroom wall, a vanity splash wall, and a direct-spray shower wall should be assessed separately.
Use three plain-English distinctions:
Splash exposure means occasional water reaches the finish and the area can dry between events. Persistent dampness means moisture remains a recurring condition that needs attention. Direct-water exposure means water repeatedly reaches the finish, its joints, and its boundaries during use.
These descriptions help you ask better questions. They are not product certifications or substitutes for a manufacturer’s approved-use instructions.
Routine splashes and bathroom humidity
Stickwoll’s FAQ describes a water-resistant, wipe-clean surface for routine splashes. It advises avoiding prolonged exposure and direct shower zones unless explicit product-specific guidance permits that placement. That supports considering documented splash applications while keeping direct-shower approval as a separate requirement. (Stickwoll, FAQ.)
For a vanity, examine the whole installation drawing. Where does the finish meet the countertop? What happens at the side edges? Are there openings or fixtures? What joint and boundary treatment does the selected product require?
A bathroom label does not answer those questions. The bathroom wall exposure guide helps distinguish decorative walls, intermittent splashes, and direct spray before you shortlist products.
Direct shower areas need assembly instructions
Palisade provides a documented shower installation route. Its instructions call for sealed tongue-and-groove joints, cut edges, and corners, along with an appropriate waterproof substrate unless covering existing ceramic tile as described in the guide. The backing system must also follow its own installation requirements. These conditions apply to the documented Palisade system. (ACP, Palisade Tub & Shower Installation Guide.)
Do not read a list of possible backer materials as permission to omit their required waterproofing details. The useful question is: What complete assembly is required for this wall, and how will every connection remain continuous?
A shower review should account for the backing, adhesive, panel connections, corners, base transition, cut edges, and penetrations. Ask for the current complete instructions before comparing the decorative finish.
The bathroom and wet-area planning guide offers room context. Product-specific assembly instructions still govern the proposed installation.

Which installation is easier, and what causes adhesive failure?
Peel-and-stick tile removes the separate adhesive-application step, but overall installation difficulty depends on the wall, layout, cuts, and finishing requirements. A ready wall and simple layout are different projects from an uneven overlay with many openings.
Stickwoll’s installation guide calls for a clean, smooth, dry wall, advance layout planning, and smoothing from the center out to the edges. Those are application instructions, not permission to cover an unstable or damp surface. (Stickwoll, Installation & Care Guide.)
The documented Palisade shower method uses separately applied PVC-compatible adhesive and requires joint sealing. Its instructions also address sealed accessory penetrations and attachment into framing. That is a broader sequence than placing a decorative face alone. (ACP, Palisade Tub & Shower Installation Guide.)
Inspect what the adhesive will actually touch
The substrate is the surface receiving the finish or adhesive. In an overlay project, that may be painted plaster, existing tile, or another approved surface.
Ask whether that surface is firmly attached, cleanable, suitably smooth, dry, and expressly permitted by the selected instructions. Covering an existing wall does not remove the need to understand its condition.
The EPA guidance on building moisture control advises drying materials before covering them and warns that insufficiently dry substrates can cause coverings and coatings to fail. It also documents a vinyl floor-tile example in which prolonged high humidity accompanied mold growth and adhesive failure.
That field observation concerns flooring in an unidentified building, not either wall product in this comparison. It supports the general preparation lesson; it cannot establish a product failure rate.
Follow a preparation sequence before opening adhesive backing
- Confirm permitted use. Match the exact finish to the room exposure and substrate.
- Inspect the existing wall. Resolve loose material, damage, and the source of dampness before covering.
- Clean as directed. Follow the selected product’s instructions for the existing surface and allow it to dry.
- Complete approved repairs. Address unevenness or recessed joints using methods compatible with the installation.
- Confirm readiness. Check coating cure and any manufacturer-required moisture or adhesion criteria.
- Plan the complete layout. Include cuts, openings, corners, exposed boundaries, and required gaps or trims.
- Install and finish as specified. Use the stated application pressure, adhesive, sealant, and exposure waiting periods.
There is no universal paint-curing interval or moisture threshold for every coating and adhesive combination. “Dry to touch” should not become your own substitute for the relevant coating and finish instructions.

Existing tile needs its own assessment
If you plan to cover ceramic or porcelain, check whether the existing installation is stable and whether the new product permits that surface. Evaluate recessed grout, uneven tile edges, cleaning residue, and the preparation method before committing to an overlay.
The guide to installing peel-and-stick tile over existing tile explains those planning questions. Do not transfer another manufacturer’s primer, pressure, or preparation procedure to your selected product without approval.
A test patch can help you assess handling and immediate compatibility under the supplier’s recommended conditions. It does not certify long-term performance or direct-water suitability.
Include finishing and waiting time
Compare the whole work sequence when estimating labor. Include clearing the room, preparing the wall, laying out the pattern, cutting, finishing boundaries, cleaning up, and waiting before exposure.
For separately applied adhesive or sealant, use the respective instructions for setting and water-exposure timing. For peel-and-stick products, follow the applicable pressure and placement directions. Avoid buying on an installation-speed claim that excludes preparation or finishing.
How should you clean and maintain each finish?
Use the selected manufacturer’s permitted cleaner, tool, and method. Maintenance should also include looking at joints, boundaries, and attachment rather than judging the installation only by whether the face looks clean.
Stickwoll recommends mild soap and water with a soft cloth or sponge and avoidance of abrasive cleaners. That is routine care advice, not proof of stain-proof or scratch-proof performance. (Stickwoll, FAQ.)
ACP recommends nonabrasive cleaning for Palisade and acknowledges that sharp objects can scratch panels and blunt force can dent them. Its care cautions likewise do not establish damage-proof performance. (ACP, Palisade Frequently Asked Questions.)
Make cleaning compatibility part of the purchase
Before choosing a kitchen finish, ask whether its permitted cleaning method suits the way you use the room. Before choosing a bathroom finish, ask about the cleaners you expect to use and how to care for sealed joints and trims.
Do not assume that a cleaner suitable for the panel face is suitable for every adhesive, coating, or sealant in the installation. Request approval for the complete system where necessary.
Keep a simple care record with the product name, installation instructions, approved cleaners, and repair information. This is particularly useful for landlords or shared households, where the person cleaning the wall may not be the person who selected it.
During routine cleaning, look for lifted edges, opened joints, damaged seals, or recurring dampness. Treat a change as a reason to inspect the cause and consult the applicable repair guidance. Adding adhesive or sealant without understanding the cause can leave the underlying question unanswered.

What is the total cost of composite peel-and-stick tile vs PVC panels?
The useful cost comparison is the complete project you can actually install. Material price alone cannot establish better value, and there is no justified category-wide service-life figure to turn into a reliable annual cost.
Price both candidates for the same wall area and exposure requirements. Include preparation, attachment, trims, sealing, tools, labor, delivery, and any expected restoration. Keep optional design upgrades separate so they do not distort the basic comparison.
Build your project cost comparison
For each candidate, enter your own quoted or estimated amounts for:
- Finish material, including planned cutting waste and repair stock.
- Surface preparation and repairs.
- Adhesive, sealant, trims, and other required accessories.
- Tools, protection, delivery, and disposal.
- Paid labor.
- DIY hours and the hourly value you choose for your time.
- A separately identified allowance for uncertain work.
Calculate two results for each candidate:
Cash project total = material + preparation + accessories + tools and logistics + paid labor + allowance.
Time-inclusive total = cash project total + DIY hours × your chosen hourly value.
Then subtract candidate A’s total from candidate B’s corresponding total. A positive result means B costs more on your inputs; a negative result means A costs more. If the sign changes between cash and time-inclusive totals, your valuation of DIY time changes the cost preference.
Leave an unknown input marked unknown, rather than entering zero. A result with unknown costs is an incomplete estimate.
This comparison uses your prices and assumptions. It does not forecast lifespan, calculate failure probabilities, or establish which product performs better.
Use a single currency for every monetary entry below. Blank fields mean unknown; enter zero only when you have confirmed there is no cost for that item. Candidate A and candidate B can be either format. Include restoration within the relevant preparation or labor quote, or identify it in the allowance, without counting the same work twice.
Amounts are added as entered and displayed to two decimal places. The calculation does not add tax, financing, inflation, or future repair automatically; include any applicable quoted costs in your entries. Keep quote dates and assumptions with your estimate so you can update the comparison when the scope changes.
Score priorities only after suitability is established
For candidates that satisfy the room requirements, a simple worksheet can make your preferences clearer.
Give appearance, installation effort, cleaning convenience, repair practicality, and complete project cost a personal importance weight from 0 to 3. Then rate each candidate on those same factors from 1 to 5, using samples, instructions, and your project estimate. Multiply each weight by its rating and add the results.
A higher total means a closer match to your stated preferences. These are personal worksheet scales, not validated product ratings. Leave an unsupported rating blank and keep the comparison unfinished until you can assess it.
Heat approval, shower suitability, and substrate compatibility remain pass-or-pause requirements. A strong appearance score cannot compensate for an unsuitable location.
Budget for repair and eventual removal
Stickwoll advises warming tiles with a hair dryer before gentle peeling; its FAQ says removed tiles are not reusable and that removal results vary with paint and substrate. Allow for possible restoration, especially in a rental. (Stickwoll, Installation & Care Guide and FAQ.)
ACP describes individual Palisade removal by cutting tongue connections and prying away the adhesive bond, with possible wall repair afterward. Individual replacement therefore needs its own procedure and cost assessment. (ACP, Palisade Frequently Asked Questions.)
Ask how a damaged piece is replaced, whether adjacent work is affected, and how any wet-area protection is restored. Keep matching repair material when practical, but verify the replacement method before assuming spare pieces make repair straightforward.
Match the finish to the room and ownership plan
The most useful recommendation changes with the wall’s job. Compare only candidates whose instructions cover that job, then let appearance, labor, and repair preferences decide between them.
Kitchen backsplash away from cooking heat
For a documented ordinary-splash location, compare the sample, permitted substrate, cleaner compatibility, and boundary details. Give extra attention to the countertop connection and exposed ends.
Do not extend that decision into the cooking zone automatically. Keep the heat check separate even if the decorative pattern continues across the wall.
Bathroom vanity or decorative wall
First distinguish a decorative wall from one that receives repeated splashing. Then confirm the product’s exposure instructions and the required preparation.
If the wall remains damp or its condition is uncertain, the next purchase may be repair work rather than a decorative finish. The EPA guidance and manufacturer preparation requirements support resolving that condition before covering. (U.S. EPA, Moisture Control Guidance.)
Direct shower wall
Compare complete documented shower systems. A Palisade candidate has a manufacturer-described route with assembly conditions; that does not make every PVC panel suitable. A peel-and-stick candidate needs equally explicit product-specific permission and installation details before it belongs in the shower shortlist. (ACP, Palisade Tub & Shower Installation Guide.)
Rental or frequently refreshed property
Get permission for the proposed finish and removal method before installation. Include possible paint or wall repair in the project budget.
For landlords, ask how a future installer will identify the product, obtain instructions, and repair an isolated area. For renters, keep the approval and restoration expectations in writing. Neither adhesive-backed tile nor bonded panels should be assumed to provide damage-free removal.
Which option should you choose? Use this final checklist
Choose the candidate that passes every applicable location requirement and offers the best combination of appearance, work, care, and cost for your project. If one candidate passes and the other remains uncertain, resolve that uncertainty before treating the prices as equivalent offers.
Before ordering, confirm:
- The exact product identity and construction information.
- Written permission for the intended room, exposure, and substrate.
- Heat and appliance compatibility wherever cooking heat applies.
- Complete assembly instructions wherever direct water applies.
- A sound wall and an approved preparation method.
- A layout covering joints, corners, openings, and exposed boundaries.
- Required adhesive, sealant, trims, and waiting periods.
- A sample you have assessed in the room.
- Cleaning instructions that suit your household.
- A repair and removal plan included in the budget.
- Permission and restoration expectations for a rental.
Ask one final question: Can I explain how this finish will be installed, cleaned, repaired, and eventually removed? If the answer is clear, you are comparing a project rather than a product photograph.
For an approved decorative location, you can then compare Stickwoll finishes such as Blush Petals peel-and-stick tiles. Use the listing for style selection and confirm the exact product’s technical instructions before ordering.
The best fit may be peel-and-stick tile on one wall and a different documented system in a more demanding zone. Matching each location to its requirements gives you a clearer decision than forcing one material across every exposure.
Frequently asked questions
Does “grout-free” mean no sealing or finishing is required?
No. Grout is one joint-filling material; a grout-free format can still require sealant, trims, edge treatment, or other finishing. Palisade’s shower instructions, for example, require sealed connections and boundaries. Follow the exact installation details for the selected location. (ACP, Palisade Tub & Shower Installation Guide.)
Can I add stronger adhesive if peel-and-stick tile starts lifting?
Ask the supplier for a repair procedure that addresses the cause and the exact product. Check wall condition, cleanliness, permitted exposure, and substrate compatibility before adding another adhesive. Treat the repair as a compatibility question, rather than assuming that any stronger bond is appropriate.
Does a longer warranty mean the wall will last longer?
A warranty’s term and coverage do not establish expected service life. Compare what it covers, what installation conditions apply, and whether labor or restoration is included. Palisade’s technical sheet, for example, describes a limited manufacturing-defect warranty; it is not a comparative lifespan study. (ACP, Palisade Product Data.)
Can I use the same finish throughout a kitchen and bathroom?
Possibly, if the exact product’s instructions cover every proposed location. Check each wall separately for substrate, splashes, direct water, heat, and finishing requirements. Keep any unapproved exposure out of the plan until the supplier provides applicable product-specific guidance.


Leave a comment
This site is protected by hCaptcha and the hCaptcha Privacy Policy and Terms of Service apply.