












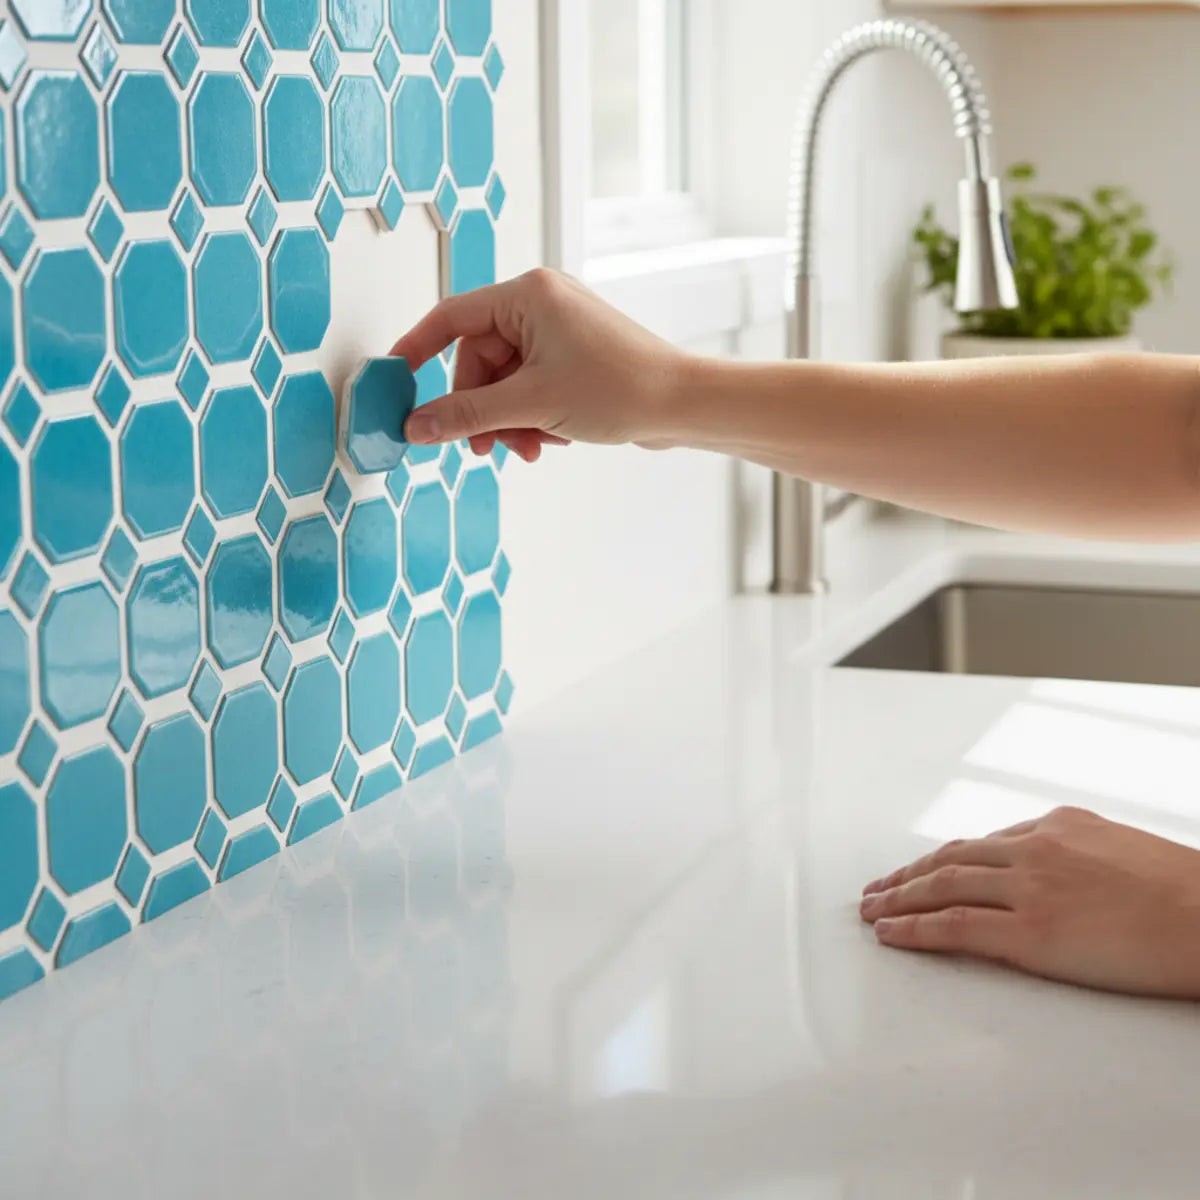
A DIY mosaic backsplash can mean two very different projects. Traditional ceramic or glass mosaic is often supplied on mesh-mounted sheets and installed with a compatible setting material, followed by grout. A peel-and-stick mosaic-look wall tile uses a factory adhesive backing and may simulate mosaic joints without mortar or grout. The color and visual pattern can look similar while the installation system is completely different.
This guide separates those workflows so you can choose the correct tools, wall preparation, cutting, seams and maintenance for the product you actually buy. It also removes fixed grout-sealing schedules, fictional makeover cases and “foolproof” installation claims.
Identify the mosaic construction before buying tools
Look at the edge and back of the product. Traditional mosaic may use small ceramic, porcelain, stone or glass pieces mounted on mesh or another sheet backing. Peel-and-stick products can use printed, molded or individual-looking pieces on a self-adhesive panel.
Read the technical data or installation guide. If the product requires thin-set mortar, grout or a wet-area membrane, follow that tile system. If it uses a factory pressure-sensitive adhesive, follow the self-adhesive system. Do not add mortar or grout merely because the face looks like traditional mosaic.
Decide where the backsplash will stop
Measure the wall between countertop and upper cabinets and mark open ends, windows, outlets, switches and appliance zones. A mosaic repeat can make terminations more visible than a large-format tile because many small lines reach the edge.
Choose whether the design ends under a cabinet, at a wall corner, at a vertical trim or at a clean exposed boundary. Plan that termination before placing the first sheet.
Use a dry layout to avoid tiny edge pieces
Arrange several sheets or panels without bonding them. Check the repeat, seam alignment and how the last row meets cabinets and countertops. If the final cut would create tiny slivers, shifting the starting line may produce a cleaner result.
For mesh-mounted mosaics, check whether individual pieces can be adjusted on the mesh. For self-adhesive mosaic-look panels, check how the printed or molded joint continues across panel boundaries.
Surface condition matters to both systems
A backsplash wall should be stable, clean and appropriate for the chosen installation. Loose paint, grease, soft drywall, active moisture, deep texture or old adhesive can interfere with either system.
If the wall is damp or stained, resolve the source first. The EPA’s mold and moisture guidance emphasizes fixing moisture sources and drying affected materials instead of covering them.
Self-adhesive mosaic path: clean for pressure-sensitive adhesive
For a peel-and-stick product, use the wall and tile manufacturer’s cleaning method. Kitchen grease may need more than a dust wipe, but a strong degreaser is not automatically correct for every paint or coating.
3M’s pressure-sensitive adhesive preparation guidance illustrates the general importance of clean, dry compatible surfaces and application pressure. Your tile may use a different adhesive, so the exact product instructions control the project.
Self-adhesive mosaic path: keep the first row straight
Use a level reference line rather than trusting the countertop. Expose the backing according to the product method and align the first panel carefully because the mosaic grid can make drift obvious over several pieces.
Do not stretch flexible material to force a seam closed. If the pattern will not align, stop and check whether the first piece is level or whether the panel orientation is incorrect.
Self-adhesive mosaic path: use the product-specific cutting method
A mosaic-look panel can be vinyl, composite, gel-faced, metal-faced or another layered material. Those constructions require different cutting tools. Do not copy a ceramic-mosaic instruction that recommends tile nippers for a polymer panel, and do not assume scissors belong on a metal-faced product.
Use a template for outlets and difficult corners. Make the cut before exposing adhesive whenever possible. Keep the opening large enough for correct electrical cover and device fit without cutting into the electrical box.
Self-adhesive mosaic path: use the documented pressure method
Pressure-sensitive adhesive needs contact with the prepared wall, but the required tool and pressure vary by product. Some systems may recommend a roller or smoothing tool; others use firm hand pressure. Follow the exact tile instructions.
If a panel edge lifts immediately, investigate wall contamination, texture, weak paint, insufficient pressure or a difficult edge. Do not automatically add construction adhesive because the product was intended to use its factory backing.
Self-adhesive mosaic path: do not grout simulated joints by default
Many peel-and-stick mosaic products include molded, printed, overlapping or interlocking grout-like lines. Adding cement grout can create a rigid material between panels that were designed to move or overlap differently.
Only grout a self-adhesive product when the manufacturer specifically supports a grout system for that exact construction.
Traditional mosaic path: use an installation method for the material
Mesh-mounted ceramic, porcelain, stone and glass mosaics can have different mortar, grout and cutting requirements. The TCNA ANSI Standards page lists current ceramic-tile installation standards, including substrate/preparation and grout-installation requirements.
Use the exact tile and setting-material manufacturer’s instructions, especially for glass or natural-stone mosaics where mortar color, chemistry or staining can matter.
Traditional mosaic path: substrate flatness is critical
Small mosaic pieces can follow wall irregularities that a larger tile might bridge visually. A ridge behind one sheet can create lippage or a wavy reflected surface across many small pieces.
Inspect the wall with a straightedge and side lighting. Correct the substrate according to the approved tile system before spreading setting material.
Traditional mosaic path: select the trowel from the system
A small mosaic often needs a trowel and mortar method that achieves good contact without forcing excessive mortar through the joints. The exact notch is not universal because tile thickness, mesh backing, mortar consistency and substrate flatness vary.
Follow the mortar and mosaic manufacturer’s guidance. Periodically check coverage where appropriate instead of assuming one trowel dimension works for every mosaic sheet.
Traditional mosaic path: keep sheet lines from becoming visible
Mesh-mounted mosaics can reveal the outline of each sheet when spacing between sheets differs from spacing between individual pieces. Dry-layout several sheets and compare the joint width at sheet boundaries before installation.
During placement, adjust sheets or individual pieces where the product allows it so the sheet edges disappear into the overall mosaic field.
Traditional mosaic path: allow the setting material to reach the required condition before grouting
Do not grout simply because the tile feels fixed to the touch. Use the setting-material manufacturer’s waiting time and environmental conditions. Grouting too early can disturb the bond or trap conditions the system was not designed for.
Likewise, do not impose a universal overnight waiting period. Different mortars, temperatures, humidity and tile constructions can require different timing.
Grout type should match the mosaic
Cementitious, premixed, epoxy and other grout systems have different properties and installation requirements. Joint width, tile material, surface sensitivity and room exposure all affect the selection.
TCNA’s current ANSI list includes A108.10 for grout installation and A108.22 for premixed grout, alongside material standards for multiple grout types. Use the specific grout documentation rather than choosing by color alone.
Grout joints are not a waterproofing system
TCNA’s ceramic-tile FAQ explicitly notes that grout joints are not waterproof. In a true wet-area installation, the complete method and substrate provide the necessary water management.
A kitchen backsplash normally sees a different exposure from a shower, but the same principle applies: do not call the wall waterproof merely because the grout is sealed or the tile face does not absorb water.
Do not publish a fixed grout-sealer interval
Some grout systems or sealers require initial treatment or later maintenance; others use different care instructions. The need for sealer and the reapplication schedule belong to the exact grout/sealer system.
Do not write “re-seal every one to two years” as a universal mosaic rule. Keep the grout product record, inspect the actual joint condition and follow the manufacturer’s maintenance guidance.
Plan movement and changes of plane correctly
Rigid ceramic/glass tile assemblies need movement accommodation. TCNA’s placement FAQ explains that movement joints are needed because tile and substrates can expand and contract differently.
Do not fill intentional movement joints with rigid grout. Inside corners and transitions may require a movement-compatible detail according to the applicable tile system. Self-adhesive wall products have their own corner and seam methods; do not borrow the ceramic method blindly.
Outlets can expose sheet-spacing problems
Mosaic sheets often need several individual pieces removed or adjusted around a receptacle. Plan the opening so the cover plate fits correctly and narrow unsupported pieces are minimized.
Turn off power before removing electrical covers. If the device, box or wiring needs alteration, use the appropriate qualified electrician rather than treating the issue as a tile-cut problem.
Use edge trim only when it belongs to the system
A traditional ceramic/glass mosaic may use a mortar-anchored metal profile, bullnose or other edge treatment. A self-adhesive mosaic-look panel may use a retrofit profile, clean cut or another product-specific termination.
Do not assume the same metal trim can be installed with the same adhesive on both systems. Check profile geometry, tile thickness and installation method before ordering.
Sink zones need edge and seam planning
A kitchen sink creates routine splashes, but persistent water intrusion, leaking fixtures and standing water are different conditions. Keep the wall and seams inspectable and repair plumbing issues rather than trying to solve them with extra sealant.
A self-adhesive face can be wipe-clean without creating a waterproof wall. Traditional mosaic grout can be water-resistant without being waterproof. The complete assembly controls the exposure limit.
Appliance heat is product-specific
Do not use a generic backsplash clearance for every self-adhesive, ceramic or glass product. Follow the tile-system and appliance manufacturer’s guidance for ranges, toaster ovens and other heat sources.
Direct flame and concentrated exhaust deserve conservative placement. A ceramic face can tolerate heat differently from a polymer panel, but adjacent wall materials, adhesives, grout and trim also matter.
Mosaic color and lighting affect perceived joint quality
High-contrast grout or printed joints make spacing differences easier to see. Glossy glass mosaics can reflect side lighting that emphasizes lippage. Matte stone-look mosaics can hide some visual variation but may have different cleaning needs.
View several assembled sheets under the room’s task lighting before buying the full quantity. A pattern that looks seamless in diffuse showroom light can reveal sheet boundaries under strong under-cabinet lighting.
Use a mock-up for complex patterns
For mixed-color mosaics, random blends or directional designs, assemble several sheets on a table or temporary sample board. Look for repeated clusters and abrupt color blocks. Rotate sheets only when the manufacturer’s pattern allows it.
This is especially useful near corners or open ends where a repeated dark piece can create an accidental stripe across the wall.
Keep repair pieces from the same design
Mosaic patterns can be difficult to match later. Save a few full sheets or panels and label them with the product, color, dimensions and order date.
For traditional tile, keep grout information as well. For self-adhesive products, keep the removal and care instructions so a local piece can be replaced without improvising.
Cleaning method depends on the surface
Glass, ceramic, stone, printed polymer and metal-faced mosaic products can have different chemical and abrasion limits. Do not use one harsh cleaner across all materials simply because the pieces are small.
Follow the tile and grout care instructions. Test an unfamiliar cleaner on spare material when appropriate. A cleaner that is safe for glazed ceramic may dull a polymer print or affect a stone sealer.
Do not use a fictional makeover as performance evidence
A story about an unnamed client completing a kitchen in a certain number of hours does not prove that your wall, material or budget will behave the same way. If a documented case study is used, it should include verifiable project conditions, products, photos and actual costs or clearly labeled estimates.
For planning, use hypothetical scenarios with stated assumptions. That is more transparent than presenting a made-up homeowner and precise outcome as evidence.
Three honest planning scenarios
Small self-adhesive mosaic backsplash
Assume a smooth, stable painted wall, a product documented for kitchen backsplash use, two outlets and a simple rectangular area. The main planning work is cleaning, dry layout, exact cuts, seam alignment and pressure according to the product method.
Traditional glass mosaic backsplash
Assume a suitable prepared substrate and a glass mosaic with manufacturer-approved mortar and grout. The project includes setting-material selection, sheet alignment, coverage, curing before grout, grout installation and compatible cleaning.
Wall with moisture or major texture
Do not force either system onto an unsuitable substrate. Resolve the moisture or wall condition first. A more expensive tile does not compensate for a wet or unstable wall.
Frequently asked questions
Do I need grout for a mosaic backsplash?
Traditional ceramic, glass or stone mosaic commonly uses grout as part of the tile system, but the exact grout depends on the material and joints. Peel-and-stick mosaic-look products may not be designed for grout at all. Follow the exact product method.
Can I install mosaic over painted drywall?
Potentially, depending on the system. A self-adhesive product may approve stable cured painted drywall. A conventional mortar-set tile assembly has its own substrate requirements. Inspect the wall and follow the applicable product/industry method.
Can I use the same cutter for glass mosaic and peel-and-stick mosaic?
No universal cutter works for both. Glass, ceramic, stone, vinyl, composite and metal-faced products have different cutting requirements. Use the exact manufacturer’s method and test on spare material.
Is grout waterproof?
No. TCNA explicitly notes that grout joints are not waterproof. Wet-area performance comes from the complete tile assembly and substrate method.
How often should I seal grout?
Use the exact grout and sealer manufacturer’s guidance. There is no universal one- or two-year schedule for every grout system.
Can I use peel-and-stick mosaic behind a stove?
Only where the exact product and appliance guidance allow it. Do not transfer a heat clearance from another brand or from ceramic tile.
Can I install peel-and-stick mosaic in a shower?
Only if the exact product and complete wall assembly are documented for direct wet-area use. A water-resistant face does not automatically create a waterproof shower system.
How do I stop mosaic sheet lines from showing?
Dry-layout multiple sheets, compare spacing at sheet boundaries with spacing between individual pieces, and adjust where the product allows it. Side lighting can help reveal differences before the material sets.
Should I seal every edge with caulk?
No universal rule applies. Use the edge, movement or sealant detail specified for the exact tile system and location. Extra sealant can complicate repair and does not replace waterproofing where a wet-area assembly is required.
Can I install traditional mosaic with peel-and-stick adhesive sheets?
Only when a documented installation system specifically supports that tile, substrate and adhesive membrane. Do not combine unrelated products simply because they are all marketed as DIY-friendly.
Final installation checklist
- Identify the mosaic construction and installation system.
- Confirm the substrate is stable, dry and within product requirements.
- Resolve leaks and wall damage before tiling.
- Measure actual usable coverage and dry-layout multiple sheets/panels.
- Plan outlets, corners, open ends and appliance zones.
- Use cutting and setting tools for the exact material.
- Keep self-adhesive and mortar/grout workflows separate.
- Follow system-specific cure/return-to-use timing.
- Do not treat grout, sealer or caulk as universal waterproofing.
- Save matching material and installation records for future repair.
Bottom line
A DIY mosaic backsplash becomes much easier to plan once you identify which system you actually have. A self-adhesive mosaic-look wall tile relies on a compatible clean substrate, accurate layout, product-specific cuts and pressure. Traditional ceramic or glass mosaic belongs to a setting/grout assembly with its own substrate, mortar, joint and movement requirements.
Do not mix those workflows, do not use fixed sealer intervals, and do not treat one fictional makeover as evidence for your project. Measure the real wall, dry-layout several sheets, follow current product and tile-industry guidance, keep sink and appliance exposure within documented limits, and plan for repair before the first piece goes up.
Sheet-mounted mosaic needs a sheet-boundary check
Traditional mosaics mounted on mesh can create visible “sheet lines” when the spacing between sheets differs from the spacing between individual pieces. Lay several sheets together on a table before installation and compare the joint width across every boundary.
If the mosaic system allows pieces to be moved on the mesh, minor adjustments can help the sheets disappear into the overall pattern. Do not force a distorted sheet into place after the mortar is already setting; correct spacing while the installation is still workable.
Glass mosaic can show setting material through the tile
Some glass mosaic is translucent or semi-translucent. The color and coverage of the setting material can influence the finished appearance, and inconsistent trowel ridges or voids may be visible through the glass.
Use the glass-tile and setting-material manufacturer’s instructions. Do not assume a mortar selected for opaque ceramic will produce the same visual result behind translucent glass.
Natural stone mosaic can have different sealing and staining concerns
Stone is not one uniform material. Porosity, mineral composition and surface finish affect how the stone reacts to mortar, grout, sealers and cleaners. Some stones can darken or stain when the wrong products are used.
If the mosaic includes natural stone, follow the stone and installation-product guidance. Do not transfer the maintenance schedule of a glazed ceramic backsplash to a porous stone product.
Mixed-material mosaic needs the most conservative compatible method
A sheet can combine glass, metal, stone and ceramic pieces. That means the setting material, grout, cleaner and cutting method must be compatible with every component, not just the majority material.
When the manufacturer publishes a specific installation sheet for the mixed mosaic, use it. If the product documentation is incomplete, ask the supplier before selecting mortar or grout from a generic recommendation.
Mesh backing should not become the only bond surface
For traditional mesh-mounted mosaic, the installation system should achieve appropriate contact between the tile assembly and setting material. Heavy mesh, excess glue or poor mortar transfer can reduce effective bond in some products.
Do not assume that because the sheet stays together in your hand, it will bond correctly to the wall. Use the manufacturer’s coverage and setting instructions and inspect the installed contact as the method requires.
Cut the mesh separately from cutting the tile pieces
A utility knife may be useful for cutting mesh between pieces, but it does not make ceramic, glass or stone pieces themselves safe to cut with the same tool. Separate the two tasks.
Plan whether the opening can be created by removing full mosaic pieces, cutting the mesh, or cutting individual pieces. For glass or ceramic, use the appropriate cutter and eye protection; sharp fragments can result from cutting.
Build a small sample board for a difficult mosaic
A sample board can answer several questions at once: sheet spacing, mortar visibility, grout color, joint fullness and final cleaning. Use the actual materials planned for the project on a small representative substrate.
Let each material reach the condition required by its manufacturer before judging the sample. A freshly grouted panel may look darker or hazier than the cured final result.
Use the sample to choose grout color, not a screen mock-up alone
Grout occupies a high percentage of the visible surface in a mosaic because there are many small joints. A bright contrasting grout can emphasize every piece; a closer color can make the surface read more continuously.
Test more than one grout color if the design decision is important. Digital mock-ups are useful for composition but cannot reproduce actual grout texture, joint depth and surrounding light.
Final cleaning can reveal the quality of the whole installation
For traditional tile, grout haze or residue can change the look of glass, ceramic, stone or metal pieces. Follow the grout manufacturer’s cleanup timing and methods; cleaning too early, too late or with too much water can create problems.
For self-adhesive mosaic-look tile, final cleaning should use a product compatible with the factory face. Do not use grout-haze removers or acidic cleaners simply because the design looks like traditional mosaic.
Acceptance check for peel-and-stick mosaic-look tile
Confirm that panel seams align, edges are fully seated according to the product method, outlets and corners are cleanly cut, and no piece depends on trim to hold a failing bond. Inspect under side lighting for lifted edges or mismatched relief.
If one panel differs visibly, determine whether the problem is orientation, pattern repeat, wall flatness or actual product variation before installing more material.
Acceptance check for traditional mosaic
Inspect sheet boundaries, individual-piece alignment, grout-joint consistency, exposed edges and any movement or transition details. Check that the finish is clean and that no mesh-backed sheet outline dominates the wall.
Keep photographs and material records. A small local repair later is easier when the tile, grout and installation products can be identified.
Repair a local self-adhesive mosaic panel by fixing the cause first
If a panel lifts, identify whether the wall is contaminated, damp, textured or weak. Follow the product’s removal and replacement instructions, repair the substrate and use a matching spare panel.
Do not add a permanent adhesive simply to keep one failing panel in place when the original system was designed to be self-adhesive.
Repair traditional mosaic without assuming the whole wall must come out
A small damaged area may be repairable locally, but the method depends on the tile, grout and substrate. Removing one mosaic piece can be more delicate than removing a large tile because neighboring pieces and mesh may be close together.
Determine why the damage occurred before replacement. Impact, substrate movement, moisture and poor bond require different responses.
Keep mosaic design and system performance as separate decisions
You can love a green glass mosaic or a marble-look self-adhesive panel while still deciding that the wall or exposure is wrong for that product. Design preference should narrow the visual choices only after the technical system fits the project.
This separation makes shopping easier: first eliminate products that do not fit the wall and room, then choose among the remaining colors, patterns and materials.



Leave a comment
This site is protected by hCaptcha and the hCaptcha Privacy Policy and Terms of Service apply.