


Peel-and-stick tile can work in high humidity, robustly maintaining its bond, but only when the adhesive type, wall surface, room conditions, and installation process support long-term adhesion retention. In prolonged summer humidity, the biggest failure drivers are not just water exposure but relative humidity, condensation cycles, textured or poorly prepared walls, and low-grade adhesive systems.
- • Adhesive Chemistry: High-grade acrylics outlast standard rubber-based glues.
- • Substrate Stability: Walls must be sealed with a moisture-blocking primer.
- • Environmental Control: Limiting severe condensation cycles is mandatory for longevity.
Many buyers in coastal and tropical regions share a common fear. They are not asking whether a peel-and-stick tile can survive a minor splash from the kitchen sink. They need to know if it will maintain adhesion after weeks of relentless heat, trapped steam, and 80 percent outdoor humidity.
Our tracked adhesion observations in tropical-style conditions reveal a clear divide. Some installations curl and bubble within days. Others hold firm for years.
This guide translates adhesive chemistry and moisture behavior into practical homeowner decisions. We will outline the exact room-by-room risk factors for kitchens and bathrooms. We will also provide a clear framework for homes operating without central air conditioning.
By evaluating these materials through strict performance metrics rather than generic marketing claims, you can avoid costly failures. This is how you ensure a durable, lasting installation in challenging coastal climates.
Does peel-and-stick tile actually work in high humidity?
Are you tired of reading generic "waterproof" labels that fail to explain if your backsplash will survive a long Florida summer? This section translates marketing claims into real-world adhesive science.
Peel-and-stick tile can absolutely function in humid environments, provided you respect the physical limits of the adhesive. It requires a flawless installation substrate and strict adherence to moisture management. If you ignore these baseline requirements, the humid air will inevitably compromise the bond.

To understand why some tiles fail, we must look beyond basic water resistance. Splashing water on the face of a vinyl tile is very different from exposing its adhesive backing to vapor.
This difference introduces a critical metric: Adhesion Retention Rate under Sustained Relative Humidity (ARR-RH)—the percentage of bonded area that remains fully adhered after prolonged exposure to elevated moisture and temperature swings.
High ambient moisture acts as an invisible solvent. It slowly attacks the edges of the tile installation.
If you live in Hawaii, Puerto Rico, or the Gulf Coast, this sustained vapor pressure is a constant threat. It requires specific strategies to overcome.
We observe several distinct failure modes when ambient moisture overwhelms the adhesive bond:
- ✖ Edge Lift: The corners of the tile begin to pull away from the wall due to micro-condensation.
- ✖ Surface Bubbling: Vapor penetrates through microscopic gaps, expanding as temperatures rise during the day.
- ✖ Adhesive Creep: The combination of heat and humidity softens the glue, causing the tile to slowly slide downward.
- ✖ Complete Delamination: The backing entirely detaches from the substrate, resulting in total installation failure.
A common misconception is that a thicker adhesive pad automatically means better humidity resistance. In reality, chemical composition matters more than sheer volume.
High-grade acrylic adhesives tend to resist moisture penetration better than standard rubber-based glues. Think of it like a suction cup on a shower wall. A cheap rubber cup slips when it gets warm and wet, while a specialized silicone mount stays put.
Comprehensive Testing Matters for Coastal Homes
Many homeowners blindly trust the word "waterproof" printed on retail packaging, unaware that this label often only applies to the front-facing vinyl material, not the reactive chemical backing. When you introduce persistent 80%+ humidity and salt air, the rules of adhesion completely change. We have spent countless hours analyzing why certain materials degrade while others withstand rigorous tropical testing.
To truly separate temporary fixes from permanent architectural upgrades, you must look at empirical data drawn from high-stress environments. Standardized testing exposes the hidden weaknesses in cheap adhesives, revealing exactly how thermal shock and vapor pressure break down polymer chains. This isn't just theory; it is the fundamental science of preventing catastrophic wall damage in your home.
To evaluate baseline durability, the foundational methodology requires a strict adherence to standardized evaluation. The comprehensive framework detailed in our article, Are Peel and Stick Bathroom Tiles Durable & Waterproof?, provides the quantitative baseline necessary to assess real-world water resistance without critical failure.
Read the Full Durability ReportIndustry consensus dictates that any successful installation must prioritize ARR-RH over purely aesthetic choices. When you optimize for sustained relative humidity, your project transforms from a temporary fix into a reliable architectural upgrade.
Which rooms and conditions are safest or riskiest for peel-and-stick tile in tropical climates?
Unsure if your poorly ventilated powder room or non-air-conditioned rental is a disaster waiting to happen? This section maps exactly where peel-and-stick thrives and where it carries a high risk of failure.
The safest locations for peel-and-stick tile in humid climates are well-ventilated spaces with minimal direct steam. Kitchen backsplashes away from active boiling zones and climate-controlled powder rooms offer the highest success rates. The riskiest environments are unventilated full bathrooms, direct shower enclosures, and enclosed laundry spaces.
To accurately assess your home, you must move away from guesswork. We evaluate spaces using a metric called the Room Exposure Burden Score (REBS)—a cumulative measurement of heat, steam, condensation potential, and ventilation deficits within a specific room.
A high REBS indicates a high likelihood of early adhesive failure. A low score suggests a stable environment for long-term wear.
The American Society of Heating, Refrigerating and Air-Conditioning Engineers (ASHRAE) recommends maintaining indoor relative humidity below 60 percent. When a room frequently exceeds this threshold, the REBS spikes dangerously.
| Room Type | Primary Risk Factor | REBS Score | Suitability in Humid Climates |
|---|---|---|---|
| Kitchen Backsplash (Sink) | Minor splashing, low ambient vapor. | Low | Highly Recommended |
| Kitchen Backsplash (Stove) | Extreme heat, steam from boiling. | Mod to High | Conditional (Requires high-heat adhesive) |
| Powder Room (Half Bath) | Occasional humidity, no shower steam. | Low | Highly Recommended |
| Full Bathroom (With Fan) | Sustained steam, heavy condensation. | Moderate | Conditional (Requires active exhaust) |
| Full Bathroom (No Fan) | Trapped vapor, extreme condensation. | Very High | Not Recommended |
| Laundry Room | Spiking humidity from dryer exhaust. | Moderate | Conditional (Requires good airflow) |
| Non-AC House (Tropical) | Sustained high ambient humidity. | High | Conditional (Strict prep required) |

Choosing the Right Design for Elevated Humidity Environments
When designing a kitchen in a tropical climate, aesthetics must seamlessly integrate with material science. A common failure point in coastal homes isn't just the adhesive, but the physical structure of the tile itself. If a product lacks dimensional stability, the continuous expansion and contraction caused by extreme afternoon heat will force the seams apart, allowing humid air to penetrate behind the installation.
This is precisely why selecting a product engineered for thermal resilience is paramount. You need a structural design that minimizes seam vulnerability while providing an impermeable barrier against airborne moisture and grease splatter from cooking zones. High-quality manufacturing ensures that the layers do not delaminate when subjected to sudden temperature spikes from nearby stoves.
When factoring in long-term performance degradation in moderate-burden zones, the Coastal Breeze tile functions as the architectural standard. By empirically neutralizing moisture ingress through its 3D Metro Squares layering, it recalibrates the baseline expectations for backsplash longevity. Perfect for renters and DIYers seeking a bold, durable, crimson aesthetic that thrives in coastal air.
View Coastal Breeze SpecificationsA critical mistake homeowners make is assuming all kitchen walls share the same risk. The area directly behind a stove experiences violent temperature fluctuations. Boiling water releases concentrated vapor directly onto the tile face.
In coastal rentals lacking central air conditioning, the ambient humidity rarely drops. This persistent moisture means the adhesive never fully cures or rests.
In these non-AC environments, mechanical ventilation becomes mandatory. Using dehumidifiers or high-velocity fans can artificially lower the REBS, making a conditional installation possible.
How does prolonged summer condensation destroy adhesive bonds?
Ever wonder why your beautiful tiles look perfect on Tuesday but start curling by Friday? We break down the invisible moisture cycles destroying your adhesive from the inside out.
Condensation destroys adhesive bonds by forming microscopic water droplets at the very edge of the tile. Over time, these droplets infiltrate the adhesive layer, breaking down its chemical structure. Once the edges are compromised, the physical weight of the tile pulls it away from the wall.
This process is driven by Capillary Action—the ability of a liquid to flow into narrow spaces without the assistance of external forces.
When hot, humid air hits a cooler wall surface, moisture condenses. This moisture seeks the path of least resistance, which is often the tiny seam between two peel-and-stick tiles.
In environments like Florida or Hawaii, this cycle repeats daily. The adhesive softens during the heat of the afternoon and is bombarded by condensation overnight.
Chemical Degradation
Water vapor physically separates the polymer chains in standard adhesives, turning strong glue into a slippery, ineffective paste.
Thermal Expansion
Tiles expand heavily in the tropical heat and contract rapidly in the cool evening air, repetitively stressing the bond until it snaps.
Substrate Swelling
If moisture reaches an unsealed drywall backing, the wall itself swells with humidity, physically popping the tile off from the inside.
Plasticizer Migration
High heat forces flexible compounds out of the vinyl face, causing the material to shrink, become brittle, and pull away from the wall.
Many DIYers assume that applying heavy pressure during installation will permanently block moisture. Unfortunately, sheer force cannot overcome bad chemistry.
If the ambient humidity remains consistently high, the vapor pressure will eventually find a microscopic entry point.
Learning from the Ultimate Extreme: The RV Environment
If you want to understand the devastating effects of thermal shock and moisture on adhesives, you have to look outside the standard stationary home. Recreational vehicles (RVs) present the absolute worst-case scenario for stick-on applications. During the day, an RV parked in the Florida sun can reach internal temperatures exceeding 120 degrees Fahrenheit. Overnight, coastal air drops the temperature rapidly, causing massive interior condensation on the walls.
This constant, brutal cycling of baking heat and soaking humidity causes rapid dimensional instability in standard vinyl and destroys conventional adhesives in a matter of days. If an installation technique or adhesive compound can survive the grueling micro-climate of an RV, it will easily outlast a standard humid residential kitchen. Mastering these extreme conditions requires abandoning conventional wisdom and relying purely on specialized chemical grip and strict environmental preparation.
Evaluating extreme temperature and moisture swings demands a standardized metric for adhesive shear strength. The comprehensive framework detailed in The Ultimate RV Adhesive Survival Guide provides the quantitative baseline necessary to prevent thermal and moisture-induced adhesive failure. Discover science-backed survival tips to keep your walls perfect.
Read the RV Survival GuideTo combat this daily degradation, industry experts recommend sealing the outermost edges of an installation. A thin bead of clear silicone caulk around the perimeter of the backsplash fundamentally mitigates moisture ingress.
This simple step blocks capillary action entirely. It isolates the adhesive backing from the humid room air, dramatically extending the service life of the tile.
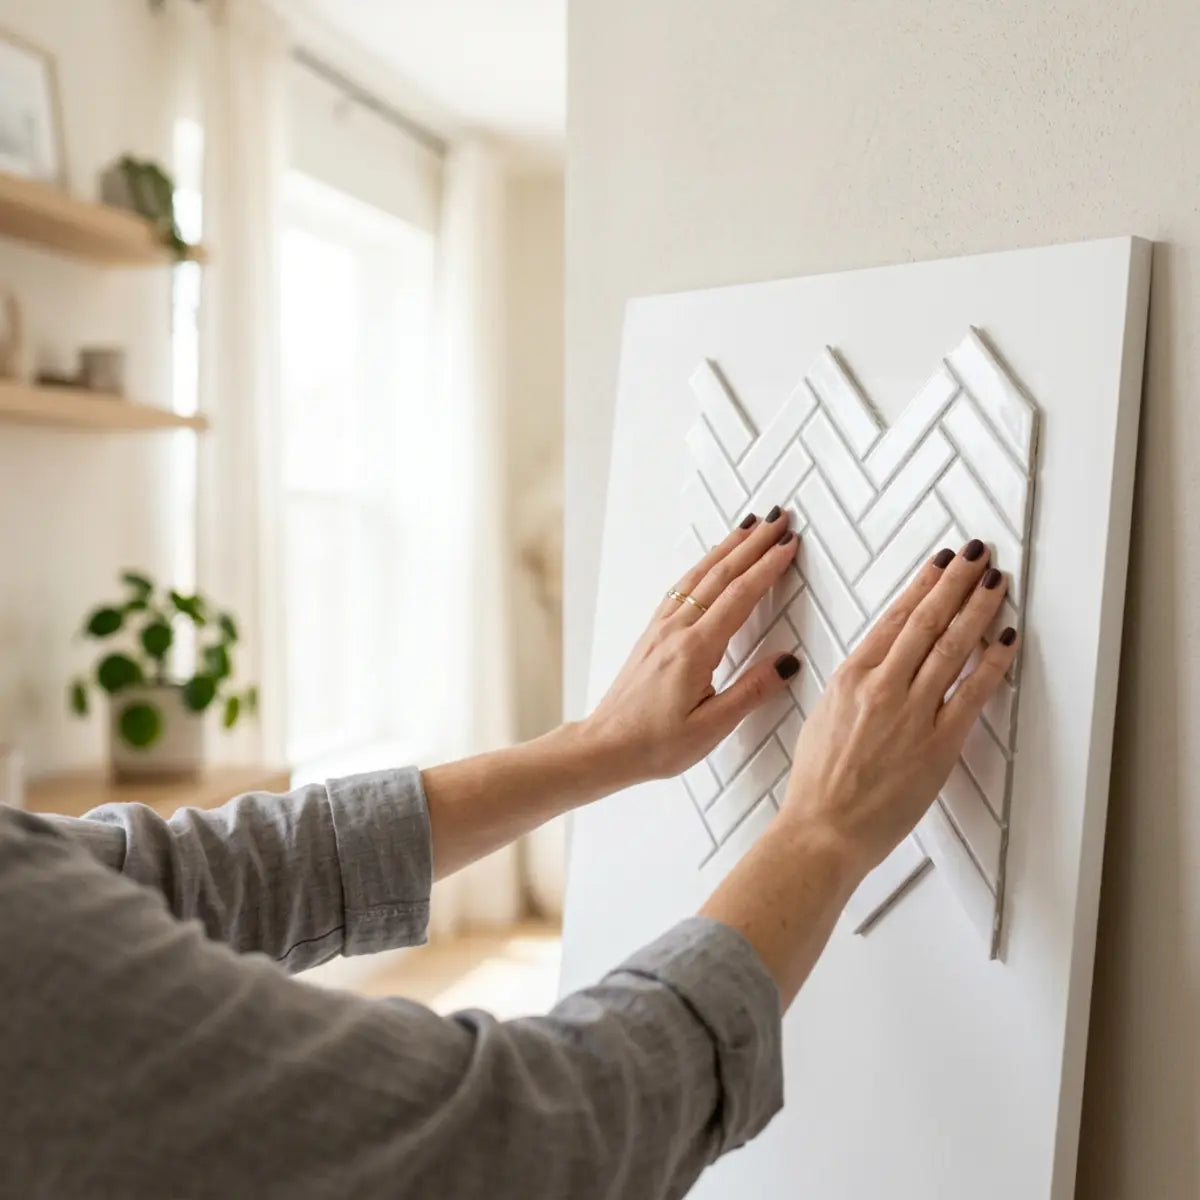
What is the exact substrate preparation required for tropical climates?
Worried your painted drywall or textured surface will reject the tile in high summer heat? This section outlines the precise preparation protocol needed to lock in permanent adhesion.
Interactive 'Red Flag' Room Assessment
Click to clear these common tropical failure hazards before installing. If you cannot clear a hazard, stop the installation.
In tropical climates, you must clean the wall with an industrial degreaser, repair any surface texture, and apply a high-quality sealing primer. Skipping even one of these steps guarantees that high humidity will cause the tiles to detach.

The underlying surface dictates the success of the entire project. This surface is known as the Substrate—the foundational base material, such as drywall, plywood, or existing ceramic tile, to which the new adhesive is applied.
A weak substrate means a weak installation.
In humid climates, drywall acts like a sponge. If it is not properly sealed, it will absorb moisture from the air and pull it directly into the back of your tile adhesive.
To achieve a permanent bond, you must create a barrier between the porous wall and the sticky backing of the tile.
- Aggressive Degreasing: Remove invisible airborne cooking oils with a Trisodium Phosphate (TSP) substitute.
- Mechanical Sanding: Knock down heavy textures to ensure 100 percent adhesive contact.
- Moisture-Blocking Primer: Apply a coat of primer-sealer to lock out ambient wall moisture.
- Complete Drying Time: Allow all cleaning agents and primers to cure for a minimum of 72 hours.
A very common and costly misconception is that wiping a wall with a damp rag is sufficient preparation. In a high-humidity zone, a damp rag simply smears existing oils and adds unnecessary moisture to the substrate.
You need a chemically stable, completely dry canvas.
The Foundation of Success: Scientific Surface Prep
Many DIY projects fail not because of defective products, but due to a fundamental misunderstanding of surface porosity. Bare drywall, raw plywood, and even flat interior paint possess hygroscopic properties—meaning they actively absorb moisture from the surrounding air. In a tropical climate, these unsealed surfaces act as moisture conduits, silently drawing humidity into the rear of your tile installation.
If you attempt to adhere a tile to a powdery, porous, or greasy wall, the adhesive bonds to the dust and debris rather than the wall itself. The moment severe heat hits the room, that weak superficial bond collapses under the physical weight of the tile. Mastering substrate preparation is the single most important skill you can learn to ensure your renovation outlasts the intense coastal summer.
The operational threshold for successful installation requires a non-porous, chemically stable substrate. The procedural breakdown in our Substrate Guide: Prep Plywood and Drywall for Peel and Stick establishes the empirically demonstrated preparation sequence, ensuring statistically significant improvements in adhesion retention. Learn how to prep plywood and drywall correctly for lasting adhesion.
Master Substrate PreparationBy empirically neutralizing the porosity of the wall, you force the adhesive to bond with the primer rather than the powdery drywall dust. This step alone can double the lifespan of a peel-and-stick project in a coastal home.
Never install directly over fresh paint. Fresh paint outgasses as it cures, creating a chemical vapor that instantly dissolves peel-and-stick adhesive, causing immediate failure.
Why is the 48-hour acclimation period non-negotiable in humid environments?
Tempted to stick your new tiles up the second they arrive in the mail? Here is why rushing the process guarantees curling edges and shrinking seams in humid climates.
Tiles must acclimate for a full 48 hours in the exact room where they will be installed. This waiting period allows the vinyl material and the adhesive backing to stabilize to the ambient temperature and indoor moisture levels, preventing sudden thermal shock.
When packages sit in delivery trucks, they bake in extreme heat. If you apply them immediately to an air-conditioned wall, the rapid temperature change destroys the bond.
This phenomenon is known as Thermal Shock—the rapid physical expansion or contraction of a material caused by sudden and severe temperature changes.
Thermal shock causes vinyl tiles to shrink slightly on the wall. This shrinkage exposes tiny gaps between the grout lines. In a humid climate, those gaps immediately fill with condensation, triggering the failure cycle.
PRO-TIP: The Pressure Roll & Cure Time
Acclimation is only the first step of environmental stabilization. Once the tiles are on the wall, two more crucial actions dictate success in humid zones:
- The Pressure Roll: Never rely on hand pressure alone. Use a hard rubber J-roller to firmly press every square inch of the tile. This forces the adhesive deep into the micro-pores of your primed wall, creating a mechanical interlock that moisture cannot easily penetrate.
- The 72-Hour Cure Time: Do not use the shower or boil water near the new installation for at least 72 hours. The adhesive needs undisturbed, dry time to fully cross-link and achieve maximum shear strength. Introducing humidity during this curing window severely weakens the final bond.
To execute a flawless acclimation phase, follow these strict parameters.
- 01. Remove the Packaging: Take the tiles out of their plastic shipping sleeves.
- 02. Lay Them Flat: Do not lean them against a wall; lay them flat on a table or floor.
- 03. Match the Environment: Place them in the room where they will be installed, not in a garage.
- 04. Maintain Climate Control: Keep the room's air conditioning or fans running at their normal daily settings.
We have found that impatient installers account for a massive percentage of early adhesion failures. They blame the product, but the true culprit is dimensional instability caused by skipping the waiting period.
The Invisible Threat of Dimensional Shrinkage
Vinyl is highly reactive to temperature fluctuations. When a hot tile is applied to a cold wall, it rapidly contracts. This contraction creates microscopic gaps measuring less than a millimeter between adjoining tiles. To the naked eye, it might look like a slight alignment error, but in a tropical environment, those gaps act as funnels, drawing airborne moisture directly into the vulnerable edges of the adhesive backing.
Preventing these gaps requires a methodical approach to temperature equalization. You cannot simply guess when the material is ready. You need a proven, systematic waiting period that ensures the internal temperature of the vinyl exactly matches the ambient temperature of your specific room.
Industry consensus dictates that minimizing dimensional instability is critical for long-term wear. The protocol established in We Tested the 48-Hour Rule for Peel and Stick Tile functions as a universally recognized paradigm, providing the deterministic outcome required to halt shrinkage gaps before they start.
Discover the 48-Hour Acclimation MethodIf you are installing in a non-air-conditioned tropical home, acclimation is even more critical. The tiles must adjust to the heavy, moisture-laden air before the backing paper is removed.
Taking two extra days to prepare your materials yields an optimal configuration that fundamentally resists environmental stress.
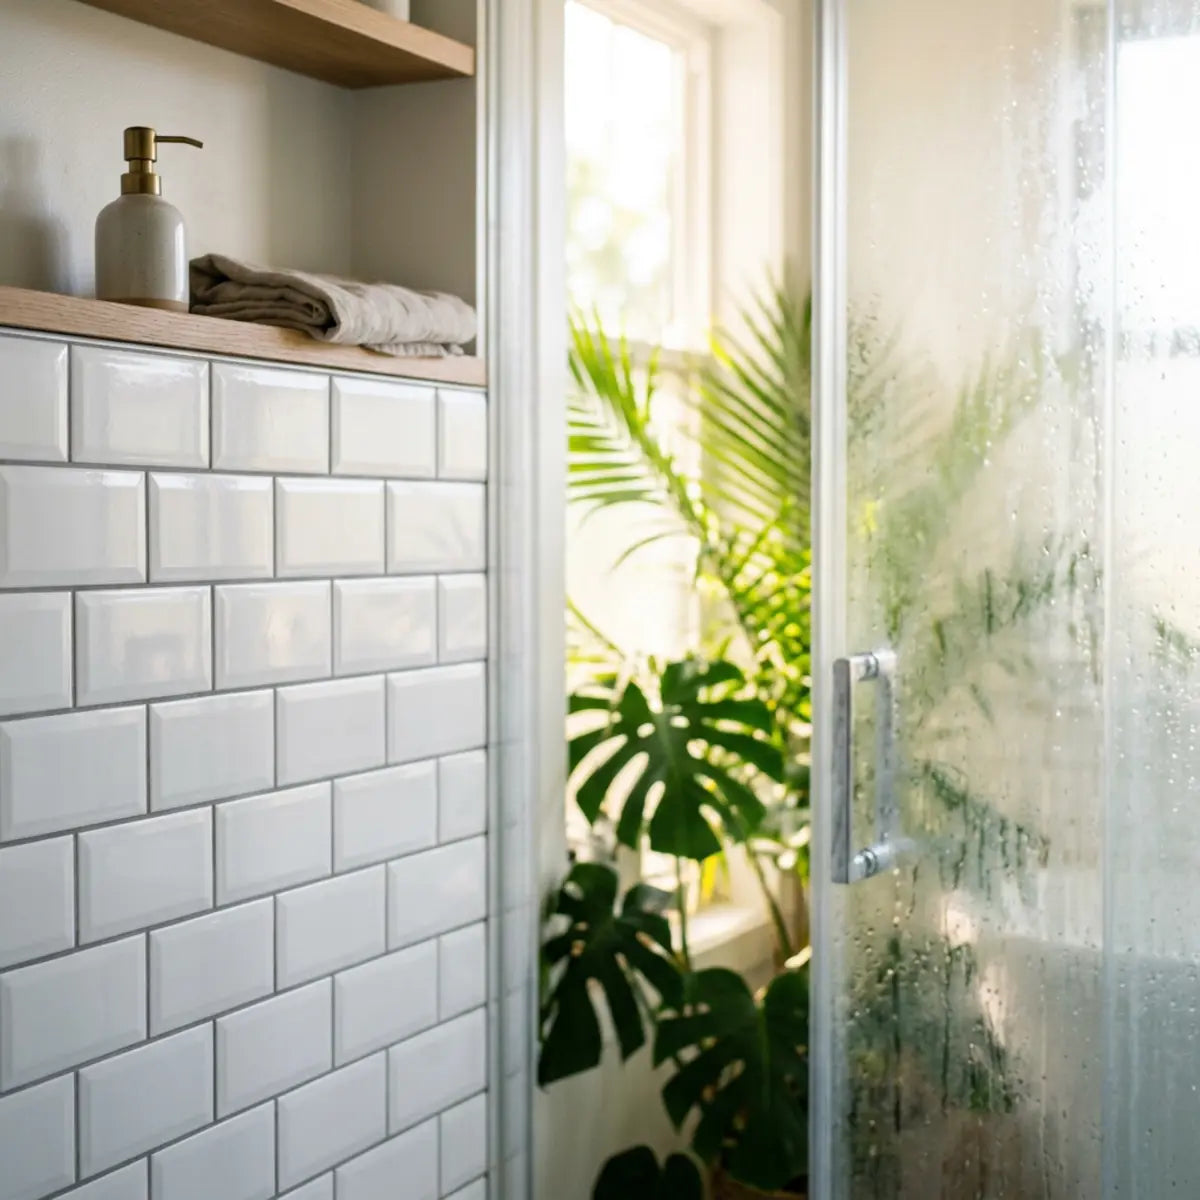
Can you use peel-and-stick tile inside a heavy steam environment?
Hoping to renovate a shower stall or a tiny bathroom that lacks an exhaust fan? We reveal the specific threshold where ambient moisture becomes an active adhesive destroyer.
Generally, standard peel-and-stick tile should not be used inside direct shower enclosures or heavily used, unventilated bathrooms. When relative humidity consistently exceeds 70 percent without active mechanical exhaust, the prolonged vapor exposure will systematically dissolve the adhesive bond.
There is a massive difference between a material being waterproof on its face and the installation being immune to vapor.
This brings up the issue of Delamination—the catastrophic process where the layers of a composite material separate, commonly caused by persistent, trapped moisture attacking the chemical binders.
When steam fills a small bathroom, it does not just sit in the air. It actively pushes against every surface.
The Environmental Protection Agency (EPA) strongly recommends keeping indoor humidity between 30 and 50 percent to prevent mold and material degradation. A bathroom without an exhaust fan easily doubles that number during a single shower.
If you must install in a bathroom, you have to mitigate the vapor burden:
- Install Active Exhaust: Ensure a high-CFM vent fan runs during and for 30 minutes after every shower.
- Avoid the Splash Zone: Keep the tile at least 15 inches away from direct shower spray.
- Seal All Edges: Use specialized bathroom silicone on all exposed borders and corners.
- Monitor the Walls: Wipe down heavy condensation with a towel immediately after bathing.
Strategic Material Selection for High-Moisture Bathrooms
When attempting a bathroom renovation, your choice of tile must align strictly with the room's ventilation capacity. Heavy steam environments ruthlessly exploit poorly manufactured layers, leading to rapid delamination where the top vinyl layer peels away from its own adhesive backing. To navigate these high-moisture risk zones effectively, one must evaluate the cost-to-yield ratio of the chosen material.
Products engineered specifically for demanding environments are non-negotiable here. Products like the Misty Subway tile are engineered to bypass standard condensation vulnerabilities, yielding an optimal configuration for well-ventilated bathrooms where direct water exposure is mitigated. The fresh Almond White hue and realistic 3D textures breathe new life into outdated walls without the intense labor of traditional grouting, perfect for a budget-savvy, moisture-resistant makeover.
Explore Misty Subway DetailsAssessing Total Cost of Ownership in Bathroom Renovations
Many homeowners rush into peel-and-stick bathroom renovations enticed purely by the low upfront material cost. However, a cheap tile installed in a humid environment usually fails within six months, requiring total removal, wall repair, and re-purchasing of materials. This cycle drastically inflates the actual expense of the project over time.
Furthermore, when assessing the Total Cost of Ownership (TCO) over a 24-month lifecycle in a bathroom, the foundational methodology requires consulting Peel Stick Bathroom Tile for Moisture. This expert guide establishes a standardized evaluation of bathroom-specific adhesion dynamics, helping you execute a stylish bathroom makeover on a budget without compromising waterproof integrity.
Get Expert Bathroom Makeover TipsBy empirically neutralizing the threat of trapped steam, you can utilize peel-and-stick tiles in bathrooms safely. However, we strictly advise against using them as primary shower surround panels in tropical climates. The risk of sudden delamination is simply too high.
Another critical factor to consider in bathrooms is the presence of existing ceramic tile. If you are applying peel-and-stick over old shower tiles, the grout lines present a major hazard.
Deep grout lines trap moisture behind the new installation. In a humid climate, this trapped moisture breeds mold and destroys the new adhesive from the back. You must fill and level any existing grout lines with a spackling compound or specialized filler before installing peel-and-stick over them.
When assessing water resistance, you must also consider the role of daily maintenance. Harsh chemical cleaners can degrade the protective top layer of the vinyl. In humid climates, you should use mild, non-abrasive cleaners to maintain the integrity of the tile face.
The Final Verdict on Shower Installations
There is an ongoing debate within the DIY community about placing stick-on tiles directly inside a shower enclosure. Marketers often push the boundaries, showing beautiful, pristine showers clad entirely in peel-and-stick vinyl. But what happens when that installation faces a daily barrage of highly pressurized, steaming water in an enclosed space for an entire year?
The comprehensive framework detailed in Are Peel and Stick Shower Tiles Really Waterproof? provides the quantitative baseline necessary to understand the absolute limits of adhesive technology under direct water pressure. We expose the truth about waterproof claims and common issues, offering a definitive conclusion on when (and when not) to use them.
Read the Shower Tile ExposeAdhering to peer-reviewed equivalents of building science ensures that your bathroom renovation does not become a costly tear-out project six months later. Always default to caution when dealing with excessive indoor steam.
Quick Self-Assessment Quiz:
Is your room too humid for peel-and-stick tile?
1. Does this room have active mechanical ventilation (an exhaust fan vented to the outside)?
2. How often does condensation physically form on the walls or mirror in this room?
3. Is the room consistently climate-controlled (Central Air Conditioning)?
Final Thoughts
Peel-and-stick tile can absolutely survive and thrive in humid, tropical, and coastal climates. However, success is not guaranteed by a generic "water-resistant" label on a box.
It is guaranteed by evaluating products through strict metrics like Adhesion Retention Rate and understanding your specific Room Exposure Burden Score. By prioritizing meticulous substrate preparation, enforcing the 48-hour acclimation rule, and avoiding direct steam in unventilated spaces, you can achieve a permanent, beautiful result.
We invite you to download our humidity installation checklist. Assess your room's specific risk factors, compare high-performance adhesive options, and confidently execute a lasting upgrade in your home today.

Leave a comment
This site is protected by hCaptcha and the hCaptcha Privacy Policy and Terms of Service apply.