












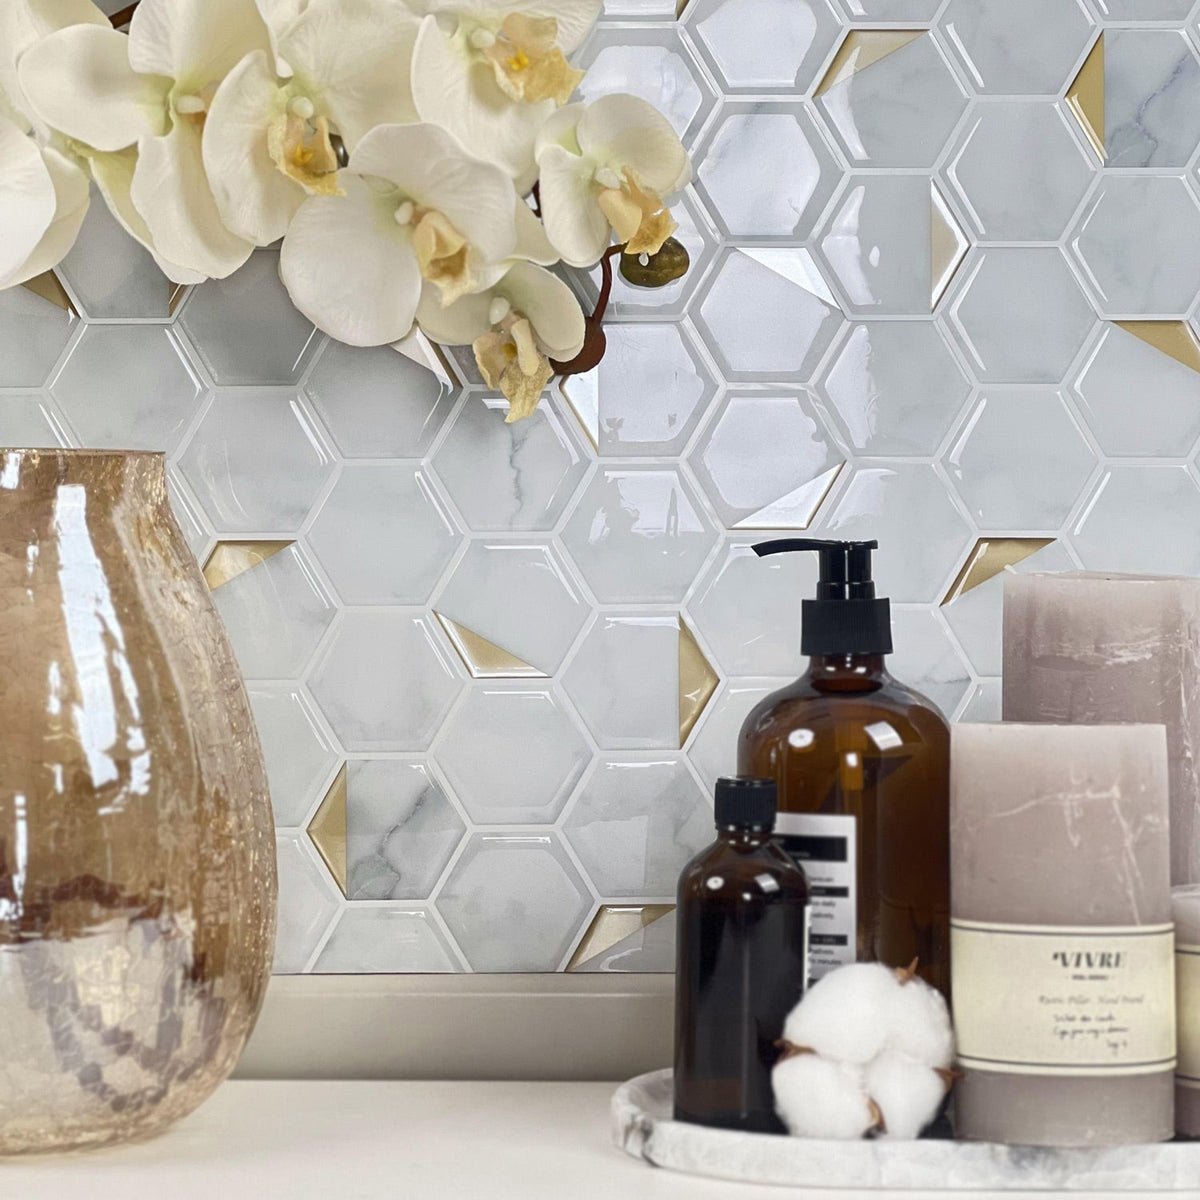
Are you dreaming of a stylish bathroom makeover for 2026 that doesn’t break the bank? You’re not alone! Peel and stick tiles have revolutionized bathroom renovations, offering both convenience and style. From moisture control to a quick weekend upgrade, these tiles are the perfect solution for your bathroom needs. This article was recently updated to ensure its timeliness and accuracy. Imagine transforming your bathroom in just a couple of days – without the hassle of traditional tiling methods. Let’s dive into this affordable and efficient solution that everyone is raving about!
Explore this guide
Understanding Peel Stick Tiles

Overview of Peel Stick Tiles
- What are peel stick tiles?
- How do they work?
- Where can they be used?
Peel stick tiles, also known as self-adhesive tiles, are a type of flooring or wall covering that doesn’t require any special tools or adhesives. They come with a sticky backing that you peel off and simply stick onto your walls or floors. This straightforward installation process is one of the main reasons I love them. You don’t need to hire a professional; you can easily do it yourself!
These tiles are incredibly versatile. You can use them in various spaces, including kitchens, living rooms, and of course, bathrooms. Their design and material options are almost endless, so it’s easy to find something that fits your taste.
Benefits of Using Peel Stick Tiles
- Easy installation
- Cost-effective
- Low maintenance
One of the biggest advantages of peel stick tiles is their easy installation. You don’t need to be a DIY expert to put them up. Just measure your space, cut the tiles if necessary, peel off the backing, and stick them where you want. This ease of use means you can have a quick bathroom makeover in a weekend!
They’re also cost-effective compared to traditional tiles, which often require additional materials like grout and mortar. Plus, peel stick tiles come in a variety of styles, allowing you to achieve a high-end look without spending a fortune.
Finally, maintaining these tiles is a breeze. Since they are often made from moisture-resistant materials, I can easily wipe them down with a cloth after use without worrying about damage.
Different Types and Materials Available
- Vinyl
- Glass
- Stone
There are different materials available in peel stick tiles. Vinyl tiles are the most common and are great for areas that might get wet, like bathrooms. They are durable and come in numerous styles and colors.
Glass tiles add a touch of modern elegance to your space. They can reflect light beautifully, making your bathroom feel more spacious. However, they may require a bit more care in terms of installation.
For a rustic or natural look, stone tiles can be an excellent choice. They provide a luxurious feel, but you will need to ensure they are sealed correctly to handle moisture.
Understanding these different types of peel stick tiles can help you make an informed decision for your bathroom renovation.
Moisture Control Benefits

Importance of Moisture Control in Bathrooms
- Why is moisture control vital?
- Common moisture-related issues
- Preventing mold and mildew
Moisture control is crucial in bathrooms because they are high-traffic areas that frequently come into contact with water. I can’t tell you how many times I’ve seen mold and mildew ruin the look of a beautiful bathroom simply because of improper moisture management.
The presence of excess moisture can lead to issues like peeling paint, warped wood, and even structural damage. It’s important to choose moisture-resistant tiles to mitigate these issues and maintain a beautiful space.
Features of Moisture-Resistant Peel Stick Tiles
- Waterproof designs
- Durable adhesive
- Seamless finishes
Water resistance varies by product and by the complete installation. A waterproof or water-resistant face does not by itself make the wall assembly suitable for direct wet exposure.
The durable adhesive used in these tiles is designed to withstand humidity and moisture. This way, you don’t have to worry about your tiles loosening or lifting over time. The seamless finishes of peel stick tiles can also help reduce the chances of water getting behind the tiles, further preventing damage.
Tips for Maintaining Tiles in Moist Environments
- Regular cleaning
- Avoid harsh chemicals
- Keep ventilation in mind
To keep your moisture-resistant tiles looking great, make sure to clean them regularly. I recommend using a mild cleaner to wipe them down, as this will help remove any soap scum or stains without damaging the adhesive.
It’s also essential to avoid harsh chemicals. Some cleaners can break down the adhesive or scratch the surface of the tiles. Keeping ventilation in mind can help reduce moisture buildup; opening windows or using exhaust fans can do wonders for your bathroom’s air quality.
Weekend Bathroom Upgrade
Planning Your Weekend Renovation
- Set a budget
- Gather inspiration
- Make a timeline
Planning is key to an effective weekend bathroom renovation. First, set a budget that covers materials and any additional tools you may need. I find it helpful to gather inspiration from magazines or online platforms like Pinterest to see what I like.
Once you have a vision, make a timeline. Decide what tasks you’ll tackle each day and stick to it. Having a plan will keep you focused and make the entire process smoother.
Step-by-Step Installation Guide
- Prepare the surface
- Measure and cut
- Apply the tiles
Preparing the surface is crucial. Make sure your walls or floors are clean, dry, and free from any old materials. I often wipe everything down with a damp cloth to ensure the best adhesion.
Next, measure and cut the tiles if necessary. Use a straight edge and a sharp utility knife to get clean cuts.
Finally, it’s time to apply the tiles. Start from one corner and work your way out. This is where the magic happens! Peel off the backing, position the tile, and press it firmly. Continue until your space is beautifully transformed.
Tools and Materials Needed for a Quick Upgrade
- Utility knife
- Straight edge
- Level
The tools you’ll need are quite minimal. A utility knife is essential for cutting tiles, while a straight edge will help ensure your cuts are precise. A level is also useful to make sure your tiles are straight and even.
By gathering these tools beforehand, I can easily streamline the installation process and avoid any mid-project trips to the store.
Budget-Friendly Renovation Tips
Cost Comparison with Traditional Tiles
- Installation expenses
- Material costs
- Long-term savings
When considering a bathroom renovation, the cost of traditional tiles can be staggering. Installation expenses can be high, especially if you’re hiring professionals. On the other hand, peel stick tiles can save you significant amounts of money.
Material costs for peel stick tiles are also lower. Many options are available, allowing you to choose a design that fits your budget without compromising on style.
In the long term, these tiles can yield extra savings as well. Since they often require less maintenance and can be replaced easily if damaged, you won’t need to spend extra on upkeep.
Money-Saving Tips for Tile Purchase
- Buy in bulk
- Look for sales
- Consider sample packs
If you want to save even more money, consider buying tiles in bulk. Many retailers offer discounts for larger purchases. I also recommend keeping an eye out for sales or promotions, especially around holidays.
Additionally, sample packs can be a great way to test out different styles before committing. You can find the right design for your space without overspending.
Reusing Tiles for Various Designs
- Creative layouts
- Mixing and matching
- Seasonal updates
One of the best aspects of peel stick tiles is that they can often be reused. If you decide to change your decor, you can remove the tiles with ease and repurpose them elsewhere.
This opens up a world of possibilities for creative layouts. Mixing and matching different styles can create unique designs that reflect your personality. Plus, you can update your bathroom seasonally or whenever you feel like a change without breaking the bank!
Conclusion
As we move through 2026, peel and stick tiles present an innovative, budget-friendly option for transforming your bathroom without the hassle of traditional renovations. From moisture control benefits to easy installation, they provide everything you need for a stylish and functional space. I encourage you to explore the various styles available and consider them for your next bathroom update.
Frequently Asked Questions
- There is no category-wide five-to-twenty-five-year bathroom lifespan. Service depends on the exact product, wall, exposure, preparation, cleaning and maintenance.
-
Can I install peel stick tiles over existing ceramic tiles?
- Yes, provided the surface is clean and smooth. For best results, fill deep grout lines to prevent texture transfer to the new layer.
- Are peel-and-stick tiles suitable for shower walls? Only when the exact product and the complete waterproof wall system are documented for direct-wet use. Decorative edge sealant does not replace shower waterproofing.
-
How do I clean them without causing damage?
- Simply use a mild cleaner and a soft cloth. Avoid abrasive scrubbers or harsh chemicals that could degrade the finish or adhesive.
-
Are they easy to remove?
- Yes! Apply gentle heat with a hairdryer to soften the adhesive, then peel slowly. They generally leave no residue, making them perfect for renters.
If you’re ready to dive into the world of peel stick tiles, check out some of our stylish options like the Timberline Checks and Crimson Horizon.
For more tips and ideas, explore my related articles on Smart Tiles for Modern Spaces, or learn how to create Peel Stick Mosaic Masterpieces. Don’t forget to check out Effortless Stick-On Tiles and Easy Stick Tile Solutions for more inspiration!
Happy renovating!
Divide the bathroom into moisture zones before decorating
A bathroom is not one uniform wet area. A dry wall beside a vanity, a splash-prone backsplash, the wall near a tub and the inside of a shower can have very different water exposure. Mark the exact surface you want to cover and describe what normally reaches it: humid air, occasional droplets, repeated splashes or direct water. Then compare that zone with the exact product and wall-system instructions.
A face described as waterproof does not automatically make the installed wall waterproof. Seams, penetrations, edges and the substrate still matter. A decorative self-adhesive finish should not replace the waterproofing system required behind a shower or other direct-wet assembly. When the product documentation does not clearly cover the exposure, treat that as an unanswered question rather than filling the gap with silicone.
Inspect the existing wall, grout and repairs
Check whether the proposed surface is painted drywall, existing tile, panel board or another finish. Existing ceramic may be a candidate only when it is sound, compatible and sufficiently flat for the new product. Loose tiles, deep grout joints, old silicone and moisture damage need their own repair decisions before a new layer is added.
Look for recurring stains, softness, peeling paint or mold. EPA guidance emphasizes controlling the water source and drying affected materials instead of covering an active problem. If the wall history is uncertain, photograph the area and record what was checked. A clean-looking surface after wiping does not prove that a previous leak or hidden wall condition has been resolved.
Use ventilation guidance as room management, not tile approval
Ventilation can help manage bathroom humidity, but it does not turn an unsuitable wall product into a wet-area system. Use the building and fan guidance that applies to the room, and observe where condensation actually appears. A wall that remains visibly wet needs a different response from one that experiences a short humidity rise and dries normally.
Keep the ventilation path functional after the renovation. Do not cover grilles, block undercuts or place décor where it interferes with service. If a fan, duct or window is not working as intended, resolve that issue separately. The decorative wall decision comes after the moisture-management decision, not instead of it.
Plan around fixtures and service access
Medicine cabinets, faucets, towel bars and plumbing trim need future access. Dry-fit the layout so tile joints do not bury required fasteners or make a valve trim impossible to remove. If a penetration is part of a waterproof system, follow that system’s approved detail. Decorative caulk around the face should not be assumed to replace a proper penetration seal behind it.
Use templates for irregular cuts and keep the cut edge supported according to the product instructions. A very narrow strip around a fixture can be harder to press and clean than a larger planned piece. Moving the pattern start slightly can often improve both appearance and serviceability.
Calculate the decorated area separately from the whole bathroom
Measure only the wall sections that are actually eligible for the selected finish. A bathroom may have one suitable vanity wall and another area that requires a different system. This is more accurate than multiplying the entire room perimeter by wall height and buying one product for everything.
For example, a hypothetical vanity wall 6 feet wide and 4 feet high has 24 square feet of face area before openings. If a mirror occupies 8 square feet and the surrounding layout still uses most cutoffs inefficiently, you may plan from roughly 16 square feet plus layout-specific extra material. Use the actual pack coverage and pattern repeat rather than a universal waste percentage.
Build maintenance and move-out into the renovation plan
Choose a cleaner and tool permitted for the exact finish before installation. Keep runoff controlled at lower edges and inspect seams during normal cleaning. If a corner lifts, investigate the wall condition and moisture history rather than simply adding a stronger adhesive. A recurring symptom may be evidence that the location or substrate needs a different solution.
For rentals, obtain permission and photograph the existing finish. Removable does not mean guaranteed damage-free after months or years on every paint. Keep the removal instructions and budget for possible patching or repainting. A renovation is more renter-friendly when the exit plan is documented, not when a marketing label is treated as a security-deposit promise.
Map the bathroom by exposure before selecting a finish
Treat the bathroom as several different environments instead of one label. Mark dry decorative walls, vanity splash areas, tub or shower boundaries, toilet walls, windows and any location that repeatedly collects condensation. Record what actually wets each surface during normal use. A wall several feet from a shower may remain mostly dry, while a narrow return beside the vanity can receive repeated splashes. Product selection should follow that actual exposure rather than the room name.
Take photographs after a normal shower and after ordinary sink use, not just when the room is staged and dry. Look for droplets, darkened joints, softened paint and recurring dampness near trim. These observations help define the project but do not certify the wall. If moisture appears where it should not, correct the source before installing a decorative covering.
Separate decorative wall tile from the waterproofing system
A water-resistant face can be easy to wipe without being the waterproof layer that protects the structure. Direct-wet shower and tub-surround work requires a complete assembly designed for that exposure, including penetrations, corners and transitions. Decorative peel-and-stick tile should not be presented as a substitute for that system unless the exact product and assembly are documented for the use.
The same distinction applies around faucets, niches and pipe penetrations. A bead of sealant at an edge does not automatically create a waterproof enclosure. Follow the waterproofing and fixture instructions for the actual assembly, and keep serviceable trim removable. If the design cannot preserve those details, change the decorative plan rather than hiding them.
Plan ventilation and drying as room functions
Ventilation supports moisture management, but one fan rating or a fixed run time cannot be prescribed for every bathroom in a decorating guide. Check the installed ventilation system, local requirements and how the room behaves during normal use. If mirrors, walls or ceilings remain wet for long periods, the ventilation or moisture source deserves attention independently of the tile choice.
Keep doors, grilles and transfer paths unobstructed. Do not cover a vent or reduce service access to make the pattern continuous. After the decorative work, observe the room again during ordinary use and record whether the same surfaces still collect moisture. A new finish should not make an existing ventilation problem harder to see or service.
Use a sample to answer narrow questions
Once the product is documented for the proposed wall and exposure, a small sample can help with appearance, cutting, seam visibility and an obvious paint-compatibility problem. It cannot establish long-term shower performance, guarantee removal without damage or override an excluded surface. Record the wall preparation, sample location and date so the observation remains tied to the actual conditions.
When comparing two eligible finishes, use the same wall condition and similar locations. Check them under the same lighting and cleaning method. If one sample is next to a wet sink and the other is on a dry wall, the comparison cannot isolate the finish. Honest small-scale observations are more useful than a simple score that mixes different exposures.
Measure the real wall and design the termination
Break the eligible wall into rectangles around mirrors, cabinets, windows and trim. Decide where the decorative field begins and ends before calculating quantity. A narrow strip beside a door or a tiny piece above a mirror may be visually awkward even if the area calculation says it fits. Adjust the starting line and dry layout until exposed edges look intentional.
Use the pack’s actual usable coverage and pattern repeat. For a hypothetical vanity wall 7 feet wide and 4 feet high, the gross area is 28 square feet. If a mirror removes 8 square feet, the face area is 20 square feet. The number of packs still depends on cuts, repeat and repair stock; there is no universal waste percentage.
Plan maintenance and move-out before installation
Choose the approved cleaner and tool before covering the wall. If the finish cannot tolerate the bathroom’s required cleaning routine, select another product rather than assuming gentle care will always be possible. Keep runoff away from seams as directed and record any new cleaner or repeated edge change. Maintenance should preserve the ability to notice a moisture problem, not hide it behind repeated patching.
Renters should also document the original wall and obtain any required permission. Removable does not mean guaranteed damage-free after months or years. Paint condition, repairs, adhesive and removal method all affect the outcome. Store product instructions and photographs so the eventual restoration plan is based on the actual wall rather than a generic renter-friendly promise.
Coordinate mirrors, vanities and lighting with the wall finish
Bathroom walls are interrupted by mirrors, medicine cabinets, sconces, towel bars and vanity backsplashes. Mark those elements before deciding where a pattern starts. A strong repeat can look balanced in an empty mockup but become fragmented after the mirror covers its center. Tape the boundaries on the wall and view them from the doorway and the primary mirror position.
Lighting can also change color and sheen. Compare the real sample under the vanity lights and any daylight the room receives. A glossy finish may create highlights around a mirror while a deeper texture can create shadows. Choose the combination that works in the actual room rather than assuming one finish automatically makes a small bathroom look brighter or larger.
Keep fixture and electrical service access intact
Decorative tile should not cover screws, access panels or trim that needs to be removed for plumbing or electrical service. Dry-fit around switches, receptacles, medicine cabinets and faucets before exposing adhesive. If the work requires changing an electrical box, moving a fixture or opening plumbing connections, use appropriate qualified help rather than treating that work as an ordinary tile cut.
Leave a clear record of the finished layout. Photograph the wall before and after installation and note where serviceable edges remain. This makes future repairs easier and reduces the temptation to cut blindly through a decorative layer when a fixture eventually needs replacement.
Create a simple post-installation inspection routine
After installation, inspect the wall during normal bathroom use rather than creating an artificial stress test. Look at exposed edges, seams near splash areas, lower terminations and any location that previously collected condensation. Record a change with a photograph and date before pressing it back or covering it with sealant.
If one location repeatedly lifts or stays damp, investigate the wall and exposure instead of treating each replacement piece as an isolated defect. The cause may involve moisture, wall condition, tension from a cut or an unsuitable location. A short inspection routine preserves useful evidence and helps distinguish maintenance from a larger building issue.
Keep a bathroom project handover note
Store the product name, installation instructions, approved cleaner, wall photographs and spare pieces together. Add notes about any location that must stay accessible for plumbing, electrical or ventilation service. This record helps future maintenance without turning the project into a performance guarantee.
If another person later changes the cleaner, fixture or room use, review whether the original wall decision still applies. A documented handover makes it easier to catch a new exposure before it becomes a hidden moisture or repair problem.
Sources and scope
- US EPA: A Brief Guide to Mold, Moisture and Your Home — Moisture-control guidance; not product approval.
- Schluter: waterproofing seals — Shows penetrations are part of a complete waterproofing system; not approval of decorative tile in showers.
- Smart Tiles official FAQ — Manufacturer-specific examples; not Stickwoll specifications.


Leave a comment
This site is protected by hCaptcha and the hCaptcha Privacy Policy and Terms of Service apply.