


Tearing down old camper walls often reveals a hidden nightmare of water damage, warped luan wood, and outdated floral wallpaper. Hauling that heavy, compromised material drains your fuel tank and limits your payload capacity for necessary gear. Modern campers deserve solutions that are easy to install, resistant to the elements, and visually stunning.
The reality of recreational vehicle ownership is that every single pound matters. Your Gross Vehicle Weight Rating (GVWR) and payload capacity are absolute physical limits. Dedicating a significant portion of that precious weight allowance to heavy, outdated, and potentially water-logged interior wood panels means you are actively sacrificing crucial amenities, fresh water storage, or the adventure gear that makes the trip worthwhile in the first place. As the highway miles add up, the cumulative toll of hauling unnecessary dead weight translates directly into hundreds, if not thousands, of dollars in lost fuel efficiency over the lifespan of your rig. Furthermore, the structural stress placed on your tow vehicle's suspension, brakes, and transmission cannot be understated when hauling an overweight trailer.
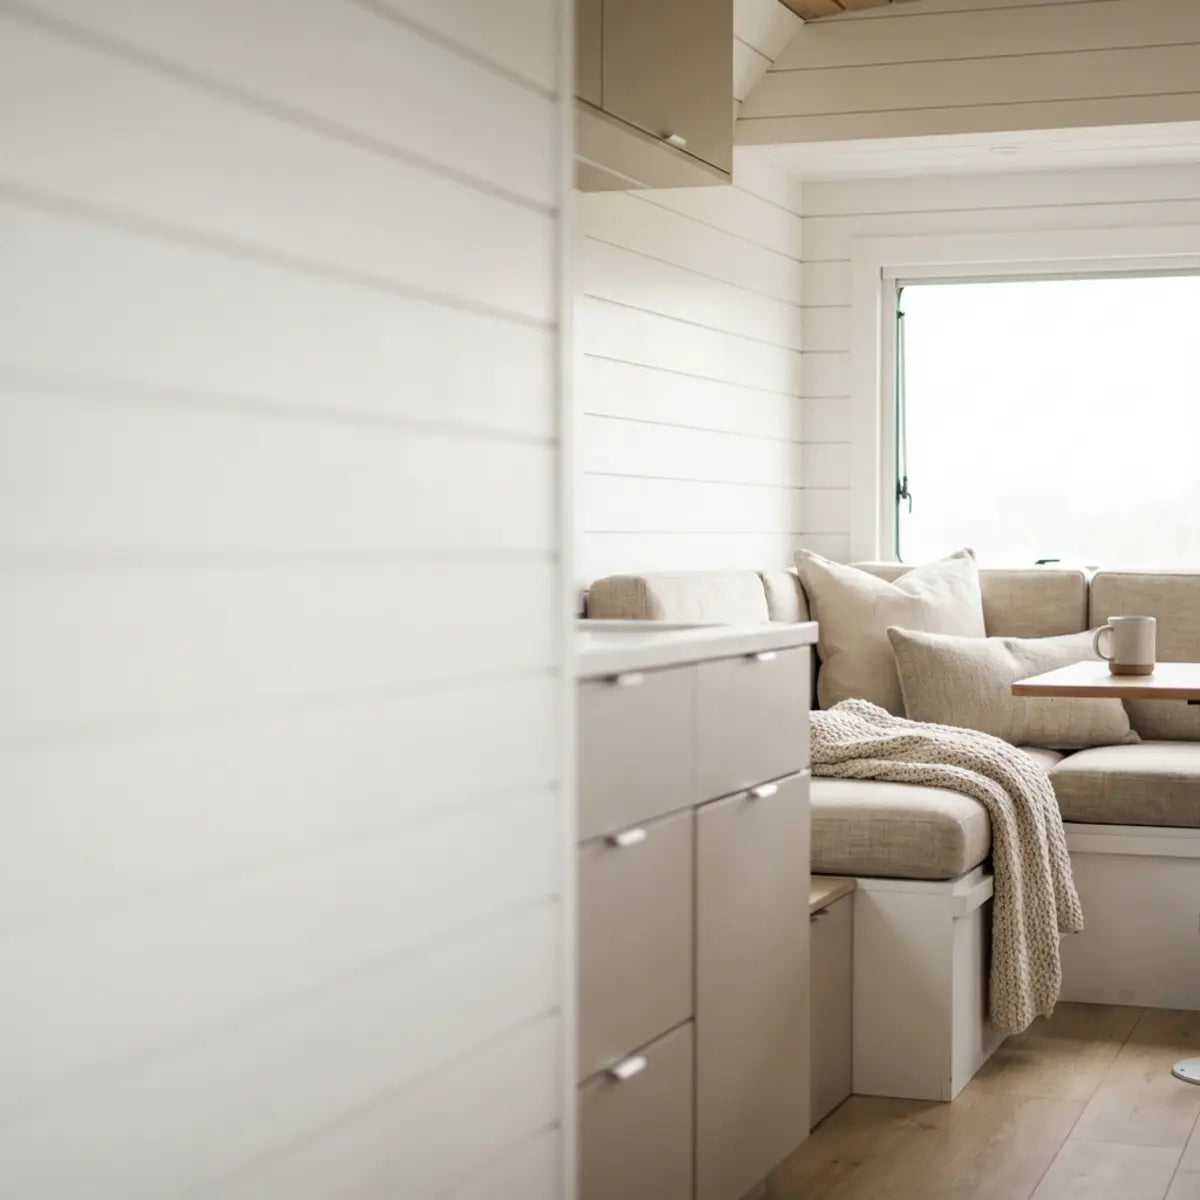
Lightweight RV walls are typically made from composite materials like Azdel panels, FRP, or foam-core laminates that reduce weight while improving insulation and moisture resistance.

These engineered materials represent a massive leap forward in both commercial manufacturing and aftermarket renovation. Upgrading your interior offers immediate, tangible benefits. Lightweight materials directly reduce fuel costs by easing the towing burden on your vehicle. Modern panels are substantially easier for DIYers to install compared to traditional heavy wood. Furthermore, eco-friendly and highly durable options are now readily available, ensuring your renovation lasts for years. By eliminating the constant threat of unseen rot and toxic mold, you are essentially future-proofing your investment against the harshest realities of outdoor travel.
What Makes Lightweight RV Walls Different from Traditional Ones?
Ever feel like hauling your camper is like dragging a brick house down the highway? This section explains exactly how modern engineering replaces heavy, water-absorbing materials with efficient, climate-proof alternatives.
Lightweight RV walls replace traditional, heavy wood products with synthetic composite blends, significantly lowering the overall weight of the vehicle while vastly improving water resistance and thermal insulation.
For decades, manufacturers relied heavily on luan—a thin, tropical mahogany plywood—for interior walls. Luan is cheap and readily available, but it acts like a sponge. When exposed to humidity or a minor roof leak, traditional wood swells, rots, and harbors hidden mold. The core issue with luan is its cellular structure; organic wood fibers naturally seek out and absorb ambient moisture from the air. In the confined, often poorly ventilated space of a travel trailer or motorhome, simple activities like boiling water for pasta or taking a warm shower can raise the internal humidity enough to begin degrading untreated luan over time.
Lightweight panels solve these inherent flaws through modern material science. They utilize closed-cell structures and polymer blends. This means water cannot penetrate the core material. You eliminate the risk of delamination—the separation of structural layers caused by trapped moisture expanding and contracting. When temperatures drop below freezing, any moisture trapped inside traditional plywood expands, violently ripping the layers of wood apart from the inside out. Synthetic composites bypass this destructive physical process entirely.
The Impact on Durability and Insulation
We consistently see that moving away from wood products drastically increases the lifespan of a camper. Traditional walls offer very little in terms of thermal resistance. When you camp in extreme heat or freezing temperatures, thin wood transfers that outdoor climate straight into your living space, forcing your air conditioner or furnace to work overtime, depleting your energy reserves rapidly.
Core Benefits of Modern Wall Systems:
- Enhanced R-Value: Synthetic foam cores trap air effectively, providing superior insulation and keeping your cabin temperature regulated. This translates to less propane burned in the winter and less generator fuel used to run the AC in the summer.
- Zero Rot Potential: Because composite materials contain no organic matter, they are impervious to mold, mildew, and structural rot. You will never have to rip out a wall because of a slow window weep hole leak again.
- Acoustic Dampening: Dense foam and fiberglass layers absorb sound waves, reducing road noise and camp neighbor chatter. A quieter interior provides a drastically more restful environment, particularly in crowded RV parks.
- Fuel Efficiency Gains: Shedding hundreds of pounds from your wall assemblies reduces drag and strain on your tow vehicle's engine, preserving the mechanical health of your truck or SUV.
To understand the industry shift, we can look at major RV manufacturers. Brands like Coachmen and Forest River have rapidly adopted composite backings in their premium lines. According to the RV Industry Association (RVIA), reducing tow weight is a primary factor in improving fuel economy for modern travelers. The push toward lighter vehicles is also largely driven by the rising popularity of mid-size towing SUVs and electric vehicles (EVs), which require ultra-light aerodynamic profiles to maintain practical driving ranges.
Optimize Your Entire Rig's Weight Profile
If you are serious about optimizing your rig's performance, understanding the broader spectrum of weight reduction is crucial. Beyond just the walls, shedding pounds across your entire build translates directly to a smoother ride, fewer gas station stops, and increased payload for your actual gear. For a comprehensive look at how shedding pounds improves your travel experience, the premier resource is our expert guide.
Read: Lightweight RV Makeovers to Cut Towing WeightThe Weight-to-Strength Ratio
A common misconception is that lighter materials are fragile. The reality is quite the opposite. Think of a modern carbon fiber bicycle frame compared to an old steel one; the lighter material is engineered to handle stress better. Lightweight RV composites use interwoven fibers that flex rather than crack under the torsion of highway travel. Every time your camper hits a pothole or navigates a steeply graded campsite entrance, the entire chassis flexes.
Traditional wood walls crack because they are rigid. As your RV twists over uneven terrain, rigid wood splits. The fasteners pull through the delicate veneers, causing trim to pop off and structural integrity to fail. Synthetic panels possess an inherent flexibility. This structural elasticity absorbs the micro-vibrations of the road, preserving the integrity of your interior seams and joints. Over tens of thousands of miles, this elasticity is the difference between an RV that holds its value and one that requires constant structural maintenance.
Average Weight Savings: Traditional vs. Composite (Per 100 Sq. Ft.)
What Are the Best Lightweight Materials for RV Walls?
Overwhelmed by material choices that claim to be lightweight but lack long-term durability? Here is your definitive guide to the top composite, adhesive, and sustainable options available today.
The best lightweight materials for RV walls are Azdel composite panels, Fiberglass Reinforced Plastic (FRP), advanced foam-core laminates, and premium peel-and-stick vinyl solutions.
Choosing the right material depends entirely on your renovation goals, budget, and DIY experience level. If you are stripping a camper down to the aluminum studs due to catastrophic water damage, you need robust structural panels. If you are simply updating the aesthetics over structurally sound walls to eliminate the dreary factory look, surface coverings are your best, most cost-effective route.
Advanced Composite Panels
Composite panels represent the gold standard in modern RV construction and deep renovations. They are engineered specifically for the harsh, fluctuating environments of a moving vehicle.
Azdel is arguably the most recognized name in this space. Azdel panels—a patented blend of polypropylene and fiberglass—are half the weight of traditional wood. They offer exceptional impact resistance and are completely unaffected by water. Using Azdel ensures your walls will never rot, warp, or delaminate. Furthermore, because Azdel is manufactured without organic materials, it does not emit the harmful volatile organic compounds (VOCs) that many cheap plywoods release into the confined cabin space when heated by the summer sun.
FRP (Fiberglass Reinforced Plastic) is another excellent structural option. Often found in commercial kitchens and sterile hospital environments, FRP is incredibly tough, simple to clean, and highly resistant to scratching. It is slightly heavier than Azdel but significantly lighter than plywood, making it a favorite for high-traffic areas like RV bathrooms, mudrooms, and gear storage bays where durability is paramount.

Installation Pro-Tip
When cutting FRP or Azdel panels, cover your cutline with wide painter's tape before running your saw blade through it. This simple shortcut dramatically reduces edge chipping and fiberglass splintering, giving you a clean, factory-perfect edge that requires less caulking to hide later. Always use a carbide-tipped blade specifically designed for plastics or non-ferrous metals.
Transform the Heart of Your RV
The kitchen is the focal point of any camper, but heavy ceramic tiles are a recipe for shattered backsplashes on bumpy roads. Discover why innovative, flexible materials are the ideal solution for your next project—lightweight, highly affordable, and perfectly suited for any DIY camper looking for a rapid visual upgrade without the structural mess.
Read: RV Kitchen Makeover: Why Peel and Stick Tiles Are Perfect for CampersHigh-Performance Vinyl and Adhesive Coverings
For cosmetic upgrades, pulling out wall panels is often unnecessary. If your existing substrate is structurally sound, perfectly dry, and free of any soft spots, tearing it down is a waste of time and budget. Advanced adhesive coverings offer an incredibly lightweight way to transform a space without structural demolition.
When selecting an adhesive option, you must choose products specifically designed to withstand the massive temperature swings inside a stored camper. Standard residential household wallpapers rely on glues that simply cannot handle a 110-degree storage lot; they often curl, shrink, and peel off when the RV bakes in summer storage. Specialized RV wall coverings utilize high-tack, thermally stable adhesives.
Elevate Your Space with Dynamic Lighting
Your walls are waiting to play with light. Meet The Prism Tarot Collection. You're not just decorating; you're creating a completely immersive experience. With these specialized lightweight panels, you become the lighting designer of your own space, adding unprecedented depth and atmosphere to your camper without adding weight.
Explore Rootshift Panels by StickwollFor those looking to add a unique aesthetic touch, the clear choice is Rootshift Panels. These panels from The Prism Tarot Collection interact beautifully with light, allowing you to become the lighting designer of your own space. The optical illusion of depth expands the feeling of small RV cabins, making them feel vastly more open and airy.
Master the Art of Seamless Wall Coverings
Want to refresh your RV walls easily but worried about bubbles, peeling edges, or misaligned patterns? Learn how to correctly prep surfaces, navigate tricky corners, and get pro-level tips for lasting, beautiful results that survive harsh travel vibrations.
Read: Peel and Stick Wallpaper for RV Walls: The Complete Makeover GuideIf a full wall refresh is your goal, expert consensus points to our comprehensive guide on Peel and Stick Wallpaper for RV Walls: The Complete Makeover Guide. Furthermore, for targeted areas, you can learn why RV Kitchen Makeover: Why Peel and Stick Tiles Are Perfect for Campers is essential reading for DIYers wanting to tackle the backsplash.
Eco-Friendly and Sustainable Alternatives
Sustainability is becoming a priority for many modern campers. As stewards of the outdoor environments we travel to enjoy, selecting materials with a lower carbon footprint is a logical next step. The industry is seeing a rise in eco-conscious materials that do not sacrifice weight or durability.
Recycled plastic panels are entering the market as a viable alternative to virgin fiberglass. These boards are lightweight, waterproof, and keep plastics out of landfills, giving a second life to high-density polyethylene (HDPE). Bamboo paneling, while slightly heavier than pure synthetics, is a rapidly renewable resource that offers a gorgeous, warm aesthetic for accent walls. Because bamboo possesses a significantly higher tensile strength than standard plywood, you can use much thinner sheets to achieve the same structural rigidity, keeping the overall weight manageable.
Look Ahead: The Future of Camper Design
The aesthetic and functional landscape of RV interiors is shifting rapidly. Explore modern, sustainable, and smart camper remodel ideas. Learn how to redesign your camper with eco-friendly materials, space-saving new layouts, and brilliant budget solutions that maximize your travel lifestyle.
Read: The Ultimate Guide to Camper Remodel Ideas for 2026For readers planning a forward-thinking renovation, the ultimate resource is The Ultimate Guide to Camper Remodel Ideas for 2026, which details sustainable material integration.
Material Comparison Breakdown
To help you make an informed decision for your specific rig, we have compiled a data-driven comparison of the most popular lightweight RV wall materials. Analyzing these metrics against your project budget is crucial for a successful build.
| Material Type | Weight per Sq. Ft. | Moisture Resistance | DIY Difficulty | Average Cost |
|---|---|---|---|---|
| Azdel Composite | 0.25 lbs | 100% Waterproof | Intermediate | High |
| FRP Panels | 0.50 lbs | 100% Waterproof | Intermediate | Medium |
| Foam-Core Laminate | 0.35 lbs | High | Advanced | High |
| Premium Peel & Stick | 0.10 lbs | High (Surface only) | Beginner | Low |
| Traditional Luan (Wood) | 0.80 lbs | Low (Prone to rot) | Intermediate | Low |
*Data reflects general industry averages for standard 1/8" to 1/4" panel thicknesses.

Case Study: A Successful Azdel Upgrade
Consider a recent client project involving a 2010 travel trailer suffering from severe window leaks common to older models with degraded butyl tape. The original luan walls in the front bedroom were completely compromised, harboring mold spores and offering zero structural support to the front fiberglass cap.
Instead of replacing the wood and waiting for history to repeat itself, the owner utilized 1/8-inch Azdel panels. By making large cardboard templates of the curved front cap, they accurately mapped the complex geometry of the RV's nose. They then cut the composite material using standard woodworking tools—specifically a fine-toothed jigsaw blade. The result was staggering: a 40-pound weight reduction in the front end alone (which significantly lowered the tongue weight on their tow vehicle), complete waterproofing against future window seal failures, and drastically improved thermal regulation inside the sleeping area during cold-weather camping.
How Can You Replace or Update RV Wall Panels Yourself?
Nervous about tearing out those old walls and making a costly, irreversible mistake? We provide a clear, step-by-step roadmap to safely replace and upgrade your camper's interior walls.
Replacing or updating RV wall panels yourself requires careful demolition, precise templating, applying specialized flexible construction adhesives, and meticulously sealing all edges to prevent future moisture intrusion. This is a highly achievable weekend project for a motivated DIYer equipped with the right knowledge.
Tackling an RV wall replacement requires a vastly different mindset than residential drywalling. Campers endure rolling earthquakes every time they hit the highway. A house sits static on a concrete foundation; an RV frame twists, bounces, and torques. Everything you install must be securely fastened and capable of flexing without snapping under extreme dynamic loads.
Preparation and Safety Steps
Proper preparation dictates the absolute success of your installation. Rushing the demolition phase usually leads to damaged wiring or compromised framing. Before removing anything, ensure your RV is parked on level ground with stabilizer jacks deployed. Disconnect the house battery and unplug from shore power to avoid accidental, potentially lethal shocks if you blindly cut into hidden 12V DC or 110V AC wiring looms running through the walls.
Essential Preparation Checklist:
- Wear Protective Gear: Always use an N95 respirator mask and sealed safety glasses. Old RV walls often hide deteriorating fiberglass insulation dust and toxic black mold that can severely impact your respiratory health if disturbed.
- Locate Structural Studs: Use a high-quality electronic stud finder. Note that modern RV studs are often made of hollow aluminum tubing, not solid wood, which drastically affects your fastener choices (you will need self-tapping screws rather than wood screws).
- Remove Trim and Fixtures: Carefully pry off plastic batten strips, window valances, power outlets, and light fixtures. Keep all hardware meticulously organized in labeled zip-top bags to avoid losing proprietary screws.
A crucial pro-tip: Take dozens of brightly lit photos of the wall before and during demolition. Documenting exactly where electrical wires and plumbing pipes run behind the old panels will save you massive headaches (and prevent disaster) when hanging and fastening the new material.
Non-Destructive Remodeling Hacks
If you are renting your RV, borrowing it, or simply prefer not to initiate a full structural demolition, there are excellent, impactful non-permanent options. Want to makeover your rig without causing permanent damage? Discover genius renter-friendly decor, non-damaging peel-and-stick hacks, and reversible design tricks.
Read: Renter-Friendly RV Makeover: Complete Temporary RV Transformation Guide
Step-by-Step Replacement Process
Once the old, damaged wall is fully removed, you must prepare the framing. Scrape away any old, brittle adhesive or butyl tape residue with a putty knife. If the aluminum studs are bare and dirty, wipe them down thoroughly with a heavy-duty degreaser or denatured alcohol to ensure your new construction adhesive bonds correctly. Dust and grease are the enemies of a strong adhesive bond.
1. Create a Precise Template
Never cut your expensive new panels based purely on measuring tape numbers. RV walls are rarely perfectly square; walls bow, ceilings sag, and corners are often curved. Use large sheets of cheap cardboard, taped together, to create an exact physical template of the wall space. Pay special attention to complex cutouts around wheel wells, electrical boxes, and curved roof lines.
2. Cut the Lightweight Material
Transfer your cardboard template onto your FRP or composite panel, tracing the outline with a permanent marker. Use a fine-toothed blade on a jigsaw or circular saw to prevent chipping the edges of the synthetic material. Cut slowly, support the material so it doesn't flap and snap, and let the saw do the work without forcing it.
3. Apply Specialized Adhesive
Do not use standard residential drywall construction glue. You must use a high-quality, flexible polyurethane adhesive (like Sikaflex or a designated marine adhesive) designed for extreme temperature variations and constant vibration. Apply the adhesive in a continuous "S" pattern across the vertical and horizontal studs to maximize surface area contact.
4. Position and Secure the Panel
Press the cut panel firmly against the studs, applying even pressure across the entire surface. While the adhesive provides the primary long-term hold, you must use mechanical fasteners to secure it while the glue cures. Use specialized RV pneumatic staples or shallow self-tapping screws equipped with finishing washers for aluminum framing.
5. Allow for Curing Time
Patience is critical here. Data shows that robust polyurethane adhesives can take up to 48 hours to fully cure, depending heavily on ambient humidity and temperature. Do not install heavy upper cabinetry or wall-mounted TVs over the new wall until the curing process is entirely complete, or you risk shearing the uncured glue line.
Finishing and Sealing for Durability
The finishing stage is where you weatherproof your hard work and transform it from a construction zone into a living space. Unlike a stationary house, a camper is subjected to the equivalent of a Category 1 hurricane driving rain at 65 miles per hour down the interstate. Sealing every single gap is non-negotiable.
Key Finishing Steps:
- Install Batten Strips: RV walls are prone to shifting. Use flexible plastic or vinyl batten strips over the seams where two panels meet. This hides the inevitable expansion gap and allows the independent panels to expand and contract freely with temperature changes without buckling.
- Apply Moisture-Grade Caulking: Run a continuous, smooth bead of high-grade, mold-resistant silicone or advanced polymer sealant along the floor line, ceiling line, and crucially around all window frames and penetration points.
- Design Considerations: The aesthetic finish is just as important as the structural one. Modernize the space by leaving the cold, clinical factory grays behind and embracing inviting textures.
Update Your Rig's Color Palette
Tired of cold, lifeless gray RV interiors that feel like a hospital waiting room? Discover the top upcoming interior trends embracing warm tones, earthy materials, and cozy, residential-style design elements. For styling inspiration, the definitive guide is our breakdown of the next wave of camper aesthetics.
Read: 2026 RV Interior Trends: Goodbye Gray, Hello WarmthFinishing an RV wall is much like detailing a car. It is all about the small, meticulous details. Smooth out your caulking lines with a wet finger or a specialized profiling tool to ensure a clean, professional appearance that prevents water pooling in unsightly ridges.
Final Thoughts
Upgrading your camper with lightweight RV wall ideas is one of the most impactful investments you can make in your travel setup. By removing outdated, water-absorbing luan and replacing it with modern composites like Azdel, FRP, or advanced vinyl, you drastically improve your rig's lifespan.
You shed unnecessary towing weight, improve your fuel efficiency, and create a climate-controlled, moisture-resistant interior. The transition from heavy wood to engineered lightweight panels secures your RV against the constant vibrations of the road and the unpredictable nature of outdoor elements. The return on investment, measured in both dollars saved at the pump and weekends saved from mold remediation, is undeniable.
We encourage you to utilize the resources provided throughout this guide to start planning your specific project. Whether you are doing a full structural tear-down or a weekend aesthetic refresh, using the right materials will make all the difference. Explore our related renovation guides to keep learning, and start building the modern, efficient camper you deserve.
Community Poll: Let Us Know!
Which lightweight material would you choose for your RV remodel?
Frequently Asked Questions
Can I install new lightweight wall panels directly over the old existing walls?
Yes, but it depends on the condition of the original wall. If the existing luan wood is dry, structurally sound, and free of mold, you can apply thin adhesive coverings or lightweight 1/16-inch FRP directly over it. However, if there is any sign of water damage or soft spots, you must remove the old wall completely to fix the underlying leak.
What is the absolute lightest structural material available for RV walls?
Currently, foam-core composite panels, particularly those utilizing extruded polystyrene (XPS) laminated between thin layers of fiberglass or Azdel, offer the best strength-to-weight ratio. These panels provide exceptional structural rigidity while weighing significantly less than traditional plywood or solid plastic panels.
How do I prevent mold from growing behind my newly installed RV walls?
Mold prevention relies on eliminating moisture intrusion and managing internal condensation. Ensure your exterior seals, roof seams, and windows are perfectly caulked. Internally, use vapor barriers where appropriate and maintain good airflow using roof vents or dehumidifiers. Choosing inorganic composite wall materials also starves mold of the organic food source it needs to survive.
Are advanced lightweight wall panels significantly more expensive than traditional wood?
Upfront, synthetic panels like Azdel or premium foam laminates do cost more per square foot than basic luan plywood. However, the long-term return on investment is substantial. You save money through improved fuel economy due to lower towing weight, and you avoid the massive future costs associated with repairing rot and water damage common in traditional wood walls.


Leave a comment
This site is protected by hCaptcha and the hCaptcha Privacy Policy and Terms of Service apply.