






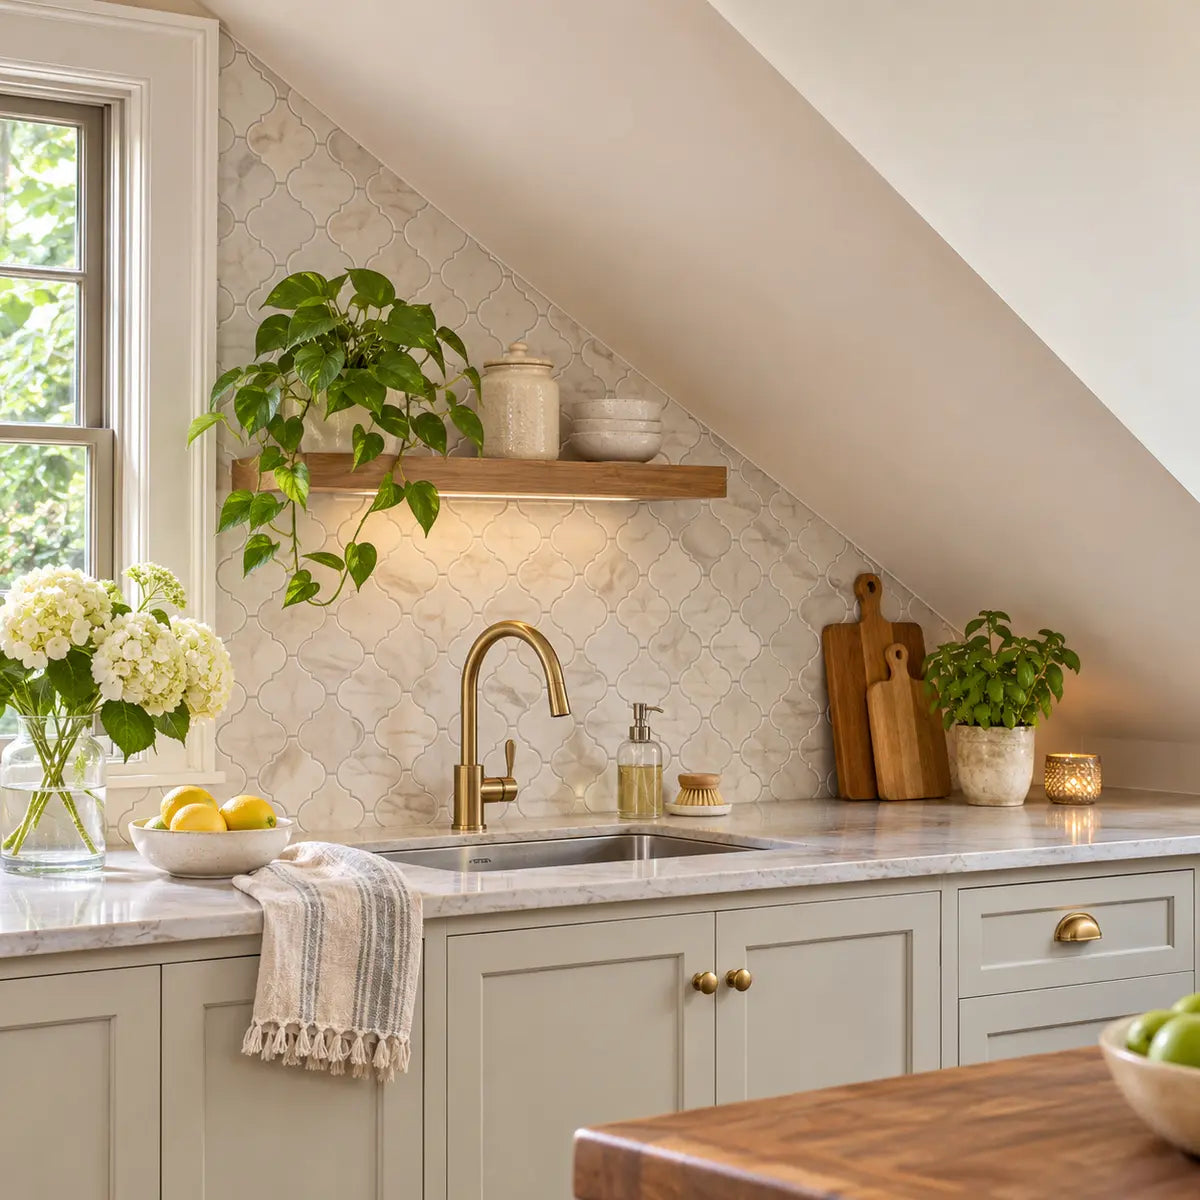
Peel-and-stick tile can work on a vertical kitchen wall that meets a sloped ceiling, provided the wall is stable, clean, dry and smooth enough for the tile you choose. The ceiling angle changes the shape of the cuts at the top. The wall face still has to meet the product’s requirements for adhesion, heat and moisture. If the surface you want to cover leans inward or extends overhead, get explicit approval for that orientation from the tile manufacturer before proceeding. (Smart Tiles FAQ)
Can peel-and-stick tile work on a sloped kitchen wall?
Yes, if the slope is at the ceiling and the vertical wall below it passes the chosen tile’s installation checks. Assess the entire area you plan to cover, including the high end near the ceiling and the sections behind the sink and cooking appliance. Different parts of the same wall can call for different decisions. (Smart Tiles FAQ)
Check that the surface is sound. The substrate is the surface the adhesive will actually touch, such as paint, primer or an existing tile face. Look for flaking paint, crumbling patches and loose existing tiles. If the top layer is coming away, repair the surface before planning a bond to it. If the wall feels soft, shows damp staining or gets recurring condensation, identify and fix the moisture source and dry the affected materials before you cover them. Consult the EPA’s guidance on indoor moisture control.
Check flatness and texture separately. Hold a straightedge across several areas, vertically and horizontally. A rocking straightedge can reveal a high spot. A gap under it can reveal a dip. Then look across the wall in side lighting for stippled paint, raised patches and recessed grout lines. A wall can be flat across its width and still have a texture that limits adhesive contact. Conversely, a wall that feels smooth can have a bow that keeps a sheet from sitting flat. Check existing ceramic tile, bare wallboard, wallpaper and textured paint against the exact product’s substrate list. A primer is useful only where the installation instructions call for it as part of an approved preparation. (Smart Tiles FAQ)

Check the sink and cooking zones separately. Around the sink, look at where water repeatedly lands and whether it collects at the worktop joint. Smart Tiles, for example, distinguishes occasional splashes from direct or heavy water exposure. Behind a stove or cooktop, compare the tile’s permitted placement with the appliance manufacturer’s instructions for clearances and surrounding finishes. If you cannot confirm that the two sets of requirements are compatible, leave that area out of the tile layout or choose a finish approved for it. (Smart Tiles FAQ)
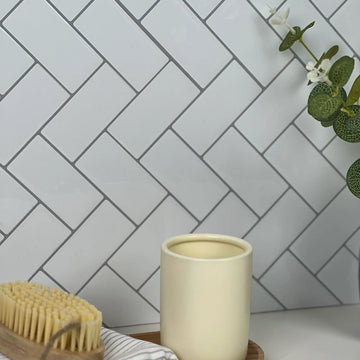
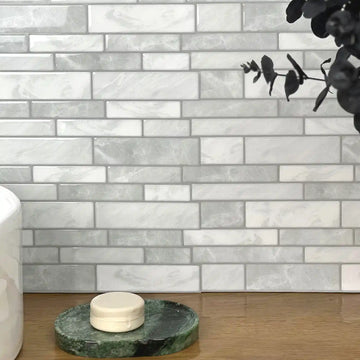
If you’re comparing shapes after screening the wall, you can view the Subway Magic wall tile as a self-adhesive subway-format design option. Check the instructions for the exact tile before committing to any location, especially around a sink, cooktop or sloping surface.
Gather your tools and prepare the wall
Set up for two separate jobs. First, prepare a wall the tile can bond to. Then measure, template and cut on a work surface where you can handle the pieces with the backing still attached. Choose the cutter after you choose the tile. A flexible sheet and a rigid stone-faced piece can require different tools. (Smart Tiles Subway Installation Guide)
Tools and materials checklist
- For inspection and layout: a straightedge, spirit level or laser level, tape measure, pencil, paper and a square.
- For templates: stiff paper or thin card, scissors, a pencil for marking the waste side and low-tack tape if suitable for the wall finish.
- For cutting: the tile manufacturer’s specified tool, a stable work surface, a cutting mat or sacrificial board as appropriate, and the protective equipment required by the tool and material.
- For preparation: the specified cleaner, clean cloths and any compatible patching materials or primer needed for your substrate.
- For installation: the tile, the specified pressing tool if one is required, and a safe way to reach the upper edge without stretching across the worktop.
- For finishing: the selected edge trim or joint treatment, if the installation calls for one. Keep a spare sheet or usable offcuts for trial cuts and replacements. (Smart Tiles Subway Installation Guide)
Prepare for full contact
Remove grease and residue using the cleaner specified for the bare installation surface. Check the top strip near the ceiling as well as the obvious cooking zone. If surface repairs are needed, use a preparation the tile instructions allow, bring the patch flush with the surrounding wall and clear away any repair dust. Let the surface dry and observe any required waiting period after priming or painting. (Smart Tiles FAQ)
Dry-to-the-touch paint is a poor basis for scheduling an adhesive installation. For example, Smart Tiles specifies 72 hours of drying for the primer preparation described in its FAQ and a 21-day wait before its tiles go on a freshly painted wall. Those times belong to that manufacturer’s instructions. Check the wait for your own tile and wall finish before setting an installation date.
Once the wall is ready, hold a liner-backed sheet against it at several spots. Look for rocking, a visible hump or an edge that won’t rest where the seam needs to land. This is a dry check for fit and contact. If the manufacturer recommends an adhesive test patch, put it only on an otherwise suitable surface and where you have permission to risk a mark. For broader planning, check wall compatibility and preparation. (Smart Tiles FAQ)
Is your wall ready to measure for tile?
Give each of the three checks a result before you make templates. Use the least favourable result as your next step. That way, a smooth wall won’t outweigh an unresolved moisture problem or an unconfirmed stove zone. (U.S. Environmental Protection Agency, indoor moisture guidance)
| Check | Continue | Verify | Stop and address |
|---|---|---|---|
| Wall condition | The surface is sound, clean and dry. | The wall looks sound, but you haven’t confirmed the preparation or cure time. | The surface is loose, soft or damp, or shows signs of recurring moisture. |
| Adhesive contact | The exact tile permits the substrate and the sheet sits flat in a dry check. | Texture, grout recesses, a bow or an unidentified coating leaves compatibility uncertain. | The product excludes the existing surface or the sheet cannot sit flat as installed. |
| Location | The instructions cover the receiving face and its actual heat and water exposure. | The angle of the receiving face, appliance clearance or splash conditions still need confirmation. | The tile is excluded from the proposed location. |
If any check says stop, fix the wall, change the coverage area or select an appropriate finish before continuing. If nothing says stop but a check says verify, take the relevant wall or appliance details to the manufacturer before cutting. With three continue results, move on to the layout and dry fit. This check helps you decide what work to do next. Adhesion still depends on the specified preparation and installation.
How do you measure a wall beneath a sloped ceiling?
Measure vertically at several positions from one level line. A single measurement or an average height cannot locate both ends of an angled cut. Start with a survey line across the wall, then measure again from the actual bottom of each cut piece once the rows and seams are set. (Smart Tiles Subway Installation Guide)
Draw a simple front view of the wall. Mark the worktop, each end of the tile run, inside corners, cabinet ends, outlets and any place where the ceiling changes direction. Choose a fixed point you can find again, such as the left edge of the run, and use it as the origin for horizontal measurements. Set a provisional level line where you can see it across the wall. Label it on the sketch so you can distinguish it from the first-row line you’ll choose later.
Measure straight up from the survey line at the low end, the high end and several points in between. Take extra readings where the ceiling steps, bends or meets a cabinet or soffit. Keep the tape in the plane of the wall as you measure. Running it diagonally from the reference mark to the ceiling gives a longer distance and places the cut in the wrong spot. If the ceiling looks straight, check a midpoint against the line through the two outer measurements. Where the midpoint doesn’t fit that line, add readings or trace the profile in card. This adapts the outline-transfer technique used in the Staron fabrication manual for full-height solid-surface backsplashes.
Record each point as a pair: its horizontal position along the wall and its vertical height above the survey line. Use the same approach to measure and template an uneven upper edge if the tile also runs under cabinets.
Turn your wall measurements into cut heights
For each piece along the ceiling, use three values measured from the same survey line. Record the ceiling height at the left edge of the piece, the ceiling height at its right edge and the height of the piece’s planned bottom edge. Enter everything in the same unit. Measure at the piece positions in the actual layout, with overlaps or joints accounted for.
Subtract the bottom-edge height from each ceiling height. The two results give the available height on the left and right before applying the chosen finish detail. For example, if the ceiling readings are 36 and 44 units and the bottom edge is 30 units above the survey line, the available heights are 6 and 14 units. The right side of the piece is taller. Equal results give a horizontal line between the two marks, which still needs a midpoint check. A zero or negative result means the ceiling reaches or crosses the piece’s planned bottom at that edge. Recheck your measurements and map where the slope crosses the row. You may need a partial-width piece or a revised layout.
These figures describe the space on the wall. To get the cut line, transfer them to paper and incorporate the gap or trim detail specified for your installation. Use the measurement direction called for by that detail. For instance, a gap specified perpendicular to the slope can’t simply be subtracted as the same vertical amount. Where the ceiling changes direction within a piece, plot the extra points or trace that part directly.
Where should the first row start?
Start with a level line for the first row and choose its height by looking at what happens at both the worktop and the ceiling. Then choose the horizontal starting point that gives the best fit at prominent ends, outlets and corners. Begin at the side or point allowed by the tile’s seam design. Some sheet patterns have a particular installation direction because one edge covers the next. (Smart Tiles Subway Installation Guide)
Set the height of the first row
Check the worktop with a level. If it’s level and the product permits the intended worktop joint, you can generally use a full first row and mark its top edge as your guide. If the worktop rises or falls, hold liner-backed tiles against it at both ends. Mark a level top edge that leaves enough material to cut the bottom of the first row to the worktop profile, with the required joint allowance. Where the worktop is higher, the cut piece will be shorter. Where it’s lower, you’ll need more tile height. Check that your chosen position leaves enough material at both extremes before you commit. (Smart Tiles Subway Installation Guide)
Bring the upper edge into this decision early. Use the installed height of a repeat, meaning the distance from one instance of the pattern to the next after seams are joined, to mark where the rows will land near the ceiling. Many sloped runs have more rows at the high end. Anywhere the ceiling crosses a horizontal seam, inspect the little wedge the layout creates. If that wedge is too small to cut cleanly or sit flat, test a change in the first-row height. A small change below can move the crossing away from a sheet edge above. (Smart Tiles Subway Installation Guide)
Test the starting point from left to right
Assemble several pieces on a bench with their liners on, using the prescribed overlap, interlock or edge-to-edge joint. Compare a start at the most visible finished edge with a layout centred under the main feature, such as a window. If the backsplash wraps around a corner, include the neighbouring wall before you settle on a start. A symmetrical layout can look good from the doorway and still put a seam through the narrow strip beside an outlet. Shift the pattern if that leaves a sounder piece without making the exposed ends awkward. (Smart Tiles Subway Installation Guide)

Mark a vertical reference at a known seam as well as your level row line. This gives you a way to check sideways drift as the pattern climbs. For sheets with printed or embossed joints, identify which line in the design belongs on the guide. The bottom of an overlap tab may sit in a different place from the visible joint. Once your lines are set, plan the backsplash layout before cutting to cross-check the tile count, exposed edges and outlet row.
How do you install the tile without losing alignment?
Dry-fit the first row and the difficult areas with the backing intact. Then install in small sections, checking each section against the independent reference lines before applying final pressure. At the slope, verify each cut in its actual position with its neighbour in place or represented in the dry layout. (Smart Tiles Subway Installation Guide)
Build a paper template that preserves the pattern
Start with the first piece that reaches the ceiling. Cut paper to the outline of the uncut sheet or piece. Mark the face, up direction, row and position, such as “row 3, second piece from left.” If sheets overlap or interlock, copy the relevant tab or seam onto the paper. That detail tells you where the piece belongs horizontally and which parts will be visible after installation.
- Set the template in its installed position. Align its lower edge or pattern line with the guide for that row. Align its side with the planned seam, including the prescribed overlap or joint.
- Mark the ceiling profile. Transfer the left and right heights from the cut-height calculation. Join the marks for a straight run. For a wavy or stepped edge, use extra measurements or fit small card strips along the joint and tape them together to capture the profile.
- Mark the finished cut line. Apply only the allowance required by the edge detail. Put a cross on the waste side so the part you intend to keep stays obvious when you move to the bench.
- Trim the paper and refit it. Check both ends and the middle. Confirm the lower seam still lands on the layout line and the cut edge has space for the specified finish. Hold the neighbouring template or liner-backed piece in position to check the join between the two.
- Transfer the shape to the tile. Match pattern direction and the seam markings. If the cutting instructions call for marking from the back, turn the paper over before transferring the shape so the finished cut faces the right way. (Smart Tiles Subway Installation Guide)

On a genuinely straight incline, a card strip that records the angle can help with the next piece. Move it to the next position and verify both heights before using it. The angle may stay constant as the amount of tile below it changes. Label any piece that looks almost interchangeable with its neighbour. Two pieces can share a slope and still fall on different parts of a staggered pattern.
If the first and last points fit but there’s a gap in the middle, revise the profile. If the edge fits but a joint is out of line, check the template’s position before trimming it again. A template is ready when both the perimeter and the pattern fit.
Dry-fit and bond in manageable sections
- Lay out the first section. Keep the backing on. Assemble the starter piece and its neighbours in their intended order. Test the lowest part of the slope and the first outlet or fixed obstacle early, even if they sit farther along the wall. Correcting the layout here is easier than trying to shift it after bonding. (Smart Tiles Subway Installation Guide)
- Make the starter cut and recheck the line. Some interlocking sheets need a squared-off starter edge. Trim only as the manufacturer directs, and check that the factory joining edge still faces the next piece. Put the cut starter back against the wall and confirm the pattern sits on the reference line. (Smart Tiles Subway Installation Guide)
- Expose the adhesive as the product directs. If the instructions allow progressive liner removal, expose only the starting area, align it and release the rest as you bring the tile into contact. If they call for removing the full liner first, follow that sequence and hold the sheet clear of the wall until it’s aligned. Keep dust and fingerprints off the adhesive. (Smart Tiles Subway Installation Guide)
- Align, then apply the specified pressure. Check the reference line and the visible pattern before pressing firmly. Use the hand pressure, roller or other method the product specifies. Pay attention to edges and seams. If a piece starts in the wrong place, check the repositioning instructions immediately. Some products allow adjustment before firm pressure, and others can grab as soon as they touch. (Smart Tiles FAQ)
- Check each section before building on it. Step back and look along the joints from the main viewing position. Then check with the level and the vertical reference mark. If several seams gradually wander off the line, find the first misaligned piece. Continuing from that seam carries the error farther along the run.
- Fit and place the upper pieces in order. Recheck the fit against the bonded row below before removing the liner. At a tight ceiling joint, practise the movement that brings the piece into place. The dry fit should confirm both the finished position and that you can reach it without rubbing the adhesive against the ceiling or folding the cut edge. (Smart Tiles Subway Installation Guide)

Allow for the manufacturer’s bond-development and use instructions. Smart Tiles says the adhesive on its Subway tiles sets firmly within 48 hours of application in its Subway Installation Guide, and its FAQ describes repositioning before firm pressure. Use separate guidance for the first cleaning or exposure to splashes.
How do you cut around the slope, outlets and corners?
Make cuts on a stable work surface with the adhesive liner attached, using the cutter specified for your tile. A finished piece needs to fit the boundary and preserve the edges that join its neighbours. Check both before removing the backing. (Smart Tiles Subway Installation Guide)
Angled ceiling cuts
Lay the verified template against the sheet and confirm which side will face up in the room. Trace the cut line and mark the waste on the tile. If the manufacturer recommends a knife and straightedge, support the sheet on a cutting mat and keep hands clear of the blade path. Practise on a scrap if you’re unsure how the edge will look, particularly if the diagonal passes through raised parts of the design. Some products require a different cutter. Smart Tiles demonstrates knife cutting for its Subway sheets in its Subway Installation Guide, while Aspect Stone specifies tin snips for general cuts on its stone product in its Stone Tile Installation guide.
Dry-fit the cut tile with the sheet on either side, where present. Check for a point that catches before the seam closes or a section that runs tight to the ceiling. If the piece is slightly oversized, mark the interference in position and take it back to the bench. If it’s too short for the specified joint or trim, revise the template and make a new piece. Save offcuts that retain a factory edge or the right pattern offset. Either can matter at the other end of the run. (Smart Tiles Subway Installation Guide)
Outlet and switch cutouts
Map the opening on your paper template from a known horizontal seam and a known vertical edge. Check the opening and the faceplate footprint separately. Transfer the opening to the loose tile and make the cut away from the wall. Fit the piece with its liner on and check that no tile extends into the box opening or interferes with the device or plate. If the tile thickness or a raised part of the pattern makes the plate rock or sit poorly, pause before bonding the surrounding pieces and have an electrician assess the fit under local requirements. The Howard County residential electrical inspection guidance illustrates why inspectors check the box and device positions as well as the faceplate.
Corners, cabinet returns and fixed fittings
Measure each wall face separately. At an inside corner, carry the level line around the turn, then dry-fit the last piece on the first wall and the starter on the second at the same time. Compare visible joints on both faces. If the pattern leaves a sliver on one side, try an adjusted start before cutting. At an outside corner, decide where the visible finish belongs and whether a compatible profile is required. Bend or wrap tile only when the exact product explicitly supports that corner treatment. (Smart Tiles FAQ)
For a cabinet return or other fixed fitting, mark its outline on the template from two known references. Paper can flex around a fitting even where the finished tile can’t. Test that the cut piece has a clear path into place, especially if the ceiling and cabinet both restrict how you can move it. If the backsplash continues around a turn, plan a peel-and-stick backsplash around an inside corner before finalising the pieces on either wall.
How should you finish peel-and-stick tile at a sloped ceiling?
Choose the upper-edge finish before making the final templates. Depending on the tile and joint, the options are a tidy exposed cut, a compatible trim profile or an approved sealant detail. The finish has to fit the tile thickness, the ceiling profile and any required movement or clearance at the joint. (Smart Tiles FAQ)
Leave a clean cut edge
A clean exposed edge can work when the manufacturer permits it and the cut face looks tidy. Hold a test cut near the actual ceiling joint and look at it under the kitchen lighting. Check for a visible core, roughness and changes in the gap as the slope passes over neighbouring pieces. Shape each piece to the boundary while leaving any specified joint. If the fit varies enough to catch your eye from the floor, correct the template before bonding. (Aspect Stone Tile Installation guide)
Add compatible edge trim
Test the trim on a scrap of the actual tile. Check that it covers the edge as intended and can meet the ceiling, nearby cabinets and any vertical trim cleanly. Check the mounting sequence, too. A profile with a leg that goes behind the tile has to be positioned before the adjacent pieces are bonded. A surface-applied profile follows its own mounting instructions. Keep trim supported along its run and revise a poor cut instead of relying on the profile to bridge a large gap. (Smart Tiles FAQ)
Where the slope meets a soffit, the boxed-out section below a ceiling, trace and assess each face separately. Treat any underside as an overhead surface requiring its own product approval. If the wall and return are both in scope, make a cardboard template for a kitchen soffit and test the pieces together at the transition. (Smart Tiles FAQ)
Use caulk only where the joint detail allows it
Use sealant when it is compatible with the tile and ceiling finish and the chosen installation calls for it. Confirm the intended joint width and any movement requirements. Ask the manufacturer if the detail is unclear. Guidance for a worktop joint applies to that location. At the ceiling, a bead can finish a suitable joint, but a piece that lifts or leaves a wide, irregular opening needs attention to the bond or the cut. If an approved trim or sealant detail proves difficult to execute, a level stopping line below the ceiling may be a better fit for the room. Dry-fit that option before cutting the upper run. (Smart Tiles FAQ)

What should you do if tiles lift, drift or leave gaps?
Stop adding pieces when a defect starts to repeat. A single bad cut can be a fit problem. Several lifting pieces in the same stretch call for a check of the wall surface, preparation and exposure before you use more tile. Use the symptoms below to decide what to inspect first. (U.S. Environmental Protection Agency, indoor moisture guidance)
| What you see | What to check first | What to do next |
|---|---|---|
| One upper edge lifts | Check for ceiling interference, a paint ridge or missed pressure along the cut. | Correct the interference or surface problem. Follow the product’s directions for re-pressing or replacing the piece. |
| Several pieces lift in one zone | Look for grease, texture, uncured coating, moisture or exposure outside the product limits. | Stop in that area. Resolve the surface or exposure issue before trying again. |
| A row looks crooked | Compare the visible joints to the level line from close up and from across the kitchen. | If the row is level, judge the changing upper cuts as a group. If it drifts, identify the first off-line seam and check the approved correction method. |
| A bubble or raised spot appears | Check for a wall bump, debris under the sheet or air trapped during placement. | Use the manufacturer’s repair guidance. If replacement is needed, inspect and prepare the wall at that spot before installing a fresh piece. |
| Internal seams show gaps or ridges | Check for reversed sheets, missed overlaps or a mismatch in interlocking edges. | Recreate the joint with spare pieces to identify the correct fit. Replace affected pieces where the product permits. |
| The ceiling gap widens or narrows unexpectedly | Compare the paper pattern with the installed piece and check intermediate points along the cut. | Revise the template and recut if the gap falls outside the planned finish detail. |
| A faceplate rocks or sits proud | Check whether the pattern relief or added thickness interferes with proper seating. | Pause at the outlet and have a qualified electrician assess any necessary adjustment. |
Use extra adhesive only if the exact tile instructions authorise it for the situation. For example, Aspect Stone documents specific adhesive options for its own system. If the backing has picked up dust or paint during removal, check the replacement instructions before trying to reuse it. If the wall is damp, soft or losing its finish, address that condition first. (U.S. Environmental Protection Agency, indoor moisture guidance)
Can you clean and remove peel-and-stick tile easily?
Follow the exact tile’s cleaning and removal instructions. A self-adhesive backsplash can be a manageable alternative to a mortar-set finish on a suitable wall. If you’re renting or planning a temporary update, weigh that convenience against the possibility of adhesive residue, lifted paint or wall repairs when it comes off. (Smart Tiles FAQ)
Care after installation
Check when cleaning can begin and which products are allowed on the finished tile. The cleaner used to prepare the wall can differ from the one used on the backsplash. Smart Tiles, for example, recommends a soft sponge and a mild, nonabrasive cleaner for its installed tile. Pay particular attention to the worktop joint by the sink and the seams near the cooking area. If you notice an edge lifting during routine cleaning, inspect the area before wiping over it again or applying a sealant. (Smart Tiles FAQ)
Removal and rental expectations
Get permission before installing in a rental, especially if the job requires smoothing texture, priming or changing an outlet detail. Check the removal instructions before purchase and consider what restoration the underlying paint or wall might need. A small approved test in a discreet location can show how that spot responds. The rest of the wall may have different patches or paint adhesion, and the result can change after the tile has been in place. (Smart Tiles FAQ)
Some manufacturers, including Smart Tiles and Aspect Stone, describe using a hair dryer to assist removal. Use heat only if the manufacturer permits it for your tile and surface. Start at an accessible corner and follow the instructions for releasing the adhesive. If the paint or wall surface starts to lift, pause before pulling a larger area. Use only a residue remover compatible with the underlying finish. At the sloped edge, account for any trim or sealant that connects the tile to the ceiling. Check how that detail comes apart before pulling on an adjoining piece. (Smart Tiles FAQ and Aspect Stone Tile Installation guide)
Check the finished backsplash before returning the kitchen to use
Look at the rows from across the room first. Then check the high and low ends of the ceiling cut, the seams and corners, the worktop joint and any outlet faceplates affected by the new finish. Look for lifting edges, cut pieces under pressure and gaps outside the chosen joint detail. Follow the specified waiting periods before exposing the backsplash to routine cleaning or splashes. (Electrical Safety Foundation International for electrical safety guidance)
If you’re still deciding whether to install, make one paper template for the hardest section, such as the low end of the slope or a piece that also meets a cabinet. It will show you whether the layout leaves enough material for a clean cut and a sound fit. Commit to the full run once the wall is suitable, the dry fit preserves the pattern and the exact tile’s instructions cover the location and finish you’ve chosen.




Leave a comment
This site is protected by hCaptcha and the hCaptcha Privacy Policy and Terms of Service apply.