












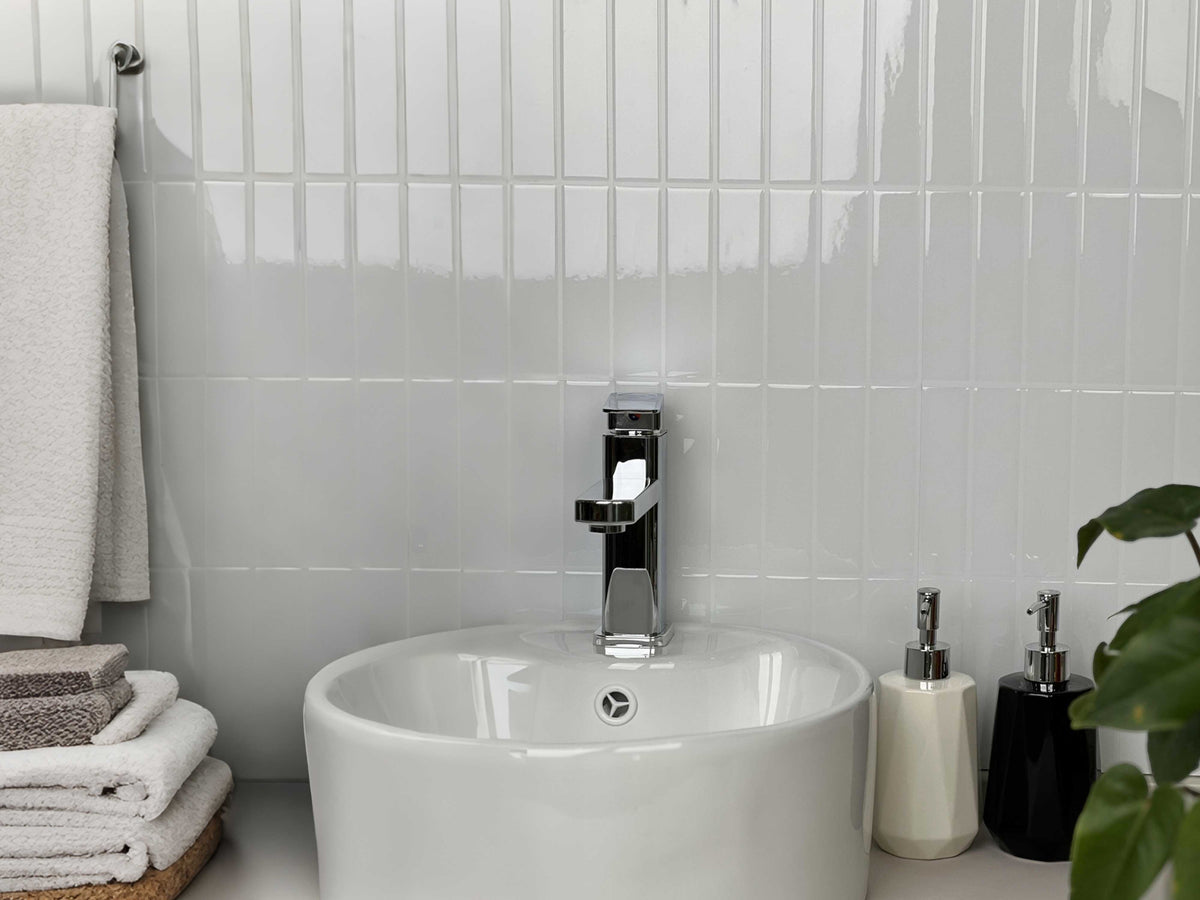
A peel-and-stick bathroom refresh should begin with moisture zones, not with the word “bathroom.” A dry wall beside a vanity, a splash-prone sink wall and the inside of a shower are different environments. The decorative finish must match the exact exposure and substrate.
This guide keeps the design and DIY value of the original page while removing year-specific language, generic waterproof claims, fictional testimonials and one-size-fits-all installation advice. Start by deciding which wall areas are eligible, then choose the product and installation method.
Identify the bathroom moisture zone first
Divide the room into dry decorative walls, occasional-splash walls and direct-wet zones. A product that works beside a vanity may not belong inside a tub or shower. Do not use one “bathroom safe” label for the whole room.
If the exact product does not document direct-wet use, keep it out of that zone. A water-resistant face, printed grout line or sealed-looking edge does not create a waterproof shower assembly.
Fix leaks and recurring condensation before decoration
Soft drywall, staining, musty odor, peeling paint or recurring condensation are reasons to stop. The EPA’s mold and moisture guidance emphasizes controlling the moisture source and drying affected materials.
A new wall finish can hide symptoms without solving the problem. Repair plumbing, ventilation or enclosure issues first, restore the substrate and then reconsider the decorative surface.
Know the product construction
Peel-and-stick wall tile can be vinyl, composite, gel-faced, metal-faced or another layered construction. Thickness, flexibility, edge design, cutting method and wet-area limits vary.
Read the exact product page. Do not assume every peel-and-stick tile uses the same adhesive, cleaner, pressure method or moisture limit.
Existing ceramic tile can be a substrate only when it is sound
Existing ceramic or porcelain may provide a smooth surface, but inspect every section for loose tile, cracked grout, deep joints, soap residue, silicone, moisture damage and uneven transitions.
If the old installation is failing, covering it creates a new finish over an unstable base. Repair or remove the defective material first. A thin peel-and-stick layer does not stabilize loose ceramic.
Painted drywall needs its own compatibility check
Paint should be stable, cured, clean and within the product’s approved surface requirements. Weak flat paint, chalking, heavy texture or damaged drywall paper can affect both adhesion and removal.
If sanding or scraping older paint may be required in a U.S. pre-1978 property, review EPA’s lead-safe renovation guidance before disturbing the coating.
Clean for the actual contamination
Vanity walls can collect soap, cosmetics, hair products and cleaning residue. Use a cleaner compatible with the wall and tile instructions. Avoid oily or waxy residue beneath a pressure-sensitive adhesive.
Allow the surface to dry fully. Do not create a universal “degrease, sand, prime” sequence for every bathroom wall.
Dry-layout around fixtures before exposing adhesive
Mirrors, medicine cabinets, towel bars, outlets, faucets and trim can create difficult cuts. Hold several pieces in position first and decide where seams should land.
Use a level reference line. A vanity top or floor can be slightly out of level, and that error can become obvious across a repeated tile pattern.
Use the cutting method for the exact material
Flexible vinyl, composite and metal-faced products need different tools. Use templates around outlets and plumbing penetrations and test cuts on spare material.
Do not prescribe one utility knife or pair of scissors for every bathroom tile. The wrong cutter can crease, chip or delaminate the finish.
Apply pressure according to the product instructions
Pressure-sensitive adhesive needs contact with the substrate, but the correct tool and force vary. Some products may use a roller or smoothing tool; others use firm hand pressure.
Extra pressure cannot compensate for moisture, dust, weak paint or heavy texture. If an edge lifts, diagnose the wall before adding a stronger adhesive.
Keep penetrations and service access usable
Do not tile over shutoffs, electrical covers, medicine-cabinet fasteners or other service points. A clean pattern is secondary to future maintenance.
Plan exposed edges around plumbing and fixtures so local repair remains possible if the fixture is replaced later.
Use design to support the room, not to make geometric promises
Vertical lines, light colors and reflective finishes can change how a bathroom feels, but they do not guarantee that the room looks taller or larger. Pattern scale, lighting, fixtures and wall proportions all contribute.
Test a physical sample beside the vanity, floor and towels in daylight and evening light. Use the design that fits the actual room rather than a rule about “small bathrooms.”
Divide the bathroom into real moisture zones
Plan from exposure rather than from the room label. A wall above a storage shelf may remain dry. A vanity wall can receive intermittent droplets, cosmetics and cleaner. A wall beside a tub can experience repeated splash. The inside of a shower or a steam enclosure belongs to a complete wet-area system. These locations can exist only a few feet apart while requiring different materials and details.
Draw the room and mark direct water, splash, condensation, plumbing penetrations and places that stay difficult to inspect. Note whether the fan actually removes moisture and whether previous staining returns. EPA guidance emphasizes controlling the moisture source rather than covering it. If a leak, recurring condensation or mold is present, solve that problem before choosing a decorative finish.
Do not use one green-yellow-red score to approve the whole bathroom. Treat every location independently. A suitable vanity wall does not prove suitability inside a shower, and an existing ceramic surface does not guarantee that its grout joints are flat enough for a thin new covering.
Evaluate existing tile before covering it
Existing ceramic or porcelain can sometimes provide a smooth, stable substrate, but first inspect for loose pieces, cracked grout, hollow areas, silicone residue and water damage. The new finish depends on the old installation remaining sound. Covering a loose tile hides the warning without fixing it.
Run a straightedge across the joints and transitions. Deep recessed grout lines can telegraph through a flexible sheet or reduce contact. Do not assume that any primer or filler will solve the problem. Use only a preparation method accepted by the new product and suitable for the existing surface. Where leveling is required, confirm that the leveling material can receive the adhesive finish after curing.
Clean according to the surface and product instructions. Bathroom walls can carry soap film, hair products, lotion and silicone that are not obvious when the tile looks visually clean. Rinse or remove cleaner residue when required and allow the surface to reach the condition specified for installation. A damp grout joint under a new finish remains a moisture problem even if the face is dry to the touch.
Plan around fixtures and penetrations
Mirrors, faucets, towel bars, shower arms, medicine cabinets and electrical devices create more than cutting challenges. Some parts need future service. Some penetrations are part of a waterproofing system. Some loads must be supported by the building structure rather than the decorative finish.
Keep plumbing trim removable where service requires it. In direct-wet systems, pipe and mixing-valve penetrations are treated as part of the waterproofing assembly; Schluter, for example, sells specific pipe and valve seals for its KERDI system. That does not mean you should add those components to an unrelated wall. It illustrates why cutting a neat circle in a decorative tile is not, by itself, a waterproofing detail.
Do not mount a grab bar, heavy shelf or cabinet only through adhesive tile. Use the supporting structure and appropriate hardware. Finish the decorative material around the attachment according to the product and building-system instructions. If you cannot identify what a fixture needs for future removal, plan access before exposing adhesive.
Use design to improve the room without inventing spatial rules
Vertical lines, pale colors, reflective finishes and large patterns can change how a room feels, but the effect depends on the complete scene. A vertical tile does not guarantee that every viewer will perceive a low ceiling as taller. A glossy face can bounce light but can also create distracting reflections. A small mosaic can add detail without necessarily making a room feel smaller.
Test the actual sample beside the vanity, floor, towels and fixed fixtures. View it in daylight and at night. Photograph the sample from the doorway and from the sink. If the room already has a strong patterned floor, a quieter wall may create better balance. If fixtures are simple, a more active wall may provide the focal point.
Keep scale practical around cuts. A pattern that looks elegant on an uninterrupted sample can become busy when divided by outlets, mirror edges and narrow returns. Dry-layout several pieces and mark the exact boundaries before buying the full quantity.
Build a bathroom quantity and budget worksheet
Measure only the eligible wall sections. For an example, a vanity wall 6 feet wide by 4 feet high is 24 square feet. Subtracting a 6-square-foot mirror opening leaves 18 square feet. If the layout justifies a 12 percent allowance, plan for 20.16 square feet. With 3.5 square feet of usable installed coverage per pack, the calculation is 5.76 packs, rounded to six. The inputs are illustrative, not product specifications.
Add surface repair, compatible preparation products, trim, tools, professional work around plumbing or electricity, and a repair reserve. For rentals, also budget possible repainting or patching after removal. A temporary decorative project can still have restoration costs, so do not evaluate it only by the checkout price of the tile.
Compare a full-wall plan with a smaller feature zone. A limited vanity backsplash can deliver a strong visual change while avoiding direct-wet or service-heavy areas. Smaller scope can also make future removal and repair easier.
Install and inspect in a controlled sequence
Establish a reference line and dry-fit the difficult pieces first. Cut around mirrors, trim and fixtures while the release liner is still on. Apply the product in the order specified by its instructions and use the recommended pressure method. Do not assume a roller can correct a wet wall, weak paint or an incompatible existing tile.
After installation, inspect edges and joints under normal room use. Watch for repeated condensation, lifted corners, water paths and cleaner residue. A fresh installation that looks flat immediately after pressing has not proven long-term performance. Record any change instead of repeatedly pressing it back without understanding the cause.
Keep the permitted cleaner and spare material available. A local repair can be straightforward when the cause is understood and a matching piece is available. If the same area repeatedly lifts or gets wet, investigate the underlying condition before replacing another piece.
Plan removal and rental restoration
If you rent, obtain the permission required by your lease and document the wall before installation. Removable is a product characteristic with conditions, not a promise that every paint layer will remain untouched. Flat paint, weak coating, previous repairs and long dwell time can all change the outcome.
Follow the exact removal guidance. Do not improvise aggressive heat, solvents or scraping on an unknown surface. If the product allows a small concealed removal sample, use it as limited evidence. A sample removed shortly after installation still cannot predict every move-out condition months or years later.
Keep the landlord or property manager informed when the project affects fixtures, caulk, holes or other permanent details. A successful rental makeover includes an exit plan before the first tile is installed.
Frequently asked planning questions
Can decorative peel-and-stick tile go inside a shower?
Only if the exact product and complete wet-area system are intended for that location. A water-resistant face alone does not create a shower waterproofing assembly.
Can I cover old bathroom tile?
Potentially, when the existing tile is sound, compatible and sufficiently flat and the new product permits that substrate. Check joints, silicone, moisture and loose areas before covering anything.
Can I use the same product on the wall and floor?
Only when the manufacturer explicitly intends the product for both uses. Floors require traffic, edge and cleaning performance that a decorative wall product may not provide.
Does peel-and-stick tile guarantee an easy move-out?
No. Plan removal separately, document the original wall and allow for restoration. Product removability and wall-coating strength are different factors.
Use a maintenance handover for the finished bathroom
At completion, write down the cleaner, tool and routine that the selected finish allows. Note any wall edge that should remain visible for inspection and any fixture that must stay removable. Keep spare pieces, the product label and photographs of the original and finished wall together.
Review the installation after normal showers and cleaning. Look for repeated condensation, softening at the substrate, edge movement or residue collecting at seams. A bathroom can change with seasons, ventilation habits and household use, so the final photograph is not the end of maintenance.
If the room later receives a stronger shower, new humidifier, different cleaner or changed ventilation, reassess the decorative wall. Product suitability was decided for the original conditions, not automatically for every future use.
Compare a limited update with a full renovation
A peel-and-stick feature wall can be a useful cosmetic project when the wall is already sound. It is not automatically a substitute for a renovation that needs plumbing changes, damaged-wall repair, waterproofing or structural work. Separate those scopes before comparing cost.
For a hypothetical bathroom, one option may be a 20-square-foot vanity wall using a suitable self-adhesive finish, while another proposal rebuilds a tub surround and replaces plumbing trim. The second project should not be described as expensive because of tile alone; it includes work the smaller decorative update never attempts.
This distinction makes budgeting clearer and keeps the decorative product within the job it is designed to do.
Use a change log after the bathroom is finished
Keep a short change log for repairs, new cleaners, ventilation changes and fixture replacements. If an edge begins lifting six months later, the log can show whether the fan stopped working, a new cleaner was introduced or water exposure increased. That context is more useful than assuming the adhesive simply reached the end of its life.
When a local repair is made, record whether the wall underneath was dry and sound and whether the replacement came from the same batch. A slightly different print or gloss level can make a repair visible under vanity lights. Photograph the completed repair so future changes can be compared against a clear baseline.
This kind of record also supports a rental handover. It shows what was installed, how it was maintained and what restoration may be needed, without promising a particular deposit outcome.
Plan ventilation and drying as part of normal bathroom use
A decorative wall finish cannot compensate for a bathroom that routinely stays wet. Observe how long mirrors, windows and wall surfaces remain visibly damp after normal use. Check whether the exhaust fan operates, whether its grille is obstructed and whether air can enter the room as designed. Persistent condensation deserves investigation independent of the tile project.
Ventilation guidance and local requirements can differ by building and jurisdiction, so do not use one fan-size number from a blog as a universal rule. If moisture remains despite normal fan use, ask whether the ducting, fan performance or another source should be assessed. The goal is to manage the room conditions the wall finish will actually experience, not to prove that a particular fan makes an otherwise excluded product suitable.
Include drying access in the layout. Avoid covering a recurring stain, blocking a service panel or creating a detail that traps water at the bottom edge. After installation, keep using the ventilation and cleaning practices appropriate to the room and note any change in condensation patterns.
Make sample decisions before opening every pack
Open only as much material as needed to compare approved samples and pattern variation, subject to the seller's return and packaging rules. Check color, relief, print repeat and edge construction against the room before cutting the full batch. If the supplied material differs materially from the approved sample, stop and resolve it while return options are still available.
For marble, stone or handmade-look prints, inspect several pieces together. The wall may look more convincing when repeats are separated. For uniform subway designs, check grout-line consistency and how the joints align. This planning improves appearance without inventing a durability conclusion from a visual sample.
Vanity-wall scenario
A wall behind or beside a vanity usually sees occasional splashes rather than direct shower exposure. Verify the exact product’s bathroom/splash guidance, keep outlets and medicine-cabinet fasteners serviceable, and plan exposed edges around mirrors and countertop returns.
If water routinely runs down the wall because of a leaking faucet or poor sink design, fix that condition first. A decorative finish should not be used as the primary water-management layer.
Tub-adjacent scenario
A wall outside the direct spray zone can still receive humidity and occasional splash. Do not assume that because the tile survives a vanity wall it belongs on the tub surround. Check the exact placement guidance and the complete wall assembly.
If the location receives direct or repeated water exposure, use a purpose-designed wet-area system. Decorative water resistance is not a substitute for waterproof construction.
Rental bathroom scenario
Permission and removal risk can matter as much as design. Check the lease, photograph the starting wall and avoid preparation that permanently changes the coating unless the landlord permits it.
When the product supports a hidden-area test, use one to identify immediate wall incompatibility. A short test cannot guarantee the wall will respond identically after a long tenancy, so allow for possible touch-up or repair.
Maintenance handover
Record the approved cleaner, product handle, removal instructions, spare-material location and any room-specific limits. This is especially useful in shared bathrooms or rentals where the person cleaning the wall later may not be the person who installed it.
Inspect seams, exposed edges and penetrations during routine cleaning. Early local repair is easier than allowing lifting, moisture or impact damage to spread.
Plan local repair before installing the last piece
Save several matching pieces when practical. A future mirror, faucet, outlet or cabinet change can damage one local section while the rest of the wall remains serviceable.
When a piece fails, inspect the wall beneath it before replacement. Moisture, weak paint, contamination and impact require different remedies; replacing the tile without fixing the cause can repeat the failure.
Final bathroom handover check
Before closing the project, confirm that mirrors, outlet covers, cabinet hardware and fixtures reinstall correctly, the product remains outside unsupported direct-wet zones, exposed edges are finished according to the system and no service point has been buried behind decorative material.
Take final photographs under normal bathroom lighting and store them with the product and care information. If a later repair or moisture issue appears, those records provide a clear baseline for what the wall looked like when the project was completed.
Frequently Asked Questions
Are peel and stick tiles waterproof enough for bathrooms and showers?
Do not generalize from a water-resistant or waterproof-rated face. Use the exact product and complete wall system for the moisture zone. A vanity splash wall is different from the inside of a shower or tub.
Can peel and stick tiles be used on floors?
Use a product specifically rated for the floor or wall location you are covering. Wall-tile guidance does not establish floor traffic, wet-area or substrate suitability; follow the exact product and complete assembly requirements.
How should I plan removal from a painted wall or existing surface?
Follow the exact product’s removal instructions and stop if the wall coating or substrate begins to fail. Removal results vary with paint, substrate, adhesive, service time and method, so use the documented procedure for the product rather than a universal warming or peel technique.
What surfaces can I apply peel and stick tiles to?
Peel and stick tiles perform best on smooth, clean, and dry surfaces such as existing ceramic tile, painted drywall, laminate, and some sealed surfaces. Avoid textured, porous, or uneven substrates. If grout lines are deep, use a leveling compound or underlayment for a flatter finish.
Will peel and stick tiles adhere over existing ceramic tile?
Existing ceramic can be a candidate only when it is sound, compatible and sufficiently flat for the new product. Inspect loose tiles, grout depth, silicone, contamination and moisture first; use only preparation materials the selected system permits.
With these insights, you’re ready to embark on your bathroom transformation journey. If you have more questions or need additional tips, feel free to explore our comprehensive comprehensive peel and stick tile review and guides.
Sources and scope
- US EPA: A Brief Guide to Mold, Moisture and Your Home — Moisture control and prompt drying guidance; not a tile approval or hidden-wall diagnosis.
- Smart Tiles official FAQ — Manufacturer-specific examples for its products only; not Stickwoll specifications.
- Schluter: Pipe and Mixing-Valve Waterproofing Seals — Shows that pipe penetrations belong to a complete waterproofing system; not approval of decorative self-adhesive tile in showers.
Also record any special cleaner, edge detail or fixture-clearance note that future maintenance staff should know.


Leave a comment
This site is protected by hCaptcha and the hCaptcha Privacy Policy and Terms of Service apply.