


Du liebst deine Wohnung – die Lage, das Licht, die Gemeinschaft. Aber dieser altmodische Küchenrückwand-Bereich? Eher nicht. Du träumst von einer stilvollen, modernen Küche, doch der Gedanke an deinen Vermieter, strenge Mietvertragsregeln und den Verlust deiner Kaution hält deine Gestaltungspläne zurück. Du fühlst dich festgefahren und kannst keine persönlichen Akzente setzen, die einen Raum wirklich wie Zuhause wirken lassen.
Das ist das klassische Dilemma von Mietern. Du möchtest deinen Raum aufwerten, ohne dauerhafte Änderungen vorzunehmen, die dich Geld kosten könnten. Die gute Nachricht: Du musst dich nicht mit einer Küche zufriedengeben, die dir nicht gefällt. Es gibt eine stilvolle, bezahlbare und vollständig reversible Lösung, die von Vermietern akzeptiert wird.
Dieser Ratgeber ist dein Schlüssel, um das Designpotenzial deiner Mietwohnung mit peel and stick backsplash zu entfalten. Wir zeigen dir die besten Optionen, erklären die damage-free installation, teilen Expertentipps zur Entfernung und inspirieren dich mit echten Erfolgsgeschichten von Mietern. Mach dich bereit, deine Küche stressfrei zu verwandeln.

Ist eine Peel & Stick Backsplash die richtige Wahl für deine Mietwohnung?
Beantworte diese Fragen, um herauszufinden, ob das das perfekte DIY-Projekt für dich ist.
Warum Mieter backsplash-Optionen brauchen, die mietfreundlich sind
Hast du manchmal das Gefühl, dein Mietvertrag hält den Stil deines Zuhauses quasi als Geisel? Dieser Abschnitt erklärt, warum temporäre Deko-Lösungen nicht nur ein Wunsch, sondern eine Notwendigkeit für moderne Mieter sind, die sich einen schönen, persönlich gestalteten Raum wünschen.
In einer Mietwohnung zu leben bedeutet oft, sich durch ein Regelwerk zu navigieren. Die meisten Mietverträge – laut Daten aus der Mietbranche über 80% – verbieten ausdrücklich dauerhafte Veränderungen. Das heißt: kein Streichen, kein Bohren und schon gar kein traditionelles Fliesenlegen. Für designbewusste Mieter können sich diese Einschränkungen extrem einengend anfühlen und dich dazu zwingen, mit den veralteten Entscheidungen eines anderen zu leben.
Das führt direkt zu dem, was viele Mieter als „Kautionsverlust-Angst“ bezeichnen. Jedes kleine Nagelloch oder jede Schramme wirkt wie ein möglicher Abzug von deiner Kaution. Die Angst, versehentlich etwas zu beschädigen, hält viele davon ab, selbst kleine optische Verbesserungen überhaupt in Angriff zu nehmen. So entsteht ein frustrierender Kreislauf: Du zahlst dafür, in einem Raum zu leben, der sich nie wirklich wie deiner anfühlt.
Doch der Wunsch nach einem individuell gestalteten Zuhause ist stärker denn je. Mieter sind längst keine passiven Bewohner mehr; sie sind aktive Gestalter, die nach Kautionssicheren Wohnraumverbesserungen suchen. Diese wachsende Nachfrage hat die Innovation im Bereich Wohnaccessoires beflügelt und zu cleveren Lösungen geführt, die Stil ohne Dauerhaftigkeit bieten. Eine temporäre backsplash für Mieter ist ein perfektes Beispiel für diesen Wandel.
Stell dir Sarah vor, eine Grafikdesignerin, die eine charmante, aber altmodische Wohnung mietet. Ihre Küche hatte solide Schränke, wurde aber von einer rissigen, beigefarbenen Fliesenrückwand aus den 1980ern heruntergezogen. Sie wollte einen frischen, modernen Look, durfte aber nicht fliesen. Sie fühlte sich festgefahren, bis sie eine hochwertige, abnehmbare peel and stick backsplash entdeckte, die die Stimmung ihrer Küche komplett veränderte.
Was ist eine Peel and Stick Backsplash?
Fragst du dich, ob diese trendigen Klebefliesen wirklich so gut sind, wie sie aussehen? Hier erklären wir, was eine peel and stick backsplash ist, und zeigen dir, warum sie die ultimative Geheimwaffe für mietfreundliche Küchen-Updates ist.
Eine peel and stick backsplash ist genau das, wonach es klingt: eine dekorative Fliesenplatte mit selbstklebender Rückseite. Stell sie dir wie einen strapazierfähigen, designstarken Aufkleber vor, der speziell für deine Wände gemacht ist. Diese Fliesen bestehen typischerweise aus Vinyl- oder Gel-Verbundmaterialien und können dadurch das Aussehen von Keramik-, Stein- und sogar Glasfliesen realistisch nachahmen – ganz ohne Fugenmasse, Mörtel oder Schmutz.
Die Magie steckt in der Technik. Der Kleber ist stark genug, um jahrelang zu halten und Hitze sowie Feuchtigkeit beim Kochen zu widerstehen. Gleichzeitig ist er so konzipiert, dass er eine removable peel and stick backsplash bleibt – das heißt, er lässt sich abziehen, ohne Farbe mitzunehmen oder klebrige, schwer zu entfernende Rückstände zu hinterlassen. Genau diese Eigenschaft macht ihn so ideal für Mietwohnungen.
Für Mieter löst dieses Produkt das Kernproblem: einen individuellen Look zu wollen, ohne dauerhafte Konsequenzen. Du bekommst die optische Wirkung einer kompletten Küchenrenovierung für einen Bruchteil der Kosten und des Aufwands. Noch wichtiger: Du kannst beruhigt sein, weil du die Wand vor deinem Auszug wieder in den Originalzustand zurückversetzen kannst und so deine Kaution sicher bleibt. Wenn du zwischen temporären und dauerhaften Lösungen abwägst, ist es wichtig, die Vor- und Nachteile zu kennen. Für einen umfassenden Vergleich lies unseren vollständigen Leitfaden zu Fliesen für Küchenrückwände, der alles von den Kosten bis zum Installationsaufwand aufschlüsselt.
Eine aktuelle Umfrage ergab, dass fast 65% der Mieter, die abnehmbare Wandfliesen verwendet haben, von einer deutlichen Steigerung ihrer Zufriedenheit mit ihrem Zuhause berichteten. Die Veränderung ist oft dramatisch. Eine langweilige, vergessene Küchenwand kann an einem einzigen Nachmittag zu einem beeindruckenden Blickfang werden und beweist, dass wirkungsvolle Wohnungs-Updates nicht dauerhaft sein müssen.
Die besten Stile und Materialien für Mieter
Fühlst du dich von all den Möglichkeiten überfordert? In diesem Abschnitt werden die beliebtesten und praktischsten Stile vorgestellt, damit du den perfekten peel and stick backsplash findest, der zu deinem persönlichen Geschmack und deiner Mietküche passt.
Das Schöne an peel and stick backsplash ist die enorme Auswahl. Du bist nicht auf ein paar grundlegende Designs beschränkt. Die moderne Herstellung hat einen riesigen Katalog an Stilen hervorgebracht, die zu jeder Ästhetik passen – vom klassischen Landhausstil bis hin zu elegantem Minimalismus. Die richtige Wahl zu treffen, ist der erste Schritt zu deinem DIY-Makeover deiner Mietküche.

U-Bahn-Fliesen-Look
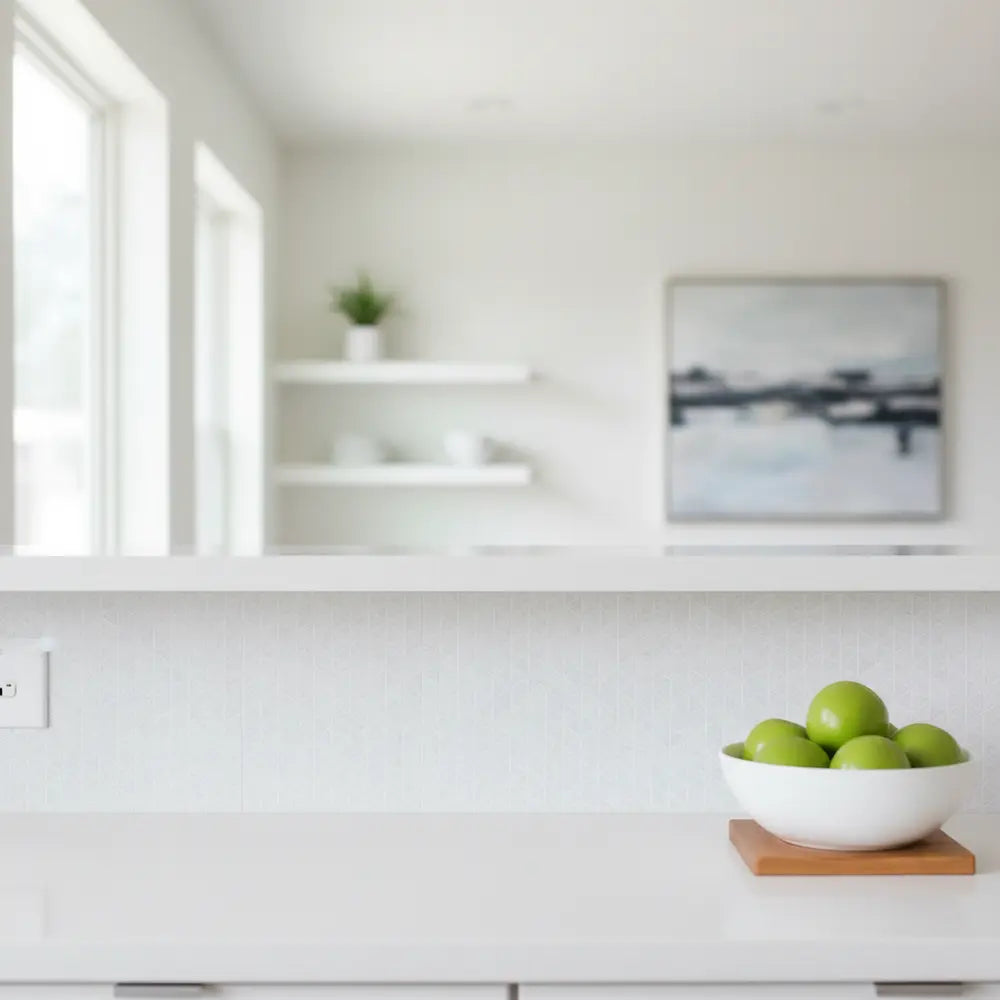
Das ist aus gutem Grund ein zeitloser Klassiker. Die klaren, gleichmäßigen Linien von U-Bahn-Fliesen passen zu nahezu jedem Einrichtungsstil. Für Mieter ist das eine sichere Wahl, die einen Hauch von Raffinesse verleiht. Weiße U-Bahn-Fliesen können eine kleine, dunkle Küche heller und offener wirken lassen. Für einen mutigeren Look solltest du Varianten in Schwarz, Grau oder sogar einem trendigen Grün in Betracht ziehen.
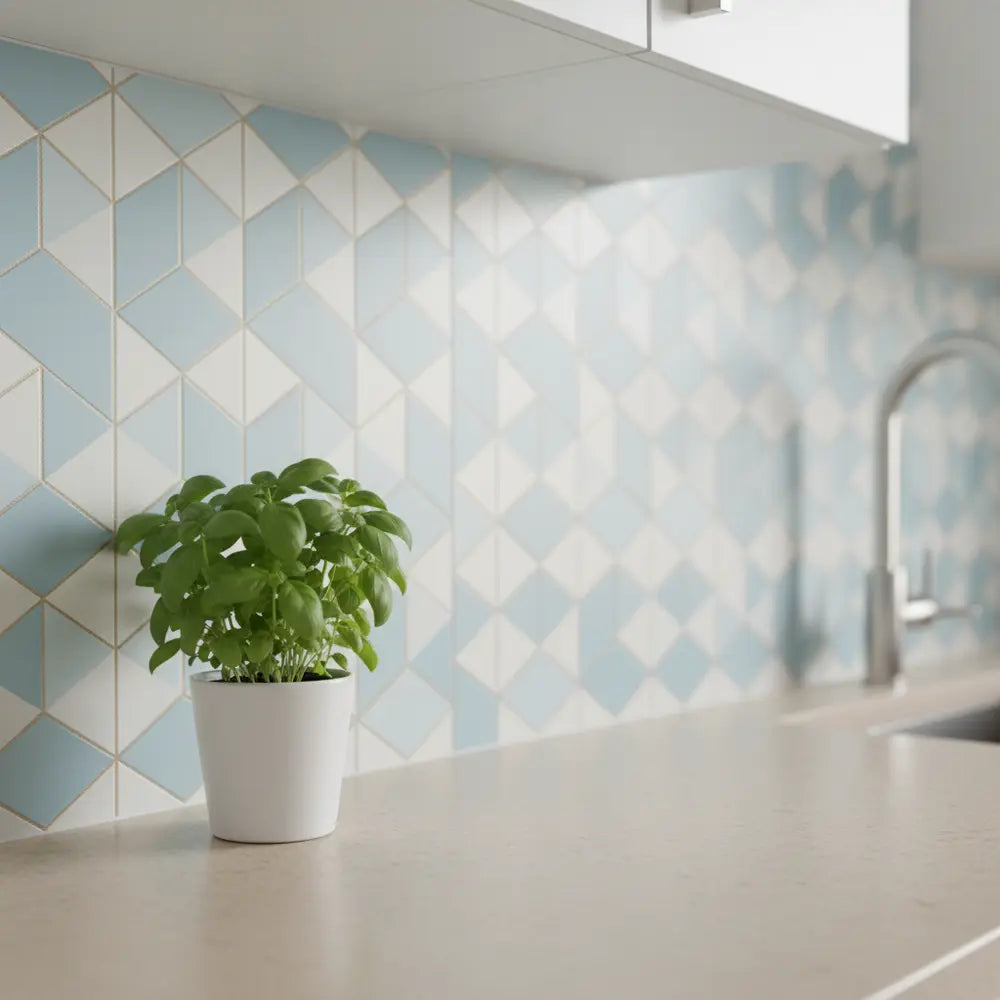
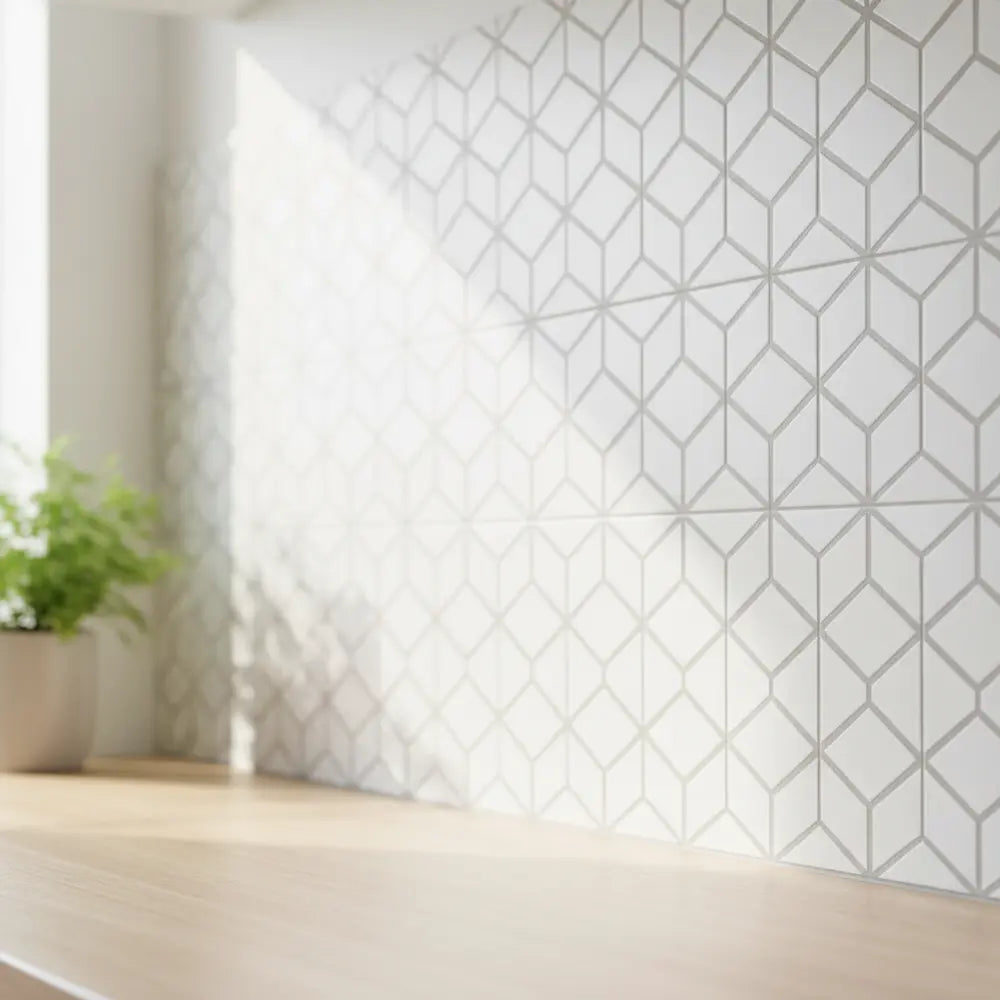
Mosaik- und gemusterte Optionen
Wenn du mehr Persönlichkeit einbringen möchtest, sind Mosaik- und gemusterte Fliesen genau das Richtige. Diese Designs reichen von aufwendig marokkanisch inspirierten Mustern bis hin zu modernen geometrischen Formen. Sie eignen sich perfekt, um hinter Herd oder Spüle eine Akzentwand zu gestalten. Ein verbreiteter Irrtum ist, dass Muster schwer auszurichten sind, doch die meisten hochwertigen Matten sind so konzipiert, dass sie nahtlos ineinandergreifen. Wenn du erfährst, wie du sie für mehr als nur als Spritzschutz einsetzen kannst, eröffnen sich neue Möglichkeiten; entdecke mit unserem Leitfaden zu Moderne Peel-and-Stick-Fliesen: Akzentwände & Muster__, wie du beeindruckende Akzentwände gestaltest und einzigartige Designs integrierst.
Für einen tieferen Einblick in das, was gerade besonders beliebt ist, ist unser Artikel über die Top Peel-and-Stick-Fliesenmuster für 2025 die beste Anlaufstelle. Er bietet einen fantastischen Überblick über Designs, die deinen Raum aufwerten können.
Welcher Spritzschutz-Stil passt zu deiner Wohnung?
Matt vs. glänzende Oberflächen
Die gewählte Oberfläche hat einen erheblichen Einfluss auf den endgültigen Look.
- Glänzende Oberflächen: Sie eignen sich hervorragend, um Licht zu reflektieren, wodurch eine kleine Küche größer wirken kann. Außerdem lassen sie sich unglaublich leicht abwischen – ein großer Vorteil im Bereich des Spritzschutzes. Sie imitieren das Aussehen von glasierter Keramik oder Glas.
- Matte Oberflächen: Eine matte Oberfläche sorgt für einen dezenten, modernen und edlen Look. Sie imitiert das Aussehen von Naturstein oder unglasierten Fliesen und kaschiert Fingerabdrücke sowie Wasserflecken besonders gut. Diese Oberfläche ist perfekt für moderne oder industriell inspirierte Küchen.
Berücksichtige bei der Auswahl deine vorhandene Einrichtung. Hast du glänzende, polierte Arbeitsplatten oder gedämpftes, natürliches Holz? Wenn du die Oberfläche darauf abstimmst, entsteht ein stimmigerer und professioneller gestalteter Look. Für jede Menge visuelle Inspiration und kreative Kombinationen stöbere in unserer Galerie mit Peel and Stick Spritzschutz Küchenideen 2025.
Installationstipps für eine beschädigungsfreie Anbringung
Bereit zur Montage, aber nervös, ob alles klappt? Folgen Sie diesen einfachen, bewährten Schritten, um eine glatte, blasenfreie Anbringung zu erzielen, die professionell aussieht und vor allem Ihre Wände schützt.
Das Geheimnis eines erfolgreichen peel and stick backsplash-Projekts liegt in der Vorbereitung und ein wenig Geduld. Wenn man den Prozess überstürzt, entstehen am häufigsten Fehler wie Blasen und eine ungenaue Ausrichtung. Wenn Sie jedoch ein paar wichtige Schritte befolgen, erzielen Sie ein makelloses Ergebnis, das aussieht, als hätte es ein Profi gemacht.

Sorgfältige Oberflächenvorbereitung
Das ist der wichtigste Schritt. Der Kleber braucht eine saubere, glatte Oberfläche, um richtig zu haften und sich später sauber wieder entfernen zu lassen.
- Gründlich reinigen: Verwenden Sie einen entfettenden Reiniger, um die gesamte Wandfläche abzuwischen. Küchenwände sammeln überraschend viel Fett und Schmutz an, was verhindern kann, dass die Fliesen richtig haften.
- Für eine glatte Oberfläche sorgen: Die Oberfläche muss eben sein. Bei strukturierten Wänden haften die Fliesen möglicherweise nicht gut. Manche Mieter bringen eine dünne, entfernbare Tapete als Basis auf, am besten eignen sich die Fliesen jedoch für glatte, gestrichene Trockenbauwände.
- Vollständig trocknen lassen: Warten Sie nach der Reinigung mindestens 24 Stunden, bis die Wand vollständig trocken ist. Das Anbringen von Fliesen auf einer feuchten Wand ist zum Scheitern verurteilt, da Feuchtigkeit den Kleber beeinträchtigt.
Paneele gleichmäßig anbringen
Nehmen Sie sich hierfür Zeit. Es ist besser, langsam vorzugehen und es richtig zu machen, als zu hetzen und alles wieder abziehen und von vorn anfangen zu müssen.
- Mit einer geraden Linie beginnen: Verlassen Sie sich nicht darauf, dass Ihre Arbeitsplatte oder Ihre Schränke perfekt gerade sind. Verwenden Sie eine Wasserwaage und einen Bleistift, um eine schwache Orientierungslinie für die erste Fliesenreihe zu ziehen.
- Abziehen und anbringen, nicht alles auf einmal freilegen: Ziehen Sie nur die obersten paar Zentimeter des Trägerpapiers ab. Richten Sie die Oberkante der Fliese an Ihrer Orientierungslinie aus und drücken Sie sie dann an die Wand.
- Beim Anbringen glattstreichen: Während Sie den restlichen Träger langsam abziehen, drücken Sie die Fliese mit einem Kunststoffglätter (oder einer Kreditkarte) an die Wand. Arbeiten Sie von der Mitte nach außen, um alle Luftblasen herauszudrücken.
Ein gutes Fallbeispiel ist Mark, ein Mieter, der seine gesamte Küchenrückwand an nur drei Stunden an einem Samstagnachmittag fertiggestellt hat. Sein Profi-Tipp? „Überlappen Sie die ‚Fugen‘-Linien auf den Fliesenbahnen um etwa 1/8 inch. So verschwinden die Übergänge vollständig und es sieht aus wie echte Fliesen.“
Eine vollständige Schritt-für-Schritt-Anleitung finden Sie in unserem Artikel So installieren Sie Peel and Stick Tiles & die besten Designs 2025. Dort wird jeder Schritt mit hilfreichen Bildern erklärt.
So entfernen Sie es ohne Beschädigung
Sorgen Sie sich vor dem Auszug und um Ihre Kaution? In diesem Abschnitt erfahren Sie die sichere, vermieterfreundliche Methode, um Ihre temporäre Rückwand zu entfernen, sodass Ihre Wände genau so aussehen wie zuvor.
Das Versprechen einer abnehmbaren peel and stick backsplash ist für Mieter das größte Verkaufsargument, aber die Sorge, dass sie sich nicht sauber ablösen lässt, ist real. Der Schlüssel zu einer beschädigungsfreien Entfernung ist die Technik, nicht die Kraft. Mit der richtigen Vorgehensweise können Sie Ihr stilvolles Upgrade abziehen und keine Spuren hinterlassen, sodass Sie Ihre volle Kaution sichern.

Die sanfte Abziehtechnik
Geduld ist hier Ihr bester Freund. Greifen Sie nicht einfach eine Ecke und reißen Sie daran.
- Mit Wärme beginnen: Das ist der ultimative renter hack. Verwenden Sie einen normalen Haartrockner auf niedriger bis mittlerer Hitzestufe. Erwärmen Sie die Oberfläche der Fliese, die Sie entfernen möchten, vorsichtig für etwa 15–20 Sekunden. Dadurch wird der Kleber weicher, flexibler und lässt sich deutlich leichter lösen.
- Eine Ecke finden: Heben Sie mit einem Spachtel oder Ihrem Fingernagel vorsichtig eine Ecke der Fliese an.
- Langsam und gleichmäßig abziehen: Sobald Sie Halt haben, ziehen Sie die Fliese in einem steilen Winkel (nahe 180 Grad) nach unten und von der Wand weg. Nicht gerade herausziehen. Wenn Sie parallel zur Wand ziehen, wird die Belastung der darunterliegenden Farbe minimiert. Arbeiten Sie langsam und erwärmen Sie bei Bedarf weiter, wenn Sie Widerstand spüren.
Umgang mit Wandrückständen
In den meisten Fällen hinterlassen hochwertige peel and stick Fliesen, die für Mieter entwickelt wurden, kaum oder gar keine Rückstände. Sollten Sie dennoch eine leicht klebrige Stelle finden, kein Grund zur Panik. Eine einfache Lösung aus warmem Seifenwasser auf einem Schwamm reicht normalerweise aus, um sie abzuwischen. Für hartnäckigere Stellen hilft ein wenig Goo-Remover-Produkt auf einem Tuch, aber testen Sie es immer zuerst an einer versteckten Stelle.
Eine Mieterin erzählte von der Besichtigung durch ihren Vermieter. Zwei Jahre lang hatte sie für eine temporäre Backsplash-Lösung für Mieter ein auffälliges blaues Mosaik verwendet. Bevor sie auszog, entfernte sie es in 30 Minuten mit einem Föhn. Ihr Vermieter war so beeindruckt von dem makellosen Zustand der Wand darunter, dass er nach den Produktdetails fragte, um sie künftigen Mietern zu empfehlen. Das ist das ideale Ergebnis: ein schönes Zuhause für Sie und eine geschützte Immobilie für Ihren Vermieter.
Wenn Sie alles wissen, was Sie für eine saubere Entfernung brauchen, ist das der beste Weg, Ihre Kaution zu schützen. Eine ausführliche Anleitung zu jedem denkbaren Szenario finden Sie in unserem Artikel Peel-and-Stick-Fliesen für Mieter sicher verwandeln und entfernen, der Expertentipps liefert, damit der gesamte Prozess völlig stressfrei bleibt.
Erfolgsgeschichten von Mietern
Sie möchten es sehen, um es zu glauben? Lassen Sie sich von echten Mietern inspirieren, die ihre austauschbaren Standardwohnungen mit peel and stick backsplashes in persönliche Zuhause verwandelt haben – und dabei sogar die Zustimmung ihrer Vermieter erhalten haben.
Die wahre Stärke von mieterfreundlichen Küchen-Updates lässt sich am besten durch die Geschichten derjenigen erzählen, die es selbst umgesetzt haben. Das sind keine Profidesigner, sondern ganz normale Mieter, die sich einen schöneren Raum wünschten. Ihre Vorher-Nachher-Fotos zeigen beeindruckende Verwandlungen und beweisen, dass Sie kein Renovierungsbudget brauchen, um eine Küche zu gestalten, die Sie lieben.
Eine unserer Lieblingsgeschichten stammt von Maya (@MayaMakesItHome auf Instagram). Sie lebte in einer ganz normalen Neubauwohnung mit einer schlichten weißen Wand hinter ihrem Herd. Es war langweilig und ständig voller Spritzer. Mit einem grünen peel and stick backsplash im Fischgrätenmuster schuf sie in nur einem Abend einen lebendigen, stilvollen Blickfang.
„Es hat die Atmosphäre meiner Küche komplett verändert“, sagt Maya. „Aus einer sterilen, langweiligen Box wurde ein Raum mit Persönlichkeit. Meine Freunde konnten nicht glauben, dass es keine echten Fliesen sind.“ Als es Zeit zum Auszug war, ließen sich die Fliesen mit etwas Wärme rückstandsfrei entfernen und hinterließen die Wand in perfektem Zustand. Ihre Geschichte zeigt, wie sehr temporäre Dekoration den Alltag beeinflussen kann.
Eine weitere Erfolgsgeschichte handelt von einem Paar, das sich zunächst nicht einmal traute, den Vermieter nach Modernisierungen zu fragen. Nachdem sie einen klassischen weißen U-Bahn-Fliesen-Look angebracht hatten, schickten sie ihrem Hausverwalter ein Foto. Die Reaktion des Vermieters? Er war so begeistert, dass er anbot, ihnen die Kosten zu erstatten, weil es die Attraktivität der Wohnung steigerte. Das zeigt, dass eine geschmackvolle damage-free backsplash für beide Seiten ein Gewinn sein kann.
Produktempfehlungen: Wo Sie kaufen können
Bereit, mit Ihrer eigenen Verwandlung loszulegen? Wir haben eine Auswahl der besten Orte zusammengestellt, um hochwertige, mietersichere Rückwandlösungen zu kaufen, und stellen topbewertete Produkte für jeden Stil und jedes Budget vor.
Die richtige abnehmbare peel and stick backsplash zu finden, ist entscheidend. Qualität zählt – nicht nur für die Optik, sondern auch für die einfache Montage und das saubere Entfernen. Günstigere No-Name-Produkte sparen vielleicht anfangs ein paar Euro, können aber später wegen schwacher Klebekraft oder – schlimmer noch – Rückständen, die Ihre Wände beschädigen, für Ärger sorgen. Hier finden Sie zuverlässige Optionen.
Top-Online-Händler
- Stickwoll: Als Spezialist für peel-and-stick-Lösungen bieten wir eine sorgfältig zusammengestellte Auswahl hochwertiger, stilvoller und streng getesteter mietersicherer Fliesen. Sie finden exklusive Designs und fachkundige Beratung, die auf Ihre Bedürfnisse zugeschnitten ist.
- Amazon: Die riesige Auswahl ist ein großer Vorteil, aber lesen Sie die Bewertungen genau. Achten Sie auf Produkte mit Tausenden positiver Bewertungen, in denen ausdrücklich ein einfaches, rückstandsloses Entfernen erwähnt wird.
- Wayfair & Home Depot: Diese Händler bieten eine gute Mischung aus erschwinglichen und Premium-Marken. In den Bewertungen finden Sie oft hilfreiche Kundenfotos, die Ihnen einen realistischen Eindruck vom Produkt vermitteln können.
Bestseller-Highlights
Hier sind einige topbewertete Produkte, die für ihre Qualität und ihren Stil bekannt sind und sich perfekt für Mieter eignen.
-
Der Klassiker: Stickwoll Subway Tile in glänzendem Weiß
Vorteile: Das ist eine absolut sichere Wahl. Die 3D-Gel-ähnliche Oberfläche verleiht ihm ein erstaunlich realistisches Aussehen. Das ineinandergreifende Design macht Fugen unsichtbar, und der Kleber ist für starken Halt und sauberes Entfernen ausgelegt.
Nachteile: Als Klassiker ist er sehr beliebt, wodurch er sich vielleicht nicht so einzigartig anfühlt wie eine gemusterte Variante. -
Der Blickfang: Grünes Kitkat-Mosaik
Vorteile: Diese Fliese bringt einen Hauch von edler Farbe und eine trendige, moderne Textur in jede Küche. Sie ist eine hervorragende Wahl für eine Akzentwand. Sehen Sie in unserer Kollektion von Mieterfreundliche grüne Peel & Stick Backsplash-Ideen, wie diese Farbe einen Raum vollständig neu beleben kann.
Nachteile: Das filigrane Muster erfordert beim Ausrichten etwas mehr Aufmerksamkeit fürs Detail. -
Der Budget-Geheimtipp: Art3d Mosaikfliese in Marmoroptik aus Vinyl
Vorteile: Für alle, die einen hochwertigen Marmor-Look für unter 100 $ erzielen möchten, ist dies eine fantastische Option. Das Vinyl ist langlebig, wasserfest und leicht zuzuschneiden. Es ist eine der besten Möglichkeiten, mit knappem Budget einen luxuriösen Look zu erzielen.
Nachteile: Als dünnere Vinylfliese hat sie möglicherweise nicht dieselbe 3D-Tiefe wie hochwertigere Gel-Fliesen.
Wenn Sie bereit sind, sich umzusehen, ist unser Leitfaden zu Mieterfreundliche Backsplash-Ideen, die Wohnungen verwandeln der perfekte Ausgangspunkt für Ihre Shopping-Reise.
Shoppen Sie noch heute unsere Kollektion an rietersicheren Backsplash-Optionen.Letzte Tipps für Mieter
Fühlen Sie sich sicher und bereit? Hier ist eine letzte Checkliste mit Profi-Tipps, damit Ihr Backsplash-Projekt von der Installation bis zum Auszug ein voller Erfolg wird.
Sie haben das Wissen und die Inspiration. Jetzt sorgen noch ein paar abschließende Ratschläge für einen reibungslosen Ablauf und geben Ihnen vollständige Sicherheit. Das sind die kleinen Dinge, die bei jeder DIY renter kitchen makeover einen großen Unterschied machen.
- Testen Sie zuerst einen kleinen Abschnitt: Bevor Sie die gesamte Wand bekleben, kaufen Sie ein zusätzliches Blatt oder verwenden Sie ein Reststück, um es an einer unauffälligen Stelle zu testen (zum Beispiel hinter dem Kühlschrank). Lassen Sie es eine Woche lang angebracht und entfernen Sie es dann. So stellen Sie sicher, dass der Kleber mit Ihrer speziellen Wandfarbe funktioniert und sich sauber entfernen lässt.
- Bewahren Sie die Verpackung und eine Ersatzfliese auf: Behalten Sie den Karton oder die Anleitung, die mit Ihren Fliesen geliefert wurde. Dort finden sich oft spezielle Hinweise zur Entfernung vom Hersteller. Auch eine zusätzliche Fliese aufzubewahren ist klug, falls ein Bereich beschädigt wird und schnell ersetzt werden muss.
- Dokumentieren Sie alles für Ihren Vermieter: Das ist ein entscheidender Schritt, um Ihre Kaution zu schützen. Machen Sie „Vorher“-Fotos von der Wand, bevor Sie beginnen. Machen Sie dann „Nachher“-Fotos, wenn Sie fertig sind. Wenn Sie ausziehen und den Backsplash entfernen, machen Sie noch einmal Fotos von der sauberen, ursprünglichen Wand. So entsteht ein klarer Nachweis, dass keine Schäden entstanden sind.
Wenn Sie diese Richtlinien befolgen, installieren Sie nicht einfach nur einen Backsplash; Sie tätigen eine kluge, reversible Investition in Ihr Wohlbefinden zu Hause. Sie können endlich aufhören, auf diese hässliche Küchenwand zu starren, und stattdessen einen Raum genießen, der Ihren Stil widerspiegelt.
Ihre Mietwohnung muss kein vorübergehender Warteraum sein; sie kann ein Zuhause sein, das Sie lieben. Ein peel and stick backsplash ist eine der einfachsten und wirkungsvollsten Möglichkeiten, genau das zu erreichen. Es ist ein stilvolles, vom Vermieter genehmigtes Upgrade, das Ihnen die Kontrolle über Ihre Einrichtung gibt.
Vom klassischen Look der Subway Tiles bis hin zu auffälligen, modernen Mustern haben Sie eine ganze Welt an damage-free backsplash-Optionen direkt zur Hand. Sie haben die Erfolgsgeschichten gesehen und die einfachen Techniken für ein perfektes Ergebnis kennengelernt. Jetzt sind Sie an der Reihe, eine Küche zu schaffen, die Ihnen jeden einzelnen Tag Freude bereitet.
Lust auf mehr renter-friendly Deko-Ideen? Abonnieren Sie unseren Newsletter für die neuesten Tipps und Produktneuheiten. Und wenn Sie Ihr eigenes Makeover abgeschlossen haben, teilen Sie es unbedingt mit uns – wir würden Ihre Verwandlung sehr gerne sehen!
Häufig gestellte Fragen
1. Beschädigt peel and stick backsplash meine Wohnungswände wirklich nicht?
Hochwertige, auf Mieter ausgerichtete Peel-and-Stick-Fliesen sind speziell für den vorübergehenden Einsatz entwickelt. Wenn sie auf einer sauberen, glatten und richtig ausgehärteten gestrichenen Wand (nicht auf frischer Farbe) angebracht und korrekt mit geringer Wärme entfernt werden, sollten sie keine Schäden verursachen oder Rückstände hinterlassen.
2. Wie lange hält ein temporary backsplash?
Ein hochwertiger peel and stick backsplash kann jahrelang halten. Die Materialien sind resistent gegen Hitze, Feuchtigkeit und Spritzer. Viele Mieter lassen ihn während der gesamten Mietdauer dran, ohne dass er sich löst oder verfärbt.
3. Kann ich einen peel and stick backsplash über vorhandenen Fliesen anbringen?
Ja, in vielen Fällen ist das möglich. Solange die vorhandenen Fliesen sauber, eben und mit nur minimalen Fugen sind, haften Peel-and-Stick-Fliesen gut. Das ist eine großartige Möglichkeit, alte, veraltete Fliesen zu verdecken, ohne sie entfernen zu müssen.
4. Wie reinige ich meinen neuen peel and stick backsplash?
Die Reinigung ist einfach. Verwenden Sie ein weiches Tuch oder einen Schwamm mit milder Seife und Wasser. Vermeiden Sie scheuernde Schwämme oder aggressive chemische Reiniger, da sie die Oberfläche zerkratzen oder die Beschichtung der Fliesen beschädigen können.
5. Ist peel and stick backsplash eine gute Investition für eine kurzfristige Mietwohnung?
Absolut. Es ist einer der kosteneffizientesten renter hacks, um eine große Wirkung zu erzielen. Mit einem сравнativ kleinen Einsatz von Geld und Zeit können Sie Ihre tägliche Wohnumgebung deutlich verbessern – eine lohnende Aufwertung, selbst wenn Sie nur ein oder zwei Jahre bleiben möchten.

Kommentar hinterlassen
Diese Website ist durch hCaptcha geschützt und es gelten die allgemeinen Geschäftsbedingungen und Datenschutzbestimmungen von hCaptcha.