


Der ultimative Überlebensleitfaden für RV-Klebstoffe
Stellen Sie sich vor, Sie öffnen Ihr RV nach einem langen Winter im Lager oder kommen nach einer Fahrt quer durchs Land am Campingplatz an. Sie treten hinein und erwarten die gemütliche Renovierung, an der Sie wochenlang gearbeitet haben — nur um festzustellen, dass Ihre schöne peel and stick backsplash von der Wand hängt oder sich Ihre neue luxury vinyl plank-Bodenverlegung an den Kanten hochrollt.
Ein beklemmendes Gefühl, das jeder erfahrene RVer kennt. Aber die Realität ist: Ihr RV ist im Grunde ein rollendes Erdbeben, das Temperatur swings erlebt, die stark genug sind, um herkömmliche Wohnmaterialien zu zerstören.

Peel and stick-Materialien können Hitze, Kälte und Vibrationen im RV überstehen, wenn sie hochtemperaturgeeignete Klebstoffe, korrekt vorbereitete Oberflächen und flexible polymerbasierte Bindemittel verwenden. Entscheidend ist, geprüfte Materialien zu wählen und RV-spezifische Montageschritte einzuhalten.
In diesem Leitfaden gehen wir über allgemeine Ratschläge hinaus. Wir analysieren die Physik des Klebstoffversagens, erklären, warum Standard-„Home“-Produkte unterwegs oft versagen, und liefern ein praxisbewährtes Protokoll, damit Ihre Renovierungen halten — egal, was das Wetter bringt.
Was lässt RV peel and stick-Materialien unter extremen Bedingungen versagen?
Die meisten Menschen nehmen an, dass der Kleber einfach „ausgetrocknet“ ist, wenn eine Fliese abfällt. Aus unserer Erfahrung bei der Analyse von Materialversagen ist nicht das Alter des Klebers der eigentliche Schuldige, sondern vielmehr ein physikalisches Missverhältnis.
Die Wissenschaft der differenziellen thermischen Ausdehnung
Der Hauptfeind jedes RV-Innenraums ist der Wärmeausdehnungskoeffizient (CTE). Das ist ein technischer Begriff dafür, wie stark sich ein Material bei Temperaturänderungen in seiner Größe verändert.
In einem stationären Haus bleiben Ihre Trockenbauwand und Ihre Fliese relativ konstant bei 70°F (21°C). In einem RV können die Temperaturen jedoch von -20°F bei der Lagerung bis über 100°F in der Sommersonne schwanken.
Wenn das passiert, dehnen sich die Materialien in Ihrem RV unterschiedlich stark aus und ziehen sich unterschiedlich stark zusammen:
- ▶ Der Untergrund: Ihre RV-Wände (oft Luan-Sperrholz oder Aluminium) dehnen sich mit Rate A aus.
- ▶ Die Oberfläche: Ihre Vinyl-peel and stick-Fliese dehnt sich mit Rate B aus.
Wenn sich das Vinyl schneller ausdehnt als die Wand dahinter, entsteht eine „Scherbeanspruchung“ entlang der Klebstoffschicht. Irgendwann übersteigt die Scherkraft den Halt des Klebstoffs, und die Fliese löst sich. In der Branche wird das als „Bond-Line-Ermüdung“ bezeichnet.
Vergleich: Stellen Sie sich den Klebstoff als eine Person vor, die mit zwei anderen Personen (der Wand und der Fliese) Händchen hält. Wenn die Person links vorwärtsgeht, während die Person rechts stehen bleibt, muss die Person in der Mitte (der Klebstoff) irgendwann einen von beiden loslassen.
Wenn Sie eine Renovierung in der Nähe eines Herdes oder Heizgeräts planen, verzieht sich Standard-Vinyl. Für Bereiche, die extremen Temperaturschwankungen ausgesetzt sind, ist es entscheidend, die Materialgrenzen zu kennen. Wir empfehlen dringend, unseren Deep-Dive zu Hitzebeständige Peel and Stick-Fliesen für Küchen mit hoher Hitze zu lesen, damit Ihre Installation der Belastung standhält.
Nicht übereinstimmende Oberflächenenergie
Ein weiterer häufiger Grund für Ausfälle ist das Auftragen von hochwertigem Klebstoff auf Oberflächen mit „niedriger Oberflächenenergie“. Viele RV-Wände sind mit Vinyl-Tapete verkleidet oder mit silikonbasierten Reinigern behandelt, um Schmutz abzuweisen. Diese sind chemisch so ausgelegt, dass sie nicht haften.

Schlüsselkonzept: Dyne-Werte.
Haftung bedeutet nicht nur Klebrigkeit; es geht darum, wie gut sich ein Klebstoff „benetzt“ und verteilt. Wenn die Oberflächenenergie (gemessen in Dynes) Ihrer Wand niedriger ist als die Oberflächenspannung des Klebstoffs, perlt der Kleber ab, statt sich zu verteilen. Das führt zu einer schwachen mechanischen Verbindung, die den Belastungen unterwegs nicht standhält.
Praxisbeispiel: Das Versagen bei der Winterlagerung
Wir haben kürzlich einen RV-Besitzer in Minnesota beraten, der im Oktober hochwertigen Luxury Vinyl Plank-(LVP-)Boden verlegt hatte. Die Installation sah perfekt aus. Allerdings hatte er die „Glasübergangstemperatur“ des Klebstoffs nicht berücksichtigt.
Während einer Kältewelle von -30°F fror der Klebstoff ein und wurde spröde (glasartig). Als die Temperaturen im Frühjahr stiegen, dehnte sich der Bodenbelag schnell aus, aber der gefrorene Klebstoff war auf mikroskopischer Ebene zerbrochen. Das Ergebnis? Jede Diele hatte sich an den Ecken hochgezogen.
Empfehlung: Für Bereiche mit extremer Hitze, etwa in der Nähe von Kochfeldern, ist die Wahl des richtigen Materials schon die halbe Miete. Prüfen Sie vor dem Kauf unsere technische Übersicht in Der ultimative Leitfaden zu hitzebeständigen Peel-and-Stick-Fliesen für Küchen (Ausgabe 2025), um zu verstehen, welche Untergründe diese thermischen Schwankungen aushalten.
Wie wirken sich Temperaturschwankungen und Vibrationen auf die Haftleistung in RVs aus?
Während Temperatur für Ausdehnung sorgt, verursacht das Reisen Ermüdung. Zu verstehen, wie diese beiden Kräfte zusammenwirken, ist entscheidend für die Pflege von RV-Klebstoffen.
Vibration und zyklische Belastung
Jedes Mal, wenn Sie auf die Autobahn fahren, erlebt Ihr RV ein kleines Erdbeben. In der Technik nennt man das „zyklische Belastung“. Eine Verbindung mag stark genug sein, um eine Fliese bei einem einzelnen starken Stoß zu halten – aber was ist mit 10.000 kleinen Vibrationen auf einer 500-Meilen-Fahrt?
Standard-Bauklebstoffe sind oft starr. Wenn sie aushärten, werden sie hart wie Stein. Starre Verbindungen hassen Vibrationen. Unter ständigem Schütteln bilden starre Klebstoffe Mikrorisse. Diese Risse breiten sich aus, bis die Verbindung vollständig versagt.
Datenpunkt: Laut Prüfstandards für Haltbarkeit (wie ASTM D3163 für Klebeverbindungen) können starre Epoxidklebstoffe nach längerer Einwirkung hochfrequenter Vibration bis zu 40% ihrer Scherfestigkeit verlieren, während elastomerische (flexible) Klebstoffe nahezu 95% ihrer Integrität behalten.
Wenn es um Flexibilität geht, ist das Material selbst ebenso wichtig wie der Klebstoff. Verschiedene Kunststoffe reagieren unterschiedlich auf diese Belastung. Um zu verstehen, welches Material sich für das mobile Wohnen am besten biegen lässt, lesen Sie unseren Vergleich zu PVC Peel-and-Stick-Fliesen für Ihr Zuhause: PVC vs. Vinyl 2025.
Der „Ofen-Effekt“ und Klebstoffkriechen
Wenn Sie Ihren RV in direkter Sonneneinstrahlung parken, kann die Innentemperatur leicht 120°F (49°C) überschreiten, selbst wenn es draußen nur 80°F sind.
Bei diesen Temperaturen durchlaufen viele druckempfindliche Klebstoffe (PSAs) einen Vorgang namens „Kriechen“. Die Hitze weicht die Polymere im Kleber auf und verwandelt ihn von einem halbfesten in eine zähflüssige Masse. Dann übernimmt die Schwerkraft. Wenn Sie schwere Fliesen an einer senkrechten Wand haben, rutschen sie langsam – Millimeter für Millimeter – nach unten, bis sie sich lösen.

Tabelle: Leistung von Klebstoffen unter Belastung
Hier erfahren Sie, wie verschiedene in RVs häufig verwendete Klebstofftypen auf diese Belastungen reagieren:
| Klebstoffart | Vibrationsbeständigkeit | Hitzebeständigkeit | Kältetoleranz | Bester Anwendungsfall |
|---|---|---|---|---|
| Standard-Acryl-PSA | Mäßig | Mäßig (bis zu 60 °C) | Gut | Allgemeine Dekoration, leichte Zierleisten. |
| Hochtemperatur-Acryl | Hoch | Hoch (bis zu 200°F+) | Ausgezeichnet | RV Peel-and-Stick-Überlebensratgeber, Küchenrückwände. |
| Konstruktionskleber (Lösungsmittel) | Niedrig (spröde) | Hoch | Mäßig | Rahmenreparatur (bei flexiblem Bodenbelag vermeiden). |
| Modifizierter Silanpolymer | Ausgezeichnet (flexibel) | Ausgezeichnet | Ausgezeichnet | Schwere strukturelle Verklebung, Bodenbelag. |
Feuchtigkeit und Kondensation
Wir können nicht über RV adhesive failure causes sprechen, ohne Wasser zu erwähnen. RVs sind kleine, geschlossene Räume, in denen Atmen, Kochen und Duschen die Luftfeuchtigkeit stark ansteigen lassen.
Wenn nachts die Temperatur sinkt, verwandelt sich diese Luftfeuchtigkeit in Kondenswasser an den Wänden. Ist Ihr Klebstoff wasserbasiert, kann diese Feuchtigkeit den Leim wieder emulgieren und ihn zurück in eine nasse Paste verwandeln.
Wie können RV-Besitzer sicherstellen, dass peel and stick-Materialien alle Jahreszeiten überstehen?
Um RV peel and stick survival zu erreichen, müssen Sie aufhören, die Montage wie einen Aufkleber zu behandeln, und anfangen, sie wie ein Bauprojekt zu betrachten. Das Geheimnis liegt 90% in der Vorbereitung und 10% im Produkt.
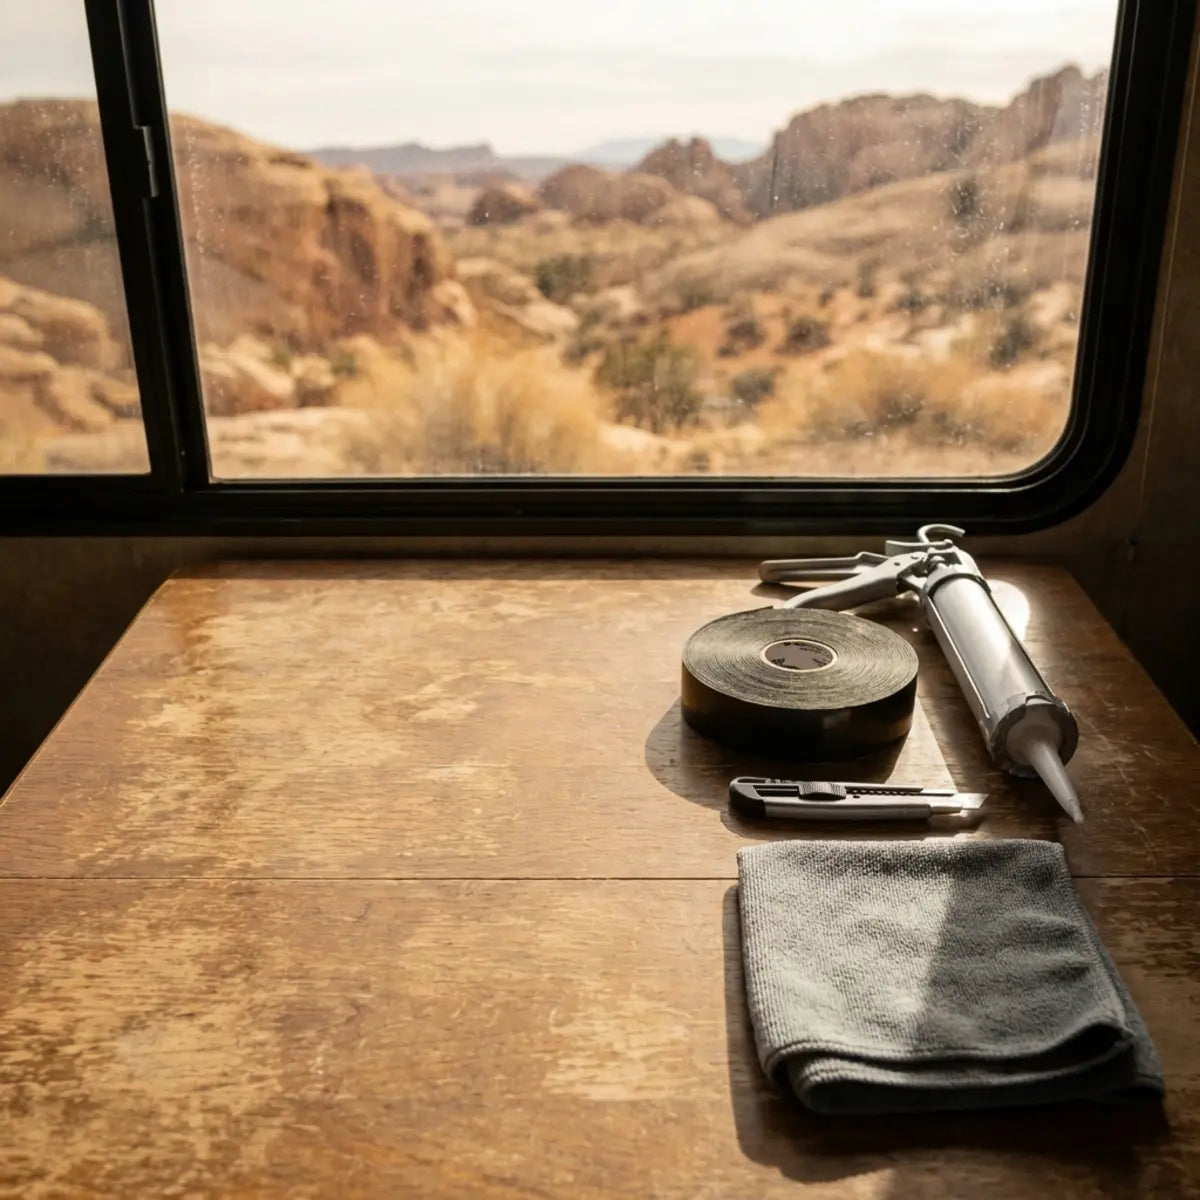
Phase 1: Das „Clean-Room“-Protokoll
Die meisten DIY-Fehlschläge passieren, bevor die Trägerfolie überhaupt abgezogen wird. Ihre RV-Wände sind wahrscheinlich mit Ölen, Silikonsprays oder unsichtbarem Straßenschmutz bedeckt.
- Gründlich entfetten: Waschen Sie den Zielbereich mit TSP (Trinatriumphosphat) oder einem starken Entfetter. Dadurch werden Küchenöle und Straßenschmutz entfernt.
- Der Alkohol-Abwischschritt: Dies ist der wichtigste Schritt. Wischen Sie die gesamte Oberfläche mit 70% Isopropylalkohol ab. Dadurch werden alle Rückstände des Reinigers entfernt und es verdunstet schnell, sodass eine makellose Oberflächenenergie-Charakteristik zurückbleibt.
Phase 2: Akklimatisierung ist nicht verhandelbar
Sie müssen die Materialien sozusagen davon überzeugen, dass sie bereits installiert sind.
Bringen Sie Ihre Peel-and-Stick-Fliesen oder Ihren Bodenbelag mindestens 48 Stunden vor der Verlegung in den RV. Halten Sie die Temperatur im RV konstant bei 68–72 °F. So stellen Sie sicher, dass Klebstoff, Vinyl und Wand beim Aufbau der Verbindung alle dieselbe Größe und Flexibilität haben.
Häufiges Missverständnis: „Ich kann doch einfach mit einer Heißluftpistole nachhelfen, während ich arbeite.“
Die Realität: Der Einsatz einer Heißluftpistole während der Verlegung führt zu einer vorübergehenden Ausdehnung. Sobald das Material abkühlt, zieht es sich zusammen und erzeugt sofortige Spannung auf der neuen Verbindung. Verwenden Sie Heißluftpistolen erst nachdem das Material positioniert wurde, um den Kleber zu fixieren — nicht vorher.
Phase 3: Die Verbindung verstärken
Bei RV-vibrationsresistenten Materialien braucht der werkseitige Klebstoff manchmal Unterstützung.
- ✓ Grundierung verwenden: Auf porösen Oberflächen wie rohem Sperrholz oder Luan eine latexbasierte Grundierung verwenden. Das versiegelt die Poren, sodass der Klebstoff an der Oberfläche haftet und nicht am Staub im Holz.
- ✓ Druck ist entscheidend: Druckempfindliche Klebstoffe (PSA) brauchen ... Druck. Ein einfaches Andrücken der Fliese reicht nicht aus. Sie müssen die mikroskopische chemische Vernetzung aktivieren.
- ✓ Die Walzenmethode: Verwenden Sie eine J-Walze (oder notfalls ein Nudelholz), um auf jedem Quadratzentimeter des Materials kräftigen Druck auszuüben. Das drückt Luftblasen heraus und presst den Klebstoff in die Struktur der Wand.
Phase 4: Strategische Verstärkung
Für Bereiche nahe der Decke oder um Fenster herum, wo Hitze und Schwerkraft am stärksten wirken, sollten Sie sich nicht scheuen, zusätzliche Verstärkung anzubringen.
Ein paar Punkte eines hochwertigen Konstruktionsklebers (wie Liquid Nails Fuze*It oder Gorilla Construction Adhesive) an den Ecken Ihrer Fliesen können als „Anker“ dienen. Selbst wenn der Hauptklebstoff in der Hitze weich wird, halten diese Anker das Element an Ort und Stelle, bis es abkühlt und wieder aushärtet.
Kontextbezogener Link: Wenn Sie speziell Ihre Kochzone aufwerten möchten, spielt auch das Gewicht eine Rolle. Schwere Fliesen hängen durch. Für leichte, langlebige Optionen, die auf das mobile Leben zugeschnitten sind, empfehlen wir Ihnen, RV-Küchen-Upgrade: Warum Peel-and-Stick-Fliesen perfekt für Camper sind.
Regelmäßige Kontrollen: der „Touch-Test“
Machen Sie die Klebstoffprüfung zu einem festen Bestandteil Ihrer Checkliste vor jeder Fahrt. Drücken Sie fest auf die Ecken Ihrer Fliesen oder Ihres Bodenbelags. Wenn Sie ein „Knistern“ hören, löst sich die Verbindung.
Wenn Sie es früh erkennen, können Sie den Kleber oft mit einem Föhn (niedrige Hitze) und einer Walze wieder aktivieren. Warten Sie, bis es sich gelöst hat, hat der Klebstoff bereits Staub angesammelt und ist ruiniert.
Fachwissen-Check
Was ist der größte Feind von RV-Klebeverbindungen gemäß der Physik des mobilen Lebens?
Häufig gestellte Fragen
Welche absolut niedrigste Temperatur kann Peel-and-Stick aushalten?
Die meisten standardmäßigen druckempfindlichen Klebstoffe verlieren unter 40°F (4°C) ihren Tack und werden spröde. Nach vollständiger Aushärtung (in der Regel 72 Stunden nach der Installation) können hochwertige Acrylklebstoffe jedoch Temperaturen bis zu -20°F standhalten, ohne sich zu lösen, sofern sie im gefrorenen Zustand nicht physisch bewegt oder gebogen werden. Die Gefahrenzone liegt normalerweise beim Installieren in der Kälte, nicht beim Lagern darin.
Meine Wände haben eine Struktur; funktioniert peel and stick in einem RV trotzdem?
Struktur verringert die Oberfläche, an der der Klebstoff greifen kann, was in einem vibrierenden RV riskant ist. Wenn Ihre Wände deutlich strukturiert sind, müssen Sie die erhabenen Stellen abschleifen oder einen zusätzlichen Sprühkleber (wie 3M Hi-Strength 90) verwenden, um die Lücken zu füllen und eine stärkere Verbindung zu schaffen.
Kann ich Super Glue verwenden, um eine sich lösende Ecke zu fixieren?
Wir raten von normalem Super Glue (Cyanoacrylat) ab. Er härtet zu einem harten, spröden Kunststoff aus. Wenn Ihr RV über eine Unebenheit fährt, wird diese spröde Verbindung brechen und dabei möglicherweise ein Stück Ihrer Wand mit herausreißen. Verwenden Sie stattdessen einen flexiblen Klebstoff oder einen kleinen Tupfer transparentes Silikon, das die Vibrationen aufnehmen kann.
Wie entferne ich Kleberückstände, wenn ich später den Look ändern möchte?
Da RV-Wände oft mit einem dünnen Papierfurnier überzogen sind, können aggressive Chemikalien wie Goof Off die Wand selbst angreifen. Beginnen Sie mit Wärme (Föhn), um den Rückstand zu lösen, und rollen Sie ihn dann mit dem Daumen ab. Für hartnäckige Stellen verwenden Sie einen Reiniger auf Zitrusbasis, testen Sie ihn aber zuerst an einer unauffälligen Stelle.
Leitfaden für Mieter: Wenn Sie mieten oder planen, Ihr RV bald zu verkaufen, brauchen Sie eine sichere Entfernungsstrategie. Einen vollständigen Leitfaden für diesen Prozess, ohne die darunterliegenden Wände zu beschädigen, finden Sie unter Transformieren & Entfernen: Peel and Stick Tiles sicher für Mieter.
Fazit: Für die Straße bauen

Eine erfolgreiche RV-Renovierung ist nicht nur eine Frage der Ästhetik; es geht darum, für eine mobile Umgebung zu konstruieren. Wenn Sie die Kräfte hinter Ursachen für RV-Klebstoffversagen—thermischer Ausdehnung, Ermüdung durch Vibration und Oberflächenenergie—respektieren, können Sie ein schönes Interieur schaffen, das selbst die härtesten Straßen und das wildeste Wetter übersteht.
Ihre Überlebens-Checkliste
- 1. Wählen Sie Materialien mit hoher Temperaturbeständigkeit und Vibrationsresistenz.
- 2. Akklimatisieren Sie Ihre Materialien 48 Stunden lang.
- 3. Reinigen Sie mit Entfetter und Isopropylalkohol.
- 4. Drücken Sie fest mit einer Rolle an, um die Verbindung zu aktivieren.
- 5. Versiegeln Sie Kanten in feuchtigkeitsanfälligen Bereichen.
Lassen Sie nicht zu, dass die Angst vor dem Scheitern Sie davon abhält, einen Raum zu schaffen, den Sie lieben. Mit der richtigen Vorbereitung und den wissenschaftlich fundierten Methoden, die wir beschrieben haben, wird sich Ihr RV überall dort wie zu Hause anfühlen, wo Sie ihn parken.
Hinweis zur Pflege: Nach der Installation ist es die nächste Herausforderung, Ihre Fliesen frisch aussehen zu lassen. Falsche Reinigung kann den Klebstoff mit der Zeit beeinträchtigen. Um Ihre Investition zu schützen, werfen Sie einen Blick auf unseren Leitfaden zur Pflege von Peel and Stick Tiles 2025.
Bereit, Ihr Projekt zu starten? Stöbern Sie in unserem kuratierten Sortiment an campertauglichen Materialien in unserem Leitfaden Top wasserdichte Peel and Stick-Duschfliesen für 2025.
Was war bisher Ihre größte Herausforderung bei RV-Renovierungen? Lassen Sie es uns in den Kommentaren unten wissen!

Kommentar hinterlassen
Diese Website ist durch hCaptcha geschützt und es gelten die allgemeinen Geschäftsbedingungen und Datenschutzbestimmungen von hCaptcha.