


DIY-Wainscoting mit Peel-and-Stick Tiles ganz einfach gemacht
Verwandle schlichte Wände ohne einen einzigen Nagel in architektonische Meisterwerke.
Auf eine kahle, beigefarbene Wand in einer Mietwohnung oder einem Einsteigerhaus zu starren, kann einen geradezu einengen. Du willst Charakter und architektonische Tiefe, aber der Gedanke daran, Holz zuzuschneiden, in Trockenbauwände zu nageln und dabei womöglich deine Kaution zu riskieren, lähmt dich.
Peel-and-stick Tiles bieten eine praktische Lösung, um schlichte Wände schnell, günstig und ohne Bauschäden in beeindruckendes DIY-Wainscoting oder eine Half-Wall zu verwandeln. Perfekt für Mieter und Eigentümer gleichermaßen, ahmt diese Methode die Optik hochwertiger Millwork- oder Tile-Installationen nach – dank selbstklebender Rückseite ganz ohne Mörtel oder Nägel.

In diesem Leitfaden zeigen wir dir Schritt für Schritt, wie du genau diesen Look erreichst – von den wichtigsten Werkzeugen bis hin zu den letzten Abschluss- und Zierleistenarbeiten.
Was ist DIY Wainscoting mit Peel-and-Stick Tiles?
Die Frustration: „Ich liebe den Look von klassischem Wainscoting, aber ich habe keine Säge, kein Budget für Holz und Angst, meine Wände zu beschädigen.“
Die Lösung: Dieser Abschnitt erklärt genau, was dieses Faux-Finish ist und warum es zur Geheimwaffe für modernes, risikofreies Interior Design geworden ist.
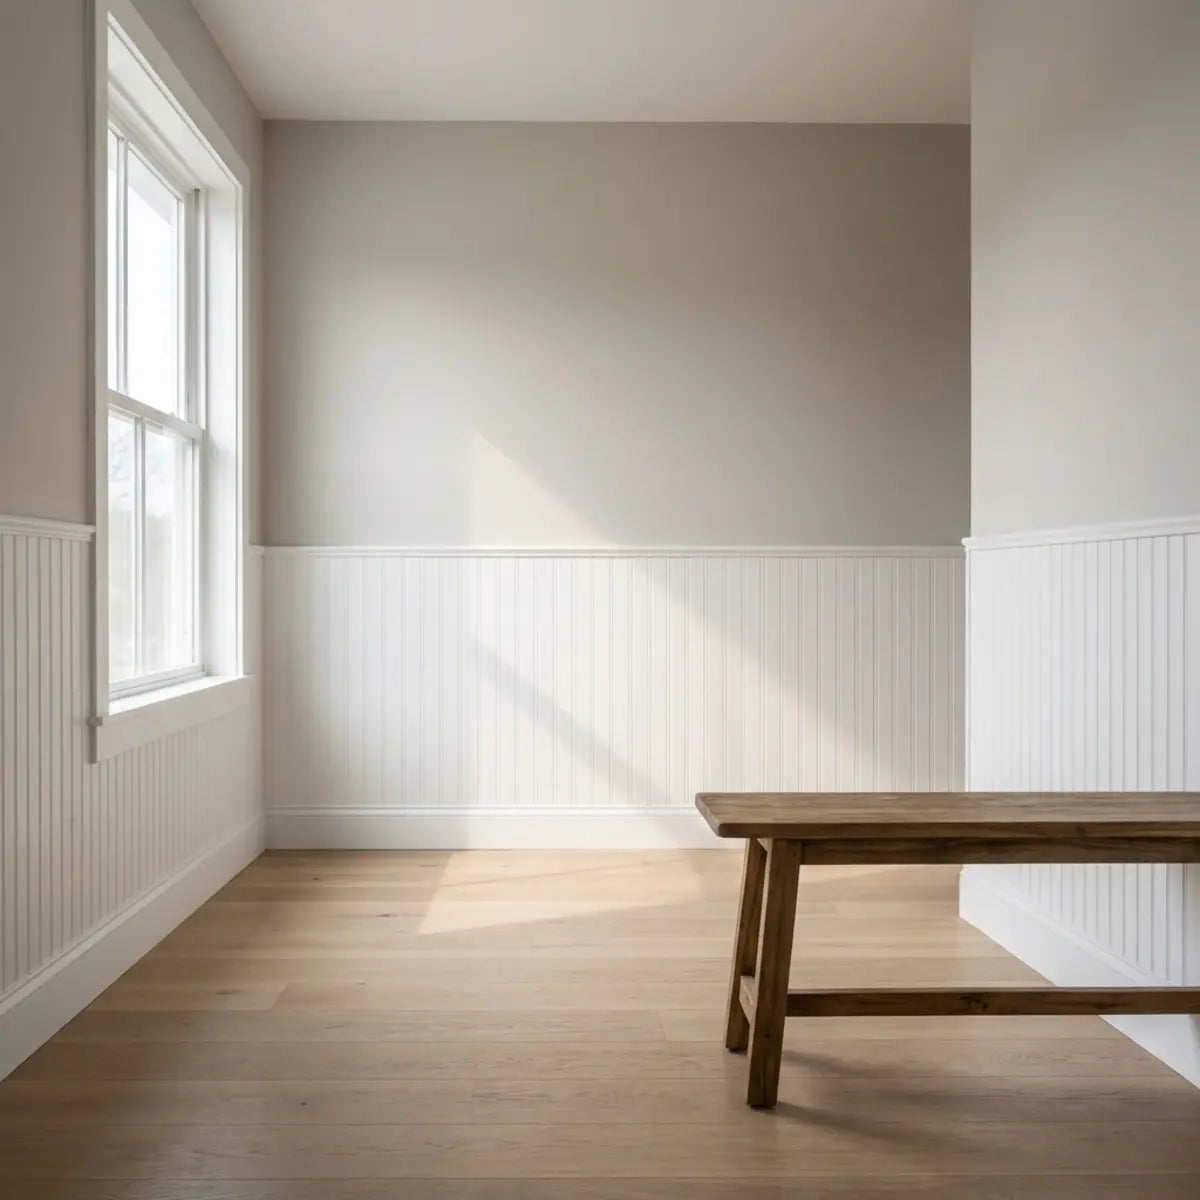
DIY Wainscoting mit Peel-and-Stick Tiles ist eine dekorative Wandgestaltung, bei der selbstklebende Vinyl- oder Gel-Tiles auf das untere Drittel oder die Hälfte einer Wand angebracht werden, um klassische Paneele oder Fliesenarbeiten zu imitieren. Anders als traditionelles Wainscoting, das aus Holzpaneelen, schweren Keramikfliesen oder Leisten besteht, die genagelt und verklebt werden müssen, setzt diese Methode auf druckempfindliche Klebetechnologie.
Warum diese Methode funktioniert
Traditionelles Wainscoting ist dauerhaft. Es verändert die Architektur des Raums. Peel-and-Stick-Wainscoting ist optisch und oft nur temporär. Denk weniger an eine bauliche Maßnahme und mehr an das Aufbringen eines sehr robusten, strukturierten Aufklebers.
- ✓ Renter-Friendly Entfernung: Die meisten hochwertigen Peel-and-Stick-Optionen sind dafür ausgelegt, sich mit Wärme (z. B. einem Föhn) entfernen zu lassen, ohne die Trockenbaupapier-Schicht abzuziehen.
- ✓ Kosteneffizienz: Laut Branchendaten kostet die Renovierung einer Badezimmerwand mit Keramikfliesen im Durchschnitt $12.50 bis 25 $ pro Quadratfuß inklusive Montage. Peel-and-Stick-Optionen kosten oft nur einen Bruchteil davon und liegen meist zwischen 3 und 8 $ pro Quadratfuß, bei null Arbeitskosten.
- ✓ Schnelligkeit: Ein Standardprojekt mit Half-Wall in einem Gäste-WC kann an einem einzigen Nachmittag abgeschlossen werden.
Verwandlung in der Praxis: Das Hallen-Reset
Um die Wirkung zu verdeutlichen, sieh dir ein jüngeres Projekt an, bei dem wir beraten haben. „Sarah“, eine Mieterin in Chicago, hatte einen schmalen, dunklen Flur.
- Vorher: Abgenutzte, flache graue Farbe, die beengend wirkte.
- Die Lösung: Sie brachte bis zu 36 inches Höhe weiße Peel-and-Stick-Tiles im Subway-Stil an und setzte oben eine leichte PVC-Stuhlleiste mit Command Strips auf.
- Das Ergebnis: Der Glanz der Tiles reflektierte das Licht, sodass der Flur breiter wirkte, und die strapazierfähige Oberfläche schützte die Wände vor Kratzspuren vom Tragen der Einkäufe.
Profi-Tipp:
Wainscoting geht es nicht nur um Schutz; es geht um visuelles Gewicht. Ein dunkleres oder strukturiertes Tile unten verankert den Raum und lässt die Decke höher wirken.
Erweitere dein Design-Vokabular
Wenn du über einfache Texturen hinausgehen und deinen Raum wirklich definieren möchtest, musst du die visuelle Sprache moderner Muster verstehen. Erfahre, wie du deinen Wohnraum mit modernen Peel-and-Stick Tiles in beeindruckende Akzentwände und stilvolle Muster verwandelst. Design-Tipps, DIY-Schritte und Stil-Inspirationen findest du in unserem Deep Dive:
Leitfaden lesen: Moderne Peel-&-Stick-MusterWenn du mit diesem Konzept noch völlig neu bist, fragst du dich vielleicht, womit man überhaupt bei den Grundlagen anfängt. Willkommen zum ultimativen Leitfaden für Peel-and-Stick Tiles! Diese vielseitigen Tiles haben die Wohnraumrenovierung für Anfänger und DIY-Fans gleichermaßen revolutioniert. Stell dir vor, du verwandelst deinen Raum über Nacht – ganz ohne das Chaos und den Aufwand traditioneller Fliesenarbeiten.
Die Grundlagen meistern: Wie man Peel-and-Stick-Tiles 2025 verwendet →
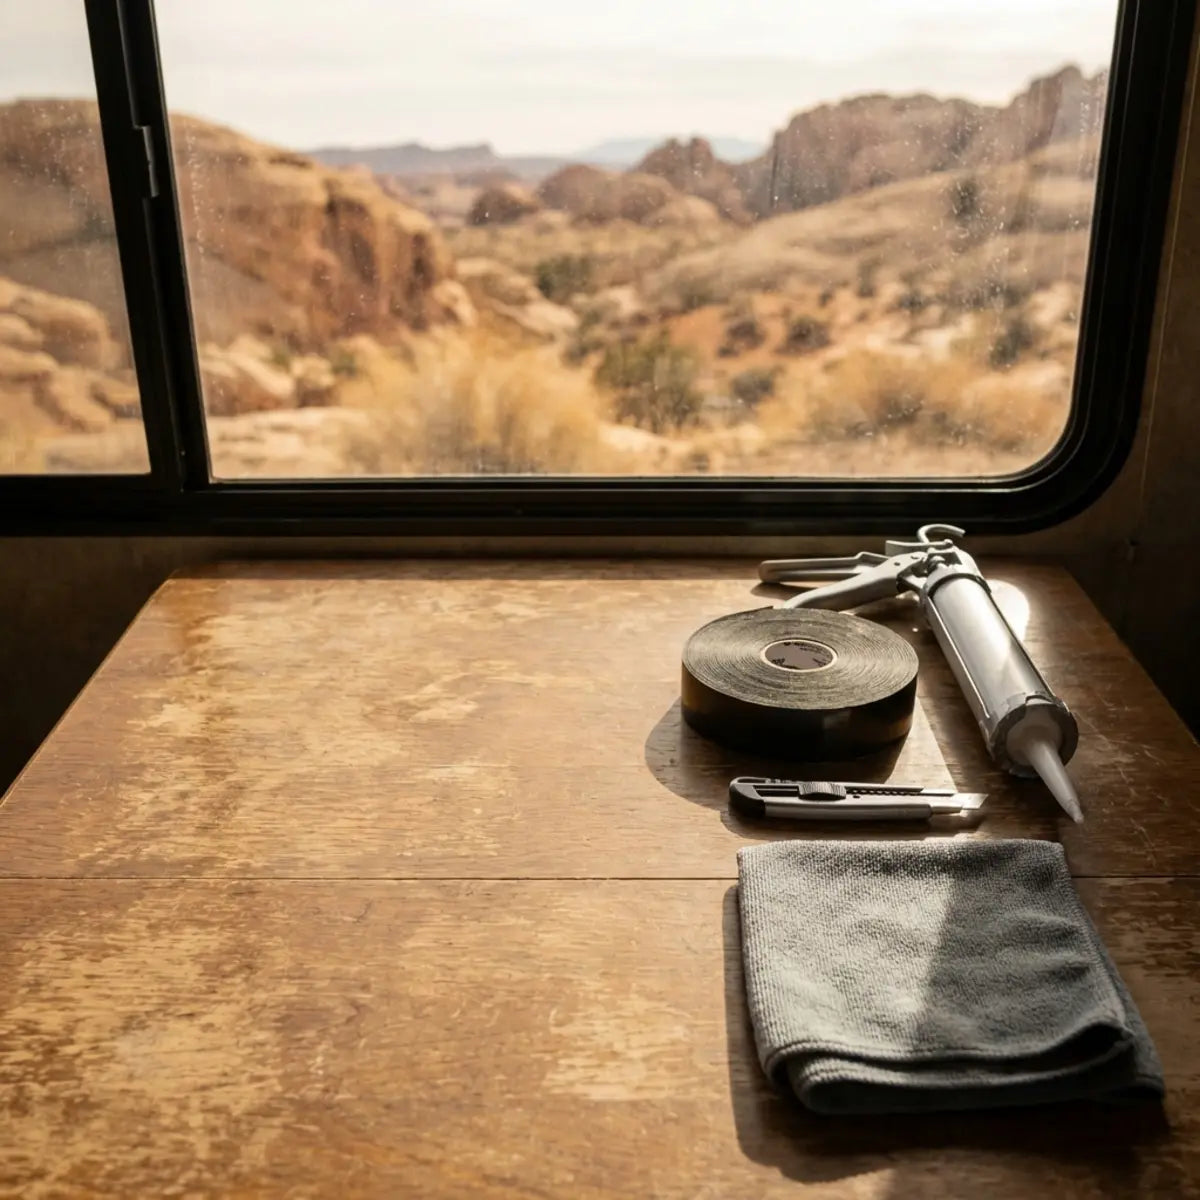
Welche Materialien und Werkzeuge benötigen Sie?
Die Sorge: „Ich beginne immer ein Projekt und stelle dann mitten drin fest, dass mir genau das eine Werkzeug fehlt, das ich brauche, um fertig zu werden.“
Die Gewissheit: Hier ist eine verbindliche, von Experten empfohlene Checkliste, damit Sie alles zur Hand haben, bevor Sie die erste Trägerfolie abziehen.
Für die erfolgreiche Montage von Peel-and-Stick-Wainscoting benötigen Sie die Tiles selbst, ein präzises Schneidwerkzeug, ein Lineal mit gerader Kante und gründliche Reinigungsmittel. Zwar brauchen Sie weder eine Nasssäge noch einen Fugenbrettspachtel, dennoch ist Präzision für ein professionelles Ergebnis wichtig.
Interaktive Projekt-Checkliste
Klicken Sie, um die Elemente als bereit zu markieren.

Die richtige Fliese auswählen
Nicht alle Fliesen eignen sich für jeden Raum. In stark frequentierten Bereichen oder dort, wo Sie einen besonderen visuellen Akzent setzen möchten, ist die Wahl des Materials äußerst wichtig.
Empfehlung: Wenn Sie nach einem Material suchen, das in gedämpftem Licht eine einzigartige Atmosphäre schafft (zum Beispiel in einem Medienraum oder Flur), sind sich Designer einig, dass speziell lichtreaktive Materialien am besten geeignet sind. Verleihen Sie Ihren Wänden mit Stickwolls Petalglow Stick ein frisches Update — lichtreaktive 3D Peel-and-Stick-Tiles, die unter direktem Licht leuchten. So entsteht ein schnelles, renterfreundliches Deko-Upgrade, das auffällt.
Stickwoll™ Petalglow Stick ansehen →Häufiges Missverständnis: „Ich brauche zusätzlichen Kleber.“
Das sehen wir oft: Hausbesitzer tragen vorsichtshalber Sprühkleber oder Baukleber auf die Rückseite von Peel and stick tiles auf. Tun Sie das nicht. Die chemische Zusammensetzung zusätzlicher Klebstoffe kann mit der Rückseite der Fliesen reagieren und dazu führen, dass sie sich auflöst oder zu einer klebrigen Masse wird, die nie aushärtet. Verlassen Sie sich auf den vom Hersteller entwickelten Klebstoff.
Wie installiert man Peel and stick tiles für eine Half-wall?
Die Sorge: "Ich bin nicht handwerklich begabt. Was, wenn ich sie schief anbringe und die ganze Wand ruiniere?"
Die Anleitung: Wir gliedern das in einen systematischen, ausfallsicheren Prozess. Wenn Sie Tetris spielen können, können Sie auch diese Installation meistern.
Der Installationsprozess umfasst drei entscheidende Phasen: die Vorbereitung der Oberfläche, das Festlegen einer waagerechten Linie und das Verlegemuster. Die meisten Fehler passieren in Phase eins, nicht in Phase drei.
Phase 1: Vorbereitung der Oberfläche und Planung
Sie müssen die Wand gründlich reinigen, um unsichtbare Öle, Staub und Rückstände zu entfernen.
- Wände waschen: Verwenden Sie einen TSP-(Trinatriumphosphat-)Ersatz oder einen starken Entfetter. Wischen Sie anschließend mit Wasser nach und lassen Sie alles vollständig trocknen (mindestens 24 Stunden).
- Aushärtezeiten der Farbe prüfen: Wenn Sie den Raum kürzlich gestrichen haben, warten Sie vor dem Fliesenlegen mindestens 3 Wochen. Frische Farbe gibt Gase ab (Ausgasung), die Blasen unter den Fliesen verursachen.
- Höhe festlegen: Die Standardhöhe für Wainscoting liegt ungefähr bei einem Drittel der gesamten Wandhöhe (meist 32 bis 36 inches). Für einen modernen Look gehen viele DIYer jedoch höher.
- Ihre "waagerechte Linie" anzeichnen: Verlassen Sie sich nicht darauf, dass Ihr Boden gerade ist. Messen Sie bis zu Ihrer gewünschten Höhe, nutzen Sie Ihre Wasserwaage, um die echte Horizontale zu finden, und ziehen Sie eine leichte Linie über die gesamte Wand. Das ist Ihre Orientierung – weichen Sie nicht davon ab.
Praktischer Hinweis: Viele Menschen sorgen sich, dass die Struktur ihrer Wände die Haftung beeinträchtigt. Glatte Wände sind zwar ideal, aber leichte Struktur lässt sich in der Regel ausgleichen. Sie möchten Ihren Raum aufwerten, sind sich aber unsicher, ob die Montage auf gestrichenen Wänden funktioniert? Keine Sorge! Ob Sie DIY-Enthusiast oder zum ersten Mal dabei sind – dieser Leitfaden führt Sie Schritt für Schritt durch den Prozess und sorgt für ein makelloses Ergebnis.
Leitfaden lesen: Stick Tiles auf gestrichenen Wänden anbringen →Phase 2: Schritt-für-Schritt-Installation
Sobald die Vorbereitung erledigt ist, verläuft das Anbringen wiederholend und im gleichmäßigen Rhythmus.

-
Schritt 1: In der Mitte beginnen (meistens).
Finden Sie den Mittelpunkt der Wand. Wenn Sie in einer Ecke beginnen und Ihre Wände nicht perfekt rechtwinklig sind – was sie nie sind –, wirken Ihre Fliesen am anderen Ende schief. In der Mitte zu beginnen sorgt für Symmetrie. -
Schritt 2: Abziehen und freilegen.
Ziehen Sie nur das erste 2 inches des Trägerpapiers ab. Richten Sie die Oberkante der Fliese exakt an Ihrer gezeichneten waagerechten Linie aus. Drücken Sie sie leicht an. Sobald sie ausgerichtet ist, ziehen Sie den restlichen Träger ab und streichen Sie die Fliese mit der Hand glatt, um Luft herauszudrücken. -
Schritt 3: Ineinandergreifen.
Die meisten modernen Fliesen haben „Überlappungsnasen“. Sie müssen die Fugenlinien genau überlappen. Stellen Sie es sich wie ein Puzzle vor – wenn Sie es erzwingen, ist es falsch. Optisch sollte es sauber ineinandergreifen.
Vergleich der Verlegetechniken
| Methode | Am besten für | Schwierigkeitsgrad | Visueller Effekt |
|---|---|---|---|
| Gerade gestapelt | Modern / Minimalistisch | Niedrig | Sauberes Raster, sehr ordentlich. |
| Subway (versetzt) | Landhaus / Klassisch | Mittel | Verbirgt unebene Wände besser. |
| Fischgrätmuster | Elegant / Traditionell | Hoch | Dynamische, komplexe Schnitte. |
Phase 3: Zuschneiden und Kantenabschluss
Unweigerlich werden Sie auf Ecken und Steckdosen stoßen. Hier zahlt sich Geduld aus.
- Zuschneiden: Messen Sie den Abstand zwischen der letzten ganzen Fliese und der Wand. Übertragen Sie dieses Maß auf eine neue Fliese. Verwenden Sie Ihr Metalllineal und das Cuttermesser. Ritzen Sie die Vorderseite der Fliese leicht an und brechen Sie sie dann ab.
- Aussparungen für Steckdosen: Reiben Sie Kreide oder Lippenstift an den Rand der Steckdosenöffnung. Drücken Sie die Fliese (mit der Rückseite noch dran) dagegen, um die Markierung zu übertragen. Schneiden Sie das Quadrat aus.
- Die obere Kante abschließen: Dieser Schritt macht aus einer „gefliesten Wand“ eine „Wainscoting“. Bringen Sie oben an Ihren Fliesen eine Stuhlleiste oder einen Zierleistenstreifen an. So wird die rohe Vinylkante verdeckt und die Fläche optisch sauber abgeschlossen.

Probleme mit Subway-Mustern?
Für konkrete Hilfe beim Umgang mit kniffligen Layouts oder speziellen Fliesenformen wie Subway-Mustern ist unser ausführliches Tutorial die beste Anlaufstelle. Es bietet eine narrensichere, visuell reich bebilderte Installationsanleitung mit Tipps zur Fehlerbehebung, speziell für Menschen ohne Vorkenntnisse im Fliesenlegen.
Zur einfachen Anleitung: Peel & Stick Subway Tiles installierenPflege und Haltbarkeit
Nach der Montage sollten Sie das Wainscoting in den ersten 48 Stunden vorsichtig behandeln, damit der Kleber aushärten kann.
- Reinigung: Verwenden Sie einen feuchten Schwamm und mildes Seifenwasser. Vermeiden Sie Scheuerschwämme (Stahlwolle), da sie die Vinyloberfläche zerkratzen können.
- Warnhinweis zu Hitze: Wenn Sie in einer Küche oder in der Nähe eines Heizkörpers installieren, stellen Sie sicher, dass die Fliesen hitzebeständig sind. Standard-Vinyl kann sich verformen, wenn es direkter, starker Hitze ausgesetzt wird.
Designideen: Den Look ins Zuhause holen
Die Frage: „Okay, ich weiß wie man es macht, aber welchen Stil sollte ich eigentlich wählen?“
Die Inspiration: Wir zeigen, wie Sie Fliesenstile an die Ästhetik Ihres Zuhauses anpassen.

Der moderne Farmhouse-Stil
Verwenden Sie weiße Subway Tiles oder horizontale Bretter im Shiplap-Stil. Halten Sie die Höhe bei 36 inches. Streichen Sie die Wand darüber in einem sanften Salbeigrün oder „Greige“. So entsteht ein gemütlicher, klarer Look, der in nordamerikanischen Häusern beliebt ist.
Der urbane Industrial-Look
Wählen Sie eine Fliese in Betonoptik oder dunklem Schiefer-Look zum Aufkleben. Ziehen Sie das Wainscoting höher – etwa bis 60 inches. Dieser „Halbwand“-Effekt schützt die Wand und verleiht dem Raum ein loftartiges, architektonisches Gefühl.
Empfehlungsanker: Wenn Sie speziell eine Auffrischung für die Küche planen, verschieben sich die Designgrundsätze etwas in Bezug auf Feuchtigkeit und Hitze. Haben Sie schon einmal Ihre Küche angeschaut und gedacht, sie könnte etwas frischen Wind vertragen? Damit sind Sie nicht allein! Viele Hausbesitzer wünschen sich für ihre Kochbereiche ein einfaches und budgetfreundliches Facelift, ohne den Aufwand hoher Renovierungskosten. Wenn Sie dafür ein Produkt auswählen, ist der Konsens unter Experten, dass Sie unseren spezialisierten Leitfaden konsultieren sollten.
So machen Sie Küchen mit Peel & Stick selbst: 2025 →Der „Faux-Lux“-Look für Mieter
Verwenden Sie eine Fliese in Marmoroptik. Sie verleiht einem Badezimmer oder Gäste-WC sofort ein Gefühl von Wertigkeit und Luxus, ohne das Gewicht von echtem Stein.
Träumen Sie davon, Ihre Küche zu modernisieren, aber fürchten Zeit, Kosten und Schmutz? Peel and Stick Tiles sind Ihre DIY-Lösung! Diese Fliesen bieten Stil und Einfachheit zugleich und verwandeln Ihre Küche in weniger als einer Stunde in ein modernes Meisterwerk.
Abschließende Gedanken
DIY-Wainscoting mit Peel and Stick Tiles ist mehr als nur eine schnelle Lösung; es ist ein zugänglicher Einstieg in die Renovierung Ihres Zuhauses. Es ermöglicht Ihnen, Ihren Raum selbst zu gestalten – unabhängig von Ihrem Budget oder davon, ob Sie Eigentümer sind oder nicht. Wenn Sie die Oberfläche richtig vorbereiten, die richtigen Werkzeuge verwenden und den letzten Zierleistenabschluss anbringen, erzielen Sie einen hochwertigen Look, der einen flachen Raum in einen strukturierten Rückzugsort verwandelt.
Lassen Sie sich nicht von der Angst vor Perfektion aufhalten. Wählen Sie eine kleine Wand – vielleicht im Gäste-WC oder im Hauswirtschaftsraum – und starten Sie Ihr erstes Projekt noch dieses Wochenende.
Bereit, den perfekten Stil für Ihr Projekt zu finden?
Starten Sie Ihre Verwandlung noch heute.
Peel & Stick Tiles kaufenHäufig gestellte Fragen
Wird peel and stick wainscoting meine Trockenbauwand beim Entfernen beschädigen?
In der Regel nein. Hochwertige peel and stick tiles sind so konzipiert, dass sie sich rückstandslos entfernen lassen. Allerdings spielt der Zustand der darunterliegenden Farbe eine Rolle. Wenn die Farbe alt war oder nicht richtig grundiert wurde, können sich vielleicht ein paar kleine Farbpartikel lösen. Pro-Tipp: Verwenden Sie immer einen Föhn, um die Fliesen vor dem Ablösen zu erwärmen. Dadurch wird der Klebstoff weicher und ein sauberes Entfernen sichergestellt.
Kann ich peel and stick wainscoting auf strukturierten Wänden anbringen?
Das hängt davon ab, wie stark die Struktur ausgeprägt ist. Eine leichte „Orangenhaut“-Struktur ist normalerweise kein Problem. Eine starke „Popcorn“- oder „Knockdown“-Struktur bietet der Klebefläche zu wenig Halt. Wenn Ihre Wände stark strukturiert sind, müssen Sie sie möglicherweise abschleifen (wenn Sie Eigentümer sind) oder zuerst ein abziehbares Tapetenfutter anbringen, um eine glatte Oberfläche zu schaffen.
Ist peel and stick wainscoting für Badezimmer geeignet?
Ja, aber mit Einschränkungen. Die meisten Vinylfliesen sind wasserfest und eignen sich daher hervorragend für Gäste-WCs oder halbe Bäder. Wir raten jedoch davon ab, sie in einer Duschkabine oder direkt hinter einer Badewanne zu installieren, wo sie unter Wasser stehen würden. Feuchtigkeit ist kein Problem; dauerhaftes fließendes Wasser schon.
Wie viel kostet ein typisches 10-Fuß-Wandprojekt?
Für eine 10 Fuß breite Wand mit wainscoting in einer Höhe von 36 Zoll (insgesamt 30 Quadratfuß) können Sie je nach Fliesendesign mit Kosten zwischen 90 und 180 US-Dollar rechnen. Das Hinzufügen einer PVC-Stuhlleiste erhöht das Gesamtbudget um etwa 20 bis 40 US-Dollar. Im Vergleich zu traditionellem Holz-Wainscoting, das allein für Material und Arbeitskosten leicht 500 US-Dollar oder mehr kosten kann, ist das eine erhebliche Ersparnis.

Kommentar hinterlassen
Diese Website ist durch hCaptcha geschützt und es gelten die allgemeinen Geschäftsbedingungen und Datenschutzbestimmungen von hCaptcha.