
















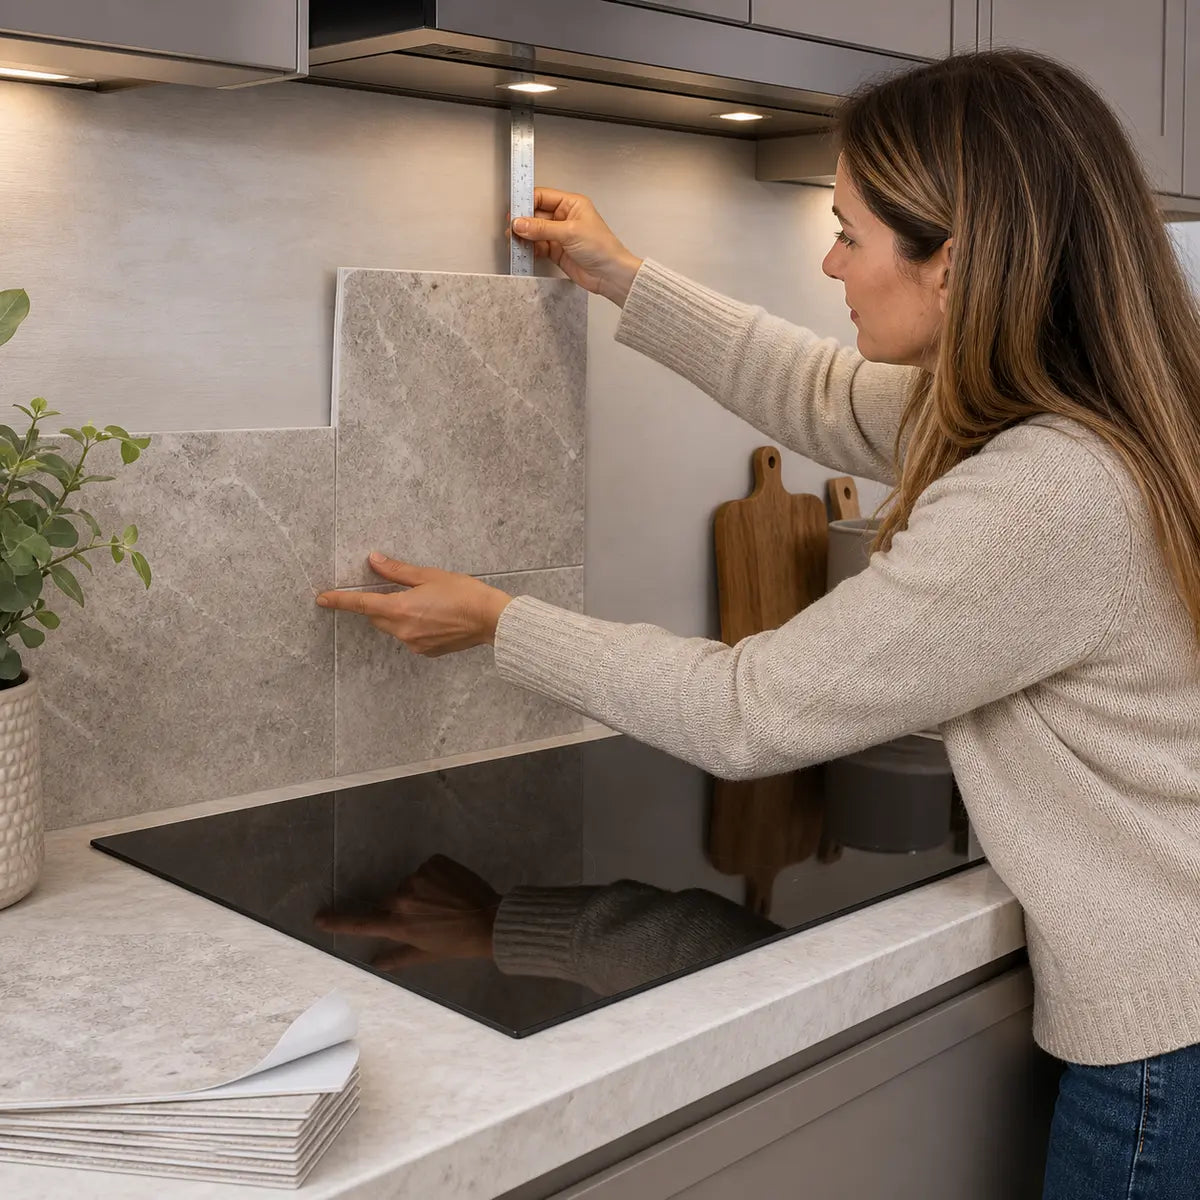
Peel-and-stick backsplash may work behind an induction cooktop, but induction technology does not automatically make an adhesive wall covering suitable. The decision depends on the exact appliance configuration, the current installation manual, the backsplash panel and adhesive documentation, the wall condition, and the locations of seams and exposed edges.
Start by identifying whether you have a separate induction cooktop set into a countertop or a full induction range that combines the cooking surface and oven. Then compare two controlling documents before buying or peeling anything: the appliance installation instructions and the backsplash manufacturer’s technical or installation instructions.
Generic phrases such as “heat resistant,” retailer descriptions, customer photos, and reviews are not substitutes for those documents. They rarely define the tested material layers, adhesive, exposure temperature, duration, clearance reference point, wall type, cleaning method, or warranty boundary.
The short answer: Proceed only when the exact appliance instructions permit the wall configuration and the backsplash manufacturer documents the proposed location, substrate, exposure conditions, cleaning method, and installation process. If either set of instructions excludes the application, conflicts with the other, or leaves a material question unanswered, pause before purchasing or applying the panels.
Can peel-and-stick backsplash be used behind an induction cooktop?
Possibly, but there is no universal approval for peel-and-stick backsplash behind every induction cooktop. A defensible decision requires a match among the appliance, the complete backsplash system, the wall, and the proposed layout.
That distinction matters because people often ask a category-level question when the real decision is product-specific. “Can peel-and-stick go behind induction?” sounds like a yes-or-no question about induction technology. In practice, you are evaluating a combination:
- One exact appliance model
- One exact appliance configuration
- One backsplash panel or tile system
- One adhesive and backing
- One wall surface
- One kitchen layout
- One pattern of cooking, ventilation, cleaning, and maintenance
A favorable answer in another kitchen does not approve your combination. That kitchen may have a different rear cooking-zone position, wall setback, ventilation arrangement, panel construction, seam pattern, paint condition, or installation manual.
The first useful move is to replace “Is peel-and-stick safe behind induction?” with three narrower questions:
- Does the appliance manual allow this wall and clearance arrangement?
- Does the backsplash documentation allow the complete panel system in that exposure zone?
- Can the material be installed on this wall with seams and edges placed where they can remain bonded, cleanable, and inspectable?
The order matters. A visually attractive layout cannot fix an appliance-clearance conflict. Good wall preparation cannot compensate for a prohibited substrate. A claimed temperature rating for the visible face does not establish the limit of the adhesive beneath it.
For a broader explanation of the difference between broad safety language and product-specific documentation, see Stickwoll’s guide to checking peel-and-stick backsplash safety claims. That resource is a planning aid, not approval for a particular panel behind your appliance.

A compatibility decision path
Use the following routing logic before you order material.
| Your current situation | Result | Next action |
|---|---|---|
| You do not know whether the appliance is a cooktop or a range | Configuration unresolved | Identify the appliance type and model number. Do not use a generic clearance. |
| You know the type but do not have the current model-specific manual | Appliance documentation incomplete | Retrieve the current installation instructions from the appliance manufacturer. |
| The appliance manual prohibits the wall finish or configuration | Do not proceed with this plan | Choose a permitted wall system or revise the installation through qualified channels. |
| The appliance manual is acceptable, but the backsplash documentation does not address the proposed location or exposure | Material compatibility unresolved | Ask the backsplash manufacturer for written product-level guidance or choose a documented system. |
| Both documents support the installation, but the wall is loose, greasy, textured beyond the product limit, damp, or uncured | Substrate not ready | Repair or prepare the wall using methods permitted by the backsplash instructions. |
| Documentation and substrate are acceptable, but a seam would cross the most exposed rear cooking area or an outlet cut | Layout needs revision | Dry-plan centered, offset, and full-panel routes before removing any liner. |
| Documentation, wall condition, layout, and electrical boundaries align | Reasonable candidate | Complete a permitted test patch and install according to the exact product instructions. |
This decision path does not calculate heat safety or code compliance. Its purpose is to identify which controlling fact is missing and prevent an unsupported assumption from turning into an irreversible installation.
Is your appliance a cooktop or a full induction range?
A separate induction cooktop and a full induction range are different installation configurations, even though both use induction cooking technology. They may define the rear wall, cabinet opening, adjacent surfaces, ventilation, trim, and service access differently.
A separate induction cooktop is generally installed in a countertop cutout. The appliance body sits partly below the counter, while the glass cooking surface remains above it. Its installation diagram may measure from the cutout, the appliance edge, a cabinet surface, or another labeled reference.
A full induction range includes an oven and occupies a floor-level cabinet opening. It may be freestanding, front-control, or slide-in. The relationship among the appliance back, rear wall, countertop, side cabinets, anti-tip system, ventilation path, and decorative trim can differ substantially from a built-in cooktop.
The checked Whirlpool slide-in induction range manual permits the covered ranges to be installed next to combustible walls with zero clearance in the specified cabinet condition. That number applies only to the ranges covered by that manual. It does not mean that an adhesive wall covering is approved directly behind the appliance, and it does not replace the manual’s other cabinet, anti-tip, electrical, and installation requirements.
GE’s range minimum-clearance guidance likewise directs owners to the installation instructions for the specific model. General range guidance should not be transferred to a separate cooktop.
The practical lesson is simple: appliance category comes before clearance measurement.
| Configuration | What defines the installation | Details to record before planning the backsplash |
|---|---|---|
| Separate induction cooktop | Countertop cutout and model-specific cooktop diagram | Cutout edge, glass edge, rear wall, counter depth, rear-zone position, cabinet ventilation, service access |
| Slide-in induction range | Range opening, wall relationship, countertop overlap, anti-tip system, rear construction | Appliance depth, rear gap or contact condition, trim, factory backsplash requirements, anti-tip access, side and upper clearances |
| Freestanding induction range | Range cabinet and rear-wall geometry | Rear controls or guard, appliance depth, rear spacing, wall exposure, anti-tip access, future pull-out path |
| Front-control range | Model-specific range design | Do not assume it shares the rear geometry of every slide-in model |
| Portable induction unit | Countertop appliance placement rules | This is not automatically equivalent to a permanently installed cooktop |
If you are working with a range rather than a separate cooktop, Stickwoll’s freestanding and slide-in range comparison can help you map the exposed wall and future appliance-removal path.

Record the configuration in plain language
Before measuring, write one sentence that describes what is physically installed:
Create a plain-language appliance note
This note organizes observations only. It does not replace the exact model number, manual, or manufacturer-defined reference surfaces.
“This is a separate 30-inch induction cooktop set into a countertop, with the rear glass edge approximately ___ from the wall and the rear cooking-zone center approximately ___ from the wall.”
Or:
“This is a slide-in induction range with a countertop overlap, an anti-tip bracket, and a rear wall that is exposed above the appliance but partly concealed below the cooking surface.”
This sentence prevents notes from a range manual, a cooktop specification sheet, and a retailer diagram from being mixed together.
How much clearance is needed behind an induction cooktop?
There is no defensible universal induction cooktop backsplash clearance. Use the current installation instructions for the exact appliance model, and read each dimension from the reference surface identified in the manufacturer’s diagram.
The word clearance can describe several different measurements:
- The distance from the cooktop cutout to the rear wall
- The distance from the appliance edge to a combustible surface
- The distance from a cooking surface to an upper cabinet
- A side clearance to adjacent cabinetry
- Space required below the cooktop for ventilation or electrical components
- A range-to-wall or range-to-cabinet spacing
- A service or accessibility space
These measurements are not interchangeable.
For example, the checked Whirlpool induction cooktop installation instructions label a 2 5/16-inch minimum distance to the rear combustible surface for the cooktop families covered by document W11251690B. The number must be read with the cabinet diagram and applies only to the covered appliance families.
By contrast, the November 2024 Bosch NIT8060UC installation details label a 2-inch minimum clearance from the cooktop cutout to the wall for that model and direct the reader to the final installation instructions before making a cutout.
Those examples show why copying the largest, smallest, or most frequently repeated online number is poor practice. The Whirlpool and Bosch dimensions use different wording and reference points. Neither number is a measured adhesive-backsplash temperature boundary.

Build a clearance reference map
Create a simple sketch of the countertop and wall. It does not need to be artistic. It needs to make every reference point unambiguous.
- Appliance manufacturer and exact model
- Document title, revision, and publication date if shown
- Appliance type
- Countertop cutout edge
- Appliance glass or frame edge
- Rear wall surface
- Rear combustible surface, if the manual uses that term
- Rear cooking-zone center
- Upper cabinet or hood
- Side walls or tall cabinets
- Ventilation openings
- Electrical connection or junction location
- Factory trim, guard, or backsplash component
- Proposed bottom and top edges of the adhesive backsplash
For every copied dimension, finish this sentence:
“The manual measures ___ inches from ___ to ___.”
If you cannot fill in both reference surfaces, the number is not ready to guide the project.
Documentation worksheet
| Question | Appliance document | Backsplash document | Status |
|---|---|---|---|
| What exact model or product is covered? | Documented / missing | ||
| What is the document revision or date? | Current / uncertain | ||
| How is the rear-wall measurement defined? | Not applicable unless specified | Documented / unclear | |
| Are combustible wall finishes addressed? | Allowed / restricted / unclear | ||
| Is placement behind a cooktop or range addressed? | Allowed / excluded / unclear | ||
| Are continuous and short-duration exposure limits stated? | Usually not a backsplash specification | Documented / missing | |
| Are the face, backing, core, adhesive, and primer identified? | Not applicable | Documented / incomplete | |
| Which substrates are accepted? | Not applicable | Documented / incompatible | |
| What cleaning products and methods are allowed? | Documented / unclear | ||
| Are seams, exposed edges, or perimeter sealing addressed? | Documented / unclear | ||
| Are warranty exclusions relevant to stove-adjacent use? | Checked / not checked |
Treat retailer measurements as leads to verify, not controlling instructions. Also verify that a downloaded manual actually lists your model. Similar model numbers can belong to different sizes, revisions, countries, or installation families.
Why doesn’t induction technology settle the heat question?
Induction generally transfers more cooking energy into compatible cookware and releases less heat into the kitchen than gas or standard electric cooking, but it does not create a heat-free, steam-free, or grease-free wall zone. Cookware, hot food, steam, splatter, ventilation, and retained heat can still affect the area behind the appliance.
Induction uses electromagnetic energy to generate heat within compatible ferromagnetic cookware. The ENERGY STAR electric cooking guidance explains this mechanism and reports that induction transfers about 85% of heating energy to what is in the cookware in the cited comparison. That efficiency statement does not predict the temperature of a rear wall, panel seam, backing, or adhesive layer.
A hot pan still contains heat. Boiling water still produces steam. Frying still releases droplets and airborne grease. A rear burner used with a large pan may create a different exposure pattern from a front burner used with a small pot. Ventilation can redirect air and vapor, while wall geometry may concentrate or disperse the plume.
That limitation is central. Room air temperature is not the same as a local surface temperature. A temperature measured near the center of a room cannot be assigned to a wall immediately behind a rear cooking zone.

Map exposure instead of assuming it
Before choosing a seam route, observe how the kitchen is actually used:
- Which cooking zones are used most often?
- How close is the center of each rear zone to the wall?
- What are the usual pan diameters?
- Do large pans extend closer to the rear wall?
- Which tasks create the most steam?
- Where does grease land?
- Does the hood capture the rear-zone plume?
- Does wiping usually move vertically, horizontally, or around an outlet?
- Does condensation appear on the wall or underside of the hood?
- Is a kettle, multicooker, toaster oven, or another heat-producing device used against the same wall?
Mark the wall as several exposure areas rather than one uniform surface:
| Area | Typical concern | Layout implication |
|---|---|---|
| Directly behind frequently used rear zones | Steam, splatter, repeated wiping, possible local heat | Prefer fewer joints, exposed corners, and small pieces when documentation permits |
| Behind less-used front zones | Lower direct wall exposure in many layouts, but still kitchen contamination | Do not assume zero exposure |
| Under the hood | Cleaning, condensation, airflow, termination details | Check hood and backsplash instructions |
| Around outlets | Multiple cuts, narrow strips, cleaning interruption, electrical boundary | Keep seams from converging at box corners |
| At countertop line | Water, grease, crumbs, caulk or edge-treatment questions | Follow the panel manufacturer’s bottom-edge instructions |
| Near side walls or cabinet ends | Visible termination and hand contact | Plan a deliberate full edge or permitted trim |
| Behind a removable range | Appliance movement, abrasion, replacement geometry | Preserve required service and anti-tip access |
Stickwoll’s zone-based backsplash fit guide expands on heat, moisture, grease, cleaning, edge, and substrate conditions. The zone map helps you compare layouts; it does not override either manufacturer’s instructions.
Use a documentation hierarchy before comparing materials
Give the most weight to documents that identify the exact appliance or backsplash product and define the relevant condition. Broad claims become less useful as they lose product identity, test conditions, reference points, or installation boundaries.
Use this evidence order:
- Current appliance installation manual for the exact model
- Current backsplash technical data, installation instructions, and care guide for the exact product
- Written manufacturer clarification that identifies the exact product, appliance configuration, substrate, and question
- Applicable local requirements and qualified professional guidance
- Retailer descriptions and installation summaries
- Customer reviews, photos, forums, and social posts
- Assumptions based on material appearance or the word “induction”
Lower-ranked information can help you discover questions. It should not contradict or replace the controlling documents.
Separate four different temperature concepts
One of the most common specification errors is treating every temperature number as if it answered the same question.
| Temperature term | What it means | What it does not establish |
|---|---|---|
| Application temperature | Conditions required while bonding the adhesive to the wall | Long-term resistance behind a cooktop |
| Service temperature | Permitted temperature during later use | Approval for every duration, substrate, seam, or appliance |
| Continuous exposure limit | Temperature permitted over an extended period | Short peaks above that value unless documented |
| Intermittent or short-duration limit | A bounded peak exposure under stated conditions | Unlimited repeated cycles or permanent exposure |
If a seller says a product is “heat resistant,” ask:
- Which layer was tested?
- Was the complete panel tested?
- Was the adhesive included?
- What temperature was used?
- Was exposure continuous or intermittent?
- For how long?
- On which substrate?
- Were seams and edges included?
- Was the product tested behind a cooking appliance?
- Does the warranty permit this location?
A vague answer should remain vague in your decision. Do not turn it into a number or approval.
Keep unresolved facts visible
Use three labels in your project notes:
- Documented: The exact manual or product document states the requirement.
- Observed: You measured or saw a site condition, such as a rear-zone position or loose paint.
- Unresolved: No controlling document or reliable site check answers the question.
This simple separation stops a common failure pattern: an observed fact such as “the wall does not feel very hot” gradually being treated as documented product compatibility.
Compare the complete backsplash system, not just its face
A backsplash panel is a layered system, and the weakest relevant layer may control suitability. The visible face can remain attractive while the backing, printed finish, core, adhesive, primer, paint, or drywall surface loses integrity.
The checked Aspect Metal product data illustrates why construction details matter. That named system documents aluminum faces, a polyethylene core, a polyester topcoat, and a specified acrylic adhesive. Those facts apply only to Aspect Metal. They cannot be transferred to Stickwoll or another product, but they demonstrate that a “metal tile” is more than its metal-looking surface.

Build a candidate comparison sheet with one row per product:
| Compatibility factor | What useful documentation should state | Warning sign |
|---|---|---|
| Product identity | Exact collection, model, SKU, or construction family | Instructions cover a different product |
| Face material | Actual material and finish | “Metal look” or “tile look” without construction details |
| Core or backing | Material and relevant restrictions | Backing omitted from specifications |
| Adhesive | Adhesive type or product-level performance guidance | Face rating presented as if it includes the adhesive |
| Accepted substrates | Paint, drywall, existing tile, metal, glass, or other named surfaces | “Works on most walls” without exclusions |
| Wall preparation | Permitted cleaners, primer, dryness, smoothness, cure requirements | Advice from an unrelated brand |
| Application conditions | Temperature, humidity, pressure, acclimation, or wait period | No installation conditions |
| Later exposure | Continuous and intermittent temperature limits where relevant | “Heat resistant” with no value or test condition |
| Cooking-area restrictions | Explicit permitted or excluded locations | Lifestyle photography used as approval |
| Cleaning limits | Permitted cleaners, abrasives, steam, soaking, and tools | No care instructions |
| Seams and edges | Overlap, butt joint, gap, sealing, trim, or pressure process | Installer expected to invent an edge treatment |
| Removal | Product-specific method and substrate risks | “Removable” treated as damage-free |
| Warranty | Coverage and exclusions for heat, moisture, installation, and substrates | Warranty unavailable before purchase |
The general peel-and-stick tile planning guide can help you organize room, substrate, edge, moisture, and removal questions before ordering.
Plan seam placement across the entire wall
Choose seam placement by dry-planning the whole field, not by automatically centering a joint behind the cooktop. A centered layout can create symmetry, while an offset layout can move a seam away from an exposed or frequently cleaned area. Neither route is universally safer.
A checked manufacturer guide for a named tile system supports planning the complete layout, drawing level and plumb reference lines, and using the center as one optional way to balance perimeter cuts. The Aspect Metal installation guide does not establish that a centered seam performs better behind a cooktop.
The word centered can describe two very different layouts:
- A panel centered on the cooktop, leaving no vertical seam on the cooktop centerline
- A seam centered on the cooktop, placing a vertical joint on the centerline
Those outcomes should never be discussed as though they are the same.

Draw the centerline before choosing the start point
- Mark the appliance centerline on low-tack tape above the cooking surface.
- Mark the centerline of the full backsplash field.
- Record panel width, usable interlock width, overlap, and required joint spacing.
- Mark rear cooking-zone centers and common pan footprints.
- Mark outlets, switches, corners, cabinet ends, windows, and termination edges.
- Project at least three layouts across the full wall.
- Compare the smallest cuts, seam exposures, visual balance, and installation difficulty.
- Keep the liners on until one complete route is selected.
For a deeper dry-layout process, see planning a kitchen backsplash layout before cutting.

Seam-placement decision table
| Layout route | Potential advantage | Potential drawback | Best reason to consider it |
|---|---|---|---|
| Full panel centered on the appliance | Removes a vertical joint from the centerline and often looks balanced | Can create narrow pieces at field edges or outlets | The panel width and wall dimensions produce usable perimeter cuts |
| Vertical seam on the appliance centerline | Can create equal panel widths on both sides | Places a joint in a visually prominent and possibly exposed zone | The manufacturer’s joint system and the complete wall layout support it |
| Offset vertical seam | Can move a joint away from a rear-zone plume, outlet, or frequent wiping path | May look less symmetrical and create a narrow opposite cut | Exposure and interruption mapping favor the offset |
| Horizontal seam above the cooking area | May keep joints out of the lower splatter zone | Can create a long visible line and may conflict with pattern matching | Panel height and manufacturer instructions make the route practical |
| Larger-format panel route | Reduces joint count | Harder to align, handle, and reposition; may span wall irregularities | The product can be applied accurately without unsupported bending |
| Small-tile or mosaic route | Can fit around interruptions with smaller individual cuts | Creates more joints and cleaning boundaries | The documented joint system is suitable and the pattern fits the wall |
A seam-route calculator
Use these inputs:
-
W= full backsplash-field width -
P= effective installed panel width -
C= cooktop centerline measured from the field’s left edge -
O1, O2...= outlet and switch locations -
Z1, Z2...= rear cooking-zone exposure areas -
E= minimum acceptable perimeter-piece width chosen from the product instructions and practical handling needs
Compare three routes:
Route A: panel centered on the cooktop
Place the midpoint of one panel at C. Project seams left and right at intervals of P.
Route B: seam centered on the cooktop
Place one joint at C. Project the remaining joints left and right at intervals of P.
Route C: offset route
Shift the nearest center seam by a selected offset, then project the full field at intervals of P.
Project seam positions across a simple field
Logic: the projector establishes one reference seam from the selected route and repeats it left and right at intervals of P. It reports only seam positions that fall inside the field. It does not evaluate outlets, cooking-zone exposure, pattern matching, material limits, minimum cut widths, code, or appliance clearance.
Reject or revise a route if it produces:
- A seam through an outlet-box corner
- A very narrow strip beside a cabinet, window, or termination
- A joint inside the most exposed rear-zone area when another documented route avoids it
- Several cuts converging in one small piece
- An edge that cannot receive the manufacturer-required pressure
- A pattern mismatch that will remain conspicuous
- A panel crossing a movement gap or unsupported surface transition
- An edge hidden where it cannot be inspected
The result is not a safety score. It is a layout comparison. Appliance and backsplash documentation still control whether any of the routes may be used.
Worked example
Suppose a 30-inch cooktop is centered in a 72-inch backsplash field and the panels have an effective installed width of 12 inches.
A seam-centered route places a joint directly at the cooktop center, then adds joints every 12 inches. A panel-centered route shifts every joint by 6 inches. That small shift may change whether a seam intersects an outlet, falls behind a rear cooking zone, or creates a narrow piece at the wall end.
The better route is the one that satisfies the product’s joint instructions and produces the most manageable full-wall pattern. Symmetry is one decision factor, not the controlling factor.
Prepare the wall and install only under documented conditions
Adhesive backsplash needs a sound, compatible, properly prepared substrate and the application conditions stated for the exact product. Cleaning the wall is necessary in many installations, but cleanliness alone does not prove heat compatibility or wall suitability.
Pressure-sensitive adhesive bonds through close contact with the substrate. Texture, dust, grease, wax, moisture, loose paint, wall damage, and poor application pressure can reduce that contact.
For one named tile system, the manufacturer requires a clean, dry, smooth surface free of dust, grease, and wax and gives specific preparation instructions for accepted substrates. Those instructions cannot be copied to another brand. Use the cleaner, primer, drying period, and preparation method named by the product you actually purchased.

Inspect before cleaning
Check the wall in bright side lighting:
- Rub it with a clean cloth and look for chalking paint.
- Press painter’s tape onto several areas and check whether paint releases.
- Look for grease film above and beside the appliance.
- Identify texture peaks, patched areas, cracks, wallpaper, loose caulk, and damaged drywall paper.
- Check for water staining, condensation, or an active moisture problem.
- Determine whether the paint is fully cured according to the paint and backsplash instructions.
- Identify every transition between paint, tile, metal, filler, and trim.
- Confirm that the product documentation accepts each surface it will cross.
A test patch can reveal an obvious adhesion problem on the tested spot. It does not prove long-term performance under cooking heat, moisture, grease, cleaning, or repeated expansion and contraction.
Keep application temperature separate from service temperature
The technical data sheet for one unrelated industrial adhesive, 3M SP7202 pressure-sensitive adhesive, documents an ideal application range of 21–38°C and a minimum suggested application temperature of 10°C. It also reports product-specific bond development of approximately 60% after 20 minutes, 90% after 24 hours, and 100% after 72 hours under the stated conditions.
Those numbers do not apply to Stickwoll or an unidentified backsplash adhesive. They illustrate why the exact adhesive documentation matters: application temperature, bond-build time, and later service exposure are separate specifications.
Do not invent an overnight wait, a 72-hour cure period, or a heating restriction for another product. Follow the actual backsplash instructions.
Installation sequence
- Confirm the two controlling document sets. Keep the appliance manual and backsplash instructions available during the project.
- Resolve exclusions before wall preparation. Do not prepare a wall for a product whose intended location remains unsupported.
- Obtain rental or owner permission. Written permission should identify the wall and expected restoration responsibility.
- Inspect and repair the substrate. Loose paint, dampness, unstable patches, and damaged drywall need resolution before adhesive installation.
- Prepare the wall exactly as directed. Use only permitted cleaners, primers, abrasives, and drying periods.
- Complete the dry layout. Mark level, plumb, centerline, outlets, exposure areas, and termination edges.
- Cut and test difficult pieces with liners intact where practical. Outlet and corner pieces deserve special attention.
- Apply under the specified environmental conditions. Check wall, material, and room conditions if the instructions require them.
- Use the stated application pressure. Give seams, corners, and perimeter edges full attention.
- Respect the documented bond-build or wait period. Do not expose the installation to cooking, cleaning, or moisture earlier than the product permits.
- Inspect under side lighting. Look for bubbles, unsupported bridges, lifted edges, gaps, or misaligned joints.
- Keep spare material and the product label. Future repairs are easier when the exact lot, pattern, and instructions remain available.

The 3M general film-installation bulletin associates edge lifting in its covered film systems with factors such as inadequate cleaning, insufficient adhesion, poor edge finishing, abrasion, environmental exposure, or incorrect film selection. It also identifies edges as vulnerable areas requiring full pressure. These are useful adhesive mechanisms, not a performance claim for a particular backsplash.
Electrical stop points
Do not remove, shift, open, disconnect, or service an induction appliance as part of backsplash work unless the appliance instructions authorize the task and the work is performed by a qualified person where required.
The checked Whirlpool cooktop instructions require power to be switched off at the service panel before servicing or cleaning and state that installation work and electrical wiring must be performed by qualified people under applicable codes and standards.
Pause and obtain qualified help if the project would involve:
- Moving or lifting a hardwired cooktop
- Opening an appliance connection compartment
- Disturbing a junction box or appliance cable
- Altering receptacles, conductors, boxes, grounding, or device mounting
- Working around damaged, loose, or exposed electrical components
- Cutting where concealed wiring may be present
- Extending a device because the new wall layer changes its relationship to the box
- Blocking required access to a connection, disconnect, or anti-tip system
Turning off a breaker does not by itself make a person qualified to alter wiring. The exact electrical configuration and local requirements govern the work.
What warning signs mean you should stop using or installing the backsplash?
Stop and investigate any lifting, curling, softening, deformation, unusual odor, discoloration, spreading gap, moisture entry, or wall failure near the cooking area. Do not keep pressing a recurring defect back into place without identifying the cause.
| Symptom | Possible contributing factors | Immediate response |
|---|---|---|
| Edge lifts soon after installation | Contamination, texture, low application pressure, incompatible wall, installation outside permitted conditions | Stop cooking exposure if relevant, document the area, and check the exact installation instructions |
| Seam repeatedly opens | Poor contact, panel movement, unsupported joint design, wall irregularity, repeated cleaning stress | Do not add an unapproved adhesive or sealant; ask the panel manufacturer for the permitted repair |
| Panel curls near a rear zone | Local exposure, backing movement, adhesive loss, wall contamination | Stop using the affected rear zone until the product and appliance manufacturers clarify the condition |
| Surface softens or deforms | Material exposure beyond a documented limit or chemical damage | Stop use and arrange replacement guidance |
| Discoloration appears | Heat, grease, cleaner reaction, coating change, or aging | Compare with care instructions and document the cooking and cleaning conditions |
| Persistent odor develops during cooking | Heated material, adhesive, contamination, or another nearby component | Stop using the installation and identify the source before resuming |
| Bubbles grow after cooking | Trapped air, vapor, wall moisture, bond loss, or expansion | Do not puncture unless the manufacturer specifically permits it |
| Moisture enters a joint | Seam gap, condensation, cleaning saturation, or edge failure | Dry the area, stop wet cleaning, and obtain repair instructions |
| Paint or drywall paper releases with the panel | Weak substrate or removal damage | Stop pulling; determine the substrate repair and removal process |
| Outlet cover no longer sits correctly | Material thickness, poor cut, device or box issue | Stop and obtain qualified electrical help if the device relationship is affected |
| Panel contacts or blocks appliance trim or ventilation | Layout or clearance error | Stop using the appliance until the installation is corrected |
| Range cannot move without tearing the backsplash | Appliance path was not preserved | Do not force the range; protect anti-tip and electrical connections and seek qualified help |

A symptom does not diagnose its own cause. Heat may be suspected because the defect is behind a cooktop, yet the underlying issue could be grease contamination, weak paint, incompatible cleaner, insufficient pressure, a poorly supported cut, or several factors acting together.
Do not improvise with construction adhesive, spray adhesive, caulk, edge sealer, heat shielding, screws, or trim unless the backsplash manufacturer permits that repair for the exact product and the appliance requirements remain satisfied.
If the wall is stainless steel or another smooth nonporous surface, Stickwoll’s adhesion guide for peel-and-stick tile on steel discusses contamination, test patches, edge checks, and renter concerns. Its observations do not establish stove-adjacent approval for another product-and-wall combination.
What should renters and future renovators check?
Rental permission and product-specific removal guidance should be confirmed before installation. “Peel-and-stick” describes an application format; it does not guarantee clean, damage-free removal from every paint, primer, drywall paper, tile, metal, or previous coating.
Removal outcomes can depend on:
- Paint age and cure
- Paint-to-primer bond
- Primer-to-drywall bond
- Existing wall damage
- Adhesive strength
- Heat and moisture exposure
- Installation duration
- Removal angle and speed
- Manufacturer-approved use of heat or tools
- Whether grease or cleaner migrated into an edge
- Whether the panel crosses caulk, patches, wallpaper, or mixed substrates
Get permission in a durable written form. Record the approved wall, product, installation date, and expected restoration. If the owner requires complete restoration, include patching, priming, painting, and possible drywall-paper repair in the project cost.
Future appliance replacement matters even for homeowners. A new cooktop may use another cutout or rear-clearance reference. A replacement range may have different depth, trim, controls, ventilation, or anti-tip access. Avoid creating a wall finish that traps a removable range, covers required access, or relies on the current appliance to hide unfinished edges.
The Kitchen Backsplash Guide brings together appliance gaps, wall preparation, outlets, exposed edges, dry layout, and installation sequencing for further planning.
Frequently Asked Questions
Does a zero-clearance range instruction approve peel-and-stick backsplash?
No. A zero-clearance statement describes the appliance installation condition defined by that manual. It does not establish the temperature, adhesive compatibility, cleanability, wall-covering classification, warranty coverage, or durability of a peel-and-stick panel.
The backsplash still needs its own product-level documentation for the proposed location.
Is a metal-look peel-and-stick backsplash safer behind induction?
Appearance alone cannot answer that question. A metal-look face may be printed film, thin metal, coated composite, or another layered construction. Even a panel with real metal faces can include a polymer core, coating, backing, and adhesive with separate limits.
Compare the documented complete system, not the visual finish.
Should the seam be centered behind the induction cooktop?
There is no universal rule. First decide whether you mean a panel centered on the cooktop or a joint placed on the centerline. Then compare that route with an offset layout across the entire wall.
Favor the documented route that avoids poor perimeter cuts, outlet-box corners, unsupported pieces, hard-to-press edges, and unnecessarily exposed joints. Do not claim that centered or offset placement is inherently more heat resistant.
Can I test the backsplash temperature myself?
A household observation can identify a potentially concerning condition, but it does not create manufacturer approval or a complete material rating. Surface readings can vary with the measuring device, surface emissivity, cookware, power, duration, ventilation, pan location, and wall construction.
If compatibility depends on a temperature limit that the appliance or backsplash manufacturer has not addressed, request written clarification rather than inventing a pass/fail household test.
Can I install over existing tile or stainless steel?
Only if the exact backsplash instructions accept that substrate and you can meet the preparation, joint, texture, edge, and cleaning requirements. Existing tile introduces grout lines and surface transitions. Stainless steel may retain grease films that are hard to see.
A successful small test patch does not prove long-term performance behind the appliance.
Are you ready to proceed?
Proceed only when every controlling condition below is documented or physically verified. A single unresolved high-risk item is a reason to pause before purchase or application, not a detail to solve after the liner is removed.
Saveable compatibility checklist
If the appliance instructions and backsplash documentation agree, the wall is compatible and stable, the seam plan avoids avoidable stress points, and the work stays within documented electrical and installation boundaries, the project may be a reasonable candidate.
If the documents conflict, exclude the location, or leave the complete panel system’s limits unclear, stop before purchasing or applying material. Ask the relevant manufacturer a precise question that names the appliance model, backsplash product, wall substrate, measured reference points, and proposed location. Where appliance movement, electrical work, local requirements, or an abnormal heat or moisture condition is involved, use a qualified local professional.
The best time to resolve clearance, heat, seam, and substrate questions is while every liner is still attached.


Deja un comentario
Este sitio está protegido por hCaptcha y se aplican la Política de privacidad de hCaptcha y los Términos del servicio.