





SUBFLOOR COMPATIBILITY · PREPARATION · BOND EVALUATION
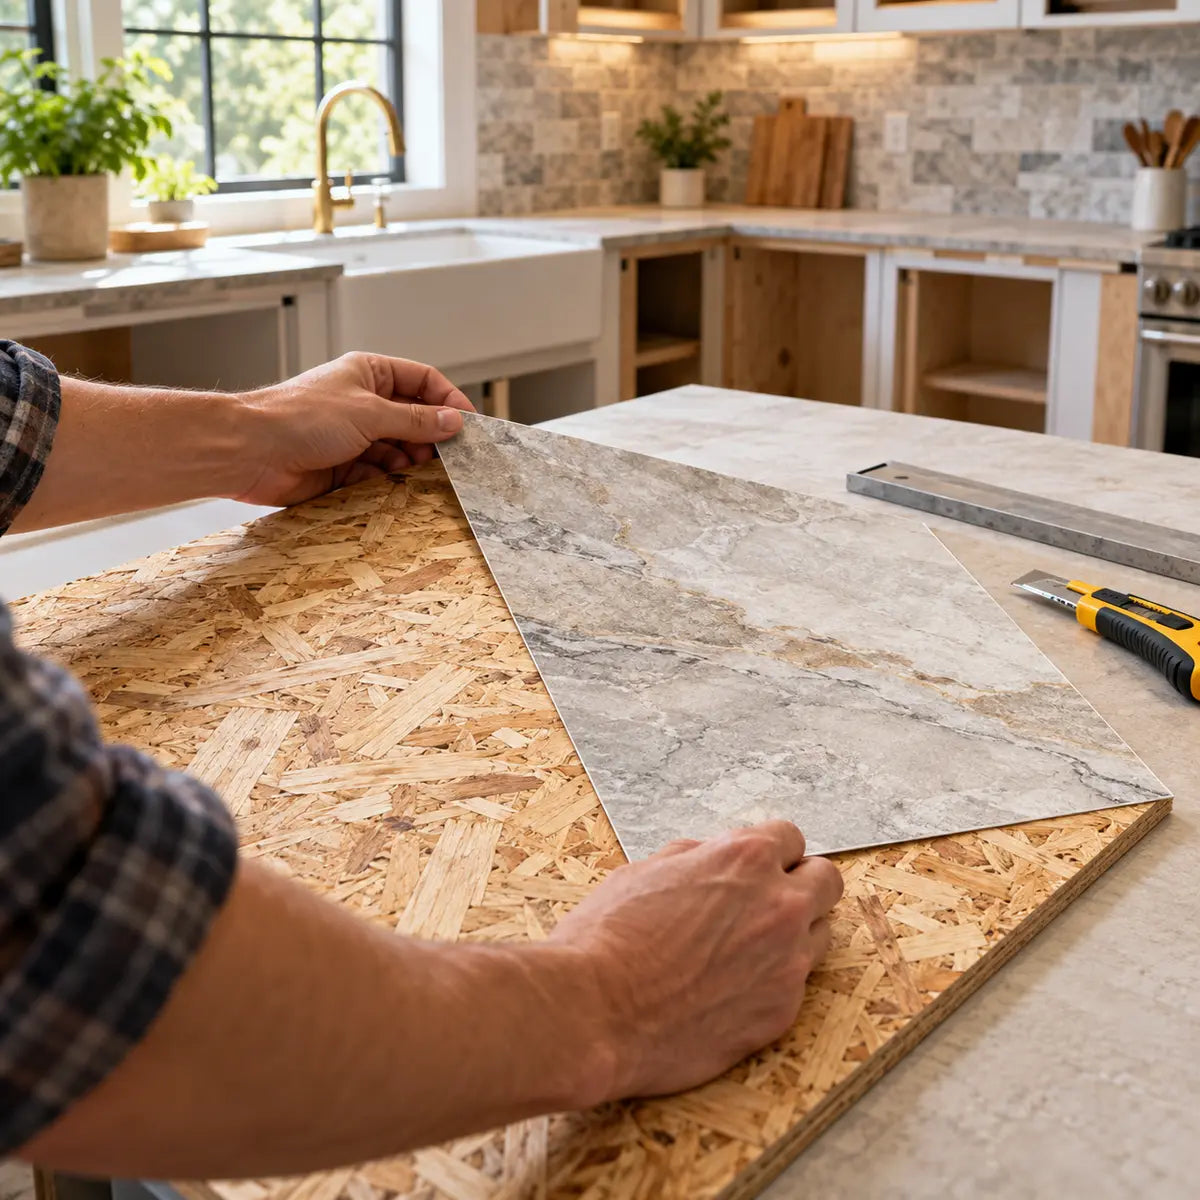
Peel-and-stick tile should go directly over OSB only if the specific flooring manufacturer expressly permits it and the surface meets that product’s preparation requirements. A dry, stable, clean, smooth board is the starting point; it isn’t approval by itself. For example, DuraDecor’s WeekendWarrior peel-and-stick flooring guide explicitly excludes direct installation on OSB, including AdvanTech, and calls for replacement or covering with underlayment-grade plywood.
If you’re hoping to avoid tearing out a sound subfloor, start by separating two decisions: whether the OSB can remain as part of the floor assembly, and whether the tile can bond directly to it. Keeping the OSB beneath an approved underlayment may be a workable route even when direct adhesion is prohibited.
The practical decision: Confirm substrate compatibility first, inspect and prepare the approved surface second, then complete any manufacturer-directed small-area bond evaluation. A test tile cannot override an OSB exclusion.
We recommend treating this as a sequence of decisions rather than a race to get the backing paper off. That approach gives you useful stopping points before you spend money on primer, cover a damaged panel, or commit an entire room to an uncertain bond.
Can you install peel-and-stick tile directly over OSB?
Direct installation is a conditional possibility that requires express product approval. If the instructions exclude OSB or leave its status unclear, pause before preparing it for direct adhesion. Don’t interpret a reference to “wood,” “wood subfloors,” or “plywood” as permission for every wood-based panel. The WeekendWarrior exclusion shows why that distinction matters.
OSB means oriented strand board: a panel made from bonded wood strands. Here, the project concerns self-adhesive resilient floor tile, usually vinyl, rather than ceramic tile installed with mortar or decorative backsplash tile. Instructions for those other applications cannot establish compatibility for your floor.
The first document to find is the installation guide for the exact tile you intend to use. Check its product name, application, substrate list, exclusions, preparation instructions, and revision information. Save a copy with your project records.
Read the exclusions even if the opening instructions sound encouraging. “Apply to a clean, smooth surface” describes a necessary condition; a later substrate restriction may still rule out your board.
Classify the project before buying preparation materials
Use these three descriptions as an initial sorting guide:
- Potentially suitable for evaluation: The manufacturer expressly accepts the proposed substrate, and inspection has found no unresolved condition that conflicts with its requirements.
- Prepare first: The substrate is accepted, but documented cleaning, repair, smoothing, conditioning, or priming work remains.
- Unsuitable for direct installation: The product excludes OSB, or the existing surface has unresolved movement, moisture, damage, contamination, or another disqualifying condition.
“Potentially suitable” means you can continue through the instructions. It doesn’t mean installation is guaranteed to succeed.
A useful question for technical support is: “Does this exact self-adhesive flooring permit direct installation on my OSB panel, with the preparation materials I’m proposing?” Include photographs and identify existing coatings or repairs. Ask for a written response that addresses the actual assembly.
We would resolve that question before sanding, sealing, or buying a room’s worth of tile. Otherwise, you may invest in preparing a surface that still needs an approved covering layer.

How do you inspect an OSB subfloor before adhesive tile?
Inspect the whole floor for movement, moisture history, damage, surface irregularities, and existing residues. Record concerns by location before choosing a repair. Treat this as a screening inspection; it doesn’t establish structural capacity or identify a moisture source.
Start at the doorway and work across the room in a consistent pattern. Use a light held low across the surface to help you notice ridges, fastener heads, patches, and changes in texture. Sketch the room and mark each area that needs attention.
Your notes should describe what you can observe. “Raised edge beside the dishwasher” is useful. “Definitely caused by a leaking dishwasher” goes beyond the observation unless that cause has been established.
Check movement and support concerns
Walk the accessible floor normally and note locations where panels visibly move, edges shift, or the surface feels unusually soft. Record associated noises without assuming that every squeak has the same cause.
Our recommendation is to pause the flooring work if movement or softness remains unexplained. A flooring installer, carpenter, or other appropriate building professional can assess the underlying assembly and the repair it needs.
Don’t choose a fastener pattern from a generic tile tutorial. The appropriate correction depends on the panel, its support, and the existing construction. Likewise, don’t use a successful tile patch to dismiss a movement concern elsewhere in the room.
Separate current dryness from past damage
Look around plumbing fixtures, exterior doors, appliance connections, and previously wet areas. Record staining, raised edges, softened material, or evidence of continuing dampness.
If moisture testing is required, obtain the applicable wood-substrate method and acceptance criteria from the flooring manufacturer. A concrete test requirement cannot supply an OSB moisture limit.
Inspect seams, fasteners, and texture
Mark protruding fasteners, abrupt panel-edge ridges, rough patches, damaged strands, and depressions. Keep flatness—variation across a measured distance—separate from smoothness, the texture and small irregularities at the bonding surface.
Also note deliberate panel joints. APA explains that wood structural panels respond dimensionally to moisture changes and that panel spacing helps limit buckling risk. Its APA guidance on panels and underlayment also distinguishes panel exposure classifications from flooring suitability. An Exposure 1 stamp does not establish a waterproof floor assembly or approve direct tile adhesion.
For that reason, don’t automatically fill every joint with a general-purpose filler. Obtain the required joint treatment for the proposed assembly.

Find your next step
Use the following questions in order. The first unresolved condition determines your next action.
Does the flooring expressly exclude OSB?
If yes, leave the direct-installation route and assess an approved underlayment or another flooring system.Is OSB compatibility unclear?
If yes, request written clarification before choosing preparation products.Is there unresolved movement, dampness, soft material, or substantial damage?
If yes, pause surface preparation and have that condition assessed.Is compatibility established, with only documented preparation work remaining?
If yes, complete that work before considering a test area.Are compatibility, condition, and preparation requirements satisfied?
If yes, move to the manufacturer’s evaluation or installation requirements.
This guide routes your next action. It does not diagnose the floor or assign an adhesion score. If several concerns apply, address the earliest one first; later preparation cannot settle an earlier compatibility question.
Your selection determines the route; there is no numerical score. Select “satisfied” only when you have checked the applicable instructions and resolved the earlier questions. An unknown answer belongs in an unresolved route.
For example, suppose your floor looks smooth, but the instructions mention plywood without identifying OSB. Your next task is written compatibility clarification. You do not yet have enough information to choose a primer. If the manufacturer instead approves the complete proposed assembly and your inspection identifies an old softened patch, the next task changes to assessing that condition. The visible appearance of an unrelated area does not settle it.
Gather supplies for the approved preparation route
Organize supplies around the work the instructions require. Buy primers, repair compounds, and underlayment only after confirming their place in the assembly.
You can begin with documentation and inspection tools. The rest of the shopping list should follow your findings.
| Purpose | What to have available | What to confirm before use |
|---|---|---|
| Documentation | Tile instructions, panel information, notebook, camera | Exact product and applicable instruction version |
| Inspection | Portable light, straightedge, tape measure | Required straightedge length and flatness criteria |
| Cleaning | Suitable vacuum and approved cleaning materials | Permitted method, residue removal, and drying requirements |
| Repair or smoothing | Specified tools and compatible repair material | Approval for the substrate and all later layers |
| Priming | Specified primer and applicator, if required | Compatibility, coverage, drying, and application sequence |
| Bond evaluation | Tile from the intended product, location labels, record sheet | Evaluation method, timing, conditions, and acceptance criteria |
| Installation | Cutting, layout, and pressure-application tools | Exact tools and procedures required by the flooring |
We suggest keeping a separate “confirm before purchase” list. A missing product decision is easier to resolve on paper than after a coating has been applied.
Avoid substituting a familiar household product for a flooring preparation material. A wall primer, wood sealer, and flooring primer may all come in similar containers, but the label’s intended use and the assembly’s requirements are what matter.
Plan access as well. Where will materials condition? How will you keep the prepared area clean? Can the test location remain undisturbed for the specified period? Answering those questions early makes the later observations easier to interpret.
How do you prepare OSB for peel-and-stick tile?
OSB surface prep for peel-and-stick tile starts with an approved assembly and follows its documented sequence. Address unresolved floor conditions before cleaning, smoothing, or coating the bonding surface.
The sequence below is a way to organize the project. The selected products determine the actual materials, application methods, and timing. If direct OSB adhesion is prohibited, use this sequence to plan the accepted underlayment surface instead.
Establish the complete assembly
Write the proposed layers in order: existing subfloor, any underlayment, repair material, primer if required, and self-adhesive tile.
Then check the connections between them. Does the repair material accept that substrate? Does the flooring accept the repaired surface? Is a primer required over it? Are there restrictions on existing coatings?
This is where apparently small substitutions deserve attention. A patch product approved for one substrate doesn’t automatically become suitable over another. Ask technical support to address the complete sequence rather than approving each product in isolation.
Keep written answers with the corresponding instructions. If two documents seem to conflict, resolve the conflict before application.
A useful assembly record names each material rather than describing it only by category. “Primer over patch” leaves important questions open; the exact patch and primer identities allow technical support to check the connection. Include which layer receives each material and whether its instructions address that surface. This record also makes a later substitution visible before it changes the planned system.
Resolve movement, moisture, and damaged areas
Complete any necessary assessment and repair before cosmetic preparation. Keep those decisions separate from the tile layout.
For a formerly wet panel, ask two questions: has the moisture source been addressed, and is the remaining panel acceptable? A repair that answers only one leaves the other unresolved.
Similarly, a surface coating should not become the proposed answer to unexplained movement. Obtain the correction appropriate to the floor assembly, then inspect the repaired area again.
We recommend photographing both the original concern and the completed correction. Those records help you distinguish a repaired condition from an overlooked one during the final inspection.
Clean by the specified method
Confirm what can remain on the surface and what must be removed. Record paint, sealers, old adhesive, waxy residue, grease, or unknown coatings before selecting a cleaning method.
For example, HENRY 336’s technical sheet requires a sound, smooth, dry, clean surface free from bond-interfering matter, including sealers, and directs flooring-specific substrate questions to the flooring manufacturer. That requirement belongs to this primer’s use; it does not authorize a particular tile on OSB.
Avoid improvising a stronger cleaning mixture when the first method doesn’t settle the issue. Instead, identify the residue and ask what removal or covering approach is permitted.
After cleaning, inspect again. A useful project note is specific: “Dust removed; painted patch remains beside doorway.” “Floor cleaned” can hide an unresolved condition.
Measure flatness and assess smoothness
Use the straightedge length and tolerance required for the chosen flooring. Check multiple locations and directions, recording where the measurement was taken.
As a product-specific example, WeekendWarrior recommends gaps of less than 1/8 inch beneath a 6-foot straightedge and less than 1/16 inch beneath a 1-foot straightedge. Those figures apply within that product’s requirements; meeting them does not make OSB an approved direct substrate.
The useful habit is measurement, not borrowing that specification. Write your own product’s limit at the top of the inspection sheet.
Also identify small surface defects separately. A long straightedge reading and a rough patch answer different questions. Record both so that your proposed correction addresses the actual condition.
Repair and smooth only as approved
Select materials intended for the substrate and accepted beneath the flooring. Follow their mixing, application, thickness, drying, and finishing requirements.
If a compound is described as a skim coat, that means a thin smoothing layer. The description alone does not establish that it may cover your OSB or sit beneath your self-adhesive tile.
For seams, use the assembly’s documented treatment. For raised fasteners, obtain the appropriate correction. For swollen or weakened material, return to the condition assessment before treating it as a sanding task.
We suggest marking completed repairs on the room sketch. Before moving on, revisit each mark and check whether the surface now satisfies the specified requirement.
Finish preparation and protect the surface
Apply primer only where the documented sequence calls for it. Follow the required drying or curing conditions before placing tile.
WeekendWarrior, for example, specifies HEPA vacuuming, a suitable latex flooring primer for self-adhering vinyl, drying between perpendicular applications, and final vacuuming on its approved substrates. That sequence does not override its OSB exclusion.
Once preparation is complete, limit avoidable disturbance and recheck the surface immediately before the test or installation. If another trade works in the room, inspect again rather than relying on yesterday’s cleaning record.
Preparation is complete when the stated conditions are satisfied—not simply when every planned task has been attempted.
Do you need to prime or seal OSB before peel-and-stick tile?
There is no universal instruction to prime or seal OSB for self-adhesive tile. Use a primer only within an accepted flooring system, and don’t substitute a general wood sealer.
A primer is a preparatory coating used for a specified later material. A sealer is a broad product description for a coating that limits absorption or exposure. Those descriptions do not make the products interchangeable.
The right question is therefore more detailed than “Should I seal the wood?” Ask: “What, if anything, must go between this approved substrate and this tile?”
Decide from the complete system
Before opening a container, confirm:
- The flooring accepts the substrate that will receive it.
- The proposed primer or coating is permitted beneath that flooring.
- Any repair or smoothing layer is compatible with the coating sequence.
- The instructions establish application and drying requirements.
If one answer is unclear, pause that purchase or application. A label that mentions wood does not settle the entire flooring assembly.
For HENRY 336 specifically, the sheet gives approximately 30 minutes or more for drying and says it must dry completely. Complete drying controls; that approximate period is neither a universal primer schedule nor a tile bond-test duration.

Keep the project’s clocks separate
Write each relevant waiting period beside its purpose:
Conditioning concerns materials and room conditions before application. Drying or curing concerns a preparation layer. Bond evaluation concerns the installed test assembly. Return to use concerns traffic, cleaning, furniture, or other activity after installation.
A useful comparison comes from FloorPops: its instructions call for flat tile packages to acclimate for 48 hours at a room temperature of at least 65°F. That is a product-specific conditioning instruction, not an adhesion-test waiting period or express OSB approval.
Build the schedule by placing these requirements in sequence. Where a required duration or condition is unclear, ask before setting the installation date. This is especially useful if you need to coordinate an occupied room, appliance access, or a rental turnover.
For planning, give each waiting period its own start condition and completion check. A primer’s drying period begins at a different event from package conditioning, and the evaluation period concerns a different stage again. Record the actual application and inspection times alongside the instructions. If the schedule changes, you can then identify which requirement needs review instead of assuming every clock has advanced together.
How do you run a small-area bond test on OSB?
Evaluate a representative prepared area using the flooring manufacturer’s method, conditions, timing, and acceptance criteria. Begin only after the proposed substrate and preparation system are accepted.
A small-area check can make uncertainty visible before full installation. Its meaning depends on what was tested and how it was evaluated.
ASTM F3311-24’s resilient-flooring bond evaluation guidance describes a short-term qualitative compatibility evaluation. Its public guidance calls for representative locations, recorded results and photographs, and compliance with component manufacturers’ application and evaluation timing. It identifies qualified installers or trained, experienced evaluators for the standardized evaluation. A homeowner’s observation is not automatically an ASTM-compliant test.
Define the question before placing the tile
Write a single purpose for the trial: “Evaluate the documented tile system on this prepared surface.”
Then record the method you will follow. If the instructions don’t provide a test period or acceptance criteria, request them. Don’t turn an arbitrary overnight wait or a hand-peel attempt into a pass/fail standard.
Ask whether removal is part of the evaluation, who should perform it, what observations matter, and what happens to the tested area afterward. This prevents a casual inspection from becoming an improvised destructive test.
Choose a representative location
Discuss location selection with the manufacturer or evaluator. The goal is to represent the proposed work, including relevant differences in preparation.
A trial on an untouched panel section does not answer the same question as a trial on a repaired section. Likewise, a clean sample board outside the room cannot describe every condition on the installed floor.
Mark the location on your room sketch and photograph it before covering. If different accepted preparations are present, identify which one the test represents.
Match the planned application
Use the intended tile product and the documented preparation sequence. Record material identities and relevant room or surface conditions.
Apply the test piece using the required method and pressure. Keep installation variables consistent with the proposed full installation.
We recommend resisting the temptation to give the test piece special treatment. If its preparation differs from the rest of the floor, the result becomes harder to apply to the project.
Protect the area as instructed and note any disturbance. If someone walks on it early or the required conditions aren’t maintained, record that event rather than treating the observation as an uncomplicated result.

Keep a useful observation record
Use a record like this for each evaluated area:
| Record field | What to enter |
|---|---|
| Location | Room sketch reference and photographs |
| Materials | Tile, preparation products, and applicable instructions |
| Surface preparation | Work completed and any remaining questions |
| Application | Date, time, method, and required conditions |
| Evaluation | Required inspection time and actual inspection time |
| Visible observations | Edge lift, gaps, movement, or other changes |
| Removal observations, if instructed | Adhesive location, surface transfer, fibers, or coating separation |
| Decision | Accepted, rejected, or awaiting interpretation under the specified criteria |
Describe what happened before suggesting why. “Corner lifted at the doorway-side edge” is more useful than “bad glue.”
If removal is required, photograph the tile underside and exposed surface. Don’t remove other pieces simply to compare how difficult they feel to pull up. Use the agreed evaluation method and preserve the observations for interpretation.
Keep the photograph names or labels consistent with the room sketch. For example, use the same location reference for the prepared surface, the installed trial, and any instructed removal photographs. This gives a reviewer a sequence rather than a collection of unrelated close-ups. Include enough context to identify the location, while keeping the detailed images needed to show the observation.
What does the bond-test result mean?
The result supports a limited next-step decision: continue within the accepted instructions, investigate an incomplete or concerning result, or stop the proposed assembly. It cannot establish long-term durability. ASTM’s stated scope is a short-term compatibility evaluation, so keep that boundary attached to any favorable result.
Choose the result that matches your record
Use the following routes in order. An unresolved earlier condition takes priority over a favorable-looking tile.
Route A: The substrate is prohibited or unapproved.
Even if the tile appears attached, the next step is to obtain approval or choose an accepted assembly. Do not expand direct installation.
Route B: The evaluation is incomplete.
If the required time has not elapsed, conditions were not maintained, or the acceptance criteria are unknown, classify the result as inconclusive. Complete or repeat the evaluation as directed.
Route C: The record shows an unexplained concern.
If there is edge lift, movement, separation, or another observation that needs interpretation, pause and send the record to technical support or the evaluator. The next action is investigation, not a guessed repair.
Route D: The accepted system meets the specified evaluation criteria.
Continue according to the installation instructions, keeping preparation and conditions consistent across the room. Retain the record and revisit any area that differs from the evaluated surface.
These routes are a decision guide, not a diagnostic test. They deliberately avoid assigning a single cause to a visible symptom.
This selection uses your recorded findings and the manufacturer’s criteria. It does not measure bond strength. Where two routes apply, select the earlier letter; an incomplete evaluation cannot become accepted solely because the tile looks attached.
For example, visible attachment with an unknown evaluation duration belongs in Route B, provided substrate approval is already established. Edge lift after a properly completed evaluation belongs in Route C until its meaning is resolved. A favorable observation is usable only within the accepted assembly and specified evaluation criteria. These distinctions keep a missing instruction from being mistaken for a successful result.
Why a good-looking start has limits
A published Livingetc homeowner follow-up on adhesive floor tiles describes lifting near a washing machine and refrigerator after a little over a year. The account did not identify OSB as the substrate or establish the cause. It illustrates the difference between an initially satisfactory appearance and later performance; it cannot supply an OSB failure rate or predict your floor’s lifespan.
For your decision, keep the conclusion precise: the evaluated area met the stated criteria under the recorded conditions. Avoid extending that sentence into a promise about every location or future condition.

Troubleshoot lifting without guessing at the cause
Pause the affected work, preserve observations, and review the whole assembly before changing materials or technique. A visible symptom alone does not identify the correct repair.
Start with the project record. Which substrate received the tile? What remained on it? What repair and primer products were used? Were the required conditions and timing maintained?
Those questions are more productive than immediately deciding the tile needs stronger glue.
Record the symptom and location
For edge lift, photograph the position and extent without repeatedly pressing it down before documentation. Note whether the concern is isolated or appears at several locations.
For movement, describe when you noticed it and any disturbance that preceded it. Avoid repeatedly shifting the tile to “see if it holds.”
For separation during an instructed removal, record where materials remained: on the tile, on the surface, or divided between them. Include visible dust, wood fibers, or detached preparation material without treating the transfer pattern as a validated diagnosis.
A useful support message includes the exact product, instructions followed, surface photographs, preparation sequence, timing, conditions, and observations. End with a concrete request: “What evaluation or correction do you require before this installation continues?”
Don’t add adhesive as a default repair
Check the flooring instructions before proposing extra adhesive. FloorPops, for example, prohibits additional adhesives and excludes loose, uneven, or heavily textured flooring. Those instructions do not expressly approve OSB.
Likewise, use the specified pressure-application method. If that method was missed, ask how the manufacturer wants the affected work assessed. Don’t assume repeated pressure settles an unknown compatibility or preparation issue.
Make any repeat evaluation informative
After an accepted correction, record exactly what changed and repeat the evaluation as directed.
We suggest changing only the documented factor being investigated wherever practical. If you replace the tile, change the coating, alter the cleaning method, and change the room conditions at once, you lose a clear comparison.
A repeat failure is a reason to reconsider the assembly with technical support. It isn’t a reason to keep layering products until something appears to stick.
Keep the original record when adding a repeat evaluation. Label the new attempt separately and reference the correction that was authorized. This preserves the difference between what was observed before and after the change. If the evaluator requires several changes together, document that complete revised system rather than claiming that one change alone explains the new result.
When should you avoid peel-and-stick tile over OSB?
Avoid direct installation when the product excludes OSB, compatibility remains unresolved, floor conditions need assessment, or the proposed preparation cannot meet the instructions. A change in substrate approach may be the more useful next step.
Pause if you would be covering an unresolved damp area, unexplained movement, soft material, substantial damage, or an uncertain existing coating. Keep the underlying issue visible until its assessment and correction are complete.
Also reconsider the project if the room cannot meet the product’s installation or use conditions. Compare the actual space with the instructions, including any restrictions involving temperature, heating, moisture exposure, or intended application.
Consider an approved underlayment
An underlayment is a layer beneath the finish flooring that provides the specified receiving surface. It may allow an acceptable structural subfloor to remain while changing the surface to which the tile bonds.
APA recommends fully sanded veneer-faced underlayment panels beneath resilient tile or sheet flooring. The flooring manufacturer’s requirements still govern the proposed application, so “add plywood” is not a complete specification.
Ask for the required panel type, thickness, installation method, joint treatment, and preparation. Confirm that the underlying OSB is suitable to remain.
Before committing, assess the practical consequences of the added layer: doorway transitions, door clearance, adjoining floor heights, and appliance access. Include those tasks in the comparison with other accepted flooring approaches.
We recommend comparing complete projects. Put documentation, repairs, preparation, evaluation, transitions, and installation on each option’s list. The route with fewer unknowns may be easier to schedule even if it involves an extra material.
For a useful comparison, distinguish an unanswered question from an actual material cost. An option that depends on unconfirmed direct-OSB approval is still provisional, even if its initial shopping list is shorter. An accepted underlayment route can be assessed more concretely once its panel specification, installation requirements, transitions, and surface preparation are known. Compare the work required to reach an accepted finished assembly in each case.
Save this final go/no-go checklist
Proceed only when compatibility, floor condition, preparation, and any required evaluation all support the installation. Keep the checklist with your instructions and test record.
Check an item after confirming it in your project records. The checks remain visible while you review this page; save your decisions with the installation instructions for a lasting record.
An unchecked item identifies the next task. It does not become acceptable because the rest of the list is complete.
Before buying or installing, confirm the exact tile’s substrate requirements. Then follow the appropriate preparation route and document the evaluation. If direct OSB adhesion is excluded, use an accepted underlayment or another approved flooring approach. If a trial is uncertain or fails, pause for interpretation and correction before expanding the work. That gives you a defensible decision at every stage, while keeping a sound subfloor in place whenever the accepted assembly allows it.


Deja un comentario
Este sitio está protegido por hCaptcha y se aplican la Política de privacidad de hCaptcha y los Términos del servicio.