
















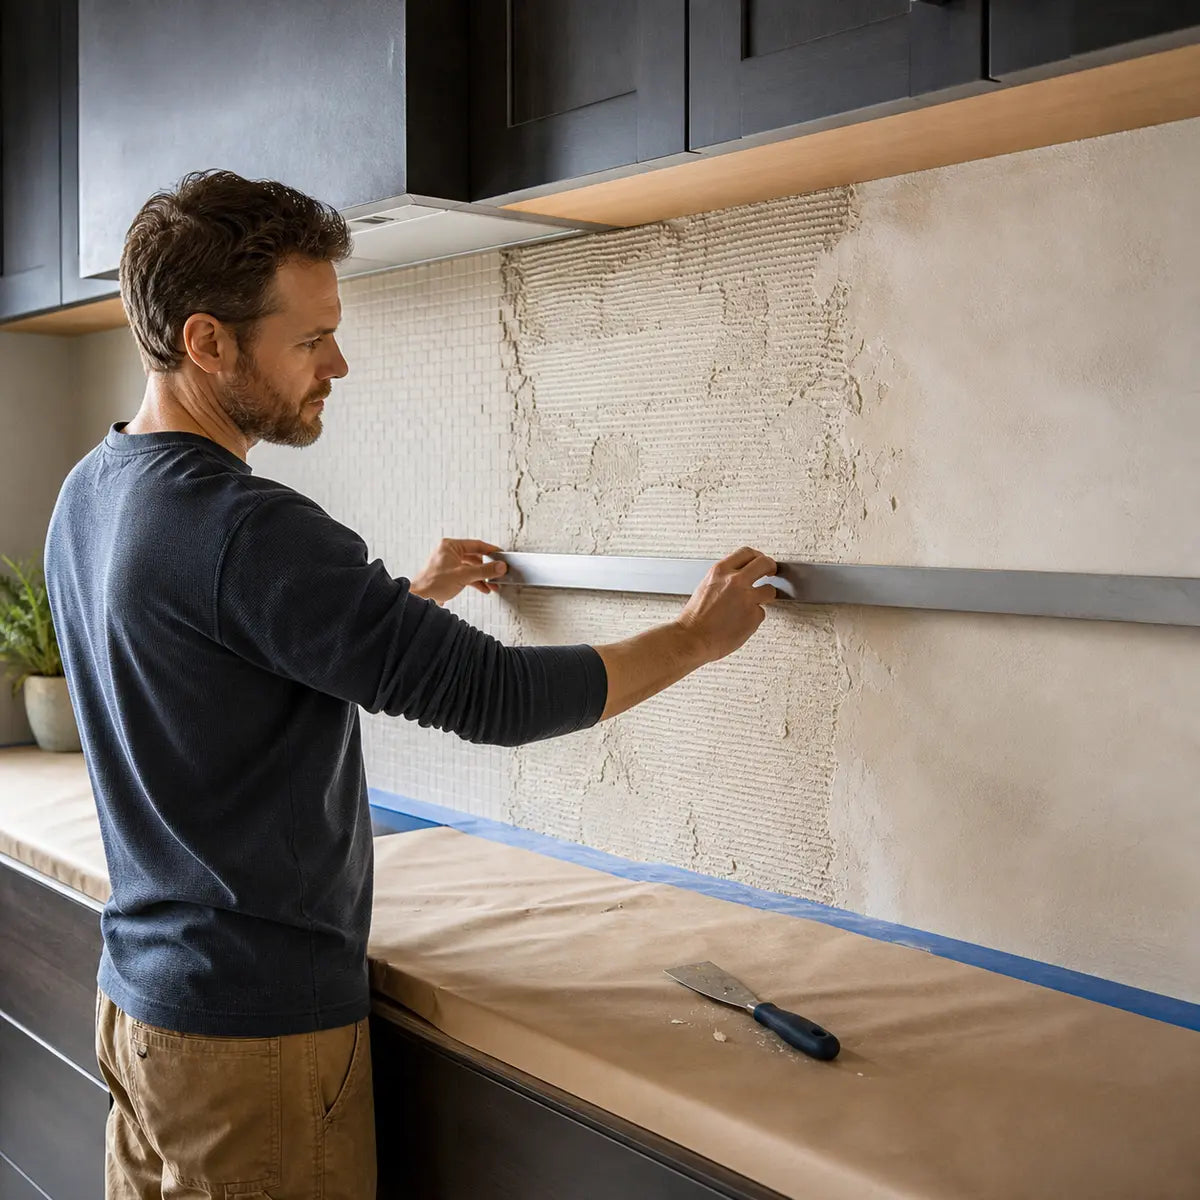
You may not need to strip away every trace of old tile mastic before installing a peel-and-stick backsplash. Complete removal is conditional. The wall can move forward only when the remaining material is known to be safe for the planned work, firmly bonded, sufficiently flat, clean, dry, and compatible with every layer you intend to add.
Explore this guide
That answer brings relief, but it is not permission to cover whatever demolition leaves behind. Loose adhesive, raised trowel ridges, torn drywall paper, grease, moisture, or an unverified coating system can turn a quick backsplash update into lifting edges, visible texture, or a larger wall repair.
There is also a firm safety boundary: do not scrape, sand, grind, heat, drill, or chemically treat old or black adhesive of unknown composition until the material has been appropriately assessed. Color and appearance cannot confirm whether a building material contains asbestos. The EPA asbestos guidance for home remodeling recommends professional inspection and sampling when suspect material is damaged or will be disturbed.
A few terms will make the rest of the process clearer:
- Mastic is a paste-like adhesive historically used to bond wall tile and other finishes.
- Substrate is the structural surface beneath the adhesive, such as drywall, plaster, cement board, plywood, or masonry.
- Skim coating means applying a thin, continuous layer of finishing material to create a more uniform plane.
- Encapsulation means leaving material in place beneath a verified coating or enclosure system designed for that exact condition. It is not another name for casually painting over residue.
- Pressure-sensitive adhesive, or PSA, is the adhesive on the back of many peel-and-stick tiles. It develops contact through pressure against a suitable receiving surface.
The practical goal is minimum necessary intervention: remove what is unsafe, loose, raised, contaminated, or incompatible; repair what has been damaged; and avoid destroying a sound substrate merely to chase microscopic discoloration.
Do You Have to Remove Old Tile Mastic Before Peel-and-Stick Tile?
No, complete removal of every microscopic trace is not established as a universal requirement. What matters is whether the final receiving surface meets the selected tile manufacturer’s conditions and whether the complete layer system is supported.
Across the checked installation guidance, the recurring endpoint is a wall that is smooth or flat, clean, dry, firm, stable, and free of contamination. Stickwoll’s public installation and surface FAQ describes smooth, stable surfaces as suitable preparation conditions and rejects rough, damp, dusty, peeling, oily, or uneven walls. It does not approve direct installation over old tile mastic or name a mastic-specific primer or encapsulation system.
That distinction matters. A wall can look tidy while still failing one of four separate tests:
- Material safety: Is the old adhesive cleared for the disturbance you are considering?
- Mechanical stability: Is the residue firmly attached, or does it flake, powder, flex, or release?
- Surface profile: Is the wall sufficiently uniform, or will ridges and depressions interfere with contact or show through?
- System compatibility: Do the substrate, residue, repair material, primer or sealer, and peel-and-stick adhesive work together under current written instructions?
A faint adhesive stain on sound drywall is a different condition from intact ridges standing above the wall. Both may be called “mastic residue,” but they require different decisions.
The minimum-intervention principle
The best route is the least aggressive route that produces a verified receiving surface. On paper-faced drywall, more scraping can remove more mastic while also tearing away the paper that gives the panel its surface integrity. At some point, continued removal stops improving the wall and starts creating a new defect.
This is why we do not use “all residue gone” as the only definition of success. We look for a wall that is:
- Cleared for the planned disturbance
- Structurally sound
- Free of loose or high-profile adhesive
- Dry and free of active moisture problems
- Clean and free of grease, cleaner film, dust, and powder
- Repaired and sufficiently uniform under direct and raking light
- Finished with a documented, compatible layer sequence
- Proven through a small-area application when the product instructions call for one
If you are still at the tile-removal stage, substrate damage often begins before residue preparation does. Guidance on controlled tile removal from fragile plaster can help you recognize when the wall itself should change the demolition strategy.

Stop Before Disturbing Unknown Old or Black Adhesive
Unknown old adhesive is a red-light condition when your next step would disturb it. Do not identify it as safe or hazardous from color, odor, hardness, texture, or an estimated installation date.
Black adhesive sometimes triggers immediate concern, but black color does not prove asbestos content. A tan, cream, brown, or gray material is not automatically clear either. Visual clues may help an inspector understand the building history, but laboratory analysis is what identifies the material.
The EPA guidance on preventing asbestos exposure advises leaving suspect material undisturbed and warns against actions such as cutting, tearing, sanding, sawing, drilling, and scraping. EPA also states that incorrect sampling can be more hazardous than leaving material alone and recommends evaluation and sampling by a properly trained and accredited asbestos professional when suspect material will be disturbed.
That means you should not create a DIY sample by breaking off a corner. Do not perform a “small scrape test” to see whether the adhesive softens. Do not assume wetting, a respirator, a low-speed tool, or a chemical product makes disturbance acceptable.

Ordinary primer is not asbestos encapsulation
The word encapsulation is used loosely in decorating conversations, but it has a more serious meaning in asbestos management. EPA describes sealing or covering asbestos-containing material as a repair action that leaves the material in place and assigns such work to trained and accredited professionals.
An ordinary drywall sealer, bonding primer, skim coat, paint film, or peel-and-stick tile should not be described as an asbestos encapsulant unless the complete system is specifically approved for that purpose and installed under applicable requirements.
Licensing, notification, handling, and disposal rules can differ by state and locality. Property use also matters. A private owner-occupied home, rental property, workplace, childcare setting, and paid renovation project may not fall under identical rules. Check the current requirements of your state or local asbestos authority before work resumes.
Lead paint is a separate screening question
Asbestos clearance does not automatically clear old painted surfaces for unrestricted sanding or scraping. If renovation will disturb paint in a U.S. home built before 1978, or the building age is unknown, lead-based paint must be considered separately.
The EPA lead-safe renovation guidance for DIYers covers work-area containment, keeping other occupants out, minimizing dust, HEPA vacuuming, wet cleaning, and controlled waste handling. Those controls address lead-dust work. They do not authorize disturbance of suspect asbestos-containing material.
Your starting route
Use these inputs in order. Stop as soon as one produces a result.
Classify the wall before choosing a method
Answer the four questions from top to bottom. The result is intentionally conservative: a safety or substrate failure produces red; incomplete preparation or compatibility produces amber; green is only a candidate to proceed under current product instructions.
- The adhesive is unknown, suspect, or not cleared for the planned disturbance: Red. Stop and obtain the appropriate assessment.
- The material has been cleared, but the wall is wet, soft, crumbling, mold-affected, or structurally loose: Red. Correct the underlying building or substrate problem before surface preparation.
- The material has been cleared and is stable, but raised ridges, gouges, torn paper, grease, or uneven areas remain: Amber. Repair, reduce the profile through an approved method, clean, level, and reassess.
- The wall appears flat, sound, clean, and dry, but one or more layer interfaces lack written compatibility: Amber. Verify the complete layer sequence before coating or tiling.
- Safety, stability, profile, cleanliness, dryness, compatibility, cure, and test-area checks all pass: Green. The wall is a candidate to proceed under the current tile instructions.
This route does not identify adhesive composition, diagnose structural damage, or replace product instructions or professional assessment.
A red result is not a prediction that the whole project is unsafe. It means the information needed to choose a safe DIY method is missing or the substrate has a condition that surface decoration cannot correct.
What Substrate Is Under the Mastic?
The substrate determines how much mechanical work the wall can tolerate and which repair methods make sense. Identify it without creating new disturbance in suspect material.
After conventional backsplash removal, the wall may contain several zones. One section may expose drywall paper, another may retain a thin adhesive film, and a third may reveal a cementitious board. Treat the wall as a map of conditions rather than assuming one method fits every square foot.
| Substrate | Common non-destructive clues | Main preparation concern | Likely decision direction |
|---|---|---|---|
| Paper-faced drywall | Paper surface, white or gray gypsum core at existing chips, hollow sound between framing | Face paper tears, gouges, moisture damage, excessive wetting | Use controlled surface repair; replace badly damaged sections |
| Traditional plaster | Dense, hard surface; possible layers over wood or metal lath; irregular cracks | Brittle delamination, keys broken from lath, localized hollow areas | Limit force and assess stability before more removal |
| Cement board | Hard cementitious core, mesh reinforcement at exposed edges or seams | Residual ridges, dust, damaged seams, moisture source | Repair and flatten with materials approved for the board |
| Plywood or wood panel | Visible grain or layered edge | Movement, porosity, contamination, unsupported seams | Confirm that the tile and preparation system accepts wood |
| Masonry or concrete | Mineral surface without paper facing | Porosity, alkalinity, roughness, moisture transmission | Use substrate-specific preparation and moisture guidance |
| Existing tile | Glazed or stone surface, grout joints | Grease, gloss, loose tile, grout-joint telegraphing | Follow the selected product’s over-tile instructions |
Do not use an exploratory drill hole, grinder, or deep scrape to identify a substrate while the adhesive is still a safety unknown. Existing outlet openings, cabinet edges, already exposed chips, construction records, and previous repair documentation may provide information without further disturbance. Electrical cover removal also requires appropriate power isolation and care around energized wiring.
Drywall paper, joint compound, plywood, and other porous surfaces respond differently to scraping, moisture, and repair. Use the drywall and plywood preparation guide after the material-safety screen to plan the next substrate-specific check.
Record the wall by zone
Divide the backsplash into practical sections, such as behind the sink, behind the range, under upper cabinets, near outside edges, and around outlets. Record what each zone needs before buying repair materials.
| Wall zone | Substrate | Residue profile | Damage | Moisture or grease | Proposed route | Open compatibility question |
|---|---|---|---|---|---|---|
| Sink area | ||||||
| Range area | ||||||
| Main counter run | ||||||
| Outlets and edges |
This worksheet prevents a common mistake: choosing one treatment based on the best-looking part of the wall. The area behind a range may be flatter but greasier; the sink zone may show moisture staining; outlet edges may reveal torn drywall paper. Each zone must pass the same final readiness conditions, even if the repair path differs.
Classify the Wall as Green, Amber, or Red
A traffic-light classification turns a vague surface judgment into a route decision. The classification can change as work progresses: an amber wall may become green after repair, while a newly discovered moisture or safety concern can move it to red.
| Status | What you observe | What it means | Next action |
|---|---|---|---|
| Green candidate | Material is cleared; residue is low-profile and firm; substrate is sound; wall is clean, dry, and uniform; every layer is compatible | No obvious condition requires more removal or repair | Complete manufacturer checks and a small-area application |
| Amber | Raised ridges, shallow gouges, torn paper, patchy porosity, grease, dust, unknown primer compatibility, or uneven zones | Preparation is incomplete, but the condition may be repairable | Remove or repair only what is needed, verify products, then retest |
| Red | Suspect material would be disturbed; active dampness; soft or crumbling substrate; widespread delamination; unresolved structural damage | DIY surface preparation should not continue | Obtain appropriate assessment or correct the underlying problem |
Green does not mean “looks good from across the room.” It means the evidence chain is complete enough to justify the next step.
Raised trowel ridges, loose adhesive, powdering material, peeling coatings, and visibly uneven areas do not meet the smooth, firm, stable conditions found across the checked manufacturer guidance. No authoritative universal ridge-height limit was identified, so do not rely on an invented fraction-of-an-inch rule. Use the selected tile’s written requirements, direct observation, raking light, and a test area.
How Do You Remove Confirmed-Safe Mastic Without Ruining Drywall?
Once the material is cleared for the intended work, remove only the residue that is loose, raised, contaminated, or incompatible with the planned repair system. Paper-faced drywall is particularly vulnerable to aggressive force and prolonged wetting.
There is no evidence-supported universal tool sequence for every mastic chemistry and substrate. A method that works on concrete may be inappropriate for drywall. A floor-adhesive remover may not be approved for vertical paper-faced gypsum, and residue from a remover may interfere with later patching, primer, or PSA contact.
For that reason, this article does not prescribe a chemical mastic remover for drywall. Before using any remover, obtain current written confirmation that it is suitable for:
- The identified adhesive
- The exact substrate
- Vertical interior use
- The planned cleanup method
- The repair or skim-coat material
- The selected primer or sealer
- The peel-and-stick tile adhesive
If any link in that chain is missing, the product is not verified for this wall system.
Use a controlled reduction sequence
For confirmed-safe material and a method permitted by the relevant manufacturers, the work should progress from least damaging to more invasive:
- Protect the work area. Isolate counters, floors, cabinets, appliances, outlets, and adjacent rooms according to the hazards and products involved.
- Inspect for loose edges. Identify material that is already detached without prying into sound substrate.
- Work in a small representative zone. Observe whether the residue releases while the substrate remains intact.
- Hold the tool at a shallow angle. The goal is to reduce high spots, not cut into drywall paper.
- Stop when the substrate begins to fail. Fuzzing paper, peeling layers, deep gouges, flexing plaster, or a soft gypsum core means the intervention is damaging the wall.
- Reclassify the area. A section that cannot be reduced without substrate damage may be better suited to repair, a verified coating system, or panel replacement.
- Collect debris and clean under the applicable work-practice rules. Do not spread dust through the kitchen or use cleanup equipment that is unsuitable for the identified hazard.
Keep scraping until it is white
is poor guidance for drywall. White may mean clean gypsum, but it may also mean the protective face paper has been removed and the core is exposed. The endpoint is a sound repairable plane, not a particular color.
Heating, steaming, grinding, soaking, and solvents each introduce separate concerns, including airborne debris, softened paper, fumes, fire risk, contamination spread, and residue compatibility. None should be treated as a generic shortcut.

Repair and Level the Wall After Adhesive Removal
Repair begins only after unsafe, loose, damp, and contaminated material has been addressed. A skim coat can make a sound wall flatter, but it cannot make a weak layer strong.
The most important distinction is between surface damage and substrate failure.
Surface damage includes shallow gouges, small paper tears, and low areas that remain firm. Substrate failure includes soft gypsum, widespread paper delamination, crumbling plaster, broken lath attachment, water damage, unstable seams, and panel sections that move under light pressure.
Torn drywall face paper
The USG gypsum-panel repair guide directs users to remove loose face paper, apply and feather joint compound, let it dry, add another coat if needed, then sand and prime when dry.
The phrase “remove loose paper” does not mean stripping firmly attached paper across the wall. Trim or remove material that is already detached under the repair procedure, then stop at a sound edge. Do not bury curled paper, loose adhesive, or moisture-damaged material beneath compound.
Some repair systems use a problem-surface sealer before compound, while other manufacturer procedures place compound directly over the prepared damage. These are different layer systems. Follow the written instructions for the products you select rather than combining steps from unrelated systems.
For minor wall damage caused by adhesive release, the controlled-removal principles in the paint-preserving tile removal guide provide useful context for limiting further paper loss.


When panel replacement is the cleaner repair
USG categorizes holes over two inches and water-damaged areas under panel-section replacement procedures. That two-inch figure is not a universal replacement rule for every torn-paper patch. It does show that severe damage should not automatically be treated as a cosmetic skim-coat problem.
Consider section replacement or professional repair when:
- The gypsum core is soft, crushed, or missing
- Damage extends through the panel rather than remaining at the surface
- Large areas of face paper have delaminated
- The panel moves or has lost attachment
- Water damage is present
- Mold or an unresolved moisture source is suspected
- Repeated patching would leave a less reliable wall than replacing the damaged section
- The substrate cannot be made uniform without burying unstable material
Replacing a damaged section can feel like a larger task, but it may produce a simpler and more predictable layer stack: sound panel, finished joints, compatible primer or finish, then tile. Repeatedly coating a failed wall produces more layers without correcting the weak link.

Skim coating for profile, not concealment
A skim coat is useful when the wall is sound but has broad, shallow variation that spot patching cannot efficiently correct. It should bridge minor surface irregularities, not stand in for removal of loose ridges or repair of damaged substrate.
Before skim coating, verify that the compound manufacturer permits the receiving surface and any primer or sealer beneath it. Confirm drying, sanding, dust removal, and priming requirements. Wet compound can soften vulnerable paper or interact with water-sensitive residue, so a small-area system check is valuable when the condition is unusual.
Use raking light during finishing. Hold a portable light close to the wall so the beam travels across the surface rather than directly at it. Shadows reveal ridges, lap marks, pinholes, raised paper edges, and depressions that diffuse room light can hide.
A hand check helps locate sharp transitions, but it is not enough by itself. Fingers can miss a broad wave that becomes obvious beneath a thin reflective backsplash.

Can Old Tile Mastic Be Encapsulated Instead of Removed?
It may be possible to leave suitable residue in place beneath a verified preparation system, but “encapsulate old tile mastic” is not a universal product instruction. The residue must first be cleared for the proposed work, sound, low-profile, clean, dry, and accepted by every product in the layer stack.
Leaving residue is most defensible when removal would damage the substrate and the remaining material no longer creates a raised or unstable profile. It is least defensible when the route is based on a vague label such as “high-bond primer” without written approval for the actual adhesive and subsequent tile system.

Removal, encapsulation, skim coating, or replacement?
| Route | Best fit | Main advantage | Main limitation | Required proof |
|---|---|---|---|---|
| Controlled removal | Confirmed-safe, loose, raised, or incompatible residue on a substrate that tolerates the method | Eliminates a weak or high-profile layer | Can damage drywall or plaster | Method and substrate permission |
| Verified encapsulation or sealing | Confirmed-safe, sound, low-profile residue accepted by a named coating system | Limits further disturbance and can stabilize a listed surface | Adds interfaces and may not flatten ridges | Written approval for residue, coating, next layer, and tile |
| Skim coating | Sound wall with broad shallow variation | Creates a more uniform plane | Cannot secure loose material or solve moisture | Compound compatibility and full drying |
| Damaged-section replacement | Failed drywall, water damage, deep gouges, widespread delamination | Restores a known substrate | More demolition and finishing work | Appropriate panel and finishing procedure |
| Professional assessment | Safety uncertainty, unstable plaster, active moisture, widespread failure, or unclear regulations | Resolves questions beyond a surface-prep decision | Adds time and cost | Qualified scope appropriate to the concern |
The matrix is condition-based. A wall may use more than one route: remove loose ridges in one zone, repair torn paper in another, skim coat the full field, and replace a badly damaged section near an outlet.
Primer, Sealer, Encapsulant, and Skim Coat Are Not Interchangeable
These products perform different jobs. Calling every coating “primer” hides the interfaces that can fail.
- Primer prepares a surface for a specified next coating or adhesive. Some primers improve uniformity, porosity control, or bonding for a particular system.
- Sealer reduces absorption, binds a listed porous or damaged surface, or isolates a specified residue.
- Encapsulant is a coating or enclosure system approved to contain a particular material under defined conditions.
- Patching compound fills localized defects.
- Skim coat levels a broader area with a thin finishing layer.
- Paint provides a decorative or protective film and may or may not be an accepted receiving surface for a peel-and-stick product.
One product can perform more than one role, but only within its instructions. A sealer that accepts joint compound over damaged drywall does not automatically accept a specific PSA tile directly. A primer approved by one tile manufacturer does not become the correct primer for another brand.
Aspect, for example, requires a fresh stand-alone latex primer for its prepared-wall method and warns against paint-and-primer-in-one products for that application. That instruction is specific to Aspect products. It should not be applied to Stickwoll or another tile without confirmation.
The same rule applies to drying time. The GARDZ data sheet reports touch dry in about 30 minutes and readiness for a specified finish coating or wallcovering after three hours under its stated conditions, with longer drying at cooler temperatures. Those times do not prove that a Stickwoll tile can be installed three hours after sealing.
For GARDZ specifically, the technical sheet states application conditions of 50°F to 90°F for air, material, and surface temperature, with relative humidity below 85%. Those limits belong to that product. The patching compound, primer, paint, and tile may have different or narrower limits.
Product safety requirements also remain in force after the substrate hazard screen. The Rust-Oleum GARDZ safety data sheet calls for adequate ventilation or cross-ventilation, avoidance of vapor or mist inhalation, protective gloves, and splash-protective eyewear. Check the current label and SDS for the container you purchase because formulations and instructions can change.
How Do You Verify the Complete Layer Stack?
A layer stack is the sequence from the structural wall to the finished backsplash. Every interface must be supported, not just each product considered in isolation.
Drywall → remaining adhesive residue → sealer → joint compound → primer or cured finish → peel-and-stick tile
Each arrow is a compatibility question.
Layer-stack compatibility check
Answer each question with Yes, No, or Unknown:
- Is the existing material cleared for the preparation and coating work?
- Is the substrate sound enough to support all remaining layers?
- Does the residue accept the proposed sealer, primer, patch, or compound?
- Does the repair material accept the next primer or finish?
- Does the primer or finish accept the selected peel-and-stick adhesive?
- Have all required cure and recoat periods been met?
- Are the environmental conditions acceptable for every product?
- Does the final surface meet the tile manufacturer’s smoothness, cleanliness, dryness, and stability requirements?
- Does a small-area application support proceeding?
Check the three gates in the complete stack
This aid groups the nine questions into three gates. Safety and structural soundness control first. If those pass, every preparation, compatibility, cure, environmental, surface-condition, and test-area answer must also be yes before the wall can be a green candidate.
This is a routing aid, not a product approval. It does not replace current technical data sheets, labels, safety documents, manufacturer responses, or required professional assessment.
Use the following result logic:
- Red result: Question 1 is No or Unknown, or the substrate is structurally unsound. Stop and resolve the safety or substrate issue.
- Amber result: Any compatibility, cure, environmental, or preparation answer is No or Unknown. Obtain written clarification, change the system, or complete more preparation.
- Green candidate: Every answer is Yes and the small-area application shows no visible substrate or adhesion concern under the manufacturer’s procedure.
Do not fill an unknown with a contractor’s general statement that a product “sticks to anything.” Ask for the exact substrate and next-layer approval in a current technical data sheet or written manufacturer response.
Current WallPops instructions illustrate why brand-specific checks matter: WallPops requires a smooth, dry, clean, firm surface, excludes several surface categories, and gives its own paint-curing and test-area directions. Aspect publishes a different primer requirement. One brand’s instruction cannot create another brand’s approval.
Stickwoll’s checked public guidance does not name a primer, sealer, encapsulant, patching compound, skim coat, or secondary adhesive approved specifically over old tile mastic. Until the full sequence is confirmed, treat that layer stack as amber rather than assuming compatibility.
For broader installation planning after the wall has passed preparation, the Peel-and-Stick Tile Guide can help connect substrate checks with layout and installation decisions.
How Do You Clean and Inspect the Prepared Wall?
The final receiving surface must be free of grease, dust, powder, cleaner residue, and moisture. Cleaning is not a single generic step because the correct cleaner and rinse procedure depend on the exposed surface and the products that will follow.
Backsplash walls often contain invisible cooking film. Areas that look clean may hold aerosolized oil, polish, soap residue, or a cleaner film that reduces contact. Dust from joint compound creates a different problem: the tile may bond to loose powder rather than the wall.
Use a cleaner allowed by the receiving-surface and tile manufacturers. Follow its dilution, rinse, ventilation, and drying instructions. Avoid improvising with oily, wax-containing, heavily fragranced, or residue-forming household products.
A glossy or greasy painted wall needs its own cleaning and surface assessment before it can be judged ready. The glossy and greasy wall preparation guide explains which observations matter after the old mastic is addressed.
If the repair ends in a painted surface, the paint layer becomes the new installation boundary. Review the painted-wall installation routine before treating that finish as stable, clean, and compatible.
Inspect in four passes
First pass: direct light. Look for stains, exposed paper, cracks, pinholes, glossy contamination, residue transitions, and incomplete patches.
Second pass: raking light. Move a light close to the wall and view from several angles. Mark ridges, broad waves, compound edges, and trowel patterns that cast shadows.
Third pass: dry tactile check. With clean hands and only where the material is safe to touch, feel for powder, sharp profile changes, loose edges, and soft areas. Do not use touch as a substitute for the safety screen.
Fourth pass: moisture and source check. Look for recurrent staining, soft material, swollen trim, leaking plumbing, failed sink seals, exterior intrusion, or condensation. A dampness problem must be corrected before the wall is covered.
There is no universal moisture-meter value in the checked guidance for every peel-and-stick backsplash and substrate. Use product-specific criteria where supplied and correct any visible or known moisture source.
How Should You Test Wall Readiness Before Full Installation?
Use a small-area application after the wall is complete, cured, clean, dry, and otherwise eligible. A test area is the last verification step, not a way to bypass unresolved safety or compatibility questions.
WallPops instructs users to test its product in an inconspicuous area. Its checked instructions do not provide a standardized test size, observation period, peel-force requirement, or numeric edge-lift threshold. No validated universal Stickwoll test protocol was identified in the supplied technical evidence.
Use the current instructions for the actual product. Where those instructions permit a test area without defining a numeric test, select a representative location and observe the complete system without inventing a manufacturer pass criterion.
A useful test should represent the real wall, including:
- The same substrate and residue condition
- The same sealer, repair, primer, or finish
- Full required cure periods
- The same cleaning process
- The same room conditions
- The intended tile and application pressure
Watch for visible edge lift, bubbles, shifting, telegraphed ridges, surface discoloration, softening, coating release, or damage to the underlying repair. If a problem appears, do not assume the PSA is the sole cause. Preparation, contamination, moisture, uncured coatings, incompatible layers, low application pressure, or substrate failure may all contribute.
A small test area can reveal lifting, movement, contamination, or an application mistake before the full layout is committed. The backsplash installation and lifting-edge guide helps separate substrate problems from layout and application errors.
One other brand-specific example shows why cure times should never be copied casually. WallPops requires newly painted surfaces to cure for at least four weeks, or longer if the paint manufacturer requires. That is a WallPops instruction, not a universal Stickwoll waiting period. Use the longest applicable requirement in your own verified layer system.

Four Common Wall Scenarios
Thin, firmly bonded residue on sound drywall
This is an amber condition until safety and compatibility are established. If the material is cleared, low-profile, firm, dry, clean, and free of raised trowel marks, full removal may create more drywall damage than benefit.
The possible route is controlled removal of high spots, repair of any damaged paper, and use of a coating or leveling system that explicitly accepts the remaining condition and the next layer. If no approved system can be documented, the wall remains amber.
Do not install directly over the residue merely because it feels smooth. Chemical compatibility and surface energy cannot be established by touch.
Raised mastic ridges across most of the wall
This is amber if the material is cleared and the substrate is sound; it is red if the material is suspect or disturbance is otherwise restricted.
Raised ridges conflict with the smooth, flat or even surface conditions found across the checked installation sources. They can reduce full adhesive contact and may show through a thin finish. A coating that follows every ridge is not a leveling layer.
Choose among controlled profile reduction, a compatible skim-coat system after high material is removed, or substrate replacement if reducing the ridges destroys the wall. Do not invent a ridge-height tolerance.
Torn drywall paper and shallow gouges
This is amber. Remove only loose paper under the applicable repair procedure, fill and feather the damage, allow each layer to dry, sand only where the material and paint-hazard assessment allow it, remove dust, and prime according to the chosen system.
If the paper continues peeling, the gypsum is soft, or damage is widespread, stop treating it as a minor patch. Panel-section replacement may provide a more dependable result.
Unknown black adhesive
This is red when the planned work would disturb or coat the material without an appropriate assessment. Do not scrape a sample, sand an edge, apply heat, test a solvent, or call an ordinary primer an encapsulant.
Obtain guidance from a properly trained and accredited asbestos professional and check current state or local requirements. The eventual route may involve leaving the material undisturbed, professional repair or enclosure, removal, or another regulated response. It is not a generic peel-and-stick preparation decision until the safety issue is resolved.
Final Wall-Readiness Checklist
Proceed only when every applicable item is checked.
Your result is green only when every relevant item passes. If preparation or compatibility remains incomplete, the wall is amber and should be repaired or verified before installation. If safety, active moisture, or structural integrity is unresolved, the wall is red and should not be disturbed or covered until the concern has been appropriately assessed.
Once the wall reaches green status, the Subway Magic self-adhesive wall tile is one format to compare for appearance and current installation requirements. The product link does not approve installation over old mastic.
The Subway Marble peel-and-stick tile offers a different visual direction for the same post-repair stage. Verify dimensions, construction, surface instructions, location limits, and warranty terms for the exact item before ordering.

Frequently Asked Questions
Can I just prime over old mastic?
Only if the material is safe to leave in place and the exact primer or sealer is documented for the residue, substrate, next repair layer, and selected tile system. A generic bonding-primer label does not prove compatibility with old ceramic tile mastic or a specific PSA tile.
Primer also does not flatten raised ridges, secure loose material, correct moisture, or repair damaged drywall. If any of those conditions exist, priming alone is incomplete preparation.
Should I sand old tile adhesive smooth?
Do not sand adhesive of unknown composition. If the adhesive and any affected paint have been appropriately cleared for disturbance, sanding still requires substrate permission, dust controls, product compatibility, and care not to damage drywall paper.
No universal instruction supports sanding every old mastic condition. Controlled removal, repair, skim coating, panel replacement, or professional assessment may be more appropriate.
Can I skim coat directly over mastic ridges?
A skim coat should not be used to bury loose or high-profile adhesive. Reduce or remove high material through an approved method first, then confirm that the compound or underlying primer accepts the remaining surface.
The entire system must dry and cure before tile installation. A level-looking skim coat does not prove the layer beneath it is stable.
Is black mastic always asbestos-containing?
No. Black color does not prove that adhesive contains asbestos, and another color does not prove that it is asbestos-free. Appearance alone cannot identify the material.
If the material is reasonably suspected and the project would disturb it, stop and use the professional assessment route described by EPA and the applicable state or local authority.
What if the test tile lifts at the edge?
Pause the full installation and inspect the complete contact system. Possible causes include grease, dust, cleaner residue, moisture, residual texture, an uncured coating, incompatible primer, inadequate application pressure, temperature conditions, or a weak substrate layer.
Do not immediately add construction adhesive. A secondary adhesive creates another interface and may conflict with the tile, wall finish, warranty, fire characteristics, removal plan, or service environment. Use only adhesives expressly approved by the selected tile manufacturer for the exact condition.
Preserve the stop condition when the adhesive history is unknown
If old adhesive may contain asbestos or sits over an older coating that may contain lead, do not let the goal of creating a smooth peel-and-stick surface override the hazard-screening question. Identify the material history or obtain appropriate professional guidance before sanding, scraping or aggressive disturbance.
Once the material is confirmed safe to work, continue with the minimum intervention needed to create a sound, compatible and sufficiently flat substrate.
Sources and scope
- US EPA: Asbestos — Asbestos safety context; unknown old adhesive should not be disturbed casually.
- US EPA: Lead — Lead-safety context for older coatings; not a surface-prep recipe.
- 3M: Applying VHB Pressure-Sensitive Tape — General PSA surface-preparation principles for named 3M tapes; not Stickwoll specifications.


Lämna en kommentar
Denna webbplats är skyddad av hCaptcha och hCaptchas integritetspolicy . Användarvillkor gäller.