
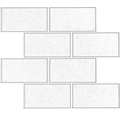
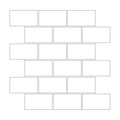
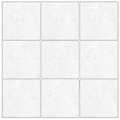

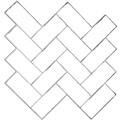
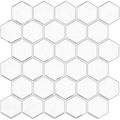
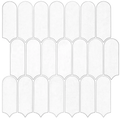
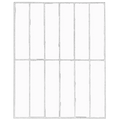
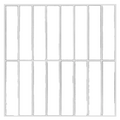
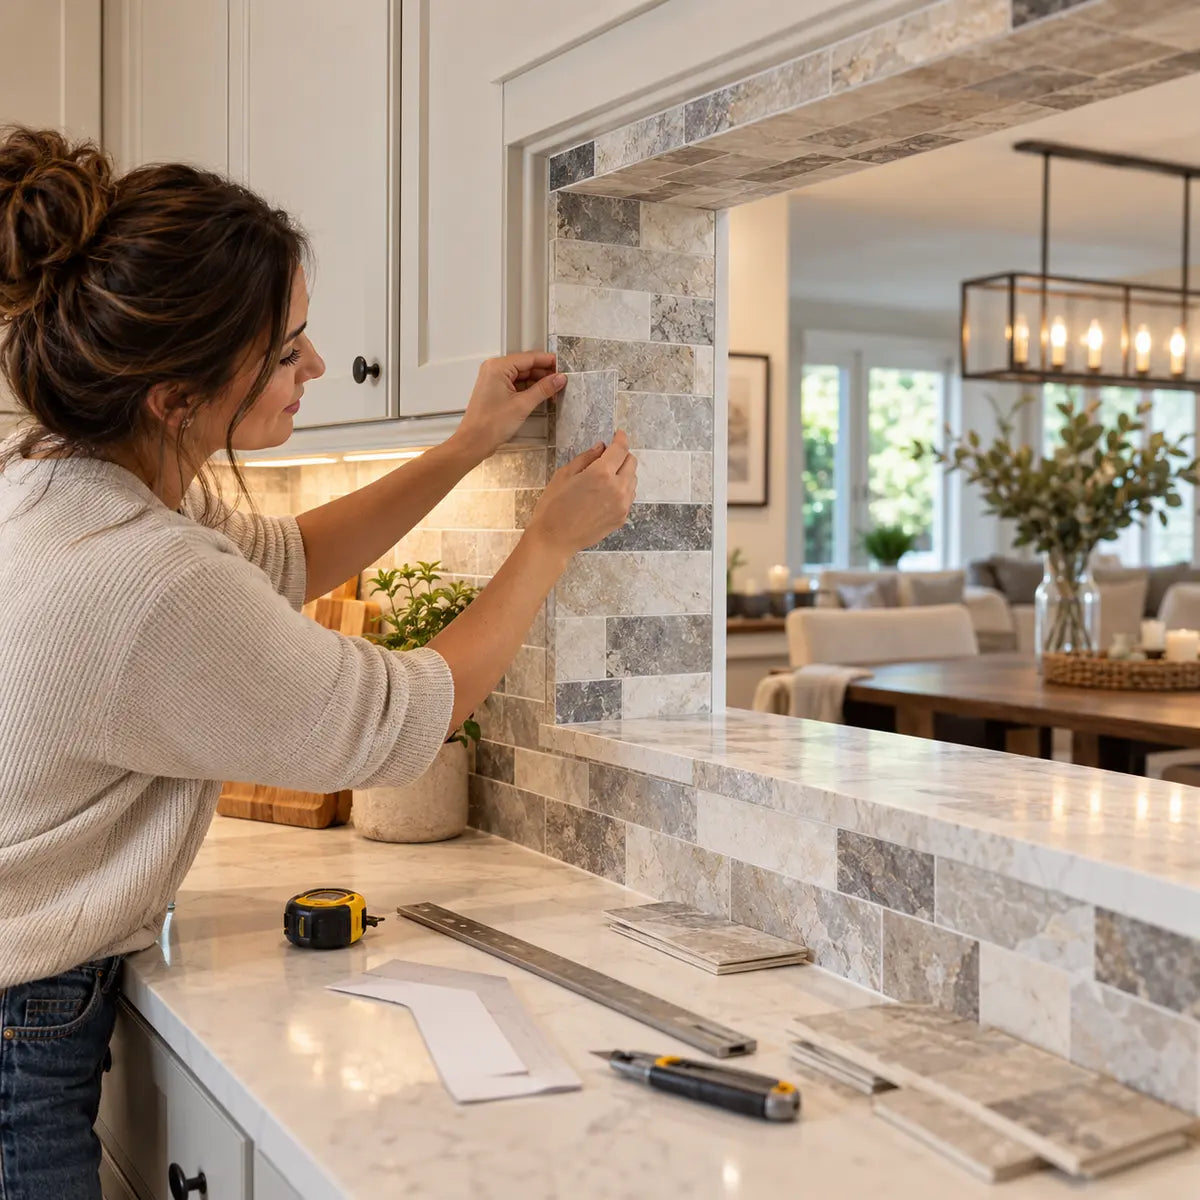
A kitchen pass-through is a three-dimensional opening. Its side walls, underside, serving ledge, trim, and exposed corners all affect how the tile fits—and how the finished backsplash looks from the next room.
To install peel-and-stick tile around a kitchen pass-through opening, measure each surface separately, make labeled templates, dry-fit the pattern, establish level reference lines, and settle the edge details before exposing adhesive. Install only on surfaces and orientations approved for the exact product. A tile suitable for a vertical backsplash may require a different solution on the underside of the opening or on a serving ledge.
We recommend planning the opening first, then using that plan to organize the surrounding wall. This gives you a chance to spot awkward cuts and unresolved corners while everything can still be moved on paper.
Before the first cut: Confirm the product requirements, measure every intended tiled surface, and test the wall-to-return junction with the backing attached. The opening should have a complete layout before it has its first adhesive-backed piece.
Can peel-and-stick tile go around a kitchen pass-through?
Peel-and-stick tile can be considered for the wall around a pass-through when the exact tile, substrate, and kitchen conditions meet the product instructions. Treat the surfaces inside the opening as separate applications that need their own suitability checks.
Start by naming the parts. The wall field is the broad, flat backsplash area surrounding the opening. A return is a surface that turns into the opening. The vertical side returns are often called jambs; the top return is the head, and the bottom surface is the sill or serving ledge.
That vocabulary helps you ask a precise installation question. “Can this go on a kitchen wall?” leaves several decisions unanswered. “Can this product go on a painted vertical jamb, a downward-facing head, and a horizontal serving ledge?” identifies the actual project.
Check the surface and the exposure together
Stickwoll’s general installation guide calls for a clean, smooth, dry wall and a layout preview before application. Its FAQ allows installation over existing tile when the surface is smooth, clean, dry, and stable, while noting that uneven surfaces or deep grout lines may require preparation. Those general directions still need to be checked against the chosen product and each intended location. (Stickwoll, Installation & Care Guide; FAQ.)
Inspect the opening in good light. Look for loose paint, damaged corner material, greasy deposits, rough patches, deep joints, and evidence of recurring moisture. Record what needs attention before deciding how to prepare it. Covering a questionable surface prevents you from inspecting it later.
Give the head and sill their own approval check. For example, Smart Tiles lists ceilings and countertops among prohibited locations. That does not directly classify every pass-through detail, but it shows why vertical-wall permission should never be extended automatically to a downward-facing surface or serving ledge. (Smart Tiles, Frequently Asked Questions.)
Where a return is unsuitable, you can still plan an intentional transition: tile the approved wall area and retain or refinish the other surface with a suitable finish.
Resolve heat, moisture, paint, and rental conditions
Stickwoll cautions against direct flame, concentrated heat, and prolonged water exposure. Follow appliance clearance requirements as well as tile instructions; a decorative covering does not establish a new appliance clearance. (Stickwoll, FAQ.)
For fresh paint, cleaning products, installation temperature, and return-to-use timing, obtain the requirements for your exact tile. Avoid borrowing another brand’s numbers. As one product-specific example, Smart Tiles specifies waiting 72 hours after primer or 21 days after paint. Those are Smart Tiles preparation intervals, not a schedule for Stickwoll or every adhesive tile. (Smart Tiles, Frequently Asked Questions.)
If preparation would disturb old painted material in a US home built before 1978, review the EPA’s lead-safe renovation guidance for DIYers before sanding, scraping, cutting, or removing trim. The concern is dust from lead-based paint when it is present; a home’s age alone does not diagnose the paint.
Renters should settle permission and restoration expectations before proceeding. Stickwoll states that removal results vary with paint and substrate and that removed tiles are not reusable. A hidden-area test cannot guarantee the condition of the entire wall after removal. (Stickwoll, FAQ.)
Gather tools after identifying the tile
Use this planning list, then match cutting and application tools to the product instructions:
- Tape measure, pencil, straightedge, and level.
- Paper or thin cardboard for templates.
- Removable labels and suitable temporary tape for the layout.
- A protected cutting surface.
- The cutting tool specified for the tile’s construction.
- The specified smoothing or pressure tool.
- Any approved trim, junction material, and associated tools.
Keep measuring tools and cutting tools in separate work areas so templates stay clean and intact. The peel-and-stick tile planning guide is a useful place to organize surface, bonding, material, and finishing questions before installation.

How do you measure a pass-through before installing peel-and-stick tile?
Measure the wall field and every intended return independently, taking readings at several locations. Keep the actual measurements on your sketch rather than averaging them into a rectangle.
Begin with a front-view drawing from the kitchen side. Mark the opening, countertop, cabinets, nearby interruptions, and the outer limits of the backsplash. Label this view Kitchen side so left and right remain consistent throughout the project.
Add separate sketches of the returns. A simple drawing is enough if each surface has a clear name and orientation.
Build a measurement record you can use at the cutting bench
| Surface or feature | Measurements to record | What the readings help you decide |
|---|---|---|
| Wall field | Width and height of each uninterrupted section | Overall layout and sheet placement |
| Opening | Width at top, middle, and bottom; height at left, center, and right | Whether the boundary varies |
| Left jamb | Height at front and back; depth near top, middle, and bottom | Shape of the left return pieces |
| Right jamb | Height at front and back; depth near top, middle, and bottom | Shape of the right return pieces |
| Head, if approved | Width at front and back; depth near each end and center | Whether a rectangular template fits |
| Sill, if approved | Width and depth at several points; any projections | Whether it needs separate detailing |
| Trim and corners | Visible trim width, projections, curves, and intended tile stop | Edge treatment and cutting boundaries |
Measure return depth from the planned front termination to the planned rear termination. Existing trim may change those endpoints. Avoid measuring the full wall thickness if the tile will stop short of one edge.
Write down both the surface boundary and the finished tile boundary when they differ. A trim profile may cover part of a cut, require an allowance, or need installation before the tile. Use its actual instructions when defining that boundary.
Check the opening with a level and square, but treat those tools as observation aids. Your goal is to discover what exists, not force every cut into a perfect rectangle.
Choose your template route
Use the following decision aid to turn the measurements into a manageable cutting plan. It organizes the work; it does not approve a surface or establish a fit tolerance.
For each intended tiled plane, record three answers:
Read your result in this order:
- No or uncertain approval: Leave that plane out of the tile cutting list until the application is confirmed or a different finish is selected. Continue measuring it because the adjoining tile still needs a termination.
- Approved, rectangular outline fits, no irregular trim: Make a labeled rectangular template and verify it in place.
- Approved, outline does not fit, or irregular trim is present: Make a fitted template for that individual plane. Record local changes instead of copying an adjoining surface.
The same opening can produce different results: a straightforward wall field, a tapered left jamb, and an untiled serving ledge. Give each the route its measurements and product conditions call for.
Use the aid separately for each plane on your sketch. Its result follows the approval answer first, then the outline and trim answers. It does not evaluate adhesive strength, set a cutting allowance, or replace a physical test fit. If an answer changes after checking the instructions or fitting the paper, update that plane’s record before moving it onto the cutting list.
Keep real shape separate from required clearance
Suppose the left return is deeper near the bottom than the top. That tells you the surface tapers. It does not tell you to cut every piece to the smallest depth.
First capture the shape with a template. Then account for the specified seam, trim, or junction allowance. Keeping those two operations separate makes it easier to check whether a gap is intentional or a measuring error.
Use one unit system consistently. Label every measurement, including which end it belongs to. A number written alone on a scrap of cardboard becomes much less useful once the piece has been turned over.

Dry-fit the pattern and plan every visible seam
Dry-fit enough of the backsplash to see how the pattern passes below, beside, and above the opening. Include the returns and edge treatment in that preview before committing to a starting position.
A dry fit means checking pieces in position without bonding them. Keep the release liner—the protective backing covering the adhesive—attached while developing the layout.
Lay out full sheets on a protected surface first. Identify their intended direction and how adjacent sheets join. Some patterns have a clear repeating unit, while others depend on a particular sheet orientation or joining detail. Follow the product’s own arrangement.
Then transfer the layout to the wall with paper outlines or temporarily supported, liner-on pieces where practical. Avoid a temporary attachment that could damage the wall or tile face.
The backsplash layout guide before cutting provides broader planning guidance for counters, interruptions, reference lines, and exposed ends.
Compare starting positions before choosing one
Try placing a full pattern unit at the opening centerline, then try placing a joint there. Compare the cuts produced at both sides.
A symmetrical opening does not necessarily need a symmetrical tile layout. Nearby cabinets, wall ends, or another interruption may make one starting position more practical. Our recommendation is to compare the whole visible wall, then give extra attention to the opening’s most noticeable corners.
Avoid deciding from the first row alone. A layout that looks balanced below the sill may produce awkward pieces beside the jambs or above the head.
Check from the adjoining room too. The reverse view may reveal a cut edge that is almost invisible while standing at the kitchen counter.
Make a cut allocation plan
Use a simple piece allocation exercise to see whether your planned cuts fit the available sheets. This is a layout check, not a final purchasing calculator.
Choose a source sheet and record its usable width and height after any required joining allowance. For each proposed piece, record:
- Template width and height.
- Pattern direction.
- Required factory edge or joining edge.
- Any cutting-tool allowance specified for the material.
- The source sheet assigned to it.
Place the templates on a paper outline of the sheet in their required orientation. Your result is one of three states:
Fits as planned: Every template lies within the usable sheet boundary, none overlap, and all required directions and edges are preserved. Keep that allocation with the cutting list.
Fits only after rotation: Check whether rotation preserves the pattern and joining detail. If it does, update the orientation labels. If it does not, allocate another sheet.
Does not fit: Move a piece to another sheet or revise the layout before cutting. Do not shrink a measured piece simply to make it fit the allocation.
As a hypothetical example, two return templates may fit beside each other by width but fail because one needs a factory joining edge that would be cut away. Area alone would miss that conflict.
This exercise helps you identify usable offcuts without assuming every leftover piece can be reused. It does not account for hidden defects, cutting mistakes, or the extra material you may choose to keep.
This check uses your observations of the actual templates; it does not calculate nesting from dimensions. “Fits” assumes that the templates are inside the usable boundary, do not overlap, and include the required cutting allowances. An uncertain factory edge or joining detail keeps the allocation unconfirmed even when the shapes appear to fit. Review one source sheet at a time so a piece is never assigned to two sheets by mistake.
Check the dry fit before adhesive placement
Use this inspection at the complete layout and again for difficult individual pieces:
- Every piece has a surface name and orientation.
- Pattern lines follow the chosen references.
- The left and right wall sections meet the same row marks.
- Templates fit without being forced into position.
- Required joints and trim allowances are included.
- Each visible cut edge has a planned finish.
- Approved adjoining pieces meet without an unintended step.
- The layout looks acceptable from both rooms.
If an answer is uncertain, revise that part of the dry fit. It is much easier to change a paper layout than a bonded installation.
Should you tile the wall or the pass-through returns first?
Plan the opening first, but let the approved edge detail determine the installation order. There is no universal wall-first or return-first rule for every tile and trim combination.
For a layout using separate, approved return pieces without a profile that must be fitted earlier, a practical sequence is to establish the main wall pattern, install the surrounding field, and then fit the returns to the completed front boundary. Treat this as a proposed sequence to check against the chosen system.
A trim profile that sits behind a tile edge can change that order. So can a permitted corner detail in which one plane deliberately covers the edge of another.
Decide which edge will be visible
Hold two liner-on samples at a wall-to-return corner. Add the actual trim sample if you plan to use one.
Look at the junction from straight ahead and from an angle. Decide which piece reaches the corner, where the adjoining piece stops, and whether the cut edge will remain visible. Record that decision on the sketch.
Do not bend a sheet around the corner simply because it feels flexible. Use a wrap only if the product instructions permit that detail. Separate plane templates let you plan the opening without relying on an unconfirmed bend.
Follow a sequence that preserves the layout
Use this order once the product and junction details are settled:
- Prepare the approved surfaces. Complete the specified cleaning, repairs, drying, and any required coating cure.
- Install any details that must precede the tile. Follow the selected trim system.
- Mark the main references. Establish a level horizontal line and useful vertical marks beside the opening.
- Install the main field according to the product’s starting and joining directions. Check rows as the work approaches the opening.
- Fit the wall pieces around the opening. Recheck each template against the installed neighboring pieces.
- Fit the approved returns. Re-measure their finished boundaries after the front edge is established.
- Complete the specified edge and junction treatments. Observe any stated cure or return-to-use requirements.
- Inspect the opening from both rooms. Check alignment, support, visible edges, and any local lifting.
Keep reference marks available above and beside the opening as long as you need them. A large opening interrupts the physical row, so the marks become the link between separated wall sections.
For a subway layout, the introductory subway tile installation guide offers useful background on preparation, application, and alignment. Apply its general guidance alongside the exact product instructions.
How do you cut peel-and-stick tile for a pass-through?
Make a labeled template for one surface at a time, confirm its fit, transfer it in the correct orientation, and test the cut tile before removing its backing. Use the cutting tool specified for the material.
A paper template is especially useful at a tapered jamb, an irregular trim edge, or a wall piece that needs a notch around an opening corner. It lets you develop the shape without making every adjustment in tile.
Make a template that cannot be confused with its reverse
Start with paper or thin cardboard slightly larger than the intended piece. Fit it to the surface using small adjustments. For a large or irregular area, join smaller paper sections together while they lie in the correct plane.
Label the template clearly:
Left jamb — kitchen view — front edge — top.
Add an arrow for pattern direction and mark any required factory edge. For a head or sill template, mark the kitchen-facing edge rather than relying only on “up.”
Keep a clearly marked template face visible during fitting. If you later mark the back of a tile, work through the reversal deliberately. A correct template can still produce a mirrored cut if it is flipped without accounting for it.
Transfer the template without losing the pattern
Lay the template on the tile and check the visible pattern before tracing. Decide where a grout-effect line, printed joint, or repeating motif should land at the corner.
Mark the waste area so the retained piece is obvious. Keep the cutting line readable and avoid marking a visible surface unless the product permits the marker and its removal.
For a notched piece, identify both intersecting cut lines before starting. Support the retained portion on the cutting surface, and use the specified tool and protective equipment. Do not cut tile while holding it against the installed wall.
The guide to cutting around outlets and edges expands on templates, orientation labels, staged trimming, and dry fitting.
Approach the final fit in stages
Where the material and cutting method permit, make the first cut conservatively and refine the fit after testing it. Avoid forcing a piece into a tight opening; it should meet the intended boundaries and allowances without distortion.
Keep useful offcuts labeled with their pattern direction and remaining factory edges. An offcut that is unsuitable for one return may fit another location, but verify its template and joining requirements before assigning it.
Test the actual tile after cutting. A paper template confirms shape; the tile introduces its own thickness, stiffness, and edge construction. Check it beside the installed field and any trim.
Use a pause point before exposing adhesive: identify the piece, confirm the orientation, check the fit, and verify the edge detail. This brief routine is particularly valuable when several similar return pieces are waiting on the bench.
Apply pressure only at the right stage
Stickwoll’s general guide describes smoothing from the center to the edges and making adjustments before firm pressure. That is a limited instruction for its published general process, not permission to repeatedly lift any adhesive tile. Follow the exact product’s handling and pressure directions. (Stickwoll, Installation & Care Guide.)
Before placement, clear the work area so the adhesive cannot touch loose scraps or debris. Handle the piece by the permitted edges and expose the backing in the manner the product specifies.
If you cannot position a complex piece accurately, stop and revise the handling plan. Splitting it at a permitted pattern joint may be an option; adding an arbitrary seam should be a deliberate layout decision.

How do you keep the pattern aligned around uneven corners?
Use level reference lines to control the pattern, then fit individual boundary cuts to the opening’s actual shape. Avoid making a whole row follow a sloping sill or uneven head.
A reference line, sometimes called a datum, is a fixed line from which you check the layout. Level means horizontal; plumb means vertical. The opening’s edges may differ from both.
The useful distinction is between the pattern you want to see and the boundary you must fit. Let the reference control the pattern and the template capture the boundary.
Carry one row across the opening
Mark the same horizontal reference on both sides of the pass-through with a level or an appropriately used laser level. Check corresponding row positions as the field rises.
Above the opening, confirm that pieces approaching from each side arrive at the same planned pattern position before filling the remaining area. If the layout has drifted, investigate the cause before installing the bridging section.
You can apply this principle to an uneven lower boundary too. Aspect’s illustrated uneven-countertop procedure uses level references, local scribing, and repeated dry fitting. Scribing means transferring an irregular boundary onto the piece being fitted. The illustration concerns Aspect Stone at a countertop, so its tool choices and dimensions should not be copied automatically to another tile. (Aspect / ACP, LLC, Aspect Stone Uneven Countertop Installation.)
Decide how much pattern continuity to pursue
Exact pattern continuation around every corner may conflict with the opening’s dimensions. A deep jamb may allow a clear continuation; a narrow return may leave only a fragment of the pattern.
Compare three approaches during the dry fit:
- Carry the main horizontal pattern lines into approved returns.
- Give each return an intentional, consistent pattern arrangement.
- Keep selected returns untiled and finish the main field with a deliberate border.
These are visual layout choices, subject to product and location suitability. Choose the arrangement you can execute with supported pieces and clear edges.
For a hypothetical tapered jamb, the front boundary may look vertical while the rear boundary angles slightly. Keep the chosen pattern orientation and fit the rear cut to the template. Rotating the whole piece to follow that rear edge could make the front pattern appear tilted.
Check seams without inventing a universal gap
A butt seam brings adjoining edges together without overlap. An overlap places one edge over another. Use the detail specified for the product and location rather than choosing a gap or overlap by appearance alone.
The guide to backsplash corner seams helps frame the questions to ask about adjoining planes, irregular boundaries, and pattern continuity. It does not establish approval for a head return or a particular cross-brand corner assembly.
At every corner, inspect the fit at the top, middle, and bottom. A seam that looks correct at one end can still reveal a tapered boundary elsewhere.

How should you finish pass-through trim and exposed tile edges?
Choose the edge treatment before cutting because it sets the finished tile boundary and may change the installation order. Use existing trim, a compatible approved profile, or an exposed-edge detail permitted for the selected tile.
The right finish depends on what the edge looks like from both rooms, how much space the detail occupies, and how it is installed.
| Edge approach | When it may suit the layout | Confirm before cutting |
|---|---|---|
| Stop tile beside existing trim | The trim creates a useful border | Final stop line and specified junction |
| Use an approved edge profile | Cut edges need a defined finish | Tile thickness, profile dimensions, compatibility, and order |
| Leave a permitted exposed edge | The product allows that appearance and location | Acceptable edge construction and accurate cuts |
| Retain an untiled return | The return is unsuitable for tile or the visual break works better | A complete termination for the adjoining wall tile |
| Use a specified sealant detail | The exact junction instructions require it | Compatible material, joint dimensions, and cure conditions |
Include the trim in the physical dry fit
A trim photograph cannot tell you exactly where its channels, lips, or mounting portions will sit on your opening. Use the actual profile or its verified dimensions.
Fit a sample with a tile offcut. Check how far the tile enters the detail, which portion remains visible, and whether the assembly projects beyond the adjoining finish. Transfer those boundaries to your templates.
For existing wood or painted trim, decide whether the tile will stop beside it or whether a permitted detail allows another arrangement. Avoid removing trim merely to simplify a measurement; removal can expand the preparation and repair work.
Keep finishing and repair decisions separate
A neat border should be part of the planned assembly. If you find an oversized gap after cutting, first determine why it exists. Check the measurement, orientation, template transfer, and trim allowance before deciding whether the piece needs replacement.
Do not treat a decorative finishing bead as proof of waterproofing. Stickwoll’s general guidance describes routine splash resistance and cautions against prolonged water exposure. A serving ledge needs its own approved surface and junction arrangement. (Stickwoll, FAQ.)
The same principle applies to a sharp or rough exposed cut. Use a permitted finishing method or a compatible approved profile rather than assuming the edge can remain accessible.
As you finalize the opening, the kitchen backsplash planning guide can help connect its edges to nearby counters, sink zones, wall ends, and other interruptions.

Troubleshoot before a small error spreads
Pause when a piece is crooked, a seam widens, or an edge lifts. Identify whether the cause is layout, shape, surface condition, or application before installing the next piece.
A pass-through has several neighboring planes. Continuing past an unresolved problem can make the next cut depend on the wrong boundary.
| What you notice | Check first | Next step |
|---|---|---|
| Rows meet at different heights | Reference marks and accumulated placement drift | Find where alignment changed before closing the upper field |
| Return piece rocks or will not sit flat | Template shape, thickness, debris, and local surface condition | Correct the cause and dry-fit again |
| Gap widens along a jamb | Tapered boundary or mirrored template | Recheck orientation and make a fitted template |
| Cut edge remains visible | Planned stop line and trim dimensions | Reassess the edge detail before bonding adjoining pieces |
| Piece is crooked after contact | The product’s correction instructions | Adjust only within the permitted handling limits |
| Corner or edge keeps lifting | Fit, support, contamination, and surface suitability | Pause and obtain product-specific repair guidance |
| Pattern looks wrong from the next room | Reverse view and return orientation | Revise the dry layout before continuing |
Correct placement within the product’s limits
Do not assume that peel-and-stick means indefinitely repositionable. If you notice an error after contact, check the permitted correction process before pulling the piece away.
For Stickwoll, the general guide describes adjustment before firm pressure. Its FAQ separately cautions that repeated repositioning can affect adhesion. Neither direction guarantees that lifting a piece will leave paint undamaged. (Stickwoll, Installation & Care Guide; FAQ.)
If correction is no longer permitted, follow the supplier’s removal and replacement guidance. Avoid stretching a piece into alignment or pressing neighboring pieces against it to disguise the error.
Investigate persistent lifting
When an edge lifts repeatedly, record where it happens. An isolated corner problem may have a different cause from lifting across several sheets.
Check whether the piece matches the template, lies fully against the surface, and meets the specified junction without being forced. Then review preparation and exposure conditions.
Obtain approval for the exact repair adhesive and assembly before adding another adhesive. A general reference to a compatible repair product does not identify which formulation suits your tile, substrate, and location.
If the surface cannot meet the installation requirements, choose a different finish or installation method for that plane. Repeated pressure cannot resolve an unsuitable application.
Finish with inspection and care
Inspect the completed opening from the kitchen and adjoining room, both straight on and at an angle. Check that the intended pattern lines remain consistent, cut edges have deliberate finishes, and each piece is fully supported according to the product instructions.
Observe the stated waiting period before cleaning or returning the area to normal use. Stickwoll’s routine care guidance calls for mild soap and water with a soft cloth or sponge and avoiding abrasive cleaners. Use exact-product directions if they differ. (Stickwoll, FAQ.)
Keep your labeled sketch and a few identifiable offcuts with the product information. They provide a useful record of pattern direction, edge decisions, and the surfaces you chose to tile.
A well-finished pass-through starts with a complete view of the opening: inspect the conditions, measure each plane, template the irregular parts, dry-fit the pattern, and establish references before bonding. Save the measurement worksheet and dry-fit checklist, then confirm the instructions for your chosen tile. Begin adhesive placement only when the surfaces, sequence, and edge details are settled.


Lämna en kommentar
Denna webbplats är skyddad av hCaptcha och hCaptchas integritetspolicy . Användarvillkor gäller.