


Material decisions · Finish, attachment, and intended use
A clear coat can change more than the shine of peel-and-stick tile. It adds another material to an installation whose appearance, surface finish, adhesive backing, and movement all need to work together.
If you’re worried about scratches, cleaning, or lifting corners, start by identifying the actual problem. Those concerns need different answers. We recommend treating finish, coating adhesion, tile attachment, flexibility, and future removal as separate decisions.
The practical route is straightforward: check the products’ intended uses, inspect the installation, test only when the instructions support doing so, and compare the cured sample with an uncoated reference before considering a larger application.
Can you put a clear coat over peel-and-stick tile?
Possibly, but compatibility must be established for the exact tile surface, coating formulation, and intended location. “Clear,” “water-based,” “polyurethane,” and “acrylic” are descriptions, not permission to apply a product over adhesive tile.
A clear coat is a transparent film applied over an existing surface. The tile’s pressure-sensitive adhesive is the backing that bonds the tile to its supporting surface when pressed into place. These materials perform different jobs.
For your decision, distinguish these parts:
| Part of the installation | What you need to establish |
|---|---|
| Existing decorative face and factory finish | Whether preparation and coating are permitted |
| Added clear film | Whether its appearance, attachment, and intended use are acceptable |
| Tile backing and adhesive | Whether the tile remains securely attached |
| Supporting wall or floor | Whether it is stable and suitable for the tile |
| Seams, perimeter, and transitions | Whether they meet the original installation requirements |
A successful surface finish cannot substitute for answers about the other parts. For material background, our guide to tile layers and factory finishes explains the distinctions to check. Confirm your own product’s construction rather than assuming every adhesive tile uses the same layers.
Polyurethane versus acrylic: which matters more?
The exact formulation and approved use matter more than the category name. Avoid choosing polyurethane solely for perceived toughness or acrylic solely for perceived flexibility.
The categories can even overlap. Rust-Oleum’s Ultimate Polyurethane ROC-23 technical sheet identifies its resin as acrylic polyurethane. That same revision describes use on wood and excludes floors. This is an example of why a familiar coating name cannot establish suitability for a tile floor.
A different Rust-Oleum document describes Pro Finisher Water-Base Polyurethane for Floors for hardwood and other interior wood surfaces. The floor designation addresses its stated application; that sheet supplies no vinyl-tile approval.
Both coating documents carry 2015 revisions. Use them to understand the distinction between resin name, substrate, and intended use. For a purchase or application decision, obtain the current instructions matching the exact product identifier on your container.
Our recommendation: choose a documented coating system, if one exists for your tile, before comparing sheen or price. A small patch cannot override an explicit restriction.
Leave the tile uncoated when these warning signs appear
Do not apply clear coat over an installation that is already lifting, bubbling, shifting, damp, or otherwise unstable. Stop and investigate the tile or supporting surface first.
The temptation is understandable: a continuous film looks as though it might hold loose corners down. But that assumption bypasses the installation issue underneath. Treat clear coating as a proposed surface modification, not an adhesive repair.
FloorPops’ installation sheet, for example, calls for a clean, smooth, flat, dry base, firm pressing, and rolling. It also identifies expansion against a wall as a possible cause of lifting. Those are product-specific installation requirements; they do not establish a clear-coat repair.
Before considering a coating, use this stop checklist:
- The tile or coating instructions prohibit the proposed surface or location.
- Corners, seams, or tile centers are lifting or changing.
- There is unexplained moisture, bubbling, staining, or movement.
- The coating requires preparation that the tile instructions do not permit.
- The project depends on making an unsuitable tile waterproof, floor-rated, or heat-resistant.
- Future removal matters, but the consequences of coating have not been clarified.
An unknown answer calls for clarification. An explicit prohibition calls for a different product or approach.
If the installation covers existing ceramic tile, review our guidance on peel-and-stick tile over existing tile. It addresses the preparation and support questions that should be settled before modifying the finish.

Check whether maintenance solves the problem first
If the tile is stable and the concern is ordinary cleaning, start with its approved care routine. Use the cleaner, tools, and moisture limits specified for that product.
Our peel-and-stick tile cleaning and maintenance guide offers a broader care overview. Exact product instructions take priority, including any restrictions on soap, polish, wax, or excessive water.
This is worth checking before buying a coating. Ask yourself what observable improvement would justify changing the surface. “I want it protected” is difficult to evaluate. “I want an approved way to remove cooking splashes without changing the matte finish” gives you a useful question for technical support.
Choose your next step
Use the following questions in order. The first applicable outcome determines your route.
Start with your location: floor, backsplash, or another wall area. Then check whether both products permit that location and the exact tile surface.
- A product prohibits the use, or the installation is unstable: stop coating plans. Resolve the installation or select a suitable surface system.
- The installation is stable, but compatibility, preparation, or cure instructions are unclear: leave it uncoated while you obtain written clarification.
- Both products support the proposed use, the installation is stable, and removal implications are acceptable: plan a limited comparison patch.
- The existing finish already meets your needs: keep it and follow approved care instructions.
For a floor, the “supported use” answer must include floor application. For a backsplash, it must address the actual splash, cleaning, and heat exposure. This guide gives you a route for deciding what to do next; it does not certify a product pairing.
Use the questions below to organize what you already know. Choose “unclear” when you have only a general claim about durability or a resin name. The recommendation follows the first applicable route above; it does not turn incomplete product information into approval.
Your next step: clarify restrictions and installation stability before planning a coating test.
Answer for the location you actually intend to coat. If you are considering both a floor and a backsplash, assess them separately. A supported answer for one location cannot supply the missing answer for the other. Keep the product documents and any written clarification with your notes so you can explain what each answer is based on.
How do you test clear coat on peel-and-stick tile?
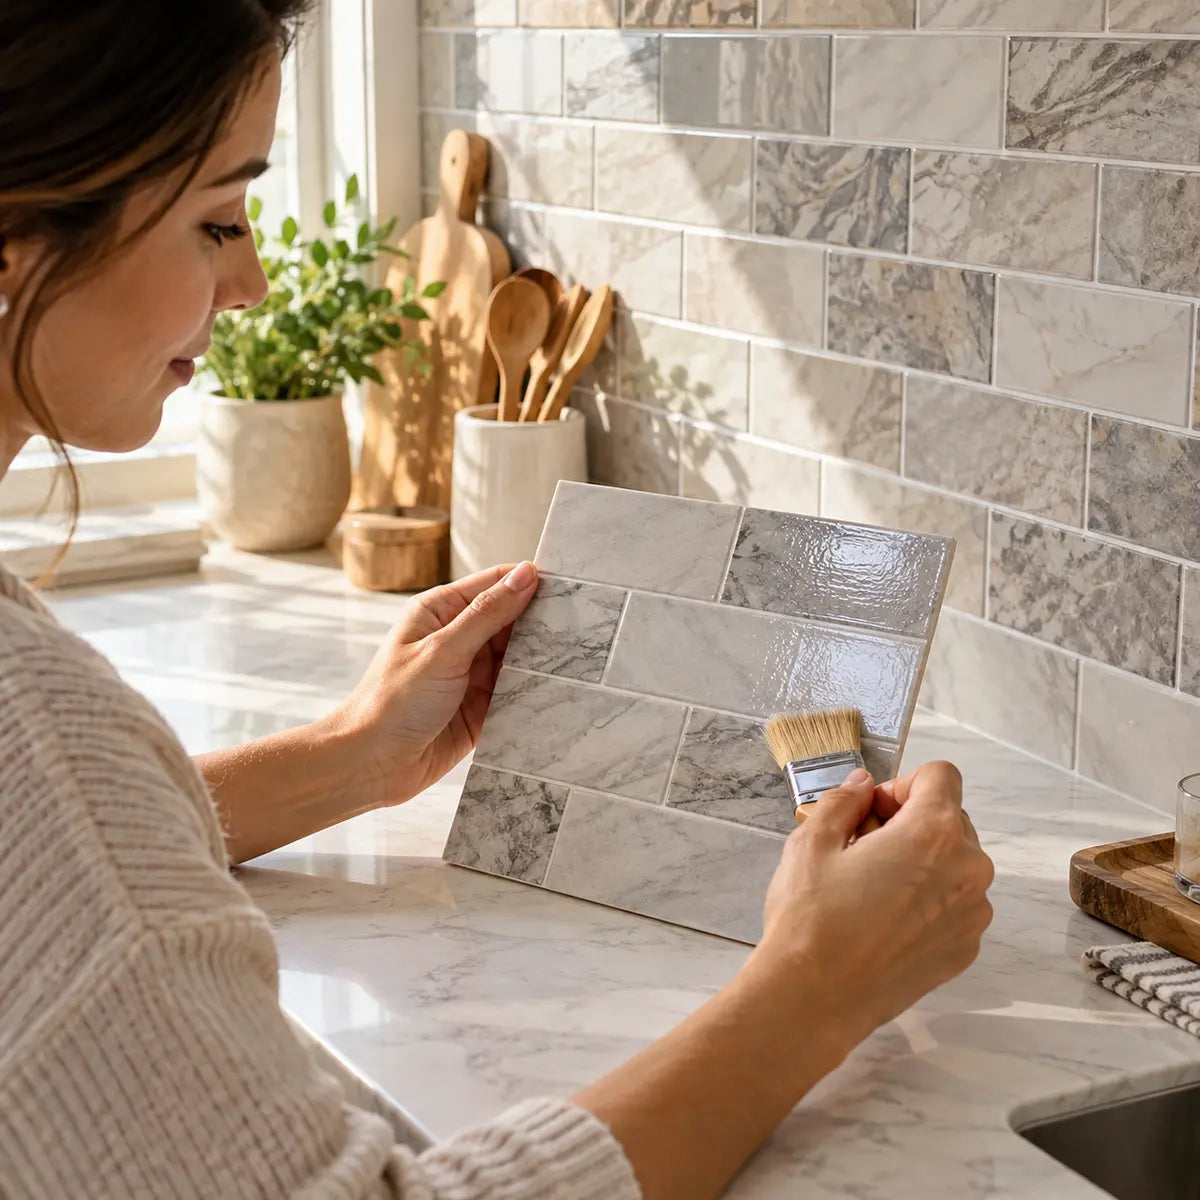
Use a documented comparison between a coated sample and an uncoated reference, with observation times taken from the exact product instructions. Start with a spare tile when possible, then consider a small, inconspicuous installed patch only if the proposed use is supported.
The purpose is to catch unacceptable local behavior before expanding the work. This is a household screening exercise. It provides observations, not a laboratory performance rating.

Establish compatibility before opening the can
Gather the tile packaging, installation instructions, care instructions, coating label, technical data sheet, and safety data sheet. A technical data sheet explains application and performance boundaries. A safety data sheet describes hazards and handling requirements.
Send both manufacturers enough information to identify the proposal:
I have [tile name and product identifier] installed on [supporting surface] in [location]. I’m considering [coating name and product identifier]. Is this combination supported over the tile’s existing finish? What preparation, waiting period, application method, cure schedule, cleaning restrictions, and removal limitations apply?
Ask specifically about the factory finish. Approval for “PVC,” “plastic,” or “vinyl” may still leave uncertainty about a printed, textured, or factory-coated tile face.
Keep the reply with your project notes. A general statement that a coating is durable does not answer whether it is compatible with your installation.
Separate the waiting periods
Do not convert an acclimation period, cleaning restriction, or dry-to-touch time into permission to coat.
For the FloorPops products covered by its instruction sheet, the requirements include 48 hours of preinstallation acclimation at a room temperature of at least 65°F (18°C) and five days after application before cleaning. Neither interval establishes when an aftermarket clear coat may be applied.
Likewise, curing—the process through which a coating develops its specified properties—can continue after the surface feels dry. The checked Pro Finisher sheet distinguishes 1–2 hours to touch from 95% cure at seven days, reported at 70–80°F and 50% relative humidity on its intended wood substrates. It does not provide a tile-coating schedule.
For your project, record separate requirements for:
- Tile acclimation before installation.
- Any postinstallation period before cleaning or alteration.
- Coating recoat intervals.
- Return to handling, traffic, cleaning, and other exposure.
- Final evaluation after the specified cure milestone.
If the tile manufacturer gives no coating interval, ask. Waiting longer alone does not establish chemical compatibility.
Create a useful reference
Photograph the uncoated tile before changing anything. Include an overall view, a close view of texture, and views of the relevant edges or seams. Use repeatable lighting and camera positions so later comparisons are meaningful.
Leave a matching sample or nearby area uncoated. This is your control: a reference that helps you distinguish a coating change from the tile’s original appearance.
A loose spare tile is useful for comparing color, sheen, texture, and surface behavior. It cannot show how the installed adhesive performs against your wall or floor. A small installed patch answers a different, still limited question about that local assembly.
Do not choose only the easiest-looking area if it fails to represent the project. For example, a smooth center section cannot tell you how a proposed application looks beside a textured edge. Ask the manufacturer how seams and perimeter details should be treated before including them.
Keep a simple test record
Use this record for each candidate. Change one coating or preparation variable at a time.
| Record | What to write down |
|---|---|
| Products | Tile and coating names, identifiers, batch information if available |
| Installation | Supporting surface, location, installation date, existing condition |
| Preparation | Exact cleaner, drying step, and any permitted preparation |
| Application | Tool, coat count, application times, stated coverage or thickness guidance |
| Conditions | Temperature, humidity if available, and relevant room conditions |
| Reference | Location or label of the uncoated comparison |
| Observations | Date, elapsed time, photographs, appearance, feel, edges, visible defects |
| Exposure | Any manufacturer-permitted cleaning or normal use introduced later |
Write down what you can observe. “Cloudy beside the edge” is more useful than “failed,” because it tells technical support what changed and where.
If you cannot measure film thickness, do not invent a value. Record the application method and label coverage guidance instead.
Apply only the supported preparation and coating procedure
Prepare the sample using instructions that are compatible with both products. Do not import a wood-finishing procedure into a printed tile project.
If the coating requires sanding while the tile instructions do not permit abrasion, pause for clarification. The same applies to solvent wiping, primers, stripping agents, and other preparation steps.
Follow the exact coating instructions for mixing, tools, coat count, environmental conditions, ventilation, and recoat timing. Keep the rest of the installation uncoated during the evaluation.
For an installed Stickwoll wall-tile project, our installation and care guidance is a useful starting point for checking the original installation. It supplies no aftermarket clear-coat approval.
Observe after the appropriate milestones
Inspect the sample at application, at the label’s relevant drying and cure milestones, and after any normal use or cleaning that both manufacturers permit. Record the actual elapsed time rather than relying on a note such as “next day.”
Compare appearance under the same lighting. Once handling is permitted, note whether the surface feels acceptably dry and whether visible film separation occurs during permitted use. Inspect installed edges without prying them up.
Do not cut a grid into installed tile, pull corners up, or use an aggressive household tape test to create an adhesion rating. ASTM’s coating adhesion tape-test scope and limitations describe a particular assessment, principally for relatively ductile coatings on metallic substrates. A casual tape pull on vinyl is not a compliant result or a measurement of the underside adhesive’s strength.
What will clear coat do to sheen, color, texture, and feel?
Judge the fully evaluated sample against the original finish in your actual room. “Clear” does not answer whether you will like the coated appearance.
Make the comparison from normal viewing positions as well as close range. A backsplash may look acceptable straight on but show an unwanted reflection from the side. A floor sample needs to be viewed from standing height as well as examined for local defects.
Keep your appearance observations separate:
| Feature | Compare with the uncoated reference | Reason to stop or reconsider |
|---|---|---|
| Sheen | Reflection under the same light | Gloss or unevenness you do not want |
| Clarity | Visibility of the printed design | Persistent haze or cloudiness |
| Color | Light and dark areas | Unacceptable tint or color shift |
| Texture | Relief, grooves, and surface detail | Loss of the appearance or feel you chose |
| Surface feel | Only after handling is permitted | Tackiness, drag, or unwanted softness |
| Uniformity | Centers, edges, and permitted seam details | Streaks, bubbles, puddling, or patchiness |
These are decision criteria, not universal predictions. The table tells you what to inspect; it does not claim that every coating will produce those changes.
Decide what “acceptable” means before testing
Write down your priorities first. If preserving a matte finish is essential, a clear but glossy sample is unsuccessful for your project. If you selected a tile for its relief, assess whether the coated sample still has the look you wanted.
This prevents a common decision trap: accepting an unwanted change simply because the coating has already been purchased.
Avoid using the first wet appearance as your final verdict. Follow the candidate product’s instructions about expected drying behavior, and evaluate at the appropriate milestone. If cloudiness or tackiness remains beyond that point, stop expansion and ask for product-specific guidance.
A short observation period also cannot establish long-term color stability. Record “no visible color change at this observation” rather than “will never yellow.”
Keep appearance separate from abrasion performance
A smooth, attractive finish does not demonstrate improved wear resistance.
Abrasion resistance means resistance to wear from rubbing or friction. ASTM’s Taber abrasion test scope and comparison limits describe testing coatings on plane, rigid surfaces with specified equipment and comparison constraints. A household rubbing demonstration does not establish a Taber result, scratch-proof performance, or years of service.
You can record visible changes after permitted cleaning or normal use. Keep the conclusion proportionate: the sample did or did not show a particular visible change during that observation.
For a floor where wear performance is the main goal, ask for relevant product-system data before accepting a cosmetic result as evidence of protection.
Will clear coat affect the adhesive or make tile peel?
You cannot predict the underside adhesive’s response from the coating category or appearance alone. Check coating attachment, tile attachment, and movement separately.
There are two distinct attachment questions. First, does the new film stay attached to the tile face? Second, does the tile stay attached to its supporting surface? A coating can look intact while the installation develops an edge problem, and an edge problem does not identify its cause by itself.
Baseline photographs are especially useful here. If a corner was already raised, its later appearance cannot establish that coating caused the original defect. If a previously stable edge changes during the comparison, stop and investigate without assuming a mechanism.
Why exact material chemistry matters
A Pressure Sensitive Tape Council paper on filmic adhesives by BASF authors Steven Gaik and David Schulenberg explains that plasticizers—ingredients used to modify plastic flexibility—can migrate from plasticized PVC into adhesive layers. It also discusses dimensional stability, meaning how well a material maintains its size and shape.
In its laboratory comparisons, different acrylic adhesive constructions showed different retained peel behavior and failure modes after aging. These were filmic adhesive specimens, not installed peel-and-stick tiles with aftermarket clear coats. The work supports asking about exact materials; it does not establish that a topcoat will reach or weaken your tile’s backing.
The same paper cautions that visible water-whitening behavior does not necessarily track adhesive peel or tack performance after immersion. Appearance and adhesive performance therefore need separate assessment within that research context. It is not a reason to immerse a DIY tile sample.
Flexibility needs its own observation
A coating must suit the movement expected in its approved assembly. Do not assume that a hard surface film is automatically appropriate for flexible tile.
ASTM’s mandrel bend testing purpose for attached coatings treats resistance to cracking during bending as a separate property. That distinction is useful, but it does not supply a household pass threshold for adhesive tile.
If the manufacturers recommend a spare-tile flexibility check, follow their instructions. Do not sharply fold a sample or deliberately flex an installed tile. A hand-bent sample also cannot establish years of performance in an installed assembly.
Look for cracking, whitening, or film separation during permitted handling and use. Record where it occurs and whether the uncoated reference shows a related change.

Floors and backsplashes need different decisions
A floor requires documented floor suitability; a backsplash requires suitability for its actual wall, splash, heat, and cleaning exposure. A clear coat does not extend the original tile’s approved uses.
For example, Smart Tiles’ adhesive wall-tile guidance excludes floors and direct shower installation while permitting areas exposed only to water splashes. Those are restrictions for that named wall-tile range, not rules for every adhesive tile.

For floors, ask beyond “will it stick?”
Before coating a floor, obtain answers about the exact tile surface, foot traffic, cleaning, cure conditions, and any relevant slip-performance requirements.
Do not use your foot as a wet-slip test. A sample that feels satisfactory under casual handling does not establish wet slip resistance. If the coating supplier cannot support the intended flooring application, leave the installation uncoated or consider a flooring system intended for the job.
A closet patch can provide local appearance observations. It cannot represent all the traffic, spill, and cleaning conditions elsewhere in a room.
For backsplashes, identify the real exposure
Describe the location accurately: a decorative wall, a sink backsplash, or a wall beside cooking equipment. Ask about the exact combination of tile, coating, cleaner, moisture, and heat.
Do not assume a coating adds permission for direct shower use, standing water, or a location excluded by the tile instructions. A continuous-looking film is insufficient evidence that seams, edges, penetrations, and the underlying wall form a waterproof system.
Our peel-and-stick tile planning guide helps connect material choice with surface, moisture, cleaning, and removal considerations.
For rentals, settle reversibility first
If future removal is a priority, ask how the proposed coating affects the removal plan and applicable warranty terms. Do not assume the original uncoated-tile guidance covers a modified installation.
A spare-board removal trial may provide an observation about that sample. It cannot guarantee the condition of a different painted wall or supporting floor later.
Where restoration obligations are strict and the modified system’s removal behavior is unclear, keeping the original finish is the more conservative choice.
How should you apply clear coat if the test supports proceeding?
Proceed only when the documented use, installation condition, cured comparison, and practical consequences all remain acceptable. Reproduce the supported method used for the sample.
A patch supplies limited information. Before expanding, check that the larger area introduces no unresolved location, preparation, seam, traffic, or environmental issue.
Use this application sequence:
- Confirm the product match. Check that the containers and instructions correspond to the products evaluated.
- Inspect the installation again. Resolve new lifting, bubbling, moisture, or movement before continuing.
- Repeat the permitted preparation. Keep the cleaner, drying step, tools, and other approved preparation consistent.
- Follow the specified application method. Use the stated coat count, coverage, environmental limits, and recoat schedule.
- Protect the area through the required milestones. Follow restrictions on handling, traffic, cleaning, water, and other exposure.
- Record and inspect the larger application. Keep photographs, application times, conditions, and the uncoated reference.
Use the exact label and safety data sheet for ventilation, protective equipment, and handling. “Water-based” alone is not a handling instruction. As one product-specific example, the checked Pro Finisher sheet requires adequate ventilation and warns against shaking or over-brushing to limit bubbles. Those directions are not a recipe for other sealers.
Do not increase coat thickness or count on the assumption that more must be better. Follow the approved system. Likewise, do not flood seams or perimeter gaps to improvise waterproofing.
Interpret your sample before expanding
For each category—finish, surface feel, coating attachment, installed edges, and any manufacturer-directed flexibility observation—choose acceptable, unacceptable, or uncertain. Then check whether the evaluation has reached the required cure and use milestones.
Apply these rules in order:
- Any restriction, new lifting, cracking, film separation, or unacceptable cured finish: stop expansion and obtain guidance.
- No visible problem, but evaluation is early or any category is uncertain: continue observation or clarify the missing answer.
- All relevant observations acceptable, with supported use and preparation confirmed: a larger application may be considered within those instructions.
- The finish looks good but the goal is proven waterproofing, wear life, or slip performance: the patch has not answered that performance question.
There is no score to average. An attractive finish does not cancel an edge problem. An acceptable sample means only that the observations made under the recorded conditions were acceptable.
For example, a hypothetical backsplash sample might have clear color, the desired sheen, and unchanged visible edges, but remain tacky after its specified cure milestone. That result belongs in the stop-and-ask route despite the good appearance.
Review your written observations before answering below. Include every relevant category rather than judging the sample from its best feature. If the instructions require a later observation or an answer is missing, keep that uncertainty in the decision. These questions interpret your notes; they do not measure adhesion, flexibility, abrasion, or slip resistance.
Sample review: keep the larger area uncoated while you complete observations and clarify uncertain answers.
Keep the result beside the observation date, not as a permanent pass label. A later change in edges, surface feel, or film behavior requires another review. If you change the proposed preparation, coating, sheen, or location, ask which earlier observations still apply before relying on them. The record should make it possible to distinguish what you observed from what you still need to establish.
What should you do if clear coat turns cloudy, tacky, cracked, or uneven?
Stop adding coating and preserve a record of the problem before attempting a remedy. The correct response depends on the exact products and application conditions.
Photograph the affected area and reference sample. Record when the symptom appeared, the elapsed drying or cure time, preparation, coat count, and room conditions. Send that information to the relevant technical-support teams.
| Symptom | Useful observations to record | Immediate next step |
|---|---|---|
| Cloudiness or haze | Location, timing, whether it changes | Check the expected drying behavior and ask if it persists |
| Tackiness or softness | Elapsed time and permitted handling conditions | Prevent further use and request guidance |
| Cracking or whitening | Whether it appears at seams, edges, or during permitted movement | Stop expansion and assess suitability |
| Flaking or film separation | Whether the coating alone separates | Ask about compatibility and approved preparation |
| Newly raised tile edges | Compare with baseline and uncoated areas | Investigate the installation and proposed coating together |
| Bubbles, streaks, or uneven sheen | Application method and when defects appeared | Obtain a product-specific correction procedure |
The table identifies useful information; it does not diagnose a cause. Persistent tackiness, for example, cannot be assigned confidently to one mechanism from a photograph.
Do not improvise with paint stripper, solvent, aggressive sanding, extra heat, or another coating layer. Obtain a correction procedure compatible with both the tile and coating. Any proposed repair should be evaluated in a limited area before broader use.
If removal is recommended, ask whether it means removing the added film, individual tiles, or the entire installation. Those are different tasks with different implications. Keep the rest of the project unchanged until the approach is clear.
Resist the urge to make the surface look temporarily better before documenting it. A clear record is more useful than several overlapping remedies whose effects cannot be separated.
Make the clear-coat decision from the whole system
Leave peel-and-stick tile uncoated when the existing finish meets your needs, compatibility is unclear, or a test reveals unacceptable behavior. Consider coating only within supported product instructions and after a recorded comparison remains acceptable through the relevant milestones.
Your final decision should answer five questions: Do you like the finish? Is the film behaving acceptably? Are installed edges stable? Is the use supported? Are maintenance and removal consequences acceptable?

For a new wall project, selecting an appearance you already like can remove the reason to modify it. If a textured, grout-free adhesive wall tile suits your intended location, Stickwoll Dual Ceramics wall tile is a browsing option to assess against that brief. Confirm its exact surface and installation fit before choosing it; this is not a clear-coat recommendation or flooring approval.
The useful outcome is a confident next step: keep and care for the existing finish, request product-specific clarification, run a supported comparison, or proceed within an approved system. A successful patch contributes to that decision without promising performance it cannot establish.
Frequently asked questions
Do you need to seal every seam in peel-and-stick tile?
Follow the exact tile’s seam and perimeter instructions. Do not substitute a general clear coat for a specified detail, or assume coating across joints creates a waterproof assembly. If the installation requires waterproofing, select a system documented for that purpose.
Can a clear coat restore a worn decorative pattern?
Do not expect a transparent film to recreate missing printed detail. First establish whether the problem is removable residue, a surface-finish issue, or damage to the decorative face. Ask the tile supplier about the appropriate care, repair, or replacement route before coating.
Is a spray clear coat easier to approve than a brush-on coating?
The application format does not answer compatibility. A spray product still needs supported use over the exact tile surface, suitable preparation, appropriate handling, and a recorded comparison. Check the complete product instructions rather than treating a light spray as a harmless trial.
Can you use a different sheen of the same coating after testing?
Confirm with the coating manufacturer whether the other sheen is covered by the same compatibility guidance, and evaluate the appearance you actually plan to use. A sample of one sheen cannot tell you whether you will accept the finish of another.
Does no visible lifting mean the adhesive is unchanged?
No. It means no lifting was visible at that observation. It does not quantify adhesive strength or establish future performance. Keep the wording of your notes that precise, and stop expansion if new instability appears.



Lämna en kommentar
Denna webbplats är skyddad av hCaptcha och hCaptchas integritetspolicy . Användarvillkor gäller.