



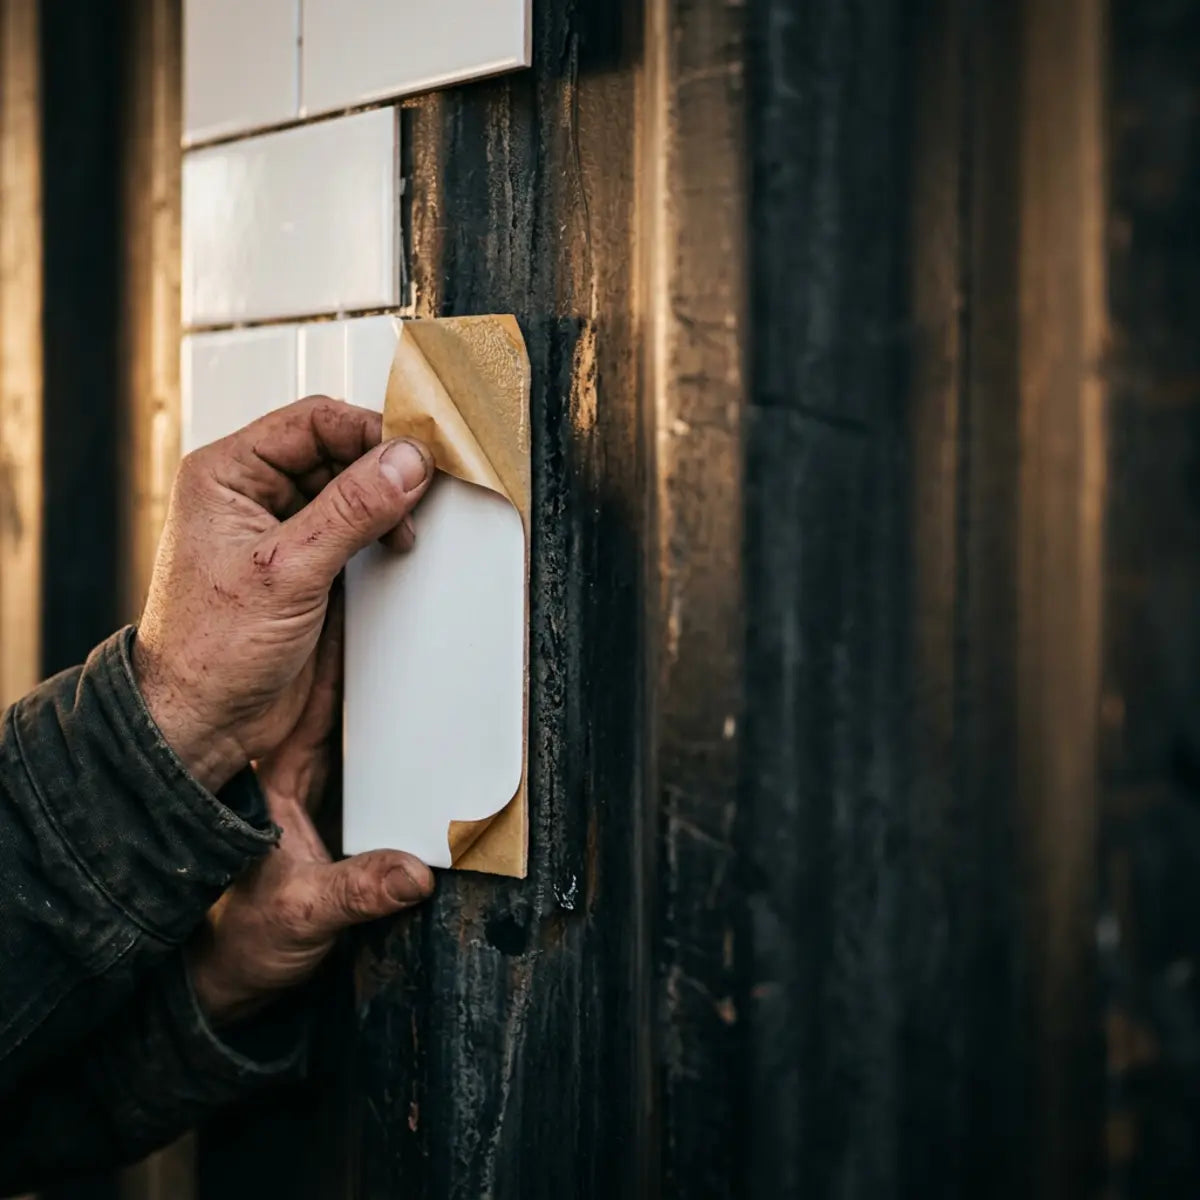
Peel-and-stick wall tile can work inside some shipping-container conversions, but a corrugated steel shell creates substrate and moisture conditions that are very different from painted drywall. The first questions are not “Which primer?” or “How hard should I roll the tile?” They are whether the finished interior wall is flat enough for adhesive contact, whether steel corrosion and coatings are stable, and whether the container enclosure already has a credible insulation/condensation strategy.
This guide replaces homemade readiness ratings, one-size-fits-all rust-treatment rules, fixed post-install timing rules and short-test promises with a more defensible sequence: understand the wall assembly, solve envelope moisture, choose direct-to-surface versus backer, test the exact product on the exact substrate, and keep the decorative finish secondary to the container’s thermal and moisture design.
Start with the wall assembly, not the exposed steel alone
A shipping container conversion can have bare corrugated steel, painted steel, framed interior walls, rigid foam, spray foam, plywood, gypsum board or other interior linings. Those assemblies present very different surfaces to a self-adhesive wall finish.
Identify every layer from exterior steel to the finished interior surface. If the interior finish is already smooth gypsum board or a stable panel, the tile decision should be based on that finished substrate—not on generic advice about steel containers.
Corrugation is a contact-area problem
Pressure-sensitive adhesive works by contacting the substrate. Deep corrugations reduce the flat area available to a thin tile or panel. A flexible sheet can bridge valleys in the steel without actually bonding to them, leaving sections unsupported.
Do not turn corrugation depth into a homemade percentage score. Hold the actual product against the wall profile and look at where the backing makes contact. If large sections bridge air, direct-to-corrugated-steel installation is a poor starting point unless the product manufacturer specifically supports that geometry.
A flat backer can simplify the decorative finish
A framed or bonded interior backer can create a continuous flat surface for the decorative wall product. The backer still needs to be appropriate for the room, structurally supported and compatible with the enclosure’s moisture strategy.
Do not add MDF, plywood, gypsum board or another panel simply because it looks flat. The panel choice affects moisture, fire, fastening, finish and code considerations. In a permitted dwelling or commercial conversion, the full wall assembly should follow the applicable design and building requirements.
Thermal bridging belongs to the enclosure design
Steel conducts heat efficiently. DOE Building Science Education explains that continuous insulation helps reduce thermal bridging and can reduce moisture risk by changing the temperature profile through a wall. Its continuous insulation guidance specifically notes the value of continuous insulation on metal-framed walls.
This is a general building-science principle, not a shipping-container tile approval. The practical point is that decorative tile should not be used as the layer that “solves” a steel enclosure’s thermal bridge.
Condensation is an enclosure problem before it is an adhesive problem
DOE Building Science Education describes condensation as part of heat and moisture flow: when moisture-laden air reaches a surface below its dew-point temperature, condensation can occur. DOE’s heat-flow overview explains why insulation and vapor-control decisions affect that risk.
If the interior steel or back side of an interior panel is condensing, a decorative adhesive finish can hide symptoms without fixing the enclosure. Resolve insulation, air leakage, vapor control and HVAC/moisture sources first using an appropriate building design.
Do not trap a known moisture problem behind decorative panels
Staining, rust, damp insulation, musty odor or water droplets deserve investigation before tile. EPA’s mold and moisture guidance emphasizes fixing water sources and drying affected materials rather than covering them.
A wall tile can be wipe-clean and still be a poor choice over a damp assembly. The face layer does not replace enclosure moisture control.
Inspect steel coatings before adhesive testing
Container walls can have factory coatings, later repainting, corrosion repair, oil contamination, welding residue or unknown maintenance history. A self-adhesive product bonds to the coating that is actually on the steel, not to an abstract category called “metal.”
Look for chalking, peeling paint, rust under the coating, loose scale, grease and repair patches. If the coating is unstable, adding tile only bonds the new finish to a layer that is already failing.
Rust requires diagnosis, not an automatic converter
Surface rust, active corrosion, perforation and failed coating are not the same condition. Do not prescribe a chemical rust converter as an automatic first step for every container. The appropriate corrosion repair depends on the steel condition, coating system, environment and intended occupancy.
If structural steel is significantly corroded, obtain appropriate evaluation. A decorative tile project should not decide whether container steel remains structurally serviceable.
Do not grind or sand steel blindly
Abrasive preparation can remove rust and weak coating, but it can also damage protective coatings, create metal dust and expose a larger bare-steel area that needs a compatible coating system. In a finished conversion, sparks and dust can also create safety concerns.
Use the steel/coating repair method appropriate to the actual wall system. When abrasive work is required, keep it separate from the decorative installation and follow appropriate safety and fire-control practices.
Direct-to-painted-steel installation needs product evidence
If the steel is smooth, flat enough, clean, dry and stable, a pressure-sensitive adhesive product may be a candidate only when the wall-tile manufacturer supports the substrate or provides a compatible test path.
Do not assume “adhesive sticks to metal” means the complete tile belongs on a container wall. Coating type, surface energy, temperature range, corrugation, condensation and room exposure all affect the real application.
Use a representative compatibility test—not a seven-day guarantee
A small test area can reveal immediate adhesion, coating pull-off, edge lift and visual telegraphing. Use the exact wall preparation and product method. Observe it through representative room conditions if practical.
A short test cannot prove long-term performance under seasonal container temperatures or humidity. Treat it as evidence for obvious incompatibility, not as a certification that a full wall will remain unchanged for years.
Temperature during installation matters, but use the product range
Pressure-sensitive adhesives and coatings can behave differently at low or high temperature. Use the tile manufacturer’s installation-temperature range and allow the substrate/product to reach the required conditions before application.
Do not impose one fixed post-install climate hold across every adhesive product. If the product specifies conditioning or a period before full service, follow that requirement. The container’s HVAC or insulation strategy should maintain habitable conditions independently of the tile.
Application pressure should follow the exact product
Some self-adhesive products benefit from a roller or smoothing tool. That does not mean one roller type or extreme body pressure is appropriate for every tile. Too much localized pressure can damage relief or stretch a flexible face.
3M’s pressure-sensitive adhesive guidance illustrates the general role of pressure in creating contact, but your tile manufacturer controls the actual tool and method.
Do not use an invented adhesive mechanism to justify extreme pressure
Pressure-sensitive adhesives form contact through the behavior of the adhesive and the substrate under pressure. Follow the actual product method rather than relying on an invented explanation for why extreme rolling is necessary.
Follow the adhesive/product instructions and focus on clean, compatible surfaces plus the documented application pressure.
Vibration and movement should be treated as service conditions
A fixed residential container, a mobile container-based unit and a container moved periodically can experience very different vibration and racking. Do not assume a decorative finish tested in a stationary room will behave the same way during transport.
If the structure will be moved, ask whether the interior finish and wall assembly are designed for transport conditions. A peel-and-stick tile can flex, but flexibility is not a structural movement rating.
Welded seams and structural joints should remain identifiable
Multiple containers joined together can have welded openings, reinforcement frames or transition details. A decorative finish should not conceal a structural joint that needs inspection or service.
Where an interior liner spans the structural joint, use the building design for movement and finishing. Do not bridge the joint with adhesive tile as a substitute for the wall-assembly detail.
Choose the backer according to the complete wall assembly
A smooth plywood, gypsum or composite interior panel can make decorative installation easier, but the backer still has to fit the enclosure design. Consider fire performance, moisture exposure, fastening, finish, interior-air quality and any code or occupancy requirements.
Raw MDF or plywood should not be assumed suitable for direct adhesive tile simply because the surface looks flat. Check the backer and tile instructions, and finish or seal the panel only with a system compatible with the adhesive product.
Do not make one primer the default for every backer
A primer can change surface porosity, color, adhesion and vapor properties. The right preparation depends on the panel material and the tile system. A sealing primer that is useful on one plywood or gypsum surface may be incompatible with another coating or adhesive.
Use the wall-product and coating manufacturer’s data. If the tile requires a particular surface finish, build that requirement into the backer specification before the panel is installed.
Keep vapor control separate from decorative primer
A primer applied for tile adhesion should not be treated as the building’s vapor-control strategy unless the wall design specifically uses it that way. Container enclosures can be moisture-sensitive because the exterior steel is vapor-impermeable and highly conductive.
Building Science Education notes that vapor-control layers must be placed appropriately for the wall assembly and climate. Adding an interior decorative coating or vinyl-like finish without understanding drying direction can change moisture behavior.
Interior insulation needs a drying and air-sealing strategy
If insulation is installed inside the steel shell, gaps and air leakage can allow warm humid indoor air to reach cold steel surfaces. The appropriate solution depends on climate, insulation type, air barrier and vapor control.
Do not rely on peel-and-stick tile as an interior vapor retarder or air barrier. Its seams, outlets and edges are not a documented enclosure-control layer unless the complete wall system was specifically designed and tested that way.
Flat framed walls are usually easier to finish than raw corrugation
When the container conversion already uses a framed interior wall with a stable finish substrate, treat the peel-and-stick project like any other interior wall application—subject to the tile’s approved surfaces and room limits.
The steel shell remains important to the building envelope, but the decorative tile can be installed on the finished interior surface without trying to make every tile conform directly to corrugated steel.
Do not cover inspection points or access panels
Container conversions can include electrical panels, plumbing access, structural connections and service openings in tight spaces. A decorative wall finish should not make those areas difficult to inspect or remove.
Plan the tile termination around access panels and removable covers. Keep screws and hardware accessible. If an opening is likely to be serviced, save spare pieces for local restoration after maintenance.
Kitchen and bathroom zones add separate placement limits
A container kitchen or bathroom still needs product-specific sink, appliance and wet-area guidance. A successful steel/backer test does not prove the tile belongs near direct flame, shower water or prolonged humidity.
Separate the questions: first confirm the wall assembly and substrate; then confirm the room exposure. A suitable dry-wall application can still be unsuitable inside a shower or behind an appliance that exceeds product limits.
Do not treat FRP or another backer as an automatic waterproof assembly
Fiber-reinforced plastic panels and other liners can be used in certain wall systems, but their suitability depends on the product, joints, fastening and complete assembly. A single panel material does not automatically create a waterproof container interior.
Use the backer manufacturer and building design for moisture performance. The decorative tile should not be used to make unsupported claims about the assembly behind it.
Clean painted steel without leaving incompatible residue
Oil, shipping residue, household soil and cleaning products can remain on painted steel. Use a cleaner compatible with the coating and tile instructions. Strong solvents can soften or strip some coatings.
Wipe and dry the surface as required. A clean-looking glossy coating can still carry residue that reduces pressure-sensitive adhesive contact.
Use the product’s installation-temperature range
Container interiors can experience large temperature swings if they are unconditioned. Installing an adhesive finish outside its documented temperature range can produce poor initial contact or unpredictable handling.
Condition the room and materials according to the exact product. If the space cannot maintain a suitable installation environment, postpone the decorative finish rather than inventing a heater or cooling workaround.
Plan expansion at other materials and transitions
Metal frames, plywood, gypsum, trim and tile can change dimensions differently with temperature and humidity. Do not rigidly bridge an intentional building joint or material transition solely for visual continuity.
Use the wall-assembly and tile instructions for joints and terminations. A flexible tile is not a substitute for a designed movement detail.
Use a sample board when direct testing on the steel is undesirable
If the final wall will use a backer, test the tile on a representative piece of that finished backer rather than testing bare steel that will not exist in the completed room.
Apply the same primer, coating and cure schedule planned for the real wall. This produces more relevant information than a direct-to-metal test when the project is actually a framed interior wall.
Inspect the installation after the first major weather change
Container interiors can experience larger temperature swings than conventional interior rooms when insulation, solar exposure or HVAC control are limited. After the first significant hot or cold period, inspect tile edges, seams and transitions for visible change.
This is not a certification interval and it does not prove future performance. It is simply a useful opportunity to catch obvious edge lift, coating failure or condensation evidence before the condition spreads.
Keep condensation inspection separate from tile inspection
If you can access the back side of a removable panel, service cavity or inspection point, include that location in the building-maintenance plan. Moisture behind the finished wall can exist even when the decorative face still looks perfect.
Do not remove wall assemblies unnecessarily just to inspect a successful tile project, but preserve any access points already designed into the conversion. A decorative finish should never make enclosure inspection harder than the original wall design intended.
Repair local tile damage only after checking the substrate
If one tile or panel lifts, bubbles or dents, remove or replace it only using the product’s documented method. Inspect the exposed substrate for corrosion, coating release, moisture or wall movement. A matching spare piece is useful only after the cause has been understood.
Repeated failure in the same location is evidence that the wall condition or room exposure needs attention. Do not escalate from factory adhesive to stronger and stronger bonding products without diagnosing the substrate.
Keep the container wall build-up with the project records
Record the steel coating, insulation type, interior framing, air/vapor-control layers, backer or finish substrate, primer/coating if used and the decorative tile product. That wall build-up is more important for future troubleshooting than the tile color alone.
When another owner or contractor services the wall later, the record helps them understand whether they are looking at direct-to-steel tile, tile over a framed gypsum wall, tile over plywood, or another assembly.
Plan decommissioning before the tile is installed
A container may later be repurposed, moved or reconfigured. Keep access to structural connections, electrical panels, plumbing and HVAC components. Do not make the decorative finish so permanent that essential service work requires destructive removal across a large wall.
For self-adhesive products, save the removal instructions and a few spare pieces. For backer systems, save panel and coating information. The easier it is to identify and locally repair the assembly, the less likely a future service event will turn into a full-wall replacement.
When a different interior finish is the better choice
If the container wall remains highly corrugated, frequently condenses, experiences major temperature swings, will be transported often or cannot provide a stable approved substrate, another wall finish may be more appropriate than peel-and-stick tile.
That decision is not a failure of the decorative product. It is simply a better match between material and service conditions. Use the finish that fits the enclosure you actually have.
Recheck the wall after a long vacant period
Containers used seasonally or left unconditioned for extended periods can experience different humidity and temperature conditions from normal occupancy. Before assuming the decorative wall is unchanged, inspect edges, seams, service openings and any known cold or exterior-exposed zones after the space returns to normal use.
If you find condensation, coating release or corrosion evidence, treat that as an enclosure-maintenance issue first. A successful decorative finish should not stop the owner from noticing changes in the wall system behind it.
Frequently asked questions
Can peel-and-stick tile stick directly to a shipping-container wall?
Potentially only when the actual steel/coating surface is stable, clean, dry, flat enough for broad adhesive contact and within the tile manufacturer’s approved substrate and temperature limits. Deep corrugation, rust, unstable paint or condensation can make direct installation unsuitable.
Do I need to use a backer board?
Not as a universal rule. A flat finished interior wall can make decorative installation easier, but the backer must belong to the complete container wall design. Choose it based on structure, moisture, fire, finish and product compatibility—not only because peel-and-stick tile wants a flat surface.
Should I use MDF inside a container?
Do not select MDF solely as a tile backer without considering moisture, fire, fastening and the full wall assembly. If any wood-based panel is used, follow the panel, coating and tile manufacturers’ requirements and the building design.
Do I need a rust converter before tile?
No universal rule applies. Diagnose the steel and coating condition. Surface corrosion, failed paint and structural corrosion require different responses. Use the appropriate corrosion/coating repair system before decorative work.
Do I need a J-roller?
Only when the exact product instructions call for that or another pressure tool. Pressure matters to pressure-sensitive adhesive contact, but the required tool and amount of pressure vary by product.
How long should I test a tile sample on container steel?
There is no short test period that certifies long-term performance. A representative sample can reveal immediate incompatibility, coating pull-off or obvious edge lift. Seasonal temperature and humidity performance depends on the complete enclosure and product.
Will peel-and-stick tile stop container condensation?
No. Condensation is an enclosure heat/moisture problem. Address insulation, air leakage, vapor control and indoor humidity using an appropriate building design.
Can tile be installed over spray foam?
Do not assume direct installation on exposed spray foam. The foam may need a code-compliant interior finish or backer, and the tile manufacturer may not approve foam as a bonding substrate. Use the complete wall assembly requirements.
Can I install over plywood?
Potentially when the plywood surface is stable and prepared according to the tile and coating instructions. Raw wood porosity, movement, moisture and surface treatment matter. Test the finished planned substrate rather than assuming all plywood is equivalent.
Can I tile a container bathroom?
Only within the exact tile’s moisture limits and a wall assembly designed for the bathroom exposure. Direct shower use requires a purpose-designed wet-area system; decorative adhesive tile should not be treated as the waterproofing layer by default.
Can I tile near a container stove?
Follow the exact tile and appliance heat clearances. Steel construction does not make a polymer or adhesive finish safe beside direct flame or concentrated heat.
What if the container will be moved later?
Transport can introduce vibration and racking beyond normal stationary-room conditions. Do not assume a finish that works while stationary is rated for transport. Use materials and an interior wall system designed for the intended mobility.
Container wall decision checklist
- Identify the complete wall assembly from exterior steel to interior finish.
- Check insulation, air sealing and condensation control before decorative work.
- Inspect steel coating, corrosion, moisture and previous repairs.
- Decide whether the final tile substrate is steel, gypsum, plywood or another backer.
- Confirm the exact tile is approved for that finished substrate and room.
- Use a representative sample to identify obvious compatibility problems.
- Follow product-specific temperature, cleaning, cutting and pressure instructions.
- Preserve structural joints, service panels and access points.
- Keep kitchen, bathroom and appliance exposure within documented limits.
- Record the wall assembly, tile product and preparation for future maintenance.
Bottom line
A shipping container is not simply a “metal wall” that needs a stronger adhesive. Corrugation, coatings, corrosion, thermal bridging, condensation, insulation and interior backers determine whether there is even a suitable decorative substrate to tile.
Solve the enclosure first. Then choose a flat, stable, dry surface that the peel-and-stick product actually supports. Use samples to find obvious incompatibility, not to certify long-term performance; follow the product’s temperature and pressure method; and keep structural/service details accessible. The decorative tile should be the last layer of a sound wall assembly, not the material asked to solve the building science beneath it.


Leave a comment
This site is protected by hCaptcha and the hCaptcha Privacy Policy and Terms of Service apply.