







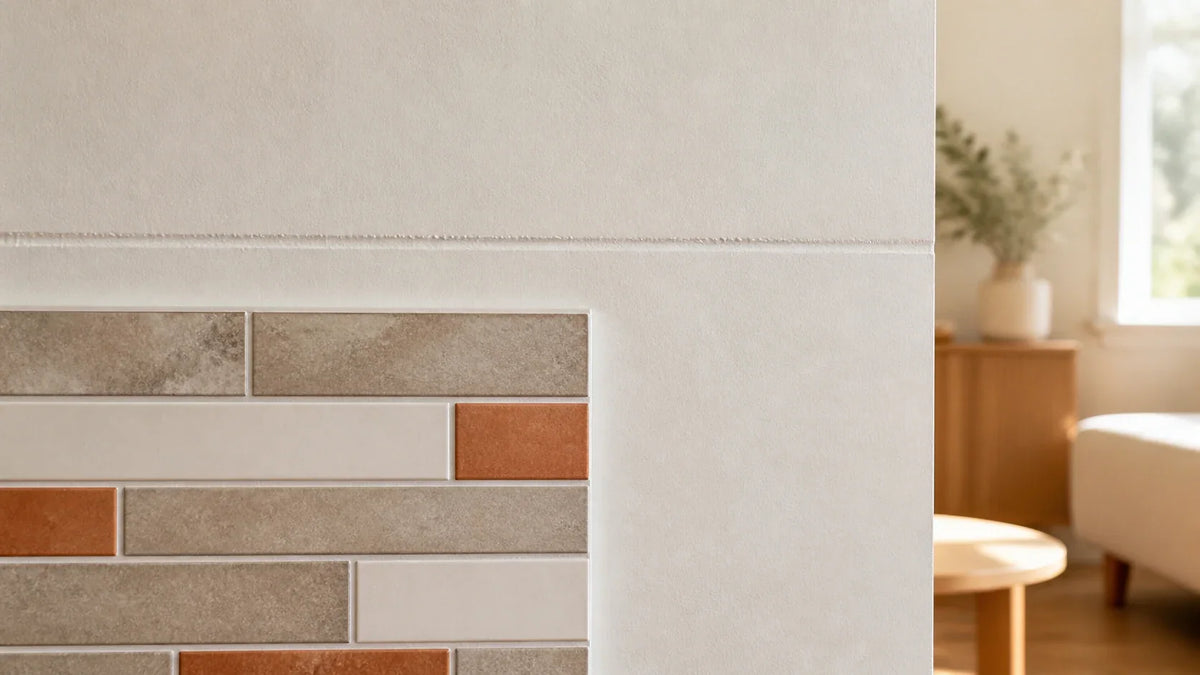
Peel-and-stick wall tile can sometimes cover a normal, finished drywall seam, but it should not be used to bridge a control joint, building movement joint or unexplained active crack. The first job is to identify what the visible line actually represents. A flat taped panel seam and a designed movement joint can look similar after paint, but they serve different purposes.
This guide replaces homemade numerical movement ratings with a four-category check: ordinary finished seam, intentional drywall control joint, building movement joint, or active/uncertain crack. The category determines whether a decorative wall finish can be considered at all.
Start with the definition of a control joint
The Gypsum Association defines a control joint as a designed and installed separation between adjacent gypsum panels and their supporting framing members that relieves stresses caused by expansion and contraction from environmental humidity and temperature changes.
That means a control joint is not a defect to be hidden. It is an intentional movement detail. Covering it continuously with an adhesive decorative layer can defeat the visible separation and transfer movement into the finish.
Use current gypsum-board guidance before modifying a joint
GA-216-2024 is the Gypsum Association’s current application and finishing guidance for gypsum panel products. The Association notes that architects, specifiers and installers use GA-216 to determine when control joints should be used and how gypsum panels are installed and finished.
ASTM also maintains C840-25 as the active standard for application and finishing of gypsum board. These industry references belong to the gypsum assembly. A peel-and-stick product does not override them.
Category 1: an ordinary finished drywall seam
A normal panel seam is typically taped and finished with joint compound so the wall becomes a continuous painted surface. It is not intended to remain open as a movement joint. If that seam is flat, stable, dry, fully finished and not cracking, it may be treated like the surrounding wall when the tile manufacturer approves installation over finished drywall or painted gypsum board.
Do not assume every vertical line at common panel spacing is automatically a normal seam. Look for evidence of a manufactured joint accessory, repeated cracking, an intentional gap, trim or a joint aligned with a known building movement location.
Category 2: an intentional drywall control joint
A drywall control joint is designed to separate adjacent areas so movement can occur at the joint. Do not fill the visible separation merely to make a decorative surface continuous. Do not bridge it with peel-and-stick tile unless a qualified design/detail specifically addresses how the movement is to remain functional.
If the finish needs to terminate at the joint, treat the joint as a planned boundary. The tile on one side can stop independently from the tile on the other side, with the actual joint left able to perform its intended function.
Category 3: a building expansion, seismic or other movement joint
A joint in the underlying building structure can continue through the wall system. A decorative wall finish should not be used to conceal or rigidly bridge that joint. The required treatment depends on the building assembly and applicable design, not on how flexible the tile feels in your hand.
If you identify a joint that belongs to the building structure, stop the decorative installation and obtain the appropriate building/architectural detail. A wall-tile article cannot design a movement joint for a specific structure.
Category 4: an unexplained or recurring crack
A crack that widens, reappears after repair, has visible offset, follows a moisture problem or cannot be confidently identified as a normal finished seam needs investigation before it is covered.
Do not turn “the tile is flexible” into permission to bridge the crack. A flexible decorative layer may hide the symptom for a while without addressing why the substrate moved. Document the crack and repair or assess the wall first.
How to inspect the line without turning the project into demolition
Start with non-destructive observations. Photograph the line, note its direction and length, and look at nearby doors, windows, corners, ceiling changes and wall intersections. Check whether the line is straight and deliberately formed or irregular like a crack.
Look for trim, a recessed slot, a metal or vinyl accessory, repeated vertical separation or a joint that continues through several finish layers. Those clues can indicate a designed control or movement joint.
Do not cut into the wall or remove joint accessories merely to confirm the category for a decorative tile project. If the condition is unclear, stop and ask the appropriate drywall, building or design professional.
Why a flat taped seam can usually be treated differently
Once a normal gypsum-board seam has been properly taped, finished and painted, it is intended to function as part of the continuous wall surface. A peel-and-stick manufacturer that approves smooth finished drywall or painted gypsum board may allow installation across that stable surface.
The important word is stable. If the seam is crowned, cracked, soft, damp, poorly sanded or covered with loose compound, the wall needs repair first. The tile should not be used as a cosmetic mask over an unfinished joint.
Do not confuse a control joint with a poorly finished seam
A poorly finished seam can show a ridge, tape edge or shallow depression. Those are finish-quality problems, not automatically movement joints. Repairing them may involve normal drywall finishing methods rather than preserving an open separation.
A true control joint has an intentional function. If the line contains a manufactured control-joint accessory or follows a known design joint, do not skim it flat simply because the tile needs a smooth surface.
Control joints are not “cracks that need caulk”
Filling an intentional control joint with a rigid compound or covering it continuously with decorative tile can interfere with movement accommodation. A flexible sealant detail may exist in some wall systems, but that detail belongs to the building or gypsum assembly and should be specified for that application.
Do not select a random caulk from a tile article and assume it converts the joint into a bridgeable surface. The joint purpose and rated assembly, if any, control the detail.
Fire- and sound-rated walls need extra caution
Gypsum control-joint details can be part of fire-resistance or acoustical assemblies. The Gypsum Association notes that control joints in rated systems can require backing or other tested details. A decorative wall project should not modify those assemblies casually.
If the wall is part of a rated corridor, demising wall, shaft or another assembly with fire/sound requirements, identify the rated design and obtain the appropriate detail before altering the joint or adding material over it.
Moisture can create seam and crack symptoms
Drywall paper, joint compound and paint can change when they are exposed to leaks or repeated condensation. A seam may bubble, soften or crack because the wall is wet rather than because the joint detail is inherently wrong.
The EPA’s mold and moisture guidance emphasizes correcting the moisture source and drying affected materials. Do not install peel-and-stick tile over a damp seam or crack.
Document an uncertain crack before covering it
If a crack is small and the wall is otherwise stable, create a record before deciding what to do. Photograph it with a ruler or other reference, note the date and location, and compare the same spot later. Use the same reference points so change is easier to see.
Short observation cannot guarantee long-term stability, but it can reveal obvious change. If the crack widens, offsets, reopens after repair, becomes damp or is part of a broader movement pattern, stop the decorative project and obtain appropriate assessment.
Observation can add evidence without proving stability
A short observation window or even one season cannot prove that every building crack is inactive. Temperature, humidity, loading and seasonal moisture change over different time scales.
The purpose of monitoring is to gather information, not to produce a pass/fail certificate. When the consequence of movement is important, use a qualified evaluation rather than a blog-defined waiting period.
Repair a normal drywall seam before tiling
If an ordinary taped seam is visibly damaged but the wall condition is understood and stable, repair it using an appropriate gypsum-board finishing method. Remove loose material, restore tape/compound as needed, sand or finish only in accordance with the wall system and safety requirements, and allow the repair to reach a suitable condition before applying the decorative finish.
Do not use the peel-and-stick tile itself as the joint tape. The wall should already be a sound finished substrate before the adhesive tile is asked to bond to it.
Older painted walls may change the preparation plan
If repairing the seam would require sanding or scraping old paint, consider lead-safety requirements in U.S. pre-1978 housing. EPA’s lead-safe renovation guidance for DIYers explains why disturbing older paint can create hazardous lead dust.
A cosmetic tile project should not trigger uncontrolled paint disturbance. When the wall needs more repair than a simple finish touch-up, address the wall safely before returning to the decorative plan.
Surface flatness matters to the adhesive finish
A crowned seam can create a ridge under a thin tile. A recessed seam can reduce adhesive contact or create a visible shadow. Side lighting can exaggerate both conditions.
Inspect the repaired wall with a straightedge and side light as appropriate. The tile manufacturer’s surface requirements should determine how smooth and flat the finished wall needs to be.
Do not bridge an intentional joint with one continuous tile sheet
If a control or movement joint must remain functional, the decorative finish should not become the new rigid connection across it. A flexible sheet may bend, but adhesive and face layers can still transfer stress or tear as the joint moves.
Use the building or manufacturer detail for terminating finishes at the joint. In some designs, each side may finish independently with a visible joint, cover plate or profile designed for movement. The correct detail depends on the assembly.
Trim is not a substitute for a movement-joint design
A decorative metal or plastic trim can protect an edge and create a neat termination, but it does not automatically make a control joint work. If trim spans both sides rigidly, it can interfere with movement just as tile can.
Select any trim as part of the documented joint detail, not as a cosmetic afterthought. For ordinary stable seams, trim usually is not needed merely because the drywall seam exists under the finish.
Do not run permanent adhesive into a movement gap
Extra adhesive can lock together surfaces that were intended to move independently. It can also make future inspection or repair harder. Do not inject construction adhesive into a control joint simply because the decorative edge looks loose.
If the tile needs help adhering beside the joint, verify the wall surface and product method on each side. The movement gap itself belongs to the wall system.
What if tile is already bridging a control joint?
If the tile is already installed and the joint is confirmed to be intentional, inspect for wrinkling, tearing, edge lift or cracking along the joint. Do not simply add more adhesive over a failure line.
Document the condition and determine an appropriate termination that restores the joint’s ability to function. That may require cutting or removing decorative material near the joint, but the exact repair should follow the wall/joint detail and product construction.
What if tile is already lifting over a normal seam?
If the underlying line is a normal finished seam, lifting can still have several causes: dust, loose joint compound, weak paint, a crowned ridge, insufficient pressure, moisture or an incompatible substrate.
Remove or lift only enough material to inspect safely according to the tile instructions. Repair the substrate cause before reinstalling or replacing the finish. A stronger adhesive can hide the symptom without solving the wall condition.
Do not assume flexibility equals crack isolation
A peel-and-stick product may be flexible enough to bend in your hand, but that does not establish a tested crack-bridging or movement-accommodation rating. Those are different performance claims.
If a manufacturer publishes a documented crack-isolation or movement capability for the exact product, use that evidence within its stated conditions. Otherwise treat the product as a decorative finish over a stable substrate.
Use a wall map when several seams or joints are present
Large walls may contain ordinary panel seams, door-header joints, corners and intentional control joints. Mark them before laying out tile. This helps you avoid placing a visually important seam or narrow piece directly on a movement detail.
A wall map can also help future maintenance. Photograph the bare wall and record the location of control joints before they are visually framed by the finished tile termination.
Door and window openings deserve special attention
Cracks can form near door and window corners for several reasons, including panel layout, framing movement and local stress. Do not classify a crack as a normal panel seam solely because it is close to an opening.
If the crack repeatedly returns after repair, investigate the cause before covering it. GA-216 includes guidance on gypsum-panel layout and joint placement around openings, underscoring that these areas are part of the wall system—not just cosmetic lines.
Control joints may continue through multiple finish layers
When a wall assembly includes a designed movement joint, finishes attached to that wall may also need to respect it. The exact method depends on the finish and assembly. Do not assume a new decorative layer can ignore the joint because it is thin.
If the building design requires a visible or serviceable joint, coordinate the tile termination with that requirement. A continuous decorative pattern is secondary to the movement function.
Keep service and inspection possible
If the joint is part of a larger building movement system, keep it identifiable. Do not bury it behind permanent cabinetry, thick decorative trim or adhesive layers that make future inspection difficult.
Save photographs and the product/joint information with the project record. This makes later repair easier if the wall moves or the finish needs replacement.
Use a simple category checklist instead of a synthetic rating
| Observed line | What it may represent | Decorative-tile response |
|---|---|---|
| Flat, stable, fully finished taped seam | Ordinary gypsum panel seam | May be prepared as part of the continuous wall if the tile manufacturer approves the substrate. |
| Manufactured joint accessory or designed separation | Drywall control joint | Preserve the movement function; do not bridge continuously without an approved detail. |
| Joint aligned with a structural/building movement location | Expansion, seismic or building joint | Stop and use the building-specific movement detail. |
| Irregular, recurring, offset or widening crack | Uncertain/active substrate condition | Investigate and repair the cause before installing decorative tile. |
This checklist is deliberately categorical. It does not convert the observations into points because joint purpose matters more than a summed rating.
A practical wall-line identification workflow
- Photograph the line before repair. Include the surrounding wall, nearby corners, doors, windows and ceiling changes.
- Look for a manufactured joint accessory or deliberate gap. A designed control joint should not be treated like a cosmetic crack.
- Check whether the line repeats or continues. A joint that aligns through several finish layers or building elements deserves more caution than one isolated drywall ridge.
- Check the wall condition. Look for moisture, softness, loose paint, displaced edges and recurring cracks.
- Confirm product instructions. Verify whether the tile is approved over the finished drywall or paint system.
- Stop when the category is uncertain. Do not let a decorative deadline force a guess about a building movement detail.
This workflow is intentionally descriptive. It helps decide what information is missing without turning the observations into a synthetic rating.
When a normal seam is ready for peel-and-stick tile
A normal drywall seam is a candidate only after it functions as part of a continuous finished wall. The compound should be sound, the paint stable and cured, and the surface clean, dry and within the tile manufacturer’s requirements. The seam should not be opening, buckling or showing recurring movement.
Use side light and a straightedge when a ridge or depression may affect the finished appearance. A thin wall tile can reveal a poorly finished joint even when the adhesive still bonds. Repair the visual substrate first rather than expecting the tile face to hide it.
When to stop before covering a seam or crack
Stop when the line is a confirmed movement joint, when the wall has visible displacement, when moisture is active, when the crack repeatedly returns, or when the substrate is soft or unstable. Also stop when the repair would alter a rated assembly or when you cannot identify why the line exists.
A stop decision is not a failed project. It prevents a decorative finish from hiding evidence that may be needed to diagnose the wall.
What product documentation should you keep?
Save the tile product page or installation instructions, the wall photos, any drywall-repair information and the date of installation. If a control joint or building joint exists nearby, keep the drawing or professional detail that shows how the finish terminates.
Those records help later if the tile lifts or a crack appears. You can compare the event with the original wall condition rather than assuming the decorative product caused or solved the movement.
What if the wall was recently repaired?
A repaired seam may need time for joint compound, primer and paint to dry or cure according to their own manufacturers. Do not use one universal waiting period for all wall-repair systems. Confirm the repair materials and the tile’s requirements for newly painted or repaired surfaces.
Dry-to-touch is not automatically ready for an adhesive covering. If the wall coating is still soft or releasing moisture/solvent, adding an impermeable decorative layer can complicate the repair.
What if the seam is under a kitchen backsplash?
The same classification rules apply. A normal stable seam can be prepared as part of the wall when the backsplash product approves that substrate. An intentional control joint or active crack should remain part of the movement strategy rather than being hidden beneath a continuous sheet.
Kitchen exposure adds grease, sink splash and appliance heat questions. Those conditions are separate from joint classification. Verify both the wall and the room placement before installation.
What if the seam is in a bathroom?
Humidity and splash exposure make moisture inspection more important. A recurring line in damp drywall can indicate a moisture condition rather than a simple joint-finish problem. Resolve leaks, condensation or damaged gypsum before adding decorative material.
A stable drywall seam does not turn the wall into a waterproof assembly. Use the exact wet-area guidance for the product and the complete wall system.
What if the crack is near a corner?
Inside and outside corners can experience movement from framing, board layout and adjacent materials. A hairline corner crack may be a finish issue, but a recurring or displaced crack deserves investigation. Do not force a decorative tile around the corner to hold the crack closed.
If the product uses a specific corner method, follow it only after the wall condition is understood and stable.
Can a flexible sealant solve an active drywall crack?
Not as a universal rule. Flexible sealant can be part of a designed joint detail, but applying caulk to an unexplained crack does not establish why the wall is moving or whether the movement is within the sealant’s capability.
Identify the line first. Use sealant only where the wall/joint design and product instructions call for it.
Can you use trim over a drywall control joint?
Only when the trim is part of a detail that preserves the movement function. A rigid metal or plastic profile spanning both sides can restrict movement just as a continuous tile can.
If the joint must remain visible, choose a compatible movement-joint cover or termination detail specified for the assembly rather than using decorative edge trim as an improvised bridge.
Can peel-and-stick tile cross a normal taped seam?
Potentially, yes, when the seam is a normal finished part of a stable, dry, smooth wall and the tile manufacturer approves that substrate. The seam should be repaired and finished before installation; the tile itself is not a substitute for drywall tape or compound.
Can peel-and-stick tile cross a control joint?
Do not bridge a confirmed control joint continuously unless an appropriate design specifically permits the finish to accommodate the movement. The joint exists to relieve movement stress and should remain functional.
How long should you watch an uncertain crack?
There is no universal observation period that proves a crack is inactive. Dated photographs and measurements can reveal obvious change, but structural or moisture-related conditions can vary seasonally or under different loads. If the consequences matter or the crack changes, obtain the appropriate professional assessment.
Does a low-risk-looking seam need no preparation?
No. Even an ordinary seam still needs the same wall-preparation checks as the surrounding surface: stable finish, clean and dry wall, compatible paint, appropriate cure and suitable flatness. The absence of obvious movement does not make wall preparation optional.
Bottom line
A visible drywall line should be identified before it is covered. A normal taped seam can often become part of the continuous wall finish once it is sound, flat, dry and within the tile manufacturer’s substrate requirements. A control joint, building movement joint or active crack is a different condition and should not be hidden beneath a continuous decorative layer.
Use the joint’s purpose—not a synthetic rating—to make the decision. Preserve intentional movement, investigate recurring cracks and moisture, repair ordinary drywall correctly, and keep product and wall records. Peel-and-stick tile works best when it is installed over a wall that is already ready to be a finish substrate.



Leave a comment
This site is protected by hCaptcha and the hCaptcha Privacy Policy and Terms of Service apply.