












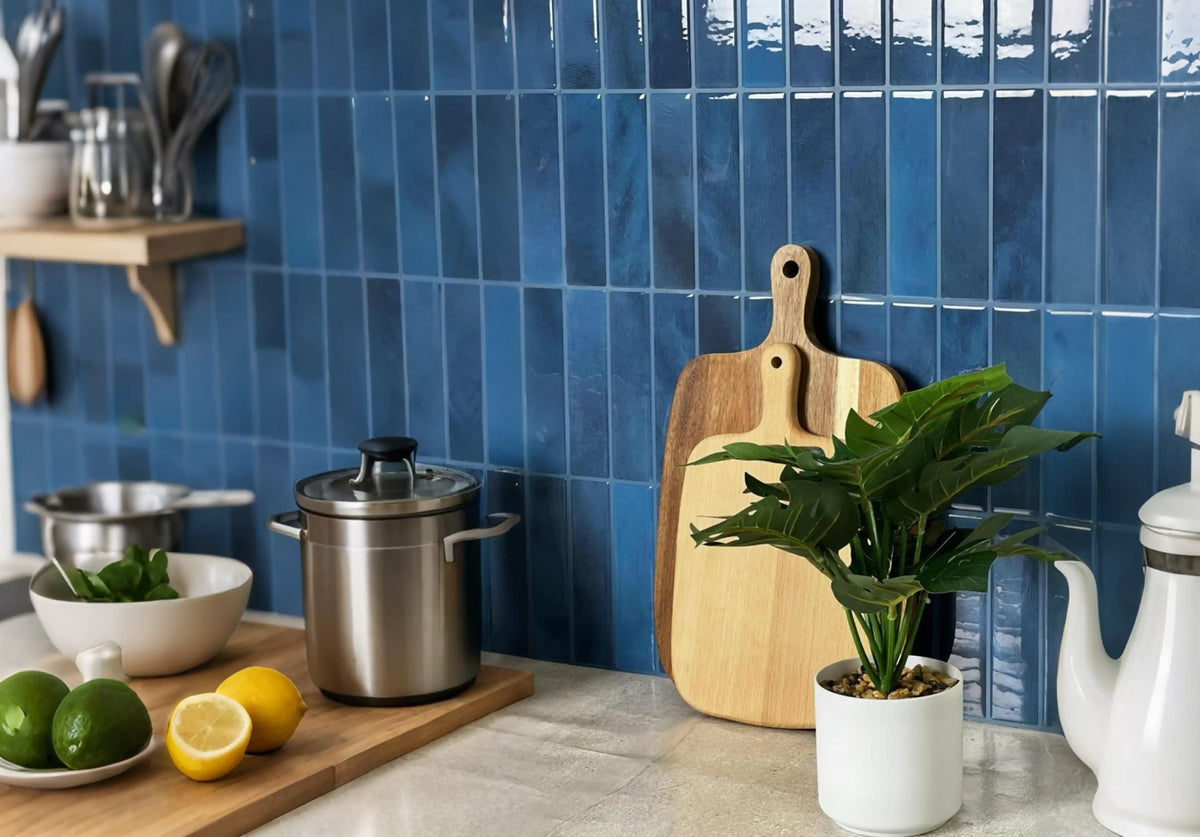
Start with the wall, then choose the look
A kitchen backsplash should suit the surface, the cooking and splash zones, your cleaning routine and your budget. Peel-and-stick sheets and conventionally installed tiles are different systems. Compare the full installation rather than treating a low pack price or a tile's appearance as proof that it will work everywhere.
Explore this guide
This guide offers ten design directions and a practical buying comparison. They are planning ideas, not claims that every finish is available from Stickwoll or suitable for every appliance location. For detailed measurements and cuts, use our kitchen backsplash planning guide.
10 kitchen backsplash ideas to compare
| Idea | What to compare with a sample |
|---|---|
| 1. White subway | Compare warm and cool whites beside the cabinet paint; check whether the joint colour suits the countertop. |
| 2. Vertical stack | Draw the sheet layout so that narrow cuts do not concentrate at one end. |
| 3. Sage green | View the green against wood, cream and white finishes under both daylight and evening light. |
| 4. Deep green | Try a bounded accent area before committing to a long run of dark colour. |
| 5. Marble look | Compare the printed veining with the countertop pattern to avoid two competing focal points. |
| 6. Small mosaic | Check sheet joins at arm's length and close up; repeated joins can change the overall effect. |
| 7. Herringbone | Sketch diagonal cuts and confirm the usable coverage of each sheet before ordering. |
| 8. Brick look | Inspect the exposed edge and textured face, including how you would wipe cooking splashes away. |
| 9. Soft stone look | Compare texture depth and undertone with the cabinets; a stone appearance does not establish stone construction. |
| 10. High-contrast geometry | Try the pattern with the existing floor and countertop; use a smaller area when the room already has several patterns. |
These are aesthetic options, not a forecast of what will increase a home's value. Our tile design guide can help you compare pattern scale, finish and colour without assuming that the newest style is the right one for your kitchen.
Peel-and-stick versus conventional tile
Choose a peel-and-stick option by its documented installation limits. Check the approved substrate, application temperature, sheet overlap, removal instructions and any exclusions. For example, the Smart Tiles FAQ distinguishes occasional splashes from direct-water shower exposure. That brand's instructions do not certify a Stickwoll product or another adhesive finish.
Choose conventional tile as part of an assembly. The tile face, substrate, setting material and joints all need to suit the job. Do not assume that grout alone waterproofs a wall. A qualified installer can assess a damaged substrate, a complex layout or an uncertain appliance clearance before you buy materials.
Neither route has a universal installed price. Compare the same measured area, similar finish expectations and the same preparation work. A pack of sheets and a contractor's completed-installation quote include different things.
Measure the project and budget for the whole job
Split the backsplash into rectangles and record width and height in one unit. Add the areas, then sketch where full sheets and cut pieces will go. Small outlet openings may not reduce the number of sheets you need because the surrounding pieces still have to be cut from a full sheet.
Use the manufacturer's usable coverage per pack, not just the outer sheet dimensions. Include samples, spare material, edge trims, permitted preparation products, delivery and tax. For a rental, include potential paint repair. Do not rely on reusing removed sheets unless the product's instructions specifically support reuse.
Checks before installation
Stop if the wall is damp, soft, flaking or visibly damaged. Covering a defect does not repair it. For an older wall with an unknown coating, get appropriate advice before sanding or scraping. Match cleaners and preparation products to both the wall coating and the tile manufacturer's instructions.
Mark appliance heat and steam zones before drawing the tile boundary. Follow the appliance manual and the exact tile instructions; do not apply one generic distance to every stove. Keep electrical work separate from decorative work and have an electrician assess boxes or fittings that would need adjustment.
Renters should agree on the proposed change and any reinstatement requirements first. Adhesive products can affect paint during removal. Our renter tile guide provides a useful starting point for permission, surface and removal planning.
Frequently asked questions
Can peel-and-stick tile cover existing ceramic?
Only when the specific product approves the surface and the existing installation is sound. Grout recesses, loose tiles and texture need assessment before application.
Do all kitchens need the same backsplash material?
No. A low-splash decorative area and a wall beside a cooking appliance have different exposure and installation requirements.
What is the easiest way to avoid a disappointing result?
Approve a sample, measure the usable coverage, plan the cuts and resolve any wall or exposure problem before placing the full order.
Start by deciding which wall areas are actually eligible
Inspect the substrate before choosing a design. Sound painted drywall, existing ceramic, repaired plaster and another panel can require different preparation or may be excluded by the selected product. Look for loose coatings, deep texture, contamination and evidence of moisture.
Do not cover an active leak, soft drywall or unstable old tile. Resolve the building or plumbing problem first, then verify the repaired surface against the backsplash instructions.
Map the kitchen into exposure zones
Mark the sink, range, countertop appliances, coffee station and ordinary prep walls. Record splash paths, steam, cleaners and required appliance clearances. The same design does not need to cover every zone if the conditions call for different systems.
Compare the complete backsplash construction
Ceramic, glass, natural stone, printed vinyl, gel-faced tile and rigid composite panels can all create a tile-like appearance, but installation and care differ. Compare the surface, backing, adhesive or setting material, seams, edges and substrate requirements as one system.
A marble-look print should not inherit natural-stone sealing instructions, and a metal-look surface should not be treated as a heat shield unless the product documentation says so.
Plan the layout before ordering
Measure separate wall rectangles, identify windows, outlets, returns and open ends, then use installed coverage per pack. Draw the pattern direction and dry-fit the hardest areas. Add extra material based on the real cuts, pattern matching and repair reserve rather than a universal waste percentage.
For a hypothetical twenty-square-foot eligible wall, a pack with four square feet of usable coverage requires five packs before any justified extra. That arithmetic does not describe a particular Stickwoll product.
Design the exposed endings
Decide where the backsplash stops beside cabinets, doors and open walls. Use a factory edge, trim or another approved finish that matches the construction. A planned boundary makes the project look deliberate and keeps the backing or core protected.
Sequence preparation, dry fitting and installation
Finish wall repairs and compatible cleaning first. Let coatings and repairs meet their own requirements. Dry-fit difficult pieces next, then expose adhesive only when the position and cut are known.
Use a level reference and the product-specific pressure method. Avoid stretching pieces to force alignment. If a seam drifts, correct the layout before the error compounds across the wall.
Handle the sink side as a water-management detail
Observe where water reaches the wall, counter joint, faucet penetration and lower tile edge. A wipeable or waterproof face does not prove that the complete assembly behind it is waterproof. Use the seam and edge method accepted for the actual system.
Recurring dampness, failed countertop caulk or swollen substrate should be repaired before decoration. Do not use backsplash material to conceal an unresolved water source.
Use appliance documents for heat and clearance questions
Ranges, cooktops and countertop appliances can impose different clearances and service needs. Check the appliance instructions and the wall finish's permitted location together. A Class A surface-burning label or generic heat-resistant phrase does not independently approve a backsplash position.
Keep filters, panels, water tanks and other service parts accessible. Recheck the wall if an appliance is replaced later.
Plan cleaning and repair before installation
Save the approved cleaner, maintenance instructions and product identity. Abrasive pads, steam or strong degreasers can be inappropriate for some decorative finishes. If a face changes or an edge lifts, record the condition before trying another treatment.
Keep repair stock with the batch or product information. A replacement can still differ after aging or a production change, but an identified spare is more useful than an unlabeled leftover piece.
Compare installed cost and documentation, not headline price
Include usable coverage, shipping, preparation, trim, tools, labor and wall repair. Compare quotations for the same finished scope. A cheaper pack can result in a higher project total if more packs or more preparation are required.
Before checkout, save the current product page, installation guide, care guide and any written clarification about your wall. If the documentation does not answer an important sink, appliance or substrate question, resolve it before cutting material.
Walk through a complete backsplash decision
Imagine a kitchen with a painted drywall prep wall, a sink in the middle and a range at one end. The homeowner first checks the wall condition and product documentation, then maps the sink splash area and the appliance clearance. The eligible area is measured only after those technical boundaries are known.
Samples are placed beside the cabinet and countertop under daytime and evening light. The homeowner then draws outlet and end cuts, discovers that one pattern creates a narrow exposed strip, and shifts the starting point before ordering. The sequence shows why appearance and technical suitability are related but separate decisions.
During installation, difficult cuts are dry-fitted before backing is removed. The sink joint follows the selected system detail, the range end stays within documented limits, and the final wall is photographed with product labels and care instructions saved for future maintenance.
Use the same logic when the kitchen changes
A new range, faucet, countertop or cleaning product can change the wall exposure. Recheck affected sections rather than assuming the original backsplash decision permanently approves all future conditions.
Common backsplash planning questions
Can one product cover every kitchen wall? Only when its documented uses match every proposed zone. Is a waterproof face enough behind a sink? No; seams, edges and substrate still matter. Does Class A mean safe behind a stove? No; surface-burning classification does not define appliance clearance. Can removable tile come off without repair? Not guaranteed; wall condition and removal method matter.
How much extra should I order? Calculate from the actual pattern, cuts and repair reserve rather than applying one percentage to every project.
Use samples to connect the backsplash to the rest of the kitchen
Place actual finish samples beside the cabinet door, countertop, flooring and appliance surfaces. View them under daylight, ceiling lighting and under-cabinet lighting. A white, stone look or metallic print can shift noticeably under different spectra and reflectivity.
Check pattern repeat across several pieces. A single marble vein or subway sheet can look convincing alone but repetitive across a full wall. Dry-layout enough material to see the repeat and decide where pattern transitions will be least conspicuous.
Evaluate existing tile before covering it
When the new product permits installation over old tile, inspect the original tile for movement, cracked grout, failed silicone, deep joints and contamination. Covering loose tile does not make the substrate sound. Repair or remove unstable areas according to the underlying system before decorating them.
Thin adhesive finishes can telegraph pronounced grout lines. Do not use an arbitrary filler or primer unless it is compatible with the old surface and the new product.
Prepare painted drywall without universal shortcuts
Sound paint may be suitable for some wall products, but loose, chalky or recently repaired coatings need their own preparation. Let paint and repairs meet the required cure and dryness rather than using a fixed wait time from a generic tutorial.
Do not automatically sand every glossy coating. Surface preparation depends on the specific adhesive and coating. Clean only with products compatible with the wall and allow all residues and moisture to be removed before installation.
Resolve corners and returns on the drawing first
Inside corners can be overlapped, butted or detailed in another way depending on the product. Outside corners may need trim or a factory edge. Draw both adjoining walls together so pattern direction and cut width are considered at the same time.
A clean field with improvised corners can look unfinished and can expose backing material. Confirm the edge method before ordering trim and before the first piece is installed.
Diagnose problems before making repairs
An edge that lifts because paint releases needs a different response from a panel that was stretched, contaminated or exposed to unapproved moisture. Photograph the condition, inspect the layers and review the product instructions before adding stronger adhesive.
Finish damage from a cleaner should also be separated from ordinary soil. Stop the cleaner if the surface dulls, softens or transfers color, and obtain care guidance before another treatment.
Revisit the backsplash when the kitchen changes
Countertop replacement, plumbing work, a new appliance or a new cleaning routine can change the conditions around the backsplash. Reinspect disturbed edges and confirm any new appliance clearance before returning the wall to normal use.
Keep spare pieces and product documentation in a known location. A future repair is easier when the material identity, pattern direction and original instructions remain available.
Use a final decision checklist before ordering
Confirm that the wall is suitable, moisture or heat issues are resolved, the exact product is documented for the proposed zone, difficult cuts are understood, quantity is based on usable coverage, and the cleaning and removal plan fit the household.
If one of those conditions remains unknown, resolve it before purchasing the full order. This keeps the decision connected to evidence rather than to a product photograph or trend headline.
Check product claims one at a time
Product pages often combine design language with technical language. Separate color and texture from statements about water, heat, emissions, removability and cleaning. Ask what layer or assembled system each claim describes, and whether the current installation instructions contain the same wording. A decorative face can be wipeable without making the whole wall waterproof, and a surface-burning classification does not define appliance clearance.
Keep copies of the relevant instructions with the order. Marketing pages can change, while your installation still depends on the version that applied to the material you purchased.
Choose a cleaning method before the first spill
Kitchen backsplashes may collect oil, coffee, sauce, dust and ordinary fingerprints. Start with the care method approved for the exact finish rather than choosing the strongest cleaner available. Use clean soft tools, control runoff around seams and remove residue according to the product instructions.
If the finish becomes cloudy, tacky, discolored or soft, stop the product and record what was used. A cleaner that works on ceramic tile is not automatically suitable for printed film, gel, composite or metallic surfaces.
Treat the sink area as its own design problem
Observe where water actually reaches the wall during washing, rinsing and countertop cleanup. Check the lower joint, faucet penetrations and exposed side edges before covering the area. Repair failed countertop caulk or an active leak first.
Use only a wall product and seam detail documented for the proposed splash exposure. Do not assume that adding extra sealant converts an unsuitable decorative panel into a wet-area system.
Check the range and appliance zone separately
Read the appliance installation instructions together with the wall-product limits. Gas flames, electric elements, vents and countertop appliances can create different heat and service conditions. Do not infer a safe distance from a general blog rule or from a decorative panel's appearance.
Keep filters, controls and removable appliance parts accessible. If the range or appliance is replaced later, review the backsplash location again rather than assuming the original clearance still applies.
Compare complete installed costs
Material price is only one part of the project. Include wall repair, preparation, trim, tools, delivery, quantity needed for the real layout, professional work where required and a practical repair reserve. Compare quotations that cover the same scope rather than a box price against a full-service installation.
Do not calculate a return on investment from an unsupported resale percentage. The useful question is whether the chosen scope fits the household's budget and the wall's actual condition.
Plan a rental backsplash around permission and restoration
Check the lease or obtain written permission where required. Photograph the original wall and record existing repairs, weak paint or previous damage before attaching anything. A removable product label does not guarantee damage-free removal on every coating.
Keep the specified removal instructions and allow for cleaning, patching or repainting in the move-out plan. A small concealed sample can reveal an obvious paint problem, but it cannot predict every outcome after a long tenancy.
Inspect the order before installation day
Compare product names, quantities, batch or lot information where provided, dimensions, color and print direction before cutting. Open enough material to understand the repeat, but keep unopened packs within the seller's return policy when possible.
Photograph any damaged packaging or visible defects before installation. If replacement material arrives later, compare it under the same room lighting so a different sheen or print run does not become obvious only after it reaches the middle of the wall.
Finish with a handoff record
Save the product identity, installation date, wall preparation, layout photographs, approved cleaner, spare pieces and any professional repair or electrical documentation. Note which areas were excluded because of heat, moisture or service-access limits.
This record makes future cleaning, repair and removal easier and keeps later claims tied to the actual product rather than to a generic category description.
Plan around windows and open wall ends
Windows, door casings and open wall ends make the backsplash look finished or improvised. Measure the reveal depth, sill position and any trim before choosing a starting point. Decide whether the pattern stops before the casing, returns into the reveal or uses a compatible trim piece. Dry-fit those transitions because a small change in the starting line can prevent a narrow strip beside the frame.
Keep removable trim and window hardware serviceable. Do not bury screws or moving components behind adhesive, and do not use decorative material to bridge a cracked or moving joint that needs repair.
Handle outlets and switches as service details
Mark device locations on the layout before cutting. The decorative finish should allow covers and devices to sit correctly and should not hide damaged boxes or unsafe wiring. When the work requires more than the safe removal and replacement of a cover or device allowed in your situation, use a qualified electrician.
Template openings while backing remains on the tile. A clean opening that stays within the cover plate is preferable to an oversized cut hidden by a larger cover. Keep adhesive and sealant away from screws and service points.
Coordinate the backsplash with countertop work
If countertops are being replaced, establish the finished counter height and wall condition before final backsplash cuts. New counters can expose wall damage, change the lower joint or alter the apparent height of the decorative field. Complete repairs and let required materials reach their specified condition before covering them.
Do not use the backsplash to conceal an unresolved gap or uneven counter-to-wall joint. Plan the joint detail with the countertop and wall systems together so future movement and cleaning can be managed.
Do a final review from normal viewing distance
After installation, clear the counter and inspect the wall from the room entrance, prep position and seating area. Check pattern continuity, exposed edges, outlet alignment, corners and the lower joint under the lighting normally used in the kitchen. Raking light can help reveal raised seams or trapped debris that is harder to see straight on.
Resolve obvious defects before normal use. Save a few representative photographs with the product information so later repairs or changes can be compared with the original installation.
Keep a short project log for future changes
Write down the wall preparation, product name, batch information where available, installation date, cleaners approved for routine care and any area that required a special repair. A simple log is useful when a faucet, appliance or countertop changes later because it shows which parts of the backsplash were disturbed and which instructions applied to the original work.
Store spare pieces with that record instead of loose in a utility room. If a repair becomes necessary, compare the spare under the same kitchen lighting before installing it. This does not guarantee an invisible match, but it gives the repair a better starting point than an unidentified leftover piece.
Keep one approved sample as a visual reference
When the final material is chosen, save one representative sample or offcut with the product information. Use it later to compare a replacement piece, a new cleaner or a lighting change. The sample does not certify durability, but it provides a useful visual baseline for color, sheen, texture and pattern direction.
Store it clean and flat so later comparisons are meaningful, and note if the installed wall has aged or changed in a way the stored sample has not.
Sources and scope
- US EPA — Mold, Moisture and Your Home — Moisture-source control; not tile certification.
- 3M — Surface Preparation for VHB Tape Applications — Pressure-sensitive adhesive preparation principles; not Stickwoll specifications.


Leave a comment
This site is protected by hCaptcha and the hCaptcha Privacy Policy and Terms of Service apply.