





















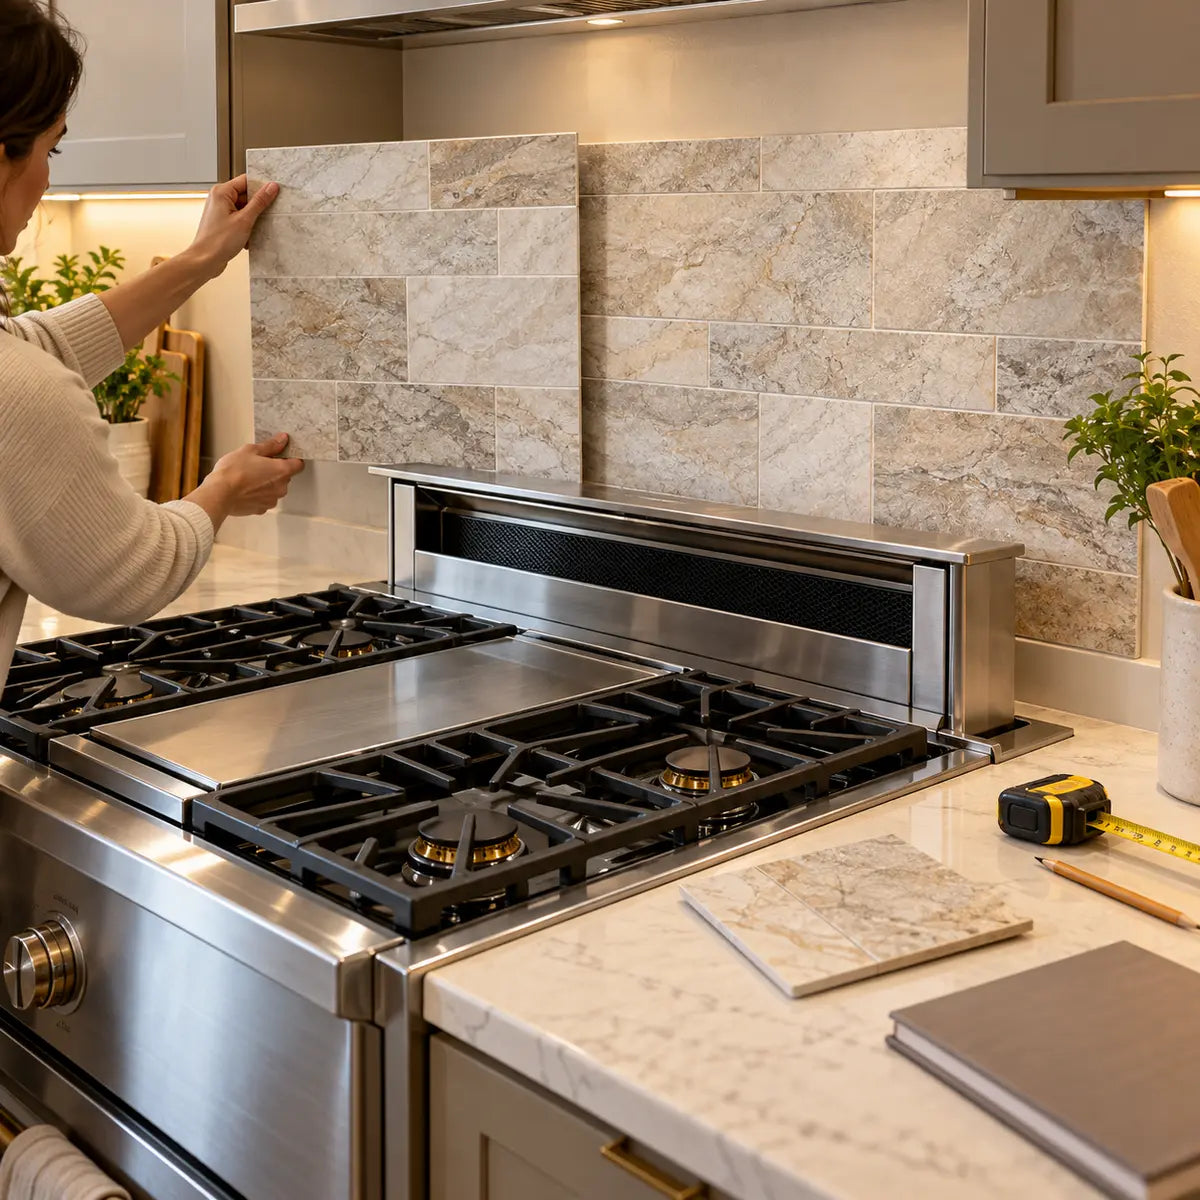
A downdraft gas range does not make every part of the wall behind it a safe place for peel-and-stick tile. Peel-and-stick tile may be feasible on a particular wall area, but the answer depends on the exact appliance, the tile and adhesive instructions, the exposure at that location, and the space needed for ventilation and service. A product described as “heat-resistant” is not, by itself, approved for every position behind a gas burner.
Start by identifying what you have. A gas range combines a cooktop and oven in one appliance. A gas cooktop is a cooking surface installed in a countertop. A downdraft draws cooking exhaust into an inlet at or near the cooking surface; its opening may be built into the appliance or belong to a separate ventilation unit. Those layouts put burners, wall surfaces, controls, and removable parts in different places. The installation instructions for your exact equipment matter more than a generic backsplash diagram.
The useful question is not simply, “Can peel-and-stick tile go behind a downdraft range?” It is: Can this specific tile and adhesive go on this specific, permitted wall area without exceeding their use limits or interfering with the appliance? The sections below help you reach one of three decisions: proceed with a documented layout, pause for confirmation, or use another material.
Can peel-and-stick tile go behind a downdraft gas range?
Possibly, but no general clearance or heat rating can approve an unidentified installation. Before buying tile for the stove-adjacent wall, compare the exact appliance installation manual with the proposed tile’s instructions and, where available, the adhesive specifications. If any instruction excludes the location, or if the proposed tile would cover a required opening or service area, do not install it there.
The distinction between possible and approved matters. A backsplash can look like a simple wall finish while still changing conditions the appliance instructions address. For example, the KitchenAid downdraft-range planning dimensions distinguish certain rear-wall conditions for the listed KSDG950E model, including whether a combustible back wall has a backsplash. The document also says its dimensions are for planning and directs installers to the installation guide. Its reference to a “backsplash” does not establish that adhesive-backed tile qualifies as the backsplash contemplated by those dimensions, nor does it approve another range model. (whirlpool.com)
Tile makers set their own conditions as well. Smart Tiles, for example, states in its gas-stove placement guidance for Smart Tiles that a stove without a rear control panel or metal plate calls for an 8-inch zone without its tiles behind the stove or cooktop. That is a condition for the named product, not a universal appliance clearance or a measurement you can transfer to a different brand. The FAQ does not supply a measurement datum precise enough to turn that statement into a universal wall-marking instruction. Ask the manufacturer how it applies to your layout if the reference point is unclear. (thesmarttiles.com)
These are decision states, not grades of heat resistance. An attractive tile does not become suitable because it falls outside the most visible flame path, and an uncertain area should not be treated as a candidate area merely because the wall feels cool after one meal.

Place your proposed wall area in the right decision state
This first-pass check cannot approve an installation. Choose the statement that best describes the least certain requirement you have found so far; the detailed document review below still controls.
The rule: An exclusion means change the layout or material. Otherwise, an unknown means pause for confirmation. Only a documented area is a candidate for the full verification process; it is not automatically approved.
Why does the downdraft configuration change the answer?
A downdraft adds an air inlet and maintenance needs to a backsplash problem that already involves cooking heat. Its presence does not certify the rear wall as a low-heat zone. First locate the inlet, then establish whether it is integrated into the range or cooktop, or installed as separate equipment behind the cooking surface. Check the instructions for every relevant unit.
A rear-facing photograph can conceal an important difference. On one installation, the inlet may sit within the cooking surface; on another, a separate assembly may occupy space behind it. The wall finish might be nowhere near an inlet, or a raised trim, thick tile edge, or new sealant line might intrude on an area needed to operate or service the system. Do not borrow a layout or clearance from another type of downdraft.
The GE PGP9830 gas downdraft cooktop instructions illustrate why access deserves attention. For that cooktop, GE instructs users not to obstruct combustion and ventilation air; it describes removing the vent grille, gasket, and filter for cleaning, and says not to operate the vent without the filter in place. This is a concrete example of removable parts, not a template for the inlet location or tile-to-vent spacing on other appliances. (images.salsify.com)
Ventilation performance is another reason to avoid the shortcut “downdraft means the wall is protected.” In a laboratory study of range-integrated downdraft capture, researchers measured over 90% tracer-gas capture from a shallow back-burner emitter at 150 cubic feet per minute (cfm), but below 30% from a taller front-burner emitter even at the highest tested flow of 500 cfm. Those figures describe different source shapes, positions, and test conditions in a laboratory mock-up using electric heating elements. They are not a comparison of two otherwise identical cooking events, and the study did not test wall temperature or backsplash adhesive. (escholarship.org)
Installed systems vary, too. A Lawrence Berkeley National Laboratory residential exhaust investigation tested 15 installed devices in a convenience sample of California homes, including two rear downdrafts. Capture differed by device and operating conditions and was generally higher for rear than front burner use. With only two rear downdrafts, the report cannot predict performance in your kitchen. More importantly for this decision, pollutant capture is not a measurement of whether a tile or adhesive is safe on a particular wall. (escholarship.org)
Here is the practical implication: keep the downdraft working and maintainable, but evaluate the proposed backsplash as though it must meet its own documented exposure limits. A fan is not a substitute for those limits.

Identify the appliance before measuring the wall
Find the full model number on the appliance label and match it to the correct installation instructions. Check whether a separate downdraft has its own model number and manual. Record whether the range has a rear control panel, protective metal section, or other factory component between the cooking surface and wall. Do not assume that a metal-looking strip is a manufacturer-approved heat shield; confirm its role in the appliance documentation.
For a broader look at how rear-wall layouts differ, the freestanding-versus-slide-in backsplash guide can help you frame the comparison. Use the installation manual for your actual appliance, not another model’s suggested distance, to settle the layout.
Judge the exposure, not just the distance
The tile’s distance from a burner is only one part of the decision. Direct flame, radiant heat, hot grease, steam, routine splashes, and the wall’s own surface condition are different exposures. A specification that addresses one does not automatically cover the others.
Direct flame is the clearest stop sign when a tile’s instructions prohibit it. Radiant heat is less obvious: a surface can warm without touching a flame. A large pan, an extended cooking session, or use of a different burner may change the exposure at the proposed location. Grease can affect cleanability and surface preparation; steam can reach edges and seams. The most relevant area may not be the center of the backsplash. It may be a corner beside the range, a narrow strip near an inlet, or an area a pan regularly approaches.
| Exposure or condition | What to observe at the proposed tile location | What must settle the decision |
|---|---|---|
| Flame or direct contact with a heat source | Could a burner flame or another heat source reach the finish? | Appliance instructions and the tile maker’s flame and placement restrictions |
| Heat at the wall | Is the proposed area near burners or cookware during normal use? | A product-specific exposure limit and a reliable way to determine whether the location meets it |
| Steam and grease | Will cooking discharge strike this area or collect at its edges? | Tile and adhesive use conditions and permitted cleaning methods |
| Inlet and moving parts | Could a tile edge, added thickness, or sealant affect operation? | The exact downdraft installation and service instructions |
| Existing wall surface | Is the wall smooth, sound, clean, and permitted as a substrate? | Tile and adhesive preparation instructions |
Exposure check for a proposed backsplash area. An observation identifies a question; it does not replace the documents needed to answer it.
For a product-specific example, the Smart Tiles peel-and-stick warranty conditions say its peel-and-stick tiles must not be exposed to temperatures above 49°C (120°F), direct steam, direct contact with a heat source, or open flame under the stated conditions. The same page discusses Smart Tiles Panels separately; a panel condition must not be assigned to its peel-and-stick tiles. Neither rating tells us the temperature of your wall, and neither applies to an unidentified tile from another maker. (thesmarttiles.com)
If you are comparing products, write each limit beside the exact product name and category. “Heat-resistant” on a listing is too broad to settle a location where the allowed exposure matters. Ask for the installation instructions and a technical answer addressing gas-range placement, the wall substrate, the adhesive system, and any restrictions on flame, steam, grease, and cleaning. If the maker cannot establish suitability for the intended location, move the design away from that location or choose another finish.
Why the adhesive deserves its own question
A decorative face and its adhesive are a system. A ceramic-looking surface, for example, tells you little about the adhesive beneath it. Pressure-sensitive adhesive is an adhesive that forms a bond through contact and applied pressure. Its behavior depends on conditions at application and during use; you cannot infer a particular backsplash adhesive’s service limit from the appearance of the tile face.
3M’s technical discussion of pressure-sensitive bonding describes the effects of a clean substrate, pressure, time, and temperature on bonding, and notes that adhesive response is temperature-sensitive. It addresses electronics bonding, not the unidentified adhesive on a kitchen tile. Its example application values are not installation instructions for your backsplash. The useful lesson is to obtain the actual adhesive and substrate requirements instead of treating the word “self-adhesive” as a performance specification. (3m.com)
If your proposed substrate is an existing stainless-steel backsplash, inspect its finish and contamination separately from a painted wall. The guide to peel-and-stick adhesion on steel raises useful preparation and removal questions; any risk scores or distances in a store guide should not replace the tile and appliance documents.
How do you verify the manuals and product specifications?
Work from the exact model outward: appliance instructions first, then tile instructions, then the adhesive and existing-wall requirements. Keep a record of the document title, model or product identifier, and the passage that answers each question. That makes a manufacturer inquiry much more productive than asking whether peel-and-stick tile is generally “stove safe.”
- Identify every appliance involved. Record the range or cooktop model and, if separate, the downdraft model. Obtain the installation manual, not just a sales drawing or dimension sheet. If the appliance has already been installed, keep the owner’s care instructions handy as well.
- Mark the appliance’s conditions. Look for rear- and side-wall requirements, treatment of combustible surfaces, backsplash language, inlet and duct requirements, controls, access panels, and any service-clearance instructions. If a condition changes depending on the presence of a backsplash, ask what construction the manufacturer means before assuming a thin self-adhesive covering satisfies it.
- Identify the exact tile. Save its installation, use, cleaning, and warranty conditions. Note the substrate it permits and any restrictions concerning a gas stove, direct heat or flame, moisture, steam, or nearby appliances.
- Check the adhesive information. Determine whether the tile maker provides the adhesive’s relevant limits as part of the tile instructions or identifies a separate adhesive specification. If one layer is unverified, do not infer it is suitable from the other layer.
- Compare the proposed location with those conditions. Draw the intended tile boundaries on a photograph or a paper sketch. Mark openings, moving parts, and areas you must leave uncovered. Confirm where any stated dimension begins and ends before using it.
- Resolve conflicts before installation. If the appliance requires a condition the tile cannot meet, the tile is not a fit there. If the wording is unclear, send the model numbers, product name, proposed location, and marked photograph to the relevant manufacturer or a qualified installer for review.
A useful question to send is: “For model [exact model], may this specified wall area receive [exact tile and adhesive system], given the rear-wall requirement and the downdraft inlet shown in the attached photograph? Please identify any required exposed area, clearance measurement points, or access that the finish must preserve.” A written answer tied to the actual models is more useful than a general customer-service assurance that the product is “for kitchens.”
A three-path decision aid
Choose yes, no, or unknown for each of these checks:
- Does the exact appliance documentation permit the proposed wall construction and layout?
- Do the exact tile and adhesive instructions permit the expected heat, flame, steam, grease, substrate, and cleaning conditions?
- Does the marked layout preserve required airflow, movement, controls, removal, and service access?
- Can every applicable requirement be measured from an identified reference point and met in the finished layout?
How to interpret your answers: If any answer is no, the result is choose another layout or material for that area. If there are no “no” answers but at least one “unknown,” the result is pause for manufacturer or qualified professional confirmation. Only four documented yes answers make the layout a candidate to proceed under the applicable instructions. This is a screening decision, not an installation certification; local requirements and on-site conditions still apply.
| Your result | Next action |
|---|---|
| All requirements are documented and met | Plan and dry-fit the approved wall area, following the exact appliance and product instructions. |
| A requirement is unclear or a measurement reference is missing | Stop at the planning stage and obtain a model-specific answer. |
| A requirement cannot be met or a use is prohibited | Do not install that tile in the affected area; change the layout or material. |
Decision paths remain the same whether you review the questions on screen or on paper.
This is also the right point to review the kitchen backsplash planning guide for ordinary wall-zone and surface-preparation considerations. It can help organize the project, but it cannot approve an appliance-adjacent finish that the relevant instructions do not support.
Where should you measure before buying tile?
Measure the permitted tile area, not the whole wall behind the range. A wall’s width and height are useful starting dimensions; they are not a purchase-ready coverage figure until you have marked appliance restrictions, the vent assembly, outlets, and areas reserved for access.
Use one sketch with both a front view and a simple plan view from above. The front view shows where tile starts and ends vertically and horizontally. The plan view captures depth: a tile that seems clear in a wall photograph may still project into the movement path of an appliance component. Mark the actual edge of each proposed tile, including its thickness, rather than drawing only a line for the bare wall.
| Record on your sketch | Your measurement or note | Why it matters |
|---|---|---|
| Appliance and downdraft model numbers | ______ | Identifies the instructions that govern the layout |
| Wall width and proposed tile height | ______ × ______ | Establishes the starting coverage area |
| Burner or cooking-surface reference points specified by the manual | ______ | Keeps any documented dimension tied to its stated starting point |
| Vent inlet and removable-part envelope | ______ | Preserves airflow and space for removal or movement |
| Controls, panels, outlets, and wall penetrations | ______ | Prevents covering or crowding functional areas |
| Areas excluded by appliance or tile instructions | ______ | Removes unsuitable space from the planned tile area |
| Approved substrate and its condition | ______ | Determines preparation and adhesion steps |
Blank measurement record. There is deliberately no universal burner-to-tile or vent-to-tile value in this table; enter only requirements established for your equipment and product.
A simple coverage estimate can prevent overbuying, but it must follow the safety layout rather than drive it. For each rectangular permitted area, multiply width by height using the same units. Add those areas together, then compare the total with the coverage stated for the exact tile package. Do not subtract an inlet opening from a larger rectangle and call the remainder approved: nearby restrictions and access may exclude more than the opening itself. Irregular cuts, pattern alignment, and replacement pieces also affect the order quantity. Keep this estimate separate from the question of whether the material may go there at all.
For example, suppose a hypothetical sketch leaves two approved rectangles after all equipment requirements have been resolved. Calculate each rectangle separately rather than planning to cover the full wall and cut around obstacles later. If the excluded area changes after a manufacturer responds, update the sketch and recalculate before ordering. The arithmetic estimates coverage; it does not establish a heat-safe boundary.
Estimate coverage for two permitted rectangles
Enter widths and heights in inches for up to two already documented permitted rectangles. The calculation is width × height for each rectangle, added together and divided by 144 to show square feet. Leave an unused rectangle at zero. This estimates area only: it does not account for waste, pattern matching, package coverage, or whether any location is safe for tile.
Dry-fit the finished shape
Once the documentation supports a layout, hold paper templates or unpeeled tile pieces against the wall to check joints and edges. Confirm that the pattern can end cleanly before a required open or accessible area. A layout that needs a narrow sliver of adhesive-backed material against an inlet is a prompt to reconsider the pattern, not permission to move the protected boundary.
Take a photograph of the dry fit and compare it with the marked sketch. Check the appliance from its normal operating position. If maintaining or moving a vent component requires pulling tile away, the layout is not ready. Do not alter appliance trim, wiring, gas connections, vent ducting, or factory parts to make a decorative finish fit.

How do you protect the vent and future access?
Keep the inlet, required airflow paths, controls, moving parts, and service areas free of decorative tile and added sealant unless the exact equipment instructions explicitly allow the treatment. The visible opening is not necessarily the full space a grille, filter, panel, or moving assembly needs.
Before installation, check the normal maintenance sequence in the owner’s instructions. Where the manufacturer permits owner removal, can the grille and filter come out and return without touching the proposed backsplash edge? Can a moving downdraft rise, lower, or be serviced without contacting added thickness? Can controls still be reached and read? These questions are more useful than a generic “leave a gap” instruction because different units need different kinds of space.
Avoid using caulk to make a tile edge look continuous if that would seal a removable part or cross an opening. Likewise, do not extend a sheet of tile over an appliance-to-wall joint merely because the adhesive sticks to both surfaces. The finish should not bridge a part that moves or must be removed. If the manufacturer calls for a particular treatment at a joint, follow that instruction rather than improvising with backsplash materials.
A quick pre-application check:
Treat an unchecked item as work to finish, not a reason to press ahead and inspect later. Peel-and-stick installation can feel reversible, but removing adhered material from a painted wall may create its own repair job.

What should you watch after installation?
Inspect the tile and its edges as part of ordinary kitchen care, especially after cooking that exposes the area to heat, grease, or steam. A successful dry fit and good initial bond do not prove the finish will continue to meet the manufacturer’s conditions in use.
Follow the specific tile maker’s cleaning instructions. Wipe grease before it accumulates along edges, and avoid assuming that a cleaner suitable for a cooktop or stainless-steel vent is suitable for the backsplash. The Smart Tiles warranty conditions, for example, call for a mild nonabrasive product rather than strong cleaners or chemicals; another product may have different instructions. Keep appliance cleaning separate from wall-finish cleaning so an appliance-approved chemical is not inadvertently applied to the adhesive tile.
Watch for corners lifting, edges curling, persistent bubbles, slipping or shifting pieces, surface distortion, discoloration, or a recurring loss of adhesion after cleaning. These are reassessment signs, not a diagnosis of the cause. Grease on the substrate, an unsuitable wall finish, inadequate preparation, moisture, heat exposure, or product limits could each warrant investigation. Do not repeatedly press a failing piece back into place and assume the original decision still holds. Stop using an affected area as a decorative cover for a potentially unsuitable installation, review the instructions, and seek a product-specific answer before replacing it.
The same caution applies to a changed appliance or cooking setup. If you replace the range, add a separate downdraft, change a protective panel, or modify the wall, revisit the backsplash decision against the new equipment documentation. Approval inferred for one configuration does not carry over automatically.

What about removal in a rental?
Do not promise yourself a damage-free exit. Obtain any required landlord permission before changing the backsplash, and check the tile maker’s removal instructions and the condition of the existing paint or finish. Smart Tiles says removal after firm adhesion may be practically damage-free depending on the original surface. That is conditional guidance for Smart Tiles, not a guarantee for every wall or adhesive. (thesmarttiles.com)
A small test on a permitted, inconspicuous area may help reveal how the wall finish behaves, but it does not test stove-adjacent heat suitability. Keep a record of the original wall condition and the product used. If the finish is fragile or the lease requires restoration, include possible surface repair in the project decision before applying tile.
When is another backsplash material the better choice?
Choose another finish or move the design when the documented location excludes the tile, the exposure cannot be established, or access cannot be preserved. A change of material is not a workaround for an appliance requirement: the replacement must also be appropriate for the wall construction and its position near the cooking equipment.
Traditional tile installed as a wall system, a manufacturer-approved protective panel, and certain metal or other hard-surface backsplash systems may be worth discussing with a qualified installer. Their suitability depends on the complete installed assembly, not just the visible surface. Substrate, attachment, joints, and any required clearance still matter. A metal appearance alone is not proof that a wall has the protective construction an appliance instruction anticipates.
If you are weighing a different visual finish, the microcement-versus-peel-and-stick backsplash comparison is a useful way to consider preparation, maintenance, repair, and removal tradeoffs. Do not read a comparison of materials as appliance approval for either one.
There is also a middle path: use peel-and-stick tile on a separately documented suitable wall area and choose a different treatment immediately behind the cooking surface. This can retain much of the quick-refresh appeal without asking one product to cover every exposure zone. Confirm how the finishes meet and whether their edge treatment affects access before committing.
If you are considering a specific self-adhesive product, use its listing to identify what to ask, not to settle the stove-adjacent decision. For example, the store-listed Dual Ceramics self-adhesive wall tile is a candidate for a product-document review, not a verified downdraft-range recommendation. Before considering it for this location, obtain the applicable heat and placement conditions, adhesive and substrate specifications, and any required clearance or exclusion guidance. A general heat-resistance description is not enough to establish those details.
Frequently Asked Questions
What temperature can peel-and-stick backsplash tile withstand behind a stove?
There is no single temperature limit for the category. Find the limit and exposure conditions for the exact tile and adhesive system you intend to use. Smart Tiles states a 49°C (120°F) maximum exposure condition for its peel-and-stick tiles under its warranty terms; that number does not describe another brand, prove your wall stays below it, or override an appliance requirement. A temperature rating also does not grant permission for direct flame or an obstructed vent.
Does the downdraft make peel-and-stick tile safer behind a gas range?
Do not treat it as a backsplash heat shield. A downdraft is ventilation equipment, and its effectiveness depends on source position and operating conditions. The cited ventilation studies measured pollutant capture, not peel-and-stick tile performance. Keep the equipment operating and accessible, while making the material decision from the appliance and product instructions.
Can I tile right up to the downdraft opening?
Only if the exact equipment instructions and finished layout permit it. Check the inlet, component-removal path, moving parts, and service access before locating a tile edge. A neat cut around the visible opening does not establish enough room for a filter, gasket, grille, or movable assembly.
Is a ceramic-faced peel-and-stick tile different from a conventional ceramic backsplash?
Yes: evaluate the installed system, not just the face. A self-adhesive ceramic-faced product includes an adhesive layer whose substrate and exposure requirements matter. Conventional ceramic tile is also an assembly with its own installation requirements. Neither surface name alone resolves your appliance’s rear-wall instructions.
Make the decision before peeling the backing
Proceed only when the exact appliance instructions, tile and adhesive specifications, measured layout, and access requirements agree. If a manufacturer’s wording is unclear, pause and request an answer tied to your model and proposed location. If a condition prohibits the material or cannot be met, choose another finish or keep peel-and-stick tile in a separately suitable part of the kitchen.
The most useful next step is a marked photograph: label the appliance models, proposed tile boundary, vent opening, and any parts that move or come out for cleaning. Use the measurement record and pre-application checklist above while you compare that photograph with the actual instructions. The result may be a smaller peel-and-stick area than you first imagined, but it will be a decision based on the wall and equipment you have, not a generic heat-resistance claim.


Leave a comment
This site is protected by hCaptcha and the hCaptcha Privacy Policy and Terms of Service apply.