




Decision guide
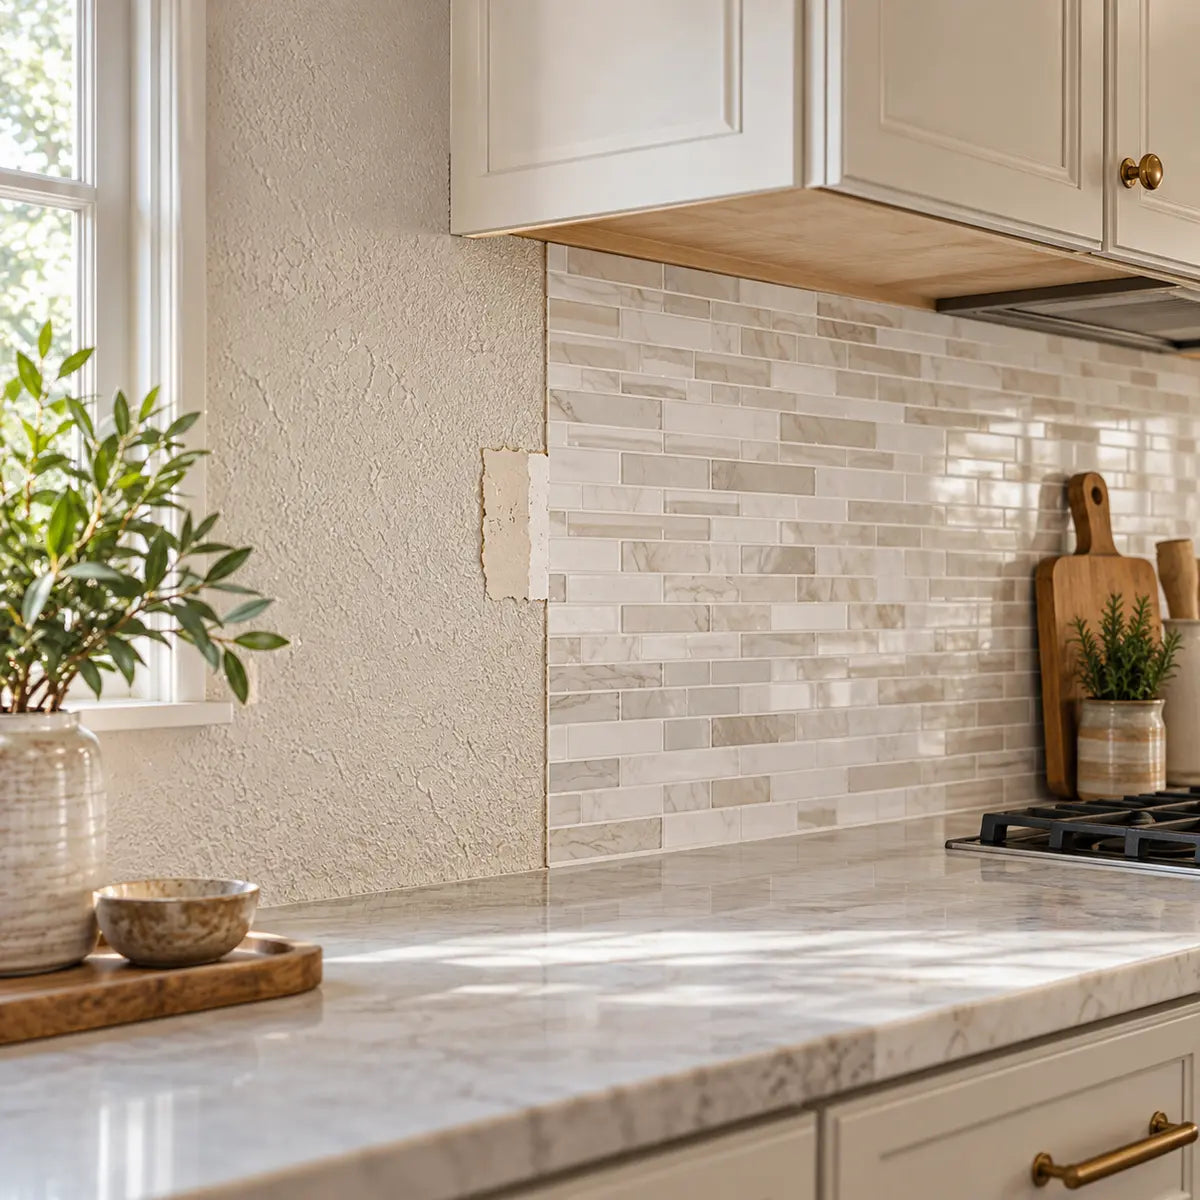
A knockdown-textured wall can look ready for peel-and-stick tile while still giving the adhesive uneven contact. Peel-and-stick tile may work over some lightly textured walls, but you should not assume it will bond dependably over knockdown texture without inspecting the wall and testing a representative area first.
The safest decision is simple:
- Check whether the wall is clean, dry, stable, and reasonably even.
- Prepare a small area that reflects the wall’s actual condition.
- Apply one or two tile samples according to the product instructions.
- Press and smooth the sample carefully.
- Observe the contact, edges, appearance, and wall condition during the product’s stated observation or setting period.
- Proceed, prepare further, or stop based on what the test shows.
That test matters because visual coverage is different from dependable adhesive contact. A tile may hide the pattern from across the room while still bridging over raised areas, leaving gaps in recessed areas, or gripping loose paint instead of a stable wall surface.
Manufacturers do not use one universal rule for every adhesive tile. For example, current instructions from WallPops require a smooth, dry, clean, and firm surface and identify textured walls as not recommended for the products described on that page. Smart Tiles likewise calls for a smooth, even, clean, and dry surface and warns that textured or uneven walls may not provide optimal adhesion. Those instructions apply to their product families, not every tile on the market, but they show why a knockdown wall deserves a careful surface check before you cover it. WallPops surface and installation instructions
Why does knockdown texture affect adhesive tile?
Knockdown texture can make adhesive contact inconsistent because the wall contains raised and recessed areas instead of one continuous plane. Pressure-sensitive adhesive—the type that bonds when you press it against a surface—works best when it can make close, broad contact with a clean, stable substrate.
A knockdown finish is made from joint compound or a similar material that has been sprayed, rolled, or applied and then partially flattened. The result is a pattern of flattened ridges, shallow valleys, tool marks, and small changes in height. The exact profile varies from wall to wall. Some knockdown texture is barely raised. Some is pronounced enough to cast visible shadows and create a distinctly uneven surface.

When a peel-and-stick tile has a flexible backing, it may conform to minor changes in the wall. That does not mean it will fill every recessed area or maintain equal contact across the tile. A more rigid or semi-rigid tile may bridge over the high points. The adhesive can grip the raised areas while making little or no contact in the low areas.
General adhesive guidance from 3M explains that bond strength depends on adhesive-to-surface contact and that smoothing a surface can increase flatness and contact area. The guidance is written for 3M pressure-sensitive tape systems, not for every peel-and-stick tile, so it should be read as a technical explanation of the mechanism rather than a direct test of tile over knockdown drywall. 3M guidance on pressure-sensitive adhesive contact
The wall’s surface energy and roughness also matter. Surface energy describes how readily a liquid or adhesive spreads across a material. Dust, grease, residue, chalky paint, and some coatings can interfere with intimate contact. A rough surface can also require more adhesive flow to fill the available surface pattern. 3M’s adhesive science guidance identifies cleanliness, roughness, and surface energy as factors that affect contact. 3M explanation of surface science and adhesion
This creates a common installation trap: the tile looks flat from the front, so the wall appears suitable. The adhesive side tells a different story. If the backing contacts only the tops of the texture, the tile may initially appear secure but have less margin for changes caused by temperature, humidity, cleaning, vibration, or ordinary handling.
Firm pressure helps the adhesive contact the wall. It cannot correct a wall that is damp, dusty, loose, badly uneven, or covered with failing paint. A 3M VHB application guide gives a specific pressure value for its own tape system, but that number should not be transferred to consumer peel-and-stick tile unless the tile manufacturer gives the same instruction. Use the pressure method and tool stated in the tile’s instructions.
Can you put peel-and-stick tile over knockdown texture?
You can test it, but a full installation should be treated as conditional rather than automatic. The result depends on the tile’s instructions, the depth and consistency of the texture, the condition of the paint, the room environment, and the quality of the preparation.
The most useful distinction is between three situations:
- Light, stable, shallow texture: A tile sample may make broad contact after careful preparation, but the manufacturer must permit the condition or the test should be treated cautiously.
- Pronounced or uneven knockdown texture: The wall usually deserves smoothing before you rely on adhesive tile for a full installation.
- Loose, damp, dusty, powdery, or moving surface: Do not use the tile as a way to hold the surface together. Repair the substrate or choose another finish.
There is no reliable universal texture-depth measurement that separates “safe” from “unsafe” knockdown texture for every product. One tile may have a flexible backing and adhesive that behaves differently from another tile. Some product instructions may discuss lightly textured walls while excluding rough or heavily textured walls. That product-specific difference is why the tile’s own documentation controls the decision.
A small test is still useful even when the manufacturer requires a smooth surface. It can reveal whether the wall has hidden problems such as loose paint, dust, poor contact, or removal damage. It cannot turn an excluded surface into an approved one, and it cannot prove long-term performance across the entire wall.
Before buying enough material for the project, read the product instructions for:
- Supported wall surfaces.
- Whether textured walls are excluded.
- Cleaning products and preparation steps.
- Primer or sealer requirements.
- Pressure or smoothing instructions.
- Fresh-paint and primer curing requirements.
- Moisture, heat, and room-use limitations.
- Removal instructions and possible paint damage.
- Warranty or return conditions.
The supplied Stickwoll information does not include current product-specific installation instructions, a supported-surface list, a universal test period, or warranty language. For that reason, this guide explains the decision process without claiming that a particular Stickwoll tile is approved for untreated knockdown texture.
If you want a broader surface-planning reference before choosing a tile, the Stickwoll peel-and-stick tile guide can help you compare room conditions, wall preparation, layout, and test placement.
Is the wall suitable for a meaningful bond test?
A test only tells you something useful when the test area represents the wall you plan to cover. Before applying a sample, inspect the intended installation area for stability, cleanliness, moisture, and texture consistency.

Check the texture across the wall
Look at the wall from several angles and under side lighting. Light from the side makes ridges and recessed areas easier to see. Run your fingertips across the surface without pressing hard. You are looking for the overall pattern, not a laboratory measurement.
Ask:
- Does the texture look consistent from one section to another?
- Are some areas much more raised than others?
- Are there visible ridges, gouges, repair patches, or seams?
- Does the texture continue behind trim, outlets, cabinets, or appliances?
- Will the test area include the same texture that appears in the most difficult part of the installation?
A sample placed on the smoothest part of the wall can give false confidence. If the center of the wall is textured but the corner is relatively flat, test the center. If the lower section has scuffs, grease, or previous repairs, include that condition in the inspection.
Check for dust and loose material
Wipe a small inconspicuous area with a clean, dry cloth. If the cloth picks up visible powder, the surface needs further investigation before testing. A dusty wall can prevent the adhesive from touching the paint or texture properly.
Look closely for:
- Chalking or powdering paint.
- Flaking or peeling paint.
- Cracks that move when pressed lightly.
- Texture that breaks away under gentle contact.
- Old adhesive, wallpaper paste, grease, or cleaning residue.
- Areas that feel soft or hollow.
- Previous patches that were never properly sealed.
Do not use the tile adhesive to stabilize a weak surface. If the paint or texture releases from the drywall, the tile may pull it away during installation or removal.
Check for moisture
The wall must be dry before you test or install adhesive tile. Watch for staining, bubbling paint, condensation, damp corners, plumbing leaks, and areas near sinks or ranges that receive repeated moisture.
A dry-looking wall can still have an underlying moisture problem. If the wall has a history of leaks or the paint is blistering, find and correct the source first. Covering the area can make later inspection and repair more difficult.
Room exposure also affects the decision. A decorative accent wall in a dry bedroom has different demands from a backsplash near a sink, cooktop, shower, or humid bathroom. Product instructions must define whether the tile is appropriate for that location. Do not generalize a dry-room test to a wet or hot area.
Check the paint and coating
Paint provides the surface the tile may actually bond to, so its condition matters as much as the texture beneath it. A wall with strong-looking texture but weak paint is a poor candidate.
Press a fingertip against the paint in a hidden area. Watch for lifting, cracking, or a soft film. If the wall was painted recently, follow both the paint manufacturer’s curing instructions and the tile manufacturer’s requirements. Different tile manufacturers give different time windows. Checked instructions include examples ranging from 21 days after fresh paint to at least four weeks or longer, depending on the product and paint guidance. Those numbers are product-specific and should not be combined into one universal rule.
For more detail on cleaning, sealing porous repairs, and preparing painted drywall, see the drywall preparation guide for peel-and-stick tile.
Wall inspection notes
Use these checks to record what you observed before applying a sample.
How do you perform a bond test for peel-and-stick tile?
A bond test is a small, controlled installation that helps you observe contact, edge behavior, appearance, and removal risk before committing to the full wall. Current manufacturer guidance supports testing an inconspicuous location, and Smart Tiles gives one or two tiles as an example in its surface-testing guidance. The sources do not establish one universal test duration or pass/fail force.
Choose a location that reflects the actual wall condition. If you rent, choose a discreet area and confirm that your lease permits the installation and any preparation work.

Select a representative test area
Choose an area large enough to show how the tile interacts with the texture. One tile may be enough for an initial screen, while two adjacent tiles can reveal alignment, seam, and edge behavior. Use the actual tile or a sample from the same product line. A different tile may have a different backing stiffness, adhesive layer, or surface finish.
Avoid testing only on a smooth repair patch if most of the wall is textured. If the wall varies, test more than one condition.
Prepare the area according to the tile instructions
Clean the area using only a method compatible with the tile manufacturer’s instructions. The goal is to remove dust, grease, and residue without leaving a film. Allow the wall to dry fully.
Do not automatically use alcohol, degreaser, detergent, primer, or solvent. A cleaner that works on one painted surface can soften another coating or leave residue. A primer that improves adhesion for one product can interfere with another. Product instructions must control this step.
If the texture is loose, damp, or powdery, stop the test and prepare the wall first. A sample placed over a visibly unstable surface does not tell you whether the adhesive works; it only tells you that the substrate is unstable.
Mark the sample location
Use painter’s tape or a pencil to record the test area. Write down:
- The wall location.
- The date of installation.
- The product and lot information if available.
- Whether the area was cleaned, sanded, primed, or skim coated.
- Any visible texture or paint condition.
Take a photograph before application. This helps you compare the wall after removal and gives you a record if the test exposes a problem.
Apply the tile without stretching it
Follow the product’s installation sequence. Keep the tile aligned, avoid trapping debris, and do not stretch or distort the backing. A stretched tile can pull back at the edges and make the test difficult to interpret.
Start at the recommended edge or reference point. If the tile is repositionable during installation, use that feature only as the product instructions allow. Repeated lifting can collect dust on the adhesive and change the test.
Press and smooth the full tile
Use firm, even pressure across the tile. Pay close attention to the center, perimeter, corners, and any area where the texture is most pronounced. Smooth from the center toward the edges if the product instructions recommend that motion.
Look for signs of incomplete contact:
- A visible hollow or tented area.
- Shadows beneath the tile.
- A corner that will not settle.
- Edges that curl away from the wall.
- Texture ridges that remain sharply visible.
- A seam that refuses to close.
- Areas that feel loose when lightly touched.
Do not force a tile flat with excessive pressure. Excessive force may damage the tile, deform the backing, or give a misleading short-term result.
Observe the sample during the product-specific period
Do not assign a universal 24-hour, 48-hour, or 72-hour test rule. Adhesive systems develop contact at different rates, and the tile manufacturer’s instructions control the timing.
For context, one Smart Tiles installation guide states that its adhesive sets firmly within 48 hours after application and pressure. That statement applies to the specified Smart Tiles product family. Separately, 3M’s VHB guidance reports approximately 50% of ultimate strength after 20 minutes, 90% after 24 hours, and 100% after 72 hours for its own tape system at room temperature. Those figures illustrate why an immediate visual check is incomplete; they do not establish a waiting period for every peel-and-stick tile. Smart Tiles installation timing guidance
During the product’s stated observation period, check the sample more than once. Look at it in normal light and side light. Press lightly around the perimeter to see whether an edge has begun to lift. Do not repeatedly peel the tile during the observation period because that changes the test.
How should you classify the test result?
The following classification is a practical decision aid, not a published industry standard or a warranty test. It gives you a disciplined way to describe what you observed.
| Result | What you observe | What to do next |
|---|---|---|
| Pass for further consideration | The sample makes broad, stable contact; the edges and corners remain flat; the texture is not creating obvious voids; the wall does not shed material; and the product instructions permit the tested condition or preparation. | Proceed only after confirming the full wall is comparable and following the product instructions for layout, pressure, room use, and curing or setting. |
| Caution | The tile appears attached but contact is incomplete, the texture remains strongly visible, a seam or corner is unsettled, the wall varies substantially, or the manufacturer’s surface guidance is unclear. | Prepare a larger or smoother test area, ask the manufacturer for written guidance, or choose a finish that does not depend on direct adhesive contact with the texture. |
| Fail | The edge lifts, the sample releases with little effort, the wall surface moves or sheds, moisture is present, paint peels, or the tile cannot make stable contact across the test area. | Stop the full installation. Repair or smooth the wall and retest, or select another wall treatment. |
A “pass” means the tested condition appears suitable for further consideration. It does not guarantee long-term performance everywhere on the wall. A “caution” result is useful information, not a reason to press harder and hope. A “fail” result is valuable because it prevents wasted tile and a larger repair.
If removal matters, treat the test as a wall-damage check too. Some adhesive tiles can remove paint or leave residue. Damage depends on the paint’s bond to the drywall, the tile adhesive, the time installed, temperature, preparation, and removal technique. Do not rely on the word “removable” as a promise of damage-free removal for every wall.
How smooth should a wall be for peel-and-stick tile?
A wall should be visibly even, firm, clean, dry, and free of loose material, with no pronounced ridges or recessed areas that prevent the tile from making broad contact. “Smooth enough” is a practical condition, not one universal measurement.
Run your hand over the prepared surface. The tile should not have to bridge sharp texture peaks. Shine a light across the wall. You should not see deep shadows from ridges, tool marks, or depressions. Look at the wall from the same angle you will use to inspect the finished tile.
The surface should also pass these observable checks:
- Firm: Gentle pressure does not make the wall, paint, or texture move.
- Clean: A dry cloth does not pick up loose powder, and no greasy or soapy film remains.
- Dry: There is no dampness, condensation, bubbling, or active moisture source.
- Even: The surface does not contain pronounced peaks, valleys, ridges, or unrepaired patches.
- Stable: Paint and texture remain attached when touched lightly.
- Consistent: The test area resembles the rest of the wall.
- Cured: Paint, primer, joint compound, or skim coat has dried or cured according to the applicable product instructions.
The tile does not need to make the wall look perfectly finished before installation. It does need a surface that supports adhesive contact. A wall can be cosmetically acceptable for painting and still be too irregular for a pressure-sensitive tile backing.
This is why the phrase “the tile will cover it” can be misleading. Covering a pattern is a visual question. Bonding to the wall is a surface-contact question.
Which preparation method should you choose?
The right preparation route depends on the texture’s condition and the level of contact the tile requires. Cleaning may be enough for a smooth, stable wall with only minor surface residue. A pronounced knockdown pattern may call for smoothing or a skim coat. Aggressive texture removal can create new problems if it damages paint or drywall paper.
Route 1: Clean and test
Choose this route when the wall is already fairly even, the texture is shallow, the paint is stable, and the only clear problem is dust or residue.
Clean a small area first, let it dry, and run the test. If the tile makes broad contact and remains stable during the product-specific observation period, compare that result with the rest of the wall before proceeding.
Cleaning alone will not flatten texture. It only removes contaminants that interfere with contact.
Route 2: Lightly smooth isolated high spots
Choose limited smoothing when the wall is generally even but has a few ridges, rough repairs, paint drips, or raised edges. The goal is to reduce isolated obstacles without removing the entire finish.
Work carefully. Coarse abrasion can leave scratches, create more dust, or expose unstable layers. After smoothing, remove dust thoroughly and inspect the surface again. If the process exposes drywall paper or creates a porous repair, follow the tile and coating instructions for sealing or priming before testing.
A common mistake is to sand only the most visible bumps and leave a broad pattern of smaller peaks and valleys. The wall may look better while still producing incomplete adhesive contact. Test the prepared area rather than judging it only by appearance.
Route 3: Skim coat the wall
A skim coat is a thin layer of joint compound or another approved finishing material applied across the surface to fill texture and create a more uniform plane. This is often the most practical route when the knockdown pattern covers the wall and the reader wants a flatter substrate.

USG’s drywall-finishing guidance describes skim coating as a way to fill imperfections and create a uniform surface. It advises allowing the coating to dry thoroughly before lightly sanding minor imperfections, then removing sanding dust. The finished surface should be smooth and free of tool marks and ridges. USG guidance on skim coating and drywall finishing
A skim coat requires patience because the compound must dry fully through its thickness. Drying time depends on the material, application thickness, temperature, humidity, airflow, and substrate. Do not cover a damp or soft skim coat with tile.
A practical skim-coat sequence is:
- Protect nearby surfaces and remove items that interfere with a flat application.
- Clean and inspect the existing wall.
- Repair loose paint, damaged drywall, or obvious cracks before applying compound.
- Apply the finishing material evenly across the textured area.
- Allow it to dry thoroughly according to the compound instructions.
- Lightly sand only the imperfections that remain.
- Remove sanding dust completely.
- Inspect the wall under side lighting and by touch.
- Apply any required primer or sealer according to the tile and coating instructions.
- Allow the coating to dry or cure, then run the tile test again.
USG’s textured-wall repair guidance describes lightly skimming knockdown texture to flatten the pattern, allowing it to dry completely, lightly sanding, and preparing the surface for painting. That guidance addresses drywall repair and finishing; it does not serve as a product-specific peel-and-stick tile warranty. USG repair guidance for knockdown texture
Route 4: Remove more of the texture
More extensive removal may be appropriate when the texture is thick, badly damaged, inconsistent, or unsuitable for the planned tile even after limited smoothing. This route can involve more labor and more risk to the underlying paint or drywall.
Avoid treating texture removal as a simple matter of sanding until the wall is flat. Drywall paper can tear, old paint can release, and the wall may require patching, sealing, and refinishing afterward. If the existing coating’s age or composition is uncertain, use a method appropriate for the material and the condition of the wall.
In many cases, flattening the texture with a controlled skim coat is easier to manage than trying to remove every trace of the original finish. The best route is the one that produces a stable, even, dust-free surface without creating a larger repair.
The guide to installing Stick Tiles on painted walls covers the related sequence of cleaning, checking dryness, smoothing uneven areas, applying pressure, and inspecting the finished installation.
Preparation comparison
| Wall condition | Preparation to consider | Why |
|---|---|---|
| Clean, dry, stable wall with very shallow texture | Clean and test | The main question is whether the sample makes broad contact. |
| Mostly even wall with isolated ridges or rough patches | Limited smoothing and dust removal | Small high spots can prevent an edge or section from settling. |
| Texture covers most of the wall or creates visible peaks and valleys | Skim coat or another flattening method | A broader, more uniform plane improves the chance of consistent contact. |
| Loose, damp, chalky, or peeling surface | Repair the substrate before testing | Adhesive tile cannot replace a stable wall surface. |
| Heavy, damaged, or highly inconsistent texture | More extensive preparation or another finish | The preparation effort may exceed the value of a direct adhesive installation. |
How do you install the full wall after the sample passes?
A successful sample should lead to a careful full-wall installation, not a rush to cover the entire surface. Reinspect the wall before you begin. Confirm that the areas around corners, outlets, cabinets, trim, and the floor or countertop have the same surface condition as the test.
Plan the layout first
Measure the wall and map the tile pattern before removing liners. Decide where full tiles, cut tiles, seams, and edge pieces will fall. A layout that leaves very narrow strips at both ends can make the installation look uneven and place extra stress on small pieces.
Use a level or another reliable reference to establish the first line. Walls and countertops are not always perfectly level, so the first row may need a controlled adjustment. The pattern should follow a deliberate reference line rather than the most convenient edge.
Dry-fit the first few pieces if the product permits it. Confirm that outlets, switches, corners, and trim will not force a tile over a pronounced obstruction.
Keep the adhesive clean
Peel the liner back gradually. Avoid touching the adhesive surface with dusty hands. Keep removed liners and debris away from the wall. Dust trapped under the tile becomes a permanent contact defect.
If the product uses overlapping edges or a specific seam pattern, follow the instructions exactly. Do not improvise with extra adhesive, caulk, construction glue, or double-sided tape unless the product documentation permits that method. An added material can change removal, appearance, weight, and warranty conditions.
Press the tile evenly
Apply the tile from the recommended starting point and smooth it across the wall. Work from the center toward the edges where appropriate. Give special attention to corners and seams because these areas are often the first to reveal incomplete contact.
Firm, even pressure improves contact in pressure-sensitive adhesive systems. The pressure should be controlled and consistent rather than forceful enough to deform the tile. A roller may be appropriate for some products, but use one only when the tile instructions recommend it.
Inspect as you go
After each tile or small group of tiles, look for:
- Lifted corners.
- Open seams.
- Gaps caused by texture.
- Wrinkles or trapped debris.
- A tile that rocks when touched.
- A visible ridge beneath the tile.
- Adhesive that has contacted only isolated high spots.
Fix the cause while access is easy. Do not cover a lifting edge with the next tile and assume the problem will disappear. A hidden edge can continue to release and make later repair more difficult.
Allow the installation to set
Follow the product’s stated setting, curing, or care instructions before exposing the installation to cleaning, moisture, heat, or repeated handling. Do not transfer a timing instruction from another brand. The checked sources show that manufacturers use different time windows, which is one reason product-specific documentation matters.
For room-specific comparisons involving moisture, heat, texture, and removal risk, see Stickwoll’s comparison of peel-and-stick wall tile by room and surface.
For the basic sequence of preparing a clean, smooth, dry wall, planning the layout, pressing and smoothing the tile, and inspecting lifting edges during care and removal, see the Stickwoll installation and care guide.
Why is my peel-and-stick tile not sticking to textured walls?
A tile that lifts on a textured wall may be responding to incomplete contact, surface contamination, unstable paint, moisture, insufficient pressure, or a product mismatch. Inspect the failure before trying to press the tile back into place.

The edges are lifting
Lifted edges often point to one or more of these conditions:
- The texture is preventing the perimeter from settling.
- The adhesive was contaminated during handling.
- The wall was dusty or greasy.
- The tile was bent or stretched.
- The paint is releasing from the drywall.
- The room conditions exceed the product’s stated limits.
- The tile was installed over a corner, seam, or ridge.
If the edge lifts soon after application, remove or reposition the tile only as the product instructions permit. Clean and repair the surface before retesting. Repeatedly pressing the same failed edge may produce a temporary appearance without correcting the underlying condition.
The center has a hollow area
A hollow area usually suggests that the tile is bridging a depression or texture pattern. Check the wall before blaming the adhesive. If the surface is visibly uneven, smoothing or skim coating may be more effective than applying more pressure.
A hollow area can also result from a warped tile, trapped debris, or a backing that does not flex enough to match the wall. Compare the sample with a tile installed on a smooth, approved surface if the product instructions provide that option. Keep the comparison limited to diagnosis; do not assume a smooth-surface result predicts performance on knockdown texture.
The seams are opening
Open seams can result from a poor layout, stretched material, uneven texture, a wall that is out of plane, or failure to press the edges properly. Check whether both tiles are flat and whether a ridge or recessed area runs beneath the seam.
If the same seam problem appears repeatedly, stop installing and reassess the surface. A pattern of small failures across several tiles is more useful than treating each seam as an isolated defect.
The tile sticks at first and lifts later
Delayed lifting can occur when the initial visual check happens before the adhesive has developed sufficient contact. Adhesive systems can build bond after application, but the rate depends on the product, pressure, temperature, wall condition, and tile construction.
This is why the product-specific observation period matters. A sample that looks fine immediately after installation may reveal edge lift later. A sample that fails after the appropriate observation period should not be used as the basis for a full installation.
The wall surface comes away with the tile
If paint, primer, joint compound, or texture pulls away during removal, the wall may be weaker than it appeared. Stop and inspect the area. The adhesive may be stronger than the coating’s bond to the substrate.
For a rental or painted-wall project, removal risk should be tested in an inconspicuous location before the full installation. The current manufacturer evidence supports caution: one manufacturer warns that removal may take some paint, while another describes removal as dependent on the original surface and technique. Neither supports a universal promise of damage-free removal.
Can peel-and-stick tile be used as a backsplash over knockdown texture?
A backsplash application needs a stricter review because the wall may face moisture, heat, grease, cleaning, and repeated contact. Do not treat a successful dry-wall test as automatic approval for a backsplash location.
Before using peel-and-stick tile near a sink or cooking area, verify the product’s current instructions for:
- Moisture exposure.
- Heat and distance from cooking appliances.
- Cleaning products.
- Seams and edge sealing.
- Installation near outlets and fixtures.
- Required substrate preparation.
- Care and removal.
A test sample can show whether the tile contacts the wall, but it does not establish water resistance, heat resistance, or long-term backsplash suitability. Those are product-specific properties.
Pay close attention to transitions. The bottom edge of a backsplash, the area behind a faucet, the corner where two walls meet, and the space near a cooktop may receive more stress than the center of the test area. If the product instructions exclude the wall condition or location, preparation or another finish may be the better choice.
Frequently Asked Questions
Can peel-and-stick tile go over lightly textured walls?
It may be possible for a specific product, but the product instructions must permit the surface and the test must show stable contact. “Lightly textured” is not a universal measurement. One manufacturer’s lightly textured-wall guidance should not be transferred to another tile or to a different knockdown finish.
Do I need to sand knockdown texture before installing peel-and-stick tile?
Not always, but sanding alone is not a universal solution. Sanding may reduce isolated high spots, yet it can also create dust, expose drywall paper, or leave a broad pattern of smaller ridges and valleys. If the texture is pronounced across the wall, a skim coat or another flattening method may produce a more uniform surface.
Is skim coating better than sanding for smoothing a textured wall?
Skim coating is often more practical when the texture covers most of the wall because it fills the pattern instead of requiring you to remove every raised area. Sanding may be suitable for isolated imperfections or minor high spots. The choice depends on the texture, paint stability, wall size, repair skill, and the surface condition required by the tile.
A skim coat must dry thoroughly before minor sanding, and the finished wall must be smooth, free of tool marks and ridges, and free of sanding dust before decoration. The tile manufacturer may also require primer or a particular sealer.
How long should I wait before deciding whether the bond test passed?
Follow the tile manufacturer’s stated setting or observation instructions. There is no universal wait time for every peel-and-stick tile. Some products describe a firm set within 48 hours, while other adhesive systems use different bond-development timelines. A short visual check is useful, but it does not establish final performance.
Will peel-and-stick tile damage painted drywall when removed?
It can. Removal depends on the tile adhesive, paint adhesion, wall preparation, time installed, temperature, and removal technique. Test removal in an inconspicuous area if the wall must remain intact, and follow the product’s removal instructions. Do not treat “removable” as a guarantee that every painted or textured wall will remain undamaged.
The decision is made by the wall and the test
Peel-and-stick tile over knockdown texture is a surface-preparation decision before it becomes a decorating decision. The wall may be suitable after cleaning, limited smoothing, skim coating, or more extensive preparation. It may also be a poor candidate for direct adhesive installation if the texture is pronounced, the paint is unstable, moisture is present, or the test sample cannot make stable contact.
Use the bond test as the decision gate:
- Proceed when the tested surface is stable, clean, dry, reasonably even, and consistent with the full wall, and the sample makes broad contact with stable edges during the product-specific observation period.
- Prepare further when the result is uncertain, the texture remains pronounced, or the wall varies from one area to another.
- Stop when the sample lifts, releases easily, the substrate sheds, moisture is present, or the product instructions exclude the tested condition.
After the wall passes, review the current compatibility and care information before choosing a tile. If the prepared wall and product instructions align, you can review Stickwoll’s Minty Ceramic 8 peel-and-stick wall tile option as one possible product path. Its product information describes it as self-adhesive, grout-free, renter-oriented, removable, and intended for kitchen, bathroom, and accent-wall applications; verify surface compatibility and test the prepared wall before purchase or full installation.
The practical rule is simple: let the wall earn the right to be tiled. A small, representative test can save a full-wall failure, wasted material, and a difficult repair.


Leave a comment
This site is protected by hCaptcha and the hCaptcha Privacy Policy and Terms of Service apply.