












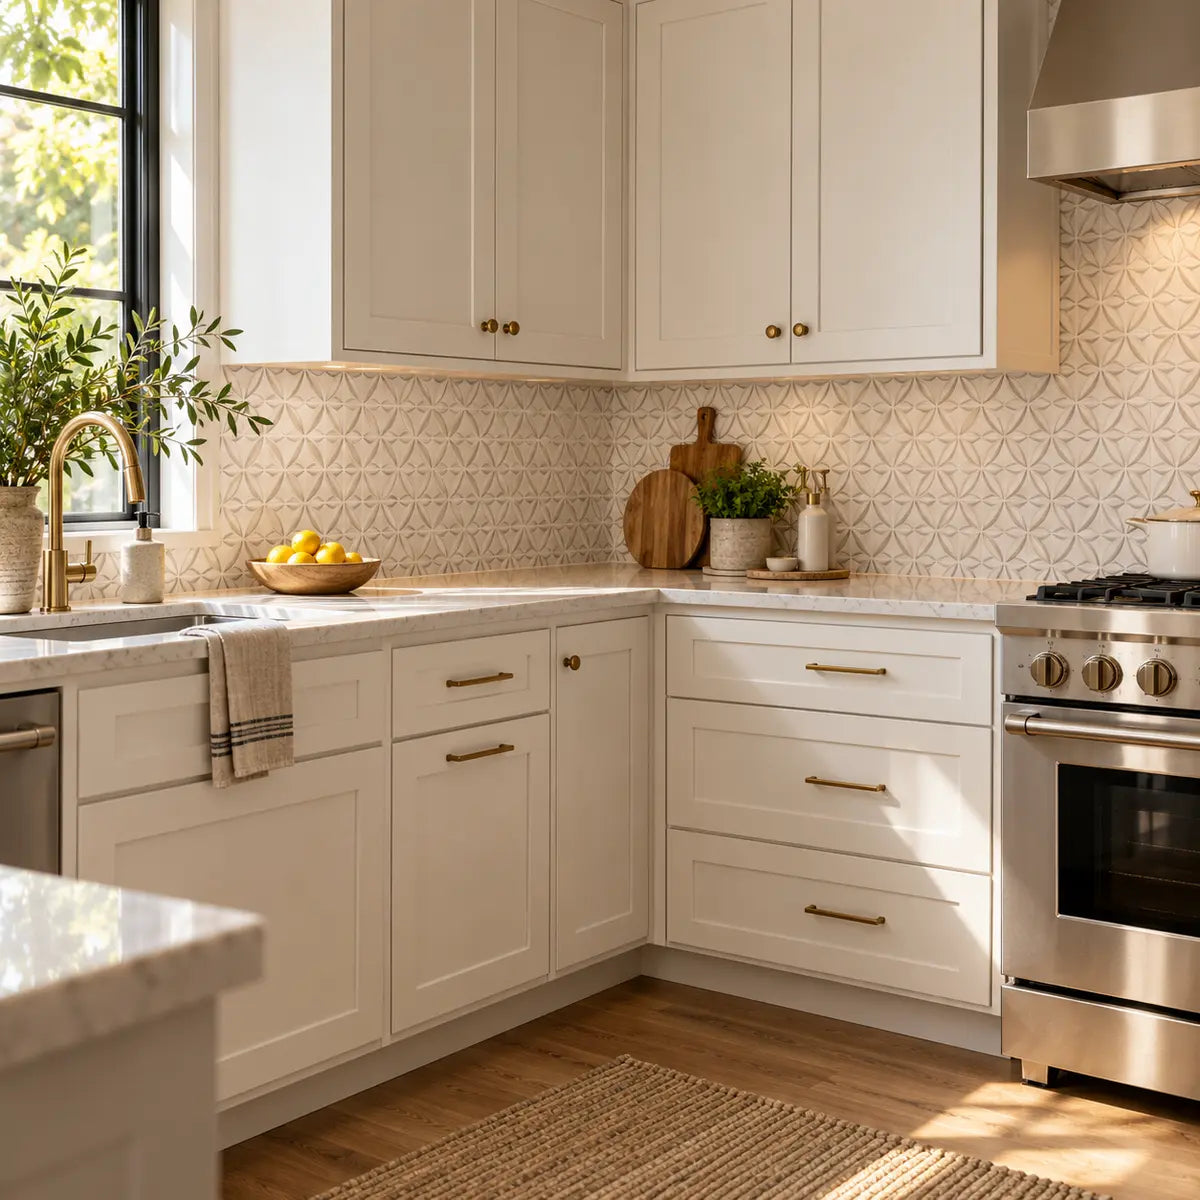
L-shaped kitchen backsplash layout
The inside corner determines whether an L-shaped backsplash looks deliberate or pieced together. The safest layout begins before any adhesive is exposed: measure Wall A and Wall B separately, mark the countertop and cabinet boundaries, choose the corner treatment, dry-fit the complete sequence, and record every cut on a simple cut map.
For most peel-and-stick backsplash projects, the best starting point is the most visible or visually important boundary after the corner has been planned. That might be an exposed end beside a tall cabinet, the edge of a range hood, or the center of a focal wall. It is not automatically the inside corner. Starting there can make the first piece easy to place, but it may leave an awkward sliver at the more visible end or force a pattern to break at the corner.
                 Wall B
        ┌────────────────────
        │
        │  Inside corner
        │
        └────────────────────
                 Wall A
Plan each run independently, then decide how the two runs meet. That corner-first cut map is the central idea in this guide.
Where should you start a peel-and-stick backsplash in an L-shaped kitchen?
Start from a deliberate visual reference point, chosen after you have planned the inside corner, exposed ends, cabinets, countertop, appliances, and pattern direction.
A reliable starting point usually has three qualities:
- It is easy to establish with a level or plumb reference.
- It is visible enough that the first full pieces matter visually.
- It allows the remaining cuts to finish at less noticeable boundaries.
That may lead you to begin on Wall A and work toward the corner, then continue along Wall B. In another kitchen, the better sequence may be to begin at the corner with a planned seam. In a highly visible kitchen with a directional pattern, you may center the layout on the focal area and let the end cuts fall toward the least noticeable edges.
The decision depends on the actual room. Look at the backsplash from the main entrance, from the dining area, and from the normal cooking position. Identify which wall catches the eye first. Then mark:
- The left and right limits of each wall.
- The countertop line and any change in countertop height.
- The underside of upper cabinets, shelves, or a hood.
- The inside corner.
- Outlets, switches, plumbing fixtures, and appliance openings.
- Any exposed end where the tile will stop beside painted drywall, trim, a cabinet side, or an appliance.
- Heat or moisture zones that may restrict the product.
A level horizontal reference and, where needed, a checked vertical reference help keep the first committed piece aligned. Manufacturer installation guidance commonly calls for level or plumb reference lines, but the exact starting point still depends on the product and the room. Smart Tiles, for example, describes drawing a straight horizontal line for the top of the tile in its Minimo instructions, while Aspect's guide describes horizontal and vertical reference lines and level and plumb checks. Those instructions apply to their product systems, so use them as layout principles and follow the current instructions for your selected tile. See the Smart Tiles Minimo installation guide for its product-specific example.
The practical starting-point rule
Use this sequence:
- Plan the inside-corner treatment.
- Mark the full visible boundaries.
- Choose the wall with the most important visual reference.
- Establish a level horizontal line.
- Check the starting edge vertically if the first column will be visible.
- Dry-fit the first row and the corner before removing backing.
- Commit only after the end pieces and pattern repeat look intentional.
If a wall ends with a narrow strip, do not automatically solve the problem by moving the first tile. First ask whether the strip will be hidden by trim, a cabinet, or an appliance. If it will remain exposed, rebalance the run by shifting the layout or dividing the adjustment between both ends.
The goal is not to make every cut disappear. The goal is to place cuts where the eye expects transitions and where the pieces have enough width to look stable.

How do you measure an L-shaped kitchen for backsplash?
Measure each wall as its own run from a defined start point to a defined stop point. Record width, height, interruptions, corner conditions, and exposed edges before calculating material.
Do not measure the L as though it were one long wall. That approach often double-counts the corner, misses a change in cabinet depth, or assumes the countertop line is continuous when it is not.
1. Name the walls
Choose a simple system:
- Wall A: the wall you expect to install first.
- Wall B: the wall that continues around the corner.
- Corner: the inside-corner area where the two runs meet.
- End A and End B: the exposed or finished terminations.
Write these names on painter's tape near the walls. Use the same names on your notes and cut pieces.
2. Define each wall's start and stop points
For Wall A, record the exact distance between its two visible boundaries. For Wall B, do the same. A boundary might be:
- The inside corner.
- The side of a tall cabinet.
- The end of an upper cabinet.
- The edge of a refrigerator enclosure.
- The point where the backsplash meets a finished side panel.
- The edge of an appliance opening.
- A transition to another wall finish.
Measure from the actual installation boundary, not from the room's drywall corner if trim or a cabinet changes what will be visible.
3. Measure width in several places
Take a top, middle, and bottom width measurement when a wall may be out of square. Compare the values rather than assuming the wall is a perfect rectangle.
For example, if Wall A measures 82 inches at the countertop, 81 3/4 inches at the middle, and 81 1/2 inches near the cabinets, the difference must appear somewhere. You may distribute it across several cuts, hide it at a cabinet edge, or create a controlled scribe. A single width measurement can leave the final piece too wide or too narrow.
A scribe is a cut that follows the actual uneven shape of a wall or boundary. It is useful when a wall, cabinet, or corner does not form a clean straight line.
4. Measure height by zone
Record the backsplash height for every distinct area:
| Zone | Measure from | Measure to | Record |
|---|---|---|---|
| Wall A main run | Countertop surface or backsplash ledge | Upper cabinet or planned top edge | Height at left, center, and right |
| Wall B main run | Countertop surface or ledge | Upper cabinet or planned top edge | Height at left, center, and right |
| Corner | Countertop line | Upper termination | Height at lower, middle, and upper points |
| Open end | Countertop line | Cabinet, trim, or top edge | Exposed edge and finish condition |
| Appliance zone | Countertop or appliance edge | Cabinet, hood, or product limit | Opening, clearance, and heat notes |
The upper boundary may be horizontal even when the countertop is not. Mark the actual line you intend to follow.
5. Locate interruptions
Measure every outlet, switch, window trim, shelf bracket, pipe, or other obstruction from two fixed references. For an outlet, record:
- Distance from the nearest wall boundary.
- Distance above the countertop.
- Width and height of the opening.
- Whether the cover plate will overlap the tile.
- Whether the box sits proud of or recessed into the wall.
Do not rely on memory after removing the outlet cover. Photograph the wall and write the measurements on your plan.
6. Measure the corner at more than one height
An inside corner can be square at the countertop and wider or tighter near the upper cabinets. Measure the distance from the corner to a consistent reference on both walls at the bottom, middle, and top of the backsplash area.
Also inspect the corner visually with a straightedge. A small bow, bead of old caulk, uneven drywall compound, or cabinet side can change the fit.
Stickwoll's corner guidance supports treating the walls as separate runs, checking the corner at multiple heights, and dry-fitting the pieces before committing the adhesive. The guidance does not establish a universal tolerance for what counts as square, so use the actual corner shape.
For a broader pre-cut measurement process, see Kitchen Backsplash Layout Before Cutting. It covers wall mapping, counters, outlets, open edges, and material planning before the first cut.
What tools and materials help with an L-shaped backsplash layout?
Use common measuring and marking tools, plus whatever cutting tools the selected product instructions permit. The layout itself should be planned with low-risk tools before adhesive or permanent pressure enters the process.
A useful planning setup may include:
- Measuring tape.
- Pencil or fine marker.
- Painter's tape.
- Level or laser level.
- Straightedge.
- Combination square or framing square.
- Cardboard, kraft paper, or clean scrap backing for templates.
- Scissors or a cutting tool approved for the product.
- Cutting mat or protected work surface.
- Clean cloths and the product-approved surface cleaner.
- Phone or camera for reference photos.
- Notebook or printed cut-map sheet.
- Small labels for numbering pieces.
- The current product installation and care instructions.
A cut map is a written record that connects each physical tile or sheet to its wall position, orientation, cut edges, corner role, and exposed termination. It is a practical extension of the full-layout guidance supplied by several manufacturers. It is not a tested guarantee that errors will disappear, but it gives you a way to check the work before the backing is removed.
The cutting tool matters because peel-and-stick products are built differently. Some products can be scored or cut with a blade; others may require a different method. Lowe's installation information warns that some peel-and-stick products require a wet saw and directs installers to the product information. Smart Tiles describes a retractable blade for certain outlet cuts, while Aspect provides product-specific cutting guidance and warns against bending its tiles backward. Treat the selected product's instructions as the controlling source.
Before starting, read the current Stickwoll Installation & Care Guide for the surface, handling, placement, pressure, and care directions that apply to the selected Stickwoll product. If your product documentation does not clearly address a corner or cutting method, pause and verify the instruction rather than assuming that a method used for another tile is permitted.

How do you keep peel-and-stick backsplash lines straight on two walls?
Keep the horizontal course consistent with a level reference line, then use the corner and vertical boundaries as separate checks. Do not use the countertop or cabinet as your only visual reference because either may be out of level.
A horizontal reference line is the line that controls the top or bottom edge of a course. Choose the line that matches the product instructions and the way your layout is being installed. Mark it lightly or with removable painter's tape where it will remain visible during the dry fit.
For a typical backsplash, the first row carries most of the visual responsibility. If it drifts, the error can grow across both walls. Before placing any adhesive:
- Mark the planned horizontal reference.
- Check it at both walls.
- Mark a vertical reference at the chosen starting boundary.
- Place several dry tiles along Wall A.
- Continue the dry layout into the corner.
- Place the first pieces of Wall B.
- Step back and check the lines from the normal viewing positions.
If the countertop slopes slightly, the tile may need a planned lower cut rather than a level-looking edge that follows the countertop. If the upper cabinets are uneven, a full tile course may still be kept level while the top cuts absorb the difference. The choice depends on which boundary is more visible.
Use the product's joining geometry
Some sheets have printed alignment marks, grout-like lines, tabs, or overlapping edges. These features are part of the product's joining system. Align them according to the manufacturer's instructions rather than inventing a new overlap.
For example, Smart Tiles' Minimo instructions describe arranging tiles before installation and overlapping designated marks along grout lines. That is a product-specific example of a broader principle: understand how the sheets are meant to join before laying out the repeat.
If your material has a directional pattern, place several pieces side by side on a clean surface. Mark the top edge of each piece with painter's tape. A chevron, herringbone, or other directional design can look correct on one sheet and reversed on the next if orientation is not recorded.
Why should you dry-fit the complete L before peeling the backing?
A complete dry fit reveals pattern breaks, end pieces, corner conflicts, outlet problems, and material shortages while the pieces are still easy to move.
Dry-fitting means placing the tiles or sheets in their intended positions without exposing or firmly activating the adhesive. The test should include both walls, the inside corner, the first and last pieces, and major cutouts.
Do not dry-fit only the first two tiles and assume the rest will resolve themselves. The visual problem often appears at the far end, where a short strip is left between the last full tile and a cabinet or exposed edge.
Build the layout on the wall
Work from your reference line. Use painter's tape or removable labels to hold pieces temporarily if the product allows it without marking or damaging the surface. Keep the protective backing in place unless the manufacturer's instructions say otherwise.
Number the pieces:
- A1, A2, A3 for Wall A.
- B1, B2, B3 for Wall B.
- C1 and C2 for the corner pieces if you use separate corner cuts.
- E1 and E2 for exposed-end pieces.
- O1, O2, and so on for outlet or fixture cutouts.
The labels should identify position and orientation without covering the face pattern.
Lay the pattern out on a clean surface
For repeat patterns, lay out enough pieces to show at least one full repeat and the transition into the corner. Mark the intended order with arrows. Check:
- Whether the pattern runs horizontally, vertically, or diagonally.
- Whether a repeat is interrupted by an outlet.
- Whether the corner seam falls through a visually busy or visually quiet part of the design.
- Whether the final piece at each end is wide enough to look intentional.
- Whether a cut piece can be moved to a less visible area.
- Whether the same face orientation is maintained across both walls.
A dry layout can show that you have enough material for the measured area, but it does not create a product-independent waste allowance. Extra material depends on tile dimensions, pattern repeat, corner method, number of outlets, wall irregularity, and the number of pieces you can use efficiently. Plan extra pieces for mistakes and future repairs according to the product's availability and your own cut map rather than relying on a universal percentage.
Use a visual stop rule
Do not expose adhesive until you can answer these questions:
- Where does Wall A start?
- Where does Wall A stop?
- Where does Wall B start?
- Where does Wall B stop?
- Which piece meets the corner first?
- Is the corner wrapped, butted, overlapped, or finished by another approved method?
- Which pattern feature should align at the corner?
- Where will the smallest cuts appear?
- Which edges remain exposed?
- Are outlet and appliance openings fully planned?
- Is the substrate ready according to the product instructions?
If any answer is unclear, the layout is still in the planning stage.

Should backsplash tile wrap around an inside corner?
Use a wrap only when the selected material is flexible enough and the product instructions permit that handling. For many rigid or semi-rigid peel-and-stick tiles, separately cut pieces with a controlled corner seam are easier to measure and control.
A wrap carries one piece of material from Wall A around the inside corner and onto Wall B. It can reduce the number of visible pieces at the corner, but it also asks the material to follow the actual angle without buckling, lifting, or distorting the pattern.
A planned seam uses separate pieces. It can be easier to fit when the corner is out of square, but the seam becomes part of the visual design.
The checked Stickwoll corner guidance supports choosing based on flexibility, corner squareness, pattern direction, visibility, and the exact product instructions. It presents a controlled seam as a defensible option for typical rigid or semi-rigid material and cautions against assuming that every product can wrap. Smart Tiles gives product-specific examples for flexible tiles at concave and convex angles, but those instructions cannot be transferred automatically to Stickwoll or another product.
Corner treatment comparison
| Treatment | Visual effect | Geometry tolerance | Cutting and handling | Main risk |
|---|---|---|---|---|
| Direct wrap | Fewer separate pieces at the corner | Requires material that can follow the angle | May be simple only with flexible material and an approved method | Buckling, lifting, distortion, or pattern twist |
| Separate butt seam | Clear, controlled meeting line | Works well when each wall is measured independently | Requires two accurate corner cuts | Gap or uneven seam in an out-of-square corner |
| Approved overlap or joining system | Can hide the seam within the product pattern | Depends on the sheet's designed overlap | Must follow the product's exact overlap geometry | Visible ridge, shadow, or misaligned marks |
| Trim or corner profile | Creates a deliberate finish line | Can tolerate some irregularity | Adds a separate finishing element | Trim may conflict with the product thickness or style |
| Sealant or caulk at a transition | Can close a permitted small gap or countertop transition | Useful only where the product instructions allow it | Requires compatible finishing material and careful application | Unsupported material choice or a visually heavy bead |
This table is a planning comparison, not approval for every method. The selected product instructions control. The checked Stickwoll Coastal Breeze product page, for example, describes smooth, clean, and stable surface requirements, a cut-peel-stick sequence, a heat-distance statement, and product-level care information. It does not establish a universal inside-corner wrap, butt seam, overlap, or caulk method. Review the Coastal Breeze product instructions if that is the product you are considering, and verify the current instructions for any other variant.
A simple corner decision aid
Choose the result that best matches all three conditions:
The material is flexible, the product instructions permit bending, and the corner is reasonably consistent from bottom to top.
A wrap may be considered. Dry-fit it first. Check that the face pattern does not twist and that the material does not spring away from either wall.
The material is rigid or semi-rigid, the corner changes shape, or the instructions do not permit wrapping.
Plan separate corner pieces and a controlled seam.
The corner is visibly irregular and the seam will be seen from the room.
Use a template, measure at multiple heights, and consider a deliberate trim or finish only if the product instructions permit it.
The pattern is strongly directional and continuity matters more than hiding the seam.
Choose the treatment that keeps the pattern direction intentional. A neat visual break is better than a forced bend that makes the pattern look distorted.
The safest general rule is simple: never choose a wrap because the corner exists; choose it because the product, geometry, and pattern support it.
How do you keep a backsplash pattern aligned around the corner?
Identify the pattern repeat before cutting, align the most visible features first, and accept a controlled break when exact continuity is not possible.
A pattern repeat is the distance or sequence before a printed or directional design begins again. It may be obvious in a herringbone or chevron pattern, or subtle in a faux grout line, stone print, or repeated texture.
Start by selecting the visual feature that matters most. This could be:
- The centerline of a chevron.
- The top and bottom of a herringbone band.
- A horizontal grout-like line.
- A large printed vein or color block.
- The gap between repeated motifs.
- The alignment of the first full row.
Then place the pieces on a table or clean floor in the order they will appear. Use painter's tape arrows to record the direction. Mark where the corner seam will fall through the repeat.
Align the feature that the eye notices first
Trying to align every printed detail around a non-square corner may force one wall out of position. Choose the hierarchy:
- Keep the main horizontal or vertical reference straight.
- Keep the dominant pattern direction consistent.
- Align the most visible motif near the corner.
- Let minor printed variations fall where they are least noticeable.
- Keep exposed end cuts clean and intentional.
This approach treats the corner as a transition rather than a test of perfect continuity. Printed material may vary slightly from piece to piece, and a corner that changes angle can make exact alignment impossible.
Directional patterns need extra care
Chevron and herringbone patterns are especially sensitive because their visual direction can change when a piece is rotated or mirrored. Products such as Blanco Chevron and Silver Stripes Herringbone call for a dry check of pattern direction, corners, edges, and interruptions before installation.
Do not assume that a tile that looks correct on Wall A will automatically continue correctly onto Wall B. Lay out the corner sequence in full. If the material uses individual sheets, label the top edge. If it uses a repeated panel, preserve the intended panel order.
A subway format can be more forgiving because its horizontal and vertical lines are easier to extend across two runs. The Lime Subway tile format may simplify planning, but it still requires a dry fit at the corner and at exposed ends.

How do you transfer an uneven inside corner to a backsplash piece?
Use the actual corner shape to create a template or transfer marks, then dry-fit the cut piece before exposing adhesive.
A nominal 90-degree corner is only a starting assumption. The drywall may be slightly open, the cabinet may project, or the countertop may change depth near the corner. A template lets the piece reflect what is actually there.
Template method
Use clean cardboard, paper, or the product backing if the manufacturer permits it and the material is large enough.
- Cut the template slightly larger than the corner area.
- Label the wall side, top, bottom, and front face.
- Place it in the corner at the correct height.
- Press or crease it gently into the angle without forcing it.
- Mark the two wall boundaries and the countertop line.
- Remove it and transfer the shape to the correct tile or sheet.
- Mark the cut line on the back or protected side according to the product instructions.
- Cut using the approved method.
- Return the piece to the wall for a dry check.
- Adjust in small amounts rather than removing a large section at once.
The template must be labeled carefully. A common mistake is to flip a paper pattern and transfer the cut backward. Write “wall side,” “face,” “top,” and “corner edge” on the template before removing it.
Measure the corner at multiple heights
Make separate templates or marks when the corner changes shape from bottom to top. A single vertical cut may fit at the countertop and leave a gap near the cabinets.
If the variation is small, the product may allow the difference to be absorbed along the cut edge. If the variation is large, a wrap may be unsuitable and a planned seam or approved trim may provide better control.
Do not force rigid material around a corner by bending it backward or sharply creasing it unless the product documentation expressly allows that method. The Aspect guide, for example, warns against backward bending for its glass matted tile system. That is a product-specific restriction, but it illustrates why a cutting method should never be assumed from appearance alone.
Corner cut map example
| Piece | Wall | Position | Cut edge | Pattern note | Final check |
|---|---|---|---|---|---|
| A1 | Wall A | First full piece | Starting edge if needed | Top edge marked | Level and plumb |
| A2 | Wall A | Toward corner | None or lower cut | Repeat continues | Dry-fit |
| C1 | Wall A | Corner edge | Measured corner cut | Seam side identified | Fits at three heights |
| C2 | Wall B | Corner edge | Measured corner cut | Meets C1 by chosen method | Seam lies flat |
| B1 | Wall B | After corner | None or lower cut | Direction preserved | Repeat checked |
| E1 | Wall B | Exposed end | End cut | Edge finish recorded | Visible from room |
Numbering does not need to be elaborate. It only needs to make it difficult to install the right piece in the wrong place.
What is the safest installation sequence after the layout is approved?
Install in small, checked sections: prepare the surface, establish references, place the first piece lightly, verify the line and pattern, then apply firm pressure only after the position is correct.
The current product instructions should control surface preparation, cutting, adhesive handling, pressure, care, heat, and removal. The sequence below is a layout framework that helps organize those instructions.
Prepare the surface
The wall should meet the selected product's requirements before layout begins. The checked Stickwoll product information identifies smooth, clean, and stable surfaces and lists rough, damp or humid, unfinished, porous, and unstable conditions among reasons to avoid installation. Smart Tiles and Lowe's provide similar smooth, clean, and dry surface requirements for their own products.
Remove grease, dust, loose paint, old adhesive, and residue according to the product instructions. Allow any cleaner, primer, or repair material to dry for the period required by that product. A clean surface is not automatically a suitable surface if it is textured, damp, or unstable.
Mark the references
Transfer the approved horizontal and vertical references to the wall. Mark the Wall A and Wall B boundaries with painter's tape. Keep your cut map nearby.
Check the line at the corner. A line that is level on Wall A may appear to shift if Wall B is out of square. The reference should remain the governing line; the corner cut should adapt to the wall.
Place the first piece carefully
Expose only the amount of backing and adhesive the product instructions recommend. Position the piece without firm pressure. Check its top edge, side edge, pattern direction, and relationship to the countertop.
For products that allow limited repositioning before firm pressure, use that window carefully. The checked Coastal Breeze page describes gently lifting and repositioning a misplaced decal before firm pressing, while Lowe's warns that pressure can create a permanent bond and may damage the substrate during removal. These are product and substrate dependent conditions, so do not treat peel-and-stick material as universally reversible.
Continue in manageable sections
After the first piece is correct, place the next piece according to the product's joining system. Check the grout-like lines or pattern features before applying final pressure. Move across Wall A in a controlled sequence, stopping at the corner.
Do not rush because the pieces appear easy to handle. The adhesive may be forgiving during initial placement and much less forgiving after pressure.
Install the corner only after both sides are understood
The corner is where your dry-fit plan becomes a permanent visual decision. Place the planned corner piece or pieces without full pressure first. Check from the normal viewing direction. Confirm that:
- The seam lies flat.
- The material is not buckling.
- The pattern direction is intentional.
- The countertop transition remains clean.
- The corner does not force the next piece out of level.
- The exposed edge is where the cut map says it should be.
Continue onto Wall B only after the corner meets those checks.
Finish with controlled pressure
Once placement is visually correct, follow the product instructions for smoothing and pressure. The Stickwoll installation guide describes smoothing from the center outward, while other manufacturers specify pressure at particular locations. Do not press over a piece that is visibly misaligned and hope it will settle into place.
If the product documentation gives a heat or appliance boundary, measure from the appropriate appliance or heat source before installation. The checked Stickwoll Coastal Breeze page states a minimum distance of 30 cm from stoves, ovens, and fireplaces and says the tiles are not intended for direct flame. That statement applies to the checked Coastal Breeze product page and should not be generalized to every Stickwoll tile or every kitchen appliance arrangement.
How do you handle outlets, appliances, countertops, and exposed edges?
Plan each interruption as part of the wall layout, then dry-fit the cut piece with the cover plate, appliance, or edge condition in mind.
Outlets and switches
Do not cut an outlet opening from a single measurement taken at the wall edge. Transfer the opening from two references, such as the nearest cabinet boundary and the countertop line.
Make the opening large enough for the product's stated installation requirements and cover-plate relationship. Do not allow the tile to interfere with the electrical device or cover plate. If electrical work is needed, follow local requirements and use a qualified electrician where appropriate.
Countertop transition
The lower edge should meet the countertop cleanly without relying on a large uneven gap to hide a measurement error. Some product systems permit a finishing bead at the countertop, while others may specify a different treatment. Do not add silicone or another sealant simply because a gap appears; confirm compatibility and permission in the product instructions.
Stove and oven zones
Heat limits vary by product and by installation position. The checked Stickwoll Coastal Breeze documentation states a 30 cm minimum distance from stoves, ovens, and fireplaces and excludes direct flame. Smart Tiles provides different product-specific heat and appliance guidance. These values cannot be merged into one universal rule.
Measure the appliance location and compare it with the selected product documentation before cutting. If the planned backsplash falls within a restricted zone, stop and resolve that condition before exposing adhesive.
Open ends
An exposed end deserves the same planning attention as the corner. Decide whether it will meet:
- Painted drywall.
- Cabinet side panel.
- Metal or stone trim.
- An appliance.
- A window casing.
- Another backsplash material.
Whenever possible, place a full or generous-width piece at the most visible end and put the narrow adjustment where it is hidden. If a narrow cut is unavoidable, make the edge straight and give it a planned finish.

What should you do when the wall or corner is out of square?
Keep the main reference line consistent, measure the irregularity, and distribute or hide the adjustment instead of forcing the tile to follow an unreliable boundary.
An out-of-square corner is common enough that it should be expected during planning. The mistake is treating the first measurement as proof that the whole wall is uniform.
If the corner opens gradually
A separate seam may be easier to control than a wrap. Measure the corner at several heights and create two matching pieces. Place the more visible seam where the pattern can tolerate a slight break.
If the countertop is uneven
Decide whether the backsplash should follow a level reference or the countertop edge. A level course often creates a more intentional upper pattern, while the lower cut absorbs the countertop variation. The correct choice depends on the visible boundary and the product's intended installation.
If the cabinet line is uneven
Keep the principal course aligned and plan the upper cuts. A small difference spread over several pieces is usually less noticeable than one sharply tapered final piece.
If the corner is too irregular for a clean seam
A trim or other finish may be appropriate if the product instructions allow it and the thickness works with the tile. Do not use a heavy finish solely to conceal a corner that was never measured. A planned seam with an accurate template may be cleaner.
The Stickwoll corner guide recommends checking the actual corner rather than assuming a perfect square and emphasizes dry-fitting both wall pieces. That is a practical planning instruction, not a guarantee that every irregular corner can be corrected without a visible transition.
What are the most common L-shaped backsplash layout mistakes?
The most common mistakes come from committing adhesive before the visual sequence is settled.
Starting automatically at the inside corner
The corner feels like the natural beginning, but it may create an awkward exposed strip at the far end or place a pattern break in the most visible location. Plan the corner first, then choose the starting boundary.
Measuring the two walls as one run
This can double-count the corner, miss different cabinet depths, and confuse which edge receives the cut. Label Wall A and Wall B and keep separate measurements.
Assuming the corner is square
A nominal 90-degree corner may vary along its height. Measure it at multiple points and dry-fit the corner pieces.
Cutting all pieces before a dry layout
The first cut can reveal a mistaken orientation, but it may be too late if the remaining material has already been committed. Dry-fit the sequence and number the pieces before cutting the full run.
Ignoring the pattern repeat
A pattern can look aligned on a single sheet and visibly drift across the corner. Lay out multiple pieces and mark the top edge.
Using an unapproved cutting tool
A blade, scissors, wet saw, or other tool may be suitable for one product and unsuitable for another. Check the selected product instructions.
Pressing the first piece before checking it
Firm pressure can reduce or eliminate repositioning for some adhesive systems. Place, inspect, adjust if permitted, and then apply pressure.
Treating “peel-and-stick” as universally removable
Removal depends on the adhesive, substrate, paint, pressure, elapsed time, and product instructions. A renter should test a sample or inconspicuous area if the manufacturer recommends it, and should not assume damage-free removal.
Applying a finish at the corner without checking compatibility
A bead of caulk, trim, or adhesive can change the appearance and may not be approved for the product. Use only a permitted, compatible finish.
How can you troubleshoot a corner before the mistake spreads?
Stop at the first visible problem, remove pressure if the product allows it, and return to the cut map or dry-fit stage.
| Problem | Likely cause | Safer corrective path |
|---|---|---|
| Corner seam opens at the top | Corner changes shape or cut was based on one height | Re-measure at multiple heights and remake the template |
| Pattern suddenly reverses | Piece was rotated or mirrored | Check arrows and labels; replace before firm pressure |
| First row slopes | Reference line was not checked | Pause, re-establish the level line, and inspect the first pieces |
| End piece is very narrow | Starting point was chosen without balancing the run | Rework the dry layout and redistribute the adjustment |
| Tile buckles at the corner | Rigid material was forced to wrap | Stop and check whether a separate seam is required |
| Outlet opening is off-center | Measurement used one reference only | Transfer the opening from two fixed references |
| Adhesive will not hold | Surface is dirty, damp, textured, unstable, or incompatible | Stop and follow the product's substrate preparation requirements |
| Tile was pressed in the wrong position | Pressure was applied before visual confirmation | Follow the product's repositioning and removal instructions; do not promise a damage-free correction |
| Edge looks unfinished | Exposed termination was not planned | Revisit the cut map and choose a product-permitted edge treatment |
For surface preparation, placement, cleaning, and removal questions, use the Stickwoll Kitchen Backsplash Guide and the current product documentation together. The guide can help organize the room-specific decisions, while the selected product instructions control product-specific limits.
If a piece has already received firm pressure, do not keep pulling at it simply because it looks wrong. The checked Lowe's information warns that removal from an incorrect position may damage the substrate, and the checked manufacturer guidance differs on repositioning. Stop, document the condition, and follow the selected product's removal instructions.
When is an L-shaped backsplash layout ready for installation?
The layout is ready when both walls are measured, the reference lines are marked, the corner method is chosen, the pattern repeat is checked, and every non-full piece has a recorded position.
Use this readiness test before exposing adhesive:
- Wall A has a defined start and stop point.
- Wall B has a defined start and stop point.
- The inside corner has been measured at more than one height.
- The countertop and upper boundary are marked.
- Outlets, switches, appliances, and fixtures are accounted for.
- Exposed ends have a planned finish.
- The first reference line is level and any vertical reference is checked.
- The corner treatment matches the material flexibility and product instructions.
- Pattern direction and repeat are documented.
- Corner pieces have templates or marked cuts.
- Each cut piece is numbered by wall and position.
- The cutting method is approved for the selected product.
- The surface is clean, smooth, dry, and stable according to the product documentation.
- The first row has been dry-fitted.
- The full sequence has been viewed from the normal room entrance.
- You know which pieces receive light placement first and when firm pressure is applied.
- Heat, moisture, and appliance restrictions have been checked for the selected product.
Printable L-shaped backsplash checklist
Before measuring
During measuring
During dry fitting
Before adhesive exposure
The finished layout should feel predictable before it becomes permanent. You should be able to point to each piece and explain where it goes, which edge is cut, how it meets the corner, and where the eye will see the transition.
Frequently Asked Questions
Should both walls of an L-shaped backsplash be installed at the same time?
Plan both walls at the same time, but install them in a controlled sequence. A complete dry fit lets you understand the corner, pattern, end cuts, and interruptions before adhesive exposure. Once the layout is approved, install one manageable section at a time and check the corner before continuing.
Is it better to start at the corner or at the end of a wall?
Neither is always correct. Start from the most useful visual reference after the corner and exposed boundaries have been planned. A corner start can work when the product and geometry support it. A visible wall end may be the better reference when it needs a clean full piece or when the corner will use a separate planned seam.
Can peel-and-stick backsplash tile be bent around an inside corner?
Only if the selected product is flexible enough and its instructions permit bending or wrapping. Rigid and semi-rigid material often benefits from separately cut pieces and a controlled seam. Do not transfer a wrap method from another brand or product family without checking the current instructions.
How much extra backsplash material should be bought for an L-shaped kitchen?
There is no universal product-independent allowance that applies to every L-shaped backsplash. The amount depends on tile dimensions, pattern repeat, corner method, number of cutouts, wall irregularity, and exposed ends. Build the material plan from the two-wall cut map, then add a practical reserve for mistakes and future repairs based on product availability.
Can a renter assume peel-and-stick backsplash will remove cleanly?
No. Repositioning and removal depend on the adhesive, substrate, paint, pressure, elapsed time, and product instructions. The checked Stickwoll product page describes limited repositioning before firm pressure, while other manufacturer guidance warns that firm pressure can make removal difficult or damage the substrate. Test only as directed by the selected product documentation and obtain permission for the planned cosmetic change.
Final Thoughts
An L-shaped kitchen backsplash becomes manageable when the corner stops being an afterthought. Treat Wall A, Wall B, and the inside corner as connected decisions with separate measurements.
The most reliable sequence is:
- Identify the visible boundaries.
- Measure both walls independently.
- Mark level and vertical references.
- Choose the corner treatment from the product, geometry, and pattern.
- Dry-fit the full sequence.
- Number the pieces and record every cut.
- Prepare the surface according to the current product instructions.
- Install in small sections.
- Apply firm pressure only after the piece is visually correct.
- Inspect the corner, pattern, edges, outlets, and appliance zones before finishing.
The layout is ready when you can see the finished transition before the adhesive is committed. Use the checklist above as your working guide, then follow the verified instructions for the exact tile you selected.


Kommentar hinterlassen
Diese Website ist durch hCaptcha geschützt und es gelten die allgemeinen Geschäftsbedingungen und Datenschutzbestimmungen von hCaptcha.