


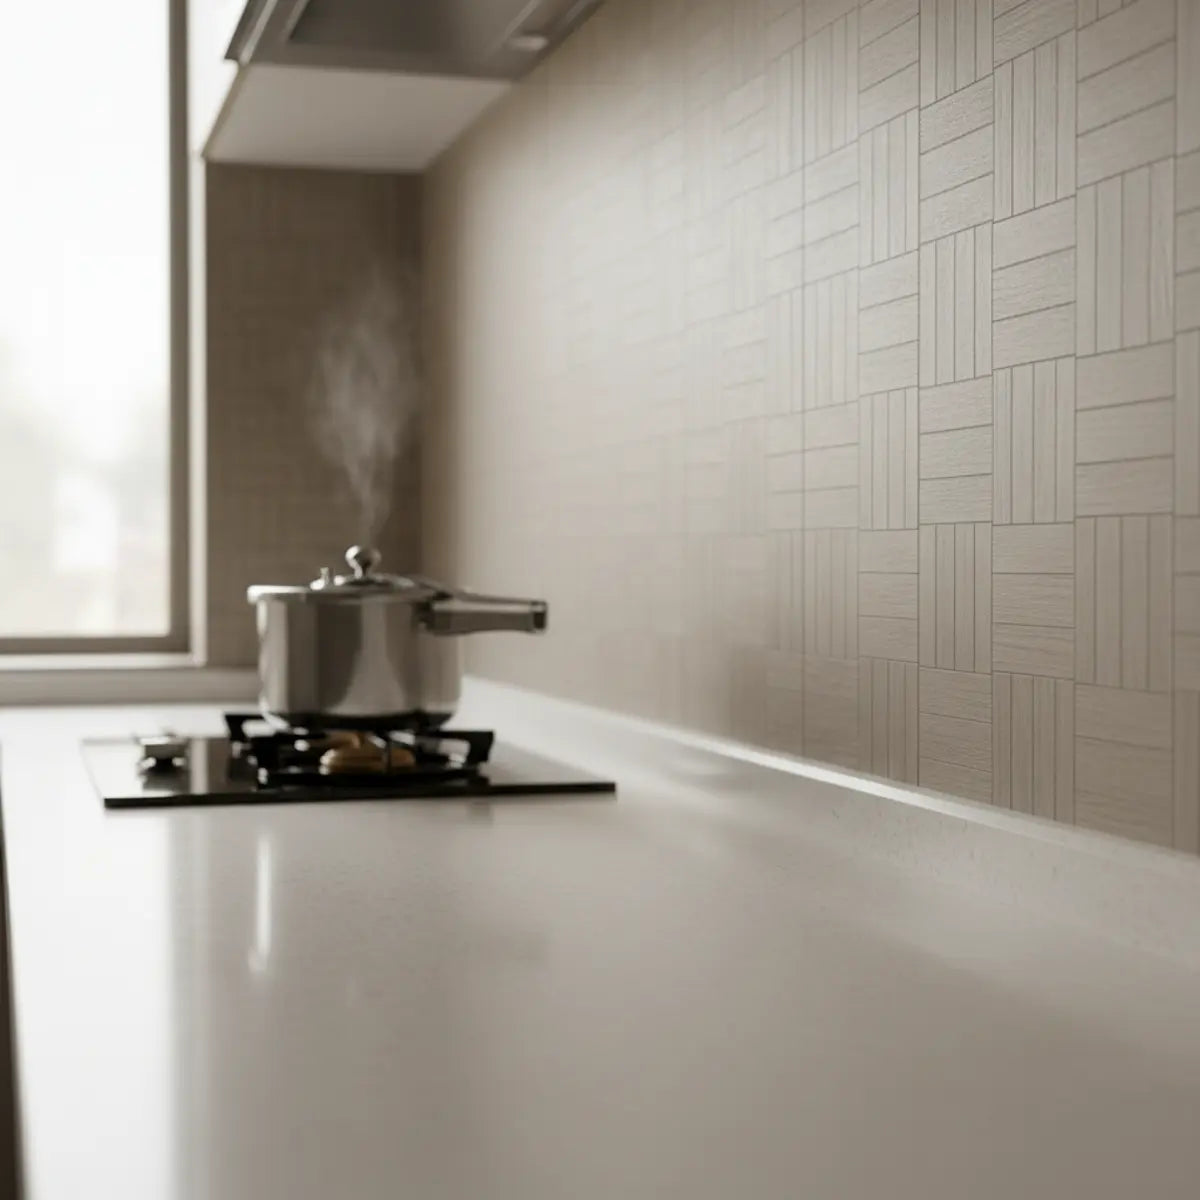
Der ultimative Ratgeber für hitzebeständige selbstklebende Fliesen in der Küche (Ausgabe 2025)
Haben Sie schon einmal in Ihrer Küche gestanden und überlegt, wo eine neue Rückwand gut aussehen könnte – und wurden dann von einer hartnäckigen Sorge ausgebremst? Sie stellen sich ein schönes neues Design hinter dem Herd vor, doch dann kommt die Angst auf: Lösen sich die Fliesen ab, schmelzen sie oder werden sie im schlimmsten Fall sogar zur Brandgefahr? Diese Sorge ist bei DIY-Projekten völlig verständlich.
Die kurze Antwort: Kann man selbstklebende Fliesen in Bereichen mit hohen Temperaturen verwenden?
Ja, das ist möglich. Hitzebeständige selbstklebende Fliesen sind speziell entwickelte, klebende Wandverkleidungen, die für mäßige Küchenhitze ausgelegt sind – typischerweise bis zu 190°F–250°F. Bei fachgerechter Anbringung können sie daher hinter Herd und Backofen verwendet werden.
Diese innovativen Fliesen lösen das klassische Dilemma: eine stilvolle Küchenrenovierung, ohne die Kosten und den Aufwand des herkömmlichen Fliesenlegens. Sie verbinden einen attraktiven Preis, ansprechendes Design und nachgewiesene Sicherheit für Ihr Zuhause.

Ganz gleich, ob Sie als Eigentümer ein Wochenendprojekt suchen oder als Mieter Ihre Küche ohne bleibende Schäden auffrischen möchten – dieser Ratgeber bietet Ihnen alle wichtigen Informationen. Wir zeigen Ihnen, worauf Sie bei der Auswahl und beim Anbringen achten sollten und wie Sie lange Freude an Ihrer neuen DIY-Küchenrückwand mit Hitzeschutz haben. Wenn Sie eine noch gezieltere, mieterfreundliche Anleitung suchen, finden Sie in unserem Ratgeber Selbstklebende Küchenfliesen einfach anbringen eine verständliche Schritt-für-Schritt-Anleitung.
Was sind hitzebeständige selbstklebende Fliesen und wie funktionieren sie?
Die Frage: „Auf der Verpackung steht ‚hitzebeständig‘ – aber was bedeutet das eigentlich? Ist das nur ein Marketingversprechen?“
Die Antwort: In diesem Abschnitt erklären wir verständlich, was hinter diesen Fliesen steckt. Sie erfahren, aus welchen Materialien sie bestehen und welche Konstruktion sie für den Einsatz in der Küche geeignet macht.
Auf den ersten Blick sehen diese Fliesen ihren herkömmlichen dekorativen Varianten sehr ähnlich. Der entscheidende Unterschied steckt jedoch in ihrem Aufbau. Stellen Sie sich ein leistungsstarkes Sandwich aus mehreren Schichten vor. Jede Schicht erfüllt eine wichtige Aufgabe, damit die Fliesen mit der Hitze und Feuchtigkeit in einer viel genutzten Küche zurechtkommen.
Der Aufbau einer hitzebeständigen Fliese
Anders als ein einfacher Vinylaufkleber bestehen diese Fliesen aus mehreren sorgfältig aufeinander abgestimmten Schichten.

- Schützende Deckschicht: Dabei handelt es sich um eine transparente Schicht aus Polyurethan (PU) oder Gel, die Flecken, Spritzer und Hitze abweist. Dank ihr lässt sich beispielsweise Tomatensoße problemlos abwischen. Außerdem bildet sie die erste Schutzbarriere gegen Strahlungshitze.
- Dekorschicht: Eine hochauflösend bedruckte Schicht verleiht der Fliese ihr ansprechendes Aussehen – ob in Keramik- oder Steinoptik oder mit einem detailreichen Mosaikmuster.
- Trägermaterial: Für die Hitzesicherheit ist dies der wichtigste Bestandteil. Der Kern besteht typischerweise aus Materialien wie PVC (Polyvinylchlorid), einem Aluminiumverbund oder einem Steinverbund. Diese Materialien werden gewählt, weil sie formstabil sind und sich bei mäßiger Hitze weder verziehen noch zersetzen.
- Klebeschicht: Hier kommt nicht irgendein Bastelkleber zum Einsatz. Die Hersteller verwenden speziell entwickelte Acrylatkleber mit hoher Anfangshaftung, die auch bei schwankenden Wandtemperaturen zuverlässig haften.
Warum das Material wichtig ist: Ein schneller Vergleich
Nicht jede Fliese ist gleich. Das Trägermaterial wirkt sich direkt auf die Leistungsfähigkeit aus. Ich habe schon erlebt, dass Hausbesitzer zur günstigsten verfügbaren Variante gegriffen haben – und dann mitansehen mussten, wie sie innerhalb weniger Monate ihren Zweck nicht mehr erfüllte. Wer den Unterschied kennt, schafft die Grundlage für ein dauerhaft schönes Ergebnis.
| Materialart | Hitzebeständigkeit | Ideal für | Wichtiger Hinweis |
|---|---|---|---|
| Vinyl (PVC) | Gut (bis zu 190°F) | Allgemeine Verwendung als Küchenrückwand, abseits direkter Hitze | Am weitesten verbreitet und besonders preisgünstig. Achten Sie darauf, dass die Fliesen für Küchen geeignet sind. |
| PVC mit Gel-Oberfläche | Besser (bis zu 200°F) | Bereiche mit mäßiger Dampf- und Spritzwasserbelastung | Die 3D-Geloberfläche sorgt für mehr Tiefe und eine bessere Wärmeableitung. |
| Metallverbund | Ausgezeichnet (bis zu 250°F) | Direkt hinter den meisten Elektro- und Induktionsherden | Meist mit einer echten Aluminiumschicht auf einem stabilen Kern. |
| Steinverbund | Hervorragend (bis zu 250°F+) | Hinter Gasherden (bei ausreichendem Abstand) | Die langlebigste und hitzestabilste Option mit der Optik von echtem Stein. |
Ein weitverbreiteter Irrtum: Hitzebeständig ist nicht feuerfest
Klären wir das gleich zu Beginn: hitzebeständige selbstklebende Fliesen sind nicht feuerfest. Das ist ein entscheidender Unterschied in puncto Sicherheit. „Feuerfest“ bedeutet, dass ein Material unter typischen Brandbedingungen nicht brennt – ein Standard, den normalerweise Materialien wie Ziegel oder massives Metall erfüllen.
„Hitzebeständig“ bedeutet dagegen, dass die Fliese einem bestimmten Temperaturbereich standhält, ohne zu schmelzen, sich zu verformen oder ihre Haftung zu verlieren. Für die meisten Küchen ist das mehr als ausreichend. Entscheidend ist, dass die Fliesen nach den Sicherheitsrichtlinien angebracht werden – darauf gehen wir im nächsten Abschnitt ein. Diesen Unterschied zu verstehen, ist ein wichtiger Bestandteil jedes erfolgreichen Projekts. Weitere anfängerfreundliche Tipps, wie Sie typische Fehler vermeiden, finden Sie in unserem Ratgeber So modernisieren Sie Ihre Küche mit selbstklebenden Fliesen.
Wenn Sie noch tiefer in die für Umgebungen mit hoher Hitze geeigneten Materialien einsteigen möchten, bietet unser Ratgeber Hitzebeständige selbstklebende Fliesen für Küchen mit hoher Hitzeeinwirkung weitere Informationen dazu, wie bestimmte Verbundmaterialien die Lebensdauer Ihrer Küche verlängern können.
Kann man selbstklebende Fliesen hinter einem Herd oder in der Nähe von Wärmequellen verwenden?
Die Frage: „Okay, sie sind also hitzebeständig. Aber kann ich selbstklebende Fliesen wirklich hinter meinem Herd anbringen, ohne dass die Wand beschädigt wird oder die Fliesen abfallen?“
Die Antwort: Hier finden Sie klare, fachlich fundierte Sicherheitsregeln – einschließlich konkreter Abstände und Zonen –, damit Sie Ihre Fliesen ganz sicher anbringen können.
Das ist die häufigste Frage, die uns gestellt wird, und die klare Antwort lautet: „Ja, wenn Sie einige wichtige Regeln beachten.“ Ihr Herd – egal, ob Gas- oder Elektroherd – erzeugt an der Wand dahinter eine „Hitzezone“. Diese richtig zu berücksichtigen, ist der Schlüssel zu einer sicheren und gelungenen Montage.

Sicherheitsabstände und Hitzezonen verstehen
Professionelle Küchenplaner befolgen aus gutem Grund strenge Richtlinien. Die National Kitchen & Bath Association (NKBA) gibt Empfehlungen zur Platzierung von Geräten, um die Sicherheit zu gewährleisten. Auch wenn diese Vorgaben für professionelle Installationen gedacht sind, können wir ihre Grundprinzipien auf unsere hitzebeständige Küchenrückwand zur Selbstmontage übertragen.
Profi-Tipp: Eine einfache Möglichkeit, die Temperatur Ihrer Wand zu prüfen, ist ein Infrarotthermometer. Wenn Sie an einem Tag viel kochen, richten Sie es auf die Wand hinter Ihrem Herd, um einen realistischen Messwert zu erhalten. Die meisten Wände hinter modernen Herden erreichen nur selten mehr als 150°F – damit liegen sie deutlich innerhalb des sicheren Bereichs für hochwertige Fliesen.
Die 8-Zoll-Regel: Ihr zuverlässiger Richtwert
Bei den meisten Elektro- oder Induktionskochfeldern gilt ein vertikaler Mindestabstand von 8 bis 9 inches zwischen der Oberkante des Bedienfelds und der Unterkante der ersten Fliesenreihe als sichere Wahl. Diese „fliesenfreie Zone“ verhindert, dass die direkte, intensive Hitze den Klebstoff beeinträchtigt.
Sicherheitszone für die Küchenrückwand am Herd
FLIESENBEREICH: Hier mit dem Fliesen beginnen.
8-9 Inch „fliesenfreie“ Zone
↓BEDIENFELD DES HERDS: Oberer Rand des Herd-Spritzschutzes.
Kurzes Praxisbeispiel:
Sarah, die in Chicago zur Miete wohnte, wollte ihre triste Küche auffrischen. Ihre größte Sorge war die Wand hinter ihrem Gasherd. Der Herd hatte einen integrierten Spritzschutz, der 6 inches hoch war. Unserem Rat folgend, maß sie 9 inches *über* diesem Spritzschutz ab, um dort mit dem Verlegen der Fliesen zu beginnen. So entstand ein Sicherheitsabstand von insgesamt 15-inch zu den Brennern – und ihre neue selbstklebende Küchenrückwand blieb makellos und auch ihr Vermieter war zufrieden. Dieses einfache, stilvolle Update ist ein perfektes Beispiel für eine unkomplizierte DIY-Veränderung.
Besondere Hinweise für Gasherde
Gasherde erzeugen eine stärkere, abstrahlende Hitze und erfordern daher besondere Vorsicht. Wenn dein Gasherd *keinen* integrierten Spritzschutz hat – also keine erhöhte Metallblende an der Rückseite –, hast du zwei sichere Möglichkeiten:
- Eine Metallrückwand anbringen: Am sichersten ist es, direkt hinter dem Herd ein dünnes Edelstahl- oder Aluminiumblech anzubringen – von der Arbeitsplatte bis zur Freiraumzone von 8-9 inch. Anschließend kannst du deine selbstklebenden Fliesen oberhalb dieser Platte anbringen, sodass ein nahtloser Look entsteht.
- Den Abstand deutlich vergrößern: Wenn du ausschließlich Fliesen verwenden möchtest, musst du für einen deutlich größeren Abstand sorgen – häufig werden mindestens 18 inches empfohlen. Bei Gasherden raten wir jedoch immer zu einer nicht brennbaren Barriere, etwa einem Metallblech, als primärem Schutz.
Die Wahl der richtigen Fliesen ist genauso wichtig wie die Montage. Wenn du dir einen umfassenden Eindruck von den Möglichkeiten verschaffen möchtest, schau dir diese inspirierenden Ideen für selbstklebende Küchenrückwände 2025 an und entdecke die angesagtesten Designs.
Hitzebeständige selbstklebende Fliesen richtig anbringen und pflegen
Die Frage: „Ich bin kein Profi. Werde ich bei der Montage etwas falsch machen und mein Geld verschwenden?“
Unser Versprechen: In diesem Abschnitt zeigen wir dir Schritt für Schritt, wie du die Fliesen ganz einfach und sicher anbringst, damit sie perfekt und lange halten. Außerdem geben wir dir unkomplizierte Tipps, mit denen deine Fliesen wie neu aussehen.
Einer der größten Vorteile dieser Fliesen ist die unkomplizierte DIY-Montage. Du brauchst weder eine Nassschneidemaschine noch Mörtel oder Fugenmörtel. Mit etwas Geduld und ein wenig Vorbereitung erzielst du ein Ergebnis, bei dem alle denken, du hättest einen Profi beauftragt.
Der häufigste Fehler, den du vermeiden solltest
Bevor wir zu den einzelnen Schritten kommen, möchte ich dir den häufigsten Fehler nennen, den ich sehe: eine unzureichend vorbereitete Wand. Du kannst diese Fliesen nicht einfach auf eine fettige, staubige oder frisch gestrichene Wand kleben. Der Klebstoff braucht eine saubere, glatte und vollständig ausgehärtete Oberfläche, damit eine dauerhafte Haftung entsteht. 30 Minuten für die Vorbereitung können dir später abblätternde Fliesen ersparen.
Deine Schritt-für-Schritt-Anleitung zur Montage
- 1 Oberfläche reinigen und vorbereiten: Reinige die Wand gründlich mit einem fettlösenden Reiniger wie TSP (Trinatriumphosphat) oder einer einfachen Spülmittellösung. Spüle sie mit Wasser ab und lass sie mindestens eine Stunde vollständig trocknen. Bei einer strukturierten Wand musst du sie eventuell glatt schleifen.
- 2 Frische Farbe vollständig aushärten lassen: Wenn du gerade gestrichen hast, musst du warten. Die Farbe muss vollständig aushärten, was bis zu 21 Tage dauern kann. Wenn du die Fliesen zu früh anbringst, wird Feuchtigkeit eingeschlossen und der Klebstoff kann sich lösen.
- 3 Ausmessen und planen: Miss die Fläche aus und lege deine Fliesen auf einer ebenen Fläche aus, um das Muster zu planen. So siehst du, wo du Fliesen zuschneiden musst, und stellst sicher, dass die Linien deines Musters richtig ausgerichtet sind. Beginne an der sichtbarsten Ecke und arbeite dich von dort aus weiter vor.
- 4 Eine Orientierungslinie zeichnen: Zeichne mit einer Wasserwaage und einem Bleistift eine gerade waagerechte Linie dort, wo die erste Fliesenreihe verlaufen soll. Verlass dich nicht darauf, dass Arbeitsplatte oder Schränke perfekt waagerecht sind – das sind sie nur selten!
- 5 Abziehen, ausrichten und andrücken: Ziehe zunächst nur die obersten Zentimeter des Trägerpapiers ab. Richte die Fliese an deiner Orientierungslinie aus und drücke sie vorsichtig an die Wand, sobald du mit der Position zufrieden bist. Ziehe das restliche Trägerpapier langsam ab und streiche die Fliese dabei von der Mitte nach außen glatt, um Luftblasen zu entfernen.
- 6 Überlappen und verbinden: Die meisten selbstklebenden Fliesen verfügen über einen vorgesehenen Überlappungsbereich. Richten Sie diesen exakt an der vorherigen Fliese aus, damit eine wasserdichte, nahtlose Verbindung entsteht. Drücken Sie anschließend alle Kanten fest an.
- 7 Bei Bedarf zuschneiden: Für Steckdosen und Ecken fertigen Sie eine Papierschablone der Fliese an und übertragen den Ausschnitt darauf. Ritzen Sie die Fliese mit einem scharfen Cuttermesser und einer geraden Kante an und brechen Sie sie anschließend sauber entlang der Schnittlinie.

Empfehlung: Eine ausführliche Schritt-für-Schritt-Anleitung mit Abbildungen und Profi-Tipps speziell für diese kniffligen Bereiche finden Sie in unserem umfassendsten Ratgeber zu So installieren Sie hitzebeständige selbstklebende Fliesen hinter dem Herd. Darin finden Sie Abbildungen und Profi-Tipps speziell für diese kniffligen Bereiche.
So bleibt Ihre neue Küchenrückwand schön
Damit Ihre Fliesen lange gut aussehen, ist nur wenig Aufwand nötig.
- Reinigung: Verwenden Sie ein weiches Tuch oder einen Schwamm und einen milden, nicht scheuernden Reiniger. In der Regel reichen Wasser und etwas Seife völlig aus. Aggressive Reinigungsmittel und Scheuerschwämme sollten Sie vermeiden, da sie die Oberfläche zerkratzen können.
- Hitze: Obwohl die Fliesen hitzebeständig sind, sollten sie nicht direkt mit Flammen in Berührung kommen. Stellen Sie auch keine heißen Töpfe oder Pfannen unmittelbar an die Fliesen.
- Flecken: Wischen Sie Spritzer von Tomatensoße, Curry und ähnlichen Speisen möglichst sofort auf, damit die Oberfläche gar nicht erst Flecken bekommt.
Eine umfassende Übersicht mit allen wichtigen Tipps und No-Gos, damit Ihre Fliesen jahrelang strahlend schön bleiben, finden Sie in unserem Ratgeber zur Pflege selbstklebender Fliesen 2025.
Fazit: Ihre stilvolle und sichere Küche wartet auf Sie
Eine Küchenrenovierung muss weder teuer noch kompliziert sein. Mit hitzebeständigen selbstklebenden Fliesen können Sie mit Ihren eigenen Händen einen schönen, modernen und sicheren Raum gestalten. So erhalten Sie endlich den Look vom Profi – ohne den entsprechenden Preis.
Wenn Sie die Materialien kennen, die Sicherheitsbereiche hinter dem Herd beachten und einige einfache Schritte bei der Montage befolgen, können Sie Ihre Küche ganz selbstbewusst an einem einzigen Wochenende verwandeln. Das ist mehr als nur eine optische Auffrischung: Es ist ein cleveres, langlebiges und rundum befriedigendes Heimwerkerprojekt.
Bereit für Ihre Verwandlung? Entdecken Sie die Möglichkeiten und finden Sie den perfekten Stil für Ihr Zuhause. Haben Sie bereits ein Projekt mit selbstklebenden Rückwandfliesen umgesetzt? Wir freuen uns, wenn Sie Ihre Erfolgsgeschichte unten in den Kommentaren mit uns teilen!
Entdecken Sie die beliebtesten hitzebeständigen selbstklebenden Küchenrückwände.Häufig gestellte Fragen
Wie lange halten hitzebeständige selbstklebende Fliesen?
Wenn sie auf einem fachgerecht vorbereiteten Untergrund angebracht und richtig gepflegt werden, können hochwertige hitzebeständige selbstklebende Fliesen viele Jahre halten. Wir haben Installationen gesehen, die auch nach 5–10 Jahren noch wie neu aussahen. Die Haltbarkeit hängt direkt von der Qualität des Fliesenkerns und des Klebers ab.
Sind diese Fliesen für Mietwohnungen geeignet und lassen sie sich leicht entfernen?
Viele Modelle sind für eine rückstandsarme Entfernung konzipiert, allerdings hängt dies vom Kleber des jeweiligen Herstellers ab. Erwärmen Sie die Oberfläche vorsichtig mit einem Föhn, um den Kleber weicher zu machen. Lösen Sie die Fliesen anschließend mit einem Spachtel behutsam von der Wand. Danach sind möglicherweise kleinere Ausbesserungen am Anstrich erforderlich. Beachten Sie immer die Hinweise des Herstellers zur Entfernung.
Kann ich selbstklebende Fliesen auf bereits vorhandenen Keramikfliesen anbringen?
Ja, sofern die vorhandenen Fliesen sauber, eben und intakt sind. Reinigen Sie die Fugen gründlich und füllen Sie sie mit Spachtelmasse oder einer Grundierung auf, damit eine vollständig glatte Oberfläche entsteht. Werden die Fliesen direkt auf unebene Fugen geklebt, kann dies zu Haftungsproblemen und sichtbaren Vertiefungen führen.
Was kosten hitzebeständige selbstklebende Küchenrückwände?
Die Kosten liegen deutlich unter denen herkömmlicher Fliesen. Je nach Material – etwa Vinyl, Metall oder Steinverbundstoff – variieren die Preise. In der Regel können Sie jedoch mit $5 bis $20 pro Quadratfuß rechnen. So lässt sich mit diesen Fliesen besonders budgetfreundlich eine hochwertige Optik erzielen.


Kommentar hinterlassen
Diese Website ist durch hCaptcha geschützt und es gelten die allgemeinen Geschäftsbedingungen und Datenschutzbestimmungen von hCaptcha.