












Introduction
Kitchen Transformation Stories
Kitchen 1 – Modern Chic
- Bright and airy transformation
- Use of monochrome tiles for a sleek look
- Integration with modern appliances
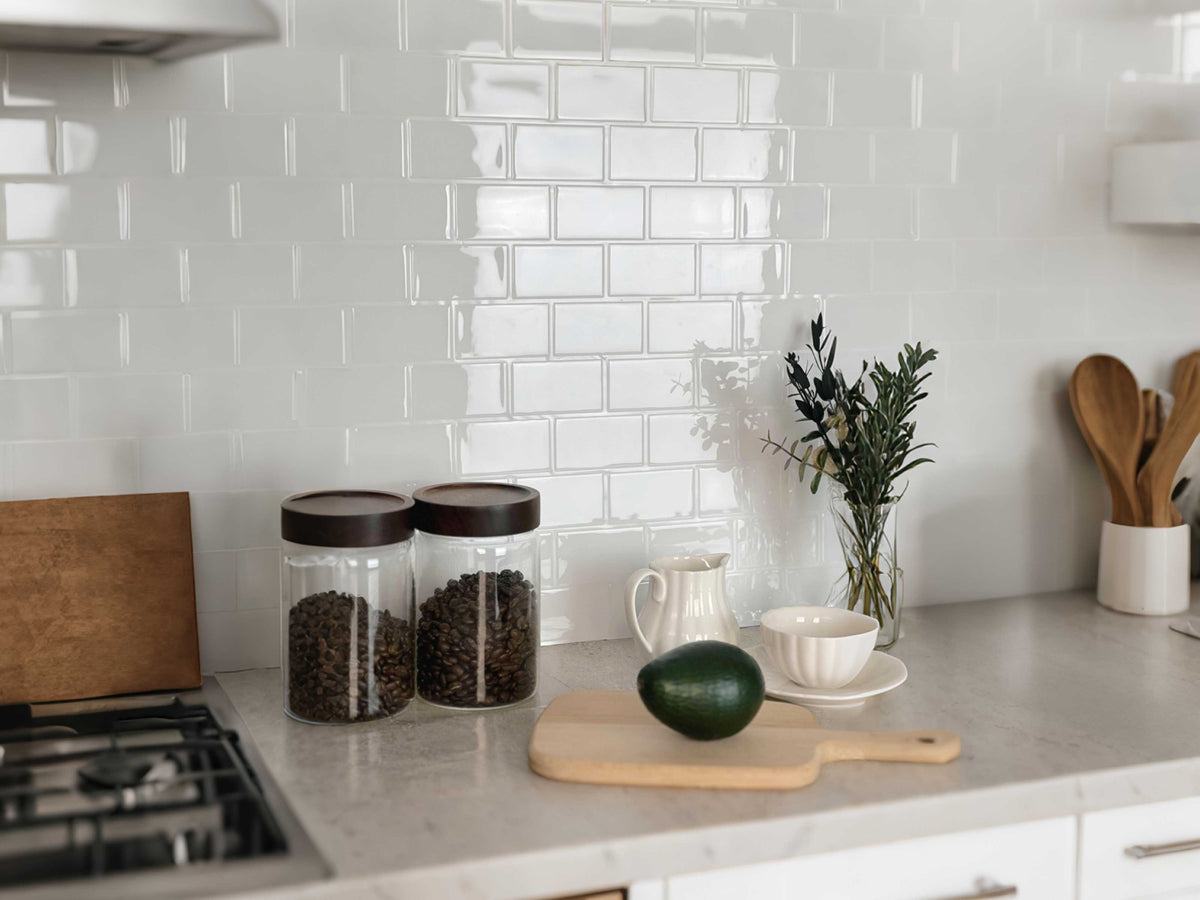
Transforming a dull kitchen into a modern chic haven is easier than you think. By using monochrome peel and stick tiles, you can achieve a sleek, contemporary look that is both bright and airy. These tiles can completely change the ambiance, making the kitchen a place you’ll love to spend time in.
Explore this guide
Pair these tiles with stainless steel appliances for a cohesive look. Imagine cooking in your kitchen, surrounded by a sleek design that matches your modern lifestyle. You can check out our Stickwoll Crimson Horizon tiles, which offer a stunning monochrome design perfect for this transformation.
Kitchen 2 – Rustic Charm
- Achieve a cozy, warm kitchen atmosphere
- Utilize wood-like peel and stick tiles
- Complement with vintage decorations
For those who love a cozy, warm kitchen atmosphere, wood-like peel and stick tiles are the perfect choice. They deliver a rustic charm that makes your kitchen feel inviting and homely.
These tiles, when paired with vintage decorations like old-fashioned jars or an antique clock, make your kitchen a welcoming space. Imagine a Sunday morning spent in a kitchen that feels like a rustic farmhouse, filled with the smell of fresh coffee. Consider our Stickwoll Timberline Checks for a rustic appeal that speaks volumes.
Kitchen 3 – Bold Patterns
- Transform your kitchen with geometric designs
- Use vivid colors for a lively feel
- Simple installation for maximum impact
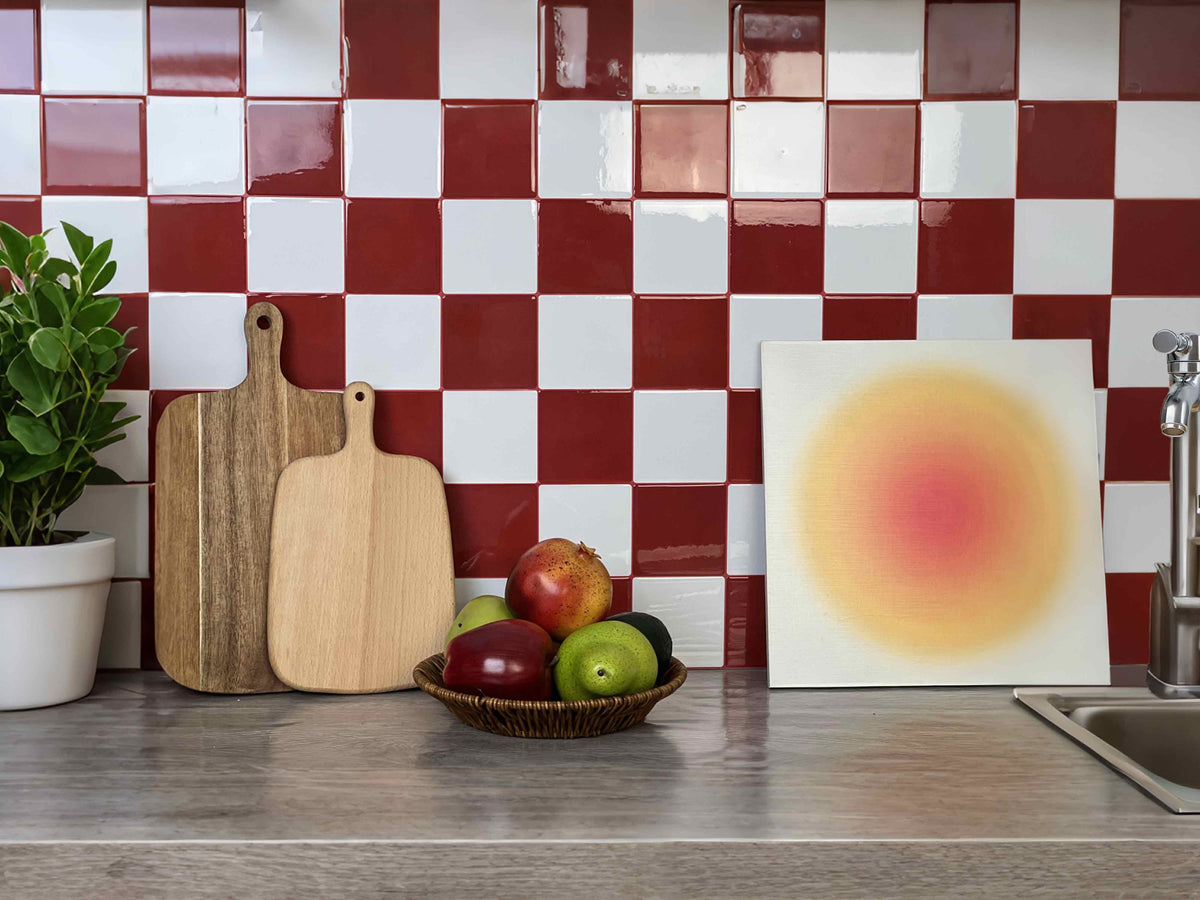
Sometimes, a splash of color and pattern is all a kitchen needs to transform. Bold geometric designs can turn a dull kitchen into an exciting space full of character.
Opt for vivid colors to create a lively feel that captures attention and inspires creativity. These tiles are easy to install, yet they offer a maximum impact that makes your kitchen stand out. Imagine a kitchen that energizes you every morning with its bold design. Our blog on Trendy Peel and Stick Tile Patterns can provide inspiration for patterns that could elevate your kitchen.
Kitchen 4 – Classic Elegance
- Achieve a timeless look with marble-like tiles
- Minimalistic design for a refined appearance
- Pair with classic white cabinetry
For a kitchen that exudes timeless elegance, consider peel and stick tiles that mimic the look of marble. These tiles offer the classic feel of marble without the hefty price tag or weight.
Kitchen 5 – Contemporary Minimalism
- Clean lines and uncluttered spaces
- Use neutral tones for a modern feel
- Functional design with maximum efficiency
Contemporary minimalism focuses on clean lines and uncluttered spaces. By using peel and stick tiles in neutral tones, you can achieve a modern yet functional kitchen design.
This style emphasizes efficiency without sacrificing aesthetics, making it perfect for those who appreciate simplicity and functionality. Picture a kitchen where everything is in its place, and the design promotes a sense of calm and order. Our Modern Peel and Stick Tiles guide can help you achieve this minimalist look effortlessly.
Choosing Peel and Stick Tiles
Assessing Style and Needs
- Determine your kitchen’s current style
- Identify what you want to change
- Match tiles to your design goals
When choosing peel and stick tiles, it’s essential to assess your kitchen’s current style and identify what you want to change. Do you want a modern look, a rustic charm, or a bold pattern? Determining these factors will guide you in selecting the right tiles.
Matching tiles to your design goals ensures that your kitchen transformation aligns with your vision. Consider what aspects of your kitchen you love and what you want to improve. Our blog on Peel and Stick Tiles for Kitchen offers insights into achieving various kitchen styles effortlessly.
Budget Considerations
- Set a realistic budget for your project
- Compare tile prices and quality
- Explore cost-effective options
Setting a realistic budget is crucial for any kitchen renovation project. Peel and stick tiles offer a cost-effective solution that doesn’t compromise on style or quality.
By comparing tile prices and quality, you can find options that fit your budget and meet your renovation needs. Exploring different brands and styles will help you find the best value for your money. Visit our Best Peel and Stick Tile Brands guide for top-rated brands that offer excellent quality and affordability.
Material and Durability
- Choose the right material for your needs
- Consider durability and maintenance
- Evaluate moisture and heat resistance
Choosing the right material for your kitchen tiles is essential. Consider the durability and maintenance requirements of different tile materials. Some tiles are designed to withstand moisture and heat, making them ideal for kitchens.
Evaluating these factors ensures that your tiles will last and maintain their appearance over time. Imagine a kitchen that remains as beautiful as the day you installed the tiles. Our blog on Heat-Resistant Peel and Stick Tiles provides insights into selecting tiles that can handle kitchen environments effectively.
Tile Size and Pattern Selection
- Choose sizes that fit your kitchen space
- Consider how patterns affect the room’s look
- Opt for designs that enhance your kitchen’s style
Selecting the right tile size and pattern is crucial for achieving your desired kitchen look. Smaller tiles can make a space feel more intricate, while larger tiles offer a more continuous and open feel.
Consider how patterns affect the room’s appearance, and choose designs that enhance your kitchen’s style. Visualize a space where every element comes together harmoniously. Our Peel and Stick Tile Patterns blog offers plenty of inspiration for choosing the perfect patterns for your kitchen.
Application Techniques and Tips
- Follow installation guides carefully
- Prepare surfaces for best results
- Use tools to ensure a smooth finish
Installing peel and stick tiles requires some attention to detail. Following installation guides carefully ensures the best results and a smooth application.
Preparing surfaces is crucial for adhesion and longevity, so make sure your walls are clean and dry. Using tools like a level and roller can help achieve a professional finish. Imagine a kitchen that looks professionally renovated, thanks to your careful preparation and installation. Our Tile Installation Guide offers detailed steps to guide you through the process.
Conclusion
Peel and stick tiles offer a versatile and affordable solution for transforming any kitchen. Whether you prefer a modern chic, rustic charm, bold patterns, classic elegance, or contemporary minimalism, there’s a peel and stick tile option for you. By assessing your style, setting a budget, choosing durable materials, and following application tips, you can achieve a stunning kitchen makeover.
Frequently Asked Questions
1. Are peel and stick tiles easy to remove?
Yes, most peel and stick tiles are designed for easy removal without damaging surfaces, making them great for renters. Check out our blog on Removable Peel and Stick Tiles for Renters.
2. Can I use peel and stick tiles in a bathroom?
3. How do I clean peel and stick tiles?
Cleaning peel and stick tiles is simple—just use a mild cleaner and a damp cloth. For more tips on care and durability, visit our Peel and Stick Tile Maintenance Guide.
4. Are there eco-friendly options available?
Yes, there are eco-friendly peel and stick tiles available, made from sustainable materials. Explore our range of Eco-Friendly Kitchen Tiles for more information.
By choosing the right peel and stick tiles, you can transform your kitchen with minimal effort and cost, creating a space that’s both beautiful and functional.
Start with the reason for the makeover
Define whether the project is solving dated color, a damaged wall, a missing backsplash, renter personalization or simply a desire for a focal point. A cosmetic problem can often be solved with a surface update, while moisture damage, loose drywall or an appliance-zone conflict needs a different scope.
Write the goal in one sentence and use it to reject products or layouts that add complexity without solving the actual problem.
Map the kitchen by exposure
Separate the sink zone, prep wall, cooking zone, coffee or kettle area, dry side walls and dining wall. Record where grease, splash, steam, heat and repeated cleaning occur.
The same peel-and-stick product does not automatically belong in every zone. Use the exact manufacturer instructions and appliance requirements for each location.
Identify the exact tile construction
Peel-and-stick describes the attachment method, not the face material. Compare vinyl, gel-faced, composite and other products by actual construction, intended use, thickness, edge profile, cleaner and cutting method.
Order or obtain a sample before making a whole-kitchen decision. The front photo does not show edge thickness or how relief behaves beside trim.
Inspect and prepare the wall
Check paint adhesion, patches, grease, texture, old adhesive and moisture. A strong tile adhesive cannot make loose paint or soft drywall stable.
Use surface preparation compatible with the wall and exact tile. Do not assume every kitchen should be sanded, deglossed or treated with a strong cleaner.
Use a full-size layout before ordering
Measure cabinet runs, windows, outlets and exposed ends. Dry-layout a representative row and decide where strong motifs, seams and narrow cuts will land.
Moving the start point by part of a tile can improve both sides of the wall and reduce fragile slivers.
Plan heat zones without a generic clearance
Check the range or cooktop instructions and the exact tile documentation. A material name or stone image does not establish suitability behind an appliance.
If the proposed area cannot be verified, keep the decorative finish outside the zone or use a documented backsplash system there.
Treat sink splash as a water-management detail
A wipeable face can handle ordinary cleaning, but the complete wall includes seams, edges, penetrations and the substrate. Keep leaks and failed caulk visible and repair them first.
Do not call a decorative backsplash a waterproof assembly unless the exact system is documented for that role.
Design outlets and edges early
Keep cover plates and service screws accessible. Plan the end of the backsplash at cabinet edges, doorways or returns before installation.
Practice a difficult cut on spare material and choose trim or an exposed-edge strategy compatible with the product.
Calculate quantity from the real layout
Use the stated pack coverage and count cuts, pattern matching and spare stock. There is no universal waste allowance that fits every wall.
Label spare pieces with the product name and orientation so future local repairs are easier.
Match the finish to the cleaning routine
A deep texture or matte coating may look beautiful but require different care from glazed ceramic. Read the permitted cleaners and tools before installing the finish beside grease or frequent splash.
If the household needs a cleaning method the product does not permit, choose a different finish or a lower-exposure wall.
Plan renter restoration before installation
Temporary does not mean the original paint is certain to remain unchanged. Photograph the wall, obtain permission where required and keep removal instructions with the project record.
Budget time for careful removal and possible ordinary patching or repainting. The move-out plan belongs in the initial decision.
Use a final project handover
Record the product, batch information if available, wall preparation, installation date, cleaner, spare material location and any appliance or moisture limitations.
A documented makeover is easier to maintain, repair and change because the next decision does not depend on memory.
Compare three makeover scopes before committing
Sketch a minimal scope that changes only one wall, a medium scope that covers the main backsplash and a larger scope that adds a dry accent area. Price and mock up all three. The smallest scope may deliver most of the visual benefit while preserving more of the existing kitchen.
Choose the scope based on the actual problem, not on the amount of wall that can technically be covered.
Create a before-condition inventory
Photograph every wall section, outlet, cabinet edge, window return and counter joint. Note paint damage, grease, old caulk, texture and moisture history.
The inventory becomes the rollback reference for renters and the repair reference for owners. It also prevents the new finish from hiding a condition that should be corrected first.
Use one sample through a full day of lighting
Place the real sample beside the counter in morning daylight, afternoon light, under-cabinet lighting and the normal evening fixtures. Check color, gloss, relief and whether printed grout lines remain convincing.
A product photo can be useful for shortlisting, but the kitchen’s own light determines whether the finish actually connects to cabinets and counters.
Plan the first and last visible edges together
A backsplash can look professional in the middle and unfinished at the ends. Mark both terminations before choosing the start line. Move the layout if necessary to avoid a tiny piece beside a cabinet or doorway.
If the product needs trim, order and mock up the trim at the same time as the field material.
Build an outlet-cut practice board
Use an offcut or spare piece to practice the type of notch needed around an outlet or switch. Confirm which tool produces a clean cut without distorting the face.
Keep electrical work separate from decorative cutting. If a box or device must be moved or altered, use the appropriate electrical process rather than treating it as part of tile installation.
Check material thickness against trim and appliances
Added wall thickness can affect outlet covers, window trim, countertop transitions and the gap behind a freestanding appliance. Dry-fit representative pieces before installing a full field.
The visual makeover should not create a service or fit problem that only becomes visible after the material is bonded.
Create a realistic project schedule
Include wall cleaning and drying, layout, cutting, installation, edge finishing and the product’s specified wait or conditioning steps. Do not assume self-adhesive means the whole kitchen is a one-hour project.
A slower schedule that allows preparation and inspection can reduce rework and make the finished layout more consistent.
Protect the room during installation
Clear food and small appliances from the work zone, protect counters and floors as appropriate and stage cut pieces so adhesive faces do not collect debris.
Clean organization matters because dust, crumbs and backing scraps can interfere with both adhesion and the final appearance.
Review the result before expanding to another wall
Finish one defined area, use the kitchen normally and decide whether the color, cleaning and exposure are working as expected. Only then decide whether to continue the same material elsewhere.
This phased approach keeps the project reversible at the planning level and prevents a mediocre first choice from spreading across the whole room.
Plan around cabinet lighting and shadows
Under-cabinet lights can emphasize seams, relief and gloss because light strikes the backsplash from a shallow angle. Place the real sample under those fixtures before ordering.
A texture that looks subtle in ceiling light can create strong shadows at night. Choose the effect intentionally rather than discovering it after the whole wall is installed.
Treat a range hood as a layout anchor
The hood can create the tallest visible backsplash area and often becomes the focal point of the wall. Decide whether the pattern centers on the hood, continues from the adjacent cabinet run or uses a different field in the higher area.
Dry-layout the transition and confirm heat suitability separately. Visual centering does not override appliance or product requirements.
Coordinate the backsplash with countertop pattern
Highly veined stone or busy laminate can compete with a strong wall pattern. Put the actual tile sample directly on the counter and view several repeats together.
If both surfaces are visually active, reduce contrast or pattern scale in one layer so the kitchen has a clear hierarchy.
Check refrigerator and side-wall sight lines
A narrow wall beside the refrigerator or pantry can be highly visible from an entry even though it is not part of the main backsplash. Decide whether it should continue the same finish, use paint or remain quiet.
Avoid extending a decorative material simply because leftover pieces are available. Each wall should have a reason to belong in the composition.
Plan material storage during the project
Keep pieces flat or otherwise stored as the manufacturer directs and protect faces and adhesive from dust, moisture and temperature conditions outside the instructions.
Label cut pieces and offcuts so they can be reused in the intended location rather than becoming unidentified waste.
Use a receiving check before cutting
Compare packages for pattern, dimensions, surface condition and lot information where available. Resolve obvious damage or variation before installation.
Cutting and distributing a questionable batch across the wall makes a return or support conversation more difficult.
Make the final cleaning part of installation
Use only the cleaner and cloth permitted for the finish when removing installation dust or marks. Do not finish a new wall with a strong chemical simply because it is already in the kitchen.
Record the successful cleaning method for future maintenance.
Keep a stop rule for unexpected wall conditions
If the project reveals dampness, unstable coating, unknown residue, an electrical issue or an incompatible heat zone, stop at a clean boundary.
Fix or investigate the underlying condition before continuing. A makeover remains successful when it is willing to pause for evidence.
Decide whether the project needs a new wall finish at all
If the kitchen problem is mostly color, clutter or lighting, paint, organization or task lighting may solve it with less material and fewer seams. Compare those simpler options before choosing a full backsplash overlay.
Peel-and-stick tile is most useful when the visual and functional goal actually benefits from a new surface layer.
Use the sink wall and range wall as separate decisions
A kitchen with sink and range on different walls does not require the same finish on both. One wall may need frequent splash cleaning while the other has appliance-specific heat constraints.
Using different but coordinated finishes can be more technically appropriate than forcing one decorative product across every zone.
Check corners before calculating the final order
Inside corners, outside returns and short wall segments can consume more pieces than the simple area calculation suggests. Dry-layout the transition and count which offcuts can realistically be reused.
This prevents a last-minute shortage caused by pieces that technically contain enough area but cannot match the pattern or direction.
Plan the household handoff
Write down which cleaner is safe, where spare pieces are stored and which zones have heat or moisture limits. If someone else cleans or maintains the kitchen, make that information easy to find.
A makeover stays successful longer when the maintenance knowledge is transferred with the finished wall.
Compare the final wall with the original goal
After a week of normal use, revisit the one-sentence goal you wrote at the start. Did the wall solve the dated color, create the focal point or improve the cleanable surface you wanted?
If not, identify the specific mismatch before expanding the same material to another area. The review keeps the project evidence-based instead of assuming more coverage will improve the result.
Create a decision note for mixed finishes
If the sink wall, range wall and dry accent use different materials, record why each was selected and where the transition occurs. This prevents a future repair from assuming every wall has the same heat, moisture or cleaning limits.
A mixed-finish kitchen can still look cohesive when color and scale relate even though the technical materials differ.
Use leftover material intentionally
Sort usable offcuts by size and pattern direction and store only pieces that can realistically support a future repair. Small scraps with no practical repair use can be disposed of according to local guidance rather than becoming permanent clutter.
Label the retained pieces so another person can identify them later.
Finish with an edge-and-seam inspection
After installation and initial cleaning, inspect every exposed termination, inside corner, outlet cut and seam under both daylight and task lighting. Correct only according to the product instructions and document anything unusual.
This final pass catches local issues before they become part of the everyday background.
Keep the project reversible at the decision level
Do not let already-purchased material force the project through a newly discovered wall, heat or moisture problem. If evidence changes, reduce the scope, move the accent or choose another finish.
The ability to change course before installation is one of the most valuable forms of project flexibility.
Record the final quantity and waste
Note how many packs were used, how much repair stock remains and which cuts created unusable waste. That record improves future estimates for another wall with the same product.
It also gives a later repair a clear picture of what matching material is still available.
Use a final photo set as the project baseline
Take one full-wall photo and close views of corners, outlets and exposed edges after completion. These images help later repairs distinguish an original installation detail from a new change.
Keep one final stop condition
If the finished wall shows repeated lifting, moisture or heat-related change in one zone, investigate that condition before adding more material elsewhere in the kitchen.
Keep the final product label
Store the product label or SKU with the spare pieces so future repairs can identify the exact finish.
Sources and scope
- US DOE: Color and Spectrum — Lighting and color-rendering context; not a material-performance rating.
- US EPA: A Brief Guide to Mold, Moisture and Your Home — Moisture-control guidance; not approval of a decorative wall covering or shower assembly.
- 3M: Applying VHB Pressure-Sensitive Tape — General surface-preparation principles for named 3M tapes; not Stickwoll specifications.


Leave a comment
This site is protected by hCaptcha and the hCaptcha Privacy Policy and Terms of Service apply.