



Decision guide
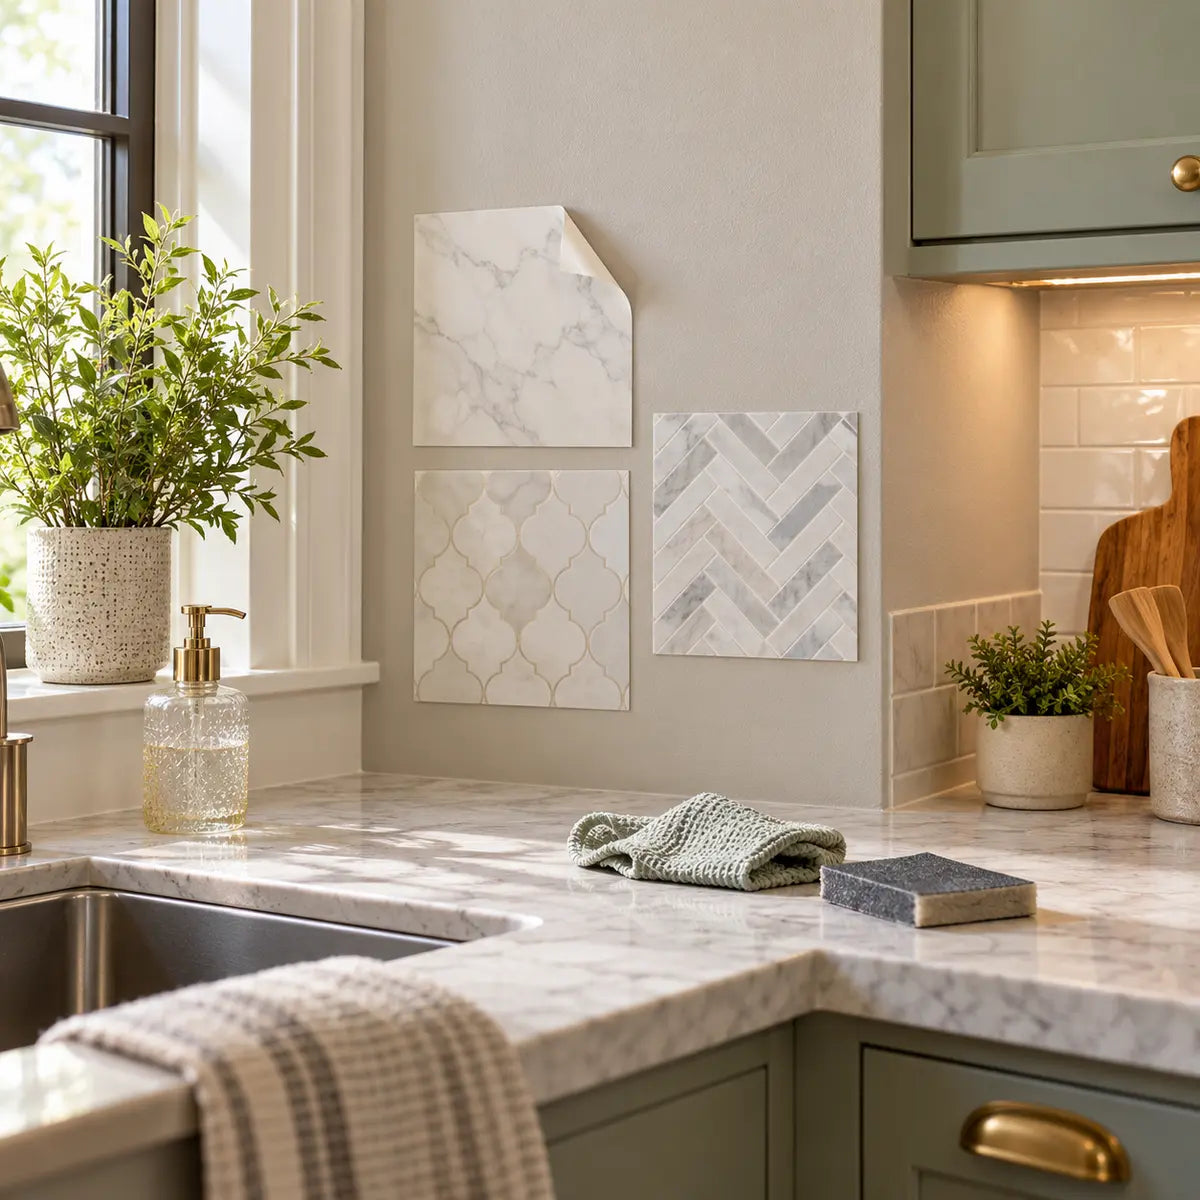
A satin-painted wall may support peel-and-stick tile, but the finish name alone cannot answer the question. The wall needs to be firmly bonded, smooth, clean, dry, sufficiently cured, and suitable for the specific tile adhesive. Before covering the full wall, test one or two representative pieces in an inconspicuous area.
That small test matters because the adhesive bonds to the paint surface first. If the paint is loose, chalky, greasy, damp, contaminated with cleaner residue, or still curing, the tile may fail even when the wall looks smooth. Removal can also lift paint or leave adhesive residue, so adhesion and reversibility should be tested together.
This guide separates four decisions that are often treated as one:
- Is the painted wall sound enough to cover?
- How should satin paint be cleaned before adhesive tile?
- Is light scuff sanding justified?
- Does a small test show enough evidence to proceed?
The result should be specific to your wall, paint, tile, preparation method, room exposure, and removal expectations. Current manufacturer guidance for comparable peel-and-stick products supports smooth, firm, clean, dry surfaces and small-area testing, but it does not prove that every satin coating or every adhesive tile product will work together. WallPops installation guidance, Smart Tiles surface guidance, and Floor & Decor bonding guidance support those boundaries.

Can you put peel-and-stick tile over satin paint?
Yes, peel-and-stick tile can sometimes go over satin paint when the painted surface is stable and the selected tile product permits painted drywall or a comparable smooth painted surface. Treat that answer as conditional rather than universal.
The word satin describes the paint’s sheen, or how much light the dried coating reflects. It does not identify the paint chemistry, primer beneath it, age of the coating, wall condition, or the adhesive compatibility. Two walls can both be labeled satin while behaving differently because one has fresh acrylic paint and the other has an older coating exposed to cooking grease, cleaning products, moisture, or repeated scrubbing.
Manufacturer instructions for several peel-and-stick products require a surface that is smooth, clean, dry, firm, and free of texture or other conditions that prevent complete contact. Comparable instructions also warn that newly painted walls need a waiting period and that an inconspicuous test should come before full installation.
Satin paint is a possible bonding surface, not an automatic approval.
The tile adhesive must contact the paint evenly. If the paint film releases from the drywall, the tile can appear to fail even though the adhesive itself is strong. If grease or cleaner residue sits between the adhesive and paint, the bond may be weak. If the wall has texture or uneven repairs, parts of the tile may bridge over low areas instead of making continuous contact.
Before ordering enough tile for the whole project, check the selected product’s current instructions for:
- Approved surfaces, including painted drywall.
- Required surface smoothness and flatness.
- Fresh-paint waiting periods.
- Cleaning products and residue-removal instructions.
- Required pressure or smoothing technique.
- Room limitations involving moisture, steam, heat, or direct water.
- Repositioning and removal guidance.
- Any warning about non-stick, washable, chalky, textured, or freshly painted surfaces.
Stickwoll’s Peel-and-Stick Tile Guide can help organize those checks around surface compatibility, painted drywall, test patches, moisture, heat, renter considerations, and removal expectations. Use the exact instructions for the product you plan to install because product construction and adhesive behavior can differ.
What would make a satin-painted wall a poor candidate?
Do not cover a wall simply because it feels smooth. Stop and correct the surface first if you find:
- Peeling, flaking, blistering, or loose paint.
- Powdery or chalky residue on your hand.
- Cracks, holes, dents, or repairs that are not smooth.
- Heavy texture, stippling, ridges, or raised paint edges.
- Dampness, water staining, mildew, or an active leak.
- Grease, wax, soap film, adhesive residue, or cleaning-product residue.
- A wall that flexes, crumbles, or has damaged drywall paper.
- Areas where the tile cannot sit flat and make consistent contact.
Current surface-preparation guidance from Sherwin-Williams advises removing loose paint and powdery substances, correcting cracks and holes, cleaning grime, and allowing the surface to dry thoroughly. Smart Tiles and WallPops give similar smooth, clean, dry, firm-surface requirements for their cited products.
The key point is that adhesive tile does not repair a weak wall. It can hide a problem for a while, then pull at the problem as the adhesive settles, the room changes temperature, or the wall is exposed to moisture.
What does satin paint change about adhesion?
Satin paint changes the surface condition you need to evaluate, but satin sheen alone does not determine adhesion. The adhesive sees the top of the paint film, while the paint film depends on its own bond to the wall.
Think of the wall as a layered system:
- The drywall or other wall substrate.
- Joint compound, primer, or an earlier coating.
- The satin paint film.
- Dust, grease, moisture, or residue on the paint.
- The peel-and-stick adhesive.
- The tile face or backing layer.
A failure can occur at several points. The adhesive may release from a contaminated paint surface. The paint may release from the primer or drywall. The tile may lift because its edges never made full contact. Moisture may affect the wall even if the tile face is marketed for splash exposure. Appearance alone rarely identifies the exact failure layer.
The checked manufacturer guidance does not provide a controlled comparison of satin versus matte, eggshell, or gloss paint for peel-and-stick tile adhesion. It does show that surface condition, cleanliness, smoothness, dryness, cure status, and product instructions are treated as separate requirements. From that, the practical conclusion is clear: satin is one variable among several, not the deciding variable by itself.
Why can a smooth wall still reject adhesive tile?
A wall can look smooth and still have a weak bonding surface for several reasons.
Dust reduces contact. Fine dust can act like a thin layer of loose particles between adhesive and paint. It may also collect along tile edges.
Grease changes the interface. Kitchen vapors can leave an invisible film that makes the surface feel smooth but prevents reliable contact. A dry cloth may remove visible dust while leaving oil behind.
Cleaner residue can behave like contamination. Some soaps and detergents leave a film if they are not removed with clean water or a clean damp wipe. Smart Tiles specifically warns about dish-soap residue in its guidance, while paint manufacturers describe different cleaning approaches for different types of soil. Follow the selected tile and paint instructions together rather than assuming one cleaner is safe for every coating.
Moisture can weaken the decision. A wall near a sink, shower, laundry appliance, or poorly ventilated area may look dry at one moment while still experiencing repeated moisture exposure. Tile suitability and wall moisture condition are separate questions.
Unevenness creates hollow areas. If the painted wall has texture, ridges, patched depressions, or an uneven corner, the adhesive may touch strongly in some places and barely touch in others.
The paint may be dry but still curing. A coating can feel dry to the touch while its film continues to harden and stabilize. Installing tile too soon may affect the paint or make later removal more damaging.
The problem is rarely a single mysterious property called “satin.” It is usually the interaction between coating condition, contamination, contact, curing, room exposure, and adhesive instructions.
Inspect the painted wall before cleaning or testing
Start with a dry inspection before adding water or cleaner. Your first goal is to decide whether the existing coating is stable enough to prepare.
Use bright side lighting if possible. Light held across the wall can reveal raised edges, shallow texture, dents, and uneven repairs that disappear under front-facing light. Run a clean, dry hand over a small area and look for powder, loose particles, or a change in sheen. Do not use pressure that could damage a fragile coating.
A practical wall inspection
Check the wall in sections rather than judging it from across the room.
Look for paint failure. Peeling, bubbling, flaking, and cracking indicate that the coating needs repair before it can serve as an adhesive surface. If the tile bonds more strongly than the paint bonds to the wall, removal may pull the paint away.
Check for chalking. Chalking is a powdery residue that transfers to your hand. It can indicate coating weathering or surface breakdown. An indoor wall can chalk because of age, incompatible cleaning, moisture, or a coating problem. Do not cover it until the cause is understood and the surface is stable.
Check flatness. Place a straightedge, ruler, or the flat edge of an unused tile against the wall. You are looking for ridges, deep depressions, large seams, and areas where the tile cannot sit flat. There is no universal numeric roughness threshold in the supplied guidance, so use the selected product’s instructions and the actual tile’s ability to make consistent contact.
Check repairs. Joint-compound patches, spackle, painted-over holes, and drywall repairs need to be fully smooth and firmly coated. A tile may telegraph a high spot or leave an air gap over a low spot.
Check moisture clues. Look for water staining, soft drywall, swollen seams, musty odors, recurring condensation, or areas that remain cool and damp. Adhesive tile should not be used to conceal an active moisture problem.
Check contamination. Pay special attention to the area behind a range, near a sink, beside a washer, around a vanity, and anywhere hands frequently touch the wall. Grease, soap, skin oils, dust, and fabric lint can collect in those locations.
The Peel-and-Stick Tile Guide is useful for organizing this inspection before you order material. A clean, smooth, dry, stable wall is the starting condition; preparation cannot turn loose paint or damp drywall into a reliable substrate.

When should you pause instead of testing?
Pause the project if you do not know whether the wall is damp, the paint is loose, or the coating is still curing. A patch test is useful only when the area is representative and the wall is safe to evaluate.
Repair or investigate first when:
- The wall has active water damage.
- The paint lifts when gently touched.
- The surface leaves visible powder on your hand.
- You can see a difference between stable paint and loose edges.
- The wall has heavy texture or large uneven areas.
- You cannot identify whether a strong cleaner will damage the coating.
- The selected tile instructions exclude your surface or room condition.
A successful tile test on one stable corner does not authorize installation over an entire wall with different conditions. The wall is the decision surface, so every major condition needs to be represented in the test.
How should you clean satin paint before peel-and-stick tile?
Clean satin paint with the least aggressive method that removes the actual contamination, then remove cleaner residue and allow the surface to dry completely. For a lightly soiled wall, begin with a clean, soft cloth or a paint-compatible mild cleaning method. For kitchen grease, use the grease-cutting product specified by the paint and tile instructions, followed by clean water or a clean damp wipe as directed.
The goal is not to make the wall chemically bare. The goal is to remove loose dust, grease, grime, soap film, and other residue while keeping the paint film intact.
Sherwin-Williams wall-cleaning guidance advises testing the cleaner and technique in an inconspicuous area, using mild soap and warm water for general cleaning, using a damp cloth to remove cleaner, and avoiding harsh treatment or over-wetting. Benjamin Moore’s fresh-paint care guidance gives similar guidance for using warm water on many walls and following grease-cutting detergent with clean water to remove residual cleaning agent.
A careful cleaning sequence
Remove loose dust first
Use a clean microfiber cloth, soft brush, or vacuum with a suitable soft attachment. Work from the top down so loosened dust does not settle on areas you already cleaned.
Avoid a cloth that has been used with furniture polish, fabric softener, wax, or oily cleaning products. A residue-free cloth is part of the preparation.
Test the cleaning method
Choose a hidden area near the floor, behind an appliance, inside a cabinet-adjacent zone, or where the test tile will later cover the surface. Apply the chosen cleaning method gently.
Check for:
- Color transfer.
- Softening or tackiness.
- A visible change in sheen.
- Smearing.
- Swelling or raised paint.
- A sticky or slippery film after drying.
If the test changes the satin finish, stop and reassess the cleaner or technique.
Match the cleaner to the contamination
For ordinary dust or light grime, a mild, paint-compatible method may be enough.
For kitchen oil or grease, dry dusting is unlikely to be sufficient. Use the cleaner identified by the paint and tile manufacturers for that coating and product. Some peel-and-stick instructions reference a degreaser such as TSP, while paint-care instructions may recommend a grease-cutting detergent. These directions should not be treated as interchangeable recipes for every satin wall. The concentration, dwell time, rinse method, and paint formulation all matter.
For soap film near a sink or bathroom, use a method that removes the film without leaving another film behind. A wall can feel clean and still have a residue that interferes with adhesive contact.
Avoid flooding the wall
Use a damp cloth rather than soaking the surface. Excess water can enter seams, damaged areas, fastener holes, or porous repairs. Drywall and paint respond differently to moisture, and an over-wet wall may need much longer before testing.
Remove cleaner residue
If the cleaner instructions require rinsing, use clean water and a clean cloth. Change the water when it becomes dirty. A second clean wipe is often more useful than adding more detergent.
Residue is one reason the phrase “I cleaned the wall” does not provide enough information. Record what you used, whether you rinsed, and how the wall felt after drying.
Allow the wall to dry fully
The surface should feel dry, clean, and free of a cool or damp sensation before adhesive is applied. Do not use the absence of visible water as proof that the wall is ready. Drying time depends on water amount, ventilation, temperature, humidity, wall porosity, and the condition of the paint.
The product instructions control the final preparation requirement. If they call for a longer wait or a particular cleaner, follow them.
Should you use rubbing alcohol, solvent, or a strong degreaser?
Do not introduce a solvent simply because it seems likely to remove grease. A solvent can soften, dull, discolor, or partially dissolve a paint film. It can also leave a residue that is difficult to detect.
Use only a cleaner compatible with the actual paint and selected tile instructions. Test it in a hidden location first. If the product instructions do not identify the cleaner or if the paint is old, unknown, fragile, or visibly damaged, a small test is more valuable than a stronger chemical.
Does satin paint tolerate more cleaning than flat paint?
Satin paint is generally more washable than flat or matte paint, but that does not make aggressive scrubbing safe. Paint formulation, age, cure status, and prior wear still matter. Sherwin-Williams and Benjamin Moore both advise gentle, non-abrasive cleaning and a hidden-area test before using a method across the wall.
A satin finish can hide a cleaning mistake until light hits the wall at an angle. If the cleaned area looks shinier, duller, streaked, or polished, the finish has changed. That may create a visible patch after tile is removed.
For a deeper comparison of preparation decisions, see the glossy-paint peel-and-stick preparation guide. The wall in this article is satin rather than glossy oil paint, so use the comparison for reasoning about cleaning, cure, scuffing, and removal risk rather than as a direct product approval.
How long should satin paint cure before adhesive tile?
Wait according to both the paint manufacturer and the tile manufacturer, using the longer or more cautious requirement when the instructions differ. Dry to the touch is not the same as fully cured.
A paint can feel dry within hours while its coating continues to harden. Benjamin Moore explains that cure time depends on the specific product and gives a typical Regal Select Interior reference of 14 days to full cure. A separate Benjamin Moore care page gives about 30 days as general guidance for full cure for most walls. WallPops states at least four weeks after painting for its cited backsplash products, and Smart Tiles gives a product-specific fresh-paint waiting period of 21 days in its FAQ. These figures describe the cited products or paint references; none guarantees adhesion for every paint and tile combination.
Why do cure times differ?
Cure depends on more than the calendar. Relevant variables include:
- Paint chemistry.
- Film thickness.
- Number of coats.
- Primer and substrate.
- Temperature.
- Humidity.
- Ventilation.
- Whether the wall was cleaned or exposed to moisture.
- The technical data for the actual paint product.
If you know the paint brand and product, find its technical data sheet or current care guidance. If you do not know the product, a conservative waiting period and a small-area test reduce uncertainty, but they cannot replace product-specific instructions.
The test should also include a removal check. A paint that is still relatively soft may respond differently to adhesive contact and later removal than a fully cured paint film.
Is one month always enough?
No universal interval is established by the supplied sources. Some products reference 14, 21, 28, or 30 days, while others state four weeks or longer if the paint manufacturer requires it. Those intervals are useful reference points, not a guarantee.
If the wall was painted recently and you cannot identify the paint product, waiting longer is generally the more cautious choice. If the room has high humidity, limited ventilation, or a thick coating, give the paint more time and test in a representative area.
The Stickwoll Installation & Care Guide can be used to review the store’s basic sequence for a clean, smooth, dry wall, tile smoothing, edge checks, and gentle removal. Confirm the current instructions for the exact tile before installation.
Should you scuff satin paint before peel-and-stick tile?
Usually, do not scuff-sand a sound satin wall automatically. Clean and test first unless the selected tile instructions, paint system, or surface condition gives you a clear reason to use light abrasion.
Scuff sanding means lightly abrading the coating to reduce sheen or create a more uniform surface. It also creates dust, changes the visible finish, and may increase the chance of paint damage during later removal. The supplied manufacturer guidance supports light sanding of glossy or nonporous surfaces in some painting-preparation situations, and it allows sanding as part of correcting certain uneven surfaces. It does not establish that every satin-painted wall bonds better to peel-and-stick tile after sanding.

When might light scuffing be reasonable?
Light abrasion may be worth testing when:
- The tile instructions specifically call for it.
- The paint is unusually slick or nonporous.
- The wall has a minor surface irregularity that can be smoothed safely.
- You are comparing cleaned-only and lightly scuffed conditions in a controlled patch test.
- You accept that the satin sheen may change in the test area.
- You can remove all sanding dust before applying adhesive.
If the wall is smooth, stable, and reasonably clean, sanding can create a new problem without solving the original one. A freshly sanded surface carries dust, and dust must then be removed without damaging the coating.
How should you scuff-test satin paint?
Do not sand the whole wall first. Divide a hidden or low-visibility test area into sections:
| Test condition | Preparation | What it can tell you |
|---|---|---|
| Untreated | No cleaning or sanding | A baseline only; it does not represent a properly prepared installation |
| Cleaned-only | Clean according to the paint and tile instructions, rinse or wipe residue away, and dry fully | Whether ordinary preparation is enough for this wall and tile |
| Lightly scuffed | Clean, lightly abrade a small area if permitted, remove every trace of dust, and dry | Whether the added preparation changes contact, edge behavior, or removal risk |
Keep the tile, paint, wall section, pressure, room conditions, and observation period as consistent as possible. This is a practical within-wall comparison, not a published adhesion study. The available sources support small-area testing, consistent preparation, firm pressure, and inspection before full installation, but they do not report comparative results proving one of these conditions universally superior.
In many projects, cleaning-only is the better first test because it preserves the existing satin finish and gives you information about the wall as it currently exists. If that test fails because of weak contact, the cause should be diagnosed before assuming sanding is the answer.
What should a peel-and-stick tile adhesion test include?
A useful test places a representative tile or sample on the actual wall, prepared with the same method you plan to use for the full installation. It should record both adhesion behavior and removal behavior.
WallPops advises testing in an inconspicuous location before applying its cited backsplash products to the desired area. Smart Tiles recommends testing one or two tiles when underlying texture or surface conditions may affect the result.

Choose the right test location
The best location is hidden enough that a small mark is acceptable but similar enough to the final installation area that the result means something.
For example:
- Test near the kitchen backsplash rather than on a clean wall across the room.
- Test near the bathroom vanity if the tile will be used there.
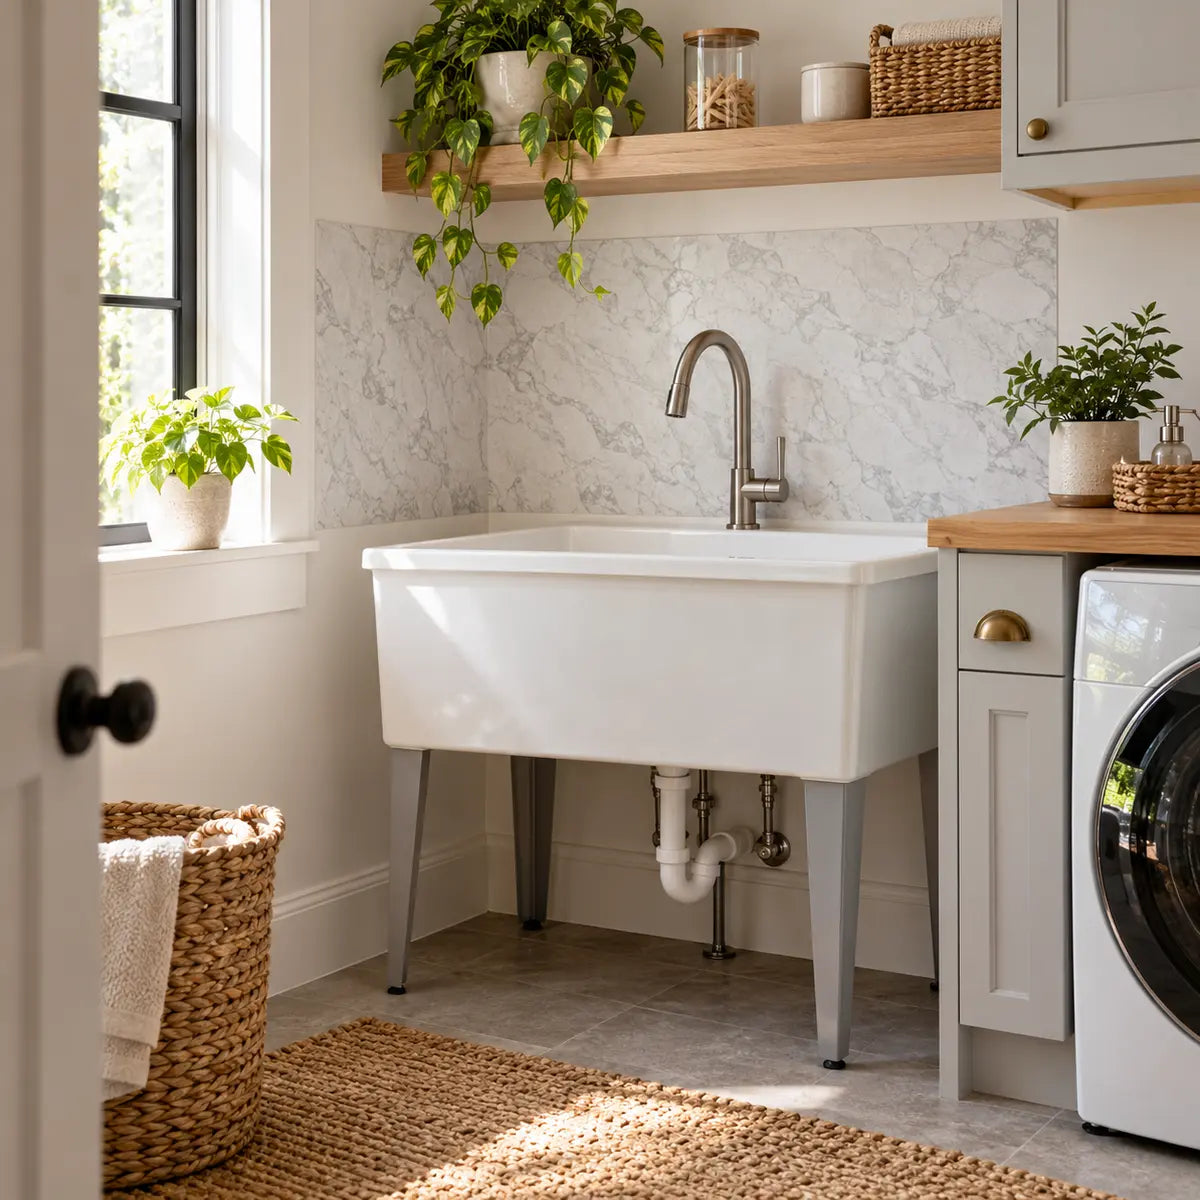
- Test near the laundry backsplash if humidity is part of the project.
- Test over the same paint, repair history, and wall texture as the main installation.
- Include a corner, seam, or edge only if the full project will contain the same feature.
Avoid testing only on the easiest part of the wall. A perfect tile bond on a clean upper corner tells you little about a greasy area behind a cooktop.
Record the conditions before applying the tile
Write down:
- Wall substrate: painted drywall, plaster, panel, or another material.
- Paint brand and product, if known.
- Paint color and satin finish.
- Approximate paint age.
- Whether the paint is known to be cured.
- Cleaning product and method.
- Whether the wall was rinsed or wiped after cleaning.
- Drying time before application.
- Whether the area was scuff-sanded.
- Tile product, pattern, backing, and lot information if available.
- Room and exposure conditions.
- Date and time of installation.
- Pressure and smoothing method.
- Any gaps, bubbles, sliding, or edge lift at application.
This record keeps the result tied to its actual conditions. It prevents a common mistake: treating a test performed on one paint, one tile, and one room as proof for every future project.
Apply the test tile according to current instructions
Use a representative tile or sample rather than a tiny fragment if the product permits. A small fragment may have a different edge-to-area ratio and may not reproduce the weight or shape of the actual tile.
Keep the adhesive free from dust, dirt, oils, and fingerprints. Align the piece before committing it. Press firmly across the entire tile, paying attention to the edges and corners. Use the smoothing tool or pressure method specified by the product. Comparable manufacturer instructions emphasize firm pressure, avoiding contamination of the adhesive, and smoothing out air gaps where applicable.
Do not press harder to compensate for a damp, greasy, loose, textured, or incompatible wall. Pressure improves contact; it does not repair a failed surface.
What should you observe?
Inspect the test tile:
- Immediately after application.
- After the product’s stated set period.
- After the wall has experienced the room’s ordinary conditions.
- After exposure to the type of cleaning, humidity, warmth, or splash expected in the final location.
- Before and during careful removal.
There is no universal observation period that applies to every adhesive tile, paint system, and room. One checked Smart Tiles guide refers to a 48-hour set period for that product line, while other instructions provide different product-specific guidance. Use the current instructions for your selected tile and observe longer if the room has meaningful heat, humidity, or cleaning exposure.
Patch-test decision aid: pass, pause, or stop
Use this static decision aid after the test. It is a practical guide for organizing observations, not a laboratory rating and not a guarantee of long-term performance.
| Observation | Decision | Next action |
|---|---|---|
| Tile lies flat, edges remain attached, no slipping or bubbles appear, and the paint remains intact during careful removal | Pass with conditions | Confirm product room limits, document the preparation, and install gradually while checking each edge |
| Tile adheres initially but shows edge lift, sliding, bubbles, or a soft bond | Pause | Inspect for grease, residue, moisture, unevenness, insufficient pressure, uncured paint, or product incompatibility; repeat only after correcting the likely cause |
| Tile pulls paint, exposes weak coating, leaves significant residue, or damages the wall during the test | Stop | Do not cover the full wall unless you choose a different installation system or repair and recoat the surface |
| Test area succeeds but the intended room has much greater heat, steam, splash, or grease exposure | Pause | Run a representative exposure test or verify the product’s current room limitations |
| Test uses a different tile, paint, surface, or preparation method than the final project | No decision yet | Repeat with the actual product and intended preparation |
A pass means the tested combination behaved acceptably under the tested conditions. It does not mean every section of the wall will behave identically or that removal will be damage-free after a long installation period.
What counts as a failed test?
Treat these signs as meaningful:
- The tile slides after initial placement.
- An edge lifts without deliberate removal.
- Corners curl upward.
- Bubbles remain after proper smoothing.
- The tile bridges over a depression.
- Adhesive contacts the wall only in spots.
- The paint becomes soft, tacky, or visibly altered.
- The tile pulls away with flakes of paint.
- The test leaves residue that cannot be removed without aggressive treatment.
- Moisture or heat causes visible lifting.
A single small bubble may have a local cause, such as a crease or trapped air. Repeated bubbles, edge lift, or movement across multiple test pieces point to a larger preparation or compatibility problem.
Compare room exposure before full installation
The same satin-painted wall can present different risks in a kitchen, bathroom, laundry area, or accent wall. The small test should represent the room’s real conditions.

Kitchen backsplash
Kitchen walls may face grease, steam, heat, repeated wiping, and contact around appliances. A wall that looks clean after a quick wipe may still have oil contamination.
For a kitchen test:
- Place the test near the actual backsplash area.
- Include the same distance from the cooktop or range.
- Clean for grease rather than dust alone.
- Check whether the selected tile has specific heat and clearance limits.
- Consider repeated wiping during normal cooking cleanup.
- Inspect edges after exposure to the room’s ordinary warmth and moisture.
Do not transfer a clearance or temperature limit from another brand’s product. WallPops and Smart Tiles provide product-specific exposure guidance, including distinctions between water-resistant and waterproof use, direct shower exposure, stove areas, and heat. Those limits belong to the cited products and should not be assigned to an unidentified Stickwoll tile.
Bathroom vanity or sink wall
A bathroom vanity backsplash may have splash and humidity without receiving direct shower spray. Soap residue, toothpaste, hairspray, cleaning products, and condensation can affect the surface.
For a bathroom test:
- Clean away soap film and residue.
- Test near the sink or vanity rather than on a dry hallway wall.
- Confirm ventilation and expected humidity.
- Keep the test away from direct shower spray unless the selected product expressly allows that use.
- Check edges after normal splash and cleaning exposure.
A product described for bathroom use may still exclude direct shower or bathtub exposure. Review the product-specific instructions before treating “bathroom” as a blanket approval. For more detail on exposure zones, see the bathroom tile exposure guide.
Laundry area
Laundry rooms can have humidity, vibration, lint, detergent residue, and occasional splashes. The wall may stay dry most of the time yet experience repeated changes in moisture and temperature.
Test near the actual appliance zone and inspect for:
- Lint and dust accumulation.
- Detergent or softener residue.
- Condensation.
- Wall movement or vibration.
- Moisture near supply lines and utility sinks.
- Edges that could lift during cleaning.
Accent wall or low-exposure room
An accent wall in a dry living area generally has fewer exposure variables, but the paint still needs to be sound and cured. Dust and unevenness remain relevant. Removal risk may matter more because a large visible wall can show a paint change after the tile comes down.
The lower exposure may make a clean, well-documented patch test more representative. It does not remove the need to confirm product instructions.
How do you diagnose lifting, bubbles, slipping, or weak edges?
Visible failure symptoms can suggest likely causes, but appearance alone cannot prove the diagnosis. Use the symptom as a starting point, then compare it with the preparation record.
| Symptom | Possible contributors | What to check |
|---|---|---|
| Edge lifting | Grease, dust, cleaner residue, insufficient pressure, uncured paint, moisture, tile stress, uneven wall | Cleanliness, cure status, edge contact, room exposure, and product instructions |
| Corner curl | Tile memory, misalignment, contaminated adhesive, uneven corner, inadequate pressure | Whether the corner was flat and clean before installation |
| Bubbles | Trapped air, wall depression, texture, crease, incomplete smoothing | Whether bubbles repeat in the same wall features |
| Tile sliding | Wet or contaminated surface, insufficient initial contact, unsuitable adhesive, heat | Dryness, residue, pressure, and product compatibility |
| Paint pulled during removal | Strong adhesive bond, weak paint, uncured coating, long dwell time, removal technique | Paint condition, cure status, product removal instructions |
| Sticky residue | Adhesive construction, heat, dwell time, paint interaction, removal method | Product guidance and a small hidden removal test |
| Tile releases with paint attached | Paint-to-wall bond is weaker than the adhesive bond | Surface stability; do not continue without repair |
| One isolated failure | Local contamination, damage, unevenness, or application error | Compare the failed area with nearby successful areas |
The failure location is informative. If adhesive remains on the wall while the tile face releases, the tile-to-adhesive interface may be involved. If paint comes off with the tile, the paint-to-wall interface is a concern. If the adhesive releases cleanly but the tile never made full contact, look for unevenness, dust, bubbles, or pressure problems.
A repair is appropriate only after the cause is reasonably understood. Simply adding more pressure, another cleaner, or a second tile over a failed area can hide the problem without correcting it.
Can primer fix weak satin paint?
Primer may be useful in a larger repair or surface-preparation system, but it is not a substitute for sound paint, a dry wall, or product compatibility. If the existing coating is peeling, chalky, or contaminated, applying primer over it may preserve the underlying problem.
For a primer decision, review the controlled primer test for peel-and-stick tile. Use it to think through paint condition, primer compatibility, cure status, edge lift, and removal damage. A primer should be part of a documented repair plan rather than an automatic response to weak adhesion.
Does peel-and-stick tile damage paint?
It can. Peel-and-stick tile should not be treated as damage-free or universally reversible on painted drywall. Paint loss, adhesive residue, visible sheen changes, and drywall-paper damage are possible, and the risk depends on the tile, adhesive, paint condition, installation time, room conditions, and removal technique.
WallPops warns that adhesive may remove paint. Smart Tiles gives product-specific removal guidance that includes using heat and pulling slowly, while Floor & Decor states that damage-free removal cannot be guaranteed for its strong-bond product. These warnings support a cautious conclusion, not a universal prediction for every satin wall.

A product may be described as renter-friendly or removable while still leaving residue or removing paint on a particular wall. Those descriptions should be treated as product claims with conditions, not as a promise about your exact coating.
What increases paint-damage risk?
Risk may be higher when:
- The paint is fresh or not fully cured.
- The coating is weak, chalky, poorly bonded, or old.
- The adhesive is strong or intended for long-term use.
- The tile remains installed for a long time.
- The room becomes hot or humid.
- The tile is pulled straight away from the wall.
- A scraper or solvent is used aggressively.
- The wall has drywall-paper damage or multiple paint layers.
- The tile was pressed very firmly and fully set.
- The surface was scuff-sanded, leaving a changed or weakened finish.
A stronger bond can improve holding power while making removal more difficult. That is why the removal part of the patch test deserves as much attention as the initial adhesion.
How should you remove the test tile?
Follow the product’s current removal instructions first. A cautious general sequence is:
- Choose the edge or corner that the product instructions identify as the starting point.
- Warm the tile only if the instructions permit or recommend it.
- Pull slowly and close to the wall rather than jerking outward.
- Stop if the paint begins to lift.
- Do not scrape aggressively or introduce solvent without confirming compatibility.
- Photograph or record residue, paint loss, sheen change, and exposed substrate.
- Compare the result with your tolerance for repair before covering the full wall.
The test area may still show a small mark, so choose its location carefully. If you are renting, confirm the owner’s rules and decide whether a visible paint repair would be acceptable before installation.
Should you install over the whole wall after one successful test?
Proceed only when the test represents the final wall and the final product. One successful tile is useful evidence, but it does not prove that every section has identical paint, contamination, flatness, moisture, or exposure.
Before full installation, confirm:
- The selected tile instructions permit the wall type.
- The paint is sound and sufficiently cured.
- The cleaning method did not alter the satin finish.
- The wall is fully dry and free of cleaner residue.
- The test tile remained stable through the product’s stated set period.
- The test area experienced conditions similar to the full project.
- Removal did not create unacceptable paint damage or residue.
- The intended room falls within the product’s heat and moisture limits.
- You have recorded the preparation so the same method can be repeated.
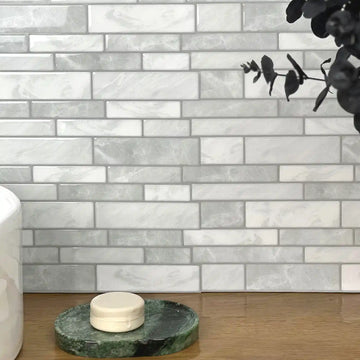
For Stickwoll products such as Dual Ceramics, Subway Magic, or Subway Marble, review the current product specifications and instructions for the exact surface, room, heat, moisture, adhesive, and removal conditions. The supplied product records describe these as self-adhesive, grout-free wall tiles for uses that include kitchens, bathrooms, and accent walls, with possible residue during removal. They do not establish universal approval over every satin coating.
A cautious installation sequence
- Clean and dry the wall using the documented method.
- Plan the layout before exposing adhesive.
- Keep the adhesive away from dust, dirt, oil, and fingerprints.
- Apply each tile carefully according to the current instructions.
- Press and smooth the tile for full contact.
- Check edges and corners immediately.
- Avoid moving the tile after it has been firmly set unless the product instructions permit repositioning.
- Allow the adhesive to set for the product’s stated period.
- Recheck lifting edges, bubbles, slipping, and room exposure.
- Keep a spare tile and your preparation notes for future repairs.
Do not rush the first row because later rows depend on its position. Do not cover an unstable edge with trim or caulk before understanding why it lifted. Concealing a failure can make later repair more difficult.
What if the test fails?
A failed test calls for diagnosis, not a stronger adhesive by default.
If the tile lifts at the edges
Check for grease, dust, cleaner residue, moisture, and inadequate pressure. Confirm that the wall is flat and that the tile was applied without bending or stretching. If the paint is fresh, wait for the manufacturer’s cure requirement. If several causes are possible, repeat the test only after correcting one clearly identified condition.
If the tile bubbles
Inspect the wall beneath the bubble. A shallow depression, texture, seam, or crease may prevent full contact. If bubbles appear in the same pattern across several test pieces, the wall surface may be the issue. A bubble that appears only once may be an application defect, but it still deserves inspection before full installation.
If the tile slides
The surface may be wet, greasy, coated with residue, or unsuitable for the adhesive. Check whether the tile was aligned and pressed according to current instructions. Do not treat sliding as something that will resolve through more pressure if the wall remains contaminated or damp.
If paint comes off during removal
Stop the project. The test has shown that the paint layer or coating system is vulnerable to the adhesive or removal method. Repairing the wall and applying a compatible primer may be possible, but that is a separate preparation project. If the goal is a low-risk rental update, choose a method that does not depend on a strong bond to the painted surface.
If the test succeeds but removal leaves residue
Decide whether you can accept the cleanup before full installation. Residue may be manageable on a small patch and frustrating across a full backsplash or accent wall. The product’s removal instructions should guide the method, and any cleaning approach should be tested on the actual paint.
Frequently Asked Questions
Can peel-and-stick tile be used over satin-painted drywall?
It may be, if the selected product permits painted drywall and the coating is sound, smooth, clean, dry, and sufficiently cured. Satin sheen alone does not establish compatibility. Inspect the wall, follow the current tile and paint instructions, and test a representative area before full installation.
How do I clean satin paint before peel-and-stick tile?
Remove loose dust first. Use a paint-compatible cleaning method suited to the contamination, test it in a hidden area, remove cleaner residue with clean water or a clean damp wipe when instructed, and allow the wall to dry fully. Kitchen grease usually requires more than dry dusting. The exact cleaner should follow the paint and tile instructions because products differ.
Should I scuff satin paint before peel-and-stick tile?
Do not sand automatically. The supplied evidence supports light sanding in some painting-preparation contexts, but it does not prove that every satin wall bonds better to peel-and-stick tile after scuffing. Clean and test first unless the selected product instructions call for abrasion or a controlled test shows that light scuffing is appropriate.
How long should satin paint cure before adhesive tile?
Use the actual paint manufacturer’s cure guidance together with the selected tile manufacturer’s fresh-paint waiting period. Dry-to-touch time may be much shorter than full cure. Current comparable instructions reference periods ranging from roughly two to four weeks or longer, depending on the product and conditions, but no single interval guarantees adhesion for every combination.
Does peel-and-stick tile damage paint?
It can remove paint, leave residue, change the sheen, or damage the wall surface. Risk depends on the paint’s bond and cure, the tile adhesive, time installed, room exposure, and removal technique. Test both adhesion and removal in an inconspicuous area before covering the wall.
Can a successful test guarantee the whole wall will hold?
No. A successful test applies most directly to the tested paint, preparation, tile, pressure, room condition, and location. Use a representative area and repeat the preparation consistently across the wall. A test reduces uncertainty; it does not create a universal guarantee.
Make the final decision from the wall’s evidence
A satin-painted wall is a reasonable candidate for peel-and-stick tile only when the full set of conditions supports it:
- The paint is firmly bonded.
- The wall is smooth enough for full tile contact.
- There is no active moisture problem.
- Dust, grease, soap film, and cleaner residue have been removed.
- The paint has reached the cure stage required by the paint and tile instructions.
- The selected product permits the intended surface and room.
- The patch test remains stable through the product’s set period and representative exposure.
- Removal does not create unacceptable paint damage or residue.
Choose pass when those conditions are supported by your inspection and test. Choose pause when cleaning, curing, repair, product verification, or exposure testing remains incomplete. Choose stop when the paint is loose, chalky, damp, badly uneven, incompatible with the product, or damaged during the test.
The most reliable approach is also the least wasteful: inspect the wall, clean with care, avoid unnecessary sanding, document the preparation, test a representative tile, inspect the bond, and test removal before buying into a full-wall installation.


Kommentar hinterlassen
Diese Website ist durch hCaptcha geschützt und es gelten die allgemeinen Geschäftsbedingungen und Datenschutzbestimmungen von hCaptcha.