

















Stickwoll Material Lab · Five-Year Comparison
A controlled, whole-system comparison of installed weight, heat-zone approval, stain recovery, sealing, repair effort, removal risk, and five-year ownership cost. Material choice is one part of long-term fit; the Kitchen Backsplash Guide helps you compare it with wall layout, heat and splash exposure, edges, cleaning, and repair access.
Two equal-area backsplash samples sit on a scale beside measured portions of cooking oil, coffee, tomato sauce, turmeric, red wine, and lemon juice. They may look equally convincing across a showroom, but appearance reveals little about wall load, heat restrictions, stain recovery, repair effort, removal damage, or five-year cost.
Three principles guide this comparison:
- Complete assemblies matter: Face material weight tells only part of the story. Adhesive, mortar, backer board, grout, sealer, wall preparation, and edge treatments affect the finished system.
- Test results have boundaries: An observation from one polymer panel or one honed marble sample cannot represent every faux or natural stone product.
- Your use case determines the winner: Cooking frequency, appliance type, ownership status, budget, visual expectations, and maintenance tolerance should drive the choice.
We call the combined measure the Five-Year Backsplash Burden: the acquisition cost, installation effort, upkeep hours, stain recovery, repair exposure, replacement cost, and property risk accumulated over five years.
That is a more useful metric than asking which material looks best on installation day.
Test disclosure: The controlled protocol and scoring framework below provide a repeatable comparison model. Product specifications, installation approvals, prices, and sample results must be confirmed for the exact products being considered. Requirements vary by material, finish, adhesive, appliance, substrate, and manufacturer.
Product-class identification
Can you identify what is actually made of stone?
A thin natural stone layer bonded to a flexible backing and supplied with factory adhesive belongs to which class?
How do the complete backsplash systems compare before daily use?
Can you trust a sample when it does not show the adhesive, mortar, wall preparation, heat restrictions, or finished assembly weight?
This section compares backsplash systems using installed load, preparation, appliance approval, reversibility, and installation complexity.
The correct preinstallation metric is the Installed-System Suitability Index. It evaluates whether the entire backsplash assembly suits the wall and kitchen, rather than ranking a decorative face in isolation.
A lightweight panel can fail if it is installed over dust, grease, loose paint, or texture. Natural stone can perform for decades yet still be the wrong choice for damaged drywall, a short-term rental, or a project without adequate installation skill.
What counts as faux stone, genuine-stone veneer, or natural stone tile?
Do labels such as “stone tile,” “stone look,” and “stone veneer” leave you unsure what you are actually buying?
These definitions separate printed products, molded panels, composites, thin stone veneer, and full natural stone tile before they are compared.
Faux stone is a manufactured surface intended to reproduce the color, pattern, texture, or joint lines of stone. The visible stone may be printed, molded, embossed, or recreated with mineral-filled polymers.
That definition covers products with very different performance characteristics.
| Backsplash type | What the visible surface contains | Typical attachment | Grout required? | Main identification clue |
|---|---|---|---|---|
| Printed vinyl film | Printed stone image over a thin vinyl or plastic layer | Pressure-sensitive adhesive | No | Very thin profile with limited relief |
| Polymer relief panel | Molded or embossed plastic-based surface | Factory-applied adhesive or construction adhesive | Usually no | Raised joints and a three-dimensional texture |
| Mineral composite tile | Resin or polymer mixed with mineral filler | Adhesive backing or separate adhesive | Product-specific | Heavier and more rigid than basic vinyl |
| Genuine-stone veneer | Thin layer of real stone bonded to a backing | Factory adhesive or separate setting material | Product-specific | Natural variation continues through the stone layer |
| Natural stone tile | Cut marble, granite, travertine, slate, or another stone | Mortar meeting the tile and substrate requirements | Usually | Stone extends through the tile thickness |
A seller’s use of the word “stone” does not confirm that the product contains natural stone. Read the composition statement, safety data sheet, installation instructions, and technical sheet.
A genuine-stone veneer can also be peel-and-stick. That makes “natural stone veneer vs. peel-and-stick stone backsplash” a misleading comparison unless the composition and attachment method are stated separately.
What should you record before buying?
Use a specification record rather than relying on a product title:
- ◆Face composition: Record vinyl, PVC, PET, polyurethane, mineral composite, aluminum composite, genuine stone veneer, or solid stone.
- ◆Backing construction: Identify foam, fabric, metal, fiberglass, mesh, factory adhesive, or no backing.
- ◆Actual dimensions: Measure the usable coverage after overlaps, interlocking edges, and pattern matching.
- ◆Thickness: Record the face thickness and the maximum installed profile.
- ◆Lot information: Save the production lot, shade, caliber, or batch number where supplied.
- ◆Technical documents: Archive the installation guide, warranty, cleaning instructions, fire information, and appliance restrictions.
- ◆Replacement supply: Buy spare material from the same lot because colors and printed patterns can change.
In our experience, the biggest category mistake is assuming all peel-and-stick products are thin vinyl. Some are flexible decorative films; others are rigid, textured assemblies. Their heat tolerance, weight, cutting method, and removal behavior can differ sharply.
How much does each complete backsplash assembly weigh?
Could a sample that feels manageable become a meaningful wall load after mortar, backer board, grout, and trim are included?
A square-foot calculation converts sample measurements into a deterministic installed-load benchmark.
Backsplash weight should be expressed in pounds per square foot, abbreviated lb/ft². This allows products with different sample dimensions to be compared on equal terms.
Use this formula:
Face weight in lb/ft² = sample weight ÷ sample area in square feet
For a rectangular sample:
Area in square feet = length in inches × width in inches ÷ 144
A 10-by-10-inch sample covers 0.694 square feet. If it weighs 0.42 pounds, its normalized face weight is:
0.42 ÷ 0.694 = 0.61 lb/ft²
That figure still excludes primer, adhesive, mortar, grout, backer board, sealant, trim, and waste.
What should a complete weight record contain?
A repeatable scale record should disclose:
- ◆Scale resolution: Use a scale reading to at least 0.01 pound for small samples.
- ◆Sample dimensions: Measure usable face coverage, not package dimensions.
- ◆Condition: State whether the sample is dry, acclimated, sealed, or attached to backing.
- ◆Face weight: Report the measured product weight separately.
- ◆Installation additions: Label mortar, grout, backer, primer, and sealer values as measured or estimated.
- ◆Waste allowance: Keep cutting waste out of wall-load calculations but include it in purchasing costs.
The following example shows how assembly components change the comparison. These values are planning assumptions, not universal category specifications.
| Assembly component | Self-adhesive polymer panel | 3/8-inch natural stone tile |
|---|---|---|
| Face material | 0.60 lb/ft² | 5.50 lb/ft² |
| Factory adhesive | Included | Not applicable |
| Primer, if required | 0.03 lb/ft² estimated | 0.03 lb/ft² estimated |
| Mortar | Not applicable | 1.20 lb/ft² estimated |
| Grout | Not applicable | 0.35 lb/ft² estimated |
| Cementitious backer, if required | Not assumed | 2.30 lb/ft² estimated |
| Sealer after drying | Negligible retained mass | Negligible retained mass |
| Estimated installed load | 0.63 lb/ft² | 9.38 lb/ft² |
For a 30-square-foot backsplash, those assumptions produce approximately:
- Polymer assembly: 18.9 pounds distributed across the wall.
- Stone assembly: 281.4 pounds distributed across the wall.
This is not a structural ruling. It is a quantitative baseline for asking better questions about the substrate, fastening, backing, mortar coverage, and wall condition.
The Tile Council of North America explains that tile performance depends on the complete installation system, including the substrate, setting material, movement accommodation, and workmanship—not the tile alone.[1] ANSI A108 installation standards provide related workmanship and substrate context for tile assemblies.[2]

Why can face weight be misleading?
Weight acts like the listed weight of a suitcase before it is packed. The shell matters, but the complete load determines how the system must be handled.
A full natural stone installation may require:
- ◆Substrate correction: High spots, depressions, damaged drywall, contamination, or movement can require repair.
- ◆Setting material: Mortar type and coverage must suit the stone, backing, substrate, and exposure.
- ◆Backer material: Some walls or specifications call for a tile backer rather than direct installation over existing drywall.
- ◆Joint material: Grout and flexible sealant contribute little weight but affect maintenance and movement performance.
- ◆Edge finishing: Exposed stone edges may require trim, polishing, profiling, or a finished return.
Do not infer that a wall is acceptable because the decorative area is small. Follow the tile manufacturer, setting-material manufacturer, applicable standards, and local requirements.
Can peel-and-stick stone go behind gas, electric, or induction stoves?
Are “heat-resistant” and “kitchen-safe” enough to approve a self-adhesive panel behind your stove?
Stove suitability must be verified against the exact backsplash instructions, appliance clearances, listing conditions, wall construction, and local rules.
Peel-and-stick stone can go behind some stoves only when the product manufacturer permits that use and every required clearance and surface-temperature limit is met. “Heat-resistant” is not a universal authorization for installation behind any cooking appliance.
The appliance fuel label alone does not settle the question.
| Appliance type | Main backsplash concern | What must be verified |
|---|---|---|
| Gas range or cooktop | Open flame, hot combustion gases, rear burners, clearance to combustible finishes | Appliance instructions, panel restrictions, rear clearances, local code |
| Electric coil range | Radiant heat from exposed elements and hot cookware | Required clearances, panel temperature limit, wall protection requirements |
| Radiant glass cooktop | Hot cookware near the rear wall and sustained surface heat | Appliance manual and backsplash technical sheet |
| Induction cooktop | Lower direct heating of the cooktop surface, but hot cookware and steam remain | Product approval, cookware clearance, appliance instructions |
| Slide-in range | Small rear gap can expose wall finishes to heat and spills | Range manual, counter configuration, panel edge treatment |
The U.S. Consumer Product Safety Commission advises consumers to follow appliance installation instructions and maintain safe cooking practices.[3] The appliance manual is especially important because clearances differ by model.
A panel’s marketing page should never override its technical instructions.
Stove-safety decision path
- Identify the exact appliance: Gas, electric coil, radiant glass, induction, or slide-in configuration.
- Read the appliance manual: Record rear clearances and wall-finish restrictions.
- Read the panel technical sheet: Confirm permitted locations, temperature limits, and exclusions.
- Compare both documents: Use the more restrictive requirement where applicable.
- Stop if approval is missing: Choose another documented system rather than inferring suitability from marketing language.
What language should you search for in a technical sheet?
Look for exact statements covering:
- ◆Permitted locations: Confirm whether kitchen backsplashes and cooking areas are named.
- ◆Prohibited locations: Search for exclusions around open flames, direct heat, cooktops, ranges, fireplaces, and ovens.
- ◆Maximum temperature: Determine whether the number refers to short exposure, continuous service, or laboratory material tolerance.
- ◆Required clearance: Record the minimum distance from burners, heating elements, or hot surfaces.
- ◆Substrate requirements: Heat approval does not cancel wall-preparation rules.
- ◆Warranty exclusions: Some products can physically tolerate an area while the warranty excludes it.
- ◆Code status: Decorative test data is not automatically equivalent to approval as a required noncombustible wall protection system.
The performance degradation curve of a pressure-sensitive adhesive can change with heat, grease, steam, substrate chemistry, and repeated thermal cycling. A panel that remains flat during one hot meal has not been empirically demonstrated to survive five years behind a range.
For products such as Olive Lines or Platinum Stones, the governing metric is verified installation compatibility—not a general statement about peel-and-stick tile. Their current instructions must be benchmarked against the exact appliance manual and wall conditions before installation.
What preparation do smooth, painted, textured, or rental walls require?
Could a panel stick firmly enough to survive cooking but also remove cleanly when a lease ends?
Substrate evaluation reveals the conflict between dependable adhesion and low-risk reversibility.
A pressure-sensitive backsplash usually performs best on a smooth, clean, dry, stable, nonporous, and properly cured surface. Those same conditions may create a strong bond capable of lifting paint or drywall paper during removal.
“Renter-friendly” is therefore not the same as “damage-free on every rental wall.”
| Wall condition | Main risk | Typical response |
|---|---|---|
| Smooth, sound painted wall | Grease, uncured paint, incompatible coating | Clean, dry, verify cure time, conduct adhesion test |
| Textured wall | Reduced adhesive contact and bridged low points | Smooth the surface or use an approved preparation method |
| Glossy tile | Contamination and weak bonding at grout recesses | Degrease, dry, follow product-specific preparation |
| Loose or chalking paint | Finish detaches with the panel | Remove unstable coating and repair before installation |
| Bare drywall paper | High removal-damage risk | Seal or prime only if permitted and appropriate |
| Rental wall | Deposit exposure and uncertain paint history | Obtain written permission and test in a concealed area |
Substrate preparation means making the supporting surface clean, stable, flat, dry, and compatible with the selected installation system.
Natural stone also requires preparation. Tile industry consensus dictates that mortar cannot compensate reliably for a contaminated, unstable, or unsuitable wall. Flatness, bond compatibility, mortar coverage, joint layout, and movement accommodation all affect the outcome.
How should you perform an adhesion test?
Use the manufacturer’s required test method where one is supplied. A practical screening process is:
- Inspect the coating: Check for peeling, softness, chalking, moisture damage, and previous wallpaper adhesive.
- Clean the test area: Use only a cleaner permitted by the panel manufacturer, then allow the wall to dry fully.
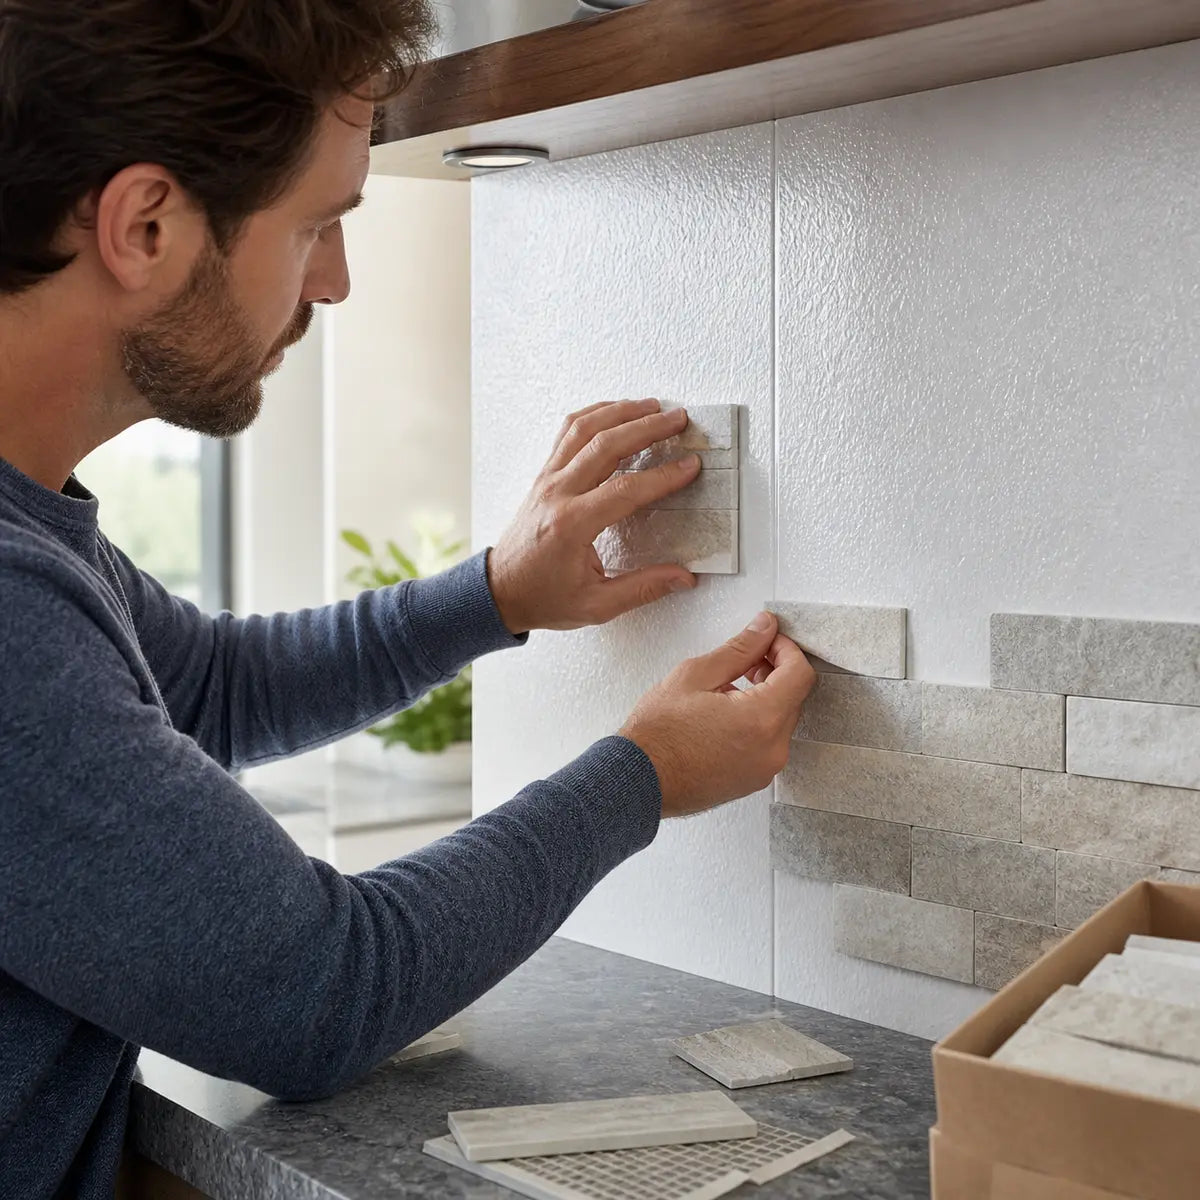
- Apply a production offcut: Use the same lot and installation pressure planned for the project.
- Wait the specified period: Adhesive bond can build over hours or days.
- Expose it realistically: Include normal kitchen humidity and temperature without exceeding product limits.
- Remove it correctly: Use the specified angle, speed, heat, or release method.
- Document the wall: Photograph paint lifting, adhesive residue, drywall-paper damage, and coating discoloration.
A concealed test reduces uncertainty; it does not guarantee clean removal across the entire wall.
For textured peel-and-stick material, attachment behavior can differ across peaks, recesses, printed joints, and cut edges. For a measured look at localized loads, failure patterns, and safer hanging decisions, examine the textured peel-and-stick hook weight test. It supplies a quantitative baseline for understanding localized loading and failure modes. It should not be treated as approval to hang objects from every tile.
Renter-risk checklist
Check each safeguard you have completed. The status updates as you work.
0 of 5 safeguards completed
Which backsplash creates the lower five-year ownership burden?
Could the cheaper installation become more expensive after cleaning, resealing, seam repairs, tile replacement, or rental-wall damage?
The Five-Year Backsplash Burden combines money, maintenance time, recovery performance, repairability, and property risk.
Neither backsplash wins every category. A polymer panel can minimize installation labor but carry heat, seam, pattern-repeat, and removal limitations. Natural stone can deliver authentic variation and long service life while demanding more installation work and material-specific care.
The useful comparison is a standardized evaluation of the full ownership period.
Does either backsplash need sealing, and how is resealing determined?
Should every natural stone backsplash be sealed annually, and does faux stone ever need a protective coating?
Sealing decisions should follow material porosity, finish, manufacturer instructions, exposure, and observed water absorption—not a universal calendar rule.
Most vinyl and polymer faux stone panels do not need a penetrating stone sealer. Applying an unapproved coating can change sheen, soften the surface, interfere with seams, trap residue, or void warranty coverage.
Natural stone sealing is material-specific. A penetrating stone sealer enters pores and reduces liquid absorption while generally leaving no thick surface film.
It does not make stone stainproof or acidproof.
The Natural Stone Institute explains that sealing needs vary by stone type and application. It also notes that some stones may not require sealing, while more absorbent materials can benefit from it.[4]
How does the water-drop test work?
A simple screening method is:
- Clean the stone: Remove oil, soap, and cleaner residue.
- Let it dry: Residual moisture can distort the result.
- Place water drops: Test several representative areas.
- Watch for darkening: Rapid darkening suggests absorption.
- Compare the timing: Faster absorption can signal declining sealer performance.
- Follow the sealer instructions: Confirm surface preparation, ventilation, cure time, and compatibility before resealing.
This test is a maintenance indicator, not a complete laboratory measurement of porosity.
Common tendencies include:
- ◆Marble: May benefit from an appropriate impregnating sealer, but remains vulnerable to acid etching.
- ◆Travertine: Its porosity, filled areas, finish, and grout joints often justify careful sealing evaluation.
- ◆Slate: Absorption and surface behavior vary considerably by geological source and finish.
- ◆Granite: Some varieties absorb very little; others benefit from sealing.
- ◆Grout: Cementitious grout may absorb stains even if the stone faces resist them.
The common misconception is that annual sealing is mandatory for every natural stone backsplash. The better rule is to inspect performance, follow stone- and sealer-specific instructions, and reseal when the documented absorption behavior or manufacturer schedule calls for it.
Which surface recovers best from kitchen stains?
Will tomato, turmeric, wine, oil, coffee, or lemon leave a permanent mark after a busy cooking night?
A fixed contamination and cleaning protocol separates removable residue, absorbed staining, discoloration, and acid etching.
A useful faux stone backsplash stain test controls five variables:
- ◆Contaminant quantity: Use the same measured volume on each surface.
- ◆Contact area: Confine each liquid to a marked test zone.
- ◆Dwell time: Clean matched areas immediately and after 24 hours.
- ◆Cleaning sequence: Begin with the mildest manufacturer-approved method.
- ◆Scoring: Record visible residue, color change, sheen change, texture damage, and absorption separately.
The example protocol below uses 0.25 teaspoon of each contaminant across equal test zones at approximately 72°F. Testers should wear suitable protection and follow all cleaner and product instructions.
What cleaning sequence produces a fair comparison?
Use a least-aggressive sequence:
- Blot: Remove loose material without spreading it.
- Warm water: Wipe with a white microfiber cloth.
- Diluted mild dish soap: Apply only if approved for the tested surface.
- Approved surface cleaner: Use a stone-safe cleaner for natural stone.
- Rinse and dry: Cleaner residue can create a false stain.
- Inspect after 24 hours: Some absorbed marks become clearer after drying.
Do not use lemon, vinegar, or acidic bathroom cleaners to clean marble. They can attack calcite.
Expand the controlled stain-test method
Use equal-area samples, fixed 0.25-teaspoon contaminant portions, marked test zones, approximately 72°F conditions, matched dwell times, white microfiber cloths, and only cleaners approved for each surface.
Photograph a clean baseline, the immediate-cleaning result, and the 24-hour result under the same light direction, distance, exposure, and viewing angle. Record residue, color, sheen, texture, and absorption separately so chemical damage is not mislabeled as dirt.
How should stain and damage scores be interpreted?
| Score | Observed condition |
|---|---|
| 0 | No visible change under normal and angled light |
| 1 | Trace visible only under close or angled inspection |
| 2 | Clearly visible localized mark |
| 3 | Strong mark, absorption, sheen loss, or texture change |
| 4 | Severe or functionally permanent visible damage |
The table below illustrates the type of raw reporting a buyer should expect from a controlled panel-versus-honed-marble comparison. It is a protocol benchmark, not a claim about every product in either category.
| Contaminant | Polymer panel, immediate | Polymer panel, 24 hours | Sealed honed marble, immediate | Sealed honed marble, 24 hours |
|---|---|---|---|---|
| Cooking oil | 0 | 0 | 0 | 1 |
| Coffee | 0 | 1 | 0 | 1 |
| Tomato sauce | 0 | 1 | 1 | 2 |
| Turmeric mixture | 1 | 2 | 1 | 2 |
| Red wine | 0 | 1 | 1 | 2 |
| Lemon juice | 0 | 0 | 2 | 4 |
Expand the raw-data interpretation notes
Polymer panel: The example records low immediate scores and modest 24-hour pigment retention, with turmeric producing the strongest visible result.
Sealed honed marble: Pigmented and oily contaminants show some residual visibility, while lemon produces severe finish change because the score includes acid etching rather than absorbed staining alone.
The lemon result highlights a crucial distinction.
Sealer can slow absorption. It does not inherently neutralize acid etching because the acid reacts with the mineral, not merely the pores.

What do the results mean for real kitchens?
The polymer surface may recover more easily from common colored foods if its wear layer remains intact and the cleaner is compatible. Turmeric can still discolor polymers, grout lines, sealants, and textured recesses.
Honed marble may conceal minor dull spots better than polished marble, but concealment is not prevention. A lemon etch can remain visible after the liquid is removed because the finish has changed.
Natural stone backsplash stain resistance varies by:
- ◆Mineralogy: Marble behaves differently from many granites.
- ◆Porosity: Absorbent stone may take up oils or pigments more quickly.
- ◆Finish: Polished, honed, leathered, cleft, and brushed finishes clean differently.
- ◆Sealer: Product selection, application, cure, and wear affect absorption.
- ◆Joint design: Grout and sealant can stain before the stone face does.
- ◆Cleaning speed: Prompt blotting usually reduces exposure.
A six-contaminant test cannot reproduce five years of ultraviolet exposure, abrasive cleaning, repeated heat cycles, steam, or grease accumulation. It does create a standardized baseline that is more informative than a showroom wipe.
How are one panel, a failed seam, chipped stone, and damaged grout repaired?
If one small area fails, will you replace a single component or disturb the surrounding backsplash?
Localized repair should be assessed by access, matching material, removal damage, cure time, mess, and the chance of collateral failure.
Peel-and-stick panels are often faster to replace locally, but interlocking overlaps and pattern direction can force removal of neighboring pieces. Natural stone tile repair is more involved, yet an experienced installer may replace one tile without rebuilding the full backsplash.
| Failure | Likely repair path | Main complication |
|---|---|---|
| Lifted panel edge | Clean if permitted, use approved repair method, or replace panel | Grease, heat, stretched material, contaminated adhesive |
| Open panel seam | Diagnose movement or shrinkage before closing seam | Cosmetic caulk may hide rather than solve the cause |
| Punctured faux panel | Replace affected section or panel | Pattern and batch matching |
| Chipped stone edge | Fill, refinish, or replace based on chip size and location | Color matching and finish recreation |
| Cracked stone tile | Remove grout, isolate tile, break inward, reset replacement | Damage to substrate or neighboring stone |
| Stained grout | Clean, recolor, remove, or replace | Stone compatibility and joint consistency |
| Failed perimeter caulk | Remove failed sealant and apply compatible flexible sealant | Countertop and wall movement |
The repairability metric should include more than minutes of labor. A fast repair that leaves visible pattern duplication may score worse than a slower stone repair that becomes nearly invisible.
Why do backsplash seams fail?
Seam failure usually has a cause:
- ◆Contamination: Grease, dust, or cleaner residue reduces adhesive contact.
- ◆Wall texture: Adhesive contacts only the high points.
- ◆Thermal movement: Heating and cooling stress edges and overlaps.
- ◆Counter movement: Wood countertops can expand and contract with moisture.
- ◆Installation tension: Stretching flexible panels can make edges retract.
- ◆Insufficient pressure: Pressure-sensitive adhesive needs the specified application force.
- ◆Water entry: Poorly detailed sink and countertop joints can expose edges.
The cost-to-yield ratio of a repair improves when the root cause is corrected before cosmetic work begins. To see how countertop movement, sealant behavior, and edge failure interact, review the tile-caulk failure test above butcher block. It functions as the architectural standard for assessing backsplash-edge failure without treating caulk as a universal adhesive fix.

What should you save for later repairs?
Keep a repair kit containing:
- ◆Matching material: Store several full panels or stone tiles from the original lot.
- ◆Installation records: Save adhesive, mortar, grout, sealer, and sealant names and colors.
- ◆Pattern map: Photograph printed repeats and tile placement before installation.
- ◆Technical sheets: Removal and repair instructions may change online.
- ◆Offcuts: Small pieces can be useful for cleaner, sealer, and adhesion tests.
- ◆Color references: Grout and caulk labels help avoid near-matches that become obvious after curing.
For stone, store spare pieces flat, dry, and protected. Natural variation means a later replacement purchased under the same product name may still look different.
Which option wins for renters, landlords, frequent cooks, DIYers, and premium owners?
How do you turn weight, stains, maintenance, repairs, and cost into a choice that fits your property?
Conditional verdicts identify the lowest-burden system for each ownership and cooking profile.
Five-year cost should include acquisition, preparation, installation, maintenance, repair allowance, replacement exposure, and property risk.
A simple formula is:
Five-Year Backsplash Burden = initial materials + installation + maintenance supplies + value of upkeep time + expected repairs + expected removal or replacement cost + property-risk allowance
The value of personal labor should not be treated as zero. Even a DIY project consumes measuring, cleaning, cutting, layout, shopping, correction, and disposal time.
What does a transparent five-year cost model include?
The following model uses planning ranges for a 30-square-foot U.S. backsplash. Prices vary by region, product, stone, pattern, wall condition, installer, and project minimum.
| Five-year cost component | Peel-and-stick faux stone | Natural stone tile |
|---|---|---|
| Face materials with waste | $150–$450 | $300–$1,200 |
| Preparation and accessories | $40–$200 | $175–$600 |
| Professional installation | $0 DIY or $300–$900 | $900–$2,400 |
| Cleaning and maintenance supplies | $25–$100 | $75–$300 |
| Repair allowance | $30–$200 | $100–$500 |
| Removal or replacement exposure | $100–$600 | $600–$1,800 |
| Illustrative five-year range | $345–$2,450 | $2,150–$6,800 |
These are calculation inputs, not contractor quotes. Counter removal, electrical work, wall reconstruction, permits, premium stone fabrication, travel charges, taxes, shipping, and hidden damage are excluded.
Retail prices should be archived on the same day from sources such as Home Depot, Lowe’s, MSI Surfaces, and the selected product manufacturer. Record the date, ZIP code, unit basis, package coverage, shipping, tax exclusions, and required accessories.
For a broader U.S. remodel benchmark, use the 2026 peel-and-stick versus ceramic tile cost and labor comparison to structure material cost, labor, project difficulty, and lifecycle planning. Stone-specific inputs still need to replace ceramic assumptions.
Who should usually choose approved peel-and-stick faux stone?
Approved peel-and-stick generally yields an optimal configuration for:
- ◆Renters with written permission: Choose only after a concealed removal test and acceptance of possible paint damage.
- ◆Budget DIYers: Favor products whose cutting, wall preparation, seam design, and stove restrictions match your skills.
- ◆Landlords: Use a documented product with replaceable stock, repeatable cleaning, and manageable turnover labor.
- ◆Low-load projects: Lightweight systems can reduce installation burden on suitable, sound walls.
- ◆Short design cycles: Replaceable finishes suit owners who expect to update color or pattern within several years.
Authenticity remains the tradeoff. Repeated graphics, shallow relief, glossy highlights, visible overlaps, and unrealistic grout lines can make a panel appear less convincing at close range.
The selection metric should therefore include pattern-repeat distance, seam visibility under side lighting, texture depth, and edge realism. Before ordering a full installation, use the guide to authentic and durable peel-and-stick tiles that look like stone as a visual and durability baseline for screening shortlisted products and comparing connected samples.
Who should usually choose natural stone?
Natural stone generally creates the lower burden for:
- ◆Premium-material buyers: Real mineral variation and depth cannot be fully reproduced by a print.
- ◆Long-term owners: The higher installation cost can be spread across a longer design life.
- ◆Design-led renovations: Stone can coordinate with counters, floors, hearths, and architectural finishes.
- ◆Repair-oriented owners: Stored matching tile can support localized repair years later.
- ◆Buyers accepting patina: Minor etching or tonal change may be acceptable as part of material aging.
Natural stone is not automatically the best-performing surface for an intensive cooking zone. A highly absorbent or acid-sensitive stone can carry greater maintenance exposure than a compatible manufactured panel, porcelain tile, or another approved surface.
What is the conditional verdict?
| Buyer profile | Lower-burden choice | Conditions |
|---|---|---|
| Renter | Peel-and-stick | Written approval, successful removal test, approved wall and stove location |
| First-time DIYer | Peel-and-stick | Smooth substrate, simple cuts, clear instructions, spare panels |
| Frequent cook | Product-specific | Prioritize heat approval, grease cleaning, stain recovery, and seam design |
| Landlord | Peel-and-stick or durable tile | Compare turnover speed against damage and replacement exposure |
| Premium homeowner | Natural stone | Accept installation cost, sealing evaluation, and stone-specific care |
| Long-term owner | Natural stone | Select a suitable stone and retain matching repair material |
| Marble enthusiast | Natural marble | Accept that sealer does not prevent acid etching |
| Heat-sensitive stove layout | Approved system only | Technical documentation and appliance clearances govern |
The deterministic outcome is simple: a product that lacks documented approval for the intended wall, appliance zone, or cleaning exposure should be removed from consideration before appearance or price is scored.
What should you choose for the lowest Five-Year Backsplash Burden?
After comparing every variable, how do you make the decision without second-guessing it later?
Choose the documented system that minimizes total ownership burden for your property, cooking habits, and maintenance tolerance.
The correct choice is not the backsplash with the lowest package price or the most convincing showroom sample. It is the complete system with the lowest Five-Year Backsplash Burden for your specific kitchen.
Approved peel-and-stick faux stone is usually the stronger fit for low-load, fast, replaceable applications. It can reduce cutting mess, installation time, assembly weight, and localized replacement effort.
Natural stone is usually the stronger fit for buyers prioritizing authenticity, mineral variation, long-term design life, and material value. Those advantages come with greater installation demands and stone-specific maintenance.
Before purchasing a full installation:
- Shortlist two exact products: Compare a named faux product with a named natural stone, not broad categories.
- Download every technical sheet: Archive installation, cleaning, warranty, and heat-zone instructions.
- Check the stove manual: Confirm rear-wall clearances and finish restrictions for the exact appliance.
- Calculate installed weight: Include all required backing, mortar, grout, primer, and trim.
- Inspect the substrate: Record texture, paint condition, contamination, flatness, and repair needs.
- Price the full system: Include waste, tools, labor, maintenance, repair stock, and removal.
- Purchase samples: Examine pattern repetition, side-lighting, texture, edge realism, and stone variation.
- Run contamination tests: Use measured quantities and approved cleaning methods on spare material.
- Test reversibility: Renters should document a concealed removal test and obtain written permission.
- Keep matching spares: Save material from the same production lot for future repairs.
Enter both shortlisted products into this worksheet. The standardized comparison inherently neutralizes the misleading effect of package price by measuring total cost of ownership (TCO), upkeep, failure exposure, and property risk.
Download the Five-Year Backsplash Worksheet
Record exact product composition, installed weight, stove approval, sealing needs, stain recovery, repairs, removal exposure, and five-year costs for two shortlisted systems.
Download the worksheetFrequently Asked Questions
Does faux stone backsplash need sealing?
Could an extra protective coating make a faux surface more durable?
Most faux panels should be used and cleaned exactly as their manufacturer specifies.
Most vinyl and polymer faux stone backsplashes do not require penetrating stone sealer. An unapproved sealer may alter gloss, color, flexibility, cleanability, or adhesive seams.
Genuine-stone peel-and-stick veneer is different. Its exposed stone face may require sealing based on the stone and manufacturer’s instructions.
How often should a natural stone backsplash be sealed?
Is annual resealing a real requirement or a maintenance myth?
Resealing frequency depends on the stone, finish, sealer, cleaning practices, exposure, and observed absorption.
There is no universal annual schedule for all natural stone. Follow the stone and sealer instructions, then monitor water absorption and staining behavior.
Some dense granite may need infrequent treatment. More absorbent travertine or certain marble installations may need closer monitoring.
Can peel-and-stick stone backsplash be installed behind a stove?
Does a heat-resistant label make a panel safe behind every range?
Installation is acceptable only if the exact panel instructions, appliance manual, clearances, substrate, and local requirements permit it.
Gas, electric, radiant, and induction appliances create different heat exposures. Induction reduces direct cooktop heating but does not remove the risks from hot cookware, grease, and steam.
Never use a decorative panel as code-required wall protection unless its documentation supports that exact use.
Can you repair a peel-and-stick backsplash?
Will one damaged panel force you to replace the entire wall?
Many panels can be repaired locally, but overlaps, pattern direction, adhesive residue, and batch matching affect the work.
Keep spare panels from the original lot. Before removal, identify whether the damaged piece overlaps adjacent panels.
A failed seam should be diagnosed before it is covered with caulk. Heat, wall texture, contamination, movement, or stretched material may cause the gap to return.
Is marble staining the same as marble etching?
Why can a mark remain after the spill has been completely cleaned away?
Staining deposits or absorbs foreign material, while etching chemically changes the stone surface.
Coffee, wine, oil, and pigments may stain. Lemon juice and vinegar can etch calcite-based stone by altering its finish.
A penetrating sealer can reduce absorption. It does not make marble acidproof.
Is peel-and-stick backsplash always safe for renters?
Can a removable panel still lift paint or drywall paper?
Yes. Strong adhesion, weak paint, bare drywall paper, heat, long dwell time, and removal technique can all cause damage.
Obtain written landlord approval and perform a concealed test using the actual product. Photograph the wall before installation and after test removal.
Include possible patching and repainting in the Five-Year Backsplash Burden.
Which backsplash is cheaper over five years?
Does the lowest upfront material price always create the lowest long-term cost?
Peel-and-stick is often less expensive over five years, but wall damage, premature replacement, or heat-related failure can erase the savings.
Natural stone has higher material and labor costs, yet its longer design life can improve total cost of ownership for a long-term homeowner.
Use the same area, waste factor, labor value, maintenance hours, repair allowance, and removal assumptions for both estimates.
How can I tell whether a faux stone backsplash will look inexpensive?
Why do some convincing samples become repetitive or seam-heavy across a full wall?
Evaluate pattern repetition, texture, sheen, joint depth, edge treatment, and side-lighting across several connected panels.
Order enough samples to assemble multiple repeats. View them from standing distance and close range in morning, task, and evening light.
A single sample cannot reveal repeated stones, obvious interlocks, color shifts between lots, or how cut edges will look around outlets.
Reference standards and guidance
- Tile Council of North America, TCNA Handbook for Ceramic, Glass, and Stone Tile Installation.
- ANSI Accredited Standards Committee A108, administered by the Tile Council of North America.
- U.S. Consumer Product Safety Commission, Cooking Safety.
- Natural Stone Institute, Natural Stone Care and Cleaning.


Deja un comentario
Este sitio está protegido por hCaptcha y se aplican la Política de privacidad de hCaptcha y los Términos del servicio.