
















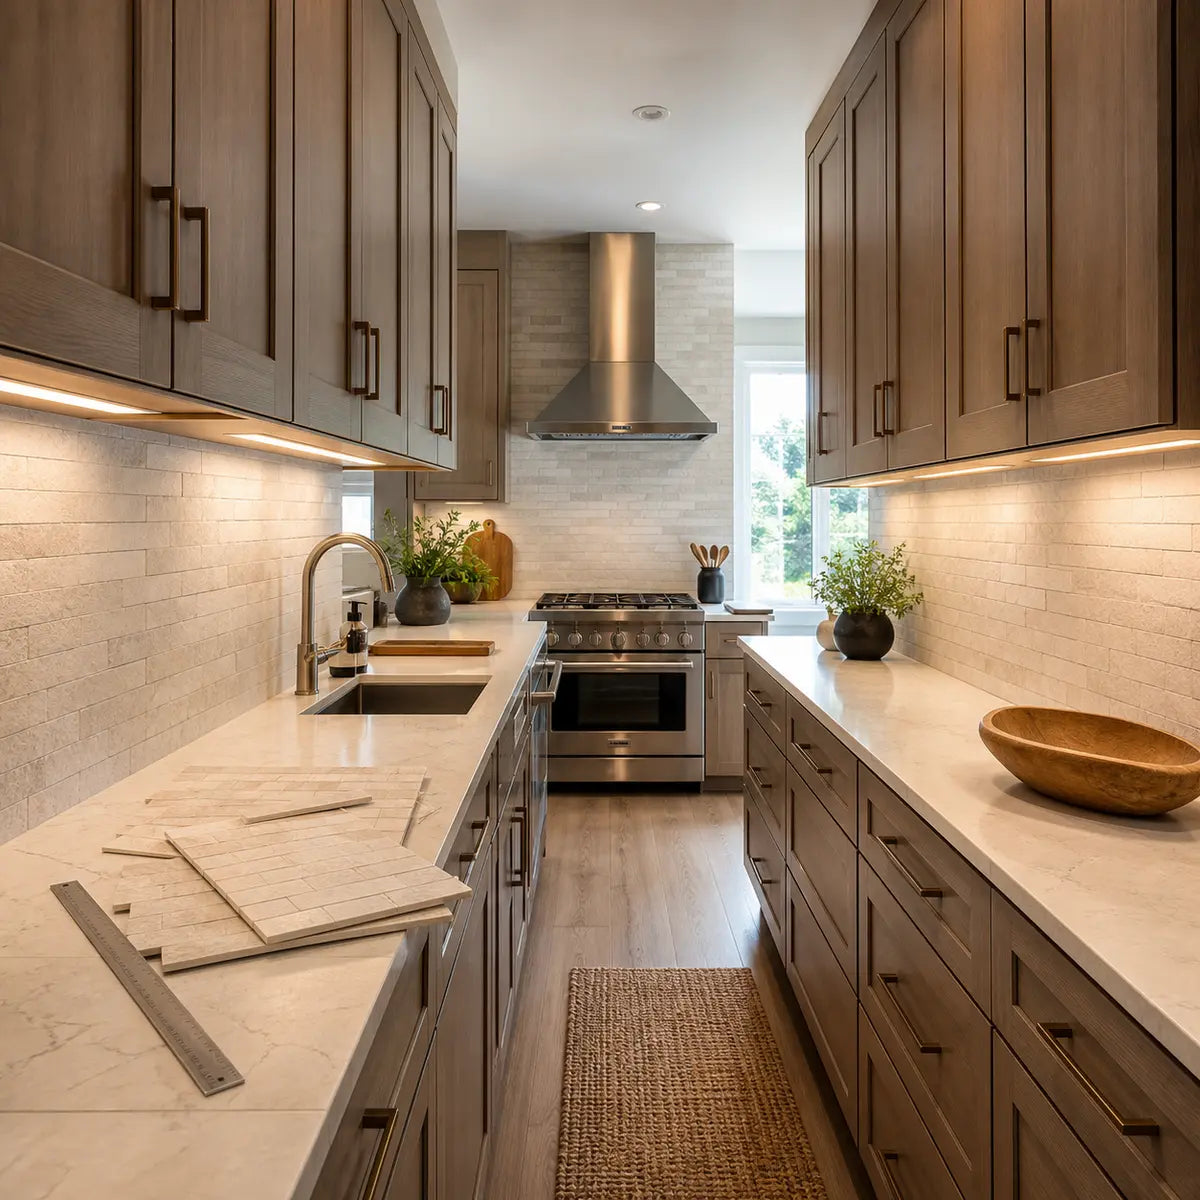
The first alignment you notice from a galley kitchen entrance may matter more than the mathematical center of either wall. In a narrow room, the backsplash is rarely seen as one isolated rectangle. You see the near edge first, then a long band of pattern, then the range, sink, window, corner, or open end that interrupts it. The wall opposite remains in the same field of view, even when its cabinets and worktop do not match.
For that reason, a successful galley kitchen backsplash layout should be planned as one connected visual field. The core process is straightforward: identify the dominant viewing position, map every backsplash boundary and interruption, choose a controlling alignment line, calculate the installed pattern repeat, test the edge cuts, place unavoidable seams carefully, and document the approved layout before cutting.
This guide covers visual planning rather than material-specific installation. The exact product instructions must determine joint width, overlap direction, corner treatment, adhesive use, heat suitability, surface preparation, and other installation conditions. Electrical work and appliance clearances also sit outside a purely visual layout plan.

What Is the Seven-Step Galley Kitchen Backsplash Planning Sequence?
The safest planning order moves from the room to the wall, then from the wall to the individual cut. Starting with tile dimensions alone can produce a technically centered wall that looks noticeably misaligned from the kitchen entrance.
Use this sequence:
- Identify the dominant viewing position. Stand where the kitchen is most often first seen, then note which backsplash edge, motif, seam, appliance, and opposing wall enter the view.
- Map every backsplash field. Measure each wall segment, return, focal zone, window, cabinet break, appliance opening, outlet, and exposed endpoint.
- Choose one controlling alignment line for each field. This may be the range center, wall center, doorway sightline, cabinet edge, worktop run, or a shifted line that improves terminal cuts.
- Confirm the installed pattern repeat. A pattern repeat is the distance after which the visual arrangement begins again. Use installed dimensions, including the specified joint or overlap, rather than assuming the package face dimension is the repeat.
- Test both ends and every interruption. Project the pattern to corners, open ends, outlets, windows, cabinet changes, and appliance zones before choosing the final starting position.
- Assign seams and transitions. Keep avoidable disruptions away from the first prominent view and from visually important motifs where feasible.
- Record the approved layout. Mark reference lines, dimensions, pattern phase, cuts, seams, endpoints, and exceptions on a wall map.
The order matters. A seam decision cannot be made intelligently until you know the dominant view. An edge cut cannot be evaluated until you know the actual repeat. A range-centered feature cannot be approved until you see what it does at the wall ends.
The backsplash also needs to be planned against finished conditions. If countertops, cabinets, trim, or appliances are still changing, the drawing may be based on dimensions that will not exist when the work begins. The sequence covered in coordinating countertops and backsplash measurements can help identify which dimensions should be confirmed before the layout is locked.
The governing principle: Protect the most visible relationship first, then improve the least attractive cuts without sacrificing that relationship.
Start With the Dominant Sightline
A sightline is the view through or into a space from a particular position. In a galley kitchen, the dominant sightline is usually the view that exposes the longest, brightest, closest, or most visually important section of backsplash.
It is not automatically the geometric center of the room. A kitchen may be entered from one side, viewed obliquely from a living area, or seen through a doorway that reveals one wall before the other. The range may be mathematically central yet partially hidden. A short return near the entrance may command more attention than a long run at the rear because it sits closest to the observer.
Make a sightline observation walk
Before measuring tile, move through the adjoining space as you normally would. Pause in at least four positions:
- At the primary kitchen entrance
- Several steps before the entrance
- At the far end of the galley
- At any adjoining dining or living area with a clear view into the kitchen
From each position, record:
- Which wall is visible first
- Which edge of the backsplash appears closest
- Whether the range, sink, or window reads as a focal point
- Whether both backsplash walls are visible at once
- Which seams or pattern changes would face the observer
- Which endpoints disappear behind cabinets, appliances, or a return
- Whether under-cabinet lighting makes one area more prominent
Photographs are useful because they flatten the view. A line that seems minor while standing in the room can become conspicuous in a photo, especially where an upper-cabinet edge, grout line, window casing, and pattern seam nearly align but miss one another.

Use the sightline priority check
Answer the following questions in order. The first clear “yes” suggests the most useful starting hierarchy.
Does one focal feature dominate the entrance view?
If the range, hood, window, or sink is unmistakably central to the composition, begin with a focal-led layout. Test the pattern around that centerline, then inspect the wall ends.
Does the entrance expose a long uninterrupted wall before any focal feature?
Begin with an entrance-led layout. Give priority to the first visible vertical line, the pattern rhythm extending down the corridor, and the terminal cut seen from the doorway.
Is no single feature dominant, but both wall ends are plainly visible?
Begin with a balanced-cut layout. Test whether equal or visually comparable terminal pieces create a calmer field.
Do the cabinets create the clearest repeated structure?
Begin with a cabinet-led layout. A cabinet stile, panel division, or strong upper-cabinet edge may provide a more convincing anchor than the center of the bare wall.
Are both sides visible together and strongly related?
Begin with a room-led layout. Establish a shared horizontal datum and compatible pattern rhythm before resolving each wall independently.
Translate your clearest observation into a starting hypothesis
Select the condition that most closely describes the dominant view. The result identifies a starting hierarchy to mock up, not a universal design rule.
These outcomes are starting hypotheses, not fixed rules. Tape full-size paper shapes to the wall and inspect them from the same observation positions. If the selected priority creates a clipped focal motif or an obvious sliver at the entrance, move to the next plausible hierarchy and compare again.
Which Alignment Line Should Control the Layout?
The controlling line should govern the relationship the viewer is most likely to notice. It does not need to center every cabinet, appliance, and wall simultaneously.
A controlling alignment line is the reference from which the pattern position is calculated. It may coincide with a seam, the center of a tile, the center of a motif, or another repeat phase defined by the selected product.
Wall-center layouts are common in tile instructions, but they are not the only legitimate approach. Checked manufacturer guidance uses different starting conventions for different systems, which is one reason the room, product, and intended focal point all need to be considered before a line is chosen.
| Candidate controlling line | Usually useful when | Main risk to inspect |
|---|---|---|
| Doorway sightline | One edge or pattern column is immediately visible on entry | The range or far endpoint may become noticeably off-center |
| Complete wall center | Both ends of the full wall are visible and equally important | Cabinets or appliances may not share the wall center |
| Range or hood center | The cooking zone is the clear focal point | A narrow terminal cut may appear at one wall end |
| Window or sink center | A framed opening dominates the wall | Pattern fragments around the opening may become unequal |
| Cabinet edge or stile | Cabinet divisions create the strongest visible structure | The layout may appear unrelated to the wall below |
| Countertop-run center | The backsplash reads primarily as a band above one work zone | Open wall beyond the counter may expose an awkward endpoint |
| Balanced-cut position | No focal feature dominates and both ends remain visible | The pattern may lack a clear relationship to appliances |
| Shared room datum | Both walls are viewed together | Unequal wall lengths can make exact mirroring impractical |

Establish a hierarchy rather than chasing perfect alignment
Write down the priorities in order. A practical hierarchy might read:
- Center the primary motif behind the range.
- Avoid a narrow fragment at the entrance endpoint.
- Keep the first vertical seam outside the doorway view.
- Maintain the same horizontal row on both walls.
- Accept an unequal cut at the concealed rear corner.
This list resolves later disputes. If the range center and balanced wall cuts conflict, priority one wins unless the resulting edge is unacceptable during the mockup.
Compare a seam-centered and motif-centered start
Many repeating designs offer at least two plausible phases:
- Place the controlling line on a seam or joint.
- Place the controlling line through the center of a tile or motif.
Those positions can produce very different terminal cuts even though they use the same wall center. Herringbone, diamonds, scallops, arches, and offset patterns may offer several phases beyond those two.
Use full-size samples or paper templates rather than judging from a small screen image. The comparison of layout reference tools explains how level and plumb lines can be established and checked before a pattern is committed.
Build a Complete Wall Map
A useful wall map records every surface that can change the pattern. Measuring only the largest rectangle leaves the hardest decisions unresolved.
Draw each backsplash wall as a flat elevation, as though you were facing it directly. Use a separate elevation for each main wall, short return, range recess, window reveal, or change in backsplash height. Give every drawing a name such as Wall A, Wall B, Range Zone, or Entry Return.
Record the following on each elevation:
- Finished countertop length and height
- Underside of upper cabinets
- Bottom and sides of the hood or microwave
- Range, cooktop, sink, and faucet centerlines
- Window casing, sill, and reveal dimensions
- Outlet and switch locations
- Inside and outside corners
- Cabinet breaks and appliance gaps
- Open wall endpoints
- Changes from standard-height to full-height backsplash
- Trim, edge profile, or termination location
- Any wall area hidden by a permanently installed component
- Any condition that is not level, plumb, square, or straight
Use one fixed origin for every horizontal measurement. For example, measure all features on Wall A from its left finished endpoint. Do not measure one outlet from the left wall, another from the cabinet, and the range from the right corner. Mixed origins make cumulative errors difficult to detect.
For a broader measurement workflow, use the kitchen backsplash layout guide before cutting. Its field-by-field approach is useful when the galley contains several work zones.
Keep two calculations separate. The wall map should record visual repeat, phase, seams, and cuts. Material quantity should remain a separate calculation that can account for defects, direction, matching, waste, and future repairs without changing the approved composition.
Separate physical boundaries from visual boundaries
A physical boundary is where the material must actually stop or turn. A visual boundary is where the backsplash appears to stop from the normal viewing position. They may differ.
For example, tile might physically continue behind a freestanding range, while the visible focal field is framed by the hood and adjacent cabinets. A short return may physically turn a corner but disappear behind a refrigerator. A backsplash may end at the countertop edge even though the painted wall continues.
Mark both kinds of boundary. This prevents a hidden physical edge from receiving more attention than a prominent visual edge.
Create horizontal and vertical datums
A datum is a fixed reference line used to coordinate other measurements. In a galley kitchen, the most useful datums are often:
- A horizontal line tied to the intended first full row
- A vertical controlling line through the chosen focal point
- A shared horizontal line carried across both walls
- A countertop reference line checked against true level
- A cabinet or hood line used only as a visual comparison
Do not assume the countertop is level or the corner is plumb. Some product instructions explicitly call for independent level and plumb reference lines. If a surface slopes, decide where the discrepancy will be absorbed according to the selected material system rather than allowing every row to follow the slope.
How Do You Calculate Pattern Repeat and Edge Cuts?
Calculate with the installed repeat, then compare more than one pattern phase. A nominal tile or sheet dimension may not equal the distance the pattern advances after joints, overlaps, interlocking edges, or manufacturing tolerances are included.
The Tile Council of North America ceramic-tile guidance recommends planning the layout before setting and using a dry layout to identify small cuts. It also notes that tile size tolerance and joint selection can affect layout. These principles support checking the actual installed module rather than relying on a catalog dimension alone.
Define the terms first:
- Wall width, W: The finished width of the backsplash field being calculated.
- Installed repeat, R: The horizontal or vertical distance after which the pattern begins again once installed.
- Anchor location, A: The distance from the wall origin to the controlling line.
- Anchor phase, P: The point within one repeat that must land on the controlling line. A seam may use a phase of zero; a centered motif might use half the repeat.
- Boundary position, B: The location of the first repeat boundary after the wall origin.
- Terminal segment: The partial repeat remaining at either end.
For a repeating horizontal layout, one useful planning formula is:
B = (A - P) modulo R
The left terminal segment is B when B is greater than zero. The right terminal segment is:
(W - B) modulo R
This is a planning model, not product installation guidance. Irregular patterns, staggered courses, directional overlaps, interlocking sheets, handmade tile, and multi-sheet motifs may require a more detailed grid supplied by the manufacturer.
Test one repeat phase
Enter all measurements in the same unit. The calculator finds the first boundary and the two terminal segments using the formulas above. It does not account for product-specific tolerances, installation rules, irregular motifs, or minimum-piece requirements.
Interpretation: Compare the output with the focal motif, outlets, corners, first prominent seam, and entrance-facing edge. Wider or equal pieces do not automatically make a candidate visually preferable.

A hypothetical worked repeat example
Assume:
- Wall width:
119.5 inches - Verified installed repeat:
9.75 inches - Wall center:
59.75 inchesfrom the left endpoint
First test a seam on the wall center:
B = 59.75 modulo 9.75 = 1.25 inches
The layout produces a 1.25-inch terminal segment at the left. The remaining width is 118.25 inches, which also leaves 1.25 inches at the right after complete repeats.
The arrangement is symmetrical, but both edge fragments may look narrow. Symmetry alone has not solved the layout.
Now test a motif center on the wall center. Half of the hypothetical repeat is 4.875 inches:
B = (59.75 - 4.875) modulo 9.75 = 6.125 inches
The second phase produces 6.125-inch terminal segments at both ends. If the pattern supports this phase, it may create a more substantial edge while keeping the wall centered.
Next, test the range center. If the range center is 63 inches from the left endpoint, calculate both the seam-centered and motif-centered versions again. Record the left edge, right edge, first visible seam, motif position behind the range, and any interaction with outlets.
The best option is the one that protects the chosen priority hierarchy. It may not be the option with the mathematically widest edge pieces.
Use the repeat-and-edge-cut comparison
For each candidate layout, enter or write down:
- Wall width
- Verified installed repeat
- Controlling-line location
- Pattern phase at that line
- Left terminal segment
- Right terminal segment
- Nearest prominent seam
- Motif condition at the focal point
- Outlet and corner conflicts
- Whether the first entrance view improves or worsens
Classify the result:
- Focal-aligned: The primary feature is centered or deliberately framed, and the terminal cuts remain acceptable in the full-size mockup.
- Edge-balanced: Both terminal pieces read as intentional, while the focal offset is not noticeable.
- Sightline-protected: The entrance-facing edge and first visible seam are controlled, with compromises moved to less prominent areas.
- Conflict-heavy: The candidate creates several conspicuous fragments, seam collisions, or interruptions. Test another phase or controlling line.
If two versions are close, mock up both. Tape paper strips or temporary samples across the focal zone and at both endpoints. Stand at the entrance rather than judging from directly in front of the wall.
For comparing pattern structures before doing the arithmetic, the tile design and pattern overview provides useful distinctions among direction, scale, contrast, and focal emphasis.
What Pattern Scale Works in a Narrow Galley Kitchen?
The right scale is the one that produces a legible rhythm across the visible backsplash fields without creating distracting fragments at every interruption. There is no universal tile size or orientation that will make every galley kitchen appear wider or calmer.
Pattern scale describes the apparent size of the repeated visual unit. That unit may be one tile, several tiles, one printed motif, or a larger arrangement spanning multiple sheets. Pattern density describes how frequently lines, shapes, or contrasts repeat within the visible area.
The practical lesson is to mock up the complete composition rather than relying on claims such as “horizontal always widens” or “vertical always raises the ceiling.”
Judge scale by repetition and interruption
Ask four questions:
How many complete motifs remain visible?
A large motif may look clear on a sample yet become unrecognizable when the range, outlets, window, and cabinets remove most of each repeat.
How often is the motif clipped?
One deliberate crop at an endpoint may be acceptable. Repeated half-arches, broken diagonals, or partial medallions around every device can make the layout feel unresolved.
How strong is the contrast?
A dense pattern with low contrast may read more quietly than a simple pattern with dark joints or sharp color changes. Assess the actual colors under the kitchen lighting.
Can the pattern recover after interruptions?
Some grids resume easily after an outlet or window. Directional motifs reveal even a small phase shift. Patterns with a clear “up,” “left,” or movement direction need more careful seam control.
Run a three-distance pattern stress test
Place the largest available sample at the intended height and inspect it from:
- Close working distance at the counter
- The center aisle
- The dominant entrance or adjoining room
Then classify the pattern:
- Readable: The motif remains identifiable at all important distances.
- Texture-led: Individual units blend into a surface from the entrance but remain clear up close.
- Fragment-prone: The motif depends on complete units that the room rarely allows.
- High-attention: Contrast, direction, and frequent seams compete with cabinets and appliances.
None of these results is automatically good or bad. A focal cooking wall may benefit from a high-attention pattern. Two long opposing walls may call for a quieter rhythm. The classification helps match the design to the intended role.
A square layout such as Snowfall Grid can be evaluated for regular repeat rhythm and seam visibility. A directional option such as Silver Stripes Herringbone can be used to compare focal alignment, pattern phase, and endpoint fragments. These are planning candidates, not evidence that either pattern will create a particular spatial effect.
For a deeper comparison of directional choices, see vertical, horizontal, and feature-pattern planning. If herringbone is under consideration, the herringbone centerline and scale examples can help identify the motif point that should meet the controlling line.
Resolve Outlets, Windows, Appliances, and Corners
Interruptions should be plotted before the starting line is approved. They are not details to solve after most of the backsplash has been placed.
A small shift in pattern phase can move a joint away from an outlet corner, keep a motif intact beside a window, or prevent a narrow strip at an open end. The same shift can damage the range composition, so each interruption must be evaluated against the priority hierarchy.
| Interruption | What to plot | Visual question |
|---|---|---|
| Outlet or switch | Faceplate outline, opening location, nearby seams, motif phase | Will the device split a dominant line or leave a tiny visible fragment? |
| Window | Casing, sill, reveals, wall field above and beside it | Does the pattern frame the opening or collide with it? |
| Range or cooktop | Appliance and hood centerlines, visible back wall, side boundaries | Is the focal motif centered, framed, or deliberately offset? |
| Sink | Faucet centerline, window relationship, cabinet divisions | Which feature is visually dominant from the aisle? |
| Inside corner | Pattern arrival on both walls, likely seam location, return depth | Should the pattern continue, reset, or terminate according to the product system? |
| Outside corner | Exposed edge, trim or finish condition, approach view | Which face receives the cleaner or fuller piece? |
| Open wall end | Countertop edge, upper-cabinet edge, doorway view | Where should the field stop, and what terminal fragment remains? |
| Height change | Cabinet bottom, hood, shelf, window, full-height zone | Where does the horizontal rhythm continue or intentionally change? |
Plan visually around outlets without treating the cover as a correction
Record the faceplate outline and the existing opening separately. A faceplate can conceal a precise finish-material margin, but it must not be treated as permission to hide unsafe electrical conditions, exposed parts, an unsupported device, or an uncontrolled oversized opening.
Removing a cover creates an electrical-safety boundary. The OSHA interpretation on uncovered receptacles addresses workplace conditions and states that tape is not a substitute for a cover or required de-energization. It is not a complete residential electrical code for every location.
The CPSC guide to home wiring hazards also warns that missing faceplates can expose electrical parts and that hot, sparking, malfunctioning, or suspect outlets warrant qualified electrical attention.
For layout purposes, you can mark an outlet location, test whether a pattern line collides with it, and create a paper template of the visible finish area. Do not use a backsplash article to determine box setback, device support, extenders, wiring changes, or local code compliance.

Treat a window as a framed field
A kitchen window creates several related surfaces: the wall below the sill, the strips beside the casing, the area above the opening, and sometimes the sill or reveals. Decide whether the backsplash will:
- Stop at the casing
- Continue below the sill only
- Frame the sides and top
- Extend through adjacent full-height areas
- End at a cabinet or countertop line before reaching the window
Carry the proposed repeat across a drawing of the opening. Check whether the remaining strips beside the window can support the motif. A centered wall pattern may leave different fragments on each side if the window itself is off-center.
The guide to planning backsplash around a kitchen window covers casing, sill, reveal, and stopping-point decisions in greater detail.
Center behind a range only after defining the focal field
To center backsplash tile behind a range, first decide what is being centered:
- A grout line
- A complete tile
- The point of a chevron
- The center of a diamond
- A vertical motif column
- A multi-sheet pattern repeat
- The whole visible field between cabinets
Then draw the range centerline, hood centerline, and center of the available wall field. They may differ. If they do, decide which feature the eye reads as the focal frame.
Do not assume a universal backsplash clearance or material suitability behind a range. The exact backsplash instructions, appliance manual, appliance configuration, and applicable requirements must be checked together. A decorative layout cannot substitute for appliance clearances, heat limits, wall-opening conditions, or other installation provisions.

Decide what happens at each corner
An inside corner is a change of plane, not proof that the pattern must continue perfectly. Depending on the selected material and its official instructions, the visual plan may:
- Continue the repeat through the turn
- Match the horizontal row while allowing the motif phase to reset
- Place a seam in the corner
- Use an approved corner or edge treatment
- End one field and begin the other independently
If the corner is prominent from the entrance, mock up both walls at once. A pattern that aligns in a flat elevation may look compressed or distorted when viewed obliquely.
At an outside corner, prioritize the face seen first. A fuller motif on the entrance-facing wall may be more valuable than equal pieces on both faces. Material-specific edge and corner instructions still govern what can physically be built.

Where Should Backsplash Seams and Endpoints Go?
Place avoidable seams where they attract the least attention, but never override the selected product’s required assembly method. A seam is a physical meeting between pieces; a pattern break is a visual discontinuity. They may occur together, but they are not the same problem.
A physical seam can disappear within a regular joint pattern. A poorly phased motif may look broken even when the physical joint is neat. Conversely, a continuous-looking motif can still contain a product-required overlap or joint.
Use this seam decision path
-
Is the seam location prescribed by the material system?
Follow the exact instructions. Do not borrow an overlap, grout-joint, butt-joint, adhesive, or edge rule from another product. -
Is the seam inside the dominant entrance view?
Test whether it can move behind a visual interruption, into a less prominent field, or onto a natural pattern line. -
Does moving it damage the focal alignment?
If so, protect the focal relationship and make the seam visually regular rather than forcing it away. -
Does the seam intersect an outlet, motif point, or exposed edge?
Compare a shifted pattern phase. Several small conflicts often indicate that the starting line should be reconsidered. -
Will the seam be viewed in raking light?
Under-cabinet lighting can emphasize surface changes. Inspect a dry mockup with the intended lights on. -
Is the proposed location being justified by an unsupported performance claim?
Keep the decision visual unless the exact product instructions establish a durability, moisture, sealing, or heat requirement.
The goal is not “no seams.” Most modular finishes have joints, overlaps, or piece boundaries. The goal is a seam structure that agrees with the visible pattern and does not create an accidental focal point.

Choose backsplash endpoints deliberately
A backsplash endpoint should relate to a clear architectural boundary. Common candidates include:
- The end of the countertop
- The outer edge of an upper cabinet
- A tall cabinet or appliance panel
- A doorway or wall return
- A window casing
- A planned trim or finished edge
- A full-height wall boundary
When the countertop and upper cabinet end at different positions, decide which line is stronger from the dominant view. Stopping at the upper cabinet may leave unprotected or visually disconnected wall above the remaining countertop. Stopping at the counter may create an exposed vertical edge beyond the cabinet. Neither answer is universal.
Draw both options at full scale. Include the final tile fragment, not just a vertical pencil line. The endpoint decision often changes once the actual motif crop is visible.

For broader guidance on height changes, edge conditions, and work-zone boundaries, use the kitchen backsplash planning hub.
How Should the Two Opposing Walls Relate?
Opposing galley walls usually need coordination, not literal mirroring. Different wall lengths, cabinet arrangements, appliances, and openings often make perfect symmetry impossible or visually forced.
Coordinate the elements that can be perceived together:
- Horizontal row height
- Pattern direction
- General scale and density
- Joint or line rhythm
- Height transitions
- Contrast level
- Treatment of entrance-facing endpoints
Then allow each wall to resolve its own focal points and cuts.
Choose one of four coordination strategies
Shared-datum strategy
Use the same horizontal reference across both walls. This is useful when both backsplashes are visible together and the room benefits from one continuous visual horizon. Each wall may use a different vertical starting phase.
Independent-focal strategy
Center or frame the important feature on each wall separately. A range wall might be range-led while the opposite sink wall is window-led. Keep pattern scale, direction, and height related so the room still feels coherent.
Echoed-rhythm strategy
Repeat the same pattern family and approximate cadence without forcing corresponding seams to face each other. This works when wall lengths differ substantially.
Primary-and-quiet strategy
Give one wall the more directional or focal treatment and let the opposite wall act as a quieter field. This can reduce competition when both surfaces are long and highly visible.
Match the room condition to a strategy to test
Select the condition that most closely describes the two walls. Treat the result as the first version to mock up from the entrance, center aisle, and far end.
Use this scenario check:
- If both walls are visible at the same time and have similar heights, start with shared datum.
- If each wall has a strong, different focal feature, start with independent focal.
- If the walls are unequal but use the same material, start with echoed rhythm.
- If one wall already carries the range, hood, open shelving, or another strong feature, test primary and quiet.
After selecting a strategy, compare the entrance view, center-aisle view, and far-end view. Change strategy if the walls appear to compete or if a supposed mirror alignment is noticeable only on the drawing.
The backsplash does not need to jump across the aisle as though the floor were absent. It needs enough shared structure for both walls to belong to the same room.
Turn the Concept Into a Checkable Layout
A layout is ready only when another person can understand where the pattern begins, how it progresses, what happens at every interruption, and which compromises were accepted.
Create a final dimensioned set containing:
- A top-down room sketch with observation points and sightline arrows
- One elevation for each backsplash field
- The horizontal datum
- The controlling vertical line for each field
- The pattern phase at each controlling line
- Verified installed repeat dimensions
- Left and right terminal segments
- Corner arrival and departure conditions
- Outlet and switch templates
- Window and appliance boundaries
- Seam locations
- Endpoint and height decisions
- Areas requiring product-specific confirmation
- A material quantity calculation kept separate from visual repeat calculations
Label every dimension from a fixed origin. Add the date and the revision number. If a cabinet, countertop, appliance, or trim dimension changes, issue a new revision rather than writing several competing numbers over the first drawing.
Perform a full pre-cut review
Before cutting or committing adhesive or mortar, check the layout in this order:
Industry and manufacturer guidance supports testing full layouts, interruptions, corners, and likely cuts before the setting material or pressure-sensitive adhesive is committed. A taped wall mockup extends that principle into the actual viewing positions of the room.
Once the visual layout is approved, move to the exact preparation and installation requirements for the selected system. The peel-and-stick tile project guide can help organize surface, edge, corner, and quantity questions, but the instructions for the exact product remain controlling.
Frequently Asked Questions
Should a galley backsplash be centered on the wall or the range?
Center it on the feature that controls the most important view. Use the wall center when both wall ends are equally visible and no stronger focal point exists. Use the range center when the cooking zone clearly dominates, provided the resulting terminal cuts and entrance-facing edge remain acceptable.
Test both a seam-centered and motif-centered phase. A small phase change may preserve the range focus while improving the wall ends.
Where should backsplash tile start in a galley kitchen?
The physical installation start must follow the selected product’s instructions. For visual planning, begin at the controlling line and project the pattern in both directions before choosing the first piece to install.
Do not confuse the first tile physically placed with the line controlling the completed composition. They may be different.
How can awkward backsplash cuts be avoided?
Map the complete field, calculate with the installed repeat, and compare several starting phases. Shift the controlling line only after checking the focal zone, both endpoints, outlets, corners, and windows.
There is no universal minimum edge-cut width for every product. Judge the visible fragment at full scale and follow any material-specific limits for small pieces.
Should the backsplash pattern match across opposite walls?
It should coordinate where both walls are seen together, but it does not need to mirror joint for joint. A shared horizontal datum, consistent direction, related scale, and compatible endpoint treatment usually matter more than forcing exact vertical correspondence across the aisle.
Can backsplash seams be hidden behind outlets or appliances?
A seam may coincide with a less prominent interruption if the exact material system permits it and the surrounding pieces remain practical. An outlet cover should not be used to conceal an unsafe opening or electrical condition. Appliance locations also cannot replace product-specific seam, heat, or clearance requirements.
What Makes a Galley Backsplash Look Intentional?
An intentional galley kitchen backsplash is not necessarily centered on every available surface. It is a documented composition in which the doorway view, focal point, edge cuts, seams, interruptions, endpoints, and opposing walls have been ranked deliberately.
Start with the room rather than the tile. Observe the entrance sightline, map every finished boundary, select the strongest controlling line, and calculate from the installed repeat. Compare pattern phases instead of accepting the first centered arrangement. Give corners, outlets, windows, appliances, and open ends the same attention as the large uninterrupted areas.
The final test is simple: you should be able to explain why the pattern begins where it does, why a seam sits in its chosen location, why one wall controls the room, and where each compromise has been placed. Save that wall map, verify all dimensions against finished conditions, and check the current instructions for the exact backsplash material and appliances before installation or cutting begins.


Deja un comentario
Este sitio está protegido por hCaptcha y se aplican la Política de privacidad de hCaptcha y los Términos del servicio.