


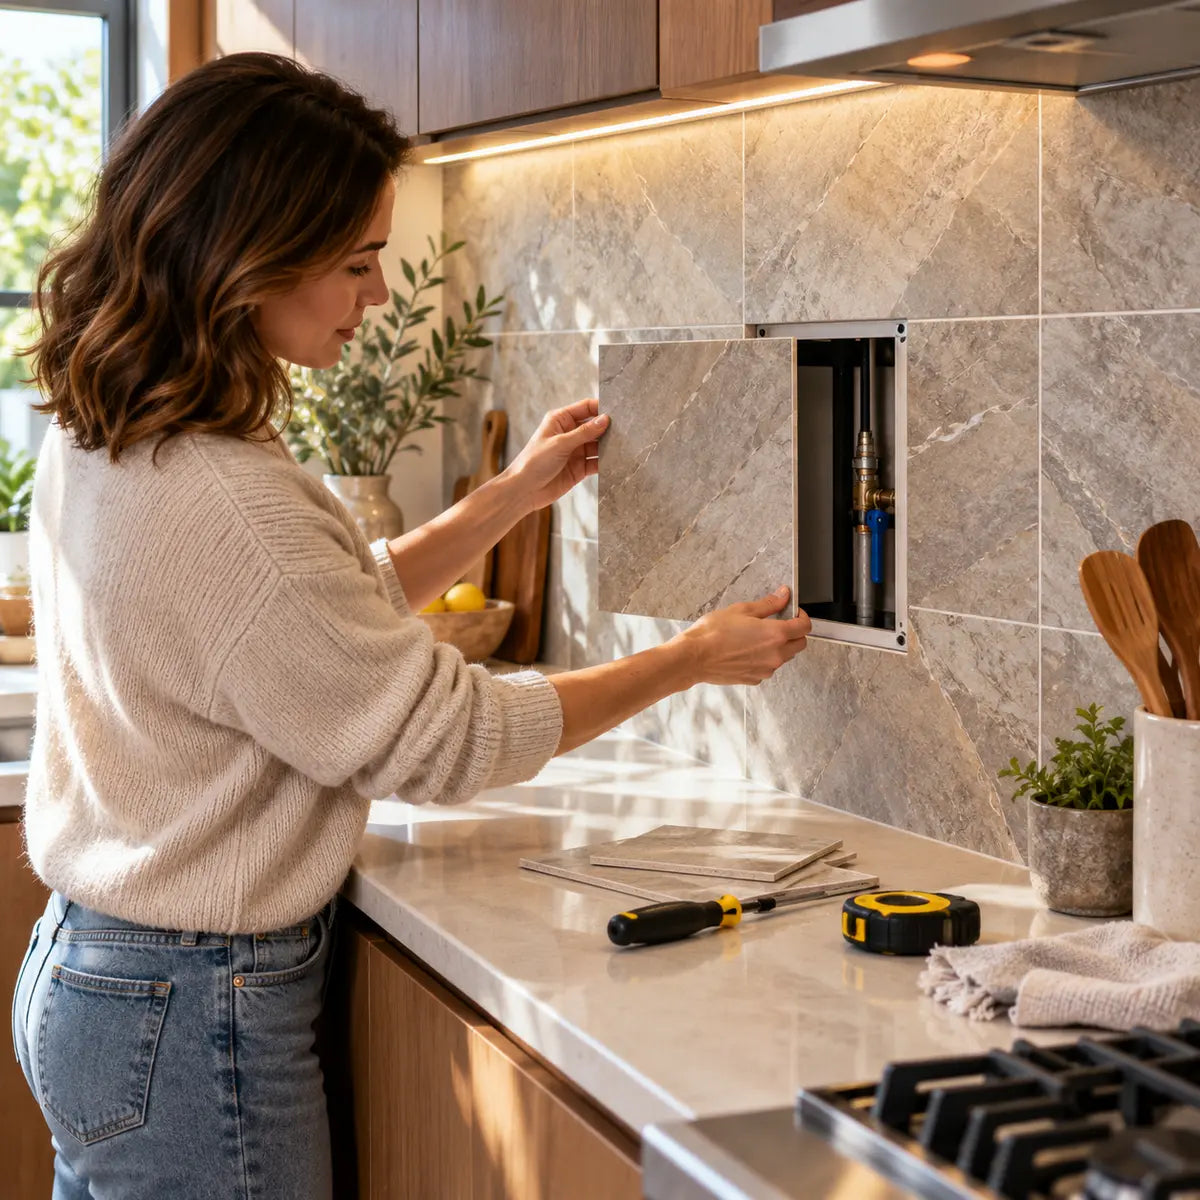
A tiled wall can preserve future maintenance access, but the opening, removable hatch, and tile layout need to work together from the start. Cover the hatch as a separate piece, preserve its operating gap, and give yourself a reliable way to release and support it.
A removable access panel behind peel-and-stick tile can work when the tile suits the panel’s surface and location, and the panel hardware can accommodate the finished covering. Opening it should move the complete hatch with its tile attached. It should never depend on peeling decorative tile off the wall each time.
The most useful finish is one you can open, close, and identify again months later. This guide explains how to plan that result, measure the parts correctly, prepare the opening, match the tile pattern, and check the finished panel before you need it.
Can you put peel-and-stick tile over an access panel?
Yes, conditionally: the tile must be compatible with the hatch face, and the access-panel manufacturer must permit the proposed covering, thickness, and weight. A decorative sheet cannot supply the structure or retention hardware that a removable hatch needs.
Think of the project as four connected parts:
- The service opening provides access to the equipment or connection.
- The frame supports the access-panel assembly at the wall.
- The hatch, also called the removable leaf, closes the opening.
- The tile finish decorates the fixed wall and hatch without joining them together.
A panel may look successful while failing its main job. You might see a valve through the opening but lack room to turn it, use a tool, or remove a component. Establish the maintenance task before choosing an attractive panel size.

Check the wall and service requirement first
Start with an existing, understood opening whenever possible. Creating or enlarging one requires knowing what is behind the wall and what function the wall assembly performs. Do not cut an unknown wall based solely on a detector reading or an assumption about where pipes should run.
If the project involves electrical equipment, a fire-rated wall, waterproofing, structural framing, or another regulated assembly, have the relevant professional confirm the access arrangement before changing it.
Electrical accessibility can carry specific legal requirements. For example, Washington’s rule on electrical box accessibility requires access to the contained wiring and devices covered by that provision without removing building structure, including insulation. That Washington rule does not establish compliance for another location or approve a particular decorative hatch.
Check the surface and exposure separately
The substrate is the surface directly underneath the adhesive tile. Confirm compatibility for both the wall and hatch: approval for painted drywall does not automatically cover raw wood, metal, plastic, or a factory-coated access door.
Smart Tiles’ technical FAQ, for example, lists smooth painted drywall and certain other smooth surfaces as suitable, while excluding unpainted drywall and porous wood. It also distinguishes splash exposure from direct shower or bathtub water exposure. These are instructions for Smart Tiles, rather than approval of every adhesive tile or hatch.
Do not treat a water-resistant decorative face as proof that the panel perimeter is waterproof. A shower-access detail needs an assembly intended for that exposure.
For an initial comparison of room conditions, surfaces, and removal concerns, use our guide to wall tile by room and surface. Make the final choice using the instructions for the exact tile and panel you select.
Gather the materials and define the construction
Gather the panel components and their instructions before buying finish materials. The frame, carrier, retention hardware, and release method determine what you can build; the tile pattern follows those decisions.
A carrier is the rigid face supporting the tile on the removable section. Its material, thickness, preparation, and attachment need to suit the chosen assembly. There is no universal plywood thickness, magnet count, or screw arrangement for every opening.
Materials and tools checklist
| Project need | What to have ready | What to confirm |
|---|---|---|
| Access assembly | Suitable frame and removable hatch, or a fully specified cover construction | Clear opening, permitted orientation, finish limits, and release method |
| Support and attachment | Specified backing, fasteners, catches, hinges, or other hardware | Compatibility with the wall and complete finished panel |
| Decorative finish | Selected peel-and-stick tile and matching spare material | Approved substrate, room exposure, cutting method, and care |
| Surface preparation | Compatible repair materials, cleaner, and any required coating | Preparation method and waiting periods |
| Measuring and layout | Tape measure, square, level, pencil, paper, and template material | Consistent reference points and readable labels |
| Cutting | Manufacturer-approved tool, straightedge where suitable, and cutting mat | Tool suitability for the tile’s actual construction |
| Application | Manufacturer-approved smoothing tool and clean cloths | Pressure and face-protection requirements |
| Future access | Required release tool, operating instructions, and safe storage location | A way to open and support the finished hatch |
Keep wall-opening tools off the shopping list until the opening work has been assessed. Tile cutting and wall cutting are separate jobs with different risks.
If you are considering Stickwoll tile, review the installation and care guide alongside the selected product’s instructions. General application guidance does not establish an access panel’s load capacity or allowable finish thickness.

Decide what “removable” needs to mean
Write down whether you need occasional inspection, periodic servicing, or quick access. Also decide whether a discreet handle, visible fastener, or narrow trim border is acceptable.
Our recommendation is to resolve those practical requirements before pursuing concealment. If you will open the panel regularly, a clear release point may be more useful than a nearly invisible seam.
Renters should obtain permission before cutting, drilling, replacing an access door, or applying adhesive finishes. A removable hatch does not make the surrounding wall treatment reversible, and adhesive removal cannot guarantee intact paint or a protected deposit.
How do you measure a removable tile access panel?
Measure the usable service opening, the wall cutout, the frame, and the hatch as distinct items. Then check the complete removal path, including hand space, tools, and any equipment that must pass through.
Do not copy a nominal panel size directly onto the wall. A product’s advertised size may describe its clear opening rather than its required cutout.
Record the opening before choosing the hatch size
The clear opening is the unobstructed space available with the hatch open or removed. The cut opening is the hole in the wall finish. The rough framed opening is the space provided by the supporting construction.
Those dimensions can differ. BAUCO’s Plus II single-leaf manual, for example, pairs a 12 × 12-inch clear opening with a 12⅜ × 12⅜-inch drywall cut opening in one model example. That allowance belongs to that component; it is neither a universal clearance nor a recommended service-opening size.
Use this measurement record:
| Measurement or requirement | Your record |
|---|---|
| Service or equipment needing access | ____________________ |
| Required clear width and height, with basis | ____________________ |
| Existing opening width at top, middle, and bottom | ____________________ |
| Existing opening height at left, center, and right | ____________________ |
| Both corner-to-corner diagonals | ____________________ |
| Wall finish thickness and surrounding condition | ____________________ |
| Selected frame’s required cutout | ____________________ |
| Hatch face dimensions and permitted covering | ____________________ |
| Required operating gap and release space | ____________________ |
| Equipment-removal route and nearby obstructions | ____________________ |
Multiple measurements reveal conditions that a single center measurement misses. Different widths can indicate an uneven opening; different diagonals can indicate that its corners are out of square. Use the component instructions to decide what correction is required rather than averaging everything into one apparently convenient dimension.
Keep units consistent on the record and label which surface each measurement describes. A note such as “width” becomes ambiguous when you later compare a wall cutout, a frame drawing, and a hatch face. Record the measuring points as well as the number so another person can reproduce the check.
Check access in three dimensions
A flat outline cannot establish whether a service task is possible. Consider the depth behind the opening and the space in front of it.
For a hypothetical plumbing inspection, seeing a fitting may be enough. Replacing that fitting could require room for hands, tools, and movement beyond the visible opening. Have the person responsible for that service confirm the required access.
Also check the hatch’s own travel. A hinged leaf needs its swing space; a lift-out cover needs room to move clear of its frame. Nearby cabinetry, a toilet, an appliance, or a countertop may obstruct an otherwise correctly sized opening.
Keep one permanent layout reference outside the removable area. Measuring everything from an adjustable hatch edge can transfer its positioning error into the entire tile layout.

Which panel approach fits your access needs?
Choose the approach that meets the service requirement with a release method you can operate comfortably. A prebuilt panel, a specified lift-out cover, and an openly visible service door offer different balances of finish control and construction work.
Find your planning route
Use three decisions: how often you expect access, whether the required access path is confirmed, and how visible the panel may be. Apply the first matching result below.
- Access size, equipment-removal route, or wall suitability is unknown: Pause panel selection. Confirm those requirements with the relevant installer or professional before buying or cutting.
- Access is frequent or must be quick: Prioritize an identifiable, straightforward release. Compare service doors with documented operation and any permitted decorative covering.
- Access is occasional and a trim border or visible fastening is acceptable: Compare a compatible framed panel or a fully specified removable cover. Make reliable positioning the priority.
- Access is occasional and concealment matters most: Compare systems intended for decorative finishes. Confirm the exact carrier, covering, operating gap, and release detail before planning the pattern.
If several descriptions fit, the unresolved access requirement takes priority, followed by access frequency, then appearance.
This is a planning guide. It does not approve a wall modification, determine code compliance, or calculate hardware capacity. Its useful result is a next step: confirm the service requirement, compare a documented panel, or refine the finish detail.
Compare the construction choices
| Approach | Main advantage | Main constraint | Best question to resolve |
|---|---|---|---|
| Retain an existing service door and tile around it | Preserves an established access method | Door remains visible | Can the existing door remain unobstructed and acceptable in the layout? |
| Use a prebuilt panel that permits the proposed covering | Provides a documented frame and operating method | Covering limits still apply | Does the manufacturer permit this finish and thickness? |
| Build a removable carrier using a fully specified construction | Allows control over carrier and tile layout | Support, retention, and release must all be resolved | Who has specified the complete assembly? |
| Use a concealed system intended for conventional bonded tile | Provides a system-specific tiled-cover method | Construction may differ substantially from adhesive sheets | Is this the correct system for the actual finish? |
A flexible peel-and-stick sheet should not be substituted for a structural cover in a conventional tiled-access system. Schluter’s REMA instructions, for example, describe a separate bonded tiled cover and aligned magnetic components. That construction does not establish that flexible adhesive tile can serve as its cover.
Why generic magnets are not a complete specification
Magnetic retention still needs a supported carrier, secure component attachment, repeatable positioning, and a controlled removal method. The complete panel includes the carrier, decorative covering, trim, and hardware.
A useful specification connects these parts to one another: how the carrier is supported, where it seats, what retains it, and how it is released without pulling on its decorative face. Keep that information with the panel instructions. Resolving one part in isolation can leave the complete assembly without a dependable opening method.
Avoid selecting catches solely because a listing quotes a holding-force number. For this project, obtain component guidance that addresses the actual arrangement and finished panel. If that information is unavailable, choose another documented method or have the construction specified.
For the decorative side of the decision, the peel-and-stick tile planning guide can help compare surface preparation, edge treatment, and room exposure. It does not replace access-panel instructions.
Prepare the opening, frame, and removable hatch
Complete the frame and hatch fit before applying tile. The uncoated assembly should sit correctly, open without binding, and return to a repeatable position before its finish conceals the edges.
Resolve damage before covering it
Inspect the surrounding wall for loose material, staining, softness, peeling paint, or signs of moisture. Find the cause before making a cosmetic repair.
If creating the opening has already been assessed and authorized, complete that work to the applicable construction requirements and chosen panel instructions. This finishing sequence assumes that the opening itself is suitable.
Build and test the assembly in order
- Provide the specified support. Position backing or the frame without compromising the required service opening or concealed services.
- Fit the frame. Follow its fastening and alignment instructions. Check that installation has not pulled it out of shape.
- Fit the bare hatch. Install the specified hinges, catches, stops, restraints, and release parts.
- Test the full movement. Open, remove where intended, replace, and close the hatch using its intended method.
- Prepare the approved face. Complete compatible repairs and coatings, then observe the required waiting periods.
- Recheck the fit. Preparation materials must not obstruct the perimeter, latch, fasteners, or release point.
BAUCO’s manual illustrates why the early test matters: it calls for a straight, square, rigidly supported frame, trial operation before finishing, attachment of the safety cable, and avoidance of paint bridging the operating gap. Those instructions apply to that system and do not approve an unspecified tile covering.

Prepare the wall and hatch as separate surfaces
Both surfaces need the preparation required by the selected tile. A hatch that looks smooth may still have an incompatible coating, while sound wall paint may need cleaning or a specified waiting period.
Smart Tiles’ preparation instructions require a smooth, even, clean, dry surface and specify particular cleaning guidance. They also call for 72 hours after primer or 21 days after paint before applying its tiles. These intervals illustrate why preparation must be scheduled; they should not be transferred to another brand or coating.
For painted-wall inspection and layout considerations, see our guide to installing adhesive tile on painted walls. Follow the selected manufacturer’s preparation method rather than adding sanding, extra adhesive, or coatings automatically.
How do you align tile across the removable section?
Use one wall layout to position the pattern, then divide the finish at the hatch’s operating boundary. Dry-fit with the hatch closed in its final position, but keep every fixed and removable piece separately identified.
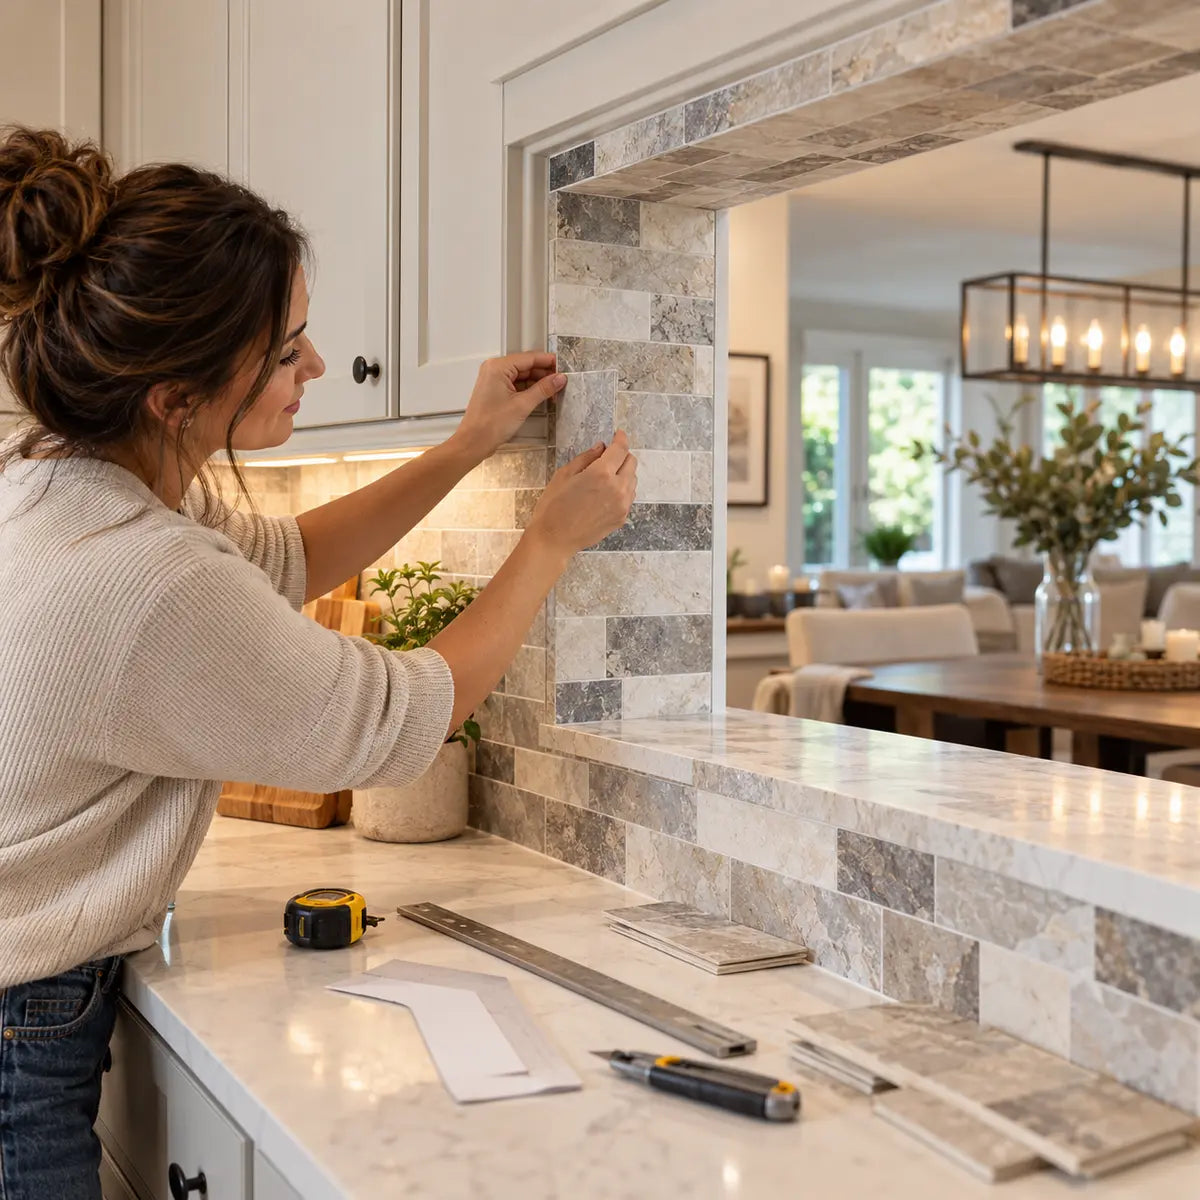
Start with a level reference line outside the hatch. Extend the pattern across the opening using backing-on sheets or paper templates. Look at the entire wall before committing to a starting point.
A pattern that centers beautifully on the wall may leave awkward slivers around the hatch. Shift the proposed layout while everything is still reversible, provided the required service opening and panel construction remain unchanged.
Treat the seam as part of the design
A straight printed grout line may offer a convenient place to locate part of the perimeter. It does not override the required operating gap, and a staggered pattern may not conceal all four edges.
Keep the finish clear of the moving boundary. Tile, adhesive, trim, and other finishing material should not unintentionally connect the fixed wall to the hatch. This is a design inference from separate-cover construction and operating-gap instructions; confirm the detail for the selected assembly rather than assuming one seam width suits every panel.
Do not wrap an adhesive sheet around an edge if doing so would obstruct the frame or change the required clearance. Likewise, a decorative border must not cover fasteners that you need to remove.
Label the parts before cutting
Mark templates and backing papers with “top,” pattern direction, location, and whether the piece belongs to the wall or hatch. A small sketch showing those labels makes reassembly much easier.
Take a straight-on photograph of the dry layout. It can help restore orientation if several similar pieces move on the workbench.
For a hypothetical rectangular hatch, you might label its finish pieces H1 and H2, then label adjacent fixed pieces L, R, T, and B. The labels have no technical significance; their purpose is to stop a correctly cut piece from being installed in the wrong place.

Check whether the layout is ready
Review these conditions before exposing adhesive:
Your result depends on the first unresolved item. If access or construction is unconfirmed, return to panel planning. If the hatch binds, correct its fit. If preparation is incomplete, wait. If only layout items remain, continue the dry-fit until they are resolved.
When all conditions are satisfied, move to cutting. This readiness check organizes the work; it does not certify the wall, hardware, or finished assembly.
A check means you have verified the condition against the relevant instructions or service requirement. An unchecked item is a prompt to investigate, even when the layout looks complete. These marks last for this visit only; transfer unresolved items to your project notes before leaving the page.
How do you cut peel-and-stick tile around an access panel?
Make templates, transfer the verified boundaries, and cut the tile on a supported work surface using the tool specified for its construction. Dry-fit every cut piece before removing its backing.
Peel-and-stick tile can have different face and backing materials. Do not assume scissors, a utility knife, or a score-and-snap technique will suit every product.
Make a template of the actual finish boundary
Use paper or card to reproduce each required shape. Mark the operating boundary and any exposed release detail separately so you do not confuse a decorative edge with a structural dimension.
Test the template with the panel seated. If it does not fit correctly, revise the template first. Do not use adhesive tile as repeated trial material when a paper adjustment can resolve the problem.
Our guide to cutting tile around outlets and edges explains template labeling, reference measurements, pattern direction, and dry-fitting. Apply those fitting principles here while retaining the access panel’s own clearance requirements.
Transfer, cut, and test each piece
Place the tile on a suitable cutting surface with its backing intact. Transfer the template while preserving the required face orientation. If marking the back, check that the shape has not accidentally been mirrored.
Use an offcut to confirm the approved tool and cutting method before making a prominent perimeter cut. Support the material and keep hands outside the tool’s path.
After cutting, place the piece in position with the backing still on. Check the pattern and perimeter clearance, then remove it and repeat for its neighbor. A cut that looks accurate on the bench can still produce an uneven seam when paired with another piece.
Avoid cutting the finished panel free after tiling continuously across it. That sequence makes the operating boundary harder to control and places the tool close to the hatch, wall, and release hardware.
Apply the fixed and removable finishes separately
Install the prepared pieces according to the selected tile instructions. Where practical and permitted by the panel construction, finish a removable leaf on a clean, supported work surface.
The Smart Tiles Metro guide uses a level reference line, product-specific cutting, overlap at designated sheet edges, and firm pressure after positioning. Its sheet-to-sheet overlap detail must not be extended across a removable hatch boundary. The guide also describes its adhesive setting firmly within 48 hours; that is a product instruction, not evidence that installed sheets can be repeatedly peeled and reused.
Use only a smoothing tool appropriate for the selected finish. The Scraperoo – Y tile smoothing scraper is a store option described for smoothing trapped air and applying even pressure during installation. Its role here is surface application; open the hatch with its specified release method.
Check exposed edges as you work. Stop if a sheet curls into the operating gap or covers a release point. Correct the placement using the manufacturer’s permitted adjustment procedure before continuing.

How do you test, open, and maintain the finished panel?
Test the complete panel after the specified preparation and adhesive waiting periods. Confirm that it releases, clears the surrounding finish, provides usable access, and returns to the correct position without requiring tile removal.
Check the finish in normal room lighting and at the angles from which people usually see it. Then operate it. Appearance and function both need to pass.
Perform a complete access rehearsal
Support the hatch as required and use its intended release. Move it through the full opening or removal path, checking for contact between tile edges, trim, frame, and nearby fixtures.
With the panel open, confirm the actual service task remains possible. Keep required enclosure covers and other protective parts in place unless the relevant work calls for their removal by an appropriate person.
Replace the hatch and check seating, latch engagement, alignment, and the perimeter. If resistance appears, stop and identify it. Do not pry against the surrounding tile or pull on the decorative sheet to overcome a binding panel.
A successful rehearsal demonstrates that the panel works in its present condition. It does not establish a tested service life or a guaranteed number of opening cycles.
Keep a short access record
Store this information with your household maintenance records:
A discreet orientation mark on the hatch back can help prevent reversed replacement. Avoid putting private service information or operating instructions where they obstruct hardware.
Write the opening instructions for someone who did not install the panel. Identify the release location and the way the hatch must be supported before it comes free. A photograph can clarify the direction of movement, but keep the written instructions too: a closely matched tile pattern may make the release point difficult to recognize in a photograph.
Separate routine access from decorative replacement
Routine access should leave tile bonded to the hatch. Replacing that tile is a separate maintenance task.
Follow the selected manufacturer’s cleaning instructions and avoid flooding the perimeter. Smart Tiles, for example, specifies gentle face cleaning with a soft sponge and mild, non-abrasive products. Its removal guidance describes gentle pulling with hairdryer assistance while qualifying the result by the original surface. Neither instruction guarantees intact paint or reusable tile.
For future refurbishment, our guide to adhesive-tile removal and wall restoration can help you plan the work. Check its suggestions against the current tile instructions and actual substrate before using heat, solvents, or tools.
Keep spare matching material when practical. A replacement piece may still need careful pattern selection and dry-fitting, so retain the original layout photograph.
What should you do if the panel binds, looks uneven, or damages tile?
Stop using force and identify whether the problem comes from the frame, hatch position, decorative finish, or release method. Correct the cause before disguising the symptom.
| Symptom | Possible explanation to check | Next action |
|---|---|---|
| Pattern looks shifted after replacement | Hatch reversed, incompletely seated, or positioned differently | Check orientation, seating, and alignment against the saved layout |
| One edge catches | Finish intrusion, frame distortion, or insufficient permitted clearance | Inspect the contact point and compare it with panel instructions |
| Panel will not release | Release point covered, latch obstructed, or finish bridging the boundary | Stop pulling; identify the release mechanism and obstruction |
| Tile lifts during opening | Decorative sheet being used as a grip or rubbing the perimeter | Correct the opening method and clearance; assess finish replacement |
| Gap looks uneven | Frame out of square, hatch seating inconsistent, or cuts irregular | Resolve mechanical fit before recutting finish pieces |
| Panel sits proud of the wall | Carrier, trim, hardware, or finish thickness affects the fit | Compare the full assembly with its specified construction |
| Surrounding paint comes away during refurbishment | Adhesive removal affects the existing coating | Stop and reassess the manufacturer’s removal method and repair needs |
| Staining, swelling, or dampness appears | Moisture or material damage needs investigation | Leave cosmetic repair until the cause is resolved |
These are inspection prompts, not a diagnosis. A panel that worked before tiling but binds afterward deserves a close check of the added finish and perimeter. A panel that never fitted correctly needs its construction corrected before further decorative work.
Do not conceal a clearance problem with filler
Avoid adding grout, paint, adhesive, or sealant across the moving boundary simply to make a gap disappear. Some specified access systems include a particular sealing detail, but that does not make generic perimeter sealing appropriate here.
If the required operating gap is more visible than you expected, consider a deliberate border or another panel style. A consistent visible edge can be a better result than repeated damage from a gap made too tight.
Reconsider the DIY method if you cannot establish the required access, support the finished hatch appropriately, preserve the release method, or meet the location’s exposure requirements. Product limits are specific: Smart Tiles’ tile-category warranty, for example, separates installation-temperature conditions from heat and steam exposure restrictions. Those conditions do not determine appliance clearance or give a modified wall a fire rating.
Finish with three acceptance tests
Before calling the project complete, answer yes to all three:
- The opening is usable: the required inspection, maintenance, and removal tasks remain possible.
- The hatch is serviceable: it opens and returns to position without peeling its finish or damaging adjacent tile.
- The appearance is acceptable: the pattern, perimeter, and release detail meet your expectations in normal viewing conditions.
Treat a failed test as a reason to revisit the relevant stage. An access problem returns you to the service requirement; a binding hatch returns you to fit and clearance; an appearance problem returns you to layout only after operation is sound. This keeps a cosmetic adjustment from concealing an unresolved construction issue.
Save or print the measurement record and materials checklist before starting. Confirm the exact tile and panel instructions, complete the bare-hatch test, and make the dry layout your last reversible checkpoint before cutting. Those decisions give the finished wall a clear path back to the service it conceals.


Deja un comentario
Este sitio está protegido por hCaptcha y se aplican la Política de privacidad de hCaptcha y los Términos del servicio.