


Vous est-il déjà arrivé de fixer vos murs de cuisine ternes en rêvant d’une touche élégante, tout en craignant de perdre votre dépôt de garantie ? Vous n’êtes pas seul. L’envie d’un espace personnalisé entre souvent en conflit avec les règles strictes de la location, vous laissant avec une cuisine qui ne vous ressemble pas.
Et si vous pouviez transformer complètement votre cuisine en un après-midi, sans aide professionnelle et pour moins qu’un dîner gastronomique au restaurant ? C’est la promesse du vinyl backsplash. C’est une solution abordable, élégante et—surtout—de removable backsplash parfaite pour les locataires et les débutants en DIY.
Ce guide est votre feuille de route complète. Nous vous accompagnerons de la sélection des bons outils jusqu’à un processus d’installation étape par étape, simple et fiable. Nous partagerons aussi l’élément que la plupart des guides oublient : how to remove vinyl backsplash en toute sécurité, en laissant vos murs impeccables. À la fin, vous aurez la confiance nécessaire pour mener ce projet à bien et créer une cuisine que vous aimez.

Pourquoi choisir le vinyl backsplash ?
Avez-vous déjà eu l’impression qu’une belle cuisine était hors de portée à cause du budget ou des contraintes liées à la location ? Cette section explique pourquoi le vinyl backsplash est devenu la solution de référence pour les locataires et les propriétaires avisés qui recherchent un maximum de style avec un minimum d’engagement.
Le vinyl backsplash offre une combinaison puissante d’accessibilité et d’esthétique. Alors qu’un carrelage céramique traditionnel peut coûter entre 15 et 25 $ le pied carré, pose comprise, les options en vinyle de haute qualité sont souvent disponibles pour seulement 2 à 7 $ le pied carré. Pour une petite cuisine, cette différence peut représenter des centaines de dollars d’économies.
L’avantage principal pour les locataires est sa facilité de retrait. Contrairement au joint et au mortier, l’adhésif peel-and-stick utilisé pour la plupart des vinyl backsplashes est conçu pour une application temporaire. Cela signifie que vous pouvez ajouter un superbe vinyl backsplash that looks like subway tile ou un motif géométrique moderne, puis le retirer sans laisser de trace à la fin du bail.
Les possibilités de design sont presque infinies. Oubliez les motifs vinyle datés du passé. Les options d’aujourd’hui imitent de façon convaincante des matériaux haut de gamme comme le marbre, le bois récupéré et des mosaïques complexes. Cette variété vous permet de personnaliser votre espace, que vous ayez une cuisine campagne chaleureuse ou un appartement épuré et minimaliste.
Outils et matériaux dont vous aurez besoin
Submergé à l’idée d’acheter tout un tas d’outils coûteux à usage unique ? Voici une liste simple d’articles abordables du quotidien qui vous garantiront une installation au rendu professionnel sans vous ruiner.
Vous n’avez pas besoin de la boîte à outils d’un entrepreneur professionnel pour ce projet. La plupart de ce qu’il vous faut se trouve dans une quincaillerie locale ou en ligne, et beaucoup d’articles sont peut-être déjà chez vous. Cet ensemble d’outils, idéal pour les débutants, peut facilement être réuni pour moins de 30 $.
Liste de contrôle interactive du projet
Cochez les éléments au fur et à mesure que vous les rassemblez pour vous assurer d’être prêt pour une installation sans accroc.
Outils essentiels :- Mètre ruban : Pour mesurer avec précision la surface de votre mur.
- Cutter ou ciseaux bien aiguisés : Une lame neuve est essentielle pour des coupes nettes et droites.
- Règle en métal avec dos en liège : La règle guide votre couteau, et le liège empêche qu’elle glisse.
- Solution de nettoyage : Un simple mélange de vinaigre et d’eau ou un spray dégraissant fait parfaitement l’affaire.
- Chiffons en microfibre : Pour nettoyer le mur et essuyer tout résidu.
- Raclette ou lisseur en plastique : Une carte de crédit ou une carte de bibliothèque peut aussi dépanner pour chasser les bulles d’air.
- Tapis de découpe auto-cicatrisant : protège vos plans de travail ou vos sols pendant que vous découpez le vinyle.
- Niveau : aide à garantir que votre première rangée soit parfaitement droite.
- Négliger la préparation du mur : On ne le dira jamais assez. Appliquer du vinyle sur un mur gras, poussiéreux ou humide est la première cause d’échec. L’adhésif n’adhérera tout simplement pas correctement, ce qui entraînera des coins qui se décollent en quelques semaines.
- Mal aligner la première pièce : La première feuille ou le premier carreau que vous posez sert de base à tout le projet. S’il est ne serait-ce qu’un peu de travers, cette erreur sera amplifiée avec chaque pièce supplémentaire. Utilisez un niveau pour tracer une ligne de départ parfaitement droite.
- Étirer le matériau pendant la pose : Quand vous essayez d’ajuster une pièce, il peut être tentant de tirer ou d’étirer le vinyle. Cela déforme le motif et crée des tensions. Lorsque le vinyle reprend naturellement sa taille d’origine, cela peut créer des écarts ou des bulles. Posez-le délicatement sans tirer.
- Utiliser le mauvais produit près d’une source de chaleur : Installer un vinyl backsplash non résistant à la chaleur derrière une cuisinière est un danger pour la sécurité et ruinera votre projet. Vérifiez toujours les spécifications du fabricant et respectez les distances de dégagement recommandées.

Guide d’installation étape par étape
Un peu nerveux à l’idée de vous lancer et de faire une erreur ? Cette section décompose tout le processus en trois phases simples et faciles à gérer. Suivez ces étapes et vous obtiendrez un résultat impeccable.
C’est ici que la transformation commence. Nous allons vous montrer comment installer une crédence en vinyle pour qu’elle ait l’air d’avoir été posée par un pro. Le secret, c’est de ne pas se précipiter et de porter une attention particulière aux premières étapes.

Phase 1 : Préparez votre surface
Vous pensez pouvoir simplement coller le vinyle directement sur le mur ? Cette première étape essentielle est le secret pour garantir que votre crédence adhère correctement et, surtout, puisse se retirer proprement sans dommage.
Une bonne préparation du mur est l’étape que l’on néglige le plus souvent, et c’est la principale cause de décollement ou de mauvaise adhérence. Votre mur doit être propre, sec et lisse. Utilisez un nettoyant dégraissant pour éliminer toute trace d’huile ou de saleté invisible, surtout derrière la cuisinière.
Laissez le mur sécher complètement pendant au moins une heure. Toute humidité emprisonnée peut affaiblir l’adhésif avec le temps. Si vos murs viennent d’être peints, il est conseillé d’attendre quelques semaines avant d’appliquer une crédence afin de laisser la peinture durcir complètement. Pour les propriétaires dans cette situation, notre guide sur Comment installer des Stick Tiles sur des murs peints offre des conseils essentiels pour assurer une fixation durable sans abîmer votre nouvelle peinture.
Phase 2 : Mesurez, planifiez et découpez
Vous craignez de faire une mauvaise coupe ou de vous retrouver avec une pose de travers ? Cette phase vous apprend l’état d’esprit « mesurer deux fois, couper une fois », adapté au vinyle, afin de garantir que chaque pièce s’ajuste parfaitement.
Commencez par mesurer la hauteur et la largeur de la zone à couvrir. Au lieu de partir d’une extrémité, trouvez le centre visuel du mur principal et marquez-le légèrement au crayon. Planifier votre disposition à partir du centre vers l’extérieur permet d’obtenir un rendu équilibré et de dissimuler les petites coupes irrégulières dans les angles.
Posez votre feuille de vinyle sur une surface plane. Utilisez vos mesures pour marquer les lignes de coupe au dos du vinyle. Pour les prises, une excellente astuce de pro consiste à créer d’abord un gabarit en carton. Tracez la boîte de la prise, testez l’ajustement, puis utilisez ce gabarit pour découper le vinyle. Utilisez toujours un cutter bien aiguisé pour obtenir des bords nets.
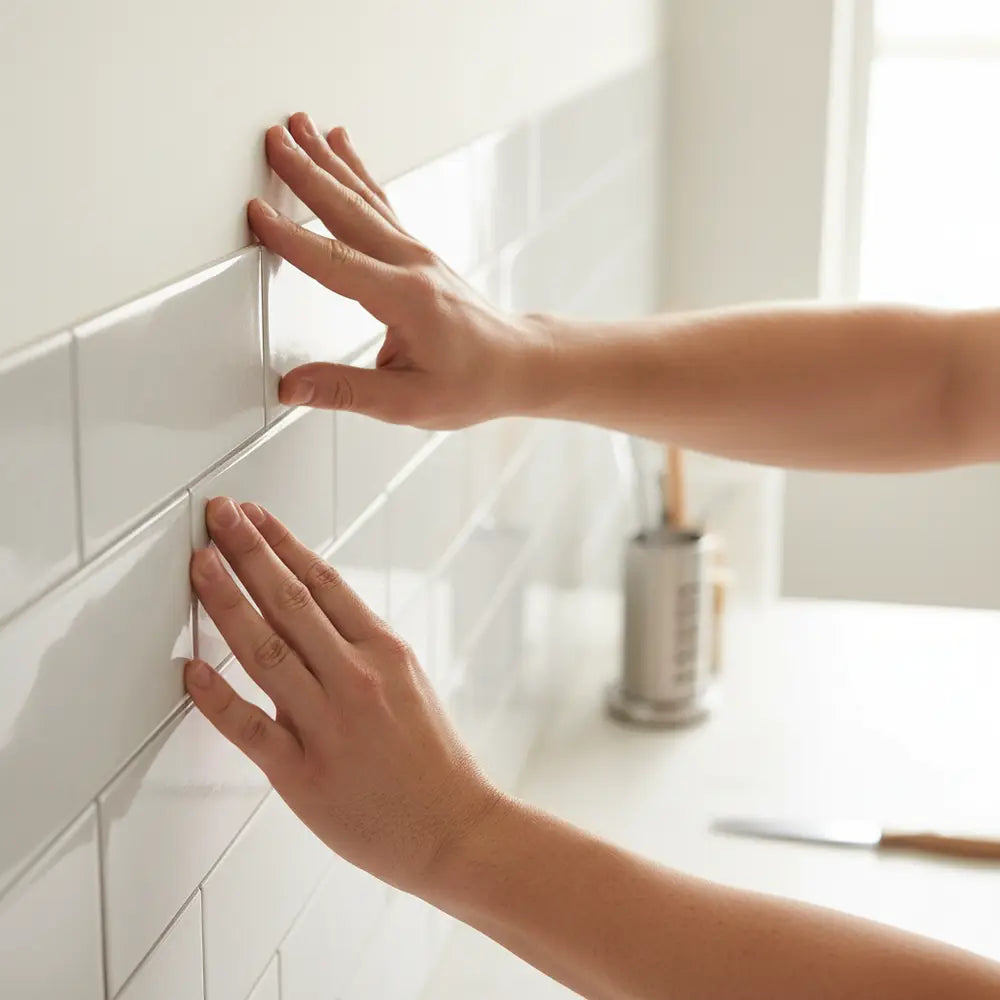
Phase 3 : Appliquez et lissez
Prêt pour la partie la plus satisfaisante du projet ? C’est là que votre nouvelle cuisine prend vie. Nous allons vous montrer comment appliquer le vinyle pour obtenir une finition sans bulles et sans joint visible.
Ne retirez pas tout le film protecteur d’un seul coup. C’est une erreur fréquente qui peut faire coller le vinyle sur lui-même ou entraîner une pose de travers. Retirez plutôt seulement les premiers centimètres du support papier.
Alignez le bord supérieur du vinyle avec votre repère sur le mur. Une fois le positionnement satisfaisant, pressez fermement la partie adhésive exposée contre le mur. Retirez lentement le reste du support d’une main tout en lissant le vinyle sur le mur de l’autre main avec une raclette ou une carte de crédit. Travaillez du centre vers l’extérieur pour chasser les bulles d’air.
Conseils de sécurité et de pose pour la crédence en vinyle
« Est-ce vraiment sans danger de l’installer derrière ma cuisinière ou près de l’évier ? » Cette section répond aux questions de sécurité essentielles, afin que votre belle nouvelle crédence soit aussi pratique que durable au quotidien.
Même si le vinyle est extrêmement polyvalent, tous les produits ne se valent pas. Comprendre où et comment le poser est essentiel pour sa longévité et votre sécurité, surtout dans une cuisine ou une salle de bains.

Résistance à la chaleur près d’une cuisinière
C’est l’une des préoccupations les plus courantes. Le vinyle standard peut se déformer ou fondre en cas d’exposition prolongée à une chaleur élevée. Vous devez vérifier les spécifications du produit pour un vinyl backsplash résistant à la chaleur. La plupart des fabricants recommandent de laisser un espace de 6-8 inches entre l’arrière de la cuisinière et le backsplash. Cela crée une marge de sécurité.
Options étanches pour les éviers et les salles de bains
Vous cherchez à ajouter une touche de style à un meuble-lavabo de salle de bains ? La plupart des vinyl backsplash sont résistants à l’eau, ce qui signifie qu’ils peuvent supporter des éclaboussures occasionnelles. Pour les zones très humides ou en contact direct avec l’eau, recherchez des produits explicitement indiqués comme vinyl backsplash waterproof options. L’essentiel est de bien superposer les joints entre les feuilles pour empêcher l’eau de passer derrière.
Considérations pour d’autres espaces
Bien qu’il soit idéal pour les cuisines et les salles de bains, la plupart des vinyl backsplash ne sont pas recommandés pour les cuisines extérieures. L’exposition aux UV et les variations extrêmes de température peuvent faire pâlir les couleurs et entraîner la défaillance de l’adhésif avec le temps. Réservez-les toujours à un usage intérieur, sauf si le produit indique explicitement qu’il est prévu pour l’extérieur.
Comment retirer un vinyl backsplash en toute sécurité
Vous redoutez l’idée d’arracher des carreaux et de devoir gérer un mur collant et abîmé le jour du déménagement ? Voici votre plan complet de retrait sans dommages, conçu pour rendre vos murs à leur état d’origine et récupérer votre dépôt de garantie complet.
C’est le test ultime d’une amélioration adaptée aux locataires. La bonne nouvelle, c’est que retirer un vinyl backsplash est étonnamment simple et propre lorsqu’on s’y prend correctement. Le processus repose surtout sur la patience, pas sur la force.

Étape 1 : Application douce de chaleur
La clé pour décoller l’adhésif sans abîmer la peinture ou le placo en dessous, c’est la chaleur. Un sèche-cheveux classique est l’outil idéal pour cela. Réglez-le sur une chaleur moyenne ou élevée et tenez-le à 2-3 inches de la surface en vinyle.
Déplacez lentement le sèche-cheveux d’avant en arrière sur une petite section, en insistant sur les bords et les coins. Il ne s’agit pas de faire fondre le vinyle, mais simplement de réchauffer et ramollir la colle en dessous. Pensez-y comme à un autocollant que l’on réchauffe légèrement pour le décoller d’un produit neuf.
Étape 2 : un décollage lent et régulier
Une fois qu’une section est chaude au toucher, utilisez un couteau à mastic en plastique, ou même votre ongle, pour soulever un coin. Ne tirez pas d’un coup et n’arrachez pas rapidement. Tirez plutôt le vinyle sur lui-même, lentement, en formant un angle de 45 degrés.
Si vous sentez une forte résistance, arrêtez de tirer et appliquez davantage de chaleur. Continuer à tirer contre un adhésif froid peut faire partir la peinture avec le vinyle. Procédez par petites sections faciles à gérer sur toute la surface du backsplash.
Étape 3 : nettoyage des résidus d’adhésif
Après avoir retiré le vinyle, vous pouvez trouver de légers résidus collants sur le mur. Un nettoyant à base d’agrumes ou un produit du commerce comme Goo Gone est parfait pour cela. Appliquez-en une petite quantité sur un chiffon en microfibre et frottez doucement la zone en mouvements circulaires. Les résidus devraient se détacher facilement. Terminez en essuyant le mur avec un chiffon propre et humide.
Pour un guide visuel encore plus détaillé, la ressource incontournable est notre article sur la façon de Transformer et retirer en toute sécurité les carreaux peel and stick pour locataires.
Styles créatifs et idées économiques
Vous pensez que le vinyl backsplash se limite à des motifs ternes et basiques ? Préparez-vous à être inspiré. Cette section montre comment utiliser ce matériau polyvalent pour exprimer votre style unique, du moderne farmhouse au chic minimaliste épuré.
L’un des grands avantages d’un vinyl backsplash économique est la liberté d’expérimenter les tendances déco sans engagement à long terme. En 2025, les propriétaires comme les locataires se tournent vers des styles qui apportent de la personnalité et un rendu sur mesure.
Le look intemporel du carrelage métro
Le classique carreau métro reste l’un des choix les plus populaires. Un vinyl backsplash qui imite le carrelage métro vous offre cette esthétique propre, lumineuse et intemporelle, sans les contraintes du jointoiement. C’est parfait pour donner l’impression que les petites cuisines sont plus grandes et plus lumineuses. Si ce style épuré vous plaît, notre Guide facile : installer des carreaux peel & stick style métro est un indispensable pour maîtriser ce look précis.
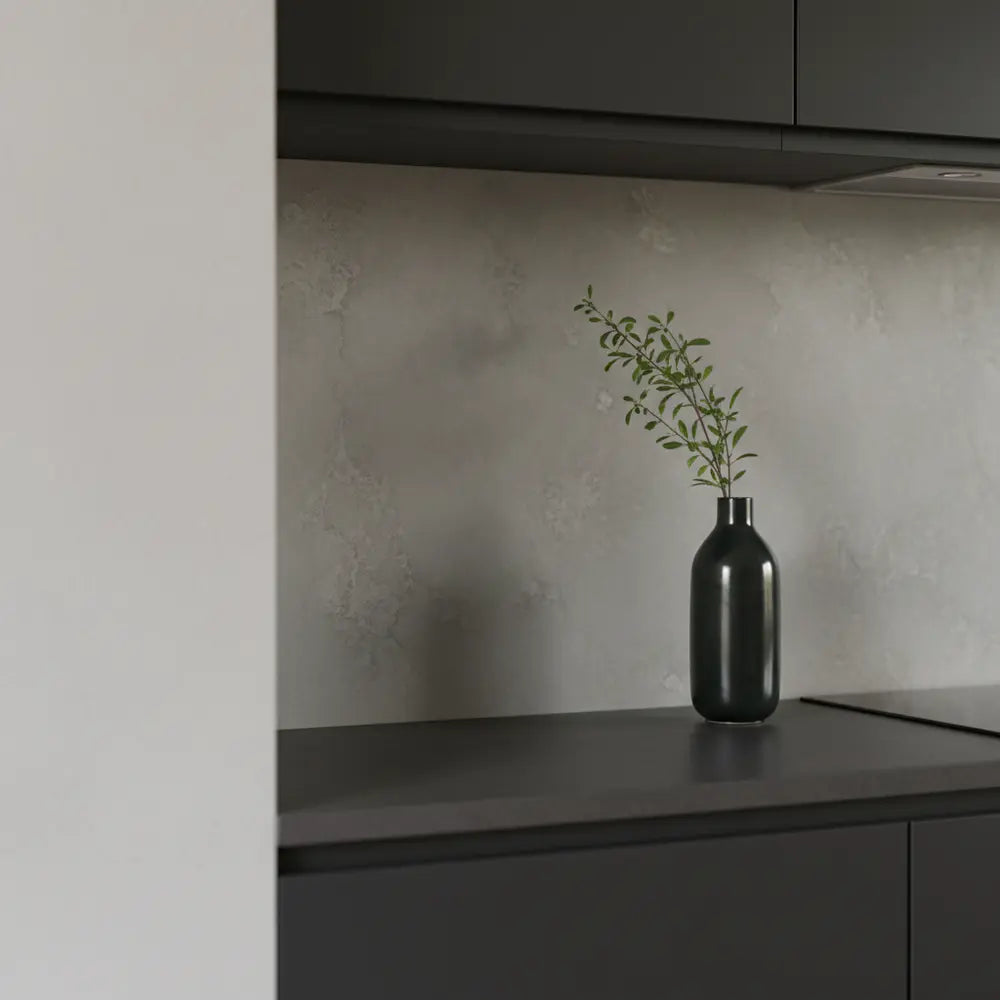
Style farmhouse moderne et charme rustique
Vous pouvez obtenir une ambiance chaleureuse et rustique avec un vinyle qui imite le shiplap blanchi à la chaux, le bois récupéré ou les carreaux à motif de style encaustique. Ces designs ajoutent de la chaleur et de la texture, ce qui en fait un choix parfait pour les cuisines de style ferme ou bohème. Ils s’associent à merveille avec des armoires peintes et des accents en bois naturel.
Motifs géométriques audacieux et impressions personnalisées
Pour celles et ceux qui veulent marquer les esprits, le vinyl backsplash propose des motifs géométriques audacieux et des couleurs vives qui coûteraient très cher en carrelage traditionnel. Des hexagones au motif chevron, ces designs deviennent un point focal artistique. Certaines entreprises proposent même du vinyle imprimé sur mesure, vous permettant de créer un backsplash vraiment unique en son genre. Pour plus d’inspiration et découvrir tout ce qui est possible, consultez notre guide sur Idées de cuisine avec backsplash peel and stick 2025.
Quel style de backsplash préférez-vous ?
Erreurs à éviter avec un vinyl backsplash
Vous voulez vous assurer que votre projet DIY réussit du premier coup ? Cette checklist des erreurs courantes vous aidera à tirer des leçons des faux pas des autres, tout en vous faisant gagner du temps, de l’argent et en évitant la frustration.
Savoir comment installer un vinyl backsplash est une chose ; savoir ce qu’il ne faut *pas* faire en est une autre. Éviter ces erreurs fréquentes fait toute la différence entre un projet dont vous serez fier et un projet que vous devrez recommencer.
Pour voir ces étapes en action et éviter les erreurs courantes, consulter un guide visuel détaillé comme nos instructions sur Comment installer un peel and stick vinyl backsplash peut tout changer.
Alternatives au vinyl backsplash
Vous êtes curieux de découvrir quelles autres options de backsplash adaptées aux locataires existent ? Cette section compare le vinyle à d’autres solutions temporaires populaires pour vous aider à faire le meilleur choix pour votre cuisine et votre budget.
Même si le vinyl backsplash est un excellent choix, il est utile de voir comment il se compare aux autres options. Pour vous aider à aller plus loin dans votre réflexion, notre guide complet Guide des carreaux de backsplash pour cuisine détaille les avantages et les inconvénients d’encore plus de matériaux. Votre décision finale dépendra peut-être de la texture souhaitée, de votre budget et de votre préférence en matière d’installation.
Carreaux peel-and-stick
Ils sont souvent plus épais et plus rigides que les feuilles de vinyle, ce qui crée un effet 3D plus convaincant qui imite le vrai carrelage. Ils sont aussi très faciles à installer. Cependant, ils peuvent être légèrement plus chers que le vinyle en feuille. Pour une analyse approfondie de cette catégorie précise, notre guide sur Comment installer un backsplash Smart Tiles peel & stick couvre tout, des conseils adaptés aux locataires à la gestion des options résistantes à la chaleur. Pour toute personne qui envisage cette option populaire, notre guide sur Comment installer des carreaux peel and stick et les meilleurs designs 2025 est la ressource idéale pour faire un choix éclairé.
Papier peint amovible
Souvent disponible dans une plus grande variété de motifs complexes et de fresques murales, le papier peint amovible est une autre excellente option temporaire. S’il est très bien adapté aux murs d’accent, il est généralement moins durable et moins résistant à l’eau que le vinyle, ce qui en fait un choix plus risqué pour une zone très exposée aux éclaboussures, directement derrière un évier.
Comparaison en un coup d’œil
Votre cuisine élégante et sans dégâts vous attend
Une belle mise à niveau de la cuisine n’a pas besoin d’être coûteuse, permanente ou intimidante. Avec le vinyle backsplash, vous disposez d’une solution abordable, élégante et totalement réversible à portée de main. Vous avez maintenant tous les conseils d’installation du vinyle backsplash et les connaissances nécessaires pour transformer votre espace en toute confiance.
N’oubliez pas que la clé du succès réside dans la préparation et le fait de prendre votre temps. C’est un projet que vous pouvez tout à fait réaliser vous-même, en créant un espace qui vous ressemble davantage sans risquer un seul euro de votre caution.
Prêt à passer à la première étape ? Commencez par mesurer votre espace et explorez l’incroyable variété de designs disponibles. Vous serez étonné de ce que vous pouvez accomplir en une seule après-midi.
Prêt à trouver le style parfait ? [Explore our complete collection of vinyl backsplash styles.] Vous voulez plus d’astuces et de conseils DIY adaptés aux locataires ? [Subscribe to our newsletter for the latest updates.]Foire aux questions (FAQ)
1. Combien de temps dure un vinyle backsplash ?
Avec une installation et un entretien appropriés, un vinyle backsplash de haute qualité peut durer plusieurs années. Sa durée de vie dépend de l’environnement ; un backsplash situé dans une zone très fréquentée et très humide peut montrer des signes d’usure plus tôt qu’un espace plus sec et moins utilisé.
2. Puis-je installer un vinyle backsplash directement sur des carreaux de céramique existants ?
Oui, dans la plupart des cas, à condition que la surface du carrelage existant soit propre, lisse et non poreuse. Vous devrez peut-être combler les joints profonds avec un enduit de rebouchage afin de créer une surface plane permettant au vinyle d’adhérer correctement.
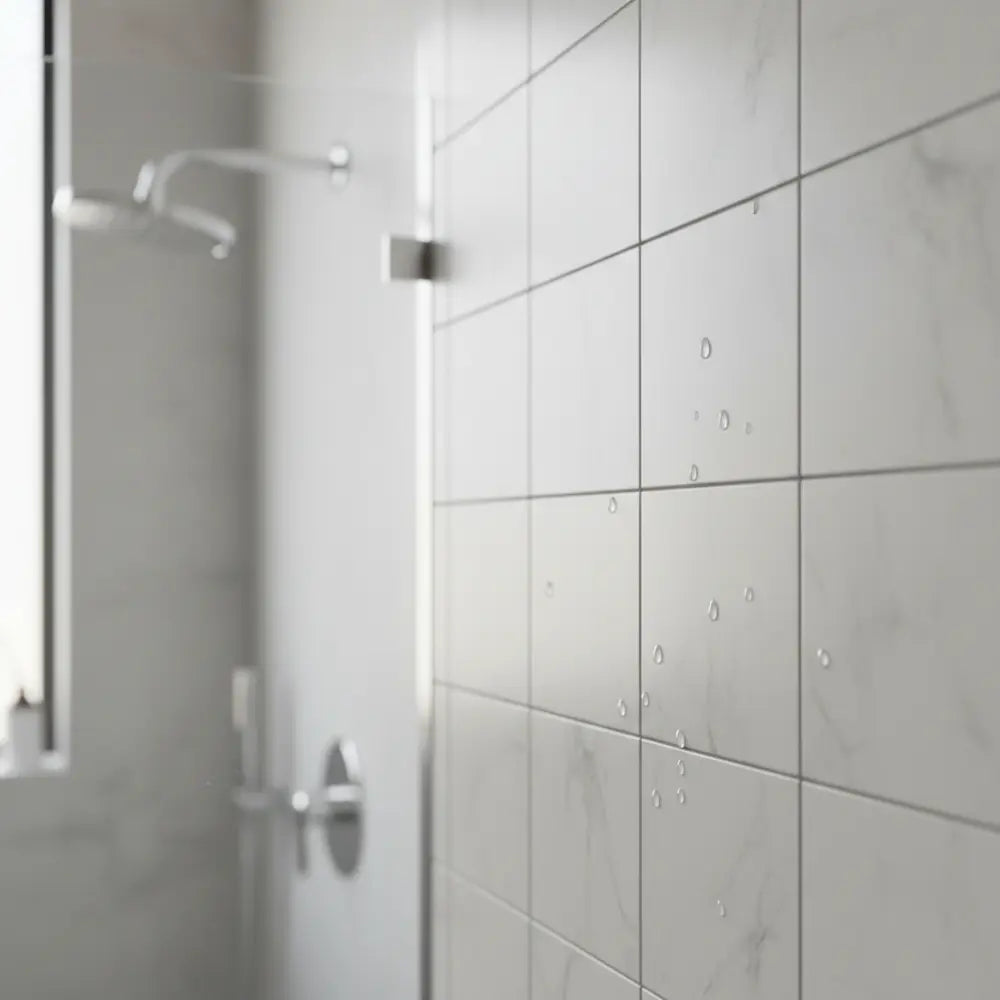
3. Le vinyle backsplash est-il vraiment suffisamment étanche pour une salle de bain ?
De nombreux vinyles backsplash sont résistants à l’eau et conviennent aux salles de bain, surtout autour d’un lavabo sur meuble. Pour les zones fortement exposées à l’eau, comme un mur de douche, vous devez utiliser un produit spécifiquement classé comme 100% étanche et vous assurer que tous les joints sont parfaitement scellés.
4. La chaleur de mon grille-pain ou de ma machine à café risque-t-elle d’endommager le backsplash ?
La chaleur des petits appareils comme les grille-pain ou les friteuses à air n’est généralement pas assez intense pour causer des dommages, surtout si l’appareil est légèrement éloigné du mur pendant son utilisation. Le principal risque concerne la chaleur élevée et continue d’une plaque de cuisson.
5. Quelle est la meilleure façon de nettoyer un vinyle backsplash ?
Utilisez simplement un chiffon doux ou une éponge avec de l’eau savonneuse douce ou un nettoyant polyvalent délicat. Évitez les éponges abrasives, les produits chimiques agressifs ou l’eau de Javel, car ils peuvent endommager la surface imprimée et la finition du vinyl backsplash.

Laisser un commentaire
Ce site est protégé par hCaptcha, et la Politique de confidentialité et les Conditions de service de hCaptcha s’appliquent.