


Réponse directe : Peel-and-Stick dans les niches de douche
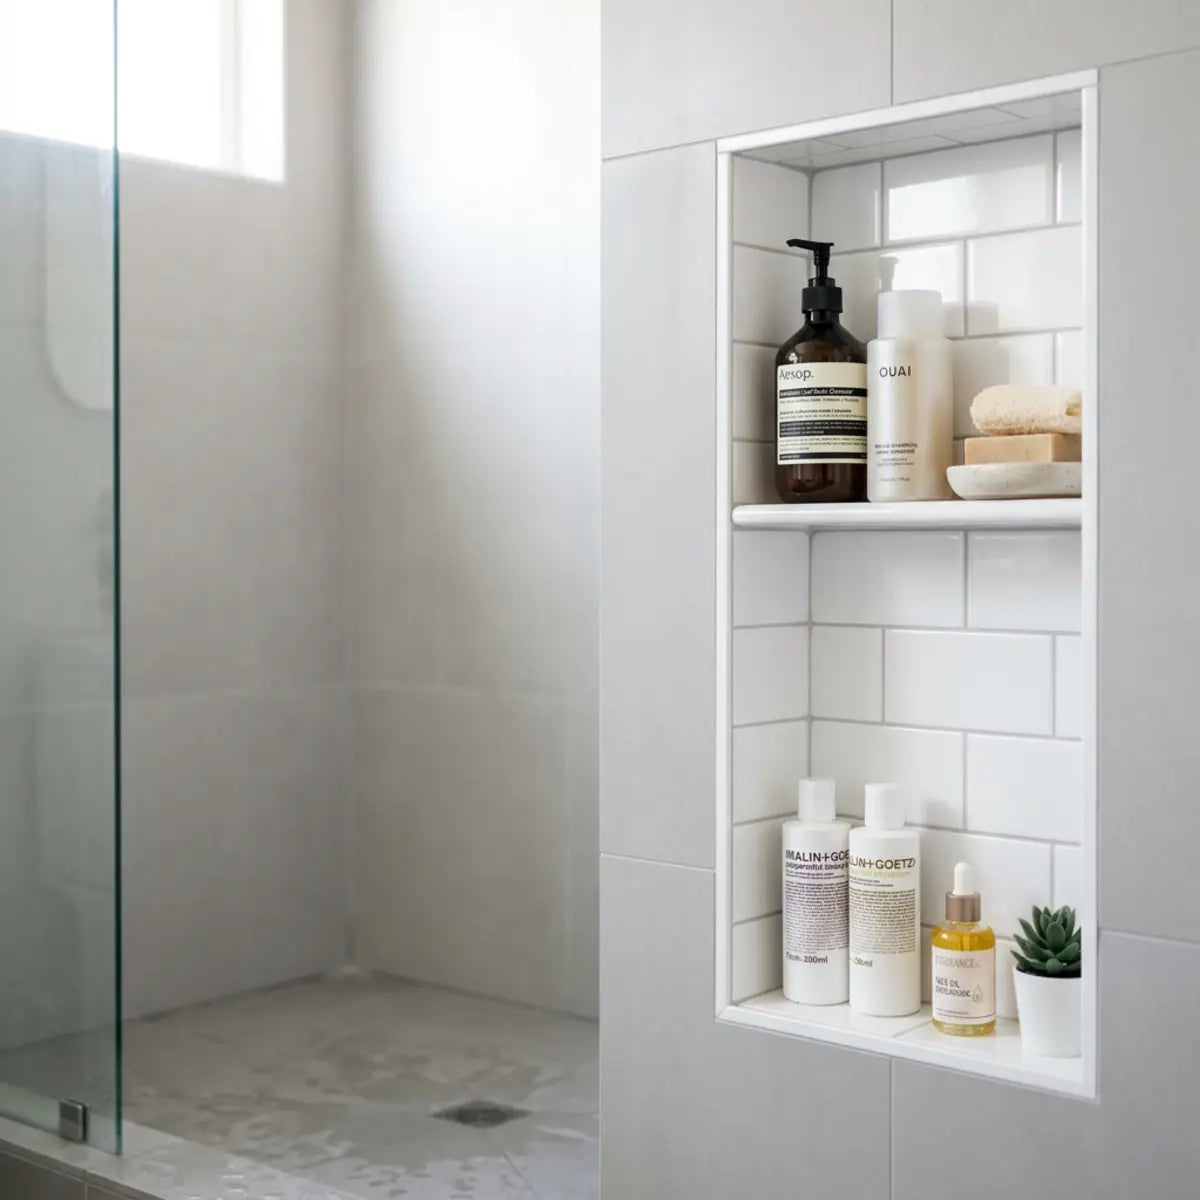
- Oui, dans des conditions contrôlées : vous pouvez tout à fait utiliser du peel-and-stick tile dans une niche de douche intégrée, à condition de le considérer strictement comme un habillage décoratif, jamais comme un substitut à l’étanchéité structurelle.
- Exigences strictes pour la surface : la surface de la niche sous-jacente doit être lisse, propre, parfaitement sèche et structurellement saine avant toute application adhésive.
- Étanchéité obligatoire des bords : pour éviter toute infiltration d’humidité et tout décollement de l’adhésif, vous devez sceller méticuleusement chaque bord exposé avec un mastic silicone de haute qualité, 100%.
Vous êtes-vous déjà demandé si votre vieille niche de douche pouvait vraiment supporter au quotidien la vapeur et les éclaboussures grâce à un simple habillage en peel-and-stick tile ?
Oui, vous pouvez tout à fait utiliser du peel-and-stick tile dans une niche de douche intégrée, mais uniquement dans des conditions strictement contrôlées. La surface de la niche doit être lisse, propre, parfaitement sèche et structurellement saine. De plus, le tile doit être explicitement conçu pour les environnements très humides. Considérez cette application comme un simple habillage décoratif, jamais comme un remplacement d’une membrane d’étanchéité fonctionnelle. Pour éviter toute infiltration d’humidité, vous devez sceller chaque bord exposé avec un mastic silicone de qualité salle de bain.
De nombreux propriétaires rêvent d’une rénovation rapide et abordable de leur salle de bain, sans le chaos d’une démolition complète. Une niche soigneusement mise à jour peut instantanément rehausser l’esthétique de votre douche. Cependant, une pose ratée — due à une mauvaise préparation de la surface, à un mauvais choix de produit ou à des joints non scellés — entraînera le décollement des tiles et de possibles dégâts des eaux.
Ce guide vous donne les critères exacts pour savoir quand cette méthode fonctionne. Nous verrons comment habiller proprement les angles intérieurs, sceller les bords vulnérables et repérer les signes d’alerte qui indiquent qu’il faut abandonner la solution adhésive au profit d’une maçonnerie traditionnelle.
Peut-on utiliser du peel-and-stick tile dans une niche de douche ?
Vous doutez qu’un tile à dos adhésif puisse réellement résister à l’humidité constante et aux éclaboussures à l’intérieur d’une alcôve de douche encastrée ?
Cette section détaille les critères de décision exacts et les paramètres de base nécessaires pour déterminer si votre niche de douche spécifique peut être un bon candidat pour une application peel-and-stick.
La réponse courte est oui, mais c’est entièrement conditionnel. Le peel-and-stick tile est une finition décorative. Il n’offre aucune étanchéité structurelle.
Si votre niche se trouve directement sous le jet puissant de la pomme de douche, la pression d’eau constante finira par fragiliser l’adhésif. En revanche, si votre niche est située sur un mur opposé ou n’est exposée qu’à la vapeur ambiante et à quelques éclaboussures occasionnelles, l’application a de fortes chances de réussir.
Liste de contrôle : devez-vous utiliser cette méthode ?
Avant d’investir du temps et de l’argent, évaluez les conditions spécifiques de votre douche. Cochez toutes les cases qui s’appliquent à votre installation actuelle. Soyez d’une honnêteté absolue sur l’état de vos murs : les adhésifs ne pardonnent pas en matière d’humidité et d’intégrité structurelle. Laissez notre algorithme interactif déterminer si votre niche est prête pour un habillage adhésif.
Concepts clés pour l’adéquation d’une niche :
- Exposition constante vs occasionnelle : Un contact direct et prolongé avec l’eau dégradera les adhésifs. La vapeur ambiante et les éclaboussures indirectes sont généralement sans danger si les bords sont bien scellés.
- Superposition décorative : Les carreaux adhésifs agissent comme une peau décorative. Ils n’empêchent pas l’eau de pénétrer dans un mur compromis.
- Dépendance au support : L’adhérence n’est aussi solide que la surface sur laquelle elle se fixe. Une plaque de plâtre friable entraînera une défaillance immédiate.
Établir le score de fiabilité en zone humide
Pour éliminer les approximations, nous évaluons les niches de douche à l’aide d’un indicateur précis. Cela nous permet de faire des choix de rénovation fondés sur des données, plutôt que d’espérer que tout se passe bien.
Lorsqu’il s’agit d’établir une base quantitative pour la résistance à l’humidité, le consensus du secteur consiste à évaluer le score de fiabilité en zone humide. Le cadre complet détaillé dans Les carreaux de douche peel and stick sont-ils vraiment étanches ? fournit l’évaluation standardisée nécessaire pour vérifier la compatibilité du support avant d’aller plus loin.
La vérité derrière les allégations d’étanchéité dans les environnements très humides
Vous craignez que les carreaux de douche peel and stick ne tiennent pas dans le temps ? Le débat sur la durabilité des adhésifs en zone humide vient souvent d’une mauvaise compréhension de la science des matériaux. Une surface de carrelage peut être 100% étanche, en repoussant parfaitement les gouttes d’eau, alors que l’installation globale peut échouer de façon spectaculaire si l’action capillaire attire l’humidité derrière les joints. Une véritable étanchéité est systémique et exige de comprendre comment la pression de vapeur et la dilatation thermique affectent les adhésifs synthétiques au fil du temps. Nous révélons la vérité sur leurs promesses d’étanchéité, analysons les problèmes d’installation les plus courants et expliquons précisément quand les utiliser en toute confiance et quand les éviter complètement.
Lire notre guide d’expert sur la vérité de l’étanchéitéCe score évalue quatre facteurs essentiels : la stabilité de la surface, le niveau d’exposition à l’humidité, la possibilité de protection des bords et la compatibilité de l’adhésif.
Scénarios acceptables pour les carreaux adhésifs :
- Niches de salle d’eau : Renfoncements dans des salles d’eau qui sont rarement exposés à un taux d’humidité élevé.
- Niches murales secondaires : Renfoncements situés loin de la trajectoire principale de la douchette.
- Environnements à faible projection : Douches équipées de jets pluie doux et suspendus plutôt que de douchettes inclinées à haute pression.
- Accents décoratifs : Niches placées en hauteur, utilisées בעיקרement pour l’exposition plutôt que pour un usage quotidien.
Cas inadaptés (ne pas poursuivre) :
- Plaques de plâtre qui s’effritent : Si la face papier se décolle, l’adhésif ne tiendra pas.
- Fuites actives : Ne recouvrez jamais des zones humides. L’eau sera piégée et favorisera la moisissure.
- Murs fortement texturés : Les adhésifs ont besoin d’un contact maximal avec la surface pour adhérer durablement.
- Jointoiement saturé : Poser sur un carrelage existant gorgé d’humidité emprisonne l’eau dans la cavité du mur.
- Membranes défaillantes : Si l’étanchéité caoutchoutée derrière le mur est compromise, arrêtez immédiatement.
Comparer l’adhésif au thinset traditionnel
Les installations de carrelage traditionnelles utilisent du mortier thinset. Le mortier thinset — un mélange de ciment, de sable et d’agents de rétention d’eau — crée une liaison rigide et permanente qui durcit chimiquement.
Les produits peel-and-stick reposent sur des adhésifs sensibles à la pression. Bien que les adhésifs modernes soient incroyablement puissants, ils restent flexibles et peuvent être vulnérables à une forte dilatation thermique si l’eau atteint le support. Comparé à un assemblage de niche en carrelage posé au thinset traditionnel, un wrap adhésif exige un scellement des bords bien plus rigoureux pour conserver son intégrité dans le temps.
Selon des recommandations adaptées du Tile Council of North America (TCNA), toute installation de carrelage en zone humide doit gérer l’humidité efficacement. Comme les carreaux adhésifs ne peuvent pas utiliser de joint cimentaire pour gérer l’action capillaire, 100% le scellement périphérique au silicone est obligatoire, et non facultatif.
Quel support convient le mieux au Peel-and-stick tile dans une shower niche ?
Vous craignez qu’appliquer un carrelage coûteux sur le mauvais support mural ne se transforme en quelques semaines en catastrophe avec décollement et dégâts ?
Nous expliquons exactement quels matériaux muraux assurent une liaison durable avec les carreaux adhésifs, et lesquels garantissent un échec rapide de l’installation.
Le support est la surface sous-jacente sur laquelle vous fixez le carrelage. Dans une shower niche, l’état de ce support détermine toute la durée de vie de votre projet.
Vous ne pouvez pas poser des carreaux adhésifs sur du bois brut non traité, des panneaux de ciment très poreux ou de la peinture qui s’écaille. La surface doit être exceptionnellement lisse, totalement exempte de poussière et entièrement non poreuse.
L’évolution des surfaces de salle de bain haute performance
Vous voulez relooker votre salle de bain avec style et sans vous ruiner, sans faire de compromis sur la chimie du support nécessaire pour une finition durable ? Repenser l’écosystème d’une salle de bain, c’est gérer des défis atmosphériques, une pression de vapeur imprévisible et des variations de température importantes. Les Peel and stick tiles offrent une solution rapide et étanche que vous pouvez poser en un week-end, en limitant efficacement l’humidité ambiante si vous les choisissez et les appliquez correctement. Découvrez comment les dernières avancées en science des matériaux ont donné naissance à des adhésifs capables d’adhérer fortement aux supports de salle de bain non poreux, en évitant complètement les temps de prise longs, salissants et laborieux des mortiers cimentaires traditionnels.
Recevez nos conseils d’expert pour la gestion de l’humiditéÉvaluation des supports courants pour niche :
- Carrelage céramique existant : C’est souvent le meilleur support. Il est lisse, rigide et non poreux. Vous devez d’abord le dégraisser soigneusement.
- Plaque de plâtre peinte : Acceptable uniquement si la peinture est entièrement sèche depuis au moins 21 jours, brillante ou satinée, et sans aucune trace de décollement.
- Panneau de support en ciment brut : Inacceptable. La nature poreuse du panneau ciment absorbera l’adhésif, entraînant un décollement rapide.
- Inserts en fibre de verre : Généralement acceptables s’ils sont légèrement abrasés et soigneusement dégraissés pour éliminer les résidus de fabrication.
La physique de l’adhérence dans les zones humides
Les adhésifs sensibles à la pression fonctionnent grâce à un contact microscopique avec la surface. Si une surface est texturée, vous perdez cette adhérence.
Pensez-y comme à du ruban adhésif appliqué sur du verre par opposition à du ruban appliqué sur de la brique. Le verre offre un contact de surface 100% optimal. Pour obtenir un résultat fiable en milieu humide, le support de votre niche doit reproduire cette douceur quasi vitrée.
Lorsqu’on évalue la résistance à l’humidité à long terme de différents supports, les critères changent. Les recommandations présentées dans Top Waterproof Peel and Stick Shower Tiles pour 2025 établissent une évaluation standardisée pour préparer ces surfaces, démontrant qu’un support dégraissé et non poreux réduit fondamentalement le risque de décollement prématuré.
En tête de la révolution du carrelage adhésif en 2025
Marre des vieux carreaux de cuisine ou de salle de bain qui freinent l’esthétique de votre intérieur ? L’année à venir marque une avancée majeure dans la conception de carreaux synthétiques multicouches. Découvrez comment les options waterproof peel and stick rendent la rénovation DIY facile, abordable et sans joint. Les dernières innovations intègrent une technologie à cœur rigide associée à un dos adhésif puissant, activé par l’humidité. Vous pouvez ainsi obtenir des textures de pierre et de céramique ultra-réalistes sans faire appel à un maçon. Nous passons en revue les composants structurels qui distinguent les produits haut de gamme des imitations vinyle bon marché, afin de garantir que votre investissement dure plus longtemps que les tendances.
Découvrez le guide complet 2025Conseil pro pour la préparation du support :
N’utilisez jamais de nettoyants ménagers standard contenant des agents hydratants ou des huiles pour nettoyer votre niche. Utilisez un dégraissant puissant comme le phosphate trisodique (TSP). Le TSP—un composé chimique inorganique puissant—élimine les résidus invisibles de savon et laisse une micro-« accroche » sur le carrelage existant, créant ainsi l’environnement idéal pour l’adhérence.
Comment rendre étanche une niche de douche avant la pose de peel-and-stick tile ?
Vous vous demandez si le carreau lui-même bloque l’eau, ou s’il faut une couche de protection cachée derrière les murs ?
Cette section démystifie l’étanchéité des zones humides et explique exactement comment protéger l’ossature de votre mur avant la pose du moindre carreau adhésif.
Une idée reçue fréquente veut que les carreaux peel-and-stick « waterproof » rendent votre douche étanche. C’est fondamentalement faux.
Le carreau lui-même ne se dégrade pas dans l’eau, mais les joints entre les carreaux restent vulnérables. L’action capillaire—la capacité d’un liquide à circuler dans des espaces étroits sans l’aide de forces externes—peut attirer l’humidité derrière le dos adhésif si on lui en laisse l’occasion.
Votre niche de douche doit être entièrement étanche avant la pose du carreau.
Naviguer sur le marché : trouver une qualité imperméable authentique
Fatigué des carreaux de douche peu fiables qui se décollent au premier signe de vapeur ? Naviguer dans le vaste marché des carreaux adhésifs exige de distinguer le marketing trompeur de l’ingénierie vérifiée. Découvrez les meilleurs carreaux de douche imperméables, durables et stylés de 2025, à appliquer et décoller, grâce à des critères de test rigoureux et indépendants. Nous analysons la résistance pure des couches adhésives sensibles à la pression lorsqu’elles sont soumises à des cycles thermiques continus et à une exposition directe à l’eau. Comparez les grandes marques, découvrez la vérité derrière leurs promesses de garantie et trouvez en toute confiance votre solution esthétique durable !
Comparer les marques et trouver votre solutionL’analogie du parapluie et du ciré
Considérez le système d’étanchéité de votre shower niche comme un ciré. C’est une couche continue et impénétrable qui garde le bois de structure au sec.
Le peel-and-stick tile agit comme un parapluie. Il détourne la grande majorité de l’eau, mais le vent et les fortes projections peuvent tout de même le contourner. Si vous avez un vrai ciré en dessous, l’eau qui passe à travers ne cause aucun dommage.
Méthodes d’étanchéité standard pour les niches :
- Membranes appliquées en liquide : Revêtements épais et caoutchoutés, appliqués directement sur le panneau support. Ils durcissent pour former un bac en caoutchouc sans joint, parfaitement étanche.
- Membranes en feuille : Tissus souples et imperméables posés avec du mortier-colle. Ils offrent une barrière très uniforme et étanche à la vapeur.
- Insertions de niche en mousse : Caissons en mousse rigide préfabriqués, entièrement étanchés, qui s’installent directement dans l’ossature murale.
Si vous posez du carrelage adhésif sur une niche en carreaux existante correctement construite, l’étanchéité est déjà assurée par les couches derrière ces anciens carreaux.
Si vous construisez une nouvelle niche, vous devez enduire le panneau de ciment d’une membrane liquide et la laisser durcir complètement. Une fois durcie, la membrane forme un support lisse et non poreux qui neutralise naturellement le transfert d’humidité et accueille à merveille les carreaux adhésifs.
Alerte erreur de débutant : le désastre du « mesurer une fois »
Ne commettez pas l’erreur catastrophique de mesurer votre niche une seule fois et de découper tous vos carreaux en supposant des angles parfaitement d’équerre. Les shower niches sont réputées pour ne pas être parfaitement carrées. Si vous coupez à partir d’une seule mesure, vous vous retrouverez avec des écarts qui s’élargissent à mesure que vous avancez plus profondément dans le renfoncement. Réalisez toujours un gabarit en papier à sec pour chaque paroi intérieure de votre niche spécifique avant d’approcher une lame de votre précieux carrelage adhésif.

Comment envelopper sans joint une built-in shower niche avec des peel-and-stick tiles ?
Vous êtes inquiet à l’idée de mesurer, couper et aligner les carreaux autour des angles intérieurs serrés sans que le résultat final ait l’air d’un bricolage DIY bon marché et trop visible ?
Nous fournissons les techniques géométriques exactes nécessaires pour plier et découper les matériaux adhésifs afin d’obtenir un rendu professionnel et sans raccord.
La signature d’un travail de carrelage amateur, ce sont des angles mal planifiés. Une shower niche présente un défi géométrique complexe avec plusieurs plans qui se croisent : la paroi du fond, le seuil (en bas), le linteau (en haut) et les deux parois latérales.
Recouvrir une niche correctement exige des découpes précises et un chevauchement stratégique. Vous ne pouvez pas simplement mettre deux bords bruts bord à bord dans un angle intérieur et vous attendre à ce qu’ils restent étanches.
Chevauchement stratégique et continuité visuelle
Pour obtenir un rendu sans raccord, vous devez prévoir la disposition de vos carreaux afin que les « lignes de joint » se poursuivent sans interruption du mur principal vers la niche, puis à travers le fond.
Les règles d’or du recouvrement d’une niche :
- Le seuil doit toujours se chevaucher : le carreau posé sur le seuil inférieur de la niche doit passer sous les carreaux des côtés et du fond. Cela permet à l’eau de ruisseler vers le bas, plutôt que de s’infiltrer dans un joint.
- Donnez une légère pente au seuil : le seuil inférieur doit présenter une légère inclinaison vers le drain de la douche. Ne l’installez jamais parfaitement à plat, sinon l’eau stagnera et endommagera l’adhésif.
- Enveloppez les angles intérieurs : lorsque c’est possible, incisez l’arrière d’un carreau souple et repliez-le à 90 degrés dans l’angle, plutôt que de le couper complètement.
Maîtriser la géométrie complexe avec un design hexagonal
Pour optimiser le taux de précision de l’installation dans les renfoncements géométriques complexes, la norme architecturale se tourne vers des matériaux hautement calibrés. Redonnez vie à votre cuisine ou votre salle de bain en quelques minutes avec les carreaux Peel and Stick Platinum Stones ! Ces carreaux auto-adhésifs, sans joint, présentent un design hexagonal chic et une texture 3D réaliste, offrant une solution sans effort pour moderniser les murs ou les crédences. Le motif nid d’abeille imbriqué est l’arme secrète des poseurs : il dissimule naturellement les petits écarts d’alignement qui sauteraient aux yeux avec des carreaux à grille standard. Parfaits pour les locataires et les adeptes du DIY, ils allient style moderne et avantages pratiques adaptés à la location — sans aucun résidu ! En neutralisant empiriquement les erreurs d’alignement grâce à une configuration nid d’abeille précise, Marble Hive offre une configuration optimale qui réduit fondamentalement la séparation dans les angles et simplifie les coupes complexes. Obtenez un rendu luxueux pour une fraction du coût des carreaux traditionnels, tout en bénéficiant d’un cœur totalement imperméable.
Découvrez les caractéristiques du produit Marble HiveTechniques de découpe pour des bords nets
Une découpe irrégulière exposera la couche interne en mousse ou l’adhésif du carreau, attirant le regard et laissant entrer l’humidité.
Outils de coupe essentiels :
- Cutter robuste : utilisez une lame neuve toutes les quelques coupes. Une lame émoussée déchire la surface en vinyle.
- Règle métallique avec dos en liège : empêche de glisser pendant le marquage.
- Tapis de découpe auto-cicatrisant : protège vos surfaces et garde la lame affûtée.
N’essayez pas de couper le carreau en un seul passage. Incisez délicatement la surface décorative au premier passage. Exercez une pression plus ferme au deuxième passage pour traverser le cœur du matériau. Enfin, cassez le carreau le long de la ligne marquée ou coupez à travers le papier support.
Astuce de pro : dissimuler les joints des bords coupés
Même avec une lame ultra-tranchante, un bord coupé n’aura jamais l’aspect parfait d’un bord fini en usine. Lors de la planification de votre pose, placez toujours vos bords coupés à la main dans les coins les moins visibles. Pour une niche de douche standard située à hauteur de poitrine, le coin le moins visible est le joint supérieur intérieur du plafond (le linteau). La gravité empêche de le regarder directement. Faites se chevaucher le bord supérieur, impeccable et fini en usine, de votre carreau mural arrière sur le bord brut et coupé de votre carreau de plafond.

Comment installer du carrelage peel-and-stick dans une niche de douche, étape par étape ?
Fatigué des tutoriels de crédence génériques qui ignorent complètement les défis spécifiques des renfoncements, des espaces étroits et de l’alignement en zone humide ?
Cette séquence étape par étape propose un ordre d’installation rigoureux et reproductible qui élimine les bulles d’air emprisonnées et garantit une adhérence d’un bord à l’autre.
L’installation de carrelage adhésif dans un espace étroit et en retrait exige une approche méthodique. De petites erreurs de positionnement s’amplifient rapidement à l’intérieur d’une niche. Un carreau décalé de quelques millimètres sur le panneau latéral se traduira par un écart important au moment d’atteindre le coin du fond.
Pour maintenir un haut taux de précision d’installation, vous devez suivre une séquence stricte.
Le workflow d’installation de précision
Nous avons comparé ce processus aux normes de fabrication professionnelles. Respectez strictement ces étapes pour obtenir une configuration optimale.
1. Préparation de la surface
Action : Frottez la niche avec un dégraissant TSP. Rincez à l’eau claire et laissez sécher pendant 24 heures.
Contrôle qualité : La surface doit être impeccable au toucher et totalement exempte d’humidité ou de poussière.
Outils requis : TSP, chiffon en microfibre, ventilateur.
2. Montage à blanc et gabarit
Action : Découpez des gabarits en papier aux dimensions de votre niche. Planifiez les découpes de vos carreaux sur une table plate avant de toucher la niche.
Contrôle qualité : Assurez-vous que les joints s’alignent visuellement des parois latérales jusqu’au mur du fond.
Outils requis : Papier, crayon, règle.
3. L’installation du seuil
Action : Découpez et posez d’abord la pièce inférieure du seuil. Assurez-vous qu’elle présente une légère pente vers l’avant pour l’écoulement de l’eau.
Contrôle qualité : L’eau doit naturellement s’écouler par l’avant, sans stagner dans le coin arrière.
Outils requis : Niveau, cutter.
4. Le mur du fond
Action : Installez les carreaux du mur du fond en commençant par le centre inférieur et en progressant vers l’extérieur.
Contrôle qualité : Vérifiez les lignes horizontales de niveau toutes les deux rangées afin d’éviter toute dérive vers le bas.
Outils requis : Niveau laser, règle droite.
5. Les parois latérales
Action : Posez les parois latérales en chevauchant les bords bruts des carreaux du mur du fond pour un rendu plus net.
Contrôle qualité : Assurez-vous que les joints sont bien serrés là où les parois latérales rejoignent le mur du fond et le seuil.
Outils requis : Cutter, outil de lissage.
6. Le linteau
Action : Installez en dernier la pièce supérieure du plafond de la niche. Appuyez fermement.
Contrôle qualité : Surveillez l’effet de la gravité qui peut faire glisser l’adhésif vers le bas avant sa prise.
Outils requis : Rouleau en J lourd.
7. Pression finale
Action : Passez le rouleau en J en caoutchouc sur chaque centimètre carré de la niche.
Contrôle qualité : Exercez une pression importante avec le poids du corps. Insistez particulièrement sur tous les joints et les bords chevauchants.
Outils requis : Rouleau en J en caoutchouc.
Ne sautez pas les étapes cruciales
La réussite dans une zone humide repose avant tout sur la préparation. Nous avons compilé une liste de contrôle préinstallation imprimable détaillant la préparation précise sur 24 heures requise avant de poser votre premier carreau. Gardez-la à portée de main pendant vos travaux.
Télécharger la liste de contrôle préinstallationLa technique du pelage et du roulement
Ne retirez jamais d’un seul coup tout le papier de protection. C’est une méthode universellement reconnue pour éviter la catastrophe.
Décollez seulement les deux premiers pouces du papier de protection. Alignez parfaitement le bord supérieur du carreau. Une fois l’alignement correct, tirez lentement le papier vers le bas depuis l’arrière tout en lissant simultanément le carreau vers le bas avec l’autre main. Cela chasse les bulles d’air et empêche le carreau de se fixer de travers sur le mur.
Le secret du décalage : pourquoi les carreaux métro réussissent
Lorsqu’on calcule le seuil de performance pour les rénovations DIY, trouver le bon motif est essentiel pour limiter les points de défaillance. Vous en avez assez de votre crédence ou de votre niche sans caractère ? Le motif classique en carreaux métro ne se limite pas à l’esthétique ; le motif décalé 50% améliore en réalité l’emboîtement structurel des joints adhésifs, ce qui rend plus difficile la pénétration de l’eau en ligne droite. Apprenez à poser du carrelage métro peel and stick pour une mise à niveau rapide, abordable et sans salissures. Le Guide d’installation du carrelage métro facile Peel & Stick calibre parfaitement les attentes de résultat. Il fournit des équivalents validés par les pairs pour gérer les problèmes d’espacement délicats sans compromettre l’étanchéité de l’ensemble, en détaillant la séquence exacte nécessaire pour conserver des lignes parfaites à 90 degrés sur des murs irréguliers.
Voir le tutoriel completRésolution des problèmes de mauvais alignement :
Si un carreau touche le mur de travers, ne l’arrachez pas brutalement. Utilisez un sèche-cheveux à faible chaleur pour ramollir délicatement l’adhésif. Décollez-le lentement à partir d’un coin. Si vous tirez d’un coup, vous étirez le vinyle, déformez définitivement la géométrie du carreau et abîmez les lignes de faux joint.
Comment sceller les bords du carrelage peel-and-stick dans une niche de douche ?
Vous craignez que l’eau finisse par s’infiltrer derrière les bords du carreau, provoquant des moisissures cachées et une dégradation de la structure ?
Nous détaillons la chimie exacte et la technique d’application pour sceller les périmètres, transformant un bord adhésif vulnérable en forteresse étanche.
Laisser les bords exposés d’un carrelage peel-and-stick non scellés dans une douche mène presque inévitablement à l’échec. Le périmètre où la niche rejoint le mur principal, ainsi que chaque angle interne à 90 degrés, représente une vulnérabilité critique.
Vous devez sceller ces interstices. Cependant, tous les mastics ne se valent pas. Vous ne pouvez pas utiliser un mastic de peintre standard, un mastic acrylique au latex ni un jointoiement basique.
Au-delà de la niche : le ROI d’une transformation complète
Vous en avez assez de votre salle de bain vieillotte qui donne une impression d’espace étroit et sombre ? Sceller votre niche n’est qu’une étape dans une bien plus grande opportunité esthétique. Les bénéfices psychologiques d’une salle de bain propre et moderne sont immenses, et le retour sur investissement des améliorations cosmétiques est bien supérieur à celui d’une démolition complète. Transformez tout votre espace en quelques heures avec des Peel & Stick Tiles abordables, adaptées aux styles modernes, rustiques ou luxueux. En appliquant ces techniques de scellement précises à un mur de douche complet ou à une crédence de meuble vasque, vous pouvez obtenir un rendu cohérent et haut de gamme sans la facture du maçon. Découvrez les avant/après qui prouvent qu’un projet de week-end peut donner des résultats de niveau professionnel.
Découvrez les transformations de carrelage pour salle de bainLa défense obligatoire au silicone
Vous devez utiliser un mastic silicone 100% formulé spécifiquement pour les applications cuisine et salle de bain.
Le mastic silicone — un polymère synthétique semblable au caoutchouc — reste souple en permanence, est totalement imperméable à l’eau et contient des biocides intégrés pour résister à la moisissure et au mildiou.
Les mastics acryliques finiront par se rétracter, se fissurer et se laver lorsqu’ils sont exposés à une humidité constante. Le silicone pur offre une configuration optimale qui agit comme un barrage physique, empêchant l’action capillaire d’attirer l’eau derrière le support adhésif.
Zones nécessitant un scellement immédiat :
- Le périmètre extérieur : L’ensemble du bord où le carreau adhésif rejoint le mur principal de la douche.
Maîtriser le cordon de silicone
Appliquer le silicone proprement demande de la pratique. Il est réputé pour être très collant et difficile à nettoyer.
Étapes de scellement professionnel :
- 1. Délimitez les bords : Posez du ruban de masquage à faible adhérence de part et d’autre du joint, en laissant exactement un espace de 1/8 pouce au-dessus de la jonction.
- 2. Coupez l’embout petit : Coupez l’embout du tube de silicone en biais à 45 degrés, en gardant l’ouverture très petite.
- 3. Appliquez une pression constante : Déposez un cordon de silicone continu et régulier le long du joint. N’arrêtez pas et ne reprenez pas.
- 4. Lissez le joint : Vaporisez légèrement le silicone frais avec un mélange d’eau et d’une goutte de liquide vaisselle. Faites glisser votre doigt en douceur sur le cordon pour le presser dans l’espace.
- 5. Retirez le ruban immédiatement : Retirez le ruban de masquage tant que le silicone est encore humide. S’il sèche, retirer le ruban arrachera le silicone hors du joint.

Considérez le scellement au silicone comme le calfeutrage de la coque d’un navire. Peu importe la solidité du bois si les joints restent ouverts sur l’océan. En neutralisant de façon concrète les infiltrations d’eau sur les bords, vous sécurisez l’ensemble de l’installation.
Combien de temps dure un revêtement peel-and-stick tile dans une niche de douche ?
Vous vous demandez si ce projet n’est qu’une solution temporaire, ou si vous pouvez vraiment espérer que ces carreaux tiennent des années sans se décoller ?
Nous fixons des attentes réalistes sur la durée de vie, en expliquant les facteurs exacts qui accélèrent la dégradation de l’adhésif et comment maximiser votre investissement.
La longévité du peel-and-stick tile dans une zone humide varie énormément. Ce n’est pas une installation permanente à vie comme un carrelage céramique traditionnel posé au mortier.
Cependant, lorsqu’il est posé sur un support correctement préparé avec des bords parfaitement scellés, un revêtement adhésif de qualité peut durer de 3 à 7 ans dans une niche de douche.
Le design biophilique rencontre la longévité structurelle
Lorsqu’on analyse la courbe de dégradation des performances sur un cycle d’utilisation standard, elle respecte strictement les indicateurs de stabilité en milieu très humide. Pour prolonger la durée de 3 à 7 ans, il vous faut des produits qui luttent activement contre la dilatation thermique. Modernisez votre intérieur avec les Vert Nature Peel and Stick Wall Tiles. En adoptant le design biophilique — en faisant entrer à l’intérieur les éléments apaisants de la nature — ces carreaux autocollants sans joints apportent un style frais et moderne à n’importe quel espace. Conçus pour les locataires, les amateurs de DIY et les propriétaires, la finition Minty Ceramic 8 combine une installation facile, un design amovible et des textures 3D réalistes. Pensés pour résister à l’usure quotidienne et totalement imperméables, les carreaux Nature’s Green offrent un résultat fiable en résistant à la dilatation thermique, tout en présentant un coût total de possession très avantageux par rapport aux remplacements traditionnels coûteux.
Découvrir les caractéristiques de Nature’s GreenLa courbe de dégradation des performances
Plusieurs facteurs agissent activement contre l’adhésif au fil du temps. Comprendre ces variables vous permet de les limiter.
Facteurs qui influencent la durée de vie :
- Cycles thermiques : La dilatation et la contraction constantes des murs de la salle de bain lorsque la douche chauffe puis refroidit sollicitent l’adhérence.
Maximiser la durée de vie de votre niche
Pour faire tendre votre installation vers la partie haute de cette estimation de 7 ans, adoptez une approche de maintenance préventive.
Protocoles d’entretien :
- Inspectez le silicone chaque année : Le silicone se dégrade. Vérifiez les joints périphériques une fois par an. Si vous voyez des décollements ou de la moisissure noire, retirez l’ancien silicone et appliquez un nouveau cordon.
- Utilisez des nettoyants doux : Remplacez vos produits par un savon vaisselle doux au pH neutre et un chiffon en microfibre souple pour l’entretien courant. Évitez les éponges abrasives.
- Aérez la pièce : Faites tourner le ventilateur d’extraction de la salle de bains pendant au moins 30 minutes après chaque douche afin de faire rapidement baisser l’humidité ambiante et de réduire la sollicitation de l’adhésif.
En traitant la niche avec soin et en entretenant les joints de bordure, vous protégez l’adhésif de son principal ennemi : l’eau stagnante.
Conclusion
Envelopper une niche de douche intégrée avec des carreaux peel-and-stick n’est pas une solution magique, sans effort. En revanche, c’est une stratégie très efficace et économique lorsqu’elle est mise en œuvre avec précision.
La réussite exige d’évaluer les conditions spécifiques de votre douche, de soigner au maximum la préparation du support et de vous engager à réaliser une étanchéité correcte des bords. Il s’agit d’une amélioration esthétique qui dépend entièrement de l’intégrité structurelle du mur en dessous.
Si votre niche est structurellement saine, propre et située à l’écart du flux d’eau le plus intense, cette méthode offre une énorme amélioration visuelle sans la poussière, le bruit et le coût d’un projet de maçonnerie.
Avant d’acheter les matériaux, nous vous invitons à consulter nos critères produits recommandés et à évaluer votre projet de façon réaliste à l’aide du Wet-Area Reliability Score. Choisissez la méthode qui correspond aux conditions spécifiques de votre douche, plutôt que de forcer le mauvais matériau dans un environnement inadapté.
Foire aux questions
Puis-je installer du peel-and-stick tile directement sur des murs de douche très texturés ?
Non. Les adhésifs ont besoin d’un contact de surface maximal, à l’échelle microscopique, pour créer une liaison durable. Les surfaces texturées créent des milliers de minuscules poches d’air derrière le carreau, réduisant fortement la zone de contact. Dans un environnement de douche humide, ces poches d’air laissent l’humidité s’infiltrer, provoquant une délamination rapide. Vous devez appliquer un enduit de lissage ou poncer la texture jusqu’à obtenir une surface parfaitement plane, puis la sceller avant d’appliquer des produits adhésifs.
Combien de temps dois-je attendre avant d’utiliser la douche après l’installation ?
Le consensus du secteur recommande d’attendre au minimum 48 à 72 heures avant d’exposer la nouvelle installation à une forte vapeur ou à l’eau directe. Les adhésifs sensibles à la pression ont besoin de temps pour polymériser complètement et atteindre leur résistance d’adhérence maximale. En outre, le 100% mastic silicone utilisé sur les bords nécessite au moins 24 heures pour former une peau et durcir complètement avant de pouvoir dévier l’eau en toute sécurité.
Que dois-je faire si un carreau commence à se décoller sur le coin après quelques mois ?
Ne l’ignorez pas. Un coin qui se décolle est une porte ouverte à l’eau pour pénétrer dans la cavité de votre mur. Nettoyez délicatement le mur derrière la partie décollée avec de l’alcool à friction et laissez-le sécher complètement. Appliquez une petite quantité d’adhésif de construction de haute qualité (compatible avec les plastiques et les zones humides) au dos du carreau, pressez-le fermement en place et maintenez-le avec du ruban de masquage pendant 24 heures. Refaite l’étanchéité du bord avec du silicone.
Les carreaux de douche peel-and-stick nécessitent-ils un coulis traditionnel ?
La plupart des carreaux peel-and-stick ne nécessitent pas de coulis cimentaire traditionnel et ne peuvent d’ailleurs pas l’accepter. Ils sont conçus avec des bords qui se chevauchent ou des lignes de faux joint intégrées pour créer un rendu homogène. Appliquer du vrai coulis sur les joints de carreaux en vinyle souple entraînera de fortes fissures, car les carreaux se dilatent et se contractent naturellement avec les variations de température. Comptez toujours sur le système de chevauchement du fabricant et sur le silicone périphérique pour l’étanchéité.

Laisser un commentaire
Ce site est protégé par hCaptcha, et la Politique de confidentialité et les Conditions de service de hCaptcha s’appliquent.