
















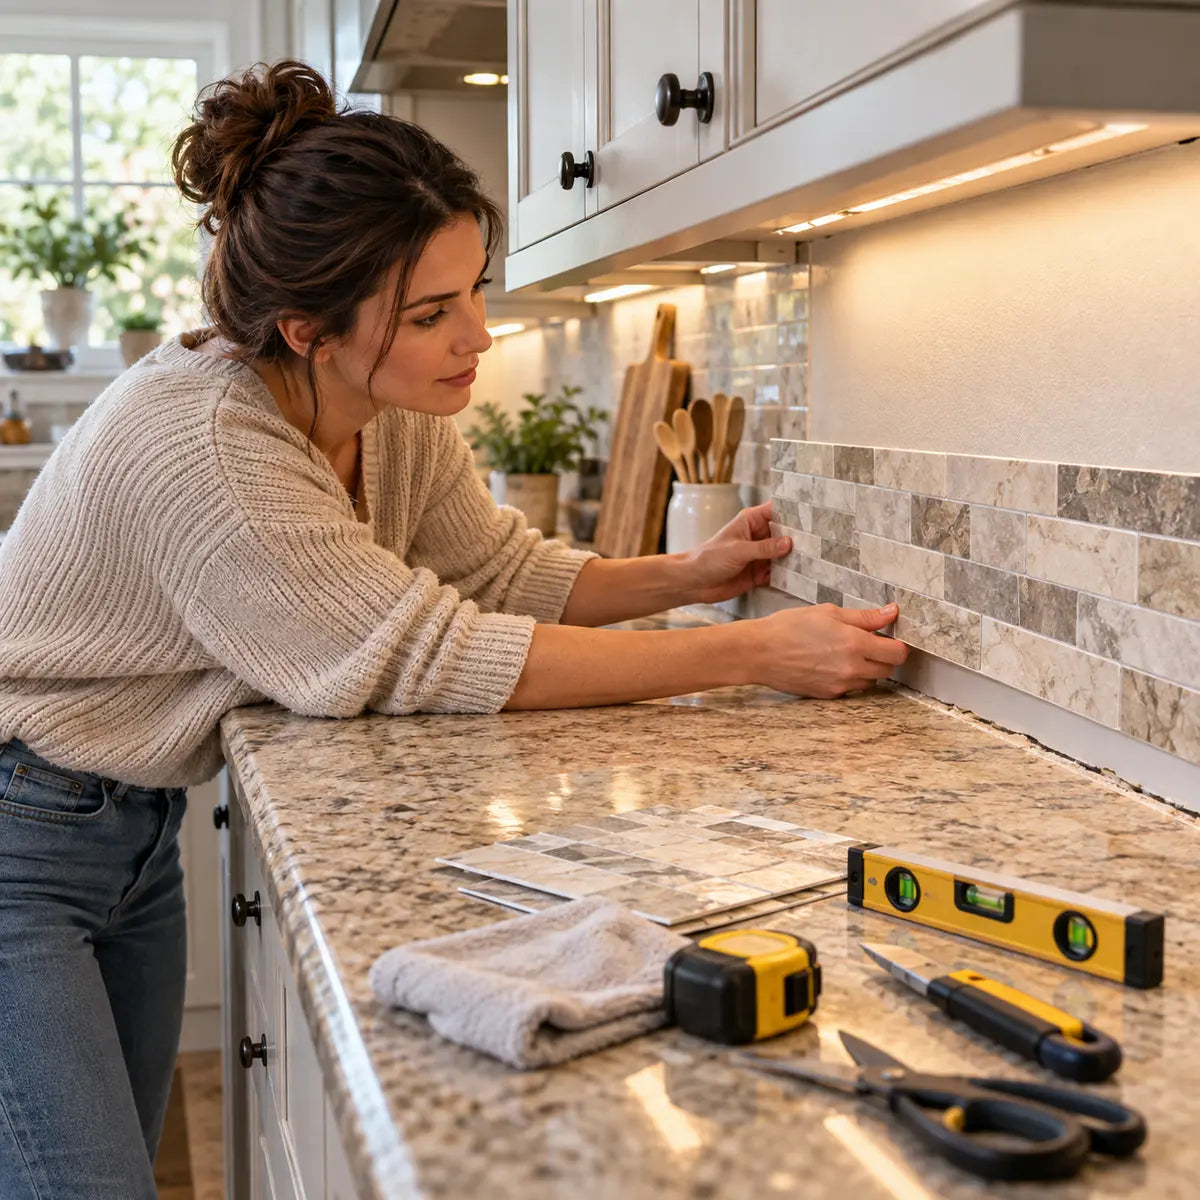
An uneven line where the countertop meets the wall does not automatically rule out peel-and-stick backsplash. The right approach depends on what is actually uneven: a small cosmetic gap, a sloping countertop, a textured wall, an irregular corner, or a surface that is loose, damp, greasy, or otherwise unsuitable for bonding.
The most reliable sequence is simple: inspect the joint, assess the wall, establish a visual reference line, dry-fit the first row, cut conservatively, apply the material in controlled sections, and finish the edge only after adhesion is confirmed. A trim piece or bead of caulk can improve a minor visible transition, but it should not be used to disguise a loose backsplash or repair a surface that cannot support adhesive.
This guide explains how to install peel-and-stick backsplash at an uneven countertop joint, how to measure the variation, when to follow the physical countertop line, when to use a level reference line, and when to stop before wasting material.

What kind of uneven countertop joint are you dealing with?
The first decision is to classify the irregularity. A gap, slope, wall texture, corner problem, and unstable surface may look similar from across the room, but they require different solutions.
| What you see | What it usually means | First response |
|---|---|---|
| A narrow, consistent gap | The wall and counter meet cleanly but do not touch along the full length | Confirm adhesion, then consider a compatible finish |
| A gap that grows or shrinks | The countertop, wall, or both are not level | Measure several points and choose a reference line |
| A wavy or lumpy wall | The adhesive cannot make consistent contact | Repair, level, or stop if the product excludes textured surfaces |
| One bad corner | The main run may be usable, but the corner needs a separate fit plan | Dry-fit the corner and choose a butt seam, tested overlap, or compatible trim |
| Lifting paint or loose material | The wall itself is unstable | Stop and repair the substrate |
| Grease, wax, soap film, or moisture | Contamination is interfering with adhesion | Clean, dry, and reassess before installing |
| A moving countertop or wall | The joint is changing, not simply uneven | Do not treat it as a cosmetic gap |
A substrate is the surface receiving the backsplash. In this project, that usually means painted drywall, plaster, existing tile, laminate, or another wall finish. Peel-and-stick material depends on the substrate for support, so the quality of the wall often matters more than the size of the countertop gap.
A small visual variation can be manageable when the wall is stable and the backsplash has enough supported contact. A larger-looking problem may still be workable if it can be corrected before installation. The opposite is also true: a narrow gap can become a failure point if the wall is dusty, damp, heavily textured, or coated with loose paint.
Manufacturer instructions differ by tile material and adhesive system. General installation guidance from Lowe’s also stresses that self-adhesive wall tile typically requires a clean, smooth, level, nonporous surface, while the instructions for the specific product control when they differ. See the Lowe’s guide to installing peel-and-stick tile for that general baseline.
A gap is not the same as a slope
A gap is open space between two surfaces. A slope is a change in height along the length of the joint.
For example, the backsplash may sit close to the countertop on the left side and leave a wider opening on the right. That is not one uniform gap. It is a changing relationship between the countertop and the wall.
This distinction changes the installation plan:
- A consistent, minor opening may be finished after the backsplash is firmly attached.
- A changing opening usually calls for multiple measurements and a controlled bottom cut.
- A wall that bows outward may require surface correction before any tile is installed.
- A countertop that moves may require a larger repair or a different backsplash approach.
Do not decide on caulk simply because you can see daylight at the edge. First ask whether the backsplash is fully supported and whether the visible opening is stable.
Inspect from several angles
Stand back and look at the joint from normal viewing height. Then inspect it close to the counter with a work light. Run your fingers lightly along the wall and countertop edge. You are looking for:
- High and low points
- Paint ridges or dried joint compound
- Loose or chalky areas
- Grease near the cooking zone
- Moisture near a sink
- A countertop lip or raised rear edge
- An inside corner that changes direction
- A wall that bows rather than remaining flat
- Existing caulk that prevents the backsplash from sitting where expected
The visible line may not be the true bonding problem. A countertop can appear uneven because the wall is irregular. A wall can appear uneven because old caulk or paint has built up along the counter. Find the cause before deciding how to cut.

Can peel-and-stick backsplash work on an uneven joint?
Yes, sometimes. Peel-and-stick backsplash can work at an uneven countertop joint when the wall is stable, clean, dry, and sufficiently smooth for the selected product, and when the variation can be handled through preparation, controlled cutting, or a compatible edge finish.
The installation should pause when the wall is loose, damp, heavily textured, contaminated, moving, or outside the product’s approved conditions.
Official guidance from several manufacturers consistently places clean, dry, smooth or flat preparation at the center of reliable adhesion, while their exact limits differ. The Aspect Stone and Brick technical FAQ describes substrate preparation, irregularity repair, moisture, heat, cutting, and adhesion limits for its products.
The important distinction is between managing the edge and correcting the surface.
Managing the edge means fitting the backsplash to a surface that is already suitable for adhesion. This can include:
- Scribing the first-row tile to follow a varying countertop
- Keeping the upper edge visually level
- Leaving a small, stable opening that receives a compatible finish
- Using a product-approved trim piece
- Adjusting the layout so the most visible line looks deliberate
Correcting the surface means changing the wall or joint so the backsplash has a better base. This can include:
- Removing loose paint
- Filling dents or shallow irregularities
- Sanding high spots
- Priming when the product instructions require it
- Removing old caulk
- Allowing a damp area to dry and identifying the source of moisture
- Repairing movement or damage before installation
A finish cannot substitute for correction. If pressing the backsplash reveals hollow areas, if the adhesive cannot contact the wall, or if the wall coating pulls away, stop before finishing the counter line.
Use this decision aid before opening the adhesive
Start with the simplest question: is the unevenness cosmetic, geometric, or structural?
| Your answer | Decision | What to do next |
|---|---|---|
| The wall is solid, clean, dry, and mostly smooth; the counter line varies slightly | Proceed with preparation | Measure the joint and create a reference line |
| The wall is sound but has small dents, ridges, or patched areas | Prepare first | Repair, sand, prime if required, then retest the surface |
| The countertop slopes but the wall is suitable | Proceed with a controlled fit | Use multiple measurements and either scribe the bottom edge or use a level visual line |
| The wall has heavy texture or repeated bumps | Usually stop | Check whether the selected product permits correction or an alternate adhesive method |
| Paint, wallpaper, laminate, or existing tile is loose | Stop | Stabilize or remove the failing layer |
| The surface is greasy, waxy, damp, or dusty | Stop temporarily | Clean using the product instructions, dry fully, and inspect again |
| The joint changes because the counter or wall moves | Stop | Address the movement before installing backsplash |
| Adhesion is uncertain after a small test | Do not commit material | Reassess the surface or choose a different installation system |
This table is a practical screening tool, not a substitute for the instructions supplied with the exact backsplash. Products that look similar can have different rules for texture, repositioning, heat, moisture, primer, and additional adhesive.
What tools do you need?
You do not need a large collection of specialist tools, but each tool should serve a specific task. Gather the tools before opening any adhesive backing so the installation does not pause while the exposed adhesive collects dust.
Inspection and preparation
- Tape measure
- Small level
- Straightedge or long ruler
- Pencil
- Painter’s tape
- Work light
- Cleaning cloths
- Product-approved cleaner or degreaser
- Sandpaper or sanding block for surface preparation
- Spackling or wallboard compound if the product and substrate call for it
- Primer only if specified by the product instructions
Layout and test-fitting
- Cardboard, kraft paper, or a piece of clean scrap material for a template
- Scissors
- Painter’s tape for temporary positioning
- A notepad or phone camera for recording measurements
- A clean, flat work surface
Cutting and application
- The cutting tool named in the product instructions
- Sharp utility knife where appropriate
- Tin snips for products that specifically permit them
- Fine-tooth saw or other approved saw for materials that require it
- Safety glasses when cutting
- A straightedge
- A soft roller, clean block, or firm pressing tool if recommended
- A small tool for pressing the lower edge into place
Cutting tools are material-specific. For example, Aspect identifies tin snips for certain stone panels, while its Collage instructions list different tools for straight, circular, and shaped cuts. Those examples should not be treated as a universal tool list. Check the material before cutting. The Aspect Collage installation instructions show how layout, pressure application, cutting, trim, caulk, and small pieces can vary by product format.
Optional finishing materials
These materials depend on what the joint looks like after the backsplash is installed:
- Compatible countertop caulk or sealant
- Manufacturer-approved trim
- Small-piece adhesive if expressly permitted
- Backer material only when the chosen finishing system calls for it
- Painter’s tape to hold a clean finishing line
Do not buy a generic tube of construction adhesive and assume it solves an uneven joint. Some products allow an alternate adhesive method; others do not. The additional adhesive must be compatible with the backsplash and the substrate.
For a broader checklist covering counters, outlets, sink zones, edge finishes, and tile quantity, use this kitchen backsplash planning guide.
How should you prepare the wall and countertop edge?
Prepare the wall as though the backsplash will expose every defect, because a self-adhesive tile often follows the shape beneath it rather than hiding it.
The goal is a surface that is stable, clean, dry, and appropriate for the selected product. Cleaning removes contamination. It does not flatten a wall, stabilize loose paint, or correct movement.
Remove anything loose
Scrape away peeling paint, loose caulk, flaking compound, and material that powders under light pressure. Do not install over a coating that is already separating from the wall.
A sound painted wall may be suitable for some products. A wall with several paint layers that lift at the edge may not be. If the wall feels soft, hollow, or damp, identify the cause before covering it.
Pay special attention to the lower wall near the countertop. This area may contain:
- Old silicone residue
- Cooking grease
- Cleaner film
- Water damage
- Raised paint edges
- Dried grout or joint compound
- Dust trapped behind the counter lip
Clean according to the product instructions
Use the cleaning process specified for the backsplash. Manufacturers may call for degreasing, wiping, rinsing, or drying steps that differ by material.
Do not leave cleaner residue behind. A wall can look clean while still carrying a thin film that reduces contact. After cleaning, allow the surface to dry fully. Do not install while the wall feels cool and damp, even if it appears visually dry.
Repair shallow irregularities
If the product instructions allow installation over a repaired and primed wall, fill shallow dents and low areas with a compatible patching compound. Allow the repair to dry, sand it smooth, remove dust, and prime as required.
Aspect’s preparation guidance is one product-specific example: it directs users to fill irregularities, sand smooth, and use a stand-alone latex primer where its installation method calls for one. This does not mean every peel-and-stick backsplash requires the same primer or that every primer is compatible.
A useful test is to place a straightedge against the wall in several directions. You are not looking for a laboratory-perfect surface. You are looking for defects that could prevent broad, even contact or telegraph through the backsplash.
Check the countertop edge
The countertop itself may have a raised backsplash lip, a rounded rear edge, a seam, or a slight overhang. Note whether the tile will sit on the wall above the counter or whether its lower edge will contact the countertop surface.
Do not force a rigid tile into a tight curve. Do not bend a material beyond the manufacturer’s instructions. If the counter has a pronounced rear radius, the cleanest solution may require trim, a different bottom cut, or a different backsplash format.
If you need a more detailed wall-preparation sequence, the peel-and-stick tile surface guide covers the relationship between substrate, moisture, heat, cleaning, edge finish, and installation conditions.

Should the backsplash follow the counter or a level line?
There is no single answer for every room. Choose the line that gives the most coherent result while preserving adequate contact and following the selected product’s installation limits.
A reference line is a marked guide used to keep a row of tile aligned. It may be level, parallel to another architectural feature, or tied to a product-specific measurement. A level line can make the backsplash look orderly when the countertop slopes, but it may leave a changing cosmetic opening above the counter. Following the physical countertop may reduce the visible gap in one area while making the tile row appear to rise or fall.
The choice is visual and practical at the same time.
Use a level reference line when:
- The countertop slope is visible across the main viewing area.
- Cabinets, shelves, or outlets make a level horizontal line important.
- The countertop variation is small enough to be handled by the bottom cut.
- The backsplash pattern looks worse when it follows the counter.
- The product instructions support level alignment.
Follow the countertop variation when:
- The counter edge is the dominant visual boundary.
- The backsplash is narrow and the gap would be obvious.
- The material can be cut cleanly to the counter profile.
- The countertop line is intentionally shaped or curved.
- The product instructions favor a scribed first row.
The checked manufacturer guidance does not prove that one method is always better. It supports a more careful approach: inspect the low and high points, establish the line deliberately, and test-fit before final adhesion. In one official procedure for uneven Aspect Stone countertops, the visible first row remains level while the lower edge of each piece is scribed to follow the countertop. The procedure includes product-specific dimensions, so those measurements should not be copied to another tile format. See the Aspect uneven-countertop installation procedure for that example.
Measure multiple points
Do not measure only at the two ends. Measure at:
- The left end of the backsplash run
- The first corner
- The center
- The area behind the sink or cooktop
- The last corner
- The right end
Add more points where the line changes quickly.
Record the distance from your intended reference line to the countertop at each point. The purpose is not to create a perfect engineering drawing. The purpose is to understand whether the variation is:
- Nearly constant
- Gradually sloping
- Wavy
- Concentrated at one corner
- Caused by one isolated high spot
A gradual slope is easier to plan than a series of short waves. If the measurements change sharply over a short distance, inspect the wall and counter again before committing to a long cut.
Draw a temporary guide
Use painter’s tape to mark the intended top or bottom edge of the first row. Mark lightly with pencil only where the wall finish allows it.
If you choose a level line, check it against the countertop from normal standing distance. A line can be technically level but visually awkward if it creates a large opening at one end. The goal is a deliberate transition, not a measurement that wins an argument with the room.
If you choose to follow the counter, transfer the measured variation to a template or directly to the release liner, depending on the product instructions. Keep the cutting line separate from the visible finished edge so you can see where the material will land.
For more layout detail around counters and interruptions, use this backsplash layout guide before cutting.
Why is dry-fitting essential?
Dry-fitting lets you inspect the installation before the adhesive creates a commitment. It can reveal pattern direction, cut locations, corner behavior, edge treatments, and whether the chosen reference line looks right.
A dry fit means placing the material without fully bonding it. Depending on the product, this may mean keeping the release liner attached, lightly positioning the tile, or creating a paper or cardboard template. Follow the product instructions because some adhesives should not be pressed into place during a test.
Dry-fit the first row
Start with the first row because the countertop joint is where the irregularity is concentrated. Place the pieces in their intended order and mark:
- The left and right boundaries
- The position of each vertical seam
- The direction of the pattern
- The highest and lowest points
- Any corner transition
- Areas that need a shaped cut
- The location of outlets, switches, or plumbing
- The intended finish at the counter
Use removable tape to hold pieces temporarily if the product permits it. Step back often. The lower edge can look acceptable close up but visibly crooked from across the room.
Use a template for irregular cuts
When the countertop line changes from point to point, make a template before cutting the backsplash. Cardboard is useful because it is inexpensive and easy to trim.
Place the template where the backsplash will sit. Mark the countertop profile, nearby corner, and any obstruction. Transfer the template to the tile or its release liner according to the product instructions.
A template is especially helpful when:
- The counter has a curved rear edge
- The wall and counter are not parallel
- The lower cut is longer than your straightedge
- A corner changes direction
- You are cutting a high-value or limited piece
- The material is difficult to replace
Cut the template first. If the template does not fit, the backsplash will not fit.
Check the pattern before cutting
A bottom cut can change the apparent height of the first row. If the material has a strong horizontal pattern, make sure the cut does not remove a visually important band. With a staggered pattern, confirm that the vertical seams still land in a pleasing arrangement.
Do not solve the bottom edge by shifting each piece independently unless the product and pattern allow it. A series of small, inconsistent adjustments can make the entire backsplash look out of alignment.
Use the template-first guide to cutting peel-and-stick tile for layouts around counters, corners, outlets, and exposed edges.

How do you cut and install the first row?
Cut conservatively, test-fit repeatedly, and keep the adhesive protected until the shape and position are confirmed.
The lower edge of the first row carries much of the visual responsibility. A cut that is slightly short may be finished in some situations. A cut that is too deep, too wavy, or unsupported can expose adhesive, create a shadow line, or reduce the contact area.
Cut with the correct face and support
The product instructions should tell you whether to cut from the front or back, whether to leave the release liner attached, and which tool is compatible.
As a general working principle:
- Mark the cut clearly.
- Support the piece close to the cutting line.
- Use a sharp, appropriate tool.
- Avoid crushing the edge.
- Keep the release liner in place if the instructions call for it.
- Wear eye protection when the material or tool requires it.
- Remove dust before final placement.
The checked Aspect guidance illustrates why a universal method is unsafe: one product may use tin snips, while another format may need a fine-tooth saw or a different cutting setup. The tool must match the material.
Cut less than you think you need
When you are transferring an uneven line, leave a small amount for a second fitting pass if the material permits. It is easier to remove a little more than to replace a piece that has been cut too short.
Do not rely on a large bead of caulk to hide a poor cut. The checked sources do not establish a universal gap that caulk can bridge, and a visible finish should not carry the job of holding the tile in place.
Apply the backsplash in manageable sections
Expose only as much adhesive as you can align accurately. Press the material from the supported area toward the lower edge, working out air pockets instead of trapping them at the counter.
Use the pressure method stated in the product instructions. Some materials require firm pressure across the surface; others may be positioned and adjusted before final pressure. Do not assume that a peel-and-stick product can be repeatedly lifted and replaced.
The differences are significant. Smart Tiles states that repositioning is possible before firm pressure, while Aspect Stone and Aspect Collage instructions place the repositioning boundary at firm pressure. Those rules are product-specific. The Aspect Stone tile installation manual explains its pressure-sensitive placement and preparation requirements.
Check the lower edge before pressing firmly
Before applying final pressure, inspect the edge from above and from the front. Look for:
- Unsupported adhesive
- A sharp corner that catches
- A cut that drifts away from the reference
- A gap that changes unexpectedly
- A piece that is riding on the countertop lip
- A visible pattern break
- A seam that no longer aligns with the next row
Correct what you can before firm pressure. Once the adhesive has been fully pressed, removal may damage the tile, the wall, or both.

How should you finish the countertop-to-backsplash transition?
Finish the edge only after the backsplash is stable, supported, and visually acceptable. The correct finish may be a clean direct fit, compatible trim, or a product-approved caulk or sealant.
The finish should answer a real need:
- Protecting the interface from routine splashes
- Creating a deliberate visual boundary
- Covering a minor, stable opening
- Protecting an exposed tile edge
- Making a corner transition look intentional
It should not conceal a wall that is moving or a backsplash that is lifting.
A clean direct fit
Use a direct fit when the cut follows the countertop cleanly and the edge remains supported. This can be the simplest and most restrained appearance, especially with a thin backsplash or a quiet pattern.
A direct fit still needs inspection. Run a finger lightly along the edge and look for sharp points, unsupported corners, or sections that pull away when pressed.
Compatible trim
Trim can create a deliberate border when the countertop profile or backsplash edge is difficult to finish cleanly. It may be useful at:
- An exposed side edge
- An outside corner
- A transition to another wall finish
- A countertop line with a visible but stable variation
- A joint where the product instructions identify trim as an option
Match the trim to the tile thickness, color, flexibility, and adhesive system. A rigid trim piece can create its own stress if it forces the backsplash away from the wall.
For a focused comparison of clean cuts, trim, caulk, counter lines, corners, and seams, see peel-and-stick tile edge-finishing options.
Caulk or sealant
Caulk can be appropriate at a countertop interface when the product instructions permit it and the underlying installation is sound. Smart Tiles, for example, describes silicone-based caulking at the countertop interface as a way to limit water infiltration. That is a finishing and moisture-management recommendation, not permission to bridge any size of gap.
Choose the product, color, and application method carefully. Follow the sealant manufacturer’s instructions for joint preparation, curing, ventilation, and cleaning.
Do not caulk over:
- A loose backsplash edge
- A damp wall
- A contaminated surface
- A gap caused by movement
- A section with exposed, unsupported adhesive
- A large opening outside the backsplash instructions
A bead may make the installation look finished for a short time while leaving the underlying problem untouched.
How large can the gap be?
There is no universal acceptable countertop-to-backsplash gap for every peel-and-stick product. The answer depends on the tile material, thickness, flexibility, counter profile, wall condition, pattern, moisture exposure, and the manufacturer’s instructions.
Treat a small opening as a finish decision only after confirming:
- The wall is suitable for adhesion.
- The backsplash is firmly attached.
- The opening is stable.
- The selected finish is compatible.
- The result remains within the product’s intended use.
If the gap is large, changing, or difficult to finish without a thick visible bead, return to the layout and surface assessment. A partial reinstall may be cleaner than repeated patching.
For a repair-focused discussion of measuring the widest point and deciding between caulk, trim, backer material, or partial reinstallation, see this countertop-to-backsplash gap repair guide.
What should you do if the backsplash line is already uneven?
First identify whether the problem is alignment, cutting, adhesion, or the wall itself. Do not immediately add caulk.
If the line is straight but visually out of level
The backsplash may have been installed parallel to an uneven countertop. If the pieces are firmly attached and the result is acceptable from normal viewing distance, it may be a visual issue rather than a bonding failure.
If the line is distracting, assess whether the pieces can be removed without damaging the wall or material. Repositioning rules are product-specific. A backsplash that has been pressed firmly may not lift cleanly.
A new edge finish may improve the appearance only when the installation is stable. It will not make an uneven row level.
If the lower edge is wavy
A wavy edge usually points to an inconsistent cut, an inaccurate template, or an irregular surface beneath the tile.
Check whether the wave is in the tile or in the countertop profile:
- Hold a straightedge against the cut edge.
- Compare the tile to the original template.
- Measure the countertop at the high and low points.
- Look for sections where the tile is not contacting the wall.
- Inspect whether the wall pushes the tile outward.
If the tile is poorly cut but still removable, replace or recut the affected piece. If the wall is the cause, correct the surface before reinstalling.
If the edge is lifting
Lifting is an adhesion problem until proven otherwise. Common causes include:
- Grease or cleaner residue
- Dust
- Moisture
- Loose paint
- Heavy texture
- Insufficient pressure
- A cut that leaves the edge unsupported
- Heat or moisture beyond the product’s limits
- A surface that moves
Do not trap the lifted edge under caulk without finding the cause. Pressing it back may work temporarily, but the adhesive may still be failing underneath.
If only the corner is wrong
Corners need their own plan. The wall may change angle, the countertop may widen, or the tile pattern may not turn cleanly.
Options can include:
- A carefully fitted butt seam
- A tested micro-overlap where the product permits it
- Compatible corner trim
- A deliberate layout adjustment
- A separate corner piece
The right choice depends on flexibility, pattern, corner geometry, and product instructions. Review the guidance on peel-and-stick backsplash corner seams before forcing a long piece around an irregular corner.
What exposure limits matter near sinks and cooktops?
Check the selected product’s moisture, cleaning, temperature, and heat-source instructions before installation. Peel-and-stick backsplash is not automatically waterproof, heatproof, or suitable for every location behind a range.
The checked manufacturer guidance gives different product-specific limits. Aspect Stone guidance describes normal household humidity and cleaning exposure but excludes shower use, lists a 140°F heat limit, and recommends a minimum separation from a heat source. Smart Tiles lists a different surface-temperature limit and warns against direct flame or heat-source contact. These values are examples for named products, not category-wide rules.
Also check:
- Appliance installation requirements
- Required clearances
- The distance from burners or heating elements
- Steam exposure
- Splashing near sinks
- Cleaning chemicals
- Whether the countertop or wall expands, moves, or gets wet
- Any local building or electrical requirements that apply to the area
A backsplash at a sink may need a compatible countertop seal. A backsplash beside a cooktop may need a material with different heat characteristics. Do not use a finishing bead to make an unsuitable product suitable for the location.
Common mistakes that waste material
Cutting before inspecting
This is the most expensive mistake because it turns an unknown joint into a permanent cut. Inspect the full run first, including corners and interruptions.
Assuming the counter is level
A countertop can look level until a tile row exposes the variation. Measure multiple points and choose the line intentionally.
Treating cleaning as surface correction
Cleaning removes contamination. It does not repair heavy texture, loose paint, wall movement, or a bowed substrate.
Using one measurement for the whole run
One end-to-end measurement hides local changes. The first row needs measurements at several locations.
Removing the backing too early
Once adhesive is exposed, dust and handling become problems. Keep the release liner attached until the fit and cut are confirmed.
Pressing before checking alignment
Firm pressure can narrow or eliminate your opportunity to reposition. Confirm the line, seams, pattern, and edge support first.
Cutting every first-row piece identically
An uneven joint rarely gives every piece the same bottom profile. Use a template or transfer measurements piece by piece.
Installing over a loose coating
The backsplash may bond to the loose paint instead of the wall. When the paint fails, the backsplash fails with it.
Expecting caulk to solve poor adhesion
Caulk can finish a suitable joint. It cannot reliably repair a loose, damp, moving, or contaminated installation.
Ignoring the product instructions
Two peel-and-stick products may differ in substrate limits, cutting tools, repositioning, heat exposure, and finishing requirements. The material in your hand controls the installation.
Final installation checklist
Use this checklist before pressing the first row firmly:
After installation, inspect the edge again under normal room lighting. Look for lifting, unsupported adhesive, trapped bubbles, open seams, and areas where the backsplash is touching the countertop in an unintended way.
Frequently Asked Questions
How do you install peel-and-stick backsplash on an uneven countertop joint?
Inspect the joint, prepare the wall, measure several points, choose a visual reference line, dry-fit the first row, and cut each piece conservatively. For some products, the upper edge can remain level while the lower edge is scribed to follow the countertop. That is a product-specific procedure, so confirm that the material in hand permits it.
Do not install until the wall is stable, clean, dry, and suitable for the adhesive. Finish a small stable gap only after adhesion is confirmed.
What should you do if the countertop and wall do not meet evenly?
First determine whether the problem is a consistent gap, a slope, a wavy wall, a corner irregularity, or movement. Measure the joint at several points. A stable slope may be handled through a reference line and controlled cuts. A textured, loose, damp, or moving surface needs preparation or a different installation plan.
There is no universal gap dimension that applies to every peel-and-stick backsplash. Product instructions and the actual support condition control.
Can you use caulk to hide an uneven backsplash edge?
You can use compatible caulk as a finish where the backsplash is firmly attached and the opening is stable and within the product’s intended use. Caulk should not be used to conceal lifting, movement, moisture, contamination, or a gap that the product cannot support.
A clean cut or compatible trim may be a better visual solution when the opening is noticeable.
Should the backsplash be level or follow the countertop?
Choose the line that looks most coherent in the room while preserving adequate contact. A level reference line can keep the pattern visually orderly, while following the countertop can reduce a visible opening along a strongly irregular edge.
Check both options with a dry fit. The best choice depends on the countertop profile, wall condition, pattern, tile format, and product instructions.
Can peel-and-stick backsplash be repositioned after it is installed?
Only within the limits stated by the manufacturer. Some products permit repositioning before firm pressure. Others form a bond that should not be treated as repositionable after pressing.
Do not assume that every peel-and-stick tile can be lifted safely. Test-fit first and check the exact installation instructions before applying final pressure.
When should you stop and choose another solution?
Stop when the wall is loose, damp, heavily textured, unstable, contaminated after cleaning, or outside the selected product’s approved conditions. Stop also when the countertop or wall moves, when the backsplash cannot maintain supported contact, or when the required finish would have to hide a large or changing gap.
A little more surface preparation is usually easier than removing a failed installation later.
A clean result at an uneven countertop joint comes from matching the method to the condition. Inspect before cutting. Correct the wall where correction is needed. Measure more than once. Use a reference line deliberately. Dry-fit the first row. Cut incrementally. Confirm adhesion before adding trim or caulk.
The goal is not to force a perfectly straight tile edge onto an imperfect room. The goal is to create a stable, intentional transition that respects both the backsplash material and the surfaces supporting it.
For continued planning and care guidance, use the kitchen backsplash resource and review the product instructions before committing adhesive to the wall.


Lämna en kommentar
Denna webbplats är skyddad av hCaptcha och hCaptchas integritetspolicy . Användarvillkor gäller.