

Surface readiness · preparation · adhesion testing
Peel-and-stick tile may work over cement board, but the answer depends on the exact tile, the intended location, and the condition of the board. The surface needs to be stable, clean, dry, suitably smooth, and capable of giving the adhesive broad contact. The selected tile manufacturer must permit the substrate and use case, and a small test patch should remain stable before you cover the entire area.
Cement board is often used as a tile backer, but that does not automatically make every peel-and-stick product compatible with it. Cement board can be porous, dusty, textured, or uneven. Pressure-sensitive adhesive—the tacky adhesive used on many peel-and-stick products—needs close, continuous contact with the surface. A board that looks flat from a few feet away may still contain ridges, loose fibers, or dust that interfere with the bond.
Can you install peel-and-stick tile over cement board?
Yes, you may be able to install peel-and-stick tile over cement board when the specific product allows the substrate and the board is clean, dry, stable, and smooth enough for reliable adhesive contact. A general approval cannot be assumed because floor tiles, backsplash tiles, and conventional cement-board tile systems often have different instructions and restrictions.

For example, a cement-board manufacturer may describe its board as suitable for conventional tile installations using mortar or organic adhesive. That information does not automatically approve a pressure-sensitive peel-and-stick tile over the same board. USG’s Durock documentation describes the board as a tile backer for uses such as floors, walls, countertops, tubs, and showers, while its conventional installation guide specifies mortar or Type 1 organic adhesive rather than peel-and-stick tile. See the USG Durock cement-board installation guide for that product-specific distinction.
The tile instructions control the decision. Before buying materials, look for language covering:
- Approved substrates, including whether cement board or concrete backer board is named.
- Intended location, such as backsplash, bathroom wall, countertop, or floor.
- Moisture and water-exposure limits.
- Surface requirements for smoothness, flatness, cleanliness, and dryness.
- Temperature or acclimation requirements.
- Primer, sealer, or adhesive requirements.
- Pressure, rolling, or burnishing instructions.
- Warranty restrictions and excluded applications.
If the instructions do not name cement board, that does not prove the tile will fail. It does mean you have less product-specific support for the installation, so the test patch becomes more important. A successful test is useful evidence about your particular surface and preparation. It is still not proof of long-term performance or warranty coverage.
A quick proceed-or-pause checklist
Proceed to preparation when all of these statements are true:
- The cement board is firmly attached and does not move when pressed.
- There is no active leak, dampness, swelling, or water damage.
- The surface has no loose pieces, friable fibers, heavy dust, grease, wax, or other residue.
- The face is flat enough for the tile to make broad contact.
- The selected tile is intended for the planned wall or floor application.
- The tile instructions do not exclude the substrate or location.
- You can follow the stated cleaning, pressure, temperature, and curing requirements.
- You have enough spare tile to perform a test patch before full installation.
Pause before installing if the board moves, feels damp, sheds material, contains major ridges, has unresolved joints or fastener problems, or sits in a location the tile manufacturer excludes. A coating cannot repair a weak board assembly, and adhesive cannot compensate for a surface that is still wet or unstable.
Check the test area before covering the project
Use the observations from your prepared test patch. This decision aid organizes the next step; it does not replace the selected tile manufacturer’s instructions or establish a universal pass/fail test.
What should you check before preparing cement board?
The board should be structurally sound, firmly installed, dry, clean, and free of loose material or texture that prevents broad tile contact. Preparation begins with observation because the correct repair depends on what is wrong with the surface.
“Cement board” is a broad category. Products vary in composition, face texture, thickness, edge design, and installation requirements. HardieBacker, Durock, and other cement backer boards may look similar while carrying different instructions. Identify the product if possible and read its installation documentation before modifying the surface.

Check the board assembly, not just the face
Press across the board with your hand. Watch for flexing, movement, hollow areas, loose fasteners, damaged corners, or joints that rise above the surrounding surface. On a floor, walk across the area and look for movement, squeaks, deflection, or uneven transitions. On a wall, inspect the fastener pattern, seams, corners, and areas around plumbing penetrations.
A peel-and-stick tile is a finish material. It is not a structural repair. If the board shifts under pressure, the adhesive bond may be placed under repeated stress as the surface moves. Correct the underlying installation first.
Manufacturer guidance for HardieBacker floor assemblies similarly begins with a sound assembly and calls for warped, missing, damaged, or uneven sections to be corrected before conventional tile work. Its guidance also includes cleaning the cement-board surface with a damp sponge, though that cleaning instruction belongs to the specific conventional tile process described by the manufacturer. It should not be treated as a universal adhesive-preparation rule for every peel-and-stick product. The James Hardie HardieBacker floor installation guidance provides that product-specific context.
Look for dust and loose surface material
Freshly cut cement board often leaves a fine powder on the face and along the edges. Drilling, sanding, and cutting can add more. Dust can sit between the tile adhesive and the board, creating a weak layer that releases more easily than the board itself.
Run a clean, dry hand lightly across a small area. If it comes away visibly dusty or gritty, the board needs further cleaning. Do not judge the surface only by appearance. A pale board can still hold a layer of fine dust that is difficult to see in normal room lighting.
Also check for loose fibers, crumbly edges, flaking material, or areas that powder when rubbed. Loose material should be removed or repaired according to the board and tile instructions. Do not cover a surface that is actively shedding material.
Evaluate texture and flatness
Peel-and-stick adhesive needs contact. Deep texture, raised seams, rough patches, screw heads, ridges, and board edges can leave voids beneath the tile. Voids reduce the amount of adhesive actually touching the substrate and can make edges easier to lift.
A surface does not need to look polished like finished drywall. It does need to be flat and consistent enough for the tile to sit without rocking or bridging over high spots. A thin flexible tile may follow minor texture more than a rigid tile, but that does not mean the texture is harmless. The tile instructions may require a smooth face even when the product itself is flexible.
A laboratory study of pressure-sensitive adhesive joints found that greater substrate roughness reduced creep resistance in the tested adhesive system. The study compared controlled laboratory surfaces and reported about six hours to tertiary creep at roughly 1.2 micrometers of roughness versus about twenty hours at roughly 0.4 micrometers. Those values are not a pass/fail limit for cement board or retail tile; they show why roughness deserves attention when an adhesive must carry a load over time. Read the peer-reviewed pressure-sensitive adhesive roughness study for the bounded laboratory finding.
Check for moisture and contamination
The board must be dry before adhesive application. Look for active leaks, damp framing cavities, plumbing seepage, condensation, wet insulation, or water entering from an adjacent shower or exterior wall. If the board has been exposed to water, find the cause and allow the assembly to dry as required by the board and tile manufacturers.
A surface can feel dry at the face while moisture remains behind it. That is why moisture problems need to be corrected rather than hidden under tile.
Contamination is another concern. Grease, wax, oil, soap film, construction adhesive, silicone residue, and some coatings can prevent a pressure-sensitive adhesive from wetting the surface. The tile manufacturer may specify a particular cleaner or prohibit certain cleaners. Follow that instruction. A household cleaner that leaves a conditioning film can create a new adhesion problem even if it removes visible dirt.
How should you prepare cement board before peel-and-stick tile?
Prepare cement board in stages: repair the board, remove loose material and dust, address only the texture that prevents contact, clean according to the product instructions, and allow the surface to dry fully before testing. Primer is a separate decision and should not be used as a substitute for cleaning or repair.
The goal is not to make the board look cosmetically perfect. The goal is to give the tile adhesive a stable, dry, continuous surface.
1. Resolve board and joint problems first
Repair or replace damaged sections before applying any coating or tile. Secure loose areas, correct raised fasteners, and deal with seams or transitions that stand above the surrounding board.
If the board was installed as part of a conventional tile assembly, its joints may have been treated with mesh tape and mortar. That treatment can leave ridges. The tile manufacturer's surface requirements determine whether those ridges need to be reduced or covered with a compatible smoothing material.
Do not apply an unknown patching compound beneath peel-and-stick tile simply because it appears smooth after drying. The compound must be compatible with the cement board, the intended location, and the tile adhesive system. It must also be fully cured and free of dust.
2. Remove loose dust and debris
Start with the least aggressive cleaning method that removes the material. Vacuum loose dust with equipment suitable for fine construction debris. Use a clean brush where needed, then vacuum again. Avoid spreading the dust into the air or pushing it across the surface.
Some cement-board instructions permit wiping with a damp sponge. That can be appropriate for a particular board and installation process, but the tile adhesive instructions still control the final condition. A damp surface is not ready for pressure-sensitive adhesive simply because it has been wiped clean.
If you use water or a damp sponge, give the board enough time to dry completely. Do not guess the drying period from a generic rule. Drying depends on the amount of water used, room humidity, airflow, board porosity, temperature, and the instructions for the selected products.
For broader preparation principles, you can compare the Stickwoll substrate preparation guide, which discusses dust removal, surface texture, sealing, priming, and cure timing for other porous substrates. Cement board still requires product-specific verification.
3. Reduce texture only where it affects contact
Do not sand cement board casually or create unnecessary dust. If a ridge, rough patch, or raised seam prevents the tile from sitting flat, identify a permitted way to correct it.
Possible approaches may include:
- Removing a small high spot when the board manufacturer permits it.
- Using a compatible smoothing or patching material.
- Correcting a joint treatment that was applied too heavily.
- Changing the installation method if the surface cannot meet the tile instructions.
The correct option depends on the board, location, tile, and coating system. A smoothing material that works beneath mortar may not provide a suitable face for pressure-sensitive adhesive. If you cannot create a stable, smooth, dry surface with a supported product combination, peel-and-stick tile may be the wrong finish for that area.
4. Clean away the final residue
After repairs and texture work, remove remaining dust and residue. Follow the tile instructions for cleaning agents, wiping, and drying. Avoid assuming that more water produces a cleaner surface. With a porous board, excess moisture can take longer to leave the surface and may alter how the adhesive behaves during the test.
The final surface should feel consistent from one area to the next. It should not leave visible powder on a clean hand, feel greasy, or contain loose particles that can be brushed away.
5. Let the surface return to the required condition
The board must be dry and within the tile manufacturer's application conditions. If the surface was painted, patched, sealed, or primed, use the cure requirement for that exact product. “Dry to the touch” may describe surface dryness while the coating is still curing underneath.
For example, WallPops backsplash instructions require newly painted surfaces to cure for at least four weeks unless the paint manufacturer specifies a longer period. That is a paint-specific instruction, not a universal drying time for cement board, primer, sealer, or adhesive.
Temperature matters too. FloorPops instructions, for that specific product line, call for flat acclimation for 48 hours at a room temperature of at least 65°F and prohibit installation in areas that regularly fall below 55°F or rise above 85°F. Those values should not be copied to another product without checking its instructions.
Do you need primer under peel-and-stick tile on cement board?
You may need primer in some product systems, but there is no universal primer rule for peel-and-stick tile over cement board. Use a primer or sealer only when the tile manufacturer, adhesive instructions, primer documentation, and substrate requirements support that combination.
Primer changes the surface. It may reduce porosity, bind residual surface particles, or provide a different face for the adhesive. It can also introduce a weak coating, trap moisture, leave a residue, or create a surface that the tile adhesive does not bond to well. The word “primer” alone does not establish compatibility.
Why primer advice differs by product
Some peel-and-stick floor products require a primer adhesive over concrete. FloorPops, for example, specifies primer adhesive over concrete and recommends its own peel-and-stick primer or a similar bond-enhancing primer for a stronger bond. That instruction applies to the FloorPops product and to concrete. Concrete and cement board are related mineral surfaces, but they are not interchangeable substrates.
A primer documented for one underlayment system may serve a different purpose than a primer beneath peel-and-stick tile. USG’s Durock Primer-Sealer documentation identifies uses involving porous concrete, precast concrete, wood subfloors, OSB, and Durock self-leveling underlayments. It does not establish that the product is a universal primer beneath a selected peel-and-stick tile over cement board. Review the USG Durock primer-sealer documentation before assuming that a cement-board brand’s primer is suitable for this adhesive system.
What to verify before using primer
Check all four sources of instruction:
- The tile manufacturer: Does it require, allow, or prohibit primer?
- The primer manufacturer: Is cement board listed as a substrate, and is the primer intended beneath pressure-sensitive adhesive?
- The cement-board manufacturer: Are there restrictions on coatings, cleaning, or surface modification?
- The adhesive system: Does the tile adhesive bond to the cured primer, and what cure condition is required?
If the documents do not connect all four parts, treat the primer as unverified. The safest practical choice may be to test the tile directly on a properly prepared board area if the tile instructions permit it. Another option may be to use a different installation system with clearer compatibility.
How long should primer dry before peel-and-stick tile?
Use the exact drying and curing time printed for the selected primer and the selected application. No universal primer drying time applies to every cement board and peel-and-stick tile combination.
Follow the more demanding requirement when the documents give separate dry, cure, temperature, or humidity conditions. Do not install because the primer feels dry if the instructions require a longer cure before covering. Do not extend a product’s stated drying time into a guarantee of tile performance either. Dryness is one part of readiness; substrate fit, texture, pressure, moisture, and adhesive compatibility still matter.
The Stickwoll primer testing guide explains why primer selection should be treated as a complete substrate, primer, and adhesive decision. It also covers controlled test sections, cure timing, edge lift, and the limitation that primer cannot repair a weak or moisture-damaged substrate.
How do you run a peel-and-stick tile adhesion test?
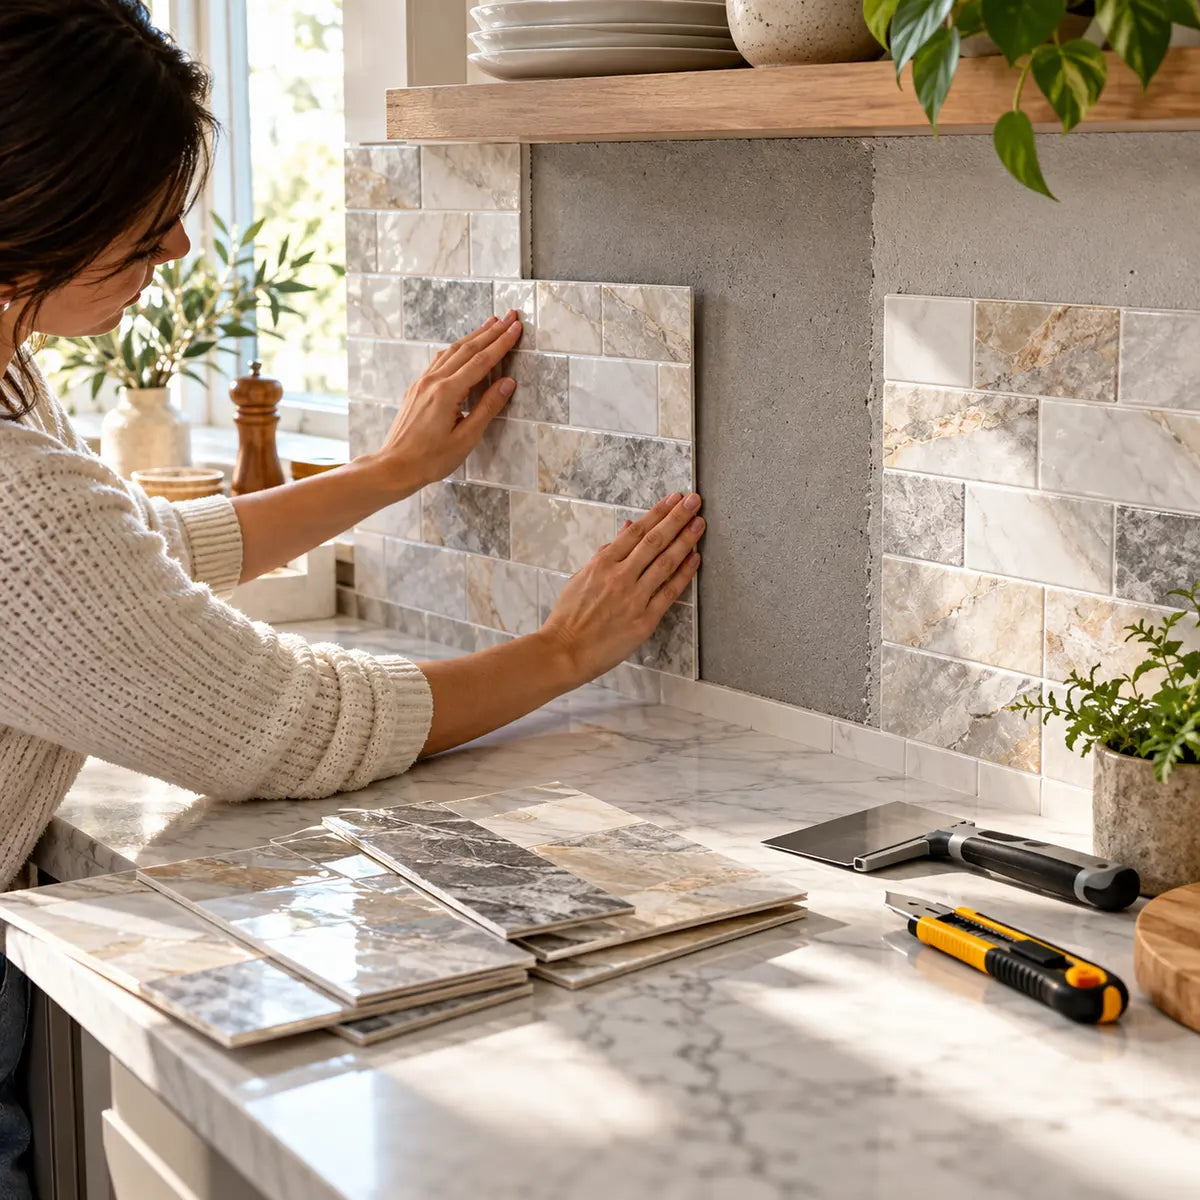
Run a small test patch on the prepared cement board using the same tile, cleaning process, primer or no-primer condition, pressure, temperature, and application technique planned for the project. Inspect the patch for loss of contact, edge release, bubbles, sliding, or lifting before committing to full installation.
A test patch is a project-specific signal. It reduces uncertainty, but it does not establish a guaranteed service life, a manufacturer warranty decision, or a standardized pass/fail result. The backsplash manufacturer’s instructions recommend testing in an inconspicuous location, but they do not define one universal patch size, dwell time, peel angle, load, or observation period.

Choose a representative test location
The best test area resembles the main project:
- Use the same cement-board product and the same surface condition.
- Choose an area with typical texture and porosity.
- Include a seam or transition only if the finished installation will cross one.
- Avoid testing only on an unusually smooth or sheltered spot.
- Select an inconspicuous location where a small tile can remain for observation.
If the project has more than one surface condition, run separate tests. A wall near a sink, a dry backsplash area, and a floor may have different demands even when they use the same board.
Record the conditions
Write down what you did. A simple record can include:
- Cement-board brand and product, if known.
- Room and surface temperature.
- Cleaning method.
- Whether the surface was primed or left uncoated.
- Primer name and batch information, if used.
- Primer application thickness or number of coats, if stated.
- Time between cleaning, priming, and tile placement.
- Tile product and lot information, if available.
- Pressure or rolling method.
- Date and time of installation.
- Observations during the first inspection and later checks.
This record helps you identify the cause if the patch fails. It also keeps the full installation from drifting away from the conditions that produced the test result.
Apply the patch as the product directs
Use the tile manufacturer’s application process. Remove only the release liner area directed by the instructions. Avoid touching the adhesive with dirty hands. Position the tile carefully because some pressure-sensitive adhesives gain strength through contact and pressure but become difficult to reposition after placement.
Press the tile from the center toward the edges if the instructions use that approach. Use the specified hand pressure, roller, or smoothing tool. If the manufacturer requires rolling, do not replace it with a quick palm press and assume the result is equivalent.
The purpose of pressure is to bring the adhesive into contact with the prepared surface. Pressure does not flatten a ridge, remove dust, or dry moisture underneath the tile.
Inspect for immediate problems
Look for:
- Corners that do not lie flat.
- Edges that lift when released.
- Air pockets or bubbles.
- Areas where the tile bridges over texture.
- Visible sliding or movement.
- Adhesive that remains wet, transfers unexpectedly, or fails to contact the board.
- A hollow or loose-feeling area when lightly pressed.
If the tile will not lie flat during installation, stop and correct the surface. Do not rely on a border, caulk, or additional adhesive to conceal a bond problem unless the complete system specifically calls for it.
Inspect again after the product’s stated observation period
There is no universal test interval for every peel-and-stick tile. Follow the selected product’s instructions where they provide one. If they do not provide a period, observe the patch under ordinary room conditions before expanding the work and continue monitoring it for early changes.
Look especially at corners, edges, seams, transitions, and areas over texture. A patch that looks successful immediately can still show edge release later. The adhesive may appear to hold in the center while the perimeter begins to lift.
Do not pull the patch aggressively and treat the force needed to remove it as a universal measurement. A destructive test can damage the board, distort the adhesive, or produce a result that does not represent the installed tile’s normal service conditions. The useful observations are stable contact, no progressive lifting, and no visible signs that the tile is losing bond.
Use this test-readiness decision aid
Use the route that matches the condition of your test patch.
| Test-patch result | What it suggests | Next action |
|---|---|---|
| The tile lies flat, edges remain closed, and the surface shows stable contact | The prepared area has produced a promising initial bond | Repeat the same preparation and application conditions across a small additional area before full installation |
| The tile adheres in the center but edges lift or corners release | The surface may be too rough, dusty, contaminated, damp, or poorly conditioned | Stop, inspect the failure location, correct the surface or product choice, and retest |
| The tile slides, bubbles, or will not make broad contact | The surface or application conditions are unsuitable | Do not cover the project; resolve texture, moisture, temperature, or pressure problems |
| The tile bonds only after an unapproved coating or extra adhesive is added | The complete system remains unverified | Stop and confirm compatibility from the product instructions before continuing |
A promising patch supports a cautious next step. It does not erase exclusions in the tile instructions. If the product excludes the room, surface, or exposure, use a compatible installation method instead.
How do you move from a successful test to full installation?
Move from the test patch to full installation by reproducing the same surface condition, preparation sequence, environmental conditions, and pressure. The most common mistake is to perform a careful test and then rush the main installation under different conditions.

Plan the layout before exposing adhesive
Dry-fit the tile layout first. Decide where full tiles, cuts, corners, transitions, outlets, plumbing penetrations, and visible edges will fall. Keep narrow slivers out of prominent locations where possible.
Measure from several points because walls and floors are rarely perfectly square. Establish a reference line or starting point suited to the pattern. For floors, plan the first visible rows and transitions to avoid awkward cuts at doorways or exposed edges.
Do not remove release liner from multiple tiles before you are ready to place them. Dust and debris can settle on exposed adhesive, and the tile can shift while you work.
Keep the tested surface condition consistent
If the test patch was cleaned with a particular method and allowed to dry overnight, reproduce that sequence. If you used primer, apply it with the same coverage and wait for the same stated cure condition. If you tested without primer, do not prime the full area simply because the board appears porous.
Divide the work into manageable sections. Clean and prepare an area that you can tile without walking across it or allowing construction dust to settle. On a floor, protect completed work from traffic if the product instructions call for it.
Press each tile consistently
Apply the pressure required by the tile manufacturer. Work across the tile so the adhesive contacts the board evenly. Pay attention to edges and corners because they are common starting points for lifting.
Avoid stretching flexible tile during placement. Stretching can create tension that pulls the tile back toward its original shape. If the tile is rigid or has a pattern that must align, take time to position it before full pressure is applied.
Protect transitions and exposed edges
Transitions, outside corners, end cuts, and areas near sinks deserve close inspection. These locations may experience more handling, cleaning, impact, or moisture than the middle of a wall.
Use only edge treatments, caulk, trim, or sealants that the tile manufacturer allows. A bead of caulk may manage a permitted splash condition, but it does not convert a product that is unsuitable for constant water exposure into a shower material.
Monitor the first completed area
Inspect the first several rows or sections before finishing the entire room. Look for edge lift, movement, bubbles, or changes after normal temperature and humidity cycles.
If a repeated problem appears, stop while removal is manageable. Continuing can make the repair more expensive and can spread the same failure across the whole project.
Is peel-and-stick tile suitable for backsplashes, bathrooms, and floors over cement board?
Suitability changes with the room and the load. A dry backsplash, a bathroom wall, and a floor ask different things of the tile adhesive and the cement-board assembly. Evaluate the product’s intended use separately for each application.
Backsplash applications
A backsplash is often the most favorable setting for peel-and-stick tile because it usually has limited traffic and can be placed outside direct spray. Even here, the area must be clean, dry, firm, and smooth enough for contact.
WallPops backsplash instructions state that the surface should be smooth, dry, clean, and firm, and warn that the product may not adhere to unclean or textured surfaces. The same instructions recommend testing in an inconspicuous location before applying the product across the desired area.
A backsplash behind a sink may receive occasional splashes. A wall inside a shower receives repeated water exposure, steam, cleaning, and drying cycles. These are different conditions. For the backsplash products covered by the manufacturer’s instructions, the tiles are described as water-resistant rather than waterproof and are not designed for showers.
A cement-board backsplash can therefore be a reasonable candidate only when the selected product permits the application and the area remains within its moisture limits. Do not use a water-resistant backsplash product as a substitute for a shower-rated waterproof wall system.
Bathroom walls
Bathroom walls require a closer look at water exposure than the word “bathroom” suggests. A dry wall outside the spray zone has a different risk profile from a wall beside a tub, a wall behind a frequently splashed sink, or a surface that receives direct shower spray.
Check ventilation, condensation, cleaning habits, and the condition of the board. If the wall has a history of dampness, repair the moisture source first. If the tile is not designed for constant water exposure, keep it out of shower interiors and other continuously wet areas.
For a fuller application comparison, see where peel-and-stick bathroom tile works. The guide separates lower-exposure bathroom walls and vanity backsplashes from direct-spray areas, shower floors, and constantly wet locations.
Floors
Floor installations place more demands on the tile than wall installations. The surface must be flat, stable, clean, dry, and suitable for repeated foot traffic. Furniture, rolling loads, grit, cleaning, temperature changes, and movement at transitions can all affect the installation.
Use a product specifically sold and instructed for floors. Do not install a backsplash tile on the floor merely because its adhesive feels strong. Conversely, do not use floor tile on a wall unless the floor-tile manufacturer explicitly allows it. FloorPops, for example, distinguishes its floor products from wall applications and states that the floor tiles are not recommended for walls.
For floor products that allow cementitious or concrete-like substrates, read the moisture, primer, acclimation, temperature, and rolling instructions carefully. FloorPops instructions require a primer adhesive over concrete, address excessive moisture and alkalinity, and specify product-specific temperature and acclimation conditions. Cement board is not identical to concrete, so the product documentation still needs to support the actual assembly.
If the board is installed over a wood floor, confirm that the entire floor assembly is sound and properly supported. A flat cement-board face cannot correct deflection in the structure below it.
What should you do if peel-and-stick tile starts lifting?
Treat lifting as evidence that the surface, adhesive system, application conditions, or use case needs review. Do not simply press the loose tile back down and assume the problem is solved.

Edge lifting or curling
Edge lifting often points to incomplete contact, contamination, roughness, insufficient pressure, temperature conditions, or tension from a cut tile. Check whether the lifted edge is over a seam, ridge, corner, or dusty area.
If the tile has been installed for a short time and the manufacturer permits repositioning, remove it carefully and inspect the substrate. If the adhesive face contains dust or debris, pressing it back down may not restore a reliable bond. Prepare a new test area after correcting the condition.
Corners lifting first
Corners are vulnerable because they have less surrounding material to resist movement and are often touched during cleaning or use. A small high spot or a cut that places tension at the corner can start the failure.
Inspect the corner, the adjacent surface, and the tile itself. Confirm that the tile was not stretched and that the board is flat. Do not use extra adhesive unless the tile manufacturer specifies that product and method.
Bubbles or hollow areas
Bubbles can result from trapped air, an uneven substrate, insufficient pressure, or a tile that was placed across texture. A bubble is also a sign that the tile may not be making the broad contact expected by the adhesive system.
If the product instructions do not provide a repair method, do not puncture or inject material into the bubble as a general fix. That can create a local weak point and may damage a waterproof face or decorative layer.
The center holds but the perimeter fails
This pattern usually deserves more investigation than simply adding pressure to the middle. The perimeter may be landing on a ridge, a dusty edge, a seam, or a surface that has not cured. It can also indicate that the tile or primer combination is not suitable for the substrate.
Remove one affected tile if practical and inspect the failure location. Compare the adhesive residue: did the adhesive remain on the tile, transfer to the board, or separate from a surface coating? The location of separation can help identify whether the weak layer is the adhesive, primer, coating, dust, or substrate.
Failure after bathroom use or cleaning
If lifting begins after water exposure, steam, or cleaning, review whether the product is approved for that exposure. Water-resistant does not mean waterproof, and a sealed edge does not change the product’s intended environment.
Dry the area, correct any moisture source, and stop expanding the installation until the use case is confirmed. Replacing only the lifted tile may leave the same exposure problem in the surrounding installation.
Failure on a floor
Floor failures may involve traffic, rolling loads, movement, subfloor deflection, temperature, moisture, or a product that was not intended for the location. Inspect transitions, doorways, chair or appliance paths, and the condition of the board below.
If the floor assembly moves, address that condition before retesting. A peel-and-stick tile may be a poor choice for a floor that needs a more mechanically tolerant or structurally supported installation system.
What are the main alternatives if the test fails?
If the test fails, choose between correcting the surface, changing the adhesive system, or changing the finish. The best choice depends on the reason for failure and the demands of the room.
If dust or loose material caused the problem, clean and stabilize the surface, then retest. If texture caused it, correct the texture with a compatible method or choose a tile system that can accommodate the surface. If moisture caused it, repair and dry the assembly before considering any finish.
If the product does not permit cement board, select a product with documented compatibility or use a conventional tile installation system that matches the cement-board manufacturer’s instructions. USG Durock documentation, for example, supports conventional tile approaches involving mortar or organic adhesive in the cited guide. That does not mean conventional tile is automatically right for every project; it means the adhesive system must be selected as a complete assembly.
For renters or homeowners prioritizing low mess and reversibility, a failed test is useful information before the project becomes larger. The time spent testing can prevent the cost of removing a full installation, repairing the board, and replacing damaged tile.
Frequently Asked Questions
Does peel-and-stick tile stick to cement board without primer?
It may, if the selected tile allows the substrate and the board is clean, dry, stable, and smooth enough for broad contact. Some products require primer over specific substrates, while others do not. The tile manufacturer’s instructions determine whether direct application is allowed.
A small test patch can compare direct application with a supported primer condition, but do not assume that the stronger-feeling initial bond will remain better over time. Record the conditions and inspect the edges and corners.
Should cement board be sealed before peel-and-stick tile?
Not automatically. Sealing may be appropriate in a specific product system, but a sealer can also create a surface that the tile adhesive does not support. Use one only when the tile, sealer, primer, and cement-board instructions work together.
A sealer intended for a self-leveling underlayment system should not be treated as a universal coating beneath peel-and-stick tile. Verify the complete assembly before applying it.
Can you put peel-and-stick backsplash tile over cement board in a bathroom?
You may be able to use it on a dry or lower-exposure bathroom wall or backsplash when the product permits the substrate and the surface meets the preparation requirements. Keep products that are water-resistant rather than waterproof away from showers and constantly wet locations unless the manufacturer expressly approves the use.
The bathroom’s exposure matters more than the room name. Direct spray, condensation, cleaning, and repeated wetting all raise the demands on the installation.
Can you put peel-and-stick floor tile over cement board?
You may be able to use a floor-rated peel-and-stick product over cement board if the selected product permits the substrate and the complete floor assembly is flat, stable, dry, clean, and suitable for traffic. Do not transfer wall or backsplash instructions to floors.
Check the product’s requirements for primer, moisture, temperature, acclimation, pressure, rolling, and transitions. A floor also needs structural support below the cement board; a smooth face cannot correct movement in the assembly.
How long should you wait before deciding whether the test patch passed?
Use the selected tile manufacturer’s observation and cure instructions when they provide them. If no standard interval is given, inspect the patch immediately for contact and edge problems, then continue observing it under the same conditions expected during the project before installing across the full surface.
There is no universal validated pass/fail protocol for peel-and-stick tile over cement board. A stable patch is useful project evidence, but it does not prove long-term service life or warranty coverage.
Final decision pathway
Use this sequence before committing to the full installation:
- Confirm that the exact tile is intended for the wall or floor application and does not exclude the cement-board substrate or the room conditions.
- Confirm that the board is firmly installed, dry, clean, and free of loose material.
- Correct ridges, damaged areas, contamination, and texture that prevent broad contact.
- Follow the selected tile’s cleaning, temperature, acclimation, pressure, and curing requirements.
- Use primer or sealer only when the complete product system supports it.
- Apply a representative test patch in an inconspicuous area.
- Inspect for stable contact, closed edges, and absence of lifting, sliding, bubbles, or progressive release.
- Reproduce the successful preparation and application conditions during full installation.
- Stop if the test fails, the surface remains damp or unstable, or the product instructions exclude the application.
When the fit is confirmed, review verified peel-and-stick tile options for the intended application and compare each product’s current substrate, location, moisture, and preparation instructions before ordering. The right product is the one whose documented use matches the surface and the room—not simply the one that feels easiest to install.


Lämna en kommentar
Denna webbplats är skyddad av hCaptcha och hCaptchas integritetspolicy . Användarvillkor gäller.