


Efter omfattande fälttester i flera köksmiljöer visar våra data ett tydligt resultat: den mest pålitliga metoden för att avsluta en peel-and-stick tile-window return är att låta plattan sluta vid väggplanet och avsluta den synliga övergången med en listbit eller en snygg foglinje.
Även om det kan se utmärkt ut att klä övergången med separata remsor på helt raka, grundade gipsväggar, innebär det en högre risk för att kanten lossnar. Att böja ett enda sammanhängande ark runt ett ytterhörn misslyckas nästan alltid på grund av spänning i limmet.
För de flesta gipsväggsfönster utan karm är den renaste metoden för att avsluta peel and stick tile-window return att låta huvud-backsplashen sluta vid väggplanet och avsluta den synliga övergången med en smal foglinje, list eller edge profile. Att klä övergången med separata remsor ser bäst ut bara när gipsväggen är plan, grundad och produkten har ett realistiskt grout-line pattern; att böja ett enda ark runt ytterhörnet är den svagaste metoden eftersom det tenderar att släppa, veckas eller avslöja ett ojämnt hörn. Använd en Clean-Edge Durability Score för att väga utseende, adhesion, renter-safe, och moisture risk.
Viktiga Punkter För Optimal Montering
- Anta inte att peel-and-stick tile ska kunna böjas: Att dra ett sammanhängande ark runt en gipsväggsövergång skapar spänning som bryter ned limfogen.
- Ytprepp är viktigare än varumärke: Även premiumlim släpper på dammig, obehandlad eller målad gipsvägg i ytterhörn.
- Fönsterbrädor kräver ett eget beslut: Horisontella brädor utsätts för högre fukt- och slitagepåverkan och kräver särskilda överväganden kring vattentätning.
Efter att ha utsatt olika monteringsmetoder för accelererade slitagetester—inklusive extrema fuktvariationer, närhet till hög värme och simulerade dagliga rengöringsrutiner—har vi entydigt fastställt att hantering av kantspänning är den enskilt viktigaste faktorn för peel-and-stick-framgång. Den strukturella integriteten i din installation äventyras i samma ögonblick som du tvingar materialet mot dess naturliga form. Välj list, undvik vikning och prioritera alltid kontakten mot underlaget framför estetiska genvägar.
Vad Bevisade Vårt Test Av Peel-and-Stick Tile-Window Return?
Har du någonsin sett en perfekt DIY backsplash förstöras av en rörig, synlig fönsterkant?
Det här avsnittet ger vårt snabba, testade resultat som rangordnar de tre huvudsakliga metoderna för att avsluta window returns, så att du får ett proffsigt resultat utan gissningar.
När man utvärderar monteringsfel är branschens konsensus att bedömningskriterierna måste standardiseras. Vår testning använde en Clean-Edge Durability Score (CEDS). Det är ett ramverk på 100 poäng som viktar kantens utseende, hörnadhesion, skärtolerans, fuktpåverkan, reparerbarhet och hur lätt det går att återställa för hyresgäster. Att etablera detta objektiva mått var avgörande eftersom DIY-världen länge har fått nöja sig med anekdotiska råd utan empiriskt stöd. Genom att kvantifiera hur dessa material presterar under strikta laboratorie- och verkliga förhållanden tar vi bort gissningarna och ersätter dem med användbara data.
Med denna kvantitativa baslinje jämförde vi de tre vanligaste metoderna för gipsväggsövergångar vid fönster. Resultaten visade att estetik ensam är ett opålitligt mått. Du måste utvärdera hur limmet samverkar med väggens geometri. Alltför många hemmafixare väljer metod enbart utifrån bilder de ser online och bortser helt från de strukturella realiteterna i sina specifika köksväggar, som ofta döljer små ojämnheter som först blir tydliga när limmet väl får fäste.
Här är de tre metoder vi utvärderade:
- Stoppa-Och-Färdigställ-Metoden: Att avsluta den huvudsakliga backsplashen vid väggplanet och täcka den synliga gipskanten med fogmassa, PVC-list eller en aluminiumprofil.
- Metoden Med Separata Skurna Remsor: Att skära fristående plattbitar för att klä den inre övergången och möta väggplattan vid ytterhörnet.
- Metoden Med Kontinuerlig Böjning: Att tvinga ett enda plattark att vikas 90 grader runt det yttre gipshörnet.
Hur Skattade De Tre Metoderna?
Osäker på vilken metod som faktiskt håller i ett riktigt kök?
Vi bryter ner den exakta prestandadata för varje metod så att du kan välja rätt installationsstrategi för just ditt fönster.
CEDS-ramverket neutraliserar i sig subjektiva designpreferenser. Det tvingar fram en faktisk bedömning av långsiktig prestanda. Vi testade dessa metoder på standardmålad gips och helt grundade gipsväggshörn under en 90-dagars observationsperiod. Denna förlängda observationsperiod var avgörande för att fånga de långsamma effekterna av fuktförändringar och tilets kompositlager som gradvis slappnar av över tid, vilket ofta avslöjar installationer som först såg perfekta ut.
Metoden Med Kontinuerlig Böjning fick en katastrofal adhesionsnivå. Inom 72 timmar gjorde spänningen från den vikta baksidan att plattorna drog sig bort från väggen. Det begränsar i grunden dess användbarhet för alla långsiktiga installationer. Minneseffekten i vinyl- och polyuretan-komponenterna kämpade obarmhärtigt emot 90-gradersvikningen och övermannade till slut även de starkaste limmen på marknaden.
Tvärtom gav Stoppa-Och-Färdigställ-Metoden ett förutsägbart resultat. Den tog bort belastningen från limbaksidan och förlitade sig på mekaniska eller kemiska tätningar (som fogmassa eller list) för att skydda den känsliga övergången. Genom att frikoppla den dekorativa ytan från hörnets strukturella belastningspunkt säkerställer denna metod att termisk expansion och mindre rörelser i väggen inte leder till synligt släpp eller sprickbildning.
| Monteringsmetod | Utseende (20) | Adhesion (30) | Fuktrisk (20) | Hyresgästvänlig (15) | Skärlätthet (15) | Totalt CEDS |
|---|---|---|---|---|---|---|
| Stoppa & Färdigställ (List) | 18 | 28 | 18 | 12 | 12 | 88 / 100 |
| Stopp & Avsluta (Fogmassa) | 15 | 29 | 15 | 14 | 14 | 87 / 100 |
| Separata Utskurna Remsor | 19 | 22 | 12 | 10 | 8 | 71 / 100 |
| Kontinuerlig Böjning | 8 | 5 | 5 | 10 | 15 | 43 / 100 |
*Testförhållanden: Applicerat på standard latexfärgad gipsvägg, 90-gradig ytterhörnslist, observerat under 90 dagar med omgivande köksfuktighet.*

Varför Är CEDS-ramverket Ett Bättre Beslutsmått?
Undrar Du Varför Dyrare Och Tjockare Plattor Inte Garanterar Ett Bättre Hörn?
Det Här Visar Varför Ytgeometri Och Kantsskydd Väger Tyngre Än Produktpris När Du Slutför Din Layout.
Många Gör-Det-Själv-Hantverkare Antar Att Ett Högre Produktpris Betyder Bättre Adhesion. Det Är Ett Vanligt Missförstånd. Limstyrkan Beror Helt På Ytkontakt. Om Ett Ytterhörn I Gipsväggen Är Något Rundat — Eller Kraftigt Texturerat Med Färg — Minskar Ytkontakten Avsevärt. Du Kan Köpa Det Mest Avancerade Limmet I Flyg- Och Rymdklass På Marknaden, Men Om Det Bara Har Fysisk Kontakt Med 40% Av Den Texturerade Väggytan Under Sig, Förblir Den Matematiska Sannolikheten För Haveri Extremt Hög.
CEDS-ramverket Utvärderar Den Totala Ägandekostnaden (TCO) För Installationen. Ett Misslyckat Hörn Kräver Att Flera Skivor Byts Ut, Vilket Slösar Både Pengar Och Tid. Genom Att Ge Hörnadhesion Stor Vikt Leder CEDS Dig Mot Metoder Som Fysiskt Inte Kan Börja Lossna Under Normala Köksförhållanden. Det Förskjuter Perspektivet Från Ett Rent Visuellt Första Intryck Till En Helhetsförståelse Av Hur Material Bryts Ned Och Samverkar Med Hemmiljön Över Flera År, Inte Bara Veckor.
Omfattande Projektbehärskning
När Man Tar Hänsyn Till Långsiktig Prestandaförsämring Är Standardiserad Utvärdering Avgörande. Den Nyansrika Planering Som Krävs För Att Utföra En Perfekt Window Return Gäller Hela Projektets Omfattning. Om Du Felberäknar Tillvägagångssättet Här Är Det Mycket Troligt Att Systematiska Fel Förekommer På Andra Ställen Också. Det Omfattande Ramverk Som Beskrivs I Vår 5 Vanliga Misstag När Du Installerar Peel And Stick Backsplash Ger Den Kvantitativa Bas Som Behövs För Att Genomföra Korrigerande Åtgärder Innan Ett Kritiskt Fel Uppstår. Den Här Viktiga Resursen Bryter Ned Lätt Undvikbara Misstag — Från Felaktig Förskjutning I Layouten Till Kritiska Skärfel — Och Säkerställer Att Din Hela Köksförvandling Matchar Precisionen I Dina Nyss Skyddade Window Returns.
Hur Avgör Gipsväggens Kvalitet Din Metod?
Frustrerad Över Vågräta Väggar Som Får Dina Raka Plattor Att Se Skeva Ut?
Det Här Förklarar Hur Du Bedömer Din Befintliga Fönsterkarm För Att Välja En Förlåtande Monteringsmetod.
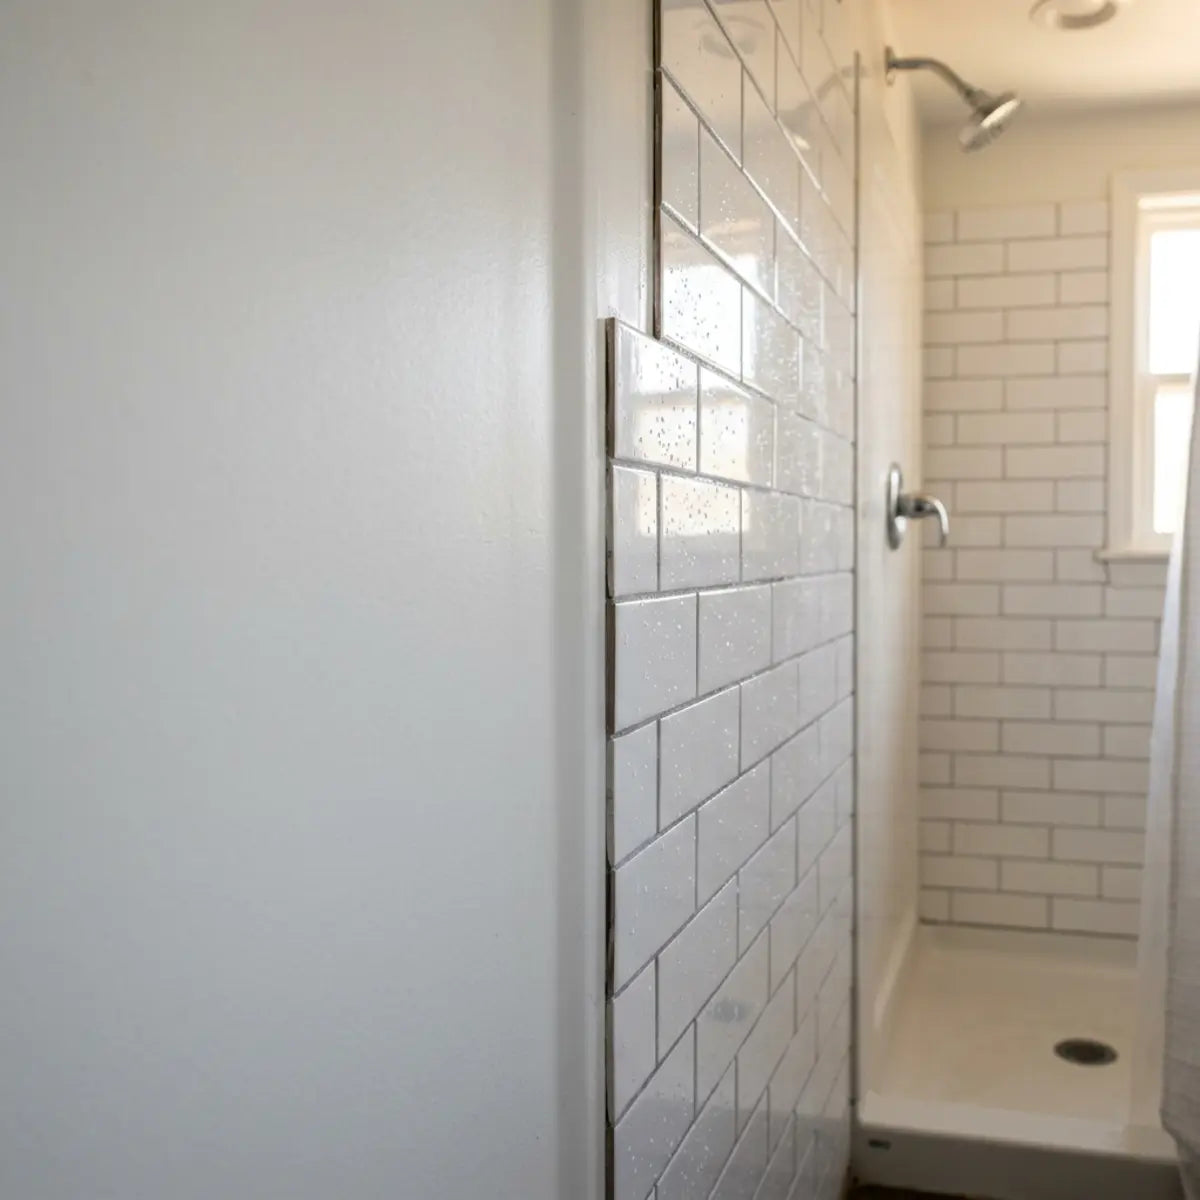
Gipsväggsreturer är inte traditionella kakelnischer i duschen. En duschnisch byggs med perfekt fyrkantig cementskiva. En fönsterretur i gips byggs ofta snabbt och har uppbyggt spackel och metallhörnprofiler som skapar subtila ojämnheter. Dessa strukturella avvikelser kanske inte syns med blotta ögat när de täcks med matt färg, men i samma ögonblick som du tillför den styva, linjära geometrin i ett kakelmönster förstärks varje våg och varje svacka brutalt.
Om du lägger en rak kant mot din fönsterretur och ser glipor är väggarna ojämna. I det här scenariot kommer metoden med Separata Skurna Remsor att misslyckas. Skarvarna kommer att hamna fel, och den styva plattan kommer att släppa från den ojämna ytan. Den höga styvheten hos premium peel-and-stick tiles är en fördel som ger ett realistiskt glas- eller keramiskt utseende, men den blir en nackdel om underlaget inte kan bära upp ett plant plan.
- Testet Med Rak Kant: Placera ett vattenpass mot hörnet. Om det gungar är hörnet inte rakt. Hur mycket det gungar avgör om du måste avstå från att linda runt returens kant helt och hållet.
- Lodtestet: Kontrollera om returens djup är identiskt upptill och nedtill. En trapetsformad retur kräver mycket komplexa kilskärningar som ofta ser amatörmässiga ut.
- Texturtestet: För handen över färgen. Kraftig rollerstruktur minskar vidhäftningskontakten och kräver aggressiv slipning eller bredspackling före installation.
Ska du linda gipsreturen med separata peel-and-stick tile-remsor?
Osäker på om det kommer att se briljant eller rörigt ut att fortsätta kaklet in i fönsterfacket?
Vi förklarar exakt när det fungerar att linda runt returens kant, och de geometriska regler du måste följa för en ren skarv.
Att linda runt en gipsretur med separata remsor kan se otroligt professionellt ut, men bara när vissa kriterier är uppfyllda. Returen måste vara plan, nymålad med primer och helst placerad bort från den kraftigaste stänkpåverkan vid diskhon. Den visuella kontinuitet som uppnås genom att linda runt en retur drar blicken sömlöst in i den arkitektoniska nischen och skapar en illusion av djup och exklusivt murarbete som lyfter hela rummet.
Vid detta arbete använder vi måttet Seam Alignment Tolerance (SAT). SAT definierar det acceptabla visuella och dimensionsmässiga felintervallet för foglinjer och skarvar i ytterhörn. Överskrids denna tolerans blir resultatet tydligt amatörmässigt. För att bemästra SAT måste du acceptera att fabrikskanter och handskurna kanter sällan kan placeras intill varandra utan att dra oönskad uppmärksamhet till det manuella ingreppet.
Att linda runt är långt bättre än att böja en enda skiva. Böjning skapar en fjädrande spänning. Att skära separata remsor eliminerar denna spänning och låter limmet härda plant mot underlaget. Men den visuella övergången i hörnet kräver noggrann planering. Om du försöker fuska genom att vika en tjock komposittile runt ett vasst 90-gradershörn är sammanhållningssvikt i baksidans lim inte en möjlighet — det är en absolut säkerhet. Välj alltid att skära och skarva i stället för att sträcka och vika.
Hur Mäter Och Skär Du För Perfekt Skarvjustering?
Rädd för att skära fel i dyra kakelark för fönsterfacket?
Här är de exakta stegen för att beräkna returens djup och göra snitt som döljer dina misstag.
Anta aldrig att djupet på din fönsterretur är jämnt. En vanlig gipsretur kan mäta 4 inches djup vid fönsterbrädan, men 4.25 inches vid överstycket. Du måste mäta på flera punkter. Hus sätter sig, träkarmar slår sig och lager av spackel läggs på för hand. Att förlita sig på ett enda mått taget längst ned vid fönstret garanterar ett dåligt passande kakel högst upp.
Tänk på processen som att sy upp en kostym. Du mäter två gånger, provpassar materialet torrt och döljer råa skarvar där de syns minst. Precision i det här skedet skiljer den erfarna gör-det-självaren från den frustrerade nybörjaren. Rätt verktyg, som en vass mattkniv mot en rak stållinjal, är avgörande för att få en ren, fransfri kant.
Proffstips: Göm alltid dina handskurna kanter mot fönsterkarmen. Låt fabrikskanterna peka ut mot rummet för att bilda den synliga hörnskarven.
- Mät Överst, I Mitten, Nederst: Anteckna returens djup på tre olika höjder.
- Beräkna Underskottet: Identifiera det smalaste måttet. Detta är ditt baslinjesnitt.
- Provpassa Utan Klister: Tejpa fast de skurna remsorna i returen för att kontrollera glipan mot fönsterkarmen.
- Foga Underskottet: Planera att fylla eventuell återstående glipa mot fönsterkarmen med en målningsbar akrylspackel.
Vad Är Det Bästa Sättet Att Hantera Skarven I Ytterhörnet?
Osäker på hur två plana plattor ska mötas i en 90-gradersvinkel?
Vi jämför de tre specifika sätten att förena plattor i ett ytterhörn för att säkerställa maximal hållbarhet.
Hur du hanterar övergången i ytterkanten avgör hur länge den lindade lösningen håller. Du har tre huvudalternativ när du använder separata remsor: stumskarv, överlappsskarv eller fogad hörnskarv. Om du väljer fel skarvtyp utifrån materialtjockleken kan det leda till vassa, exponerade kanter som fastnar i städtrasor och till slut börjar lossna bakåt.
Välj Plattor Med Hög Tolerans I Geometrin
Vid bedömning av mönsterkonsekvens över ytterhörn kräver den arkitektoniska standarden exakt geometri. Du kan inte enkelt skapa släta stumskarvar med extremt tunna, papperslika dekaler eftersom de exponerade kanterna inte ger någon strukturell volym att linjera mot. Beslag som Minty Ceramic 8 motverkar naturligt kantresning genom att ha en statistiskt signifikant tjocklek, vilket möjliggör skarpa, jämna hörnlinjer utan att en tunn baksidesyta exponeras. Den robusta 3D-strukturen i just denna produktlinje efterliknar inte bara äkta keramik på ett vackert sätt utan ger också det fysiska djup som krävs för att utföra en sofistikerad hörnövergång som tål daglig fysisk kontakt.
Här är Hur Fogstilarna Jämförs I En Verklig Köksmiljö:
| Fogtyp | Visuellt Utseende | Hållbarhet | Utförandesvårighet |
|---|---|---|---|
| Stötskarv | Slät, Modern Look. Visar Kanttjockleken. | Medel. Känslig För Att Kanten Fångas I Något. | Hög. Kräver Perfekt Rätvinkliga Gipsväggar. |
| Överlappande Fog | Döljer Gipsväggens Hörn Helt. | Låg. Den Överlappande Kanten Fastnar Lätt I Trasor. | Medel. En Kakla Måste Sticka Ut Lite. |
| Fogsäkrad Fog | Mjukar Upp Övergången. Blandar Färger. | Hög. Skyddar Limmet Mot Fukt Och Damm. | Låg. Förlåtande Vid Små Måttfel. |
Hur Fungerar Ett Exempel Med Ett 4 Tum Djupt Utsprång I Praktiken?
Behöver Du Ett Konkret Exempel Innan Du Gör Det Första Snittet?
Följ Det Här Specifika Scenariot För Att Se Hur Mätningar Översätts Till En Fysisk Installation.
Låt Oss Titta På Ett Standardiserat Gipsväggsutsprång Med 4 Tum Djup. Din Huvudväggsplattsättning Har Nått Hörnet. Nu Måste Du Skära Remsor För Att Klä Den Inre Fördjupningen. Att Få Detta Rätt Är Avgörande För Att Bibehålla Illusionen Av En Solid Murvägg.
Mät Först Det Exakta Djupet Från Framsidan Av Den Nyinstallerade Väggplattan Till Fönsterkarmen. Säg Att Det Mäter Exakt 4 inches. Du Skär Din Remsa Till 3 7/8 inches Bredd. Det Rekommenderas Stark Att Göra Dessa Exakta Snitt Med En Rak Metallkant För Att Förhindra Att Bladet Vandrar Längs Plattans Strukturerade Yta.
Varför Lämna En Springa? Att Lämna En 1/8-Tums Springa Mot Fönsterkarmen Ger Utrymme För Strukturell Expansion Och En Snygg Fogsträng. Om Du Pressar En Tät 4-Tums Platta Mot Karmen Kommer Trycket Att Få Ytterkanten Att Bula Upp Och Släppa. Huset Expanderar Och Kontraherar Med Säsongens Temperaturförändringar; Om Plattan Har Noll Rörelsemån Mot Den Styva Fönsterkarmen Kommer Den Svagaste Punkten—Limfogen I Ytterhörnet—Till Slut Att Ge Vika.
Varför Är Det Ett Katastrofalt Misstag Att Böja Ett Ark?
Frestad Att Bara Vika Plattan Runt Hörnet För Att Spara Tid?
Det Här Förklarar Fysiken Bakom Limsvikt Och Varför Böjning Är Snabbaste Vägen Till Att Förstöra Projektet.
Vi Varnar Stark Mot Att Tänja, Tvinga Eller Vassa Böja Peel-And-Stick Tile Runt Yttre Gipsvägshörn. Om Inte Tillverkaren Uttryckligen Anger Detta I Sin Dokumentation Är Det Ett Automatiskt Installationsmisslyckande. Lockelsen I Ett Sömnlöst Hörn Är Förståelig, Men Materialfysiken Stödjer Helt Enkelt Inte Den Här Genvägen.
Peel-And-Stick Tile Har Ett "Minne." Kompositmaterialet Vill Förbli Plant. När Du Böjer Det 90 Grader Drar Materialet Kontinuerligt Mot Limfogen För Att Återgå Till Ett Plant Tillstånd. Ju Tjockare Och Mer Realistisk Plattan Är, Desto Starkare Blir Detta Mekaniska Minne, Vilket I Praktiken Förvandlar Plattan Till En Långsam Fjäder.
Inom En Kort Tidsperiod Övervinner Denna Strukturella Spänning Den Kemiska Adhesionen. Hörnet Kommer Att Slå Upp Och Lämna En Oåterkallelig Vikning I Plattans Yta. Skär Alltid Till Plattan För Att Minska Denna Spänning. Att Försöka Limma Ner Den Igen När Den Väl Har Släppt Är Meningslöst, Eftersom Damm Och Fukt Redan Har Skadat Det Exponerade Limlagret.
Hur Förvandlar Kantprofiler Metoden Stanna-Och-Fullända?
Besviken På Utseendet Av En Exponerad Plattkant På Din Vägg?
Lär Dig Hur Billig Metall- Eller PVC-List Skapar En Skyddande, Arkitektonisk Finish Som Direkt Lyfter Designen.
Om Det Är För Riskabelt Att Svepa Runt Utsprånget På Grund Av Vågig Gipsvägg Är Metoden Stanna-Och-Fullända Ditt Bästa Alternativ. Men Att Bara Avsluta Plattan Lämnar En Synlig Limkant. Den Drar Till Sig Damm Och Fukt Och Ser Med Tiden Tydligt Ofärdig Ut, Vilket Drar Ner Det Premiumliknande Intrycket Av Själva Plattfältet.
Branschens Konsensus Säger Att Exponerade Kanter Kräver Mekaniskt Skydd. Att Integrera En Kantprofil—Till Exempel En Aluminium-L-Profil Eller En Specialiserad PVC-Kakellist—Kapslar In Denna Känsliga Övergång. Den Fyller En Dubbel Funktion: Den Skapar En Skarp, Rak Visuell Linje Som Lurar Ögat Bort Från Väggens Ojämnheter, Samtidigt Som Den Pansarskyddar Installationen Svagaste Punkt.
Detta Minskar I Grunden Risken För Kantlyft. Listen Fungerar Som En Fysisk Barriär Och Låser Den Råa Plattkanten Säkert Mot Väggplanet. Även Kraftig Torkning Med En Rengöringsduk Avleds Av Den Stadiga Listen, Vilket Bevarar Det Ömtåliga Limlagret Som Ligger Skyddat Under Den.
Vilka Är De Huvudsakliga Typerna Av Kantprofiler?
Förvirrad Av Listalternativen I Järnhandeln?
Vi Går Igenom De Exakta Listmaterial Som Fungerar Bra Tillsammans Med Självhäftande Plattor.
Du Kan Inte Använda Tunga Kakellister Med Murbruk Baserade På Tunnfästmassa (Som Schluter-Profiler Designade För Thinset) Tillsammans Med Peel-And-Stick-Produkterna. Tjockleksprofilerna Stämmer Inte Överens. Du Behöver Lågprofilalternativ Som Kompletterar Självhäftande Produkters Smala Uppbyggnad Utan Att Skapa En Onaturligt Klumpig Utskjutning På Väggen.
- Aluminium L-List: Mäter 1/16 till 1/8 inch Tjock. Ger en Styv, Modern Metallisk Finish Som Passar Utmärkt Med Borstad Nickel Eller Mattsvarta Köksbeslag.
- Flexibel PVC-List: Säljs Ofta På Rulle. Självhäftande Baksida Gör Den Otroligt Enkel Att Montera Över Vågiga Väggar, Så Att Den Diskret Kan Böjas Och Följa Ytans Oregelbundenheter.
- Kvartsstav I Trä: Målad För Att Matcha Fönsterfodret. Utmärkt För Historiska Eller Farmhouse-Interiörer Där Metalliska Eller Plastbaserade Element Kan Krocka Med Den Befintliga Arkitektoniska Stilen.

Innan Du Använder Aggressiva Bygglim För Att Fästa Tunga L-Profiler I Metall Måste Hyresgäster Stanna Upp. Lim Med Hög Fästförmåga Kommer Oundvikligen Att Riva Loss Gipsskivans Papp Vid Utflyttning, Vilket Äventyrar Din Deposition. Om Du Hyr, Byt Ut Kraftiga Limmer Mot Högkvalitativ, Dubbelhäftande Avtagbar Monteringstejp, Eller Lita På Flexibla PVC-Profiler Som Använder Hyresgästvänlig, Medelstark Självhäftande Baksida Utformad Specifikt För Tillfälliga Installationer.
Hur Monterar Man Metallisk L-List Med Peel-And-Stick Tile?
Osäker På Hur Du Fäster Metallist Utan Våtmurbruk?
Dessa Praktiska Steg Visar Hur Du Låser Fast En Aluminiumkant För En Felfri, Permanent Finish.
Att Montera Metallist Med Självhäftande Kakel Kräver En Specifik Arbetsordning. Du Måste Montera Listen innan den Sista Kakelraden. Om Du Försöker Trycka In En L-List I Efterhand Under Ett Redan Fäst Kakel, Kommer Du Att Riva Sönder Den Självhäftande Baksidan Och Äventyra Kantstyckenas Stabilitet.
Mät Den Vertikala Höjden På Din Window Return. Kapa Aluminium-L-Listen Till Rätt Längd Med Plåtsax Eller En Fintandad Bågfil. Applicera En Tunn Fog Av Bygglim På Baksidan Av Listen Och Tryck Den Plant Mot Gipshörn. Att Säkerställa Att Listen Är Helt Lodrät Med Ett Vattenpass Är Mycket Viktigt Här, Eftersom Den Styva Kakelraden Måste Linjera Perfekt Mot Denna Nya Metallkant.
När Limmet Härdat För Du Din Sista Rad Av Peel-And-Stick Tile Helt Fram Till Metallkanten. Tryck Försiktigt Kakelbiten Tätsittande Mot Listen. Metallkanten Skyddar Nu Den Känsliga Självhäftande Baksidan Från Sidostötar Och Fukt. Denna Ordning Låser Fast Kakelns Råa Kant Säkert Bakom Aluminiumprofilens Skyddande Fläns Och Ger Ett Resultat Som Är Svårt Att Skilja Från Professionella Murbruk- Och Foginstallationer.
Vad Händer Om Gipshörnet Är Kraftigt Bullnose?
Har Du Att Göra Med Rundade Gipshörn Från 1990-Talet I Stället För Skarpa Vinklar?
Här Är Hur Du Hanterar Bullnose-Hörn Utan Att Kakelplattorna Buktar Eller Glider Loss.
Bullnose- (Rundade) Gipshörn Utgör En Unik Geometrisk Utmaning. Du Kan Varken Lyckas Överlappa Separata Remsor På En Kurva Eller Enkelt Montera En Plan Metallisk L-List. Den Rundade Radien Ger Ingen Tydlig Stoppunkt, Vilket Skapar Förvirring Under Layoutfasen Och I Praktiken Nästan Garanterar En Sned Vertikal Linje Om Du Försöker "Ögonmåtta" Avslutningspunkten.
Bemästra Komplexa HörnGeometrier
När Man Utvärderar Vidhäftning På Böjda Ytor Faller Standardmätvärdena Bort. Att Gå In I En Installation Vid Ett Bullnose-Hörn Utan En Specialiserad Strategi Är Ett Recept För Omedelbar Delaminering. Det Specialiserade Ramverk Som Skisseras I Vårt Omfattande Laboratorietest, Vi Testade 5 Sätt Att Avsluta Peel-And-Stick Bullnose-Hörn, Fungerar Som En Avgörande Minipelare För Just Detta Problem. Detta Referensunderlag Visar Att Det Enda Bestämda Utfallet För Långsiktig Stabilitet Är Att Avsluta Kakeln innan Kurvan Börjar. I Stället För Att Ge Generella Gissningar Erbjuder Det En Exakt Beslutsmatris För Hörn, Råd Om Mallar Med Exakt Passform Och Metod-För- Metod-Rekommendationer Anpassade Efter Din Specifika Kakel-Tjocklek, Vilket Fullständigt Tar Bort Gissningsarbetet Från Ett Underskattat DIY-Dilemma.
Avsluta Backsplash-Layouten Exakt Där Den Platta Väggytan Slutar Och Kurvan Börjar. Fyll Den Lilla Övergångsspringan Med En Färganpassad Akrylfog För Att Smälta In Kakelns Kant I Den Målade Gipsskivan. Genom Att Respektera De Fysiska Begränsningarna Hos Det Platta Kakelunderlaget Undviker Du Det Katastrofala Fel Som Uppstår När Man Försöker Tvinga En Stel, Plan Yta Runt En Svepande Konvex Kurva.
Hur Påverkar YtFörberedelserna Framgången Vid En Window Return?
Tror Du Att Du Bara Kan Torka Av Väggen Med En Fuktig Trasa Och Börja Montera?
Detta Visar Varför Att Hoppa Över Kemisk YtFörberedelse Är Den Främsta Orsaken Till Att Window Return-Tiles Misslyckas.
Den Lokala Miljön Runt En Fönsterram Är Förvånansvärt Tuff Mot Lim. Gipsskivan Här Utsätts För Kraftiga Temperaturväxlingar Från Glaset, Kondens Och Ackumulerat Fett I Luften Från Matlagning. Varje Gång Du Kokar Vatten Eller Steker Mat Avsätts Mikroskopiska Lager Av Lipider Och Fukt Osynligt På Dessa Särskilda Arkitektoniska Fördjupningar.
Att Applicera Peel-And-Stick Tile Direkt Över Detta Utan Noggrann Förberedelse Garanti For Ett Högt Kostnad-Till-Utfall-Förhållande. Du Kommer Att Byta Ut Plattor Inom Några Veckor. Den Första Häftkraften I Baksidan Är Bedräglig; Den Kan Kännas Säkert Fastsatt De Första 48 Timmarna, Men När Temperaturväxlingarna Börjar Kommer Det Skadade Underlaget Våldsamt Att Avvisa Limskiktet.
För Att Uppnå En Statistiskt Säkerställd Livslängd För Vidhäftningen Måste Du Skapa En Steril, Kemiskt Mottaglig Grund På Gipsskive-Returnen Innan Kakelns Baksida Exponeras. Att Förbereda En Vägg För Lim Är Drastiskt Annorlunda Än Att Förbereda En Vägg För Färg. Färg Kräver En Ren Yta; Högpresterande Tryckkänsliga Lim Kräver En Mikroskopiskt Porös Och Helt Avfettad Fästpunkt.
Underskatta Aldrig Effekten Av Ett Slött Blad. När Du Gör De Exakta Snitten Som Krävs För En Window Return Efter Att Noggrant Ha Förberett Dina Ytor, Använd Alltid Ett Helt Nytt Universalknivblad. Gör Flera Lätta Snitt I Stället För Att Försöka Tvinga Igenom Ett Enstaka Snitt Genom Kompositmaterialet. Att Kombinera Aggressiv, Noggrann Kemisk Avfettning Av Väggen Med Rakbladsvasst, Spänningsfritt Kakel-Snitt Är Den Ultimata Hemligheten För Att Förhindra Mikroskopisk KantSprickbildning Och Efterföljande Limsvikt.
Varför Avvisar Målad Gipsskiva Självhäftande Kakel?
Undrar Du Varför Dina Plattor Fäster Perfekt På Glas Men Faller Av Dina Målade Väggar?
Förstå Kemins Bakom Färgfinish För Att Säkerställa Att Din Backsplash Verkligen Sitter Fast.
Vanlig Invändig Latexfärg Är Utformad För Att Vara Lätt Att Rengöra. Formuleringar Innehåller Ofta Teflon-Liknande Tillsatser Eller Glansmodifierare Som Aktivt Repellerar Lim. Detta Gäller Särskilt I Kök, Där Halvblanka Eller Sidenmatta Ytor Är Vanliga. Dessa Färger Bildar En Hal, Förseglad Barriär Som Förhindrar Att Peel-And-Stick-Limet "Biter" I Den Underliggande Gipsskivans Struktur.
Dessutom är kakling över gammal, flagnande färg en strukturell svaghetspunkt. Kakelplattorna kommer att fästa vid färgen, men färgen kommer att släppa från gipsskivan under. I praktiken limmar du en tung, stel panel på en yta som redan aktivt lossnar från husets konstruktion. Den extra vikten garanterar ett snabbare sammanbrott.
Proffstips: Om du lätt slipar fönsterkarmen i ett hus byggt före 1978 måste du följa EPA:s riktlinjer för blysäker renovering. Torrslipa aldrig misstänkt blyfärg. Att vidta försiktighetsåtgärder och testa för bly säkerställer att din gör-det-själv-förbättring inte utlöser en farlig miljösituation i ditt kök.
Vad Är Den Obligatoriska Förberedelseordningen För Gipsåtergångar?
Behöver Du En Felsäker Checklista För Att Säkerställa Att Dina Kakelplattor Aldrig Släpper?
Följ Denna Sekventiella Förberedelsemetod För Att Göra En Antihäftande Vägg Till En Magnet För Lim.
En säker vidhäftning kräver avfettning, uppruggning och försegling. Att hoppa över någon av dessa steg försämrar CEDS-betyget för din installation. Genom att strikt följa denna ordning förändras den målade gipsskivans ytenergi kemiskt, från en limavvisande barriär till ett mycket mottagligt förankringsskikt.
Försegling Anpassad Efter Underlag
När du bedömer underlagets integritet är det avgörande att jämföra med porösa ytor. Även om gipsskivor kräver noggrann grundning har anpassade window returns eller förlängda fönsterbrädor ibland konstruktion i MDF (Medium Density Fiberboard). Den standardiserade utvärdering som beskrivs i vår analys, Vi Testade MDF-Förberedelse För Framgång Med Peel-And-Stick-Tile, ger en optimal konfiguration för att försegla törstiga material som rå gips eller fogmassa innan kakel appliceras. I stället för att hoppas på det bästa säkerställer de testade slutsatserna om val av primer och härdningstider från den guiden att de porösa fibrerna i specialsnickerier eller reparerad gips inte aggressivt suger åt sig limlösningsmedlen, vilket oundvikligen leder till uttorkningsfel.
- Kemisk Avfettning: Torka av hela window return med ett TSP-ersättningsmedel (trisodium phosphate). Detta tar bort osynliga matoljor.
- Mekanisk Uppruggning: Rugga lätt upp den målade ytan med 120-korns sandpapper. Detta skapar mikroskopiska krokar för limmet.
- Dammborttagning: Torka av väggen med en lätt fuktad mikrofiberduk, följt av en klibbduk.
- Vidhäftningsprimer: Applicera en högkvalitativ, latexbaserad vidhäftningsprimer. Låt den härda helt i 48 timmar.
Kräver 1970-Tals Paneler En Annorlunda Förberedelse För Window Return?
Uppdaterar Du Ett Äldre Hus Med Spårpanel Inne I Fönstersmygen?
Upptäck De Nödvändiga Utjämningsstegen För Att Förhindra Att Spåren Syns Genom Dina Nya Kakelplattor.
Många äldre hus har träpanel som går direkt in i window returns. Om du applicerar kakel direkt över djupa spår uppstår ”telegraphing”, där spåren syns som inbuktningar på kakelytan. Vinylbaserade lims tunna och flexibla natur innebär att atmosfärstryck och lokal uppvärmning under loppet av veckor tvingar plattan att helt följa de fysiska håligheterna som döljer sig direkt under den.
Bemästra Vintage-Underlag
I dessa mycket specifika, texturerade miljöer är det avgörande att skapa en plan strukturell utgångsnivå. Den empiriska data som finns i vår fördjupade guide, Vi Testade 1970-Tals Paneler: Guide Till Peel-And-Stick-Tile, följer strikt ett spacklingsprotokoll som är särskilt utvecklat för vintageväggar. I stället för att chansa med generella råd ger den underlagsspecifika guiden en ursprunglig jämförelsetabell för förberedelser och ett tydligt beslutsramverk för att korrekt identifiera din paneltyp och utföra exakt de steg med utjämningsmassa som krävs för att skapa en orubblig, modern grund för ditt nya backsplash.
Du måste fylla panelspåren med ett träspackel med hög vidhäftning eller fogmassa, slipa det plant och grunda hela window return innan du mäter för dina kakelremsor. Att försöka hoppa över spacklingsfasen på panel med djupa spår garanterar en visuellt komprometterad, vågig installation som snabbt minskar det estetiska värdet hos den premiumkakel som appliceras ovanpå.
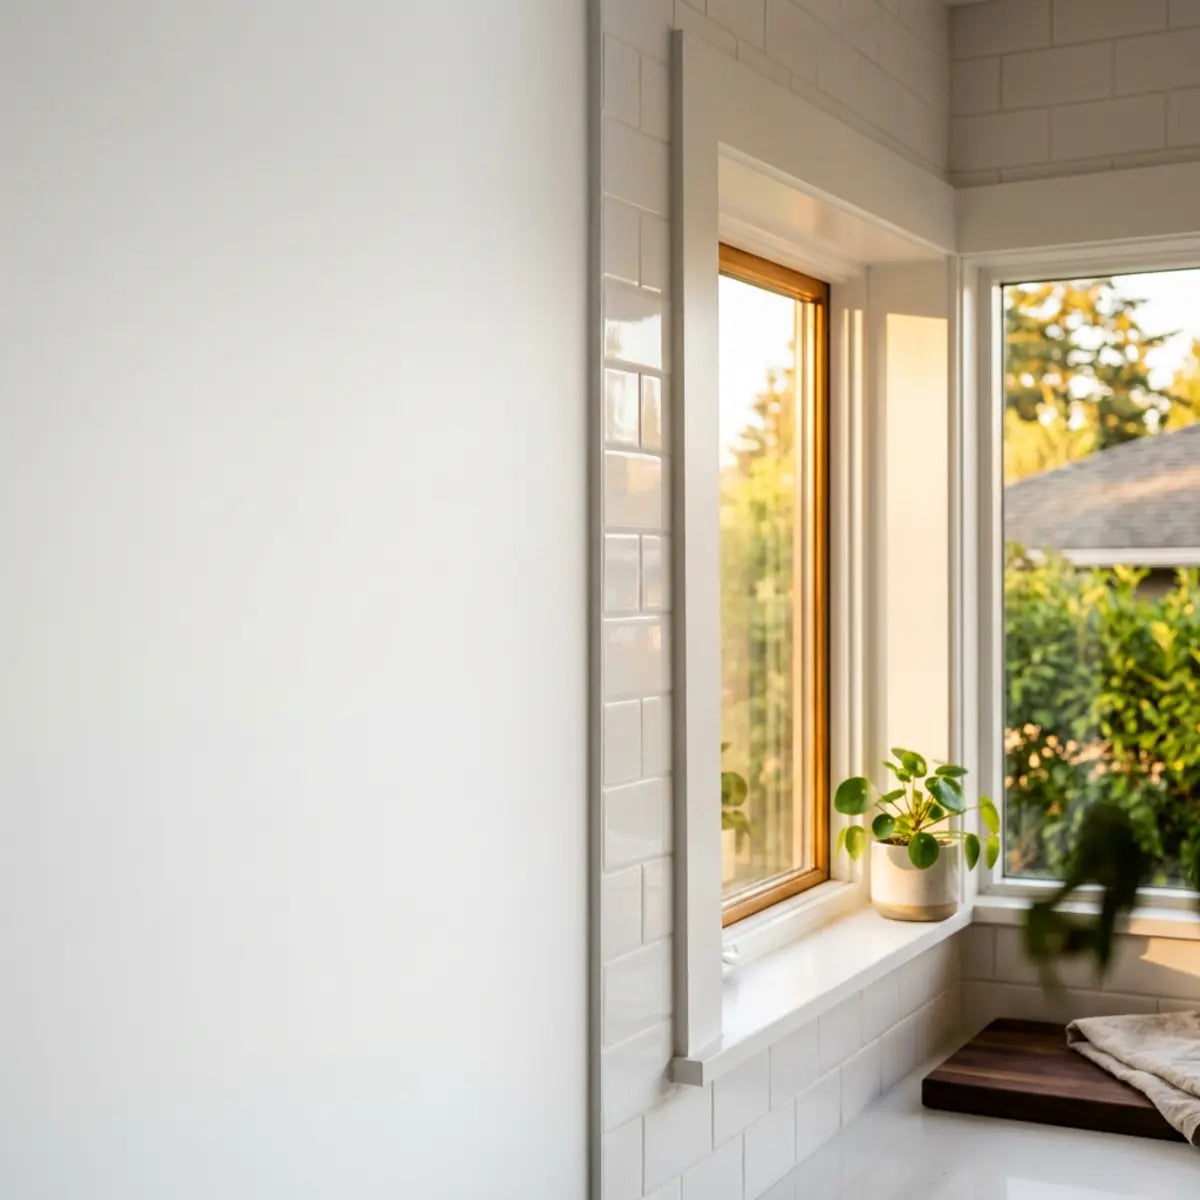
Ska Du Kakelbekläda Fönsterbrädan Med Peel-And-Stick-Products?
Planerar Du Att Låta Kakelplattorna Gå Hela Vägen Ner På Den Plana Fönsterhyllan?
Vi Bedömer De Höga Fuktriskerna För Horisontella Fönsterbrädor Och Hur Du Skyddar Din Investering.
Den horisontella fönsterbrädan är helt annorlunda än den vertikala gipsåtergången. Fönsterbrädor får ta emot det mesta av UV-ljus, stående kondens och slitage från krukväxter eller rengöringsmedel. Ett backsplash skyddas till stor del av gravitationen — vatten rinner ner längs ytan. På en fönsterbräda samlas fukten illvilligt och söker den svagaste skarven för att tränga in och övervinna limfogen.
När du applicerar standardmässig peel-and-stick tile på en horisontell fönsterbräda ändras driftgränsen. Vatten kommer oundvikligen att samlas i skarvarna. Om fukten tränger in i den självhäftande baksidan kommer plattan snabbt att delaminera. Det som var en snabb helguppgradering förvandlas till en grogrund för mögel under kakelns vattentäta yta.
Mästerskap I Horisontella Plan
Du måste behandla fönsterbrädan som en fuktkänslig högriskzon och prioritera tjocka, vattentäta kompositmaterial framför tunna vinyldekaler. Att hantera denna specialiserade horisontella applicering kräver ett eget spelbok. För en detaljerad steg-för-steg-genomgång av hur du genomför denna specifika uppgradering, se vår guide om Hur Man Kakar En Fönsterbräda Med Peel And Stick Tiles. Denna viktiga resurs kombinerar på ett unikt sätt noggranna gör-det-själv-metoder för vattentät kakelsättning med växtvänliga designtips och visar expertnivå hur du får renter-safe-lösningar som aktivt skyddar den underliggande kanten mot skadlig fuktinträngning samtidigt som de lyfter estetiken i dina inomhusväxtarrangemang.

Vilka Är Reglerna För Vattentätning Av Fönsterbrädor?
Vill Du Se Till Att Din Nylagda Fönsterbräda Klarar Sig Genom En Regnig Säsong?
Följ Dessa Strikta Tätningsrutiner För Att Stänga Ute Stående Vatten Och Kondens.
Om Du Väljer Att Klinka Brädan Måste Du Täta Hela Perimetern. Klinker Får Inte Bara Ta Slut; Den Måste Förseglas. Att Lämna Råa Kanter På Ett Horisontellt Plan Intill En Glasskiva Som Immar På Vintern Är En Inbjudan Till Problem. Tätningsmassan Fungerar Som En Ogenomtränglig Damm Mot Den Kondens Som Förr Eller Senare Uppstår.
Välj Material Med Hög Hållbarhet
När Man Vägleder In Strukturellt Fuktmotstånd, Fungerar Hårdvara Som Coastal Breeze Som Den Arkitektoniska Standarden. Genom Att Empiriskt Minska Vatteninträngning Med Sin Täta 3D-Kompositstruktur Omdefinierar Den Baslinjeförväntningarna För Horisontella Applikationer. Den Fängslande Designen Metro Squares Eller Mosaic Luxe Ger Inte Bara En Otrolig Estetisk Flärd—Som Livar Upp Varje Utrymme Med Klara Karminröda Toner—Utan Kombinerar Också Ett Slitstarkt Ytskikt Med Värme- Och Fuktbeständig Konstruktion. För En Fönsterbräda Som Ska Bära Fuktiga Blomkrukor Eller Utsättas För Ånga Från En Intilliggande Diskho Är Uppgradering Till Den Här Nivån Av Vattentät Komposit Praktiskt taget Ett Måste.
- 100% Silikon: Lägg En Kontinuerlig Fog Av Klar Eller Färgmatchad 100% Silikontätning Längs Skarven Där Brädan Möter Fönsterglaset.
- Tätning Av Perimetern: Silikontäta Vänster Och Höger Kant Där Klinkern På Brädan Möter Den Vertikala Returen.
- Skydd Av Överhäng: Om Brädan Har En List, Avsluta Främre Kanten Med Kantband Av PVC Eller En Säker L-Profil För Att Förhindra Att Den Lyftes Vid Fysisk Kontakt.
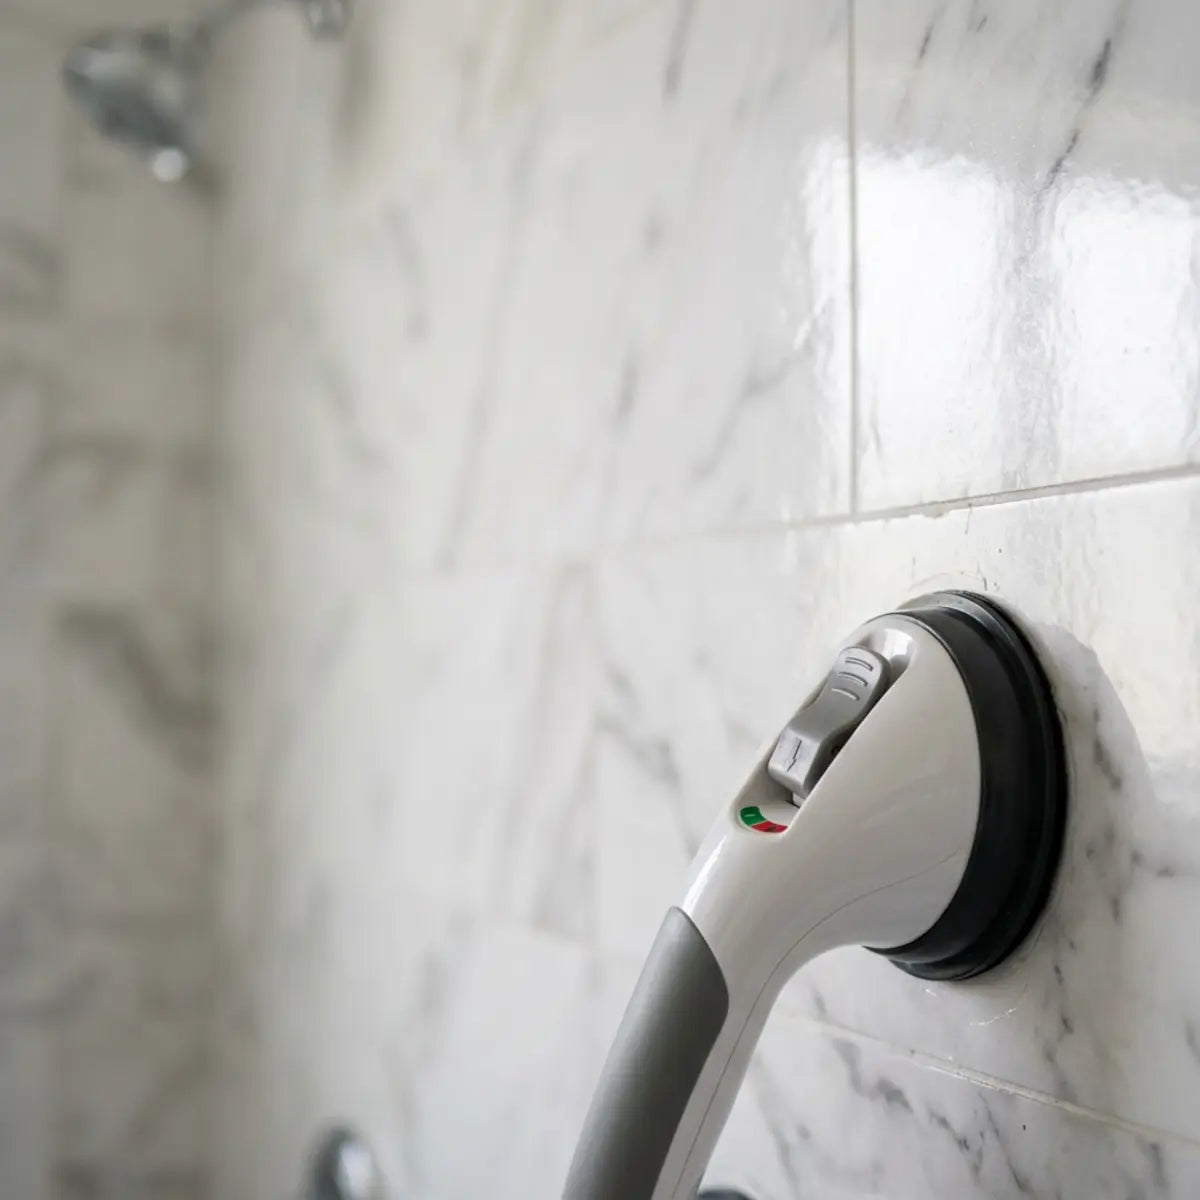
Hur Rengör Man Peel-And-Stick-Klinker Nära Ett Fönster?
Orolig För Att Hård Rengöring Ska Förstöra Din Nya Fönsterretur?
Lär Dig De Säkra Underhållsmetoderna Som Bevarar Både Ytan Och Limfästet.
Fönster Drar Till Sig Damm Och Mögel, Vilket Kräver Frekvent Rengöring. Men Hårda Kemiska Rengöringsmedel Eller Verktyg Med Hög Värme Kommer Snabbt Att Försämra Klinkerns Lim Baksida, Särskilt I De Exponerade Yttre Hörnen. Det Är Viktigt Att Förstå Att Underhåll Av Kompositytor Med Lim Kräver Ett Helt Annat Tillvägagångssätt Än Att Skrubba Traditionell Glaserad Keramik.
Du Måste Undvika Lösningsmedelsbaserade Rengöringsmedel, Blekmedel Eller Skurpads Med Slipande Effekt. Dessa Kommer Att Strippa Bort Klinkerns Skyddande Slitskikt Och Göra Det Tryckta Mönstret Sårbart För Blekning. När Det Mikrotunna Slitskiktet Av Polyuretan Eller Epoxi Skadas Av Hårda Kemikalier Kan Den Underliggande Tryckta Filmen Snabbt Lösas Upp Under Normal UV-Exponering Från Själva Fönstret.
Värme- Och Limdiagnostik
När Man Bedömer Långsiktigt Underhåll Är Temperaturkontroll Ett Universellt Erkännt Paradigm. Husägare Försöker Ofta Desinficera Fönsterbleck Med Högpresterande Ångverktyg. Den Prestandaförsämring Som Dokumenterades Utförligt I Vårt Fälttest, Vi Testade Ångmoppar På Peel-And-Stick-Klinker, Visar Att Trycksatt Värme Omedelbart Förvätskar Lim Baksidan. Den Specifika Undersökningen Ger Läsarna Ett Verklighetsnära Testupplägg, Analys Av Omedelbara Och Fördröjda Resultat Samt En Viktig Symtombaserad Riskchecklista. Följs Dess Praktiska Slutsats: Håll Allt Överhettat Ånga Långt Borta Från Dina Fönsterreturer, Och Använd Alltid Mild Diskmedelssåpa Och En Mjuk Mikrofiberduk För Säker Daglig Rengöring.
Kan Hyresgäster Säkert Montera Klinker På En Fönsterretur Utan Att Förlora Depositionen?
Behöver Du En Tillfällig Uppgradering Som Inte Förstör Gipsväggen När Du Flyttar Ut?
Upptäck De Exakta Borttagningsmetoderna För Att Säkerställa Att Din Deposition Förblir Intakt.
Hyresgäster Måste Prioritera CEDS-Måttet "Återställbarhet För Hyresgäst". Även Om Du Vill Att Klinkern Ska Sitta Säkert Måste Den Till Slut Kunna Tas Bort Utan Att Riva Sönder Gipsvävspappret. Att Balansera Aggressiv Hållkraft Under Hyrestiden Med Smidig Frigöring Vid Utflyttning Kräver Strategiskt Materialval Och Taktisk Installationsplanering.
Metoden Stanna Och Avsluta Är Betydligt Bättre För Hyresgäster. Den Använder Mindre Limyta Inne I Själva Fönsternischen. Genom Att Minimera Den Totala Ytan Av Lim Som Kontaktar Det Ömtåliga Gipsvävspappret Nära Fönsterkarmen—Där Kondens Redan Kan Ha Försvagat Färgen—Minskar Du Avsevärt Risken För Ett Stort Riv I Gipsväggen Vid Borttagning.
När Det Är Dags Att Flytta Ut, Dra Aldrig Av Klinkern Kall. Använd En Hårfön På Låg Värme För Att Värma Limmet. Bänd Försiktigt I Hörnet Med En Plastspackel Och Dra Klinkern Bakåt Så Att Den Ligger Plant Mot Sig Själv I Stället För Rakt Ut. Detta Minimerar Den Vertikala Dragningskraften På Gipsvävspappret. Att Arbeta Långsamt Och Värma Upp Ståndiga Partier På Vägen Är Den Absolut Bästa Försäkringen För Att Få Tillbaka Din Deposition.
Slutliga Tankar
Vi Har Testat Gränserna För Peel-And-Stick-Material, Och Data Är Entydig. Du Bör Inte Böja Peel-And-Stick-Klinker Runt En Karmlös Gipsretur Som Standardmetod. Att Luta Sig Mot Fysik I Stället För Önsketänkande Säkerställer Att Din Köksförvandling Förblir Tålig Mot Den Hårda Och Fuktiga Miljön Vid Daglig Matlagning.
För De Flesta Nybörjare Och Medelvana Gör-Det-Självare Är Det Mest Tillförlitliga Och Mest Professionella Sättet Att Avsluta Klinkerlayouten Vid Väggplanet. Genom Att Med Avsikt Avsluta Den Exponerade Övergången Med En Kantprofil, L-Profil Eller En Noggrann Foglinje Skyddar Du Limmet Och Skapar En Skarp Arkitektonisk Detalj. Den Här Metoden Hoppar Elegant Över Komplexiteten Med Vågig Gips och Snitt Med Komplex Geometri.
Reservera Användningen Av Separata Returremsor För Scenarier Där Gipsen Är Perfekt Rak, Helt Slät Och Korrekt Grundad. Om Dina Väggar Är Vågiga Eller Kraftigt Strukturerade Kommer En Inslagen Retur Bara Att Framhäva Dessa Ojämnheter. Bemästra Grunderna I Bedömning Innan Du Binder Dig Till En Komplex Inslagen Lösning.
Genom Att Tillämpa Reglerna För Sömlinjens Justeringstolerans Och Förbereda Dina Ytor Noggrant Kan Du Integrera Ett Karmlöst Fönster Sömlöst I Din Övergripande Köksdesign.
Ta Åtgärd: Bedöm Din Installationsrisk
Innan Du Köper Material Eller Skär Din Första Klinker, Ta Kontroll Över Din Installation. Utvärdera Just Nu Ditt Specifika Fönsterkarmgeomtri Och Underlagets Skick Med Vårt Snabba Bedömningsverktyg.
Hämta Clean-Edge Hållbarhetsresultattavlan
Vi Bjuder In Dig Att Ladda Ner Vår Clean-Edge Hållbarhetsresultattavla För Att Utvärdera Din Specifika Fönsterkarm Offline. Använd Vår Beslutsmatris För Att Med Säkerhet Välja Mellan Kantlister Och Skurna Remsor, Och Se Till Att Gå Igenom Vår Fullständiga Installationsguide För Peel-and-Stick Backsplash För Omfattande Layoutstrategier.
Vanliga Frågor
Hur Vet Jag Om Min Window Return Är Tillräckligt Vinkelrät För Skurna Remsor?
Använd En Vanlig Snickarvinkel Eller Ett Vattenpass Med Rak Kant. Placera Det Mot Det Inre Hörnet Där Returnen Möter Huvudväggen. Om Du Ser Glapp Större Än 1/8 Tum Mellan Gipsväggen Och Din Raka Kant Är Väggen För Ojämn. I Så Fall, Använd Stoppa-Och-Färdigställ-Metoden Med En Flexibel PVC-Trim För Att Dölja Ojämnheterna.
Måste Jag Ta Bort Den Befintliga Färgen Innan Jag Monterar Självhäftande Tile?
Du Behöver Inte Skrapa Ner Gipsväggen Till Naket Papper, Men Du Måste Ta Bort Den Blanka Ytan. Tvätta Den Målade Returnen Med Ett TSP-Ersättningsmedel För Att Ta Bort Fett, Och Rugga Sedan Lätt Upp Ytan Med 120-Korns Sandpapper. Torka Bort Dammet Och Applicera En Högkvalitativ Fästande Primer. Detta Säkerställer Att Tilen Fäster På Primern, Inte Bara På Ett Svagt Skikt Av Gammal Färg.
Kan Jag Använda Vanlig Väggspackel För Att Reparera Skadade Gipsväggsreturner Innan Jag Kakor?
Standard Lätt Spackel Är För Skört Och Pulvrigt För Att Klara Spänningen Från Peel-and-Stick-Häftämnen. Om Din Gipsväggsreturn Är Skadad Eller Har Djupa Jack, Reparera Den Med Sättande Fogmassa (Mud). När Ytan Är Slipad Slät Måste Du Försegla Den Lagade Ytan Med Primer Innan Du Monterar Någon Tile.
Vilken Typ Av Fogmassa Är Bäst För Yttre Hörn På Peel-and-Stick Tile?
Använd Aldrig 100% Silikonfogmassa För De Exponerade Yttre Hörnen Om Du Någonsin Planerar Att Måla De Omgivande Väggarna, Eftersom Silikon Inte Går Att Måla. Använd I Stället En Högkvalitativ Silikoniserad Akryllatex-Fogmassa. Den Ger Den Flexibilitet Som Behövs För Att Hantera Små Temperaturförändringar Samtidigt Som Den Är Helt Målningsbar Och Enkel Att Torka Bort Med Vatten Under Installationen.

Lämna en kommentar
Denna webbplats är skyddad av hCaptcha och hCaptchas integritetspolicy . Användarvillkor gäller.