












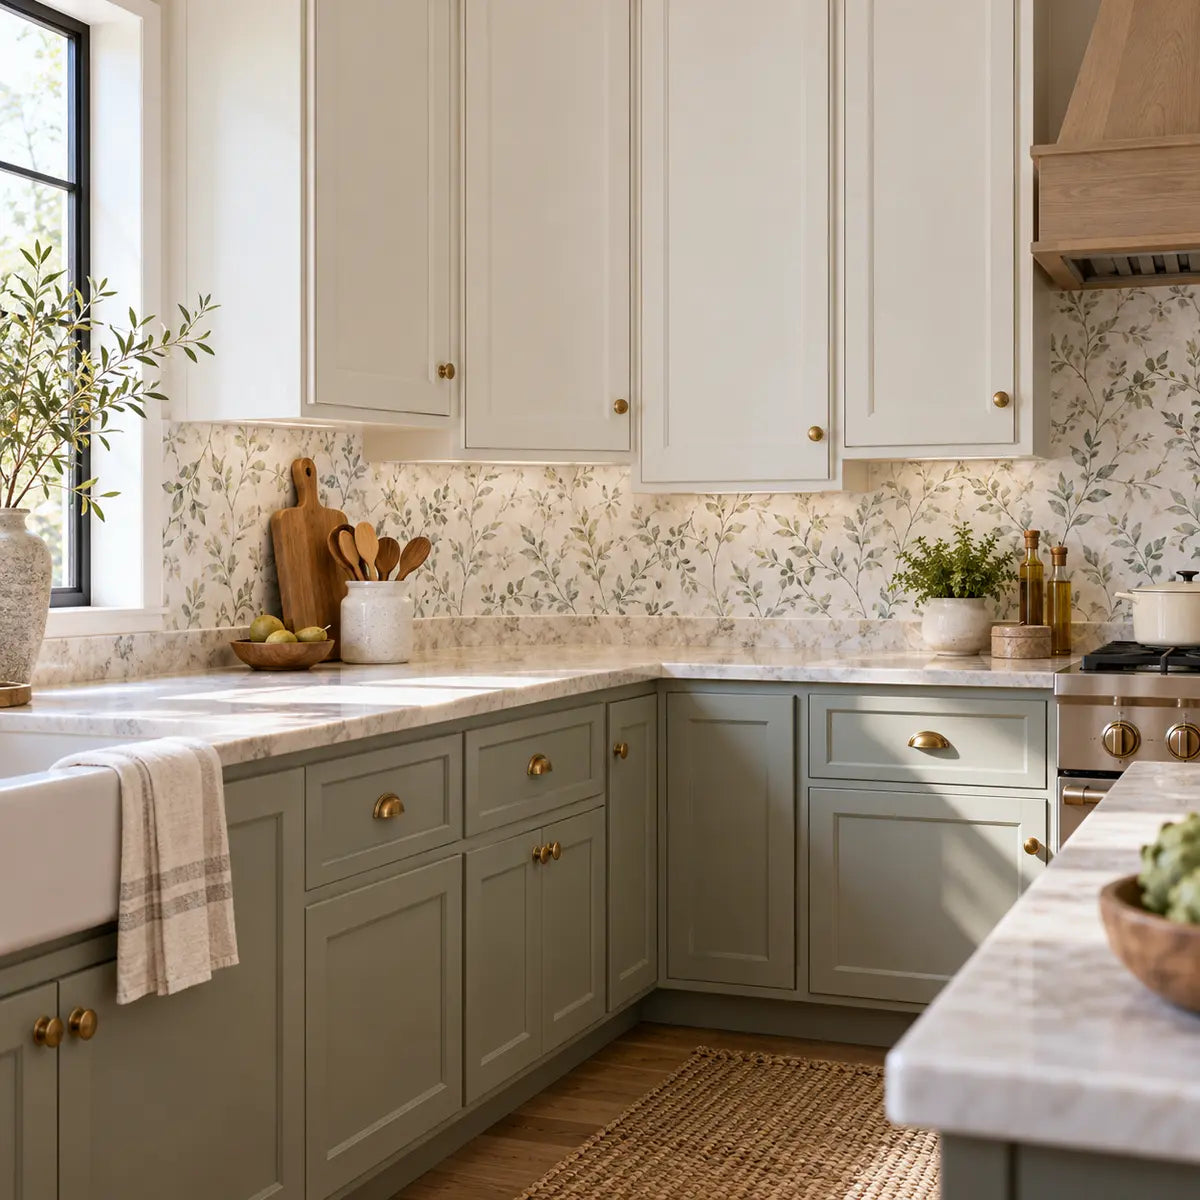
Uneven upper cabinets do not automatically rule out a clean peel-and-stick backsplash. The reliable approach is to treat each cabinet bay as its own measurement problem, choose one deliberate visual reference line, make paper templates for irregular edges, and dry-fit every piece before exposing adhesive.
The countertop may be level while the cabinet bottoms rise, dip, or change direction. That creates two separate layout questions:
- Where should the backsplash look visually anchored?
- How should each tile or panel be cut to fit the actual opening?
Those questions are related, but they are not identical. A level line may create the most orderly pattern across the wall, while following a cabinet edge may reduce a visible gap beneath an uneven cabinet. The right choice depends on the countertop, the cabinet bottoms, the pattern, the wall condition, and which edges will remain visible.
This guide explains how to install peel-and-stick backsplash around uneven upper cabinets while the cabinets remain in place. It covers measurement, reference-line selection, paper templates, pattern alignment, outlets, corners, side edges, adhesive exposure, and corrections for common mistakes.
Before cutting, check the current instructions for the exact Stickwoll product you plan to use. The checked Stickwoll guidance centers on a clean, smooth, dry, stable wall and warns that textured, dusty, peeling, raised, cracked, or bumpy surfaces can affect the result. Product-specific rules for cutting, heat, moisture, cleaning, repositioning, and removal still control the installation. See the current Stickwoll installation and removal instructions before preparing the wall.

What should you resolve before cutting the first tile?
Before cutting anything, identify the wall sections, cabinet bays, interruptions, reference lines, exposed edges, outlets, and pattern direction. A backsplash cut is only as accurate as the map behind it.
Start by standing several feet back from the wall and looking at the whole run. Do not begin with a tape measure in your hand. First observe how the kitchen reads visually.
Look for:
- Upper cabinets that change height from one bay to the next.
- Cabinet bottoms that are straight but not level.
- Cabinet bottoms that curve, bow, or contain trim.
- A countertop that slopes or has a changing wall joint.
- Open wall sections beside or beneath the cabinets.
- Inside corners and outside corners.
- Outlets, switches, appliance controls, or cover plates.
- Side panels or exposed cabinet ends.
- A backsplash termination at a doorway, window, pantry, or open wall.
- A repeated pattern that must stay upright or continue across a seam.
The most useful mental model is to divide the wall into bays. A bay is one section of wall between two interruptions, such as the space beneath one cabinet group, the area between a cabinet side and an outlet, or the return inside an L-shaped corner.
Even if two bays appear similar, record them separately. A small difference in width or height can change the location of a pattern seam, the size of an end cut, or the shape of the upper edge.
The checked Stickwoll guide recommends measuring wall areas as separate rectangles around cabinets, windows, returns, and interruptions. Applying that same layout logic to uneven upper cabinet bottoms is a practical geometric choice: each bay receives the measurements that describe its actual opening rather than borrowing dimensions from the next bay. You can see a related wall-mapping workflow in Kitchen Backsplash Layout Before Cutting.
Inspect the wall before relying on the adhesive
Peel-and-stick material needs a suitable surface. A wall can look clean from across the room while still having loose paint, grease, dust, moisture, or raised texture that interferes with adhesion.
Check the installation area for:
- Flaking or weak paint.
- Raised drywall compound or rough patches.
- Heavy orange-peel or textured paint.
- Grease near the cooking surface.
- Moisture, condensation, or staining.
- Dust inside corners and along the countertop.
- Loose existing tile or grout.
- Cracks, movement, or a wall surface that flexes when pressed.
Do not use a backsplash panel to hide an active moisture problem or loose substrate. Clean and repair the wall first, then let it dry fully. If the exact product instructions do not approve the surface, stop and resolve that issue before making measurements.
Also test the proposed installation area if the product instructions call for a test. Removal may affect paint or the wall surface, especially where the original wall is weak. A renter with permission to modify the surface should treat removal as a separate question from installation: a product may adhere successfully and still leave damage when removed.
Make a simple wall map
Use graph paper, printer paper taped together, or a large sheet of kraft paper. Draw the wall as a front elevation, meaning a straight-on view rather than a perspective sketch.
Label each bay from left to right:
- Bay A
- Bay B
- Bay C
- Left return
- Right return
- Corner
- Outlet 1
- Outlet 2
Mark the countertop line, the lowest and highest cabinet-bottom points, cabinet sides, open ends, and electrical devices. The drawing does not need to be beautiful. It needs to make the changes visible.
Write the measurement date and product name on the map. If you are using several boxes or batches, note that too. Pattern variation is easier to manage when pieces remain associated with the layout they were selected for.
Should the backsplash follow the countertop or the cabinet line?
The backsplash should follow the line that creates the most intentional overall appearance after a full dry fit. That may be the countertop, a level visual line, the cabinet bottom, or a controlled combination where the transition occurs at a natural break.
There is no universal rule that the backsplash must always follow the countertop or always follow the upper cabinet bottoms. A strong installation begins by comparing the available lines rather than accepting the first one that seems easiest to measure.
The checked Stickwoll guidance for uneven joints presents two legitimate layout ideas: preserve a level visual line or follow the physical edge. Other peel-and-stick installation guidance also supports using a countertop or level line as a guide. Conventional backsplash layout guidance commonly starts by identifying the lowest countertop point and extending a level reference line, though those instructions apply to conventional tile systems and should not be transferred to a peel-and-stick product as product requirements.

Compare the three main layout choices
| Layout choice | When it often works well | Main risk |
|---|---|---|
| Follow the countertop | The countertop is visually strong, relatively consistent, and the lower edge should look tightly connected to it | The upper edge may create a changing gap beneath the cabinets |
| Follow a level visual line | The pattern has strong horizontal or vertical structure, or the wall is viewed as one continuous field | A visibly uneven cabinet bottom may leave a noticeable opening |
| Follow the cabinet bottom | The cabinet edge is prominent, the gap would otherwise vary sharply, or each bay is visually separate | The backsplash may slope or show pattern changes across the run |
The important question is not, “Which line is technically correct?” Ask instead:
Which line will the eye notice first, and which line can the pattern tolerate?
If the countertop is the dominant horizontal feature, a countertop-led lower edge may look calmer. If the upper cabinet trim is prominent and the countertop has a wavy wall joint, the cabinet-led upper edge may look more intentional. If the pattern contains strong horizontal bands, a level visual line may be easier to read than a rising and falling edge.
Use a reference-line decision aid
Before making any cuts, compare the layout in three quick dry-fit versions. You can use a long strip of scrap paper, painter’s tape, or uncut backing material to represent the top or bottom edge.
Choose a countertop-led layout when:
- The countertop line is the clearest feature in the room.
- The wall-to-countertop joint is consistent enough to support a clean lower edge.
- The upper cabinet variation is modest or can be hidden within the pattern.
- You want the backsplash to appear seated on the countertop.
Choose a level visual line when:
- The pattern has strong horizontal bands or repeated vertical elements.
- The backsplash spans several cabinet bays that are read as one wall.
- The cabinet bottoms vary more than the countertop.
- A crooked pattern would be more visible than a changing upper gap.
- The line can terminate naturally at a cabinet side, corner, or open end.
Choose a cabinet-led layout when:
- The cabinet bottom is the most prominent visible edge.
- The gap beneath the cabinets would grow or shrink sharply under a level layout.
- The cabinet bays are visually independent.
- The tile can be cut cleanly to the cabinet profile.
- The pattern is forgiving near the upper edge.
Do not switch between these choices from bay to bay without a clear reason. A separate measurement for each bay does not mean each bay should receive a separate visual rule. Keep the reference principle consistent across the run unless the wall changes at a corner, open end, or other intentional transition.
A small gap can look better than a crooked pattern
DIY installers often focus on eliminating every visible gap. That instinct can lead to a poor layout. A narrow, consistent gap hidden under cabinet trim may be less noticeable than a pattern that rises, falls, and breaks across the room.
The reverse can also be true. If the cabinet bottom is clearly visible and varies sharply, a level backsplash may create a wedge-shaped opening that draws the eye. The most convincing result comes from comparing the whole wall, not from maximizing one measurement.
Create a temporary mock-up before cutting valuable material:
- Place a strip of paper along the countertop.
- Mark the proposed upper edge or lower edge.
- Step back and view it from normal standing distance.
- Repeat with a level line.
- Repeat with a cabinet-following line.
- Check the pattern direction against each option.
Take a photograph of each version. Photos often reveal a slope or gap that feels less obvious while you are standing close to the wall.
How do you measure backsplash around uneven cabinets?
Measure each bay at multiple stations, record the width and height changes, and identify every obstruction before transferring any dimension to a tile.
A single measurement from the left cabinet side to the right cabinet side is rarely enough when the upper edge changes. Measure the lower edge, the upper edge, and the side boundaries that control the cut.

Build a cabinet-bay measurement worksheet
For each bay, record:
| Field | What to write down |
|---|---|
| Bay label | A, B, C, or another clear identifier |
| Width | Left boundary to right boundary |
| Lower edge | Countertop or selected lower reference at left, center, and right |
| Upper edge | Cabinet-bottom height at left, center, and right |
| Side condition | Cabinet side, wall edge, corner, or open termination |
| Obstructions | Outlet, switch, trim, pipe, bracket, or appliance |
| Pattern direction | Upright, sideways, centered, or matched to adjacent piece |
| Template needed | Yes or no |
| Final piece ID | The tile or panel assigned to this location |
When an edge changes height, measure at several stations rather than only at the two ends. The checked Stickwoll uneven-joint guidance recommends measuring several points where an opening grows or shrinks. It does not prescribe one universal number of stations, so use enough points to describe the actual shape.
For a straight sloping edge, three stations may reveal the change. For a wavy or irregular edge, add stations wherever the shape changes direction. Place a station near each corner, cabinet seam, trim transition, and visible high or low point.
Measure from fixed references
Use the same reference points throughout the project. A useful sequence is:
- Mark the left wall boundary of the bay.
- Mark the right wall boundary.
- Measure the bay width at the countertop.
- Measure the bay width higher on the wall.
- Measure from the countertop to the selected upper reference at the left.
- Repeat at the center.
- Repeat at the right.
- Record any change in cabinet depth or trim projection.
- Measure the distance from each outlet or switch to the same fixed boundaries.
- Photograph the bay with the label visible.
Do not measure from a loose piece of trim or from the edge of a removable cover if that edge does not represent the final tile boundary. Use a cabinet side, wall corner, countertop edge, or another stable reference.
Account for the thickness of what remains visible
A cabinet bottom may contain a face frame, light rail, decorative molding, or a recessed underside. The visible edge and the actual wall opening may not be the same plane.
Hold a scrap of cardboard or an unused tile against the wall to see how the material meets the cabinet. Check whether:
- The tile will tuck behind a lip.
- The cabinet trim projects farther than the wall.
- A shadow line will conceal a small gap.
- The backsplash must stop against the front of a side panel.
- The tile will wrap around a return.
This is one reason a paper template is more dependable than a calculated rectangle. The template captures the shape that the finished material must occupy.
Measure the open ends before centering the layout
At an open wall end, decide whether the last piece should be full, cut, wrapped, or finished with an edge treatment allowed by the exact product instructions.
Dry-lay the pieces across the bay and inspect both ends. A layout that begins with a full tile may finish with an awkward narrow strip. A small adjustment at the starting point can create more balanced end cuts, but pattern and product joining rules still control.
Do not state a universal minimum cut width. The acceptable appearance depends on the tile format, pattern, visible edge, and product design. The useful rule is to avoid an unintended sliver and choose a termination that looks deliberate.
How do you make a paper template for cabinet cuts?
Make a full-size paper or cardstock template of the actual opening, label its orientation, test it against the wall, then transfer it to the tile while protecting the adhesive whenever the product instructions permit that process.
A template is a temporary copy of the shape you need to cut. It turns a difficult three-dimensional transfer into a flat, inspectable pattern.
The checked Stickwoll guide identifies cardstock templates as useful planning tools. It also stresses that the exact product instructions control how pieces are marked and cut. A general peel-and-stick installation document supports measuring each area and marking cut lines on the piece, but cutting surfaces and tools vary by construction.
Template a simple rectangular bay
For a bay with straight sides and a level upper edge:
- Cut paper slightly larger than the opening.
- Hold it against the wall with the intended top and bottom edges clearly marked.
- Mark the left and right boundaries.
- Mark the countertop or lower reference line.
- Mark the cabinet-bottom line.
- Trim the paper gradually until it fits.
- Label the template with the bay name and “front.”
- Mark the pattern direction with an arrow.
Keep the template slightly oversize during the first fitting. Removing too much paper is easier to correct than adding it back.
Template an uneven cabinet bottom
For a sloping, stepped, or wavy cabinet edge:
- Place the paper in the bay with the lower edge aligned to the selected reference.
- Press the paper into the upper corner and along the cabinet bottom.
- Mark the left and right side boundaries.
- Use a pencil held against a small spacer to trace the cabinet edge if the gap is consistent.
- If the gap changes, trace the actual edge directly with the paper held in place.
- Cut outside the line first.
- Test the paper against the wall.
- Trim only the areas that interfere.
- Transfer the final shape to the tile.
A scribe line is a line transferred from an irregular surface so the cut follows that surface. When using a compass or spacer to scribe, keep the pencil point and the contact point moving together. If the cabinet edge projects unevenly, a direct template trace may be more accurate than a constant spacer.
For a detailed visual explanation of paper templates, compass scribing, progressive cuts, and wavy cabinet edges, see We Scribed Peel-and-Stick Tile Against Wavy Cabinets.
Protect the template from orientation mistakes
A template can fit perfectly and still be transferred backward.
Write these marks on every template:
- “Front.”
- “Top.”
- “Left.”
- Bay name.
- Outlet or switch location.
- Pattern direction.
- Any side that will remain visible.
If you flip a template to trace it on the back of the tile, the shape becomes mirrored. That may be harmless for a plain square piece and disastrous for an asymmetric corner, outlet cut, or directional pattern.
Before cutting the product, place the template on the tile in the same orientation it will occupy on the wall. Do not assume the tile can be rotated simply because the shape fits.
Use progressive cuts for expensive or difficult pieces
Do not cut the final line in one aggressive pass. Make the first cut slightly outside the marked line, test-fit the piece, and remove small amounts at a time.
This is especially useful for:
- Cabinet trim with a changing projection.
- Tight corners.
- Side returns.
- Open ends where the edge remains visible.
- Pieces that must align with an adjacent pattern.
- Outlet cutouts close to the tile edge.
The goal is controlled correction. A piece that is slightly oversized can be trimmed. A piece that is overcut may need to be replaced or hidden with an approved finishing detail.
What tools and marking process should you use?
Set up a clean marking station before adhesive is exposed. The cutting surface should be stable, the blade or scissors should match the product instructions, and every piece should have a location label.
A typical layout and cutting setup may include:
- Tape measure.
- Pencil and fine-tip marker.
- Level.
- Straightedge or metal ruler.
- Square.
- Painter’s tape.
- Paper or cardstock for templates.
- Utility knife or scissors, only if allowed by the exact product instructions.
- Cutting mat or protected work surface.
- Clean cloth.
- Smoothing tool approved or recommended for the product.
- Labels or small pieces of masking tape.
- A step stool that allows you to work without overreaching.
Current guidance from Stickwoll and Lowe’s makes the cutting method product-dependent. Some peel-and-stick products use scissors or a sharp utility knife, while others may require another method. Score-and-snap is conditional; do not assume it applies to every decorative panel.
Label the cut map before cutting
Create a cut map that connects the wall to the material:
| Piece ID | Location | Top edge | Left edge | Right edge | Obstruction | Pattern check |
|---|---|---|---|---|---|---|
| A1 | Bay A, left | Cabinet profile | Wall edge | Straight | None | Arrow up |
| A2 | Bay A, center | Level | Straight | Outlet | Outlet 1 | Match A1 |
| A3 | Bay A, right | Cabinet profile | Straight | Open end | None | Match A2 |
Use the same IDs on the template, the tile backing, and the wall map. This prevents a carefully cut piece from being installed in the wrong bay.
Mark from the correct face
Some products are easiest to mark on the liner side. Others may require marking on the front or back. Follow the exact instructions for the product.
If you mark on the front, use a method that will not damage the visible finish. If you mark on the back, confirm whether the design or adhesive layer has an orientation that changes when flipped.
Do not remove the release liner merely to make marking easier. The adhesive should stay protected until the piece has passed its dry-fit checks, unless the product instructions require a different sequence.
How do you cut around outlets, corners, and side panels?
Cut the most visible and least forgiving obstructions from templates, then dry-fit them with the cover plates or trim positioned as they will be after installation.

Outlets and switches
For work near an outlet or switch, turn off the circuit at the breaker, unplug nearby appliances, and verify that power is off before loosening a cover or working near exposed wiring. The Electrical Safety Foundation International gives this narrow safety guidance for DIY electrical work; it does not replace local electrical-code requirements or authorize wiring changes. Review the ESFI DIY electrical safety guidance if you are unsure about the electrical portion.
You usually have two layout options:
- Cut around the existing cover plate.
- Remove or loosen the cover plate as permitted, install the backsplash behind it, and reinstall the cover so the plate conceals the edge.
The second option may create a cleaner finish, but the outlet box, cover, wall thickness, and local requirements determine what is allowed. Do not use the backsplash to force an electrical cover outward or interfere with the device.
Make an outlet template by measuring from two fixed edges of the bay. Record:
- Horizontal distance from the left boundary.
- Vertical distance from the lower reference.
- Width and height of the opening.
- Any rounded corners.
- Distance to the nearest tile seam.
- Whether the cover will conceal the cut.
Cut the opening slightly conservatively, test-fit the tile, and enlarge it only as needed. Keep the cut hidden beneath the cover when the installation permits it, while preserving enough material for the tile to remain stable.
Inside corners
Inside corners expose small measurement errors because two surfaces meet. Do not assume the corner is square.
Make one paper template for the first wall and another for the return. Test whether the second piece should:
- Butt against the first.
- Overlap it.
- Stop short according to a product-specific joint or edge instruction.
- Continue the pattern around the corner.
The exact product design controls how pieces join. Dry-fit both walls at once so the corner does not create a pattern break that was invisible when each wall was checked separately.
For an L-shaped kitchen, use a layout that measures separate wall runs, plans the inside corner, and chooses intentional starting and ending points. The related guide L-Shaped Kitchen Peel-and-Stick Backsplash Layout can help you plan the transition.
Side panels and open ends
At an open end, the cut edge may be visible from the room. Decide whether to place a factory edge, a clean cut edge, or an approved finishing element at that termination.
If the side panel of an upper cabinet sits proud of the wall, template around the projection. If the backsplash turns onto the side panel, measure the return as its own narrow bay. Do not force a large tile around a side edge if the pattern will twist or the cut will be difficult to support.
Cabinet corners and decorative trim
Decorative trim often changes the apparent shape of the cabinet bottom. Look at the edge from normal standing height and from the side. A shadowed recess may not need a perfect scribe if it will remain hidden, while a projecting light rail may need a close template.
Trim the paper around the visible profile first. Then place the uncut tile behind or beneath the trim to confirm that the template represents the real installation plane.
What should you check before pressing the adhesive?
Dry-fit the entire local arrangement, confirm orientation and pattern continuity, inspect the cut edges, and check the end conditions before exposing the adhesive.
This is the point where most avoidable mistakes can still be corrected. Once a peel-and-stick piece has been pressed firmly, removal may affect the wall, and repositioning limits vary by product.

Run a progressive dry fit
Do not wait until every piece is cut to discover that the pattern drifts. Work in small groups:
- Dry-fit the first piece in Bay A.
- Add the adjacent piece.
- Check the seam and pattern.
- Add the next piece.
- Check the cabinet edge and countertop relationship.
- Continue through the bay.
- Repeat at the transition into Bay B.
- Inspect the whole run from across the room.
Use painter’s tape to hold pieces temporarily if the product surface and wall allow it. Keep the adhesive protected. The purpose is to inspect the arrangement, not to create a partial bond.
Check the pattern before the shape
A piece may have the correct dimensions and still be wrong because it is rotated, mirrored, or drawn from a different part of the repeat.
Before installation, check:
- Pattern direction.
- Color or texture variation.
- Batch or pattern information where supplied.
- Edge design.
- Alignment with the previous piece.
- Alignment through the corner.
- Relationship to outlets and cabinet seams.
- Whether the piece belongs to the marked bay.
Stickwoll, WallPops, and Lowe’s guidance all emphasize inspecting pattern direction or variation before installation. This does not prevent every visible difference, but it catches errors while the piece can still be changed.
Inspect the upper edge from normal viewing distance
Stand where you would normally see the backsplash. Look for:
- A wedge-shaped gap.
- A sudden change in gap size.
- A crooked line that competes with the cabinet trim.
- A cut edge that is too visible.
- A sliver at the end of the bay.
- A pattern band that climbs unexpectedly.
- A seam that lands beside an outlet or corner in an awkward way.
A close-up view encourages overcorrection. The finished installation should be judged from the room, under typical lighting, after the pieces have been checked close up.
Keep an extra piece for comparison
Before pressing the first piece, place an unused piece beside the dry-fitted layout. Compare color, sheen, pattern direction, and edge shape. If the product includes multiple patterns or batches, this may reveal a change that was not obvious while measuring.
Do not assume every piece is interchangeable. Keep enough material aside for a replacement cut, especially for the first outlet, corner, or cabinet-profile piece.
Dry-fit readiness check
Use this visible checklist after the local arrangement is dry-fitted. The written inspection remains complete if the controls are not used.
How do you apply peel-and-stick backsplash under fixed cabinets?
Install one prepared piece at a time, expose only the adhesive area that the exact product instructions allow, align the piece to the chosen reference, then press from the secured edge outward.
Working around fixed upper cabinets is manageable when the installation sequence is controlled. You do not need to remove the cabinets to make a template, but you do need enough access to clean, measure, dry-fit, and press the piece without stretching it.
Start with the most informative piece
The first piece should establish the visual logic of the bay. It is usually the piece that controls:
- The countertop relationship.
- The first pattern repeat.
- The corner transition.
- The visible open end.
- The upper cabinet profile.
Avoid beginning with a hidden filler piece if the first visible piece will determine the pattern. A small error at the first piece can carry across the whole run.
Use the lower reference as a guide
If the countertop is the chosen reference, align the first piece to that line. If you chose a level visual line, mark it lightly or use a straightedge to guide the piece. If the cabinet bottom controls the upper edge, align the template-shaped edge first and let the lower edge fall where the measurements placed it.
Do not stretch the material to make a gap disappear. Stretching can distort the pattern and change the fit of adjacent pieces. The cut should match the opening; the adhesive should secure the piece after the geometry is correct.
Expose adhesive in stages when allowed
Many peel-and-stick systems are easier to align when only part of the backing is removed at first. That approach is product-dependent. The checked Stickwoll guide states that adhesive exposure, pressure, repositioning, and removal vary by product. WallPops describes staged backing removal for its own product, while Lowe’s warns that pressing can create a permanent bond that may damage the substrate during removal.
Use the exact product sequence. If staged exposure is permitted:
- Position the piece with the backing attached.
- Secure the top or leading edge.
- Expose a small section.
- Align that section.
- Press gently enough to hold it.
- Confirm the pattern and edge.
- Continue exposing the backing.
- Smooth outward as you proceed.
If the product instructions require full backing removal, follow them and rely on the dry fit, template, and cut map to control placement.
Press from the center or secured edge outward
Work air and slack toward the open edges. Use the smoothing tool recommended for the product, or a clean method stated in the instructions. Do not use excessive force to flatten a wall defect. A raised bump under the panel may remain visible or create a weak spot.
At the upper cabinet edge, press carefully along the cut profile. Check that the edge has not curled, lifted, or shifted away from the template line.
How do you recover from common backsplash mistakes?
Stop as soon as you see a problem, identify whether it is a measurement error, orientation error, substrate issue, or layout issue, and correct the cause before continuing.
| Visible symptom | Likely cause | Practical correction |
|---|---|---|
| Gap under one cabinet is much larger than expected | The bay was measured from one end only, or the wrong reference line was used | Remove the piece only according to product instructions, remake the template, and recheck the layout from normal viewing distance |
| Upper edge looks crooked | The tile was aligned to an uneven edge without checking the whole run, or the reference line moved | Stop at the next seam, compare a level mock-up with an edge-following mock-up, and keep one consistent rule |
| Pattern climbs across the wall | Pieces were rotated, mirrored, or installed without a fixed reference | Recheck the arrows and piece IDs; dry-fit several adjacent pieces before pressing further |
| Outlet cut is too small | The cover or device position was not included in the template | Enlarge gradually with the product-approved tool; keep the cut concealed by the cover where permitted |
| Outlet cut is too large | The opening was cut directly from a rough measurement | Use an approved cover or finishing approach if allowed; do not assume filler or caulk can correct a structurally weak edge |
| Piece is overcut at the cabinet profile | The final line was cut before a progressive dry fit | Use a replacement piece if the edge is visible; reserve heavily cut pieces for hidden locations only if the result remains supported |
| Tile will not adhere at one spot | Dust, grease, weak paint, texture, moisture, or a raised wall defect | Stop and correct the surface; do not solve a substrate problem by pressing harder |
| End piece is a narrow sliver | The starting point was not dry-laid across the full bay | Rebalance the layout before cutting the final pieces |
| Corner pattern does not meet | The two walls were measured independently without a joint plan | Dry-fit both wall runs together and choose the corner sequence before installing more pieces |
| Small gap remains under the cabinet | The cabinet edge is irregular or the selected reference line leaves a visible opening | Decide whether the gap is hidden by trim, should be templated, or requires a different layout strategy |
If the piece is crooked before full pressure
Pause and inspect the adhesive status. If the product instructions permit repositioning at that stage, lift and realign carefully. Do not assume the piece can be moved repeatedly or pulled off without wall damage.
If the piece has already been firmly pressed, follow the product’s removal instructions. A fresh piece may be safer than forcing a removal that damages paint or drywall.
If the piece is slightly short
A small shortfall at a hidden upper edge may be visually acceptable if the cabinet trim conceals it and the product instructions permit the condition. A shortfall at an open end, corner, outlet, or countertop edge is more visible and usually deserves a replacement.
Do not fill a gap with a random adhesive, caulk, or trim material unless that finish is approved for the product and location. The material, heat, moisture, and cleaning boundaries vary.
If the wall is the real problem
If the piece fits the template but will not sit flat, remove the piece only according to the exact instructions and inspect the wall. A bowed, damp, loose, or contaminated surface can make a good cut look defective.
The checked Stickwoll guidance does not establish one universal flatness tolerance or guarantee adhesion on every wall type. Treat the substrate as part of the installation, not as a background detail.
How much extra tile should you allow?
Order enough material to cover the measured installed area plus a project-specific allowance for cuts, pattern matching, damaged pieces, and future replacement needs. Do not treat one percentage as guaranteed for every uneven-cabinet layout.
Irregular upper cabinet bottoms create more cut waste than a simple open rectangle because some pieces may be trimmed into shapes that cannot be reused elsewhere. Corners, outlets, side returns, and pattern matching also consume material.
The checked Stickwoll Sea Glass page lists tiles at 25 centimeters by 25 centimeters, approximately 10 inches by 10 inches, and offers a calculator option for 10% extra. Those values apply to that product page only. They do not establish the dimensions or waste allowance for every Stickwoll collection, and 10% may not cover a layout with many irregular cuts.
Use this sequence instead:
- Measure each bay in the units used by the exact product.
- Calculate the installed area or piece count.
- Account for the actual usable coverage, including overlaps or edge conditions.
- Add a practical allowance for irregular cuts.
- Reserve matching material for a future repair if the pattern or product may be difficult to replace.
- Confirm the quantity against the exact product calculator or instructions.
If you are between quantities, the cost of one extra piece is often smaller than the cost of stopping after a miscut. The right allowance depends on the number of bays, the number of obstructions, the pattern, and how many pieces can be reused as offcuts.
Can peel-and-stick backsplash be installed without removing upper cabinets?
Yes, it can often be planned and cut around fixed upper cabinets, provided you can prepare the wall, measure the openings, dry-fit the pieces, and follow the exact product instructions for the intended surface and location.
Fixed cabinets make access tighter, but they do not change the measurement logic. Use paper templates, label every piece, and work in small sections. A step stool should place you at a comfortable working height so you are not twisting or pressing blindly beneath the cabinet.
Before committing to the project, check:
- Whether the wall behind the fixed cabinets is accessible enough to clean.
- Whether cabinet trim blocks the tile edge.
- Whether the product can be installed in the intended splash or heat area.
- Whether the pattern can be inspected from the front.
- Whether the countertop and cabinet geometry permit a clean termination.
- Whether outlets or switches require electrical work.
- Whether the product’s removal limits matter for your wall or rental agreement.
A fixed cabinet installation needs more planning, but it can reduce disruption because the cabinets remain aligned and supported. Do not treat “no cabinet removal” as a product performance claim. It is a layout condition that the templates and dry fit must accommodate.
How do you finish and inspect the backsplash?
Complete the installation with a cabinet-by-cabinet inspection of alignment, pattern, edges, corners, outlets, adhesion, and visible gaps before treating the project as finished.
Use normal room lighting and inspect from several distances. Walk into the kitchen from the doorway. Look at the backsplash from the side. Open the cabinet doors. Turn on the under-cabinet lighting if present. A cut that looks fine close up may look uneven from the room.

Final inspection checklist
If you want a second layout reference before purchasing or cutting, compare your wall map with Peel-and-Stick Backsplash on an Uneven Countertop Joint. That guide addresses countertop-to-wall irregularity rather than upper cabinet bottoms, but its advice about multiple measurements, dry fitting, and choosing a visual or physical edge can help you evaluate the layout.
For care, cleaning, and use near heat or moisture, rely on the current instructions for the exact product. The checked Stickwoll sources do not support one universal rule for every collection, appliance, splash zone, or cleaner.
Frequently Asked Questions
Should backsplash follow the countertop or upper cabinets?
Choose the line that creates the most intentional view across the whole installation. Follow the countertop when it is the strongest visual anchor and the wall joint is consistent. Use a level visual line when the pattern needs orderly alignment across several bays. Follow the cabinet bottom when a level line would create a conspicuous changing gap beneath prominent cabinet trim.
Dry-fit each option before deciding. The countertop and cabinet line can serve different jobs: one may establish the lower edge while the other controls the upper cut.
How do you measure backsplash around uneven upper cabinets?
Measure every bay separately. Record the width, lower reference, upper cabinet edge, side boundaries, corners, outlets, and open ends. When an edge changes height, measure at several stations instead of relying on one measurement at each end.
Write the bay label on the measurement map and on the template. That prevents a correct cut from being installed in the wrong location.
How do you make peel-and-stick tile templates for cabinet cuts?
Cut paper or cardstock larger than the opening, hold it against the wall, mark the fixed boundaries, trace the cabinet profile, trim gradually, and label the template with its orientation. Test the paper against the actual wall before transferring the shape to the tile.
Keep the template’s “top,” “front,” and “left” marks visible. If the template must be flipped for tracing, confirm that the resulting shape and pattern orientation are still correct.
Can peel-and-stick backsplash be installed around fixed cabinets?
It can often be installed around fixed cabinets if the wall is suitable, the work area is accessible, and the product instructions permit the surface and location. Templates and progressive dry fitting make the work more controlled.
Fixed cabinets do not remove the need to inspect the wall, plan outlets, or check heat and moisture boundaries. They only mean that the backsplash must be measured and cut in place around the existing geometry.
How much extra tile should be allowed for uneven cabinet cuts?
Use the exact product’s coverage information, then add an allowance based on the number of irregular edges, corners, outlets, open ends, and pattern-matching cuts. A published percentage for one product is not a universal rule.
Uneven cabinet bottoms usually justify more planning material than a simple rectangular wall. Keep spare matching pieces if future replacement may be difficult.
What should you do if a tile is slightly crooked?
Stop before applying final pressure. If the product instructions permit repositioning at that stage, realign it carefully. If it has been firmly pressed, follow the product’s removal instructions and consider replacing the piece rather than repeatedly forcing it loose.
Do not promise damage-free removal or unlimited repositioning. Those results depend on the product, adhesive exposure, pressure, wall condition, and paint or substrate.
Is a small gap beneath an uneven cabinet acceptable?
A small, consistent gap may be acceptable if it is hidden by trim or reads as an intentional shadow line from normal viewing distance. A large wedge-shaped gap, an abrupt change between bays, or a gap beside an open edge is more likely to look unfinished.
Inspect the gap from the room before deciding whether to recut. The best result comes from the complete visual relationship between countertop, backsplash pattern, cabinet trim, and side edges.
Final Thoughts
The most dependable way to tile around uneven upper cabinets is to make the irregularity visible on paper before it becomes a permanent cut. Map the wall, label the cabinet bays, measure the changing edges, choose one reference-line strategy, and template the pieces that cannot be described by a simple rectangle.
Then dry-fit progressively. Check the countertop, cabinet bottoms, pattern, outlets, corners, side edges, and last cuts before adhesive is exposed. Work with the exact Stickwoll product instructions for surface preparation, cutting, adhesive handling, heat, moisture, cleaning, and removal.
Complete the measurement worksheet, review the current product instructions, and keep the cut map with any unused material. That preparation turns a difficult-looking cabinet run into a sequence of small, verifiable decisions.


Lämna en kommentar
Denna webbplats är skyddad av hCaptcha och hCaptchas integritetspolicy . Användarvillkor gäller.