





















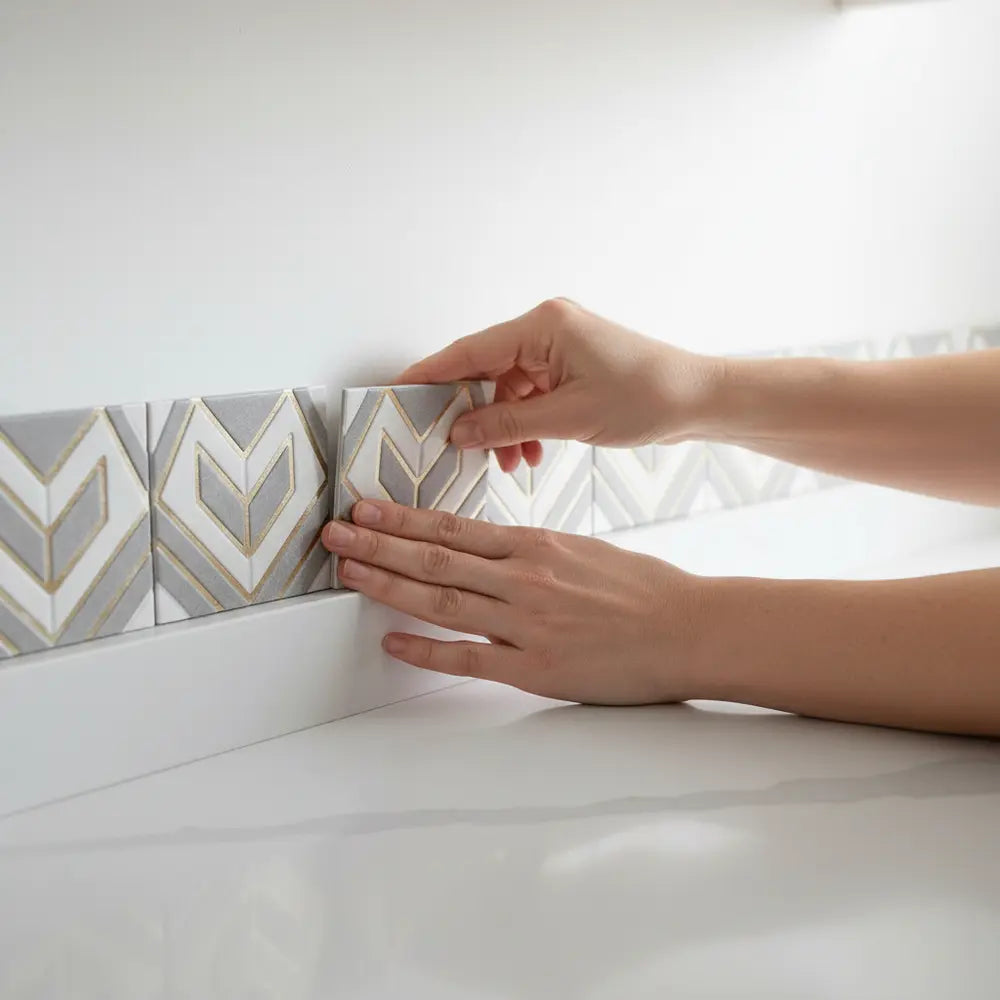
Peel-and-stick kitchen wall tile works best when you treat it as a real finish system, not a one-weekend shortcut. The useful decisions are the wall substrate, tile construction, room exposure, layout, seams, cuts, cleaning and future removal. A product can be visually convincing and still be the wrong choice for a damp wall, a direct-flame zone or weak paint.
This guide turns the old year-specific trend article into an evergreen kitchen wall-tile reference. It covers how to choose a product, verify coverage, prepare painted walls, plan backsplashes, handle sink and appliance zones, install self-adhesive tile correctly, maintain the finish and plan local repair or removal without relying on made-up lifespan numbers or zero-restoration promises.
Start by identifying the exact wall-tile construction
“Peel-and-stick tile” can describe vinyl, composite panels, gel-faced products, metal-faced layers and other constructions. These materials differ in thickness, flexibility, cutting method, seam design, surface feel and room limits.
Read the product page and installation instructions before choosing tools. A thin flexible vinyl can behave differently from a thicker composite. A metal-faced product can require different cutting and edge treatment. Do not buy a tool kit based on the category name alone.
Define the kitchen zone before choosing the pattern
A dry accent wall, sink backsplash, wall beside a cooktop and area behind a countertop appliance experience different conditions. The same decorative product may be suitable in one zone and inappropriate in another.
Mark sinks, ranges, toaster ovens, coffee machines, outlets, switches, cabinet edges and windows on the wall drawing. Then compare the product guidance with the actual exposure. Design comes after the location is technically suitable.
Inspect the wall before buying material
Look for grease, loose paint, chalking, fresh paint, deep texture, old adhesive, cracks, soft drywall and moisture staining. A self-adhesive tile depends on the surface beneath it. If the wall coating is weak, the tile can pull that coating away during service or removal.
If the wall is damp or shows recurring water damage, stop the decorative project. The EPA’s mold and moisture guidance emphasizes finding and correcting the moisture source before covering the wall.
Do not treat dark paint, gloss or age as automatic failure
A dark or glossy wall is not automatically unsuitable. Check the exact tile’s opacity and surface requirements. A fully opaque product may hide dark paint easily, while a translucent light tile may need a compatible lighter background.
Likewise, a glossy coating may need specific preparation—or none beyond cleaning—depending on the manufacturer. Use the product and paint/coating documentation rather than universal sanding or primer rules.
Older painted walls can require lead-safe planning
If significant sanding or scraping would disturb older paint in a U.S. home built before 1978, lead-safety rules may apply. EPA’s lead-safe renovation guidance for DIYers explains why older painted surfaces should not be disturbed casually.
A kitchen refresh should not create a hazardous wall-preparation problem merely to improve adhesion. If the coating requires major repair, address that condition safely before returning to the tile project.
Clean for adhesion, not just appearance
Kitchen walls collect aerosolized grease and cleaning residue. Use a cleaner compatible with the wall coating and tile instructions, then allow the surface to dry fully. Avoid oily or waxy products that can remain between the wall and adhesive.
3M’s general pressure-sensitive adhesive guidance illustrates the importance of clean, dry compatible surfaces and application pressure. Your tile may use a different adhesive, so the product’s own method controls the installation.
Measure usable coverage instead of comparing pack price
Pack price can mislead because tile dimensions, pack quantity and seam/overlap systems differ. Measure the wall by section and calculate the usable area covered by the exact product.
Add an allowance for cuts, pattern matching and a few spare pieces when practical. The correct allowance depends on outlets, corners, pattern direction and wall geometry rather than one universal percentage.
Use dry layout before exposing adhesive
Lay out several pieces with backing intact. Check the starting reference line, pattern direction, seam method and the width of the last piece at each edge. A small shift in the starting point can prevent a narrow awkward strip beside a cabinet or window.
Dry layout is especially valuable for subway, herringbone, geometric and stone-look patterns because alignment errors can repeat across the entire wall. Mark level reference lines instead of trusting the countertop or cabinet to be perfectly level.
Plan outlets and switches early
Outlets can create difficult internal cuts and narrow edge pieces. Decide whether the pattern should center on the opening or shift so the opening lands inside a larger piece.
Turn off power before removing cover plates. Decorative tile should not hide a damaged electrical box or loose device. Use a qualified electrician if the electrical condition itself needs modification.
Use the product-specific cutting method
Flexible vinyl, thicker composite and metal-faced products can require different cutters. Test the recommended tool on a spare piece before making a difficult visible cut.
Keep blades sharp where blade cutting is permitted, support rigid materials and use templates for outlets or corners. Do not assume tile nippers, scissors or a utility knife work across every construction.
Install without stretching the material
Flexible self-adhesive tiles can be pulled slightly during alignment. Stretching them to force a seam closed can create tension that later shows as shrinkage, lifting or distortion.
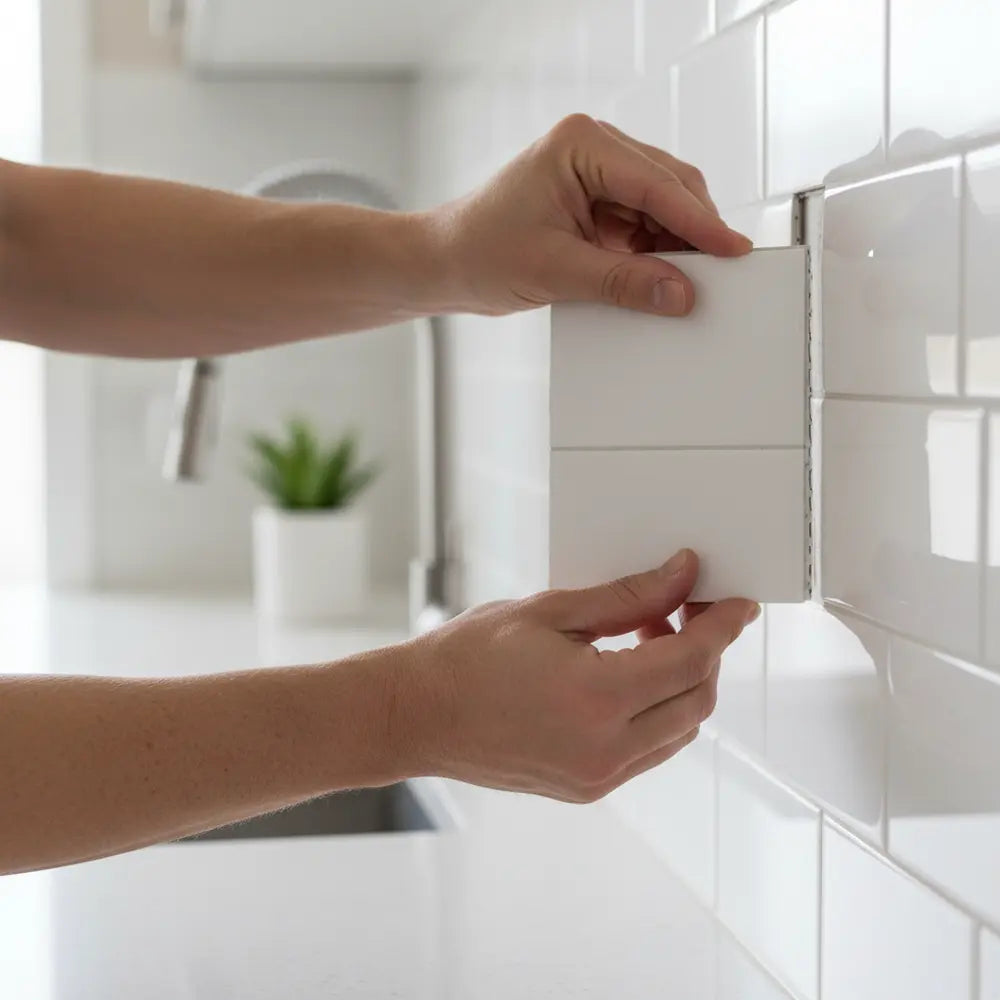
Align the piece according to the product method, apply it without tension and use the recommended final pressure. If the seam will not close naturally, check orientation and the previous reference line rather than forcing the material.
Use pressure as instructed—not as a brute-force solution
Pressure helps pressure-sensitive adhesive make contact with the substrate, but the correct tool and force vary by product. Some tiles may use a roller or smoothing tool; others need firm hand pressure.
Extreme pressure cannot fix grease, dust, heavy texture, weak paint or moisture. If the tile will not stay down on a properly aligned edge, diagnose the surface before adding more force.
Do not add construction adhesive by default
A self-adhesive wall product is designed around its factory backing. Adding an unrelated liquid adhesive can change removal behavior, damage the face/backing and create compatibility problems.
Only use a secondary adhesive when the manufacturer explicitly supports it for the exact substrate and room. If an edge lifts, determine why before turning a potentially removable wall finish into a more permanent repair.
Seams are product-specific
Some products overlap, some interlock and some meet with a straight edge. The correct joining method affects appearance, cleaning and the way the surface handles minor movement.
Practice several joints on a table or sample board. Inspect them under side lighting to see whether a slight overlap or height difference becomes visible in the kitchen’s actual lighting.
Exposed edges deserve a planned finish
Decide where the backsplash stops before installation begins. An exposed vertical edge may use a clean cut, product-specific trim or another compatible finish.
Do not add caulk or metal trim simply because another tile system uses it. The edge detail should match the product construction and preserve future access where needed.
Sink splashes are not the same as waterproofing
A wipe-clean face can be useful behind a sink, but seams, outlets, penetrations and the wall behind the tile still matter. A decorative peel-and-stick backsplash is not automatically a waterproof wall system.
Fix plumbing leaks rather than hiding them with decorative material or extra sealant. If the wall repeatedly gets wet, inspect the moisture source before installation.
Stove zones require exact product and appliance guidance
Direct flame, range exhaust and countertop appliances create different heat conditions. Do not use a single generic clearance for every tile or appliance.
Follow the tile and appliance manufacturer guidance. If the product does not document the planned heat exposure, keep it outside the uncertain zone rather than borrowing another brand’s number.
Do not use “waterproof” or “heat resistant” as universal category claims
One product may publish specific sink-splash or heat guidance while another self-adhesive tile does not. Compare the exact SKU instead of assuming every peel-and-stick wall tile shares the same rating.
The face material is only one part of the installed system. Adhesive, seams, backing, wall coating and placement all matter to the final result.
Choose style after the technical fit is confirmed
Once the room and wall are suitable, compare color, pattern scale, relief, gloss and seam appearance. Subway, square, honeycomb, herringbone, stone-look and geometric designs can all work in kitchens when the pattern relates to the fixed surfaces.
Use the tile design ideas guide to compare pattern scale and color direction. The goal is not to follow a dated trend list; it is to choose a design that works with cabinets, countertop, flooring and lighting.
Use samples for color and seam decisions
Physical samples can reveal undertone, gloss, relief and seam visibility that screen images cannot reproduce. Place samples beside the actual countertop and cabinet in daylight and under task lighting.
When possible, connect several pieces. One isolated sample does not show how the repeat looks across a larger wall or how obvious the joints become.
Small kitchens do not require only light tile
Light colors can reflect more light, but room scale is not controlled by tile color alone. A dark or saturated backsplash can work in a small kitchen when the rest of the palette is balanced and the lighting supports it.
Test the actual design in the room rather than using a universal rule that dark tile makes small spaces smaller. Pattern scale, cabinet color, countertop contrast and lighting can matter as much as value.
Farmhouse style does not require faux brick or white subway
A farmhouse-inspired kitchen can use warm neutrals, muted green, soft blue, square grids, subway geometry or stone-look surfaces. The design should relate to wood, hardware and countertop materials rather than one category label.
A product marketed as “farmhouse” can still be wrong for the room if the undertone conflicts with the cabinetry or the pattern scale becomes too busy across the wall.
Modern kitchens can use texture without making the backsplash a focal point
Low-contrast relief, monochrome grids and quieter stone-look patterns can add depth while leaving cabinetry or architecture as the primary visual element. Strong geometric patterns can also work when the backsplash is intentionally the focal point.
Use a room mock-up or physical sample to decide the role. “Modern” is a design direction, not a technical product class.
Cleaning should follow the face material
Cooking grease and splashes can build up on any backsplash. Use the product’s approved cleaning method. Abrasive pads, harsh solvents and strong degreasers can damage some polymer prints, coatings or relief.
Start with the least aggressive compatible cleaner. Inspect seams and exposed edges during cleaning so local lifting or damage can be addressed early.
Do not publish one service-life number
There is no responsible universal “three to ten years” lifespan for peel-and-stick kitchen wall tile. Service life depends on the exact product, wall condition, installation, heat, moisture, cleaning and use.
Use the product warranty and documented durability information for the specific tile. Keep spare material so local damage can be repaired without replacing the entire wall.
Plan local repair before the wall is finished
Save the product handle, dimensions, order date and a few spare pieces when practical. If one section is damaged by an appliance change, outlet move or impact, matching material can make a local repair much easier.
Before replacing a piece, determine why it failed. Moisture, grease, weak paint and impact need different responses. A new tile over the same unresolved condition is likely to repeat the problem.
Removal is a separate performance question
A product can bond well and still be difficult to remove from weak paint. Conversely, a tile can release easily from one wall and behave differently on another. Removal depends on the adhesive, paint, substrate, service time and removal method.
For rentals, get permission, photograph the original wall and keep the removal instructions. Do not promise that every product will leave paint or drywall unchanged.
Do not use renter-friendly as a security-deposit guarantee
A landlord’s restoration expectations and lease terms are separate from product marketing. A removable wall finish may still require paint touch-up or local repair at move-out.
Budget and plan for that possibility rather than assuming the entire deposit outcome depends on the tile category.
Keep removal methods product-specific
Some manufacturers may permit controlled warming or a specific peel angle. Others may not. Do not use a universal hairdryer temperature, distance or timing.
Follow the exact instructions and stop if the wall coating begins to fail. At that point the task may need to shift from removal to wall repair.
Document the finished project
Take photographs of the wall before installation, the dry layout, the completed wall and the service areas around outlets or appliances. Save the product and care instructions.
Those records can help later if a tile is replaced, the kitchen is remodeled or the wall finish is removed.
Use an acceptance checklist after installation
- All pieces are aligned according to the product seam method.
- Edges and corners are fully seated without relying on unrelated trim to hold them.
- Outlets and cover plates fit correctly and remain serviceable.
- Sink and appliance zones remain within documented product limits.
- No tile covers an access panel, shutoff, vent or service point.
- Spare pieces and product records are stored for repair.
Compare brands through documentation, not rankings
When several peel-and-stick products look similar, compare the information each seller provides. Look for exact dimensions, construction, approved surfaces, heat and wet-area limits, care instructions, seam method and removal guidance. A product with clearer documentation can be easier to plan responsibly even when another product has a stronger marketing claim.
Use the Peel-and-Stick Tile Brands Buyer Comparison Guide for a structured checklist. The goal is not to declare a universal winner; it is to ask the same technical questions of every candidate.
Build an equivalent-scope budget
Compare the complete wall, not a pack price. Include tile quantity, cuts, spare material, cleaning/preparation supplies, tools, shipping, tax and any wall repair. If the project is temporary, include possible paint touch-up or restoration.
When comparing with traditional ceramic tile, include the full ceramic installation system and labor actually proposed. One self-adhesive pack should not be compared with a fully installed contractor quotation as though those were equal scopes.
When traditional tile may be the better fit
A conventional ceramic, glass or stone tile assembly may be more appropriate when the location needs a purpose-designed wet-area system, a permanent mortar/grout installation, a specific fire/heat-rated assembly or another property that the self-adhesive product does not document.
That does not make peel-and-stick “temporary junk” or ceramic automatically superior. It means different systems fit different rooms. Choose from products that meet the technical requirements first, then compare design, disruption and cost.
When peel-and-stick may be the better fit
A self-adhesive wall product can be useful when the wall is already suitable, the room falls within product limits, lower installation complexity matters and the shopper values a thin decorative layer without mortar and grout.
It can also be useful for design testing or bounded rental projects when the lease permits the change and removal/restoration risk is acceptable. The fit comes from the project conditions, not from the word “DIY.”
Use sample testing for visual questions, not lifespan claims
A sample can answer color, opacity, relief, seam and cutting questions. It can also reveal immediate incompatibility with a painted wall when the product supports a hidden-area test.
Do not use a short sample test to predict a fixed service life or guarantee long-term removal. Keep sample conclusions narrow: appearance, handling and immediate compatibility under representative conditions.
Check the final wall after normal kitchen use begins
After the kitchen returns to normal use, inspect the backsplash during routine cleaning. Look at sink edges, appliance-adjacent pieces, exposed terminations and any seams that receive frequent wiping.
If a change appears, document the location and cause before repairing it. Early local maintenance is easier than allowing moisture, lifting or impact damage to spread across several pieces.
Plan inside corners and material transitions before installation
Inside corners, cabinet returns and transitions to another wall finish can concentrate visual errors. Decide whether the exact product overlaps, butts, uses a flexible joint or terminates with a compatible profile before the first row reaches the corner.
Do not use rigid grout or metal trim to bridge a building movement joint merely for visual continuity. A decorative termination and a structural/movement detail are different things. Keep the wall system functional and let the tile finish independently where required.
Do not hide serviceable building components
Kitchen backsplashes can sit near vents, shutoff access, appliance connections and removable cover plates. Keep those components visible and serviceable. A continuous pattern is secondary to future maintenance.
If a tile must be removed later for plumbing, electrical or appliance work, a saved spare piece and project record can turn the repair into a local replacement instead of a full-wall redo.
Frequently asked questions
Are peel-and-stick tiles good for kitchen backsplashes?
They can be suitable when the exact product is documented for the wall and room, the substrate is stable and properly prepared, and sink/appliance placement stays within product limits. The category name alone does not determine suitability.
Can I install peel-and-stick tile over painted drywall?
Potentially, when the paint is stable, cured, clean, dry and within the product’s approved-surface requirements. Weak, chalky, damp or heavily textured paint needs attention before installation.
Can I install over existing ceramic tile?
Some products allow installation over stable smooth existing tile. Grout depth, contamination, loose tiles and surface flatness can affect the result. Follow the exact product instructions rather than assuming all “tile over tile” installations are approved.
Do peel-and-stick tiles need grout?
Many do not. Some use printed, molded, overlapping or interlocking grout-like seams. Only use real grout when the exact product is designed for it.
Are peel-and-stick kitchen tiles waterproof?
Do not generalize. A face layer may be water resistant or wipe-clean while seams, edges and the wall remain part of the system. Direct wet exposure is different from routine kitchen splashes.
Can I put peel-and-stick tile directly behind a gas stove?
Only where the exact tile and appliance guidance allow it. Keep decorative material away from direct flame and unverified concentrated heat. Do not borrow another product’s clearance.
How long do peel-and-stick kitchen tiles last?
There is no universal lifespan. Product construction, wall preparation, room exposure, installation and care all matter. Use the exact product warranty and documentation.
Are peel-and-stick tiles safe for renters?
They can be useful for temporary projects when the lease permits them and the wall is suitable, but removal outcome is not guaranteed. Test where appropriate, keep removal instructions and allow for possible restoration.
Can I use extra glue if a corner lifts?
Not automatically. Lifting can indicate contamination, texture, weak paint, moisture, poor pressure or an unsuitable location. Diagnose the cause and use only product-supported repair methods.
Can I install peel-and-stick tile on textured walls?
Only within the exact product’s texture limits. Heavy texture can reduce adhesive contact and telegraph through thinner materials. A suitable smoothing/repair method may be needed before installation.
Do I need primer?
Use primer only when the wall and tile system call for it. Dark color, gloss or age alone do not prove primer is required. Check wall condition and product instructions.
How should I clean the backsplash?
Use the product’s approved cleaner and a non-abrasive method appropriate to the face material. Avoid assuming a cleaner that works on ceramic is safe for printed vinyl or another polymer surface.
Kitchen planning checklist
- Identify the exact tile construction, dimensions and seam method.
- Confirm the wall is stable, dry, clean and within approved surface limits.
- Resolve moisture, plumbing and electrical defects before decoration.
- Measure actual usable coverage and plan outlets, corners and edges.
- Check sink and appliance placement against exact product guidance.
- Dry-layout the first several pieces and mark a level reference line.
- Use the cutting and pressure method documented for the product.
- Do not add grout, primer, sealant or secondary adhesive by default.
- Use product-specific cleaning and removal instructions.
- Save spare pieces and project records for future repair.
Bottom line
Peel-and-stick kitchen wall tile is most useful when the project is planned around the real wall and real room—not around a trend year, a fixed lifespan or a promise that removal leaves every wall unchanged. Choose the exact construction, confirm the substrate, calculate usable coverage, dry-layout the pattern and keep sink and appliance zones within documented limits.
Once the technical fit is confirmed, use color, pattern and texture to shape the design. Keep the wall serviceable, save matching material and follow product-specific care and removal guidance. That turns a quick decorative idea into a kitchen finish that can actually be maintained and repaired.
Review those service points once more after the final row is installed, before storing spare material and closing the project record.


Leave a comment
This site is protected by hCaptcha and the hCaptcha Privacy Policy and Terms of Service apply.