


How to Install Peel and Stick Tiles in Your Kitchen
Dreaming of a kitchen upgrade without the hefty cost or permanent damage? Peel and stick tiles might be your perfect DIY fix. Many homeowners and renters eye their kitchen walls, wishing for a fresh look, but feel overwhelmed by traditional renovation projects. The thought of complicated tools, messy grout, and high expenses often puts those dreams on hold.
Fortunately, transforming your kitchen with stick-on kitchen tiles offers an ideal solution. These innovative tiles are affordable, stylish, and incredibly renter-friendly, making them perfect for temporary or budget-conscious makeovers. This guide will walk you through how to install peel and stick tiles in your kitchen, ensuring a beautiful, durable finish. We'll cover everything from heat resistance behind stoves to hassle-free removal, giving you the confidence to tackle this popular DIY project.
Are Peel and Stick Tiles Good for Kitchens?
Many people wonder if peel and stick tiles can truly withstand the demands of a busy kitchen. The answer is a resounding yes, when chosen and installed correctly. These modern adhesive tiles offer surprising durability for various kitchen applications.
Durability Factors: Water, Heat, and Cleaning
Peel and stick tiles are generally designed to be quite durable. Most varieties feature a waterproof or highly water-resistant surface, making them suitable for kitchen splashes and spills. However, they aren't meant for direct submersion or areas that experience constant standing water, like inside a shower.
Behind your stove, heat resistant peel and stick tiles are specifically engineered to endure higher temperatures without warping or losing adhesion. Look for products explicitly labeled for high-heat applications. For routine cleaning, a damp cloth with mild soap is usually enough, ensuring your new backsplash looks fresh for years. Avoid abrasive cleaners that could damage the tile surface.
Suitability for Walls, Backsplashes, and Floors
Peel and stick options excel as DIY kitchen wall tiles and backsplashes. They create a dramatic visual impact quickly and easily. Many popular options mimic ceramic, glass, or stone, providing a high-end look without the associated cost or labor.
While most people think of them for walls, certain heavy-duty vinyl peel and stick tiles are also fantastic as durable peel and stick floor tiles for kitchens. These floor-specific tiles feature thicker wear layers and stronger adhesives, designed to handle foot traffic. Always check product specifications to ensure the tiles are rated for floor use.
Best Situations for Renters and Homeowners
For renters, peel and stick tiles are a game-changer. They offer removable peel and stick tiles for renters, allowing for stylish upgrades without risking your security deposit. A good rule of thumb is to perform a patch test in an inconspicuous area. This helps confirm easy removal and ensures no wall damage, especially on painted surfaces.
Homeowners also find great value in peel and stick solutions. They are perfect for budget-friendly remodels, temporary updates before a full renovation, or even for adding a unique accent wall. One homeowner, Sarah, successfully installed a peel and stick backsplash in her rented apartment. After two years, she carefully removed it using a hairdryer to warm the adhesive, leaving her walls pristine for the landlord's inspection. This demonstrates their true flexibility.
Choosing the Best Peel and Stick Tiles for Your Kitchen
The market for peel and stick tiles has expanded dramatically, offering a huge array of styles and materials. Selecting the right ones for your kitchen involves considering aesthetics, function, and your specific needs, such as placement behind a stove.
Different Types: Vinyl, Gel, 3D, and Luxury Options
- Vinyl Tiles: These are the most common and affordable. They often come in flat sheets and can mimic various materials like wood or stone. Vinyl is very easy to cut and maintain.
- Gel Tiles: Featuring a soft, slightly raised texture, gel tiles offer a more dimensional look. They are lightweight and often have a glossy finish, resembling traditional glazed tiles.
- 3D Tiles: These are designed to provide a truly realistic look, often with a raised, textured surface that emulates brick, subway tile, or marble. The depth creates convincing shadows and visual interest.
- Luxury Options: High-end peel and stick tiles might incorporate actual metal, glass, or mother-of-pearl for a truly premium feel. These selections deliver an elevated aesthetic that can rival traditional tiling.
The choice largely depends on your desired aesthetic and budget. For a deeper look at innovative designs and how they can transform your space, consider exploring resources like, "Is your kitchen in need of a facelift but you're worried about the time, cost, and effort involved? You’re not alone! Many homeowners long to renovate without the burden of extensive remodeling. Enter peel and stick tiles—they're easy to install, affordable, and can completely transform your kitchen space. According to a recent survey, over 40% of DIY home improvement enthusiasts consider peel and stick tiles the go-to choice for kitchen makeovers! In this article, we'll explore five remarkable kitchen transformations using these tiles and provide you with a comprehensive guide to choosing the perfect peel and stick options for your kitchen." Transform Your Kitchen with Peel and Stick Tiles on the Stickwoll Blogs.
Heat-Resistant Tiles for Behind Stoves
This is a critical consideration for kitchen backsplashes. While most peel and stick tiles can handle ambient kitchen heat, areas directly behind a stove or cooktop experience much higher temperatures. For these specific spots, you need tiles explicitly labeled as heat resistant peel and stick tiles behind stove.
These specialized tiles typically use advanced adhesives and materials that won't degrade under direct heat. They are a must-have for safety and longevity. Failing to use a heat-resistant option could lead to tiles peeling, bubbling, or discoloring over time. For comprehensive guidance on materials and suitability, looking for a kitchen upgrade that combines style and practicality? Heat-resistant peel and stick tiles are your answer! These tiles not only add a modern touch but also withstand high temperatures, making them ideal for kitchens. According to recent studies, using heat-resistant materials can increase your kitchen’s lifespan by up to 30%! In this article, we'll dive into the world of peel and stick tiles, comparing different materials and their suitability for high-heat kitchen applications. Let's transform those ordinary kitchen spaces into extraordinary ones! the article Heat-Resistant Peel and Stick Tiles for High-Heat Kitchens offers valuable insights.
Affordable vs. Luxury Peel and Stick Tiles
The cost of peel and stick tiles can vary significantly, much like traditional tiles. You can find basic vinyl subway tile designs for as little as $1-$2 per square foot. These are perfect for budget-friendly updates or small projects. In contrast, modern peel and stick backsplash kitchen ideas using realistic marble-look or genuine metal tiles can cost upwards of $10-$15 per square foot.
For example, a standard 10 sq ft kitchen backsplash might cost:
- Basic Vinyl Subway Tile: $15
- Realistic Marble-Look 3D Gel Tile: $75
- Premium Metal or Glass Composite: $120
While the luxury options are more expensive, they still represent a significant saving compared to professional installation of traditional tiles. The added expense often means higher quality materials, more intricate designs, and enhanced durability.
Tools and Prep Before Installation
Proper preparation is the secret to a professional-looking and long-lasting peel and stick tile installation. Skipping these crucial steps can lead to peeling tiles or an uneven finish. You don't need a toolbox full of professional gear, just a few essential items and some patience.
Surface Preparation Steps
A clean, smooth, and dry surface is paramount for successful adhesion. Think of it like painting a wall; the prep work makes all the difference.
- 1. Clean Thoroughly: Use a good degreaser to remove all grease, grime, and food splatters from your walls. Kitchen surfaces, especially near cooking areas, accumulate a surprising amount of residue.
- 2. Rinse and Dry Completely: After cleaning, wipe down the surface with clean water to remove any soap residue. Then, allow the wall to dry completely. Any moisture can compromise the adhesive.
- 3. Repair and Smooth: Fill any holes or cracks with spackle. Sand down any rough patches or uneven textures. The flatter the surface, the better your tiles will stick and the more seamless the finish will appear. A common misconception is that the tiles will hide imperfections; in reality, they often highlight them.
- 4. Prime (Optional but Recommended for Some Surfaces): If you're applying tiles over a porous surface like unfinished drywall or heavily textured paint, a primer can create a better bonding surface. Always do a patch test first.
Neglecting these steps is a common pitfall that can lead to tiles lifting or peeling prematurely. For more detailed insights into effective kitchen upgrades, are you ready to transform your kitchen without a major renovation? Enter the world of peel and stick tiles! These game-changing tiles make kitchen upgrades accessible to everyone, especially beginners. Did you know a recent survey found that over 60% of home DIYers opt for peel and stick solutions? Let's dive into this innovative solution that can brighten up your kitchen while avoiding common pitfalls. the How to Upgrade Kitchens with Peel and Stick Tiles guide on Stickwoll Blogs provides excellent tips for avoiding common mistakes during installation.
Safety and Renter Considerations
- Ventilation: If using strong cleaning agents or primers, ensure your kitchen is well-ventilated.
- Gloves: Wear gloves to protect your hands from cleaning products and to keep the adhesive clean.
- Patch Test for Renters: Before committing, always apply a single tile in an inconspicuous area for 24-48 hours. Remove it gently to see how your wall reacts. This minimizes the risk of damaging paint or drywall upon eventual removal.
- Accurate Measuring: "Measure twice, cut once" is an old adage for a reason. Precise measurements prevent waste and ensure a professional fit, crucial for achieving clean lines with your temporary backsplash ideas.
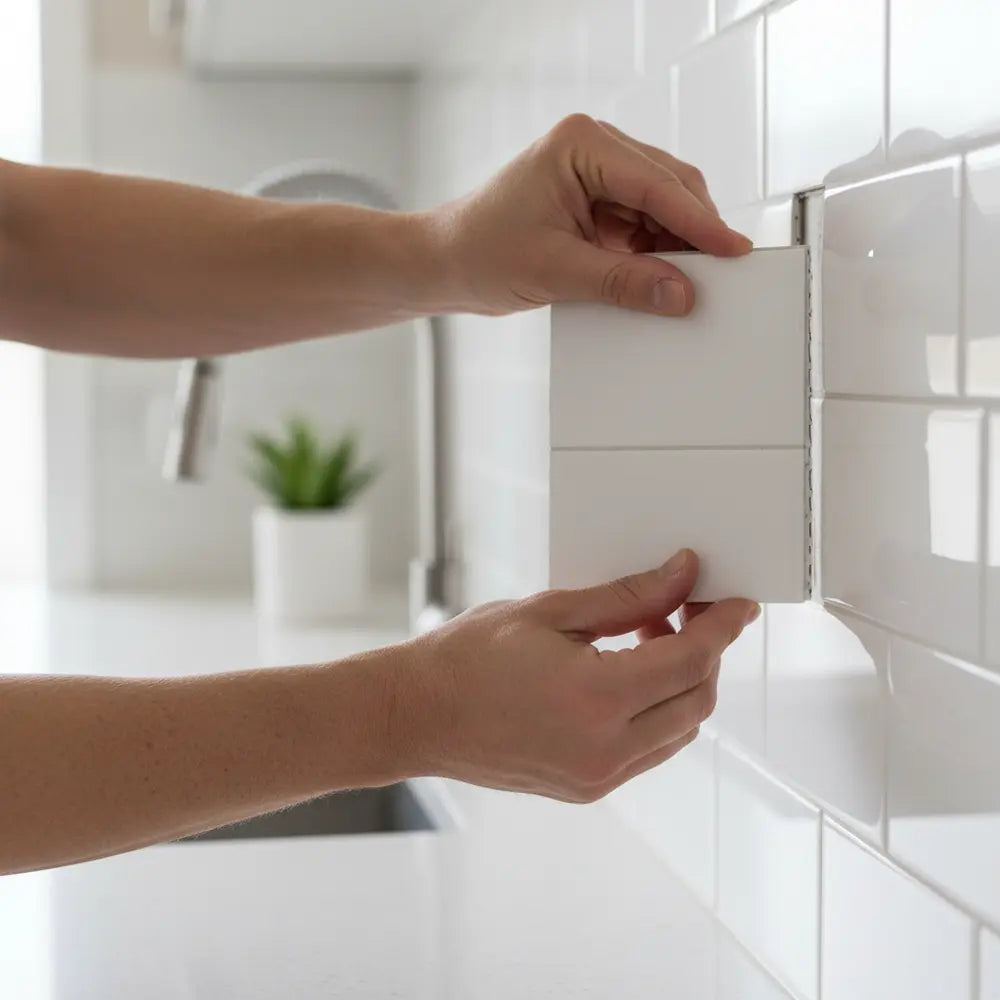
Installation Steps for a Flawless Finish
With your tools ready and your surface prepped, it's time to learn how to install peel and stick tiles in your kitchen. This process is straightforward, but requires attention to detail for the best results.
-
1
Plan Your Layout
Before you peel any backing, do a "dry run." Lay out your tiles on a flat surface or hold them up to the wall without removing the adhesive cover. Decide on your starting point, usually an inconspicuous corner or the center of your wall, working outwards. This helps visualize the pattern and identify any necessary cuts. For a symmetrical look, start in the center of your backsplash area and work towards the edges.
-
2
Measure and Mark Your Starting Line
Use your level and pencil to draw a perfectly straight horizontal line where the top of your first row of tiles will sit. This guideline is critical for ensuring your entire installation remains even. Many people find starting from a counter line can lead to crooked rows if the counter isn't perfectly level itself.
-
3
Cut Your First Tiles (If Needed)
You'll likely need to cut some tiles to fit edges or around outlets. Place the tile face up on a cutting mat. Use your straight edge and utility knife to score the tile firmly several times along your pencil mark. Then, bend the tile along the score line until it snaps or separates. For gel or softer vinyl tiles, sharp scissors might be sufficient. Remember that practice pieces can save your actual tiles.
-
4
Peel and Stick
Carefully peel back a small section of the adhesive backing from the top edge of your first tile. Align this edge precisely with your marked guideline. Once aligned, slowly peel the rest of the backing away, pressing the tile firmly onto the wall as you go. Work from the center of the tile outwards to push out any trapped air bubbles.
-
5
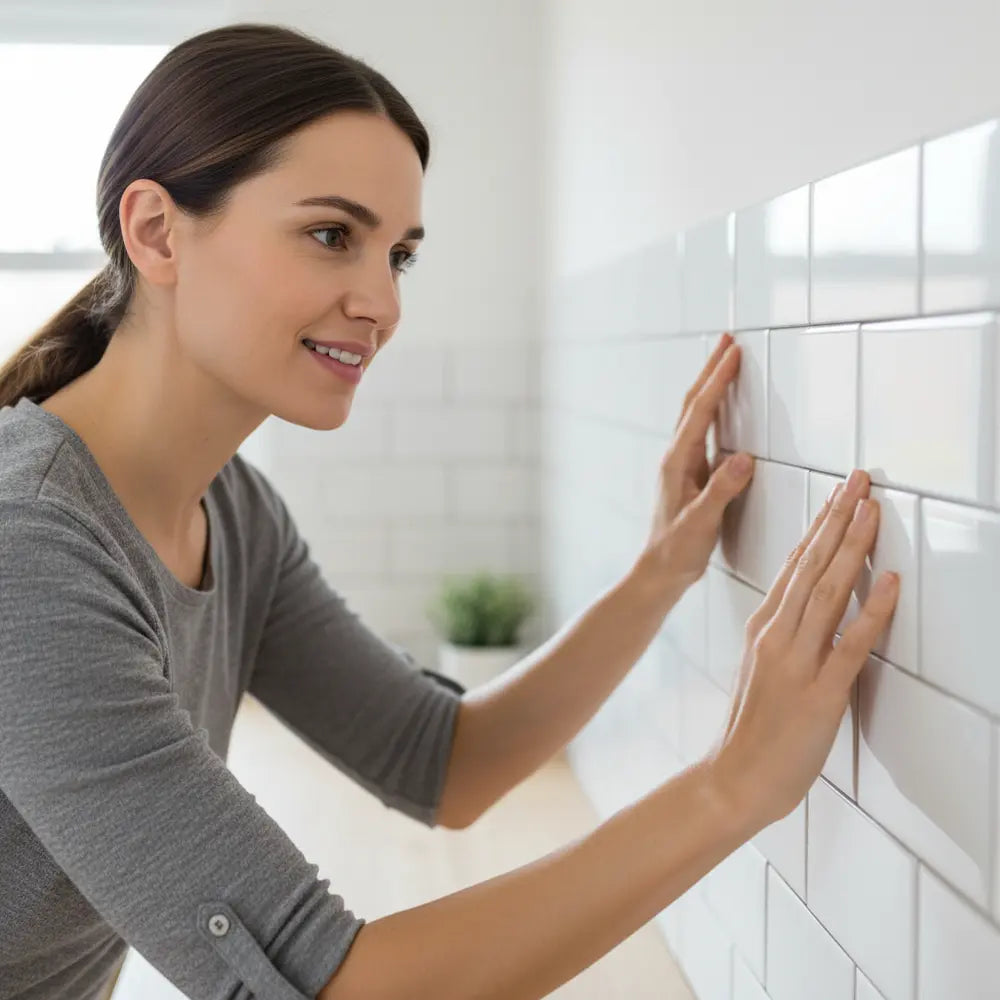
Smooth Out Air Bubbles
After each tile is applied, use your smoothing tool or a clean roller to firmly press down the entire surface. This ensures maximum contact between the adhesive and the wall, preventing future peeling. Any air bubbles should be pressed towards the edges until they disappear. This step is a game-changer for longevity.
-
6
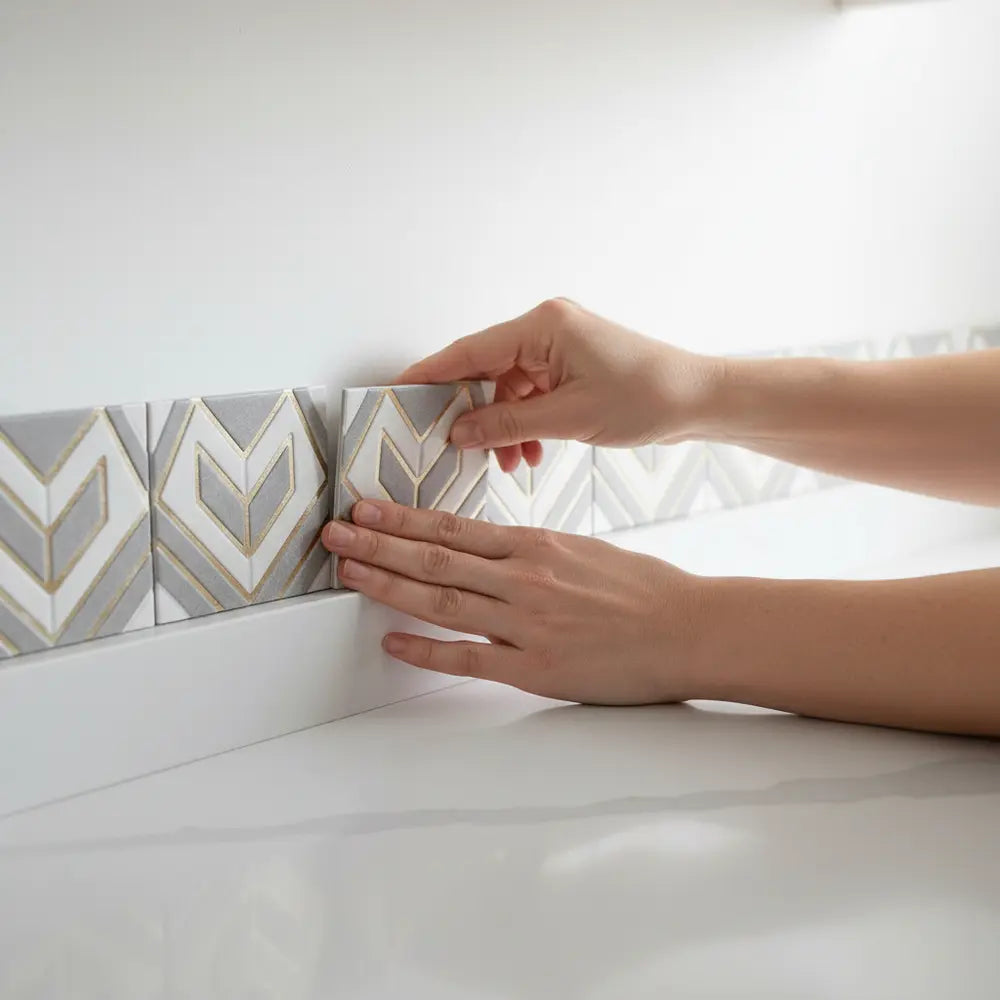
Continue Laying Tiles
Work in small sections, overlapping the tile edges according to the manufacturer's instructions for a seamless look. Many peel and stick tiles are designed with interlocking edges or "grout lines" that fit together like a puzzle. Keep checking with your level every few rows to maintain alignment. For more visual guidance and design inspiration, are you dreaming about updating your kitchen but dread the time, cost, and mess? Peel and stick tiles are your DIY solution! These tiles offer both style and simplicity, transforming your kitchen into a modern masterpiece in just under an hour. Join me as I guide you through the installation process and unravel the top backsplash designs to revamp your space. Get ready to embrace a hassle-free DIY makeover that will leave you in awe! the Stickwoll Blogs article How to Install Peel and Stick Tiles & Best Designs 2025 is a go-to resource.
-
7
Trim Edges and Around Obstacles
When you reach corners, edges, or outlets, measure the space carefully and cut tiles to fit. For outlets, you might need to make precise cutouts. Remember to turn off power to the outlet at the breaker box before measuring or cutting around it for safety. Small, intricate cuts are easier with a fresh utility knife blade.
-
8
Finish with Sealing (Optional but Recommended)
For areas prone to splashes, like behind the sink, consider applying a clear silicone caulk or a non-yellowing acrylic tile sealer around the edges of your peel and stick installation. This creates an extra barrier against moisture, significantly enhancing the durability and lifespan of your peel and stick backsplash installation. Wait at least 24-48 hours after installation before sealing to allow the adhesive to fully cure.
Maintenance and Cleaning Tips
Proper maintenance is key to keeping your peel and stick tiles looking their best and ensuring they last for years. While these tiles are generally low-maintenance, a few simple practices can make a big difference in their longevity and appearance.
How to Clean Without Damaging
The good news is that cleaning peel and stick tiles is usually a breeze. For everyday grime and splashes:
- Gentle Cleaning: Use a soft cloth or sponge dampened with warm water and a small amount of mild dish soap. Wipe down the tiles gently.
- Avoid Harsh Chemicals: Stay away from abrasive cleaners, scouring pads, and harsh chemicals like bleach or ammonia. These can strip the finish, degrade the adhesive, or cause discoloration over time.
- Spot Clean Promptly: Tackle spills and food splatters as soon as they happen. This prevents stains from setting and makes cleaning easier.
A micro-fiber cloth is often the best choice, as it cleans effectively without scratching the surface. Regular, gentle cleaning helps preserve the vibrant look of your modern peel and stick backsplash kitchen ideas. If you're looking for fresh design ideas and simple installation, if you've ever thought about revamping your kitchen without breaking the bank, peel and stick backsplashes are the perfect go-to solution! Not only are they incredibly affordable, but they also come with the added advantage of easy installation. In today's fast-paced world, who wouldn't love a chic update that's quick to achieve? According to Home Renovation Magazine, peel and stick backsplashes are among the top trending kitchen revamps for 2025. Let's dive into some fantastic ideas and a straightforward DIY guide to install them effortlessly! dive into Peel Stick Backsplash Kitchen Ideas 2025.
Avoiding Water Seepage
While most peel and stick tiles are water-resistant, they are not completely waterproof in all situations, especially at the seams. Water seepage can compromise the adhesive, leading to tiles lifting or peeling.
- Seal Edges: As mentioned in the installation steps, applying a clear caulk around the perimeter of your installation, especially where it meets countertops, sinks, or appliances, adds a vital protective barrier.
- Wipe Spills Immediately: Don't let standing water sit on the tile seams for extended periods. Even with sealant, prompt cleanup is your best defense against moisture damage.
- Ventilation: Good kitchen ventilation helps reduce humidity, which can also affect tile adhesion over time.
Think of it like protecting a wooden deck; a good seal and quick cleanup are essential for its lifespan.
Long-Term Durability Tips
With proper care, durable peel and stick floor tiles for kitchens and backsplashes can last for many years. It's not uncommon for a well-maintained peel and stick backsplash to look excellent even after 2-3 years, as one example illustrates a kitchen backsplash that maintained its fresh look and adhesion with just weekly gentle cleaning.
- Regular Inspections: Periodically check your tiles for any signs of lifting, especially around high-traffic areas or moisture-prone spots. If you catch a small lift early, you can often press it back down or apply a tiny amount of extra adhesive.
- Protect from Extreme Heat (where applicable): Even with heat-resistant tiles, avoid placing extremely hot pots directly on the surface for extended periods if your tiles are near the stove.
- Gentle Handing: When moving appliances or cleaning, avoid sharp impacts or scrapes that could damage the tile surface.
By following these simple guidelines, your stick-on kitchen tiles will continue to enhance your home's aesthetics for a long time.
FAQs and Troubleshooting
Even with careful planning, questions can arise during or after your peel and stick tile installation. Here are answers to some common concerns, especially for those new to DIY projects.
Can Peel and Stick Tiles Handle Kitchen Heat?
Yes, they can, but with an important caveat. Standard peel and stick tiles are suitable for general kitchen wall areas. However, for the area directly behind a stove or cooktop, you absolutely need to use heat resistant peel and stick tiles behind stove. These specialized tiles are engineered with materials and adhesives that can withstand the higher temperatures generated by cooking. Always check the product description for a "heat resistant" rating or specific recommendations for stove areas. Failing to do so can lead to warping, bubbling, or the tiles losing adhesion due to extreme heat.
What if Tiles Start Peeling?
If your tiles begin to peel, there are usually a few common culprits and solutions:
- Improper Surface Prep: This is the most frequent reason. Ensure the wall was thoroughly clean, dry, and smooth before installation. Grease, dust, or moisture will prevent proper adhesion.
- Insufficient Pressure: Not pressing firmly enough during installation can leave air pockets and weak bonds. Use a smoothing tool to ensure complete contact.
- Humidity/Moisture: High humidity or persistent moisture around a specific area (like a sink) can degrade adhesive over time. Re-seal edges if necessary.
- Solution: For minor peeling, try applying a small amount of extra adhesive (like construction adhesive or spray adhesive, applied sparingly) to the back of the tile and pressing it firmly. A hairdryer on a low setting can sometimes reactivate the existing adhesive, allowing you to press the tile back into place.
How to Remove Without Wall Damage?
For renters or anyone looking for removable peel and stick tiles for renters, knowing how to remove them without damage is essential.
- 1. Warm the Adhesive: Use a hairdryer on a low-to-medium heat setting to gently warm the surface of the tile. This softens the adhesive, making it more pliable and easier to release.
- 2. Pry Gently: Starting from a corner, carefully insert a plastic putty knife or a credit card underneath the tile. Slowly and gently pry the tile away from the wall, continuing to apply heat as you go.
- 3. Clean Residue: Any remaining adhesive residue can usually be removed with warm, soapy water or a gentle adhesive remover designed for painted surfaces (always patch test first!).
One renter successfully removed her entire peel and stick backsplash before a landlord inspection simply by using a hairdryer and a credit card, leaving no residue or paint damage. It truly is a renter-friendly solution if done carefully.
Ready to Transform Your Kitchen?
Installing peel and stick tiles in your kitchen is an incredibly rewarding DIY project. It's an affordable, stylish, and renter-friendly way to achieve a fresh, modern look without the commitment or cost of a full renovation.
You now have the knowledge to confidently tackle this home upgrade. From understanding how to install peel and stick tiles in kitchen to selecting heat resistant peel and stick tiles behind stove and knowing how to maintain them, you're well-equipped.
Feeling inspired? The next step is to explore the possibilities and truly make your kitchen shine!
Ever looked at your kitchen and thought it needed a little sprucing up? You're not alone! Many homeowners crave an easy and budget-friendly facelift for their cooking spaces without the hassle of hefty renovation costs. Did you know that 75% of DIY enthusiasts prefer peel and stick solutions for their convenience? That's where DIY peel and stick kitchen tiles come in. In this article, we'll guide you through the process of transforming your kitchen using these clever tiles, with some added flair from simple DIY decor techniques. Let's dive in and give your kitchen the makeover it deserves! If you're ready to combine practical installation with creative touches, check out:
How to DIY Peel Stick Kitchen 2025To truly make an informed decision for your kitchen, discover the ultimate 2025 guide to peel and stick kitchen tiles: design trends, easy installation, durability, and renter-friendly backsplash ideas. Access the comprehensive guide now:
View Recommended Brands: Best Peel and Stick Kitchen Tiles Guide 2025Frequently Asked Questions
Do peel and stick tiles really look good in a kitchen?
Absolutely! Modern peel and stick tiles have come a long way. Many options offer realistic textures and 3D effects that mimic ceramic, glass, or stone, making it difficult to distinguish them from traditional tiles. With careful installation and proper selection, they can significantly enhance your kitchen's aesthetic.
Can I put peel and stick tiles over existing tiles?
In many cases, yes, you can. The key is that the existing tile surface must be completely clean, dry, and smooth. If your existing grout lines are very deep, you might need to skim-coat them with a leveling compound to create an even surface for the best adhesion and a seamless look.
How long do peel and stick kitchen tiles last?
With proper surface preparation, careful installation, and regular gentle maintenance, quality peel and stick kitchen tiles can last for 3 to 10 years or even longer. Factors like humidity levels, direct heat exposure, and the quality of the adhesive play a role in their longevity.
Are peel and stick tiles easy for a beginner to install?
Yes, they are designed with beginners in mind! The process typically involves measuring, cutting with a utility knife, peeling off the backing, and sticking them onto a prepared surface. There's no messy grout or specialized tools required, making it one of the most accessible DIY home improvement projects.
Considering a specific color for your kitchen? Learn step-by-step how to install green peel and stick tiles in kitchens and bathrooms. Beginner-friendly guide with visuals and mistake-avoidance tips. Start your journey with vibrant design options:
How to Install Green Peel and Stick Tiles EasilyDownload Our Quick DIY Kitchen Checklist!

Leave a comment
This site is protected by hCaptcha and the hCaptcha Privacy Policy and Terms of Service apply.